RSS
 

Posts Tagged ‘practice’

5 Things Every Newbie Photographer Must Learn and Practice

21 May

There are certain things as a photographer you should know regardless of if you are an expert or a novice. These simple yet powerful lessons not only differentiate you but also help you grow in your art and your photographic career. For every newbie photographer, these are essential lessons to learn and practice.

Note: For the purposes of this article, all the images used here are SOOC (Straight out of camera). This is done to demonstrate key concepts highlighted here. My camera of choice is Canon 5D MKIII with a few common Canon L-series lenses like the 50mm and 85mm.

#1 – Know your gear inside out

This almost seems like a no brainer but I am surprised by the number of people who say that they have a really fancy (and expensive) DSLR camera but still shoot in auto mode 100% of the time. Now before you get all upset and say that there is nothing wrong with shooting in auto, I will raise my hand and say that yes, I also shot in auto when I got my first DSLR camera. But very quickly I realized that my camera (a Canon 5D MKII at that time) was a fantastic and sophisticated piece of equipment that was capable of some incredible shots if I only knew how to operate it.

So take the time and really know the ins and outs of your gear. The user manual is a great place to start to not only familiarize yourself with what all the buttons do but also where they are located on the camera. You should be able to adjust settings without removing your eye from the eyepiece/viewfinder when you are composing your frame. Think about it this way, would you like to own a convertible and always drive with the top up (i.e. closed), even on the most gorgeous of summer days?

Here are some ways to learn the ins and outs of your gear.

ISO – Play around with various ISO settings to understand how it affects exposure and what is an acceptable ISO grain (for you). This will help you make photography decisions in low light situations. Some of these ISO decisions may be limited to the kind of camera you have. Regardless, you should know the upper limits of your gear.

5 Things Every Newbie Photographer Must Learn and Practice

The quality of light at the stables where my kids ride is terrible. Even though they have lots and lots of flood lights, there isn’t enough light just because of the sheer size of the barn. These images were shot handheld at ISO 3200 – the one on the left was at 1/60th shutter speed whereas the one on the right was at 1/400th. That was because of the natural light coming in closer to the wall that illuminated my son and gave me a higher shutter speed to capture the motion of the horse.

Sweet spot – Find the sweet spot for your lens. Every lens has an aperture setting where the image is sharper overall than others. This will help you analyze what is the widest aperture (smallest f-stop) you can shoot in and still have the image in focus. This is different than the depth of field (which is how much of the scene is in focus) in that the actual resolution of the image is sharper at the sweet spot.

Minimum shutter speed – Find out what is the lowest shutter speed you can handhold your camera and get a sharp image. This will also help in low light situations as well as in creative motion blur type shots when you don’t have a tripod handy. The general rule of thumb is to shoot at one over the focal length of your lens.

5 Things Every Newbie Photographer Must Learn and Practice

Here I was shooting in a dark canyon with dark stone walls. I was using a 35mm lens at f/1.4 (completely wide open aperture) because I wanted a very low ISO (100) to eliminate any noise. My shutter speed dropped to 1/30th – which I clearly could not hold steady…the image is completely blurry and out of focus!

Weight – Find out what is the maximum weight you can comfortably carry without hurting yourself or almost passing out because of discomfort from carrying excess weight (true story!)

#2 – Know and understand light

There are some photographers who only shoot in natural light while others only shoot using some form of artificial light. Then there are photographers who shoot in any type of light and do a fantastic job at that. There is no right or wrong answer here in terms of preference but it is important to know how to shoot in any form of light. That might be the only thing that stands between you and the shot of your dreams.

Knowing how to read, analyze, and play with light is one of the most basic and important skills every newbie photographer should know, in my opinion. Keep in mind that not all light is equal from a purely technical standpoint (tungsten versus fluorescent versus white-balanced light). Certain types of light are good and others are not so good. Experiment with many different kinds of light so you know how to read light, then learn how to shoot in each.

These three images were all shot within the hour just before sunrise.

Here my settings are as follows ISO1250, f/2.8, 1/60th shutter speed. I LOVE the blue in the sky falling on the snow covered Pike’s peak in Colorado.

5 Things Every Newbie Photographer Must Learn and Practice

The warm sunrise cast such a magical glow on the mountain and surrounding areas. My settings here were ISO 320, f/5.0, and 1/500th. The sky filled with so much light that I had to stop down my aperture to be perfectly exposed.

5 Things Every Newbie Photographer Must Learn and Practice

The overcast sky with little spots of blue took my breath away. My settings here were ISO 320, f/5.0, and 1/800th to get a perfectly exposed photo.

5 Things Every Newbie Photographer Must Learn and Practice

I do not like indoor yellow tungsten light…everything become so orange! (A custom white balance or correction in processing is necessary)

5 Things Every Newbie Photographer Must Learn and Practice

But neutral natural light is so much easier to work with and to get even natural-looking skin tones.

3 – Practice good ethics

Be respectful of the people, places, and things you photograph. I cannot tell you how much it pains me when I see photographers (both amateurs and professionals) disrespect their surroundings. Be it climbing where they are not supposed to, keeping heavy equipment on delicate surfaces, overcrowding and overstaying their welcome in public places and not giving other general tourists the opportunity to enjoy the scenery.

Pay special notice to other photographers. These are folks in your industry even if they are beginners. They are all in it for the same reasons you are – love for the art! Leave that sense of entitlement behind, just because you have more expensive gear does not make you a better photographer or a creative artist. Take the extra effort to find out what the photography rules are in the places that you intend to photograph and stick to them.

5 Things Every Newbie Photographer Must Learn and Practice

I belong to several groups of photographers and we regularly meet to shoot the breeze, photograph together and just generally geek out about all things photography. There is no pressure, no tension and everyone plays nice! Community over competition!

4 – Safety

Be safe when you are out and about. Always be aware of your surrounding especially if you are a female photographer who tends to travel alone. Check out this article  Safety Tips for Travel Photographers (Particularly Women) that addresses this issue. Remember safety always comes first, art next.

5 – Be your true self and be patient

Whether you choose to be in business or not, be true to your art. Get inspiration not just from other photographers but also from daily life. There are many amazing things around us at any given point in time. Just because no-one else photographs it does not make it boring. Similarly think outside the box, just because everyone photographs something a certain way does not mean you have to follow the pack.

When you are starting out, don’t obsess over clients, getting work, and making money. Yes, they are absolutely important, I will not disagree, but take the time to perfect your art (to the point where you are confident charging money for your photography) and then the money and fame will follow.

Also give out as much as you can, be helpful and uplift others who are on this journey with you. The more you put out there the more you will receive from the universe! I truly believe in that mantra across all walks of life.

5 Things Every Photographer Must Learn and Practice

I am always coming up with shoot concepts and ideas to keep experimenting. Some work and some fail miserably but that’s okay. I take everything as a learning experience and try to stay positive in my game. An editorial shoot with my daughter captured on film was a complete disaster as I got all the setting wrong and ended up with grainy, grudge frames! – but I learned a whole lot about film and light and how different it is to digital!

5 Things Every Photographer Must Learn and Practice

Leftover florals from Valentine’s day gave me a chance to practice some styling as well as a more moody, contrasty way of editing – which I sort of like and dislike at the same time! But no money was lost and I only used 10 digital frames and spent 30 minutes in editing experimentation.

Conclusion

Are there any other life lessons that photography has taught you? In the spirit of building this community of creatives, feel free to share it with others.

The post 5 Things Every Newbie Photographer Must Learn and Practice by Karthika Gupta appeared first on Digital Photography School.

Digital Photography School

 
Comments Off on 5 Things Every Newbie Photographer Must Learn and Practice

Posted in Photography


Wesaturate will soon offer free Raw photos for photographers to practice editing

28 Mar

Students Gifton Okoronkwo and Kast Goudarzi have taken the wraps off a new website called Wesaturate, an online learning destination that will offer free Raw images for photographers to download. The intention for the website is to provide these images as learning tools, enabling anyone to practice Raw editing even if they don’t have the time or gear to go out and shoot their own photos.

Wesaturate is tentatively scheduled for a full launch on April 17, though at the moment it is only accepting email addresses from those who want to be notified about the launch. A single image is currently offered on the site in both Raw and JPEG formats; it, and others uploaded later on, are offered with a Creative Commons Zero license. Once the site fully launches, users will be able to share their own photos with the Wesaturate community.

The duo also plans to operate a blog that will publish tricks and tips for beginners. Speaking to PetaPixel, Goudarzi explained, ‘We’re really focusing on the photographer’s experience here and we want to make sure it’s all about them.’

Via: PetaPixel

Articles: Digital Photography Review (dpreview.com)

 
Comments Off on Wesaturate will soon offer free Raw photos for photographers to practice editing

Posted in Uncategorized


An Exercise to Learn and Practice Shutter Speed at Home

13 May

Practice-shutter-speed-f11-1:60

One of the most important choices you make when taking a photograph is deciding what shutter speed to use. The shutter speed controls how much light comes into your camera, and how motion is recorded.

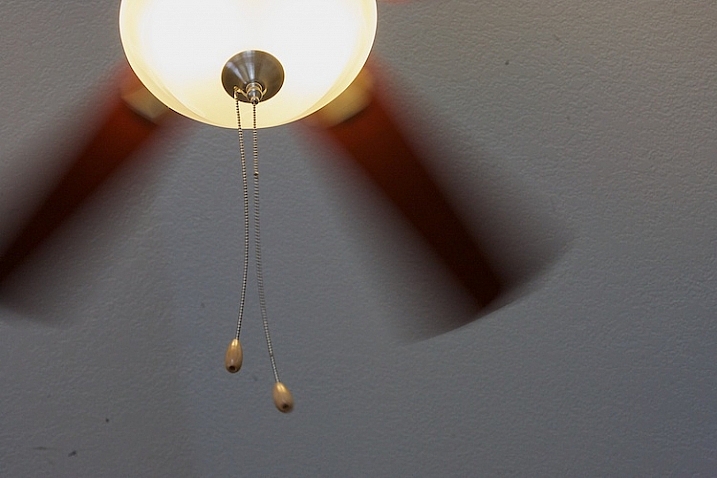
A faster shutter speed will freeze action and slower shutter speeds can create a blur. Both choices can produce great pictures. In this simple exercise that you can do at home with a ceiling fan, you will have the opportunity to practice setting your camera on different shutter speeds, and seeing how each affects motion in the image.

It’s best to do this during the day when there is some ambient light in the room. You might choose to shoot this with the ceiling lamp on or off, either will work. Or you might try both ways to see which you like better.

To get started, set your camera on shutter priority, or manual mode, and do a few test shots to check your exposure. Put your camera on a tripod for the most consistent results. I also chose to focus on the silver plate on the lamp of the ceiling fan to create consistency. It can be tricky in an exercise like this because your auto focus can get confused and focus on the ceiling, the blades, or the chain cord. (Note: you might try back button focus here, or use autofocus and then lock it or switch to manual).

Practice shutter speed using a ceiling fan/

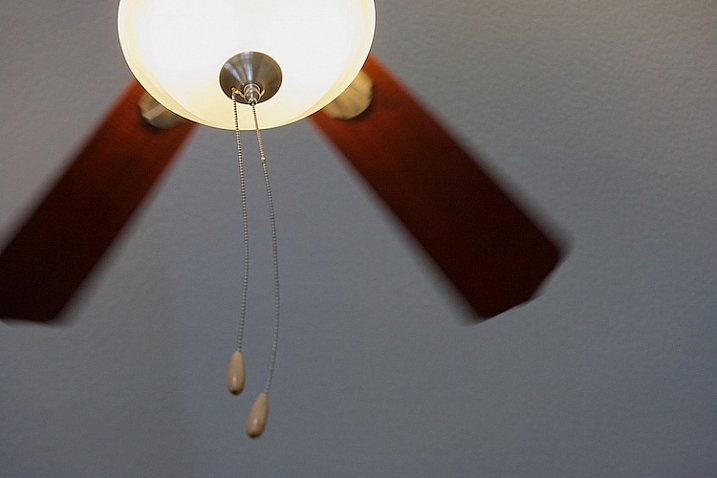
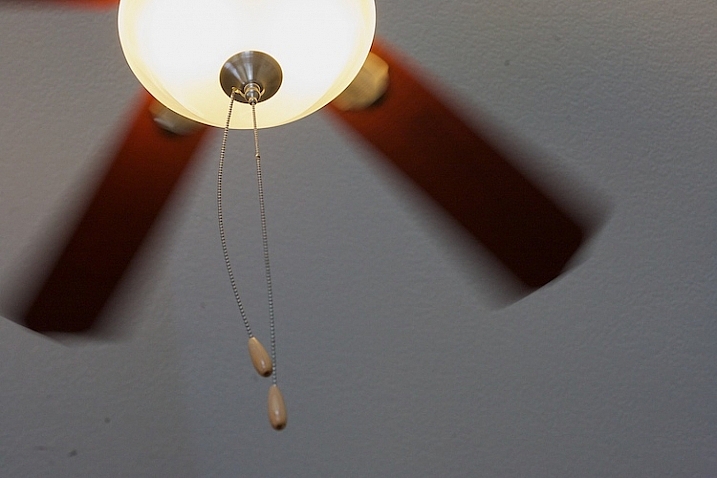
f/8 at 1/125th, ISO 1600.

Start your series at 1/125th of a second. Notice that I focused on the metal plate on the lamp, and how sharp it is. The blurring in the fan blades is caused by motion.  Also look at the chain. It’s sharp toward the lamp, but the focus gradually falls off as it gets toward the pulls.

Now slow your shutter speed down to 1/60th, and see what happens. If you are shooting in manual mode, remember that when you change your shutter speed, you must also change your aperture or ISO too.

Practice shutter speed using a ceiling fan/

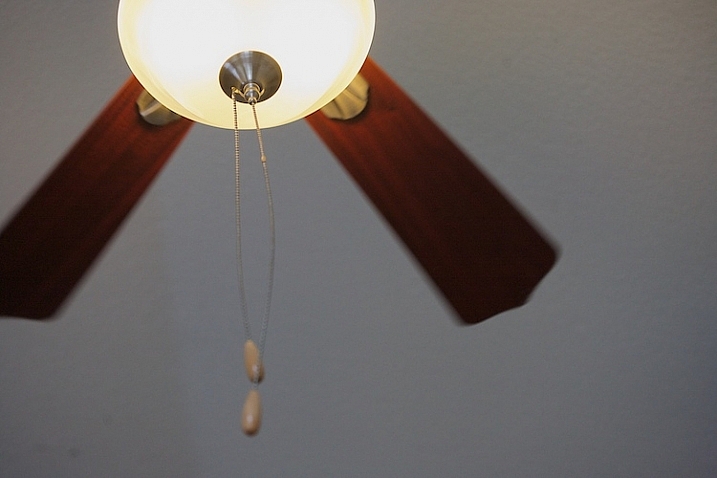
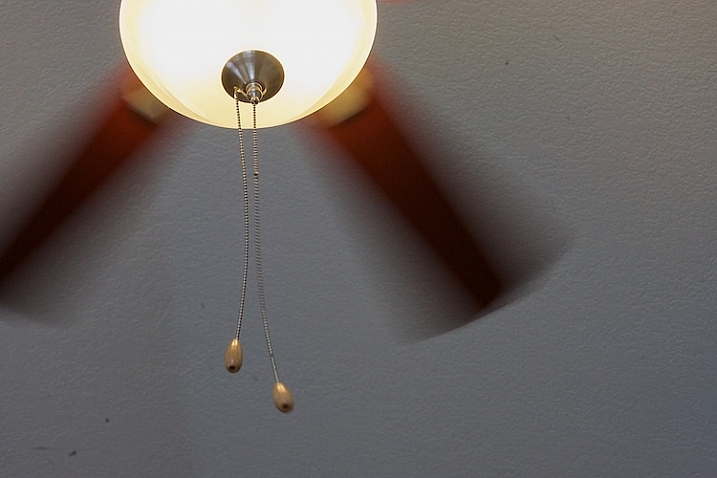
f/11 at 1/60th, ISO 1600.

Notice the blur in the blades at 1/60th. Next, look closely and you can also see that the pull chains show some movement. The depth of field is deeper as well, see how much is in focus between the metal plate on the lamp and the pulls.

Now, slow it down a little bit more.

Practice shutter speed using a ceiling fan/

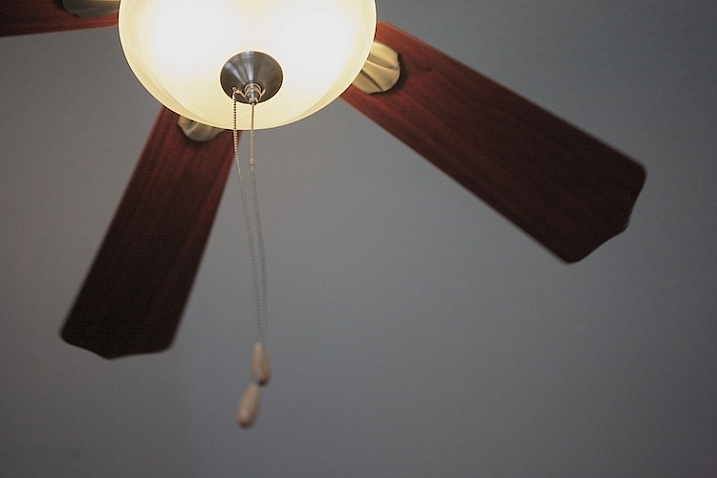
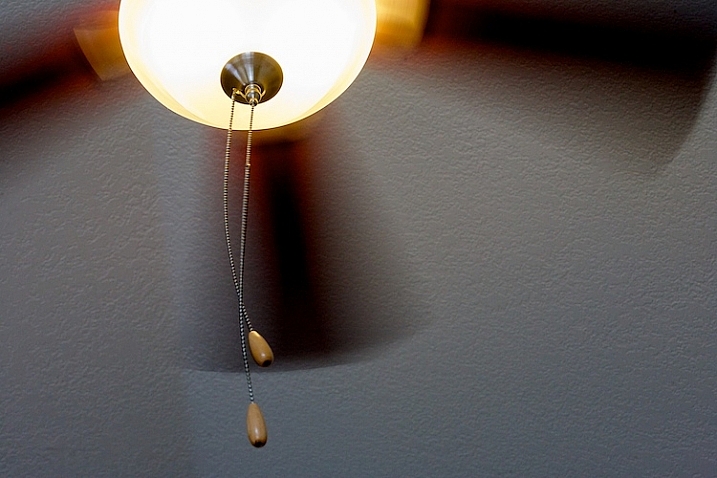
f/13 at 1/40th, ISO 1600.

What do you notice at 1/40th? The blades seem to be moving faster because of the blur, but nothing has changed with the fan. There is a greater depth of field also, much of the pull chain is in focus now.

Let’s slow it down even more.

Practice shutter speed using a ceiling fan/

f/20 at 1/4, ISO 1600.

Now, at 1/20th, the blades have taken on a new look and the chain is more in focus. Let’s slow it down a little more and see what happens.

Practice shutter speed using a ceiling fan/

f/32 at 1/8th, ISO 1600.

At 1/8th of a second, the blades are almost indistinguishable, and note that the metal plate is not as sharp as in the other photos. Ceiling fans are seldom perfectly still when the fans are moving and you can see slight movement in the metal plate.

Now, let’s go back and speed things up. Try a shutter speed of 1/250th and see what happens.

Practice shutter speed using a ceiling fan/

f/5.6 at 1/250th, ISO 1600.

Compare this to the first image, which was shot at 1/125th of a second. You can see that the blades still have motion, and notice the difference in the depth of field. At f/5.6, the chain is considerably more out of focus than at f/32.

Next, change your shutter speed to 1/500th.

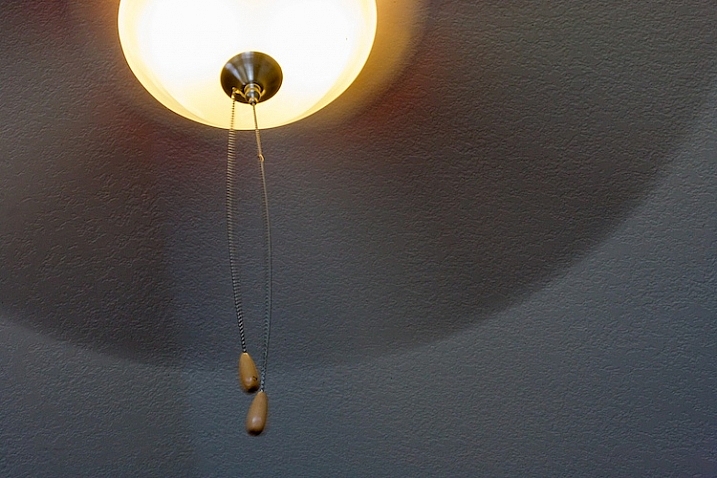
Practice shutter speed using a ceiling fan/

f/4 at 1/500th, ISO 1600.

At 1/500th, the fan blades show motion. Now try 1/1000th.

Practice shutter speed using a ceiling fan/

f/2.8 at 1/1000th, ISO 1600.

At 1/1000th of a second, the fan blades are frozen. It’s almost as if the fan isn’t turning. Notice the difference in the depth of field. The pull chain is out of focus due to the narrow depth of field at f/2.8.

Here are a couple of real world examples of how you might apply this to your photography:

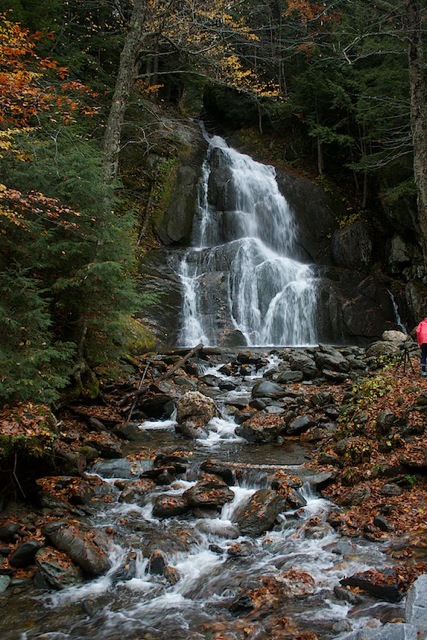
Shutter speed 1/30th - the water is partly frozen.

Shutter speed 1/30th – the water is partly frozen.

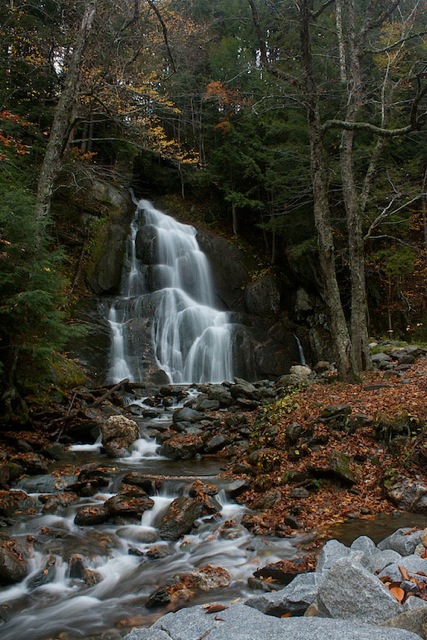
Shutter speed 1/2 second the water becomes silky and smooth

Shutter speed 1/2 second the water becomes silky smooth

You can also do this exercise by keeping your aperture consistent and changing your ISO. So what did you learn by doing this exercise? Give it a try and share your photos and what you learned below.

googletag.cmd.push(function() {
tablet_slots.push( googletag.defineSlot( “/1005424/_dPSv4_tab-all-article-bottom_(300×250)”, [300, 250], “pb-ad-78623” ).addService( googletag.pubads() ) ); } );

googletag.cmd.push(function() {
mobile_slots.push( googletag.defineSlot( “/1005424/_dPSv4_mob-all-article-bottom_(300×250)”, [300, 250], “pb-ad-78158” ).addService( googletag.pubads() ) ); } );

The post An Exercise to Learn and Practice Shutter Speed at Home by Vickie Lewis appeared first on Digital Photography School.

Digital Photography School

 
Comments Off on An Exercise to Learn and Practice Shutter Speed at Home

Posted in Photography


An Exercise For You to Practice Depth of Field Without Going Outside

01 Apr

lead-photo-Vickie-Lewis-Photography-for-dps

Many photographers, especially when starting out, have a difficult time understanding depth of field. I also hear quite often that photographers are waiting for nice weather to get out and shoot. So, here’s a fun exercise you can do at home, in any weather, that will help you understand the finer aspects of depth of field.

Depth of field is determined by which aperture you choose, what focal length you’re using, and the distance between the camera and the subject. In this example, we’ll explore depth of field using a 100mm lens.

To set up

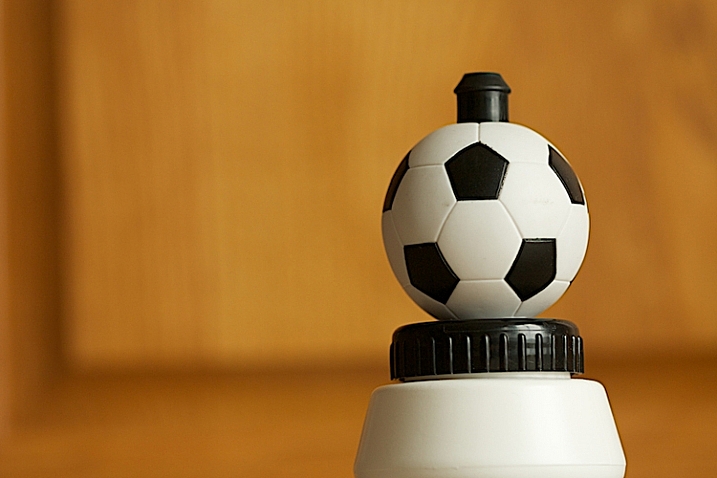
Find between one and three small objects you can photograph. I found three sports water bottles with balls on the top to shoot. Next, you need some studio space. A patio door or very wide window works well.

Your next step is to set up your object, or objects, in front of the window and to place your camera in position. The object and camera should be parallel to the window.

depth_of_field_illustration

This is how I set up my camera and objects.

I put the first ball, the soccer ball, about 12 inches in front of the cabinet. Then I put the second ball, the baseball, about 24 inches in front of that. I put the third object, the basketball, 24 inches in front of the next object, and finally I set my camera about two feet in front of the last object.

You’ll need to play a little bit to see what works best for you. It will vary depending on the size of the object you are shooting, and the focal length you are using. You want to be able to focus on all three objects, and take a photo of them without moving your camera, so play for a minute. Focus on the first object and make sure you can see all three objects in the frame. Then focus on the second and make sure you can still see them all. Lastly, do it with the third one, too.

Set your camera on either aperture priority or manual exposure, and use the widest aperture you have. I chose f/2.8. Your lens might not have that aperture available, if so f/4 or f/4.5 will be just fine.

Shoot wide opened focusing on each object in turn

Now, without changing anything but your focus, take a photo of each of the three objects.

200__depth_of_field_f-2.8

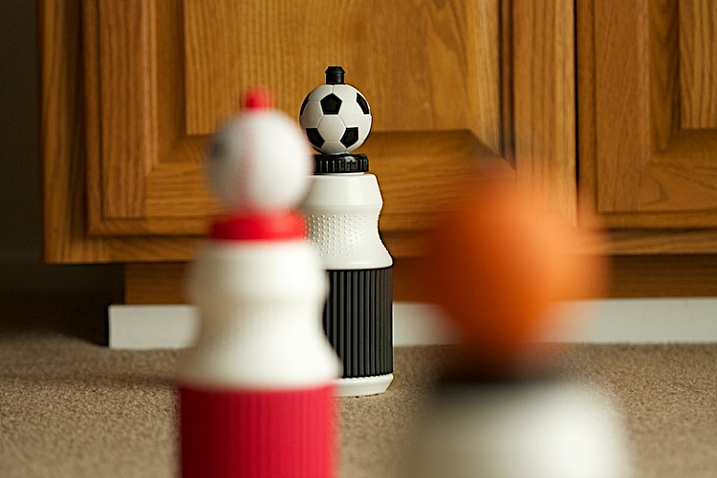
This photo was shot at f/2.8 while focused on the object closest to the camera, the basketball. Notice the narrow depth of field, in other words, how blurry the background is.

201__depth_of_field_f-2.8-f-2.8

This was also shot at f/2.8, but this time, I focused on the middle object, the baseball. Notice that it is blurry in front and in back.

202__depth_of_field_f-2.8

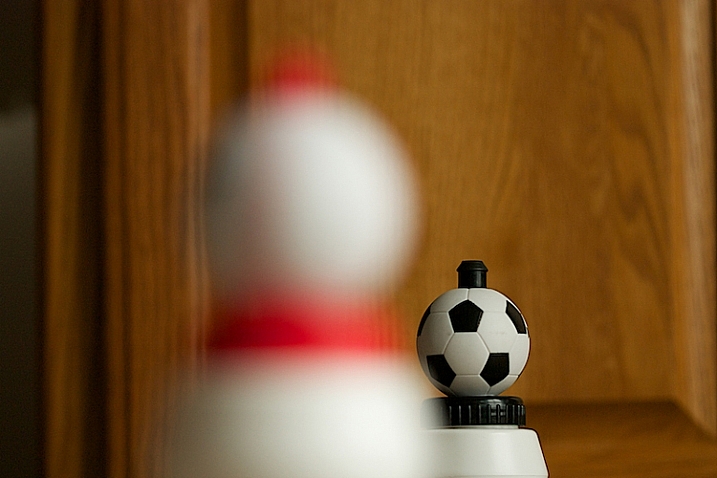
This photo was also shot at f/2.8, but I focused on the soccer ball. I did not change camera position nor did I change lenses. Notice the depth of field, but also notice the change in perspective. Can you see that more of the cabinet is in the photograph?

Next shoot with a small aperture

Now, let’s try something a little different. Instead of shooting at your widest f-stop, shoot at your smallest, which means a higher number, like f/32 or f/16.

205__depth_of_field_-f-32

Here is the same situation. The camera hasn’t moved, but the aperture is now at f/32. The focus is on the basketball, but look how much is sharp.

204__depth_of_field_-f-32

Look closely. The aperture is still at f/32, but the focus has changed to the baseball. Notice the basketball is more out of focus, but the soccer ball in the back looks pretty sharp.

203__depth_of_field_-f-32

Above is the third example. The focus is on the soccer ball.

You can practice each of these things with different f/stops to see the difference between f/4, f/8, f/11, f/16 and f/32. Each choice will change the depth of field.

Change the distance to the subject

209__depth_of_field_-f-2.8

In the above photograph, I moved the camera closer to the baseball and shot at f/2.8. Practice isolating the elements and see what happens. Notice how the baseball really stands out, and look at the background. By isolating the baseball with a very narrow depth of field, the background becomes really out of focus. This tool is very helpful to clean up backgrounds.

210__depth_of_field_-f-2.8

Then I changed my focus to the soccer ball. The aperture is still at f/2.8. What do you notice about the background?

213__depth_of_field_-f-32

In the shot above the soccer ball is still in the original position, about a foot away from the cabinet. Notice how sharp the background is – this was shot at f/32.

214__depth_of_field_-f-11

Now, notice how we start to lose detail in the cabinet behind. This image above was shot at f/11.

215__depth_of_field_-f-2.8

Finally, by shooting at f/2.8, and without moving the position of the soccer ball or the background, the background has become more out of focus and less distracting.

Take some times and practice this at home. So what you’ve learned here is a great way to practice depth of field at home–even on a rainy day! So take out your camera, find some small objects to shoot and start practicing.

Please share in the comments below how controlling the depth of field could impact how you shoot. What did you learn by doing this exercise?

googletag.cmd.push(function() {
tablet_slots.push( googletag.defineSlot( “/1005424/_dPSv4_tab-all-article-bottom_(300×250)”, [300, 250], “pb-ad-78623” ).addService( googletag.pubads() ) ); } );

googletag.cmd.push(function() {
mobile_slots.push( googletag.defineSlot( “/1005424/_dPSv4_mob-all-article-bottom_(300×250)”, [300, 250], “pb-ad-78158” ).addService( googletag.pubads() ) ); } );

The post An Exercise For You to Practice Depth of Field Without Going Outside by Vickie Lewis appeared first on Digital Photography School.

Digital Photography School

 
Comments Off on An Exercise For You to Practice Depth of Field Without Going Outside

Posted in Photography


Take this Picture of the Day Project to Practice and Help You Grow as a Photographer

26 Jun
Sunset

Sunset on Long Beach Island (NJ)

I watched the future football Hall of Fame quarterbacks practicing on the sidelines just before the Super Bowl. Although they had thrown the football perhaps millions of times before, they were practicing their throwing before the big game. They believe in the old (but true) saying, “Practice makes perfect.”

It’s important for us as photographers to continually practice our skills as well. Although we may have pressed the shutter button a million times, we need to be sure that we are always “ready for the big game”. Like the Super Bowl quarterbacks, it is important that we keep practicing our skills; whether we are professionals, aspiring professionals, or enthusiasts.

Why Practice?

Old Barney

Old Barney lighthouse in Barnegat Light, NJ

Although practice does not make perfect (we can practice doing things the wrong way), it does make our techniques more natural, and more permanent. For example, using back-button focus on my camera the first time seemed strange to me, but after practicing it over and over, it become an automatic technique that I use without even thinking about it. It’s a challenge to try turning off your brightly lit LED display on your camera once the theatre is darkened, but with practice it’s an automatic, and easy process.

Practice not only gives us a chance to make our shooting techniques more automatic, it gives us a chance to try new techniques. Practice gives us an opportunity to learn new poses, try a new lenses, or try a new post-processing technique to enhance our photographs before we use them in a client shoot. As a photographer, learning never stops; practice is a good way to try out things with no pressure or fear of failure.

Maybe I’ll Practice Tomorrow

Unless we are full time photographers or we have the luxury of having the time to shoot whenever we want, finding time to practice can be a challenge. Life is busy; there are so many things that need to be done that we are sometimes tempted to say, “Maybe I’ll practice tomorrow.” Sometime we need motivation to force us to make the effort, despite other things that may get in the way, to practice our photography techniques.

Picture of the Day

Clyde

If someone asked me what the biggest thing was that has helped me to improve my photography skills, I would have to say that it was my commitment to what I call the Picture of the Day. A little more than a year ago I started trading photographs that I took with my sister who is a photography enthusiast. Very quickly that practice spread to other family members and friends. Today, I send a new photograph to more than a hundred people every morning. The list continues to grow. But it’s not the number of people that receive the Picture of the Day that is the motivator, it’s the commitment to taking, and sending the picture, that benefits me as a photographer.

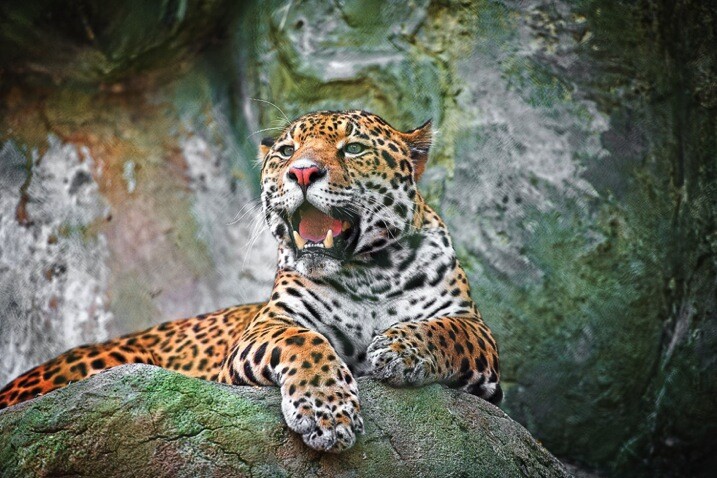
Even though my photography business focuses mainly on people (weddings, portraits and events); my Picture of the Day photos may include people, animals, architecture and landscapes. People that receive my Picture of the Day have commented that opening my morning email is like opening a box of chocolates because “you never know what you’re going to get”. Sometimes my pictures are not meant to be works of art, but rather just funny, like the shot of my dog Clyde (above), sitting by the dinner table with his sunglasses on, waiting for dinner. The zoo is always a great place to take pictures, so I make that part of my list of places to shoot.

Jaguar

Jaguar at the Elmwood Park Zoo (Norristown, PA)

Admittedly, I shoot most days, but not every day. I make time during the week to practice shooting; I am committed to take that time despite everything else. I have my camera with me most of the time, and many of my shots are unplanned. I stockpile the shots so that I always have a reserve of pictures to use for my morning emails.

How has the Picture of the Day Helped Me?

My commitment to the Picture of the Day has helped me to grow as a photographer more than anything, including the following:

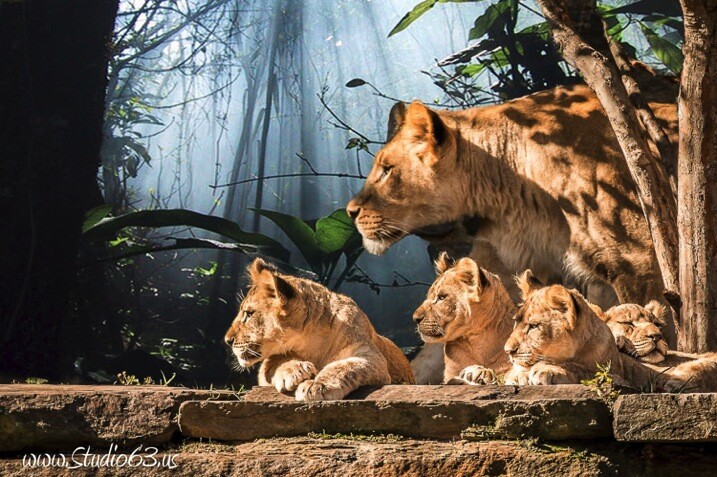
Kids and Mom

Four month old lion cubs with mom (Philadelphia Zoo)

  • Knowing that I need a new picture every day motivates me to get out and shoot, even if I am not shooting the things that my business is focused on.
  • Knowing that my Picture of the Day needs to be different than all of those that I previously sent out, motivates me to try new techniques and to look at things more creatively. That has helped me to start thinking out-of-the-box and has greatly expanded my composure skills for when I am shooting weddings or portraits for clients.
  • Shooting for the Picture of the Day has given me the opportunity to try and to practice with new lenses and filters, so that when the time comes to use them in a business shoot, I am ready.
  • My Picture of the Day has enabled my business to grow, as people that receive my email every morning are reminded that I am in the photography business. I can’t think of a more effective, less costly marketing tool.
  • Lastly, shooting for my Picture of the Day has been just plain fun!!!

Make the Commitment Today

Nina and Pinta

Nina and Pinta replicas at visit to Viking Village (Barnegat Light, NJ)

If you are not just a picture snapper, but rather, serious about photography – make the commitment to start your own Picture of the Day project today. Like mine, it can start small and grow over time (I had only one person on my list initially.) I sometimes post my Picture of the Day on my personal Facebook page which adds more visibility to my work. This visibility also adds to my list of people that subscribe to my Picture of the Day.

How do you practice your photography?

googletag.cmd.push(function() {
tablet_slots.push( googletag.defineSlot( “/1005424/_dPSv4_tab-all-article-bottom_(300×250)”, [300, 250], “pb-ad-78623” ).addService( googletag.pubads() ) ); } );

googletag.cmd.push(function() {
mobile_slots.push( googletag.defineSlot( “/1005424/_dPSv4_mob-all-article-bottom_(300×250)”, [300, 250], “pb-ad-78158” ).addService( googletag.pubads() ) ); } );

The post Take this Picture of the Day Project to Practice and Help You Grow as a Photographer by Frank Slezak appeared first on Digital Photography School.


Digital Photography School

 
Comments Off on Take this Picture of the Day Project to Practice and Help You Grow as a Photographer

Posted in Photography


tim lincecum pitching ~ 2011 spring training practice

03 Feb

monday february 21, 2011 scottsdale stadium ~ scottsdale, arizona tim lincecum pitching on one of the back practice fields at scottsdale stadium. he pitched for around 10 minutes. this was shot towards the end of it.
Video Rating: 5 / 5


2011 Toronto Natural Hair & Beauty Show – Runway Walk Practice Pt2

06 Dec

Runway Walk for the Toronto Natural Hair Dancehall Couture show Friday September 16th 2011 7 PM at the Vue.
Video Rating: 5 / 5

 
Comments Off on 2011 Toronto Natural Hair & Beauty Show – Runway Walk Practice Pt2

Posted in Nikon Videos


SKILL Concept Project 34 Night Practice PART III

28 Nov

Shot 100% on the HD HERO2® camera from ?GoPro.com This week I went out again at night. I didn’t have time to go during the day due to my trip to Okayama, so I was forced to go out after everybody went to bed. I had good fun, considering that I had no idea what i will do. It took me about 50 min to set up a course with lots of Front One-way action. I hope you will enjoy it as much as I did making it I also made this soundtrack to the video. If you like any of my music, you can download it from the address bellow. Feel free to use it as long as you give credit to MSPDawgs/Kezo sutros.com If you like my videos, please SUBSCRIBE!!! Thanks for watching and happy drifting to you all! Car: Chassis – Yokomo Drift package Basic with Stage 2 upgrade Yokomo’s Front One Way Body – HPI’s Mazda RX-8 Tires – SURGING SDT-002C D60 for carpet High speed steering servo (FUTABA BLS-451) Transmitter is also Futaba (4PL-2.4G) NO D box! Original music by MSPDawgs/Kezo

SUBSCRIBE/RATE VIDEO TOO =)! MaBSTOA’s West Farms Bus (BX36) | Gun Hill Bus (BX40/Bx42) | Kingsbridge Bus (BX41) BX36 | 179th Street/Broadway (US9), Manhattan and Soundview, The Bronx BX41| Gun Hill Road/White Plains Road, and Mott Haven, The Bronx BX40/BX42| River Park Tower and Throgs Neck, The Bronx New Flyer D60HF in the New MTA Livery is shown here Orion 5 CNG Bx36 and New Flyer D60HF BX40 or BX42 is seen here as well ENJOY! Video Taken: March 4, 2011
Video Rating: 5 / 5

 
Comments Off on SKILL Concept Project 34 Night Practice PART III

Posted in Nikon Videos


3D animation practice toy robot

28 Apr

LOL it’s for my 3ds max practice
Video Rating: 4 / 5

3D animation created by raptor5120. Sound effects are from Medal of Honor Allied Assault Spearhead.