RSS
 

Posts Tagged ‘Posing’

Glamour Posing Guide: 21 Sample Poses to Get You Started

29 May

The post Glamour Posing Guide: 21 Sample Poses to Get You Started appeared first on Digital Photography School. It was authored by Darren Rowse.

glamour photography poses

Looking for glamour photography poses that’ll give stunning results?

In this article, I’m going to share 21 glamour pose ideas. You’ll find a pose or two for every model – and you can also have fun tweaking the ideas to fit your subject’s interests.

Now, some of the ideas below are nude poses – after all, posing for nudes is a part of glamour photography. But if nudes don’t interest you, that’s completely okay; feel free to skip past.

So without further ado, let me share the poses you can use for your glamour portraits, starting with:

1. Lying down sideways

glamour photography poses

This is a good starting pose for intimate glamour shots. It works well in different settings and with different surfaces; for instance, your model might lie on a bed, on the ground, in the grass, or on a sandy beach.

Make sure you get a nice head turn, and pay careful attention to the position of your model’s hands.

2. Lying down at an angle

glamour photography poses

This is a variation on the previous glamour pose, and one that works well with all body types.

Simply ask your model to lie on the ground with their far elbow propping up their head and shoulders. Make sure they angle themselves toward the camera so that their feet are farther from the camera than their head.

3. Lying parallel to the camera with the legs up

glamour photography poses

This is a lovely pose with a more playful result. Ask the model to keep her upper body lifted, with her head tilted toward the camera and directed slightly down.

Make sure your model’s legs are up – and make sure her toes are pointed over her back.

And for the best results, shoot from a low angle.

4. Lying in a triangle

glamour photography poses

This is a glamour photography classic – and it’s pretty hard to pull off.

Ask your model to lie down, body parallel to the camera. Then have her lift her upper body using a single arm.

You’ll need to check a few items:

  • The supporting hand must be turned away from the body
  • The head should be turned toward the camera
  • The non-supporting hand should remain visible
  • The feet should be stretched

5. Body down, shoulders up

glamour photography poses

This is another challenging one – it’s not easy for the model, and it’s not so easy for the photographer, either!

To shoot this pose successfully, you’ll need to ask your model to lie parallel to the camera, their upper body pushed off the ground with their elbow. (Feel free to experiment with the positioning of the non-supporting arm.)

You’ll also need to check all body parts, including the head, hips, and legs.

6. Lying back

lying back stretched out

This is a beautiful pose for outdoor shooting.

Simply ask your model to lie down, curve their back, and stretch their feet. It works great on grass, on a beach, or in a chair.

The model’s body should be parallel to the camera, or the feet should be slightly farther away than the head.

7. Lying down, back to the camera

back to camera pose

Here’s a beautiful glamour pose for a model lying on her stomach.

The upper body should be slightly lifted, and the model should look back over her shoulder. Ask her to stretch out her legs.

This works well with all body types. Move gradually around the model while testing out different camera angles and positions.

8. Sitting with the back arched

glamour photography poses back arched sitting up

This is a simple pose to emphasize a feminine shape. It also works well as a silhouette against a bright background (though you’ll need to get low to the ground to create the silhouette effect).

Ask your model to sit with their legs tucked and back arched. Then have them lift their elbows.

9. The sitting nude

nude photography pose

For those doing nude photography, here’s a simple pose:

Ask your model to face the camera, then cross one leg over the other and drape an arm over the top knee.

If you’re after additional nude poses, try some variations; you can change the hand, leg, and head positioning for great results.

10. Sitting with the back to camera

semi-nude pose

This semi-nude pose is easy and gentle. The model should sit with both legs tucked. Their back should be angled slightly toward the camera, with their head looking over their shoulder.

11. Sitting parallel to the camera, knee up

glamour photography poses

This is another easy pose, one that works well in both indoor and outdoor settings.

(For a different result, try creating a silhouette against a bright background.)

Have your model sit parallel to the camera, legs out and knees bent. Ask them to raise an arm (though feel free to experiment with arm and hand positioning here).

12. Sitting and facing the camera

glamour photography poses

If done properly, this pose turns out amazing. But you’ll need to get the limb positioning exactly right – otherwise, you risk ending up with an awkward, imbalanced shot.

So ask your model to lie down and face the camera at an angle. Then have them partially sit up while keeping their legs stretched out.

This pose works well with all body types. Note that you should shoot from a slightly elevated angle.

13. Crouching parallel to the camera

high heels crouching pose

Now for a challenging pose:

Ask your model to crouch with their knees up. Leg positioning is a decisive factor here, so you’ve got to get it right.

High heels are a must. You can experiment with different feet positioning, but I recommend keeping the toe of one shoe separate from the heel of the next.

14. Facing away from the camera with a head turn

nude photography pose

If you’re after a simple and dignified nude photography pose, try this:

Ask your model to turn away from the camera, but with their head tilted back over their shoulder. Ask them to put one arm up and to wrap the other arm around their stomach.

Make sure the model’s face is not partly covered by their hand or shoulder. For a particularly romantic mood, the model can look down toward her body.

Also, her raised elbow should be pointing away from the camera.

15. Looking over the shoulder

nude pose with sheet

This one’s a nude pose for less experienced models.

Ask your model to turn away from the camera, but keep their head tilted back over the shoulder.

Remember that glamour and nude photography don’t exclude props, so don’t be afraid to add a piece of cloth (a sheet or an item of clothing works well); the model can hold this against their body.

16. Leaning forward against a wall

leaning against the wall pose

If you’re looking for some nice wall poses, start here:

With your model leaning forward against the wall, elbows out. Her body should be angled toward the wall.

Note that you can adjust her elbow and hand positioning for additional options.

17. Leaning back against the wall

leaning back against the wall

Here’s another easy wall pose:

Ask your model to lean back against the wall, head tilted toward the camera and arm up. For a more dynamic pose, they might bend one knee slightly (with the back foot resting against the wall or a ledge).

Again, endless variation and shooting angles are possible!

18. Against a wall, back to camera

glamour photography poses

For this one, have your model face away from the camera.

Ask her to shift her weight to one leg for a more dynamic pose. She can lean against the wall, or you can have her step off to the side (though feel free to keep the wall as a compositional element).

19. Facing the camera (full body)

glamour photography poses

Here’s another pose with many variations.

First, ask your model to face the camera. Then ask her to curve her body in an S shape, twist her hips, and raise her arms.

Ask her to experiment with different head positions (and you might experiment with leg positions, as well).

20. Angled body and flowing sheets

glamour pose with flowing sheet

Sheets and clothing work great as props. For this glamour photography pose, ask your model to angle their body toward the camera. Have her wrap a sheet around her stomach then throw it to the side.

(Especially marvelous shots can be made in windy weather!)

21. Facing away with a sheet

posing in a field glamour photography

I’ve already suggested several poses with your model’s back to the camera.

But if you want to create something unique, try taking your model to an open field – such as a farm field, a wildflower meadow, or even a desert landscape.

I highly recommend you bring a sheet or piece of clothing; your model can wrap it around her legs for plenty of interesting shots.

Glamour photography poses: final words

Hopefully, you now have plenty of glamour and nude poses to try during your next photoshoot!

But I’d like to emphasize:

Each of these initial sample poses is only a starting point. Every pose on this list has endless variations. You can ask your model to try different facial expressions, head turns, hand and leg placements, and body turns. A slight modification can make for a completely different (and potentially better!) pose.

Also, always remember to shoot from different angles (up and down, right and left). Try changing your distance from the subject. Try different crops and compositions.

Because in the end, posing is trial and error. The more variations you shoot, the better your results!

Also, if you enjoyed this article, check out our ebook, Portraits: Striking the Pose, which shares tips, tricks, and secrets for beautiful portrait poses.

Kaspars Grinvalds is a photographer working and living in Riga, Latvia. He is the author of Posing App, where you can find even more poses and posing ideas!

The post Glamour Posing Guide: 21 Sample Poses to Get You Started appeared first on Digital Photography School. It was authored by Darren Rowse.


Digital Photography School

 
Comments Off on Glamour Posing Guide: 21 Sample Poses to Get You Started

Posted in Photography


11 Tips for Posing People With Confidence (+ Examples)

11 Apr

The post 11 Tips for Posing People With Confidence (+ Examples) appeared first on Digital Photography School. It was authored by Andrew S. Gibson.

11 tips for posing people with confidence

How can you pose people in photography with amazing results?

In this article, you’ll discover 11 simple tips to start people posing like a pro (plus plenty of example images).

So if you’re ready to take your portrait photography to the next level, then let’s get started!

(Also, if you’re looking for posing inspiration, check out our handy Portrait Posing Guide, which offers a whopping 67 sample portrait poses.)

Before the shoot

Here are some points to think about before you even pick up your camera:

1. What kind of shoot is it?

The posing requirements for a family portrait shoot are very different than the requirements for a fashion shoot.

So don’t think about posing until you’ve determined the type of shoot you’re doing!

people posing photography

2. Look for inspiration online

Chances are that you have a few photographers you follow on websites like Flickr and 500px. You’ll find some good poses in their portfolios.

So download your favorite poses to your smartphone (or use Pinterest to create a mood board; I cover this in more detail in my article, How to Plan the Perfect Portrait Shoot). That way, you have something you can show to your model.

Don’t try and commit the poses to memory – you will forget them under pressure!

man in chair pose

3. Match the pose to your model

This is important.

You’ll see some wonderful poses in fashion magazines. But many of them need a professional model to pull them off.

And your model may not be able to do those – so tailor the pose to your model (not the other way around!).

people posing photography woman on stairs

4. Buy the Posing App

The Posing App gives you over 300 poses that you can access on your smartphone.

people posing the posing app
Screenshots from the Posing App. The line drawings are easy to understand and follow.

The best way to use the app is to select five to ten poses and add them to your favorites. Then you can show them to your model so they know what you want them to do.

(In fact, the author of the app has written several articles about posing for Digital Photography School you will find useful!)

During the shoot

No matter how experienced or inexperienced your model is, here are some tips to help you capture the perfect pose during the shoot:

5. Build rapport

This is essential. If your model likes you and sees what you are trying to achieve, they will work harder.

Talk to your model about things they like; this will help produce more life in their eyes and get better expressions, including natural smiles. And they’ll be more relaxed.

But if your model is tense, you are going to struggle to get natural-looking portraits. In that case, take the pressure off the model and bring it back on yourself. Assure them that if the photos don’t work out, it’s your fault, not theirs. Build their confidence.

6. Look for natural expressions

As you talk to your model, you will notice natural expressions and mannerisms that you can capture.

Don’t be afraid to say “Hold that pose!” or “Do that again.”

people posing photography
I noticed that this model had an interesting mannerism, so I asked her to repeat the gesture. The result turned out to be one of her favorites!

7. Adapt poses

When you suggest a pose to your model – such as a pose used in another photo or a pose from the Posing App – treat it as a starting point. Then adapt it to suit the model.

In other words: If your model looks unnatural in a certain pose, then change it! Adjust each pose to suit your model’s body and clothes.

woman posing against a wall
The pose on the left is one I found in the Posing App. For the second portrait, I asked my model to drop her left arm so I couldn’t see it. Don’t be afraid to tweak poses; sometimes a small change makes a big difference.

8. Simplify

Keep everything as simple as possible. This applies to composition, as well as the clothes and jewelry your model is wearing.

If your model has too much jewelry, ask them to remove some. It’ll improve the composition.

If you’re struggling to find a good full-length pose, move in closer and shoot from the waist up, or do a head-and-shoulders portrait. The background will go more out of focus, and there will be less of the model in the photo (i.e., the shot will be simplified!).

woman posing simply
Simplification in action. The closer you crop, the easier it is to pose your model. This is a good technique to use if you are struggling to make a certain pose work.

9. Pay attention to detail

Pay special attention to hands, which often look better turned sideways. Look at photos where the model’s hands look elegant or are nicely posed, and ask your model to do the same.

people posing photography man against wall

Check your model’s hair to make sure stray strands aren’t blowing across their face or eyes. Look at their clothes to make sure they aren’t wrinkled or creased in a strange way.

10. Find something for your model to lean on

This makes it much easier to create a natural-looking pose.

two woman posing with walls
Two different ways to use a wall to give a model something to do. The Posing App has lots of poses for leaning.

11. Use props

If the model has a prop to hold or otherwise interact with, it gives them something to do.

model with a hoop
The model in this photo was into hooping. Using the hoop as a prop gave her something to hold and added interest to the portrait.

And if they’re having fun with the props, you’re more likely to get a great expression!

woman with a horse people posing
I suggested the model bring her horses along to the shoot. The horses are a natural prop, and her interaction with them led to photos like this one.

Posing people with confidence: conclusion

There you have it:

11 easy tips for posing people!

So the next time you’re photographing a person, make sure to try some of these tips out!

Now over to you:

Do you have any tips for our readers about people posing? What has worked for you? Share your experiences, tips, and images in the comments below.

The post 11 Tips for Posing People With Confidence (+ Examples) appeared first on Digital Photography School. It was authored by Andrew S. Gibson.


Digital Photography School

 
Comments Off on 11 Tips for Posing People With Confidence (+ Examples)

Posted in Photography


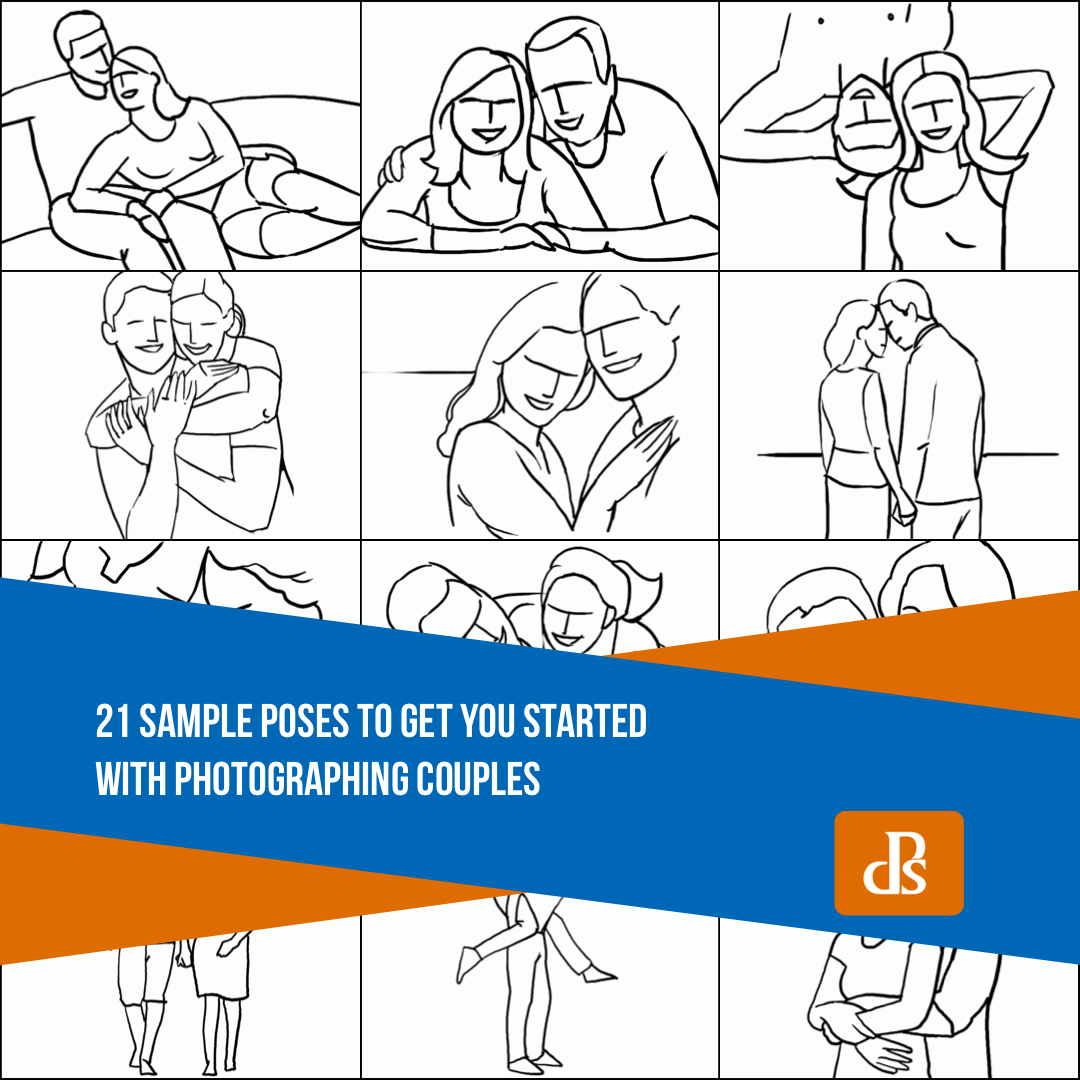
Posing Guide: 21 Sample Poses to Get You Started with Photographing Couples

12 Dec

The post Posing Guide: 21 Sample Poses to Get You Started with Photographing Couples appeared first on Digital Photography School. It was authored by Guest Contributor.

poses for photographing couples

This is a guest post by Kaspars Grinvalds from Posing App.

In this posing guide series, we’ve looked at posing female subjects, posing male subjects, and posing children. In those individual portraits, the main subject is a single person with a single personality. But couple photography is more about connection, interaction, and above all, feelings between two people. Generally, you’re working with very deep and passionate feelings, which is what makes couple photography so delightful and positive.

Couples are pretty easy to engage in a photoshoot. If they are initially a bit shy or feeling uncomfortable, just ask them to show you how they felt and looked when they met for the first time. You will touch them on an emotional level, providing you with natural and loving expressions in their portraits.

However, creating strong couple poses presents its own difficulties. That’s why we’re offering 21 simple, easy poses for photographing couples – so you can get started taking stunning couple photos, today.

1. Standing face to face (but looking at the camera); one partner should hold an arm on the other partner’s chest

Make sure you take both close-up and vertical shots.

Posing Guide: 21 Sample Poses for Photographing Couples

2. Standing close together and looking toward one another

Ask the couple to stand very close to one another to create intimate close-up portraits. Don’t be afraid to zoom in and crop real tight!

intimate close up pose

3. Hugging from behind

This is a very easy and cordial pose, with one partner holding the other from behind. The couple may look straight into the camera or at each other. They can even kiss for a more emotive shot.
Posing Guide: 21 Sample Poses for Photographing Couples

4. Holding from behind

This is a fun and loving pose, with one partner holding onto the other partner’s back and shoulders.

Pay attention to hand positioning; it should be simple and natural.

Posing Guide: 21 Sample Poses for Photographing Couples

5. Holding from behind (alternative)

This is just a variation on the previous pose, with one partner holding the other from behind.

Remember that the couple doesn’t necessarily have to look into the camera. For better results, make them interact with each other by talking, offering flirtatious looks, laughing, etc.
Posing Guide: 21 Sample Poses for Photographing Couples

6. Holding and looking out

This pose creates a very romantic mood, and it works best when outdoors with some open space in the background.

Shoot only slightly from behind the couple.

And remember that you have to be far enough to the couple’s side to capture each person’s closest eye. Otherwise, you will create an impersonal, empty shot.

Posing Guide: 21 Sample Poses for Photographing Couples

7. Looking up

Find some elevation and shoot your subjects from above.

A common pose shot from an unusual angle is always creative and will often reward you with surprisingly good results.

shoot from above

8. Intimately holding hands

This is another romantic pose. It works best outdoors with some open space in the background.

It also works very well as a silhouette against a bright background (in front of a sunset, for example).

Posing Guide: 21 Sample Poses for Photographing Couples

9. The gentle, staggered pose

This is an easy-to-create pose for a full-height shot. It’ll give your photos a calm and affectionate mood.

Posing Guide: 21 Sample Poses for Photographing Couples

10. The piggyback pose

This one’s a fun pose, but don’t assume that it only works with younger people. If an older couple feels fine with it, this pose will work superbly with them, as well.

Try different framings, take full-height shots, half-height shots, and close-ups.

Posing Guide: 21 Sample Poses for Photographing Couples

11. Standing face to face and kissing

This is a very nice way to show the affection a couple felt when they first met each other.

It works very well in crowded places, such as a famous meeting point in a city, at a train or metro station, etc.

couple kissing

12. Jumping and hugging

This pose offers a little bit of fun!

The crucial part is the leg positioning of your jumping subject; each leg should be bent at different angles.

Oh, and take a close-up portrait shot, as well.

woman jumping into a man's arms

13. Walking and holding hands

Take shots of the partners walking hand in hand as they approach from a distance.

Shoot in Burst mode only, because the majority of your shots will look awkward thanks to the leg movement. Therefore, the second part of your job is to select the photos with the best leg movement and positioning afterward.

couple pose holding hands

14. Walking and holding each other

This is another pose with a walking couple. This time, the couple should walk close together and hold onto each other.

As with the previous pose, take several shots and choose the ones with the most elegant leg positioning.

Posing Guide: 21 Sample Poses for Photographing Couples

15. Walking away from the camera

Never forget that there are often good opportunities when shooting from behind! This is a simple pose, but one that looks amazing when done right.

couple walking together

16. Lying on the ground

For this one, the couple should lie close together on the ground.

Ask them to lift their upper bodies a bit and use their arms for support. One partner might embrace the other partner gently. Shoot from a very low angle.

couple lying together on the ground

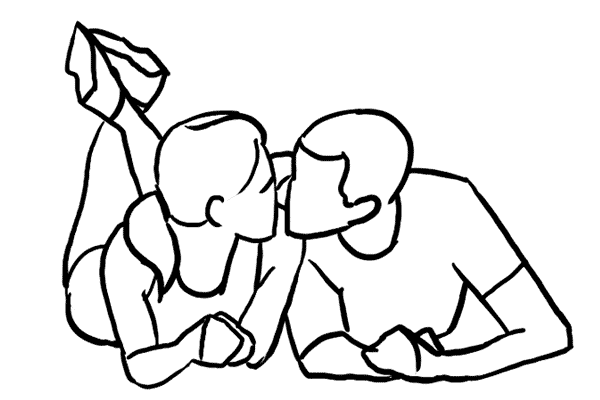
17. Lying on the ground and looking at each other

Here’s another variant with the couple lying on the ground, but this time with a little space between the partners.

Posing Guide: 21 Sample Poses for Photographing Couples

18. Cuddling on the ground

This is a nice example of an asymmetrical pose, with one person positioned slightly above the other.

Posing Guide: 21 Sample Poses for Photographing Couples

19. Lying together, looking up

This is an informal and fun way to pose – with the couple lying on their backs.

couple lying on backs

20. Sitting together on a sofa

Here’s a very cordial pose; ask the couple to sit comfortably on their favorite sofa.

couples sitting on a couch

21. The classic maternity pose

Shooting a couple may mean maternity photography.

Some poses from this couples series work pretty well for such an occasion. Simply adjust the pose accordingly to show the couple’s feelings about the baby!

This one here is a classic, and looks nice for pretty much any couple:

maternity pose

Grab our printable posing guide for photographing couples

Here’s 16 of our favorite couple poses for you to print and take with you on your next couple shoot:

Posing Guide for Photographing Couples

Also, make sure you look at these couple poses as a starting point only.

That’s the reason why they are rough sketches instead of real photos. You cannot, and should not, repeat the poses exactly; instead, adjust the poses creatively according to your shooting environment and scenario.

Check out the other posing guides in this series

  • Posing Guide: Sample Poses for Photographing Women (Part 1)
  • Posing Guide: Sample Poses for Photographing Women (Part 2)
  • Posing Guide: Sample Poses for Photographing Men
  • Posing Guide: Sample Poses for Photographing Children
  • Posing Guide: Sample Poses for Photographing Groups of People
  • Posing Guide: Sample Poses for Photographing Weddings

Grab our guide to portrait posing

Posing Guide: 21 Sample Poses to Get You Started with Photographing Couples

The post Posing Guide: 21 Sample Poses to Get You Started with Photographing Couples appeared first on Digital Photography School. It was authored by Guest Contributor.


Digital Photography School

 
Comments Off on Posing Guide: 21 Sample Poses to Get You Started with Photographing Couples

Posted in Photography


Posing Guide: 21 Sample Poses to Get You Started with Photographing Men

01 Aug

The post Posing Guide: 21 Sample Poses to Get You Started with Photographing Men appeared first on Digital Photography School. It was authored by Guest Contributor.

Posing Guide for taking Great Photos of Men

Previously we’ve created posing guides with suggested sample poses to help you get started posing women (also see part 2 for posing women), posing children, posing couples, posing groups, and posing weddings, so today let’s look at some sample starting poses for photographing men.

Men are usually less comfortable with being photographed, so it’s important to set them at ease with posing in order to get good results.

It is always a good idea to prepare before the photoshoot.

Just one more piece of advice: Involve your subject in the process!

He will feel more confident knowing the plan, what he has to “do,” and what kind of outcome is expected. Showing this kind of posing cheat sheet to your model is indeed a very good way to prepare your subject for a photoshoot and make him feel more relaxed and confident at the same time.

So, let’s look at some sample poses for men

1. Very simple pose for a man’s portrait: An upper body shot with crossed arms.

Two things to take care of: Shoulders should be pulled back a little, stomach muscles kept in check.

Posing Guide for taking Great Photos of Men

2. Crossed arms work very well in full height shots as well. In addition, ask him to cross one leg in front of the other. But make sure the body weight is not supported equally on both legs; otherwise, that would look just awkward!

Posing Guide for taking Great Photos of Men

3. A recurring question from your subject might be “Where shall I put my hands?” The solution is actually quite simple. There are four places to keep in mind (mixed in any combination, utilizing both hands).

#1. Loosely by the side.

#2. On the hips.

#3. In the pockets.

#4. Both hands crossed on the chest.

And in addition, hands should always be relaxed, which means no muscle pressure, except when you are photographing a bodybuilder.

Posing Guide for taking Great Photos of Men

4. A casual pose for a man standing upright. Men indeed have a problem with placing their hands; by keeping them fully or partly in the side pockets, you have a sure way to achieve a natural and relaxed pose.

Posing Guide for taking Great Photos of Men

5. Just a slight variation on the previous pose. A piece of clothing over the shoulder, merely a thumb in the pocket, and legs crossed work very well.

Posing Guide for taking Great Photos of Men

6. For a sitting pose, putting the ankle of one leg onto the knee of the other looks relaxed and natural. Shoot slightly from above.

Posing Guide for taking Great Photos of Men

7. Leaning against a wall is just another variant for upright posing.

Posing Guide for taking Great Photos of Men

8. The sideways way of leaning against the same wall. Works very well for both casual and formal shots.

Posing Guide for taking Great Photos of Men

9. A very simple pose for a formal portrait. Items held in the hand (e.g. a laptop, books, or even tools) can work as indicators of the subject’s occupation.

Posing Guide for taking Great Photos of Men

10. Against common belief, it is absolutely fine to make shots of a man sitting partly on a desk. For formal portraits, such a pose might counteract rigidness.

posing-men-subjects10.png

11. A very simple pose for a portrait: A man sitting at a desk. To reveal the subject’s profession, place work-related items on the desk.

Posing Guide for taking Great Photos of Men

12. A slight variation of the previous pose. Very appropriate for formal portraits.

Posing Guide for taking Great Photos of Men

13. To show the work environment while removing the distance created by a foreground object like a desk, take your shot from the backside. The result will be formal but inviting at the same time.

Posing Guide for taking Great Photos of Men

14. A man supporting himself on a desk with arms crossed. Again, you could place work-related items on the desk to point to the subject’s profession.

Posing Guide for taking Great Photos of Men

15. Using a chair as a prop can make a portrait more engaging and interesting. Very suitable when introducing creative people in their work environment.

Posing Guide for taking Great Photos of Men

16. Sitting comfortably in a chair usually works for corporate and formal portraits.

Posing Guide for taking Great Photos of Men

17. An easy and natural pose with a man sitting on the ground. Try different shooting directions and angles.

Posing Guide for taking Great Photos of Men

18. Another variant of a man’s pose while sitting on the ground. Suitable for outdoor locations.

Posing Guide for taking Great Photos of Men

19. An easy and relaxed-looking pose for a sitting man.

Posing Guide for taking Great Photos of Men

20. Informal pose. The man is sitting on the ground resting his back against the wall or some object.

Posing Guide for taking Great Photos of Men

21. Finally, let your subject be the protagonist of your picture. Never be afraid to crop tightly around the model’s face.

Posing Guide for taking Great Photos of Men

That should offer a starting point. Again, remember that there are no absolutes; each sample pose might and should be adjusted depending on your shooting environment and scenario. There is no need to overdo anything.

In reality, all you need for good people portraits is simplicity:

Simple backgrounds, simple clothing, simple poses, and natural expressions.

Check out our other Posing Guides:

  • Posing Guide: Sample Poses for Photographing Women (Part 1)
  • Posing Guide: Sample Poses for Photographing Women (Part 2)
  • Posing Guide: Sample Poses for Photographing Children
  • Posing Guide: Sample Poses for Photographing Couples
  • Posing Guide: Sample Poses for Photographing Groups of People
  • Posing Guide: Sample Poses for Photographing Weddings

Grab Our Guide to Portrait Posing

Kaspars Grinvalds is a photographer working and living in Riga, Latvia. He is the author of Posing App where more poses and tips about people photography are available.

The post Posing Guide: 21 Sample Poses to Get You Started with Photographing Men appeared first on Digital Photography School. It was authored by Guest Contributor.


Digital Photography School

 
Comments Off on Posing Guide: 21 Sample Poses to Get You Started with Photographing Men

Posted in Photography


Posing Guide: 21 Sample Poses to Get You Started with Photographing Women – Part I

18 Jul

The post Posing Guide: 21 Sample Poses to Get You Started with Photographing Women – Part I appeared first on Digital Photography School. It was authored by Guest Contributor.

This is the first in a series of Posing Guides with suggested starting poses for photographing different subjects. We are starting with the female posing guide.

Also in the series check out our posing guides for posing children, posing couples, posing groups and posing weddings.

Sample Poses to Get You Started with Photographing Women

If you ever run out of ideas, get stuck in creativity or simply need some guidance when shooting female subjects, you may use following posing samples as a “posing cheat sheet”. Many pro photographers use such a technique when preparing for and during the photo shoot.

The poses in this article are selected as an initial reference. I would advise you to look at the poses together with your subject, especially if she’s inexperienced. During a photo shoot, don’t hesitate to discuss with the subject which pose is or isn’t working in any particular situation. It’s usually very productive and you both will feel more confident in what you are doing.

OK, let’s start, one by one.

posing-photographing-female-models01.png

1. Very simple portrait pose to start with. Have the model look over her shoulder. Note how unusual and interesting a portrait might look, if shot simply from a different angle.

posing-photographing-female-models02.png

2. In portrait photography, hands are usually not visible or at least not dominant. However, you might get creative by asking the model to play around with her hands trying different positions around her head or face. Keep in mind, though: No flat palms, and the hands should only show their sides!

posing-photographing-female-models03.png

3. You might be familiar with composition rules like the rule of thirds. In a similar way, pleasing effects can be created by using diagonals. Also remember that you don’t need to always hold your camera on a perfectly even level. Don’t be afraid to tilt it, you might achieve some interesting and unusual perspectives.

posing-photographing-female-models04.png

4. A really nice and lovely pose with a model sitting. The knees have to touch each other. Shoot slightly from above.

posing-photographing-female-models05.png

5. Another open and inviting pose with the model lying on the ground. Get down and take your shot nearly from the ground level.

posing-photographing-female-models06.png

6. Just a variation for a pose with the model lying on the ground. Both hands might as well be resting on the ground. Works very well outdoors, on the grass or in a wild flower meadow, for example.

posing-photographing-female-models07.png

7. A basic easy pose, yet looks absolutely stunning. Get down and shoot nearly from a ground level. Then try to move gradually around the model while making shots. Also ask your model to change head and hand positions.

posing-photographing-female-models08.png

8. Another easy yet gorgeous pose for all body types. Try different hand and leg positioning. And remember to focus on the model’s eyes!

posing-photographing-female-models09.png

9. A really lovely pose. Works well in different surface settings: The model, for example, might lie on a bed, on the ground, in the grass, or on a sandy beach. Shoot from a very low angle and focus on the eyes.

posing-photographing-female-models10.png

10. Gorgeous and easy pose for a model sitting on the ground.

posing-photographing-female-models11.png

11. Another simple and friendly pose for a model sitting on the ground. Try different directions and angles.

posing-photographing-female-models12.png

12. A wonderful way to demonstrate the beauty of a model’s physique. Works very well as a silhouette when shooting against a bright background.

posing-photographing-female-models13.png

13. A simple and casual looking pose. Lots of variations are possible. Ask the model to twist her body, experiment with hand positioning and try different head turns.

posing-photographing-female-models14.png

14. Another very simple and elegant pose. The model is turned slightly to the side, hands in back pockets.
posing-photographing-female-models15.png
15. Leaning slightly forward can be a very attractive gesture. It is a subtle way to emphasize upper body shapes.

posing-photographing-female-models16.png

16. A sensual pose. By holding the hands above the head body curves are emphasized. Works with fit body types.

posing-photographing-female-models17.png

17. Endless variations are possible for posing in full height. This pose is just the starting point. Ask the model to slightly turn her body, change hand positioning, change head and eye directions etc.

posing-photographing-female-models18.png
18. A relaxed pose with the model standing upright and supporting her back against a wall. Remember that the model may use a wall not only to support her back, but also to put her hands on, or resting a leg against it.

posing-photographing-female-models19.png

19. Note that full height settings are very demanding and work well only with slim to athletic body types. Posing guidelines are simple: The body should be arched in an S shape, hands should be relaxed, while the weight finds support on just one leg.

posing-photographing-female-models20.png

20. An exquisite pose for slim to athletic models. Many variations are possible. In order to find the best posture, tell the model to slowly move her hands and twist her body constantly. When you see a good variant, ask your model to hold still and take some pictures. Repeat for a full set.

posing-photographing-female-models21.png

21. An absolutely romantic and delicate pose. Any kind of cloth (even a curtain) can be used. Note that the back doesn’t need to be completely bare. Sometimes as little as a bare shoulder could work pretty well.

So, there’s something for you to start with. Hope you will find at least couple of poses to work with in different shooting scenarios! Keep in mind that each of the initial sample poses is meant to be only a starting point. Each pose has endless variations! Just be creative and adjust the pose as needed (for example, try different shooting angles and ask your subject to change hand, head and leg positioning etc.)

Check out our other Posing Guides:

  • Posing Guide: Sample poses for photographing Women Part 1
  • Posing Guide: Sample posees for photographing Women Part 2
  • Posing Guide: Sample poses for photographing Men
  • Posing Guide: Sample Poses for photographing Children
  • Posing Guide: Sample Poses for Photographing Couples
  • Posing Guide: Sample Poses for Photographing Groups of People
  • Posing Guide: Sample Poses for Photographing Weddings

Grab Our Guide to Portrait Posing

Posing Guide: 21 Sample Poses to Get You Started with Photographing Women – Part I

Kaspars Grinvalds is a photographer working and living in Riga, Latvia. He is the author of Posing App where more poses and tips about people photography are available.

The post Posing Guide: 21 Sample Poses to Get You Started with Photographing Women – Part I appeared first on Digital Photography School. It was authored by Guest Contributor.


Digital Photography School

 
Comments Off on Posing Guide: 21 Sample Poses to Get You Started with Photographing Women – Part I

Posted in Photography


Tips for Posing Models (videos)

07 Dec

The post Tips for Posing Models (videos) appeared first on Digital Photography School. It was authored by Caz Nowaczyk.

If you are interested in portrait photography, one of the hard parts (after learning your lighting and camera skills) is knowing how to pose your models. Particularly, if they aren’t professional models.

When you are taking portraits of men and women, their poses can be quite different because their bodies have different shapes and bend in slightly different ways. A pose that looks great for a guy, may look totally wrong for a girl and vice-versa.

So, to help you on your way to achieving better portraits by getting better poses from your models, I have compiled some videos for you to take a look at.

If, however, you don’t like to watch videos, you can grab yourself the dPS e-books, Portraits: Striking The Pose or 67 Portrait Poses (Printable).

Alternatively, see the list of articles you can read on posing models down below the videos.

Tips for posing men in portrait photography

This video is by photographer, Anita Sadowska.

This video is by photographer, Julia Trotti.

This video is from the perspective of a model agency, DLM Model Lifestyle, giving posing tips.

Tips for posing women in portrait photography

This video is by CreativeLive, featuring photographer, Lindsay Adler. These tips are for photographing people in a seated position.

?

This video by AtchatChannel Ubonratchathani, gives 60 model poses in 1 minute.

You may also like:

  • 8 Posing Guides to Inspire Your Portraiture
  • Posing Guide: 21 Sample Poses to Get You Started with Photographing Women – Part I
  • Posing Guide for Photographing Women: 7 Poses to Get You 21 Different Photos
  • Tips for Posing People in Outdoor Portraits
  • How to do Gentle Posing: A Collection of Prompts to Get You Started
  • Tips for Posing Muscular Female Body Types
  • Portrait Tips for Posing Women
  • Beginner Tips for Posing People with Confidence


The post Tips for Posing Models (videos) appeared first on Digital Photography School. It was authored by Caz Nowaczyk.


Digital Photography School

 
Comments Off on Tips for Posing Models (videos)

Posted in Photography


Your Posing Guide for Maternity Sessions

04 Nov

The post Your Posing Guide for Maternity Sessions appeared first on Digital Photography School. It was authored by Jackie Lamas.

your-posing-guide-for-maternity-sessions

Posing can feel a little repetitive after a few shots during maternity photo sessions and if this is how you feel, read the following posing guide for maternity sessions, so that you can get more ideas for your next shoot!

Image: Interacting with the belly is a great pose for maternity photos.

Interacting with the belly is a great pose for maternity photos.

Basic posing for maternity

Basic posing for maternity sessions is centered around the baby bump and the mama-to-be, specifically. You can use very basic posing to build from and add more variety to the poses. However, these basic poses are perfect for any session and can work well in any situation or location.

Image: At 45-degrees from the camera is the best way to highlight the bump. Notice the hand placing...

At 45-degrees from the camera is the best way to highlight the bump. Notice the hand placing to accentuate the silhouette.

In order to flatter the baby bump the best, turn your client at least 45-degrees from the camera to either side. Ask which side is more natural to your client, so they feel more stable and at ease.

After you have turned your client, give her some shape by adding lines to her body. This creates more flow and adds some curves to break up the body. To do this, have your client pop out the knee that is closest to the camera. This helps guide the eye up from her leg to the bump, then ultimately resting on her face.

Image: The knee closest to the camera is best for giving shape to the body, creating a natural leadi...

The knee closest to the camera is best for giving shape to the body, creating a natural leading line.

Finally, use her hands to cradle the bump, further adding emphasis to it. You can pose hands in a variety of ways:

  • Place one on top of the bump and one under
  • Both under
  • One on the side and one under
  • Only one hand on the bump

If your client is wearing a long, flowy dress, pose her hand under the belly, so that the bump is more prominent. With a flowy or loose dress, it can be difficult to fully see the bump’s shape if it’s not gathered underneath.

Image: Same hand position in two different posed shots.

Same hand position in two different posed shots.

Using this basic set up is easy to build upon and add partners or other siblings to the mix. Posing the mama first is helpful as well, so that she doesn’t have to move around too much.

One great tip is to avoid having your clients look directly down at her belly. This can create an unflattering photo. Instead, have her look down with her eyes keeping her chin slightly up. Have her look down as if is she is trying to look past her belly and at her feet.

Your Posing Guide for Maternity Sessions

Posing with partners

Next in your posing guide for maternity sessions, is posing with partners. Posing with partners makes any maternity session a little more intimate.

Pose the mama first and have her partner fit in. This makes it easier to build poses and change it up when you want variety without tiring the mama out.

your-Posing-Guide-for-Maternity-Sessions

Using props can help with posing and highlighting certain details of the session.

Fit the partner in slightly behind your client and have their arms holding the baby bump. The partner can place their hand closest to the photographer under the belly. This might require the partner to come out a bit from behind. That’s okay. If they look comfortable in the pose, it’ll look better in the final image.

your-Posing-Guide-for-Maternity-Sessions

With the hands farthest from the camera, have the partner put their hand on the arm close to the shoulder. The mama can place her other hand on top of her bump.

Your Posing Guide for Maternity Sessions

Another great pose with the partner is to turn the partner away from your client slightly so they’re facing opposite each other with their shoulders touching.

Here, ask them to hold hands and have the mama lean into her partner. With her other hand, have her place it under the bump and pop one knee out to give her body a curve.

Your Posing Guide for Maternity Sessions

The bump isn’t the only focus. Try posing the partner caressing and cradling the bump by kneeling and getting close. Here you can ask them to give the bump gentle kisses. Talk to the baby, or simply close their eyes and enjoy.

your-Posing-Guide-for-Maternity-Sessions

In this pose, have mama look away and get a close shot of the moment. This can eliminate double chins or unflattering poses.

Posing with siblings

The next point in your posing guide for maternity sessions is working with children.

Working with children during a maternity session doesn’t need to get out of control. It’s best to start with the complete family, move onto shots with the mama and siblings, then some creative shots of everyone. Then, finally, let them go and play.

your-Posing-Guide-for-Maternity-Sessions

Allow children to cuddle and get close.

Getting photos of the siblings first can make the whole session go smoother in general. Again, begin by posing mama first. If they are in the session, place the partner next. Then place the children, or child, next to the parents.

Your Posing Guide for Maternity Sessions

For creative posing, if the children are 5 years or younger, you can have the parents hold them. Then get close-up shots of the family interacting.

your-Posing-Guide-for-Maternity-Sessions

Have them hold hands and walk along a path while they talk and interact with each other. These poses are more authentic and help children to be more active in the photos rather than forced to pose.

Switch between natural posing and posed

What is natural posing? It is when you give your clients an activity to do and allow them to enjoy the moment. For example, you can ask your clients to walk along the shore while they look at each other and enjoy the beach views.

Your Posing Guide for Maternity Sessions

Alternatively, it can be having the partner kneel down to the level of the belly and have them talk to the baby. Capture these moments from a bit of a distance so that your clients feel that they can enjoy the intimate moments.

Your Posing Guide for Maternity Sessions

Posed is when you direct your clients to stand, sit, or pose how you want for the final image. This can feel stiff after a while, so mixing natural poses with posed ones can offer a lot of variety in the final gallery.

In conclusion

Posing for maternity photos doesn’t have to be just posed, you can mix in a bit of the excitement and natural expressions adding to a variety of poses to build from.

your-Posing-Guide-for-Maternity-Sessions

I hope your posing guide for maternity sessions helps you with your next shoot. Do you have any posing ideas that work for maternity photos? Post in the comments below!

The post Your Posing Guide for Maternity Sessions appeared first on Digital Photography School. It was authored by Jackie Lamas.


Digital Photography School

 
Comments Off on Your Posing Guide for Maternity Sessions

Posted in Photography


Your Guide to Posing Bands in Photography

23 May

The post Your Guide to Posing Bands in Photography appeared first on Digital Photography School. It was authored by Anabel DFlux.

Getting your favorite band into your photo studio might sound like a dream come true – but could quickly turn into a disaster if you don’t know what you’re doing! Not all bands know how to pose or position themselves for photographs, and it’s your job as a photographer to direct them. So before you find yourself having a crisis – unsure of how to properly get bands set up for their epic promotional shoot – check out your guide to posing bands in photography!

How is band photography different from other group photography?

I hear this question a lot in my line of work. How does band photography differ from, say, a group portrait at a sports game or a family reunion? Well, the short answer is – the intent is different. Though all types of photographs tell a story, band photography has to sell both the image and idea of the band. The poses, styling, arrangement, lighting, and everything in between is akin to the marketing of the music group itself. To make this even more complex, the audience members have to develop the right preconceived idea of what the music will sound like based on the picture! This is the same principle that is applied to album artwork.

Aimee Saturne

As well as this, the connection between all of the members in the band is different than that of family members or a sports team. Bands can be a complex series of relationships, some akin to kinship, others to sibling rivalry, and some can even be likened to business partners. Whichever is true for the band you are photographing, that unique relationship will come out in the photographs.

Does the genre of music affect the pose?

DIM7

In short, yes and no. The genre of music can impact every facet of the image, but not necessarily. Doubling back to the idea that a photograph of a band needs to sell their music, the genre portrayal can be a fundamental part of that goal. For example, metal music has a much darker, harder, and tougher edge to it than, say, a girl pop band.

Much of how I figure out how to pose bands has to do with three key factors:

  1. What is the stereotypical image for that genre? (This being said, the image does not have to be stereotypical – but there are some specific poses to include if you want to really push on the fact that the band plays a specific type of music).
  2. What image does the music evoke? (I find that closing my eyes and listening to some of the key songs pointed out by the band can provide a lot of inspiration. Music and imagery tie together, and whatever image is evoked by the sound is one that you should likely follow).
  3. What is the story the band wants to convey with their presence?

Aimee Saturne

Here is an example of how these three questions can drive a photo shoot.

Say that a five-piece, all-female symphonic metal band approaches you, with a melancholy and dark sound, whose story revolves around pagan rituals. With this in mind, the posing will likely be more rigid with the band members standing in a crescent formation due to the ritualistic nature. Their chins will likely be a bit lower down with a very slight hunch and legs tightly placed together, and eyes are looking directly towards the camera (whilst the face is slightly lower down).

Likewise, say an all-male pop duo approaches you with a very light-hearted, summer, beach feel to their music, with a tagline revolving around living every day in the moment. The posing will be very loose, fun, and expressive – likely a popular choice would be to place the two lads back to back with them looking over their shoulders at one another laughing and the arms placed in very relaxed positions.

As a photographer, much of our jobs revolve around bringing a static visual image to an ever-moving description.

Chasing Desolation

To express why genre doesn’t necessarily have to affect the pose, not all bands fall perfectly within a box.

That’s a good thing. Art shouldn’t always be easily categorized.

As such, some acts defy traditional rules and do not follow convention. Their images won’t follow convention either, and the posing may change drastically from the usual.

Common posing qualms

Of course, posing groups of people isn’t without its troubles.

Here are some of the most common posing “uh-ohs” you might encounter (with solutions, of course):

Not all of the band members are a similar height – someone might be very short or extremely tall

This is a very common situation you’ll encounter. Luckily, there are some clever solutions!

Firstly, if your band promotional image doesn’t include full body shots, simply place the member(s) on boxes (often called ‘apples’ in studios) that even-out their height.

If the band does want full body shots, play with perspective. Place the taller members further in the back and the shorter members closer to the front. A reverse V or U shape is an excellent idea!

Thirdly, get creative with levels and props. My go-to – which tends to receive favorable reviews – is to place one member sitting on a chair and pose the rest of the band around the chair. The taller members can crouch on the ground at the corners of the chair while the shorter members can stand around the chair. The frontman or frontwoman sits in the chair.

You can achieve a similar effect by posing on stairs, walls, rocks, or anything that allows one person to sit while the rest are crouched or standing.

Killin’ Candace

Everyone is wearing the same color clothing

I photograph primarily heavy metal and rock music, so this is something I deal with daily. Everyone wants to wear black in a black studio, against a black wall. The result, when done right, is super cool. However, when done wrong, the image suffers from “floating head” syndrome.

The real key here is to ensure that every article of clothing is a different texture from one another. Everyone can wear the same color, but try to encourage the band to wear different textures.

For example, a shiny top with matte pants works great. If a band member has both a matte top and matte pants, throw in a textured scarf or a tie to break it up. Jewelry is also a great idea. The point is, the colors can all be the same, but the way the clothing photographs must be different from one another. This can affect pose positioning as well, as you don’t want the same texture to cross one another and look flat in an image.

You can also use lighting to help separate the subject from the background. For example, shoot your studio lighting behind the band so that it creates a rim light, which pushes them off of the studio wall.

Our Dying World

Someone is dressed elaborately and someone is not

Sometimes, a band member overdresses while others underdress. If you can’t swap out wardrobes or add accessories, then get extremely creative with posing.

When I was pursuing my visual communications degree, I had a wonderful professor drill into my head that the key to an effective image is having the viewer’s eye move around the entire frame rather than settle on one central point.

A great way to get the viewer to take in the entire image rather than settle on one point is to place the elaborately dressed band members around the less-elaborately dressed members on opposite ends.

Another solution is to use the flashy wardrobe to create lines that the viewer can follow throughout the image. A good way to create a line is to have the overdressed band member stretch an arm out to the other band members to encourage the eye to travel.

Bullet Height

You are shooting a large piece band in a small, constricted space

If you do backstage photography, you’ll run head-on into this issue (especially in Los Angeles. Unless the band is in a major theater like The Hollywood Bowl, your backstage experience will be cramped. Trust me on this one). The most efficient way to utilize small spaces is posing the band in levels. Have some crouching and some standing, some leaning on walls and some stretched on the floor! Think of keeping everyone in a square image ratio format. You’ll be able to pose even 11-piece bands in a small space (I’ve done it!).

Trash Deity

How does the lighting affect the pose?

The lighting you are using will make a difference in how you pose the band. If you’re shooting outdoors and are at the mercy of natural lighting (but don’t have a reflector), you will need to adjust head, hand, arm, and leg positions in order to make the best of the conditions you are working with.

For example, if you ended up shooting at high noon, keep chins up to avoid unflattering shadows on the neck. Likewise, make sure hands aren’t hidden in shadows so that they do not appear too dark.

Jyrki 69

If you are in the studio with more controlled light, this becomes a bit easier – assuming you have enough lights! Work with what you have, and find creative ways to pose the musicians in order to illuminate them in the most flattering way. If you don’t have enough lighting units to capture certain poses, avoid them altogether (unless you are a whiz at post-processing!).

Karim Ortega

(Pssst: reflectors are your best friend! Both indoors and outdoors. In outdoor situations, these help control the light. In indoor situations, if you don’t have enough budget for additional studio lights, you can use reflectors to bounce light and help it stretch further. Reflectors are budget-friendly solutions, and can even be made at home if you are DIY-savvy).

Is hierarchy in a band a real thing?  

Athanasia

With some bands, it definitely is! Generally, you want the frontman or frontwoman as the center of attention with the rest of the band members posed around. Some bands have more than one vocalist, and often the vocalists tend to be the central figures (not to be confused with importance. All members are important. A band does not function without all of its contributing talents). Guitarists and bassists tend to find themselves beside the singers naturally, and other instruments such as percussion and keys even further off to the sides.

Bullet Height

Most of the bands that step into the studio are live performers; that is, they have experience playing on a stage together. As such, the first thing I do is have them stand in my studio the way that they would arrange themselves on stage. I use that as the basis of where I pose everyone in the lineup. Many bands organically step into the spots that they are meant to stand in.

Posing a solo musician

Brandon Rage

Posing a solo musician opens up a door of massive possibility. Very little is out of your control here. However, remember, because you are photographing only one person, try to give the image as much interest and life as possible. Images are static; we have to make them move. The more dynamic the pose, the better, and the benefit of music photography is that you can get super-quirky with it!

Grant Webb

Remember that traditional posing rules also apply here. Flattering angles and flattering poses. Try to avoid harsh shadows on parts of the face or body that may make someone appear different than they are.

Aimee Saturne

Mess around with props as well. Props are great ways to give a client something to do with their hands or legs. They can also make an uncomfortable or nervous client much more comfortable as they have something to which to focus. Don’t assume that because a client is a musician that they love getting photographed – not everyone does. It’s your job to give them the best experience possible and make them love being in front of the camera with you.

Aaron Lee

My technique is to shoot with a high shutter speed and have the musician constantly move and change poses, encouraging even the weirdest of ideas to come through. More often than not, the weirder it seems, the better it looks. Also, making the client move continuously keeps them from pausing and overthinking.

… with instruments

Alexx Calise

Including their instrument is a common request from musicians, especially solo artists. Band photography often steps into the realm of endorsement photography for the various instrument companies that may be sponsoring the project. With solo artists, it’s fairly easy to get them posed with their instruments as you don’t have to consider the spacing with other band members.

Alex Crescioni

The key with instruments, however, is to ensure that the instrument does not cover any important parts of the musician’s body such as their face! The instrument should fit in very organically and not feel forced or uncomfortable. It’s okay to have the band member pose with, say, a guitar hanging just a bit lower than they play it – as long as everything looks natural.

Ace Von Johnson

Commonly, I have the musician play the instrument to feel more comfortable with the lens being there. Often, those candid moments look amazing.

Arielle Silver

Posing an odd number of persons

Posing an odd number of people in a band is arguably the easiest (outside of a solo musician). This is because you can adhere to many of the traditional (and very effective) band poses, such as the “U” formation, the “V” formation, and anything else that pushes the lead member to the front. The lead member that stands in front of the rest is a great baseline to use to pose the remaining band members. Moreover, you tend to keep your composition more even on either side as a result.

Athanasia

However, don’t let this fact make you lazy. Just because you can do a traditional “crowding around the lead” shot, doesn’t mean you should make it boring! After all, you’re photographing bands – play with various facets of music photography and keep it interesting.

… with instruments

The addition of instruments might seem daunting, but this is a brilliant opportunity to use the lines of the instruments to have your viewer’s eyes move around the frame. As well as that, this allows you to use the instruments as a way to direct the attention to the lead of the band.

Posing an even number of persons

Zeistencroix

The most common even-number band is two. I love posing two-person bands. There is such a dynamic range of posing you can do. The connection between each member in a two-person band is also really cool and unique. There are lots to play off here. Honestly, get as quirky with this as possible!

Batfarm

An added benefit to two-people bands is that they don’t take up much space. Whether you’re in a studio or an outdoor location, two people take up less space than three or more. You can fit in a lot of wickedly cool shots in smaller spots.

Ascent

The main things to remember are that both members need an even amount of attention in the images. Don’t try to have one overpower the other. It doesn’t look right in an image.

Our Dying World

Now, the difficult even-number bands are those of four, six, or eight members. The primary difficulty is that you can no longer arrange them in “V” formations or have one member in front of the other because there isn’t an odd number! As such, try staircase poses or diagonal lines. You don’t want either side of the frame to feel too empty or too busy; you have to even it all out.

The addition of a prop is an excellent idea to even out the composition. I like to pose even-number bands in a more square-ratio (and this isn’t just because of the rise of Instagram). This gives you more options for dynamic posing and is a good baseline to help pose even-numbered bands.

… with instruments

Much like with just the band members themselves, use the addition of instruments to comply with a square posing ratio even further. If you pose everyone straight, make sure that you have enough room for the guitar and bass necks. You can play with levels here too, like in the example image below.

Our Dying World

Bonus tips:

  • Straight backs! Pay attention to your client’s back and shoulders. If they are arching, straighten them out unless you’re going way more vogue and odd. In that case, over-exaggerate the arch.

Alex Crescioni

  • Make sure there is nothing in anyone’s pockets. You will thank me for this one in the editing room.
  • Don’t allow someone’s pose to block out a key part of another person’s body.

Brandon Rage

  • For the “stretching arms towards camera” pose, have the band member cheat and keep the arm lower. It may feel counterintuitive, but if they stretch out towards you organically, their face will be blocked.
  • Pay attention to how poses cast shadows on oneself and the people around them.

Final takeaway

In conclusion, all great posing arrangements start with a deep understanding of what your client is wanting and needing. Don’t be afraid to have some fun with it, but keep everything cool, flattering, and most of all – epic. This is the music industry after all!

Do you have any other tips to add to this guide for posing bands in photography? If so, please share with us in the comments below (and your band photos)!


The post Your Guide to Posing Bands in Photography appeared first on Digital Photography School. It was authored by Anabel DFlux.


Digital Photography School

 
Comments Off on Your Guide to Posing Bands in Photography

Posted in Photography


A Beginners Guide to Taking Portraits of Elderly Clients: Part 2 – Lighting and Posing

23 Mar

The post A Beginners Guide to Taking Portraits of Elderly Clients: Part 2 – Lighting and Posing appeared first on Digital Photography School. It was authored by Clinton Moore.

Welcome to part two in our series on photographing older clients. In part one, we looked at rapport building and the practical aspects of preparing for your shoot. In this article, you’ll learn about lighting and posing techniques to enhance your photos of elderly subjects.

Lighting older clients utilizes most of the same lighting principles that you apply to younger clients, but there are a few extra tricks that will ensure a stress-free and flattering shoot.

Lighting practicalities

For this article, we’re going to assume that you are shooting at the subject’s home – often a requirement when shooting older clients. This means that you won’t have access to a full studio setup and will have to improvise based on space.

Lost in space

If you’re lucky, your older client may still be in the old family home with beautiful high ceilings so you can set up and bounce light to your heart’s content. Unfortunately, many will have downsized and are often in smaller apartments. Others may be in nursing homes with less space than your average bathroom and have everything they own crammed within this space.

In tight spaces, the best bet is to try and get outside. However, this is not always possible for less mobile clients.

Also remember, if you’re doing a shoot in a nursing or retirement home, you’ll possibly need to gain permission from the village manager. There’s a lot of protection around older residents (and rightfully so), which means the home is not likely to take kindly to a stranger turning up unannounced and taking photos of vulnerable people.

This is not one of those situations where it’s easier to ask for forgiveness than it is to get permission first!

Flash versus continuous lighting

As a photographer, flash is probably your go-to for artificial lighting when outside the studio, but take a moment to consider continuous lighting. While a strobe is more portable and powerful than most affordable continuous lights, they can be quite disorienting for older clients – particularly those with dementia. The last thing you want is to distress the person you’re hoping to make a smile.

With the affordable price of LED lighting these days, continuous lighting is now incredibly accessible and has the added benefit of remaining cool for your client as opposed to older lights. Advances in chip-on-board LED technology also means you don’t have to worry about heavy and expensive HMI lights when you want that classic Fresnel look.

Soft versus hard light

The aim of the shoot will determine your lighting style.

It’s going to be rare to hear an older person say “please make me look old and grizzled,” so your aim is likely to create a flattering image of your subject by leaning towards soft, highly-diffused light. You can achieve this by using light from large light sources such as softboxes and umbrellas. The bigger the source, the better! You want that light to wrap around their face.

Unless it’s the desired look, contrast is your enemy when photographing elderly people as it accentuates their wrinkles and any other parts that are sagging. This might be great for gritty street photography, but it’s unlikely an older person wants you to portray them like that in a paid portrait.

Think less George Hurrell, more Anne Geddes (but leave the flower pot at home).

Of course, the final decision should always come from a mixture of trying to convey your client’s personality and meeting the brief agreed upon in your pre-shoot consultation.

Lighting setups

We’ll look at two classic lighting setups which aim to create a flattering portrait. While there are limitless portrait lighting options, not all will work with older clients due to wrinkles, sagging, and posture issues.

3-point lighting

The classic three-point lighting setup provides you with a huge amount of flexibility to sculpt the subject’s face in a flattering light.

For older clients, aim to have your key light only a little stronger than your fill light. This reduces contrast and provide a more flattering light that wraps around the face. Fill light is your friend when it comes to older clients.

Short lighting (left) generally provides a more flattering photo for an elderly subject than broad lighting (right).

Although you’ll be using more fill than normal, it’s still important to be aware of the effects of short and broad lighting, as aging isn’t always kind to the face shape. You can use short lighting to make a wide face appear more slender. This is usually the more flattering option for older faces.

Broad lighting can add some width to a skinnier face, but it tends also add more emphasis on wrinkles.

For older clients, it can also pay to lower your lights a little more than you might with a young client. The shadows cast by higher lights emphasize wrinkles and sagging skin.

Placing the lights higher as you might do with a younger client can create shadows that highlight features such as wrinkles and crow’s feet.

By lowering the lights, the face softens, and you can fill in the eyes which tend to sink with age. It never hurts to throw a reflector under the subject’s chin to lift the shadows.

Dropping your key light by just a small amount can have a dramatic difference to the final image.

You will then get a final shot that creates a warm and inviting portrait.

Combining all the changes and tossing in a reflector under the subject’s chin creates a final image that presents them in favorable light.

Clamshell lighting

Clamshell lighting can create a very dramatic look, but with large diffused light sources it can also light an older face in a flattering way while still providing a dynamic effect.

In this setup, we have a large softbox angled at 45-degrees acting as the key and an umbrella as the fill. You may also want to experiment with a beauty dish as the key light for a more striking look.

The clamshell is a simple setup and can be achieved with just one key light and a reflector to act as fill if need be.

While exposing correctly is a no-brainer no matter how you’re lighting, it goes double for a clamshell setup as excessive underlighting creates a ghoulish look like something out of a horror movie. A safe way to avoid this can be to use a simple reflector or bounce board as your fill if you’re not comfortable with setting exposure on artificial lights.

Failing to set your fill light correctly will result in underlighting that creates a scary look unlikely to be desired by your client.

As you can see, by reducing the fill light to a little more than half the exposure of the key light, you get a more balanced look.

Ensuring that you have your fill light set lower than your key light will create the classic clamshell look.

Combined with good posing, this lighting setup can provide a great option for taking a square-on image of an older person. The resulting shot can convey an introspective, but intimate feel.

By exposing correctly and positioning your client beautifully you will get a final shot that has a great introspective feel.


Elderly portrait idiosyncrasies

Although having a couple of basic lighting setups will get you 80% of the way to photographing elderly clients, there are still a few little hurdles to be aware of that may otherwise cause chaos on your shoot.

Glasses and reflections

Glasses are the bane of your existence when working with elderly clients. A pair of spectacles loves nothing more than to capture the reflection of your lights. And God help you if you’re dealing with bifocals!

Glasses! Guaranteed to destroy any portrait without some planning.

You can always ask your subject to remove their glasses completely, but many will feel that they look wrong without their glasses after having worn them for so many years.

Managing glasses always requires a bit of compromise to bring your client’s eyes back into the image, but three of the best options are:

1. Tilt Down – Ask you subject to tilt their glasses down just a little. This can be combined with tilting their head down as well. Don’t go overboard with this unless you want them to look like Santa or a librarian.

You will largely remove the reflections by asking your subject to lower their chin and tilt their glasses down. However, be careful not to overdo it!

2. Raise Your Lights – Raising your lights a little higher reduces the chance of picking up a reflection. Of course, the trade-off here is that you will get more shadows. It can help to balance the change with a reflector.

Raising the lights resolves the reflections issue, but creates a new dilemma due to the heavy shadows that now appear.

3. Lensless Glasses – Possibly the best solution. Bring along a pair of glasses with the lenses removed. Hey presto, no more reflections to worry about. The issue here, of course, is that they may not be the style of glasses that work with your subject’s face.

Managing baldness

Sure it happens to younger folks as well, but if you’re photographing older clients, you’re going to encounter a lot of bald heads. The issue here is that a bald head will act like a big reflective surface and create a hot spot.

To resolve this:

1. Lower Your Lights – by lowering the height of your lights you reduce the reflections on their head. Of course, the problem here becomes the balancing act that has to take place if your subject also happens to be wearing glasses!

2. Remove Rim Lights – When dealing with baldness it’s worth considering doing away with your rim light entirely. Find alternate ways to separate your subject from the background.

3. Powder – Having some neutral powder on hand is always handy to reduce the shine of a bald head. If you’ve got a particularly proud male that won’t wear “makeup,” take a photo without any powder applied and show them the attention drawn to their head.

Exposing hair

Jumping back to the 3-point lighting setup, this all comes down to the rim light. As mentioned above, the rim light is the enemy of the bald head. However, it also wreaks havoc with grey hair. Be extra careful not to overexpose with grey hair as you will quickly blow the highlights much more easily than you would with colored hair.

Posing older clients

Posing older clients is tricky because, as we discussed in part one, there is a range of what constitutes being “elderly.” People around 65 years of age will probably be able to do many of your standard poses with great results. However, significantly older clients may have restricted mobility and health issues that prevent them from standing for long periods.

Stools are for fools

Assuming you are working with a client over the age of 80, it’s best to consider basing your shoot around them sitting down. The first thing to do is turf that stool that you use with your younger clients.

Older clients need the back support of a chair and could fall off something as unstable as a stool. They also may not have the core strength to support themselves on a stool leading to some very bad slumping.

Clients over the age of 80 with mobility issues are also likely to have recliner style chairs that they can easily disappear into.

Shooting front-on with your client in a large chair or recliner will tend to make them look small and wider if they are allowed to sink back.

Shooting this image, particularly front-on, will make the client appear small and can have an unflattering effect on their thighs (which will spread when seated in this manner).

To remedy this issue prop your client up with some pillows to create a better posture. If the client is quite frail, ask a family member to do this so that you don’t cause any harm.

Place pillows behind the client or ask them to sit towards the edge of the chair to shift their posture.

By bringing the client forward and focusing on the head and shoulders framing, the resulting image is more flattering.

By moving the client forward they will be less likely to slump resulting in a more flattering image.

Safe and secured gear

One of the major causes of injury in elderly people is falling over. Often they will be very used to everything being set up in their home a particular way. As such, moving furniture around and bringing in big gear can pose problems.

Firstly, only move furniture with their permission and, of course, put it back when you’re done! Ensure that you’ve left a clear path to the front door and the toilet in case of emergencies.

Secondly, secure your gear! At the very least put sandbags on your light stands and tripod. If you’re using anything that has cords, pull out that gaffer tape and stick it down.

Sandbag those lights and gaffer those cords so that you don’t end up responsible for a trip to the E.R.

An uninjured client is a happy client, so take those extra few minutes to make sure the area is safe.

Flattering posing angles

Great, you’ve got everything setup safely, now it’s time to pose your client.

Again, assuming you are dealing with a client who is older than 75, posing is about compromises.

Few people look great square-on, so start by asking your client to turn their body slightly away from the camera. Next, ask the client to turn their head back to the camera with their body facing the key light.

It’s often best to avoid having older clients tilt their head as this can cause bunching of the skin under the neck. Instead, keep the head perpendicular to the body and focus on asking them to push their jaw slightly forward to stretch their neck.

If your client is really concerned about their neck wrinkles, it will be best to shoot from slightly above the client and ask them to angle their chin down. Similarly, if a male client is worried about baldness, shooting from slightly lower than eye level reduces the focus on their head.

For clients who are unable to shift their neck or body due to age, a front-on shot can still be flattering, but you will want to try and shift the weight forward.

Move your subject as close to the edge of the chair as is safe while supporting their back. Clients who struggle to support their weight may benefit from placing their hands on their thighs

Prop the client up with pillows behind their back and ask if they are able to place their hands on their knees to support their weight while leaning forward a tad. Experiment with placement on the knees and thighs to find the position that allows for the most natural shoulder alignment.

Conclusion

Photographing elderly clients is a great way to bring together all of your basic lighting and posing principles with a few extra challenges thrown in to boot!

Experimentation is always key as you will have to work with the physical restrictions of your client’s age and the practical limitations of their home. By having a clear idea of your client’s expectations, the two of you can find a way to achieve an image that makes everyone happy.

Moreover, remember that sometimes they’ve earned those wrinkles and are damn proud of it!

The post A Beginners Guide to Taking Portraits of Elderly Clients: Part 2 – Lighting and Posing appeared first on Digital Photography School. It was authored by Clinton Moore.


Digital Photography School

 
Comments Off on A Beginners Guide to Taking Portraits of Elderly Clients: Part 2 – Lighting and Posing

Posted in Photography


Tips for Posing Large Families and Groups

30 Aug

Portrait sessions can vary in many ways, one being the size of the group you are photographing. Don’t be afraid, these tips for posing large families and groups will help you to create the perfect large group portrait no matter the location or the number of people.

Tips for Posing Large Families and Groups - family posed on the grass

What is considered a large group?

Large group portraits typically begin with six or more people. Large groups can include children or be made up of adults, it all depends on the type of session you are photographing.

It can also reach up to 20 people, especially if you are photographing a bridal party or a family with smaller family units all mixed together.

Tips for Posing Large Families and Groups - large family in front of trees

Posing rule for any type of grouping

The most useful posing rule for large groups is to use the triangle method.

This is where you pose people, either standing or sitting, or a mixture of both, and if you draw imaginary lines connecting their heads, they would create triangles. This method is the best so that you don’t pose people’s heads one on top of another (totem pole-like), creating an awkward photograph.

Tips for Posing Large Families and Groups - use triangles in posing

Use the triangle method to pose large groups.

This method works for any type of grouping with three or more people. However, for large groups of 10 or more, this posing rule is perfect so that everyone in the photo can be seen. It ensures nobody’s head is directly behind another person’s.

Large Families

Large families can range from nuclear families where there are more than five people or extended portraits where more than one nuclear family is going to be in the portrait.

Tips for Posing Large Families and Groups - family of 5 with young kids

The key is to pose the families in different combinations in the same spot so that you can offer your client more poses without having to move them too much.

Always pose the parents in the middle and then pose the rest of the family out from there. The parents are a great focal point in any portrait and from there, you can lead the eyes to the children or other families.

Tips for Posing Large Families and Groups - family in white and jeans

For example, for a portrait of a family of five, begin by placing the parents in the center of your photo first. Then, pose the taller children next to each parent. Smaller children can be put between the taller child and parent, creating the triangle.

Afterward, you can seat the family in the same order as when they were standing. If there are really small children, they can stand and hug another family member from behind. Be mindful of where their heads are positioned so that you create triangles and can see each family member in the portrait.

Tips for Posing Large Families and Groups - family standing and sitting

Pose the family sitting or standing.

In the same spot, you can then have the family stand up and separate a little. This gives them a little more space but still keeps them at arm’s length. Ask them to interact with each other in between posing for the camera.

Don’t forget the triangles in this pose as well! It can look a little off if you pose two family members who are the same height together. Try and move the family members from one side to the other to create more variety.

Tips for Posing Large Families and Groups - extended family standing

Give the family some space while posing them standing.

For larger families, walking is a good way to get more natural photos of everyone. Pose nuclear families together.

For example, if you have a family of 16 with grandparents, pose the grandparents in the center, then group the families on either side keeping the children with their parents.

Tips for Posing Large Families and Groups - extended family on the beach

Keep in mind that if it looks a little awkward, it probably will look that way in the photo as well. Taking more time and moving people around will ensure that you get the right posing even before taking the photograph.

Lastly, try posing some people away from the center to give the photo more depth. Facing everyone toward the center is a good starting point. However, with large groups, it’s best to try different poses so that you can offer your clients an assortment of different options.

Connect People

There is nothing more awkward than people standing together with their arms at their sides. With families, especially large groups, try and have your clients connect with each other.

You can do this by grouping the main people (the parents or grandparents) in the center facing each other hugging, and then group smaller families where each family member is touching another person. This shows connection within small family units in the large family photo and shows warmth.

Tips for Posing Large Families and Groups - family hugging b/w

Resting hands on shoulders, holding hands, hugging and tucking fingers behind, resting a hand on someone’s arm, or having someone lean on another’s shoulders are all good examples of connection.

Connecting people in a photo also gets rid of this most often heard question, “What do I do with my hands?”

Tips for Posing Large Families and Groups - family with 4 kids

For the people that you pose on the edges of the family portrait, be mindful that they look in toward the center so that they don’t seem out of place. If they are male and there are no children present, have them put one hand in their pocket. If they are female, make sure they aren’t standing too short or they will look out of place.

Chairs and Stools

If you are photographing at a venue, say a wedding reception, you may have the chance to use chairs or stools for posing.

In this case, try and place them throughout the photo so that they don’t line up perfectly. You’ll want to space them out according to the number of people in the portrait, always keeping in mind the triangle rule.

Tips for Posing Large Families and Groups - family photo

Chairs tend to work better than stools because the stool height can create really big valleys in your triangle posing if the person is too tall or too short in relation to those around them in the portrait.

Natural Posing

Once you have taken the best-posed portraits of the large group, have them loosen up a bit by asking them to do a group huddle or squeeze. This will get some laughs out of your clients and allow them to let their posed bodies rest for a bit.

Tips for Posing Large Families and Groups - family hugging

Asking the family to take a break can offer some great natural posing. This man had his whole family together after many years and was overcome by joy.

Ask your group to walk around, talk to each other, and just be. Look out for the children in particular, as they’ll usually act the most natural.

This collection of natural posing will often make for the most emotive portraits because they will portray the family just as they are. Even better if they are in a location that is fun or open where they can enjoy a walk or play games.

Photograph Family Units Separately

When you photograph families with grandparents or more than one family unit, make sure to photograph each family separately and together. Pose each family together in the larger portrait first, then, if you have time, mix them up a bit and have some fun.

Tips for Posing Large Families and Groups

Ask them to play, run, walk, do a group hug, or anything that will create authentic smiles and expressions from the oldest to the youngest.

Tips for Posing Large Families and Groups - individual portraits

Take time to get portraits of the adults as well. Either in couples or individually.

This also helps to break up a session with little children because they can get bored quickly.

Tips for Posing Large Families and Groups - individual photos of kids

Photograph children individually.

Try different combinations with the families, for example:

  • Grandparents with the grandchildren
  • Grandchildren together
  • All of the children of the parents together with and without the parents
  • Each couple in the family alone
  • Individuals portraits of each child
  • All the men together
  • All the women together
  • Generational photos
  • Cousins together
  • Brothers and sisters with and without in-laws
  • Each grandparent alone and together

Tips for Posing Large Families and Groups - different group posing options

Not all of those may apply to each large family portrait, but they can help you to add to the collection of poses that you’ll deliver to your clients.

Tips for Posing Large Families and Groups - family and kids photos

Take photos of the whole family together and then take photos of just the children.

Tips for Posing Large Families and Groups - 4 generations photo

Make sure to get generational photographs like this one of the 4 generations of men in the family.

Wrapping up

Before you wrap up the session, ask your clients if there is any portrait or pose that they specifically want. Some large families may bring a prop for everyone to use like shirts. There may also be a combination that you missed or didn’t think of that they would like to get.

Tips for Posing Large Families and Groups

Asking, “Is there anything else you’d like me to photograph before we leave?” can also be a great way to end the session once you feel you have gotten all of the best photos.

Giving your clients the chance to make sure they get all of the portraits they want is key for you to do a complete job with their photographs.

In conclusion

Posing large families can seem like a big challenge, however, using the triangle posing method can help tremendously in getting different combinations and poses. This will give your clients an assortment of poses and keep the whole experience fun and light which will make them want to get more portraits taken in the future!

The post Tips for Posing Large Families and Groups appeared first on Digital Photography School.


Digital Photography School

 
Comments Off on Tips for Posing Large Families and Groups

Posted in Photography