RSS
 

Posts Tagged ‘Poses’

Fun Poses for Portraits of Your Pals

03 Apr

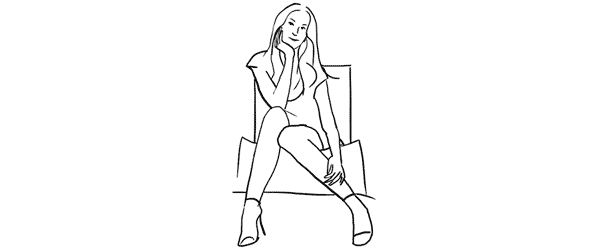
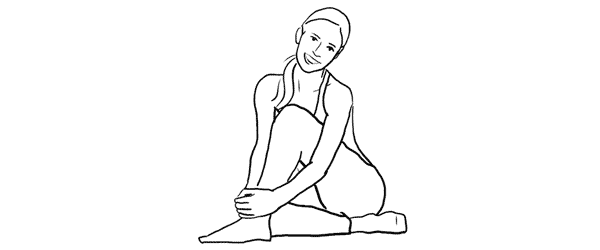
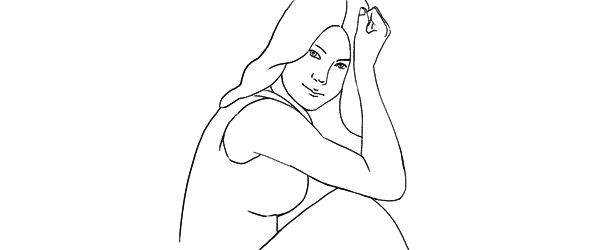
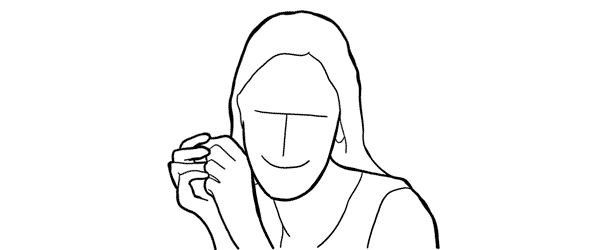
Is your Instagram full of photos of your very best pals?

Ours too! We’ve found patient pals make the best models. But what if you wanna get rid of the “stand stick-straight with an adorable (but played out) grin” stance?

Answer: check out our list of poses for pals and try one or all of them! Your photos of friends will go from “meh” to “marvelous!” in just a few simple motions.

Poses for Your BFFs’ Portraits 

(…)
Read the rest of Fun Poses for
Portraits of Your Pals (643 words)


© Taylor for Photojojo, 2015. |
Permalink |
No comment |
Add to
Portraits of Your Pals”>del.icio.us

Post tags:


Photojojo

 
Comments Off on Fun Poses for Portraits of Your Pals

Posted in Equipment


Capturing Better Portraits Between Poses

13 Aug

1-Mike_Bataki

If you do portraiture of any kind you are probably used to people giving one look when the camera is away from them and another when it is on them. This is the unfortunate game of the portrait photographer.

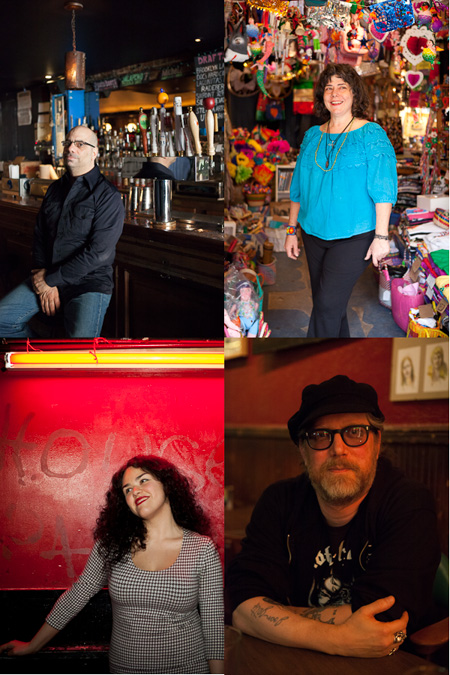
For my own work, I find that many of the most poignant portraits of people are the ones in between the actual ‘portraits’ taken during a session. These are the moments when your subject is at ease, in their element, thinking about something, and when they have the most interesting expressions.

So how do you capture these and take better portraits?

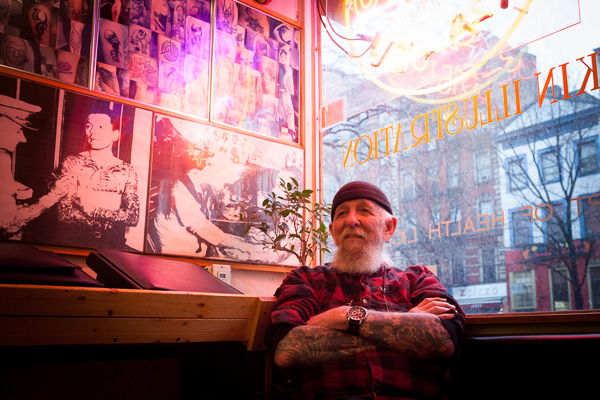
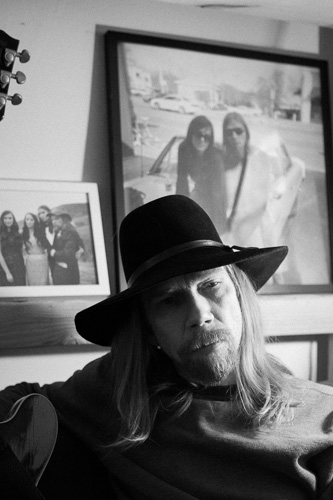
Paul KostabiThere is an important reason for taking your time to do a portrait session. It gives your subject time to get comfortable with you and the way you work. You can go through multiple backgrounds and ideas, and it is common for subjects to get over the initial portrait trepidation as the time goes on. That deer in headlights look will often (but not always) go away as they get used to how you work and what you want from them. This is the reason that you do not want to start off right away with your best idea because that will often be at their most uncomfortable moment.  Wait until they seem comfortable and in the right mindset.

Give them direction, especially at first. When people do a portrait session they want to be told what to do, even if you want them to just be natural. Talk to them about what you’re doing and what you want from them. Do you want them to give you an emotion? How are their hands and arms? How is their posture?  Where should they stand? I personally prefer to engage the subject and get them standing and interacting in a natural way, but often I will pose people at the beginning just so they feel confident that I know what I’m doing. Then over time I will start trying to get them to pose in ways that feel the most natural for them, as they get more comfortable with what they are doing.

The main key to this is that you want to get them interacting with you. Some types of shots are better posed of course, but you want them in some sort of moment. When they feel something, or think about something interesting, that feeling will shine through in the photograph.

Talk about the person’s life. Get to know them. Ask them questions and get them thinking introspectively. Tell them this is part of the process so they don’t feel uncomfortable or unsure of what to do when they are talking. This is one of the reasons that I sometimes like to interview people as part of portrait sessions. Then, within the interview, right after they have finished talking about something interesting or emotional, I will stop them and ask them to stay just like that and I will take their photo.

Portraits

Sometimes you even have to fake people out. Tell them that you are just taking a few shots to test the light and to relax for a moment. Some of my best images have been taken that way.

There are ebbs and flows in a portrait session. Sometimes it makes you feel like a boxer, bobbing and weaving with what they give you. Other times you will feel like a psychiatrist, trying to bring something out of them. If someone starts to look more and more uncomfortable, don’t keep photographing them hoping they’ll start to get better. Break them out of it by asking them to move to another location or take a break. Keep them on their toes and engaged.

All subjects are different and will react differently to you, but the key is always that you must find ways to get through to them . Then to have the wherewithal to be able to catch the moment once they finally give it to you, because often the best moments are quick and fleeting.

The post Capturing Better Portraits Between Poses by James Maher appeared first on Digital Photography School.


Digital Photography School

 
Comments Off on Capturing Better Portraits Between Poses

Posted in Photography


Posing Guide for Photographing Women: 7 More Poses to Get You 21 Different Photos [Part III]

20 Jul

A post by Kaspars Grinvalds from Posing App.

This is the third article in the series. You may want to look at the previous ones here: 7 standing poses [Part I] and 7 sitting poses [Part II].

Let’s move on with 7 lying down poses for women. And again I’ll briefly try to describe the process, how I tried to slightly adjust these poses in order to get three different photos for each pose.

Pose 1

Pose1

Very simple pose to start with. After getting the model into initial position, ask her to raise the upper body as high as she comfortably can.

7poses3 1

Photo 1: The first picture is the result of recreating this simple pose. Notice that you should shoot from very low angle, nearly from the ground level.

Photo 2: With such a basic pose as this one, you always have different options to variate – different hand placements, head tilts, eye directions and face expressions. In this shot the only difference is hand placement and slightly lowered upper body.

Photo 3: And I continued by asking the model to lower down even more. Notice that tighter crop is also a nice option to differentiate your shots.

Pose 2

Pose2

Very similar pose as the first one, but this angle is better for including longer model’s body line in the frame. And notice that one of the model’s legs is bent in the knee. This helps to raise her bum up for a better looking body shape.

7poses3 2

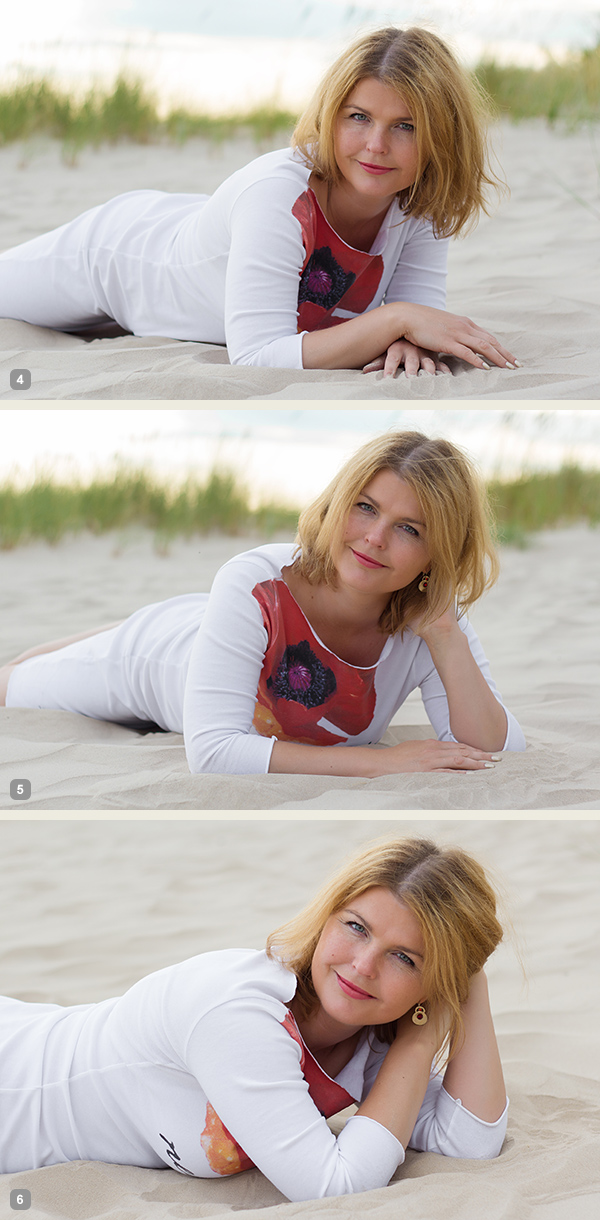
Photo 4: If you compare this shot with the first one, you will notice that it is nearly the same pose, but the changed angle gives different look to the image.

Photo 5: And again I continued with different hand placement. Note that hand doesn’t support the head, it actually doesn’t support anything, it’s just placed in the hair.

Photo 6: And one more hand placement variation and tighter cropping.

Pose 3

Pose3

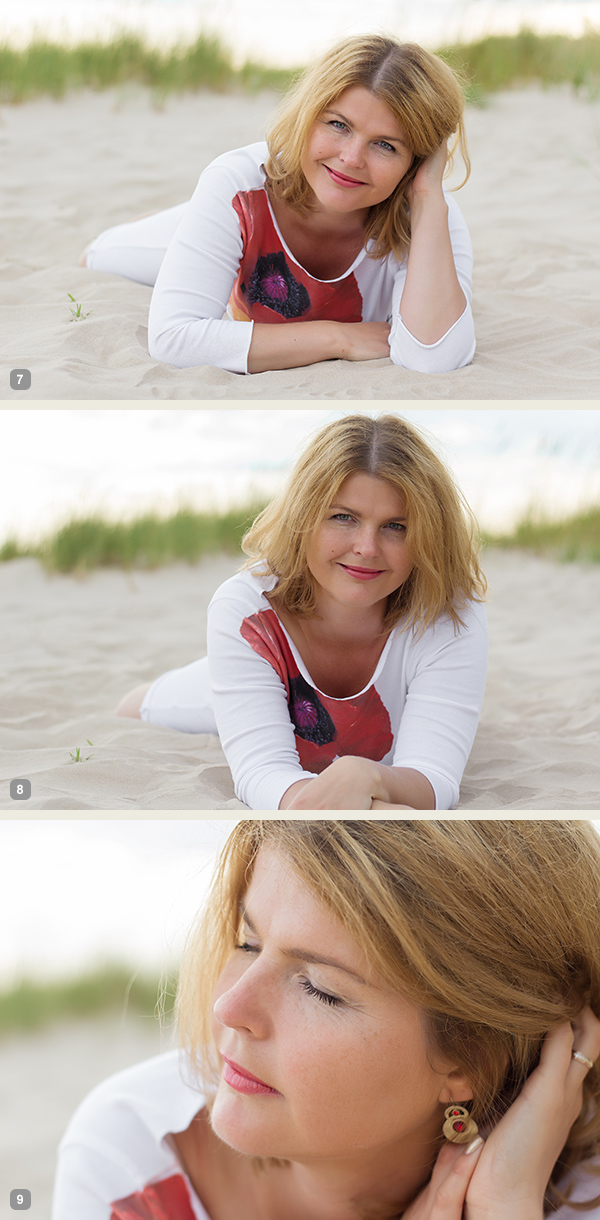
Another very similar pose to the previous ones, the main difference again is the shooting angle – right from the front. At this point the model hasn’t even moved from the initial position, it’s the photographer who moves gradually around her.

7poses3 3

Photo 7: Here the model already started to repeat the gestures from earlier shots. Don’t be afraid to take these nearly similar poses as these minor variations might be invaluable when selecting the final choice of images in post production.

Photo 8: The variations with both hands stretched in front.

Photo 9: And close-up crop again, but this time with the eyes closed.

Pose 4

Pose4

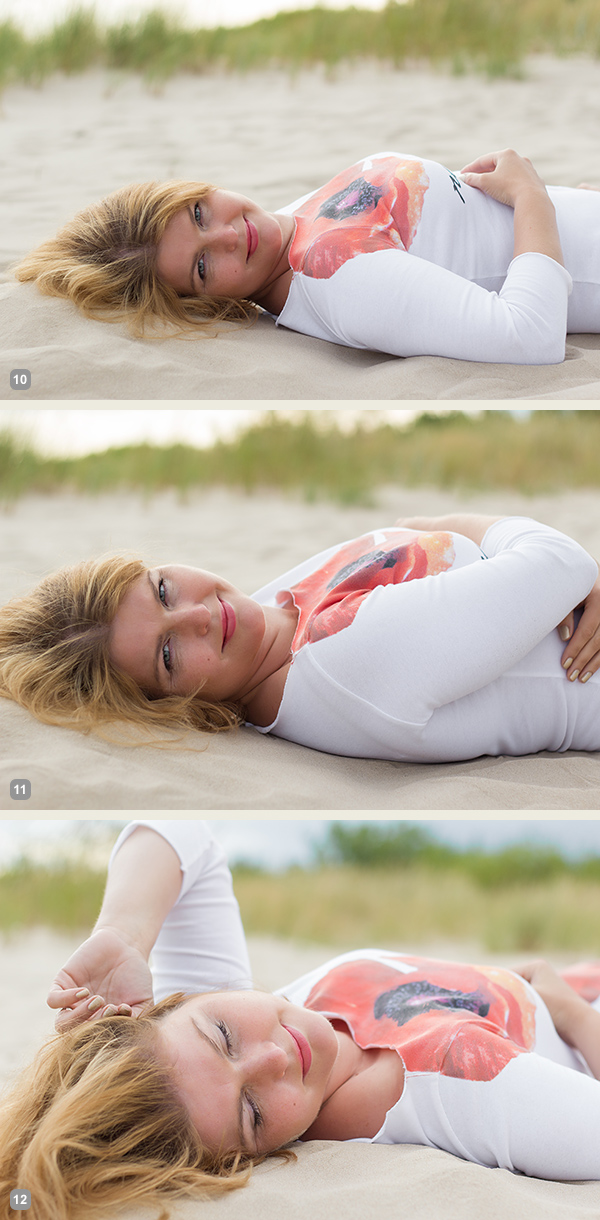
We continued with the next easy and straightforward lying down pose.

7poses3 4

Photo 10: An easy to describe and really easy to execute pose.

Photo 11: Again, only couple of options to change here. Arms could be connected under the breast line as in this example. The arms could also be stretched back behind the head for another variation.

Photo 12: And in this photo the model tried to achieve kind of dreamy look with eyes closed and hands placed asymmetrically.

Pose 5

Pose5

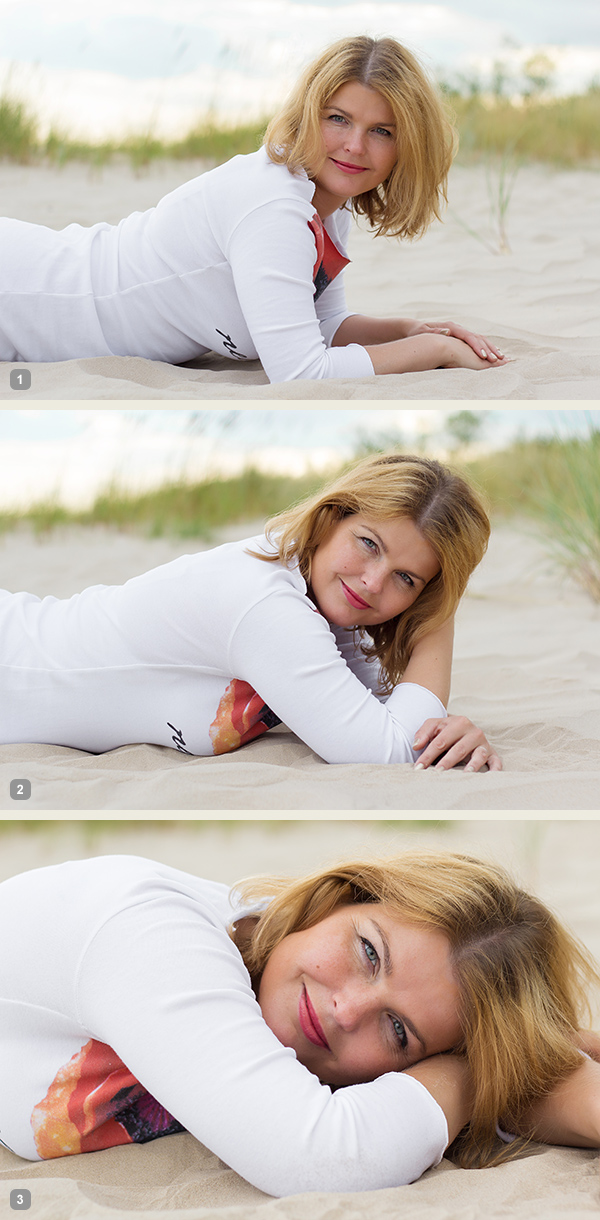
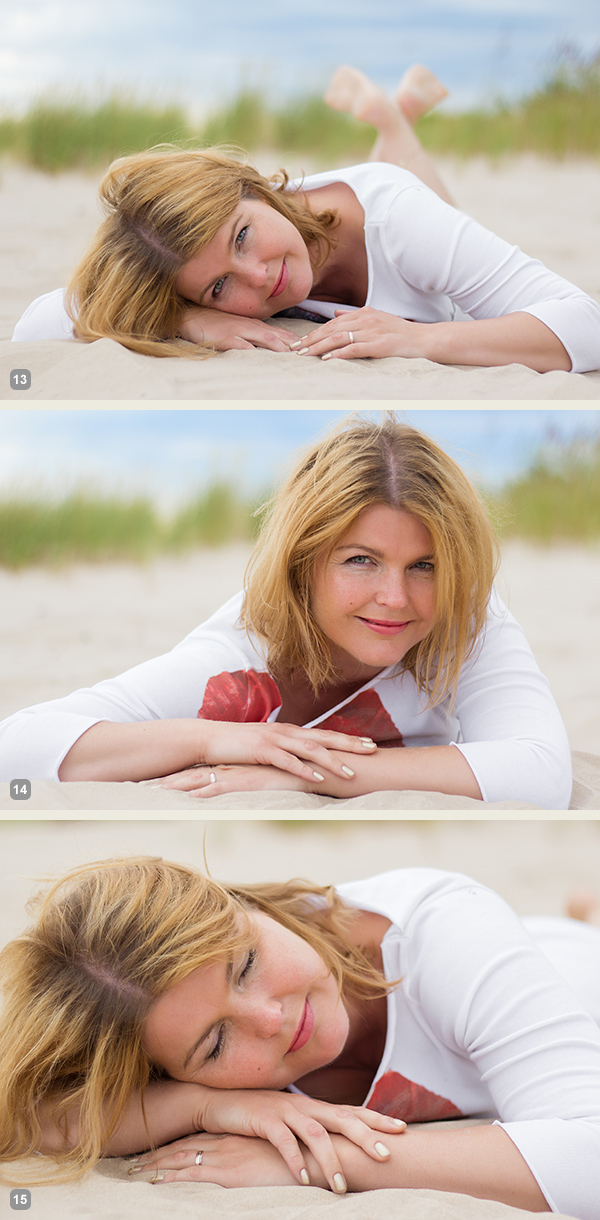
Lying down very low. Works very good as well for close-up portrait shots.

7poses3 5

Photo 13: As my model was lying on the sandy beach, I asked her to support the head on the hand, but in other settings the head might as well touch the ground.

Photo 14: Here I asked the model to raise the head higher and keep the hands placed asymmetrically.

Photo 15: And the next variation was sleeping pose with eyes closed.

Pose 6

Pose6

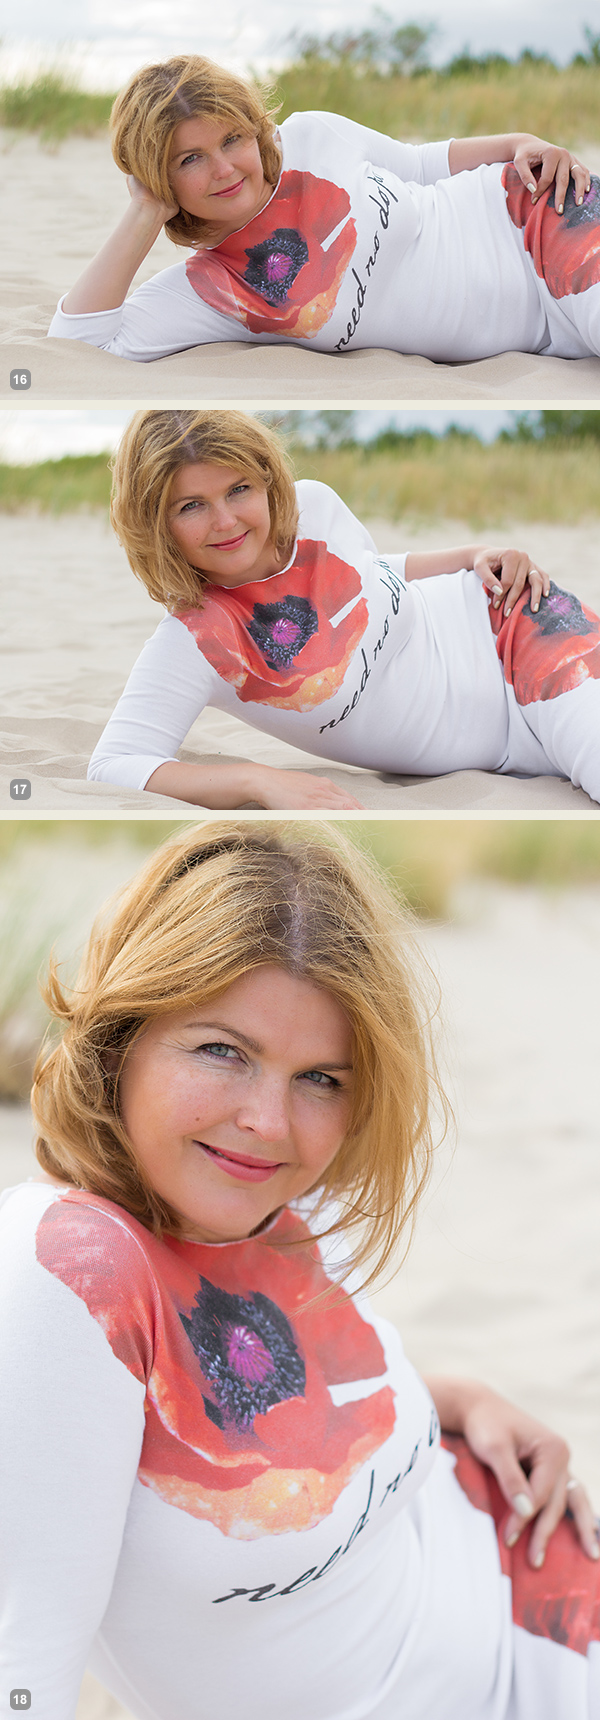
Lying down on the side. Couple of points to check. The left leg is crossed over the right. The left arm is rested on the hip and partly hidden behind the body. The right hand is placed under the head but it supports it with only the tips of the fingers. If the model’s head would be fully supported by the hand the pose would just indicate tiredness.

7poses3 6

Photo 16: Following the previously described instructions, the model easily recreated the sample pose.

Photo 17: Here basically only the right hand’s placement is different. And placing it down on the ground instantly raises her upper body higher.

Photo 18: From there she straightened the supporting hand and raised the body even more higher.

Pose 7

Pose7

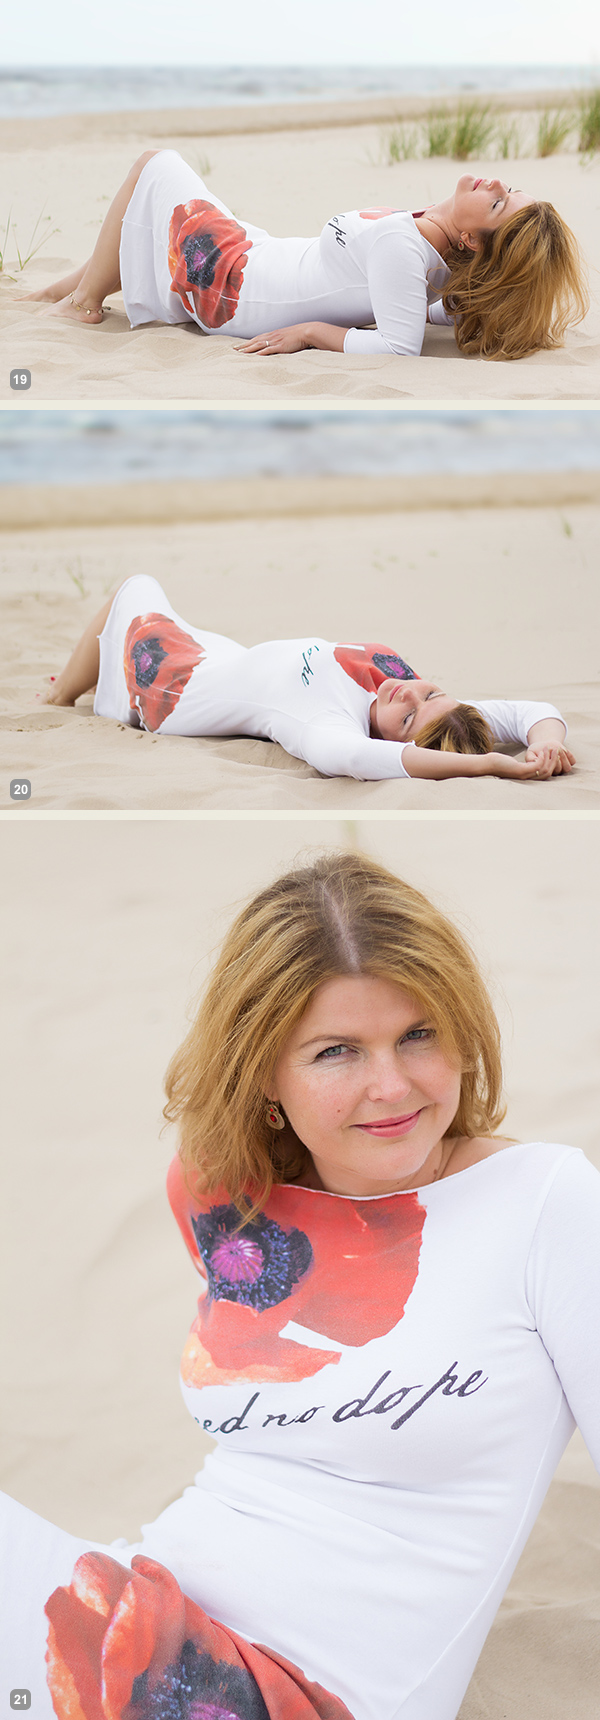
And finally a bit more demanding pose. The biggest challenge for the model is to keep an air of relaxation. Ask her to fold her head back as far as possible while slightly facing it to the camera. And this posture for sure works best with eyes closed.

7poses3 7

Photo 19: If the model can manage to look relaxed, the results will be rewarding.

Photo 20: This pose is a nice variation to the previous one as it’s far more simple for the model to recreate.

Photo 21: And here I asked the model to raise higher up and took the shot from above.

So, together with the previous articles – 7 standing poses [Part I] and 7 sitting poses [Part II] – you now have lots of poses to choose from. For more variation and a more dynamic result I would suggest to choose a few from each article and mix them in a single shoot. You will very soon discover that even a small number of starting poses is more than enough to have a great, productive session.

All of these illustrations and many more posing samples are available on Posing App for your mobile devices.

Kaspars Grinvalds is a photographer working and living in Riga, Latvia. He is the author of Posing App where more poses and tips about people photography are available.

Post originally from: Digital Photography Tips.

Check out our more Photography Tips at Photography Tips for Beginners, Portrait Photography Tips and Wedding Photography Tips.

Posing Guide for Photographing Women: 7 More Poses to Get You 21 Different Photos [Part III]


Digital Photography School

 
Comments Off on Posing Guide for Photographing Women: 7 More Poses to Get You 21 Different Photos [Part III]

Posted in Photography


Posing Guide for Photographing Women: 7 More Poses to Get You 21 Different Photos [Part II]

21 Jun

A post by Kaspars Grinvalds from Posing App.

If you haven’t read the first article in this series, I would kindly recommend you to start with Posing Guide for Photographing Women: 7 Poses to Get You 21 Different Photos – Part I where we started with 7 standing poses.

Let’s continue this time with 7 sitting poses for female subjects and their possible variations in order to get at least three different shots for each pose.

Pose 1

Pose1

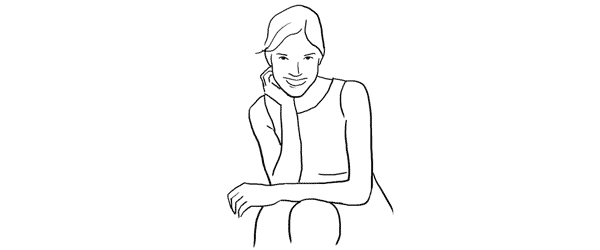
Nice and simple pose to start with. Ask your model to sit comfortably with knees placed together. One hand relaxed on the knees while the other hand placed near the neck. And remind her to straighten the spine.

7poses2 1

Photo 1 – This basic starting point provides you with many different choices to continue with. But in the very beginning you may want to just test different shooting angles and heights and check what works best for your model.

Photo 2 – After I got the first shot similar to the sample, I asked the model to lower both arms and rest them on the knees.

Photo 3 – And finally I returned to the initial pose and took a close-up portrait shot.

Pose 2

Pose2

Another easy pose with hands placed together between the legs. Notice that arms should not be completely straightened, rather slightly bend at the elbows. Also in the sample pose it is illustrated that toes should be straightened in order to raise the knees slightly up.

7poses2 2

Photo 4 – The model easily recreated the sample pose and we could move on with some variations.

Photo 5 – This shot is exactly the same pose just taken from a side. Minor change but already different result.

Photo 6 – And again one more close-up portrait shot but this time the model is looking down her own body.

Pose 3

Pose3

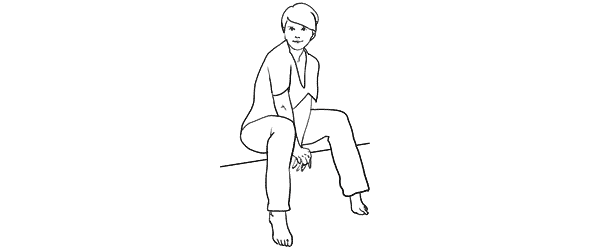
Another very simple pose with one leg crossed over the other. And I have to say here that including the legs in the frame can be challenging because it doesn’t work with all body types. If your model is curvy, consider framing closer comps (for example as in photos with the previous pose).

7poses2 3

Photo 7 – My model was with slim body type, nice legs and stylish shoes, so I chose to go for a full height frame.

Photo 8 – In exactly the same manner as with the previous sample I simply took this shot from a different angle. The model didn’t change anything, just turned her head to the camera.

Photo 9 – After that we repeated the already tested posture with one hand close to the neck. This hand movement is a very nice variation and works in many posing scenarios.

Pose 4

Pose4

This pose however is even more demanding than the previous one because it is all about the legs and thus there is no point of cropping them out. And nice shoes are a must.

7poses2 4

Photo 10 – Recreating it isn’t hard as the pose is fun and creates nice and playful mood to the photo.

Photo 11 – Here the model is looking down and kind of fixes her shoe. Very subtle changes but completely different photo.

Photo 12 – And once again the same pose but taken from a side creates one more variation.

Pose 5

Pose5

Simple and easy pose for the model sitting on the ground. And to my mind, in contrast to the previous on the chair poses, sitting on the ground works better barefoot.

7poses2 5

Photo 13 – The pose is kind of very natural and is easy to recreate. And as a result the model looks really relaxed.

Photo 14 – After recreating the initial pose, different hand placement options are available. Here for example the model raised them and connected on the knee.

Photo 15 – Only two minor adjustments to the initial pose were made here. Putting one hand up in the hair and slightly curving upper body part to the side. This also lowers the raised knee. The result is another friendly and natural looking pose.

Pose 6

Pose6

Another easy sitting on the ground pose. Very suitable for different close-up portrait shots.

7poses2 6

Photo 16 – While sitting in the initial pose try making two different versions with only the front arm and then with both arms raised on the knees. Both versions works well.

Photo 17 – A slight hand placement variation. This variation works very well for tight crops.

Photo 18 – And don’t be afraid to be spontaneous from time to time. This photo was just an improvisation on the go while sitting in the initial pose.

Pose 7

Pose7

And finally I purposely chose also one simple portrait pose for the sitting samples. Despite the fact that only face is visible in the frame, it’s more comfortable for the model to recreate it while being seated.

7poses2 7

Photo 19 – Here I tried to illustrate the previous statement and showed the sitting position. You may visualize how it would work cropped only around the face.

Photo 20 – Keeping the “portrait with hands around the face” concept in mind, try different variations by moving hands around and making different head tilts.

Photo 21 – In order to achieve the most natural postures in the image ask the model to really move hands around. In this particular example she moved her hand through her hair and I made several shots and afterwards chose the best hand position.

So, this was a process of using 7 sample poses as the starting point to create 21 different photos. I encourage you to try this approach to posing your subjects in a similar workflow and most probably you will find your own and even better ways to achieve some great results.

All of these illustrations and many more posing samples are available on Posing App for your mobile devices.

Kaspars Grinvalds is a photographer working and living in Riga, Latvia. He is the author of Posing App where more poses and tips about people photography are available.

Post originally from: Digital Photography Tips.

Check out our more Photography Tips at Photography Tips for Beginners, Portrait Photography Tips and Wedding Photography Tips.

Posing Guide for Photographing Women: 7 More Poses to Get You 21 Different Photos [Part II]


Digital Photography School

 
Comments Off on Posing Guide for Photographing Women: 7 More Poses to Get You 21 Different Photos [Part II]

Posted in Photography


Women Posing Guide in Action: 7 Sample Poses – 21 Different Photos

04 Jun

A post by Kaspars Grinvalds from Posing App.

Previously published articles in the Posing Guide series contained hand illustrated posing samples as a guide or reference during your photo shoots. Based upon feedback and questions I received about these guides, I wanted to describe the process in a little more detail and show some real photos created while using these posing techniques.

I’d like to begin by stating once again – the main purpose of using posing samples is only to get your model into some starting point. That’s it. You don’t need to (and quite often you wouldn’t be able to) precisely recreate even the simplified illustrated pose.

This will be a three part series looking at standing, sitting and laying down poses for female models. For the the first article I chose seven sample standing poses and by slightly adjusting each pose I got 21 different photos. Now, let’s take a look at this process.

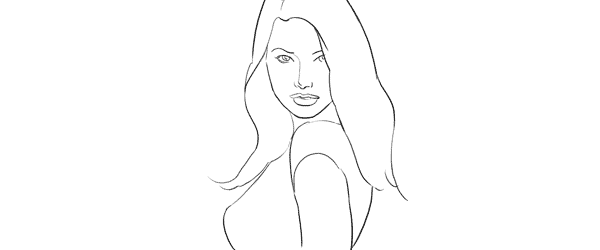
Pose 1
Pose1

It is a good idea to start your photo shoot with some very basic, easy pose. That’s why I chose this one to begin with. It’s easy to describe and easy to understand – “portrait shot from a side”. So you might start with saying to your model “Ok, turn with your side towards me, turn your head to me and look right over the shoulder at the camera. Straighten your spine and keep hands loose by sides.”

7poses 1

Photo 1 – With these instructions you should get something like the first picture. The next thing without changing the pose, is to “find” the face expression you’re looking for. You may want to try moving from very subtle smirks to stronger smiles or even laughter. And once you have the expression (or different ones) you’re after, tell and show it to the model. Thereby it will be easy for the model to learn and repeat it.

Photo 2 – After I got the simple and kind expression I was looking for, I slightly changed my position and asked the model to keep looking back over her shoulder to the camera. Exactly the same pose, just taken from another angle and you already have a slightly different photo.

Photo 3 – Also many different looking directions and head tilts are possible. In this particular example I asked the model to look back down her body. This look works very well in many posing situations, creating yet another variation just by slightly adjusting the starting pose.

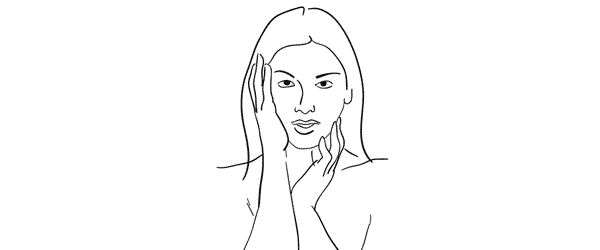
Pose 2
Pose2

Seeing this sample illustration you should grab only the basic idea – “portrait shot with hands around the face”. That’s all you need for playing around with initial sample pose. Eventually you will come up with some nice variations of your own.

7poses 2

Photo 4 – Before getting to the hands, ask the model to stand facing the camera and support her body weight on just one leg. This instantly curves her body and her shoulder line is shifted. After that ask her to gently move her hands around the face and in the hair. Generally look for asymmetrical hand placements, but as you can imagine – many variations are possible.

Photo 5 – In this shot the only difference is slight tilting of the head and putting one hand behind the hair.

Photo 6 – To differentiate the look and feel, I once again asked the model to look down her own body and cropped tighter around the face. And again with only minor adjustments from one pose we’ve got 3 different photos.

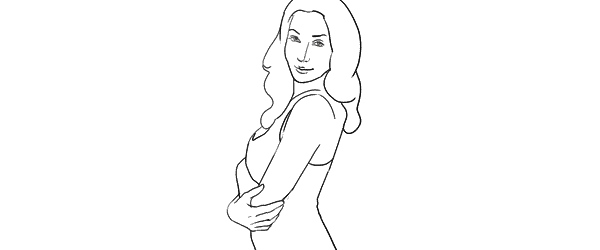
Pose 3
Pose3

Another easy pose with very simple idea – “hands connected on the chest”. Notice that hands are not really “crossed”, but “connected”. Also you should warn your model not to grip them too tight or press upper arms against the body. Simply put, the posture should feel comfortable and subtle.

7poses 3

Photo 7 – Before taking this shot, I showed the model the sample illustration and she tried to recreate it. This is as close as you usually get if you recreate the sample pose.

Photo 8 – The outlines don’t and won’t match perfectly. In this particular example I took a shot from higher angle aiming slightly down because I saw that this angle works better for the model.

Photo 9 – Another simple way of transforming the pose is simply mirroring it the other way around. And to even more differentiate it from the first shot, I asked the model to lean against a wall.

And then I moved closer and took a head shot for just another variation of the same pose.

Pose 4
Pose4

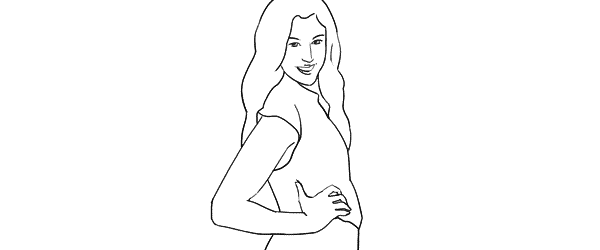
This simple pose is again self-explanatory – “the model turned to the side with one hand on the waist”. That’s all I tried to recreate.

7poses 4

Photo 10 – Here I started straight away with mirroring the sample pose because this was the better looking side for my model. Remember that it is different for each person. If you are not sure, take both variations and ask your model which one she prefers.

Photo 11 – From side view I followed to 45 degree position and asked the model to keep looking to the camera.

Photo 12 – Lastly, I just moved farther away for wider frame. The same pose, but these minor variations provide you with greater choice of images to select from in post.

Pose 5
Pose5

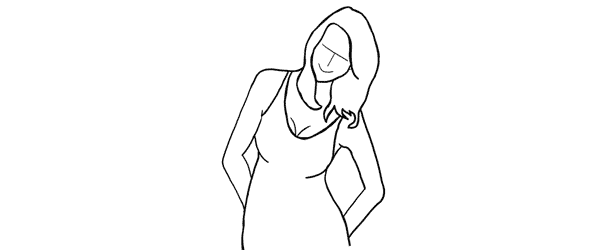
This pose provides simple yet elegant at the wall concept – “standing at the wall with hands behind the back”.

7poses 5

Photo 13 – Start with asking your model to support herself at the wall with her back. After that the first thing to take care of is shifting her body weight on one leg with the other crossed over it. Even if the legs are not visible in the frame, it is critical for forming the model’s body in S shape. Then ask her to place her hands behind her back asymmetrically. Finally ask her to lean forward slightly away from the wall with her upper body part.

Photo 14 – As usual I tried changing my shooting angle and took the next shot more from a side.

Photo 15 – And I continued to experiment with slightly different hand placement and head tilt. These images might be very similar, but most probably your subjects will be grateful for this kind of choice.

Pose 6
Pose6

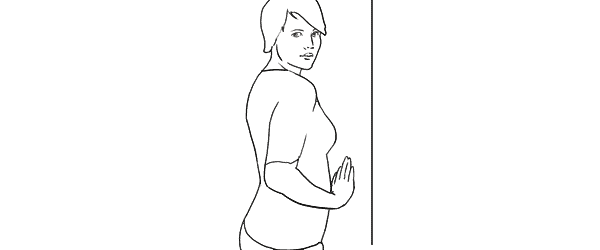
Another at the wall pose but this time with the model facing the wall. Easy to describe and recreate. Both hands are gently placed on the wall right in front of her just below the breast line.

7poses 6

Photo 16 – With the previous instructions the model easily achieved the described pose. And again I chose mirroring the sample illustration which already is one variation for any pose.

Photo 17 – Here I changed the shooting angle nearly parallel to the wall and cropped for a portrait shot.

Photo 18 – Finally the model changed the hand placement asymmetrically for just another variation.

Pose 7
Pose7

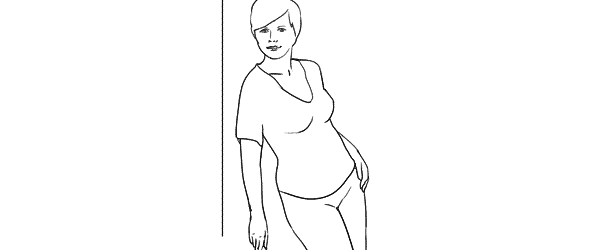
This is a bit more challenging pose than the previous ones, so definitely some guidance for the model is required in order to recreate it.

7poses 7

Photo 19 – The trick for the model here is to stand slightly off the wall and support herself against the wall with the front shoulder only. Front hand is loosened by the wall. After that the model should support the body weight on the outer leg, kicking the hip out with the inner leg crossed over. The back arm rests on the hip and the elbow is pulled behind her back.

Photo 20 – After managing the starting pose I started to variate it. Here I moved closer for tighter crop and asked the model to lean slightly forward along the wall.

Photo 21 – And finally I asked the model to turn sideways, supporting against the wall with both shoulders. And to further differentiate the shots I asked her to look down her body.

So, that’s it. Out of 7 sample poses we managed to get 21 different shots. And as you can easily imagine, even these are only samples, adjustments and variations are indeed endless.

All of these illustrations and many more posing samples are available on Posing App for your mobile devices.

Kaspars Grinvalds is a photographer working and living in Riga, Latvia. He is the author of Posing App where more poses and tips about people photography are available.

(function(d){
var f = d.getElementsByTagName(‘SCRIPT’)[0], p = d.createElement(‘SCRIPT’);
p.type = ‘text/javascript’;
p.setAttribute(‘data-pin-hover’, true);
p.async = true;
p.src = ‘//assets.pinterest.com/js/pinit.js’;
f.parentNode.insertBefore(p, f);
}(document));

Post originally from: Digital Photography Tips.

Check out our more Photography Tips at Photography Tips for Beginners, Portrait Photography Tips and Wedding Photography Tips.

Women Posing Guide in Action: 7 Sample Poses – 21 Different Photos


Digital Photography School

 
Comments Off on Women Posing Guide in Action: 7 Sample Poses – 21 Different Photos

Posted in Photography


5 Fail Proof Portrait Poses

16 Feb

In this post Gina Milicia – author of our brand new eBook “Portraits: Making the Shot” shares 10 tips on directing a portrait shoot like a Pro.

When I was starting out as a portrait photographer, I began creating a visual diary and mimicking the images I loved. Some people will tell you that it’s wrong to copy but for centuries, every generation of artist has imitated the masters before them. Once they’ve mastered the technique they move on to develop their own style.

Photography is no different.

You don’t have to come up with a thousand new ways to pose someone. Use the ways that work for you and your model.

Here are 5 of my “go to” poses

1. The Controposto (or S) pose

SundayFS06 2

This is one of my go-to poses. It’s a great starting point for both men and women because it’s flattering for almost any body shape and doesn’t require any special props or locations.

2. Lean on me (or working the wall)

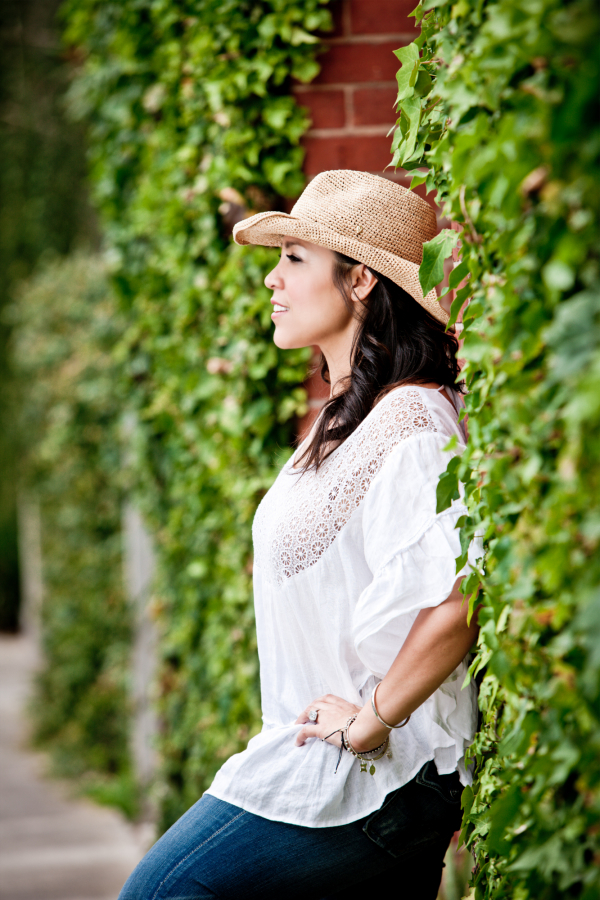
Getaway11 100
This is a particularly good pose for people who are really awkward. Some people have a real awareness of their body and they will always look comfortable, but it’s not as easy as that for others. Simply giving your model something to do, like leaning against the wall, can be enough to relax them.

3. Jump in my Car

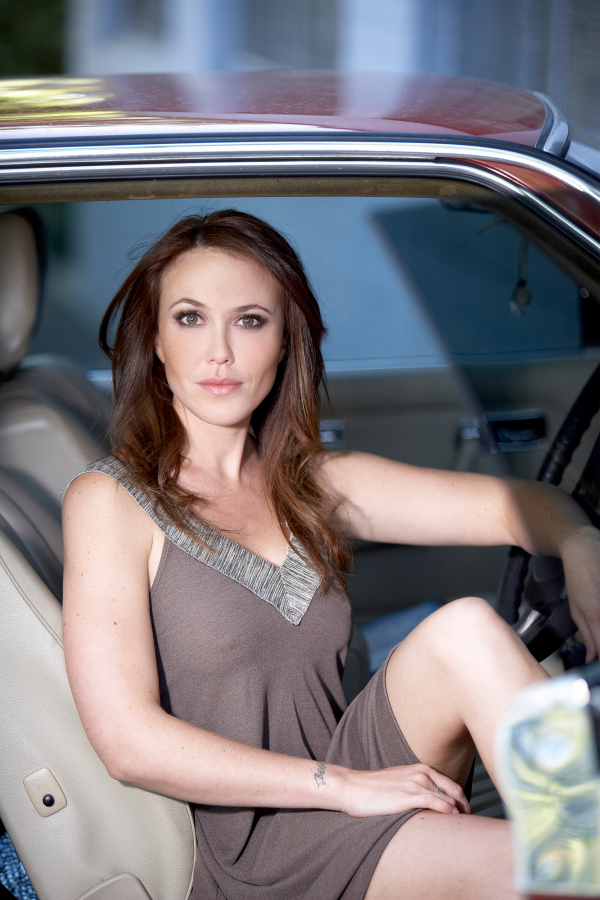
Valentine08 198

A car is another great prop. On a bright sunny day, the shade of a car will give you great light and again, your model will have something to do to help them relax.

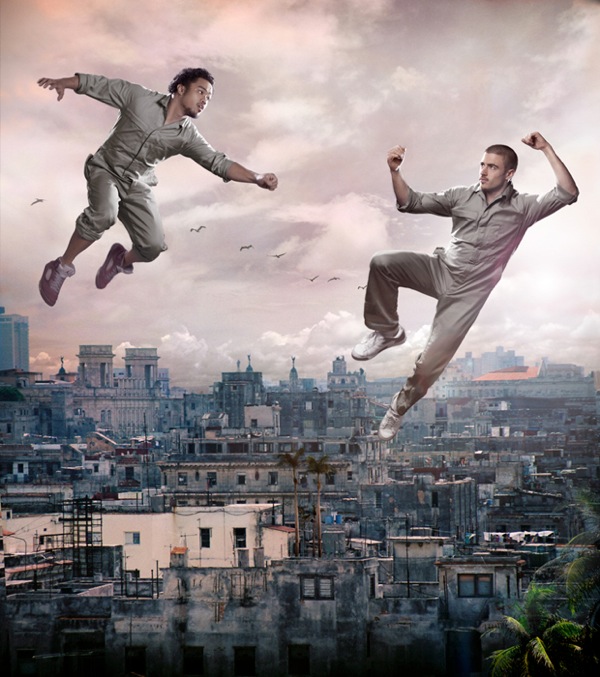
4. A leap of Faith

CTM Robotless 1
As with many of the other poses mentioned, if someone is awkward simply standing, giving them something to do can really bring the photo to life.

It’s not always easy but you can introduce some life and movement into the person and their clothes by getting them to jump or leap.

5. Walk the line

SundayFS06

The walking shot is great if you want to capture groups, couples and singles.
I like to shoot from a low angle with a fast shutter speed to freeze motion.

Enjoy this post? Check out more of Gina’s advice in her new eBook – Portraits: Making the Shot (and get a bonus one free for the next few days only).

Portraits_468x190px.jpeg

Post originally from: Digital Photography Tips.

Check out our more Photography Tips at Photography Tips for Beginners, Portrait Photography Tips and Wedding Photography Tips.

5 Fail Proof Portrait Poses


Digital Photography School

 
Comments Off on 5 Fail Proof Portrait Poses

Posted in Photography


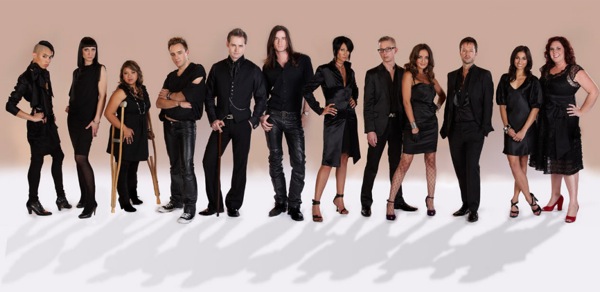
Photographer Hanson Fong Poses a Group of 15 People

25 Feb

Watch a clip from the Beauty and the Beast seminar tour. Hanson Fong demonstrates how he would pose a group of 15 people. www.ProLightSeminar.com

Now I Lay Me Down to Sleep (NILMDTS) is a 501(c)3 non-profit organization
Video Rating: 4 / 5