The post When NOT to use a Polarizing Filter appeared first on Digital Photography School. It was authored by Gavin Hardcastle.

There are times when a using a polarizing filter is a bad idea.
Yes, I just blasphemed against the gods of landscape photography. Not using a polarizing filter for landscape shooting could be considered sacrilegious in some circles, and indeed, I myself have written ad nauseam about the importance of this simple yet powerful photographer’s tool.

However, today I’m going to selectively contradict myself.
Because while a circular polarizing filter can hugely improve your photographs in most outdoor photography situations, there are times when leaving that shady piece of glass off the lens can actually give better results.
And that’s what this article is all about!
So if you’re ready to learn all about the times you should keep your polarizer packed away…
…let’s get started.
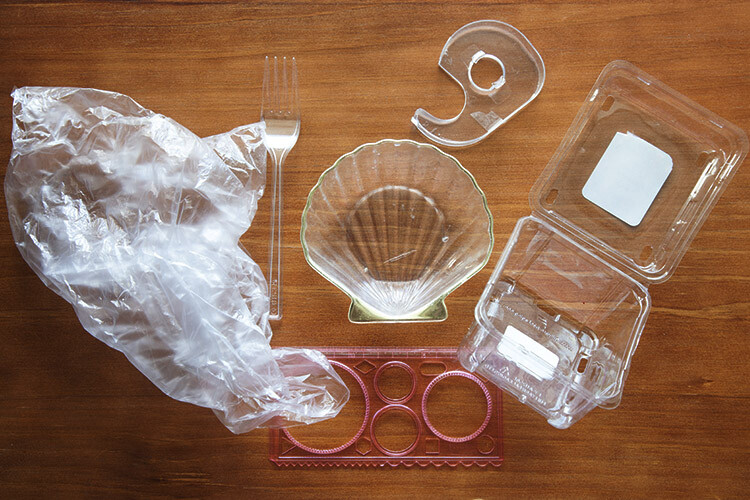
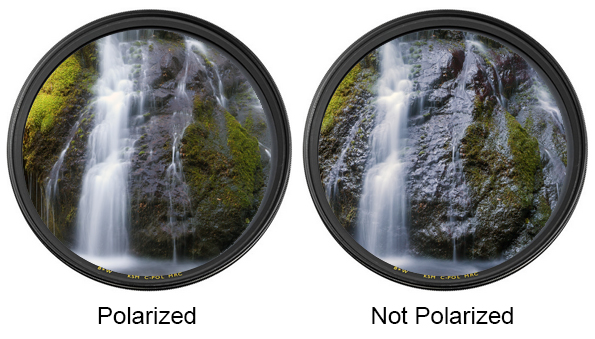
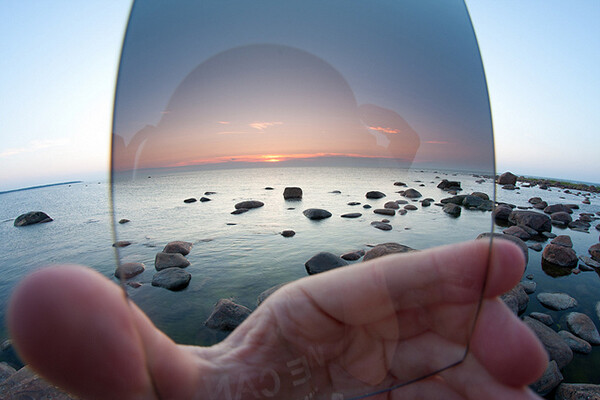
What does a circular polarizer do?

A polarizer reduces reflected light before it enters your lens.
Note that a polarizing filter can be turned by hand to engage or disengage the polarizing effect. This is useful for shooting reflective surfaces such as water, glass, wet rocks, and cars.
Most of the time, you want to control those reflective surfaces and reduce the glare of reflected light. But what if you like that super wet look and glare on certain surfaces?
Let me give you some examples where I felt that not using a polarizer actually made for a better image.
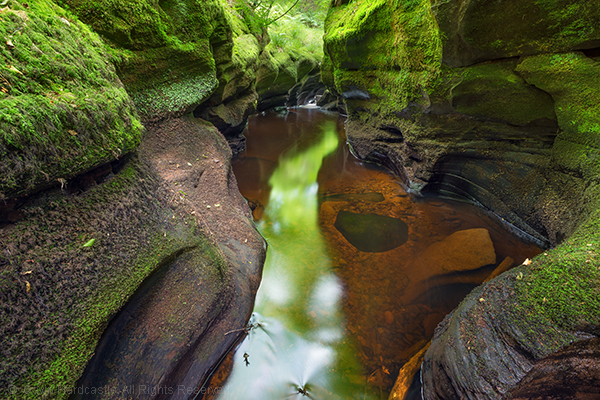
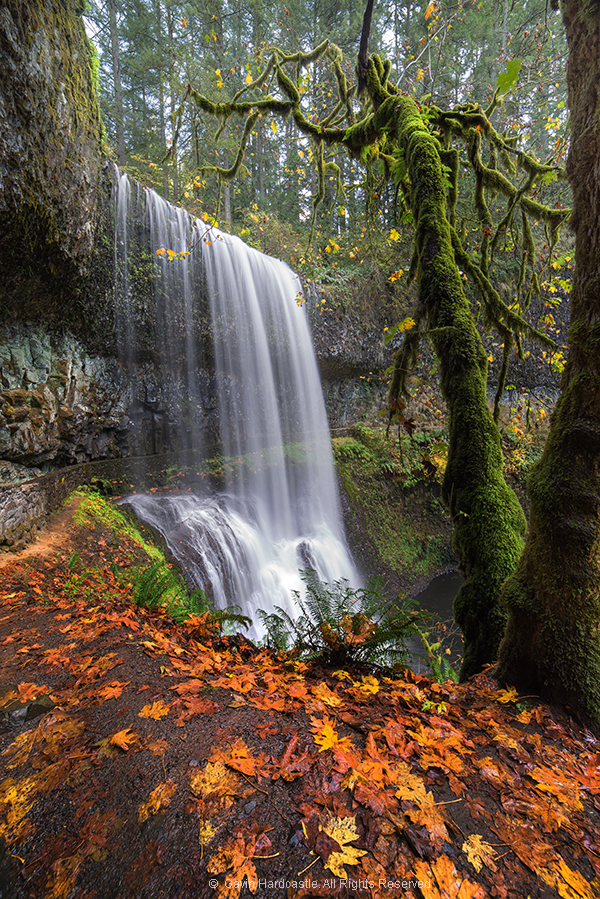
When the reflected light has color

For the image above, I decided to remove my polarizer.
And here’s why:
Because the reflected light on the wet rocks in the foreground had a distinct red color, which I really liked.
Using a polarizer would have reduced this red reflected light and would have made for a less dramatic image.
When you want that super wet look
When taking this image, I found that the wet rocks had lovely highlights that caused a soft glare from reflected sunlight.
Even though the highlights didn’t really have any dramatic color, I still felt that the wet look made for a better image, so I opted not to use the polarizer.
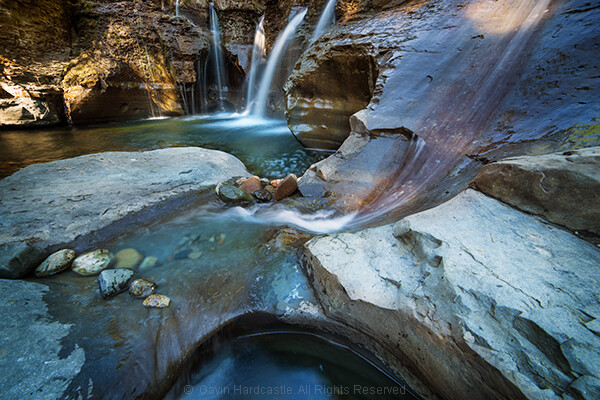
In very low light or when shooting totally shaded areas

This shot of a waterfall at Silver Falls State Park was a long exposure in very dim light, taken inside a canyon that had no direct sunlight at the time.
You see, when the sun has gone down and it’s starting to get dark, there’s little point in using a polarizer for a scene like this.
The only wet surfaces that could cause glare were the leaves in the foreground, and the light was so dim that there was no glare at all.
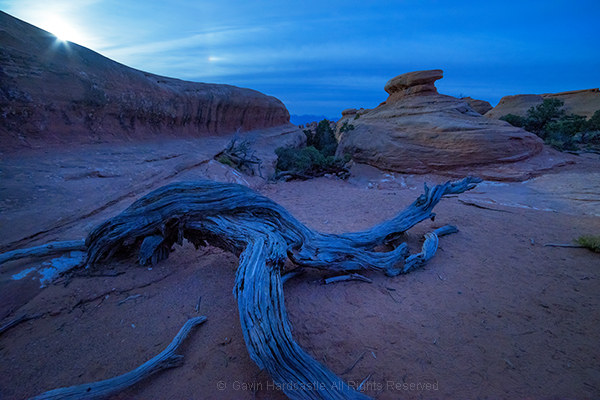
Night shooting

When you’re photographing at night, you want to get as much light as possible into your lens.
A polarizer is going to reduce the amount of light and force you to use a longer shutter speed or a higher ISO setting.
So if you’re shooting in the dark, do yourself a favor and remove the polarizer.
When capturing the full moon shot above, the polarizer would only have served to slow down my shutter speed.
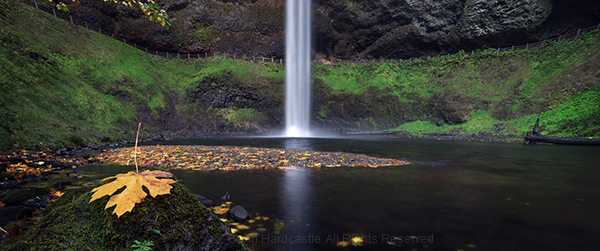
When you want reflections in water

Here’s where you want the best of both worlds.
Let’s say you like the look of your image with the polarizer on. Your colors are nicely saturated and all of the glare has been reduced from the surfaces, but you’re annoyed to see that the lovely reflections in the water have either vanished or diminished.
What do you do?
The simple answer is to take two shots – one with the polarizer engaged and another without the polarizer.
Then you can blend the two exposures in Photoshop and take the best elements from each.
For the shot above, I really enjoyed the look of the reflected waterfall in the pool, so I took two shots with different polarizer settings and then combined them.
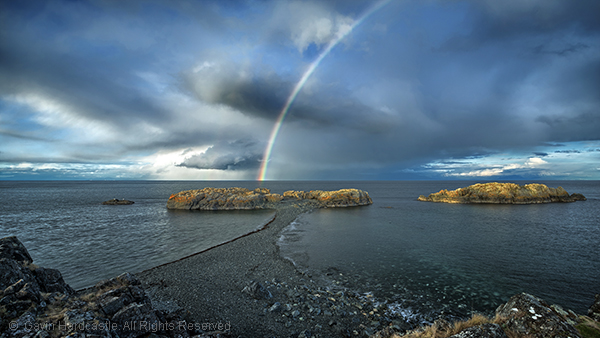
When you want to shoot rainbows

I’m sure I’ll be corrected by our more well-educated readers, but from a polarizer’s standpoint, a rainbow is reflected light.
So if your polarizer is engaged, the rainbow will perform a disappearing act in your photo.
Disengage or remove the polarizer and – presto! – the rainbow will be back in your photograph.
But still don’t forget your polarizer!
As I mentioned at the start of this article, a polarizer is a key landscape photography tool.
In fact, if I leave the house and forget my polarizers, I’ll actually turn around and drive home; they’re that important.
At the same time, I urge you to learn when conditions call for the removal of your polarizer.
And I hope this article helps you identify those golden moments so that you can get the best possible shots!
Now over to you:
Do you use a polarizing filter? How often? Are there times when you prefer to go without it? Share your thoughts in the comments below!
The post When NOT to use a Polarizing Filter appeared first on Digital Photography School. It was authored by Gavin Hardcastle.


You must be logged in to post a comment.