RSS
 

Posts Tagged ‘playing’

Videos: Learn photography by playing video games

06 Apr

Can video games help teach you photography skills? Texas-based photographer Mir-or-Image believes they can. In his ongoing video series, ‘Photo Mode Perspective,’ Mir plays popular video games and uses their built-in photo modes to help viewers learn the basics of photography, including principles of composition, how shutter speed and aperture impact the look and feel of an image, and more. Mir loves video games and photography. With his educational video series, he combines these two passions in a distinct and educational way.

Photo modes in video games have become increasingly more sophisticated. For example, in the PlayStation 4 game ‘God of War,’ the included photo mode includes sliders for the field of view and focal length, which are, of course, interconnected. As you increase the field of view, the focal length decreases. This is something that experienced photographers take for granted, but for beginners, understanding how focal length changes perspective in a scene is important.

Likewise, for seasoned shooters, you understand how aperture changes the depth of field, all else equal. Still, the photo mode in ‘God of War’ and other games offers a helpful visual representation of how the plane of focus changes with aperture. Put in simple terms, ‘Here’s something to note with f-stop, the smaller the number, the blurrier the background gets,’ Mir says in the video below. Using ‘God of War,’ Mir also discusses ways to crop images and edit brightness, contrast and colors, and more.

Another PlayStation game with a very capable built-in photo mode is 2020’s ‘Ghost of Tsushima.’ The game, developed by Sucker Punch Productions, is set on Japan’s Tsushima island during the first Mongol invasion of Japan. Some creative liberties are taken in the game for narrative and gameplay purposes, but it nonetheless provides a stunning backdrop for taking in-game photos.

Like ‘God of War,’ ‘Ghost of Tsushima’ includes focal length and aperture sliders for your virtual lens. If you want to shoot a portrait of the main character, Jin, you can use a virtual 85mm f/1.8 lens, for example. You can even direct your subject, in a sense, by changing the character’s pose and facial expression. To add creative flair, you can adjust exposure compensation (bias), add particle effects, change the lighting, color grade your image and more. Also, as a warning, ‘Ghost of Tsushima’ is a violent video game and there is some virtual blood in the video below.

Over at Mir’s YouTube channel you can also see his ‘Photo Mode Perspective’ videos for two more video games, ‘Cyberpunk 2077’ and ‘Spider-Man: Miles Morales.’ To view Mir’s real-world photography, follow him on Instagram and visit his website. The photography bug bit Mir during a trip to Europe in 2018. He enjoyed using his smartphone in manual mode, and when he returned home to Texas, he went out and bought an interchangeable lens camera. He is now a professional car photographer based in Houston.

I captured this image in ‘Forza Horizon 4’ on Xbox. It’s exceedingly unlikely that I’ll ever have the chance to photograph a 1962 Ferrari 250 GTO in the Scottish highlands in real life, so it’s neat that I get to photography rare cars in different locations in a racing video game.

Videogames can do more than help aspiring photographers learn more about how camera and lens settings impact the photos they capture. For example, professional automotive photographer Sam Dobbins used Forza Motorsport on Xbox to plan out a real-world photoshoot. Others, such as Instagram user jk_fh4_pics has an entire account dedicated to photography from the game ‘Forza Horizon 4.’ In some cases, game developers even hold photography contests using their games, which is something that Playground Games does with Forza Horizon and Rockstar Games does with Red Dead Redemption 2.

If you’re like Mir and love both video games and photography, you may be able to combine your interests like him. ‘New Pokémon Snap’ arrives on Nintendo Switch later this month, and the entire purpose of that game is to capture photos of Pokémon in their virtual habitats.

The upcoming Switch title will allow Pokémon shutterbugs to edit and share their images online with other gamers. A similar game is a PlayStation 3 title from 2008, ‘Afrika,’ in which the player assumes the role of a photojournalist hired to take photos on an African safari. It’s a difficult game to find these days, but I remember importing a copy from Japan when I became interested in photography in high school. It wasn’t an amazing game, but it was a lot of fun to take wildlife photographs of animals I’ve never seen in real life.

Articles: Digital Photography Review (dpreview.com)

 
Comments Off on Videos: Learn photography by playing video games

Posted in Uncategorized


Photography Deck is a camera-themed deck of playing cards to help teach photo basics

02 Jul

There are many ways to learn the basics of photography, such as classes, tutorials and simply capturing more images. However, there’s a neat new method using playing cards, Photography Deck.

Launched on Kickstarter, the campaign far exceeded its funding goal during its first day. At the time of writing, over 600 backers had contributed more than $ 20,000 USD, compared to the goal of just $ 1,122.

The unique and attractive deck of cards are designed to appeal to shutterbugs and photography newcomers alike. Each suit covers a different topic: Clubs cover technical details, diamonds showcase shooting styles, hearts offer composition tips and finally, spades teach camera basics.

The 3 of spades card features the exposure triangle. Image credit: Photography Deck on Kickstarter

The technical details on the clubs cards include manual shooting, white balance, color theory and more. For example, the 6 of clubs teaches the viewer about the histogram. The shooting style-themed diamonds cards illustrate styles of photography including flash photography, macro, portrait photography among others. The hearts cards feature composition topics such as negative space, symmetry, patterns, leading lines, the rule of thirds and more. Adorned with basic camera information, the spades cards illustrate camera topics such as aperture, shutter speed, focal length, depth of field and more. The 3 of spades illustrates the exposure triangle of shutter speed, ISO and aperture.

Via the Kickstarter page, creator Eric Bohring states that each card ‘illustrates the most important rules and techniques about photography’ while featuring unique camera artwork. ‘Think of them as pocket-sized cheat sheets that you can bring wherever you travel,’ the campaign continues. The product is designed as a unique gift for photography enthusiasts and as a useful and artistic addition to your own camera bag.

The deck of cards is a standard playing deck with 52 cards and a pair of jokers. Each card features a micro-linen texture and is a standard playing card size: 3.5 x 2.5 inches (89 x 64mm).

If you’d like to make a pledge to the Photography Deck project, it’s about $ 14 USD to receive a standard Photography Deck, with shipping expected in August. For about $ 17, you can receive a limited edition green deck. If you’d like both decks you can receive a standard and limited edition deck for $ 29.


Disclaimer: Remember to do your research with any crowdfunding project. DPReview does its best to share only the projects that look legitimate and come from reliable creators, but as with any crowdfunded campaign, there’s always the risk of the product or service never coming to fruition.

Articles: Digital Photography Review (dpreview.com)

 
Comments Off on Photography Deck is a camera-themed deck of playing cards to help teach photo basics

Posted in Uncategorized


How to Photograph Kids Playing, Running Around and Generally Being Kids

11 Nov

If you’re a people photographer, it’s hard to resist photographing kids as they play, run around and… well, be kids. It’s also a great chance for you to play as a photographer.

Here are seven tips to help you capture photographs of kids at play.

It was a grey hazy day at the beach so I focused on silhouette photos of my kids at play.

1. Use Your Phone Instead of Missing the Moment

I teach people how to use their new DSLR cameras. One of their biggest frustrations is that their friends seem to take better photos with a phone than they can with their complicated DSLR.

If you’re still struggling with your DSLR, don’t be afraid to use your phone as a camera. As long as you keep in mind the most important parts of a photo – light, moment, and composition – your phone will take great photos.

This photo of my daughter running through a puddle was captured with my iPhone 4s. Because it was a bright day, the shutter speed was fast and froze the water as it splashed.

2. Be an Observer Instead of a Boss

If you’re going to photograph kids at play, it’s best to have them acting candidly rather than telling them what to do. Just let them play, and they’ll give you countless moments to photograph. The moment you step in and tell them what to do or how to play, you’ll ruin the moment.

I wanted a nice portrait of my daughter with these fall colors, but I knew I wouldn’t be able to make her stand still for one. So I let her walk on ahead of me. When I called her name she looked back, and I snapped the photo.

3. Angles

While photographing kids at play, consider the angle you’re using. Your photos will look more exciting if you go for low angles or face to face. Get down to their level (if not lower) and into their world.

I achieved this extremely low angle by laying down on the ground and looking straight up.

Before it was hauled away, my kids turned this mattress into a trampoline. A low angle helped to capture how high he was jumping.

4. Get Close

Join in the play, and get as close as you can while using a wide angle. When you look at the photo it will make you feel like you’re right back there in the moment.

This son was wrestling with his dad so I decided to get in as close as I could. The wide-angle helped to exaggerate the moment.

5. Get Behind Them

Photographing people from behind adds a bit of mystery to your photo. It lets the viewer bring a little more of their own imagination to the photo. When we can’t see the person’s face, it makes us imagine what they’re up to.

This over-the-shoulder shot anticipates the action that’s about to happen.


This photo was taken in a massive outdoor sandbox. Obviously, he’s been sliding down the dirt hills on his bum.


This combines taking a photo from behind with getting in close. (Taken with an iPhone.)

6. Play With Your Shutter Speed

One of the biggest problems you’ll face when capturing action is motion blur. So you’ll need a fast shutter speed.

But you can also play with a slow shutter speed and capture creative motion blur.

Slow shutter speed motion blur

I took advantage of my iPhone’s slow shutter speed to capture this portrait of my daughter. As you can see her face is basically sharp while the background is quite blurry. This was achieved by having her walk toward me while I walked backward. To the camera everything is moving except for her.

7. Tell a Story With Your Photos

You can tell a story with your photos. It might be a ‘before and after’ story using just two photos. Or it could be a beginning, middle and end with three photos. It might even be a longer story that fills a photo book.

Daddy daughter candid moment.

This story begins with a little girl taking her daddy by the hand and leading him.


Daddy daughter dancing

Then in the middle of the story, she dances with her daddy.


Daddy daughter play

The story ends with her daddy swinging her around wildly.

Final Checklist

Here’s a checklist for photographing kids as they run around and play.

  • Consider this playtime for you as a photographer.
  • Use any camera you’ve got – even your phone.
  • Stand back and let moments happen on their own.
  • Be creative with your angles.
  • Get in close.
  • Add mystery to your photo by photographing kids from behind.
  • Be creative with your shutter speed.
  • Tell stories with multiple photos.

Now go out there and take some great photos of those kids being kids and share them with us in the comments.

The post How to Photograph Kids Playing, Running Around and Generally Being Kids appeared first on Digital Photography School.


Digital Photography School

 
Comments Off on How to Photograph Kids Playing, Running Around and Generally Being Kids

Posted in Photography


Playing Stuck in the Mud – A Creative Exercise for Photography

15 Jan

Do you remember that game called Stuck in the Mud we used to play as kids? It goes something like this; one kid is elected to be “it” and runs around to tag as many people as possible. When tagged, the other players have to freeze and stand with legs and arms apart, as if they were stuck in some glutinous mud. The only way to get free of the mud is when a non-tagged comrade climbs through the legs of the trapped players. It goes on until everybody inevitably gets stuck in the mud.

I was thinking about this game rather nostalgically over the course of this project.

Playing Stuck in the Mud - A Creative Exercise for Photography

Um… What has mud got to do with photography?

Actually, a fair bit sometimes. Fortunately, this project doesn’t involve wading in sticky mud (unless you want to).  This project is about parking your feet for a few minutes to have a good look around – as if you were stuck in the mud yourself.

Even when going for a dedicated photography walk, you are bound to miss the subtle details of a landscape. You can’t help it. The brain prioritizes images that portend to the mission at hand – surviving. Physical activity, self-preservation – it’s all the ingredients a brain focuses on to sustain its host. That’s why the best way to draw more detail out of a location is to slow down.

We know this because often when we see a potential photograph, we stop in our tracks to take the shot. So rather than halting for a brief second, the idea of this project is to and make a little extra time to investigate an environment. The shapes, colors, people, graffiti, or details in a window sill. There are countless moments that are ready for the taking, they just have to be caught.

Playing Stuck in the Mud - A Creative Exercise for Photography

How to play stuck in the mud with a camera

It sounds terrible, doesn’t it? The thought of my camera even coming near mud makes me sweat. But playing photographic stuck in the mud is easy.

The first step is to grab your camera and head out the door. Wander around, find a place to take a few shots and hold your position. Keep in mind that your spot doesn’t have to appear instantly enticing. In fact, choosing a boring location would be a quicker way to train yourself onto detail.  Plant your feet on the ground and have a good look around. I would recommend holding your position for a good one to two minutes at first. You’ll notice the time tends to go faster each try. In order to concentrate, set an alarm on your phone and get shooting!

Rules of the game

Apart from taking a few minutes to study the spot you’ve chosen, there aren’t any hard and fast rules to the stuck in the mud project. To advance, add a higher photo count or hang out in one spot for a longer period of time.

Want to stop every 100 steps? Do you want to be able to swivel around in a circle? Want to halt at particular points on a map? It’s totally up to you. You could even go out with a friend and compare shots from the same spot after! But I do recommend staying in the one spot for at least a minute or so – to truly get into that state of mindfulness and awareness. Sometimes it can be hard to get into that creative flow, so slowing down your process can help activate what I like to call “The Photography Zone”.

Also, it’s probably obvious, but don’t stop in the way of others or get yourself in a dangerous situation. This isn’t Pokemon Go, okay?

Playing Stuck in the Mud - A Creative Exercise for Photography

This is an example of a street corner I parked my feet on the other day. I was waiting for a friend and decided to take advantage of the surrounds. It doesn’t look like much, right? A fresh construction zone impeded by scaffolding. But, embracing the challenge I honed in on some of details that really make up the urban landscape.

Playing Stuck in the Mud - A Creative Exercise for Photography

This dark blue scaffold retains a sharp contrast in the midday sun.

Playing Stuck in the Mud - A Creative Exercise for Photography

A vibrant red scaffolding hanging just close enough to get a detailed shot.

Playing Stuck in the Mud - A Creative Exercise for Photography

Playing Stuck in the Mud - A Creative Exercise for Photography

You never know what you are gonna find! A cute little button.

Playing Stuck in the Mud - A Creative Exercise for Photography

And of course, don’t forget the selfie!

Pleasant Surprises

This short collection below surprised me a little because I’ve walked the route many so times before. But that’s what is so great about this project. It slows down your photographic practice, making room for unusual subjects to peek through.

Playing Stuck in the Mud - A Creative Exercise for Photography

The black and white conversion was a no-brainer to match tones in this image

Playing Stuck in the Mud - A Creative Exercise for Photography

Playing Stuck in the Mud - A Creative Exercise for Photography

I’ll often use these manholes to mark where I’ll stand next. This time, I decided to photograph one instead. I really enjoy the light filling out the overall image.

Playing Stuck in the Mud - A Creative Exercise for Photography

This tarp has been under construction for weeks but it took me a concerted effort to stop and explore the panorama of the city to capture this picture.

Sometimes the stuck in the mud project yields a cohesive series in itself. This image is the remains of Honeysuckle Creek Tracking Station in Australia. But instead of walking around to hunt out the obvious subject matter, I took a few minutes to plant my feet and take a good look at the detail around me.

It’s the act of staying put in the one space that allowed me to capture a different perspective of the old station.

Playing Stuck in the Mud - A Creative Exercise for Photography

The site of the Honeysuckle Creek Tracking Station. Before I set off to scurry around for subjects I deliberately took a minute or two to survey the details of the overall environment.

Playing Stuck in the Mud - A Creative Exercise for Photography

The results of a few minutes stuck in the mud. The detail of the ground around me lit up like an abstract artist’s canvas.

The variation from one tile to the next is a striking contrast. Perfect for focusing on the historical site in a different light.

Over to you

I would love to see the results of your stuck in the mud sessions. By taking a few moments to truly check out a landscape, odd little moments become clearer. You’ll almost definitely leave your spot thinking, “Wow, I never noticed that before!” So have a go! and share your images in the comments below.

The post Playing Stuck in the Mud – A Creative Exercise for Photography by Megan Kennedy appeared first on Digital Photography School.


Digital Photography School

 
Comments Off on Playing Stuck in the Mud – A Creative Exercise for Photography

Posted in Photography


Playing a Super Mario Bros. level with Hololens is the best case for AR we’ve seen

23 Jun

Developer Abhishek Singh makes a compelling case for wearing a headset and looking silly – he created an augmented reality Super Mario Bros. level and played through it in New York’s Central Park. Oh, and he dressed as Mario for the demo video below, which is the best thing ever.

Singh tells Upload VR that he had to re-think some of the game elements to make it playable on a human scale – Mario can jump much higher than any plumber we know. Of course, there would be some obvious challenges bringing a game like this to the masses. But we’ve got our fingers crossed for a future of virtual reality includes life-size Koopas and gold coins.

Articles: Digital Photography Review (dpreview.com)

 
Comments Off on Playing a Super Mario Bros. level with Hololens is the best case for AR we’ve seen

Posted in Uncategorized


How Playing With Manual Mode Can Help You Learn Exposure Faster

21 Sep

I have a disclaimer before I even begin this article. I shoot much more often in Shutter or Aperture Priority than I do in Manual mode. I save Manual mode specifically for studio shooting, for some tripod work where I have a lot of time to get the settings perfect, or for situations where the lighting is very consistent.

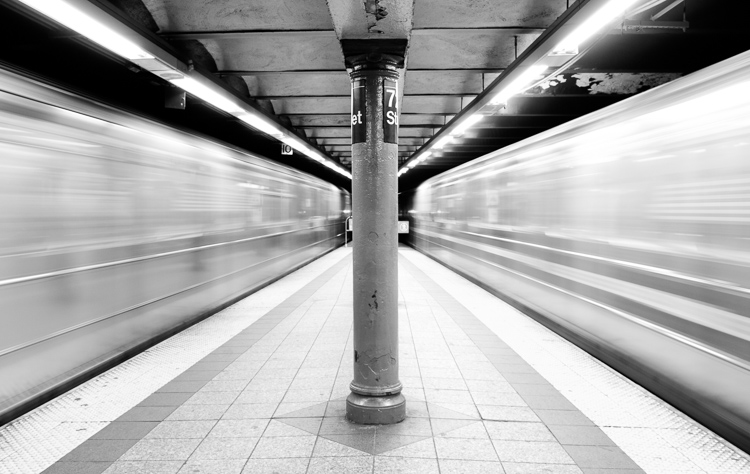
Subways in Motion, New York

Learn Manual Mode to better understand exposure

However, I think it is immensely important for you to try to periodically shoot in Manual early on, especially if you’re just learning. Take a look at your camera. How many buttons does it have on it? New cameras these days can have 20 or more buttons on them all doing different things, but in reality, there are only three settings that make the photograph: the ISO, the Shutter speed, and the Aperture.

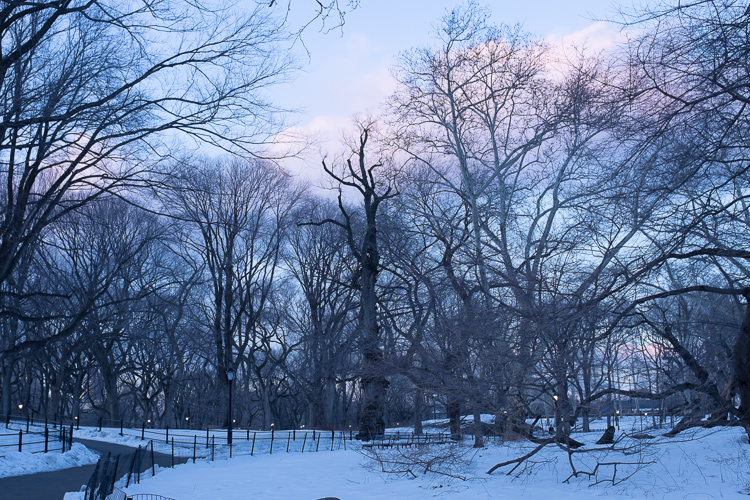
Central Park, New York

Before you even go out, turn your camera to Manual mode and figure out the fastest and most comfortable way to change each of these settings. You’re going to do a lot of that in Manual.

Understanding shutter speed

The next step is to understand a couple of important points. The shutter speed always needs to be at least one over your focal length to offset handheld camera shake. So if you are at 50mm (on a full-frame camera), then your shutter speed needs to be 1/50th of a second. To freeze the motion of moving subjects such as people, I like a shutter speed of around 1/250th or 1/320th of a second, but you can get away with a little slower than that. You will need a faster shutter speed to freeze faster moving subjects like cars, etc.

Understanding aperture

For your aperture, the lower the number (such as f/2.8), the less depth of field and more bokeh there will be. This is counterintuitively called a large aperture because the size of the aperture hole in the lens is actually larger. This will also let in a lot of light due to the size of the hole. A small aperture (such as f/11 or f/16) will create a much larger depth of field, but the tradeoff is that it will let in less light.

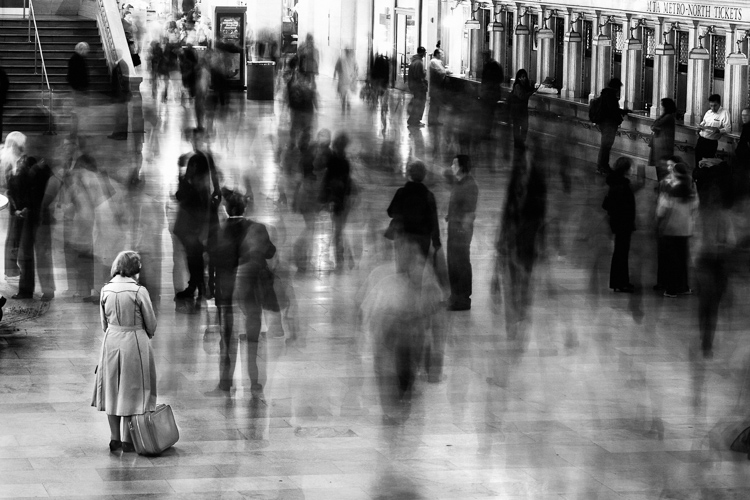
Waiting in Grand Central Terminal, New York

Understanding ISO

The ISO is the sensitivity of your camera’s sensor to light. The higher the number, the more noise that an image will have, but the more sensitive to light it will be. Newer cameras can make beautiful photos up to ISO 3200 or even 6400, but older or entry level cameras can have a lower limit of around ISO 1600 (test your camera to find your comfort zone with its upper ISO limits).

If you want a lot of bokeh in your image, and you set your lens to f/2.8, that means the camera will be letting in so much light that you will usually want a low ISO. However, if you are shooting street photography, fast moving subjects, you want a shutter speed of 1/250th or faster, and/or a smaller aperture such as f/11 – unless you are in bright sunlight, you will often have to raise your ISO to be able to let in enough light to use those settings. In general, if it’s darker out, then your ISO will often have to go up unless you are on a tripod.

Now play with them

Those are the main considerations that you need to learn; now just walk out the door and mess around with your settings. Screwing around with the settings in Manual is the fastest way to start to learn them well. Start off with your aperture. How much depth of field do you want in the image? Once you pick that, then take a guess at the shutter speed and ISO and see how it looks. View the back of the screen, look at the histogram, and zoom in on the details.

If an image is too dark, then slow the shutter speed, raise the ISO, or use a larger aperture. If the main subject is too blurry, then speed up the shutter speed.

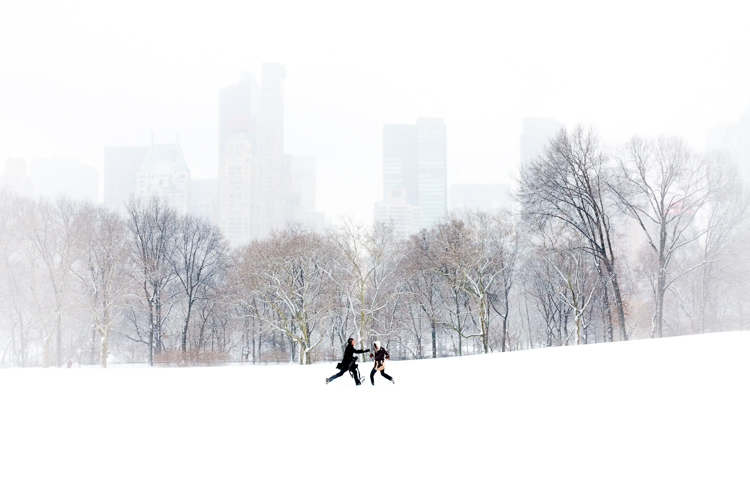
Couple in Sheep Meadow, New York

Try different lighting scenarios

Explore different lighting situations. Paying attention to lighting is the first thing that you should do before you take a photograph. How strong is the light? Where is the sun or artificial light in relation to what you are shooting? The strength of the light will be the number one factor in helping you figure out your settings. From there, you can figure out the depth of field that you want and if you need to freeze the motion of your subjects or not.

Get comfortable walking from one lighting situation to another. If you walk from the sun into the shade, what will you need to change to expose the scene correctly? Pay attention to scenes with both bright highlights and darker shadows. With these scenes you need to figure out which is most important to expose correctly. If the shady area is more important, then let in more light. If the highlights are the most important, then darken the scene so they are correctly exposed and the shadows are closer to black. If you are in sunlight, learn how your settings will change if you are shooting into the sun versus shooting away from it.

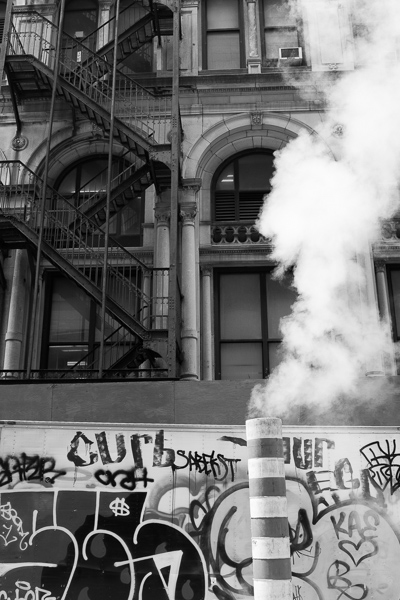
Smokestack and Graffiti, New York

Go out in the morning, in the middle of a sunny day, at dusk, or in light rain. Learn how your settings change in each of these lighting situations.

Most digital cameras will show you the light meter reading for what they believe will correctly expose your image. For instance, if you choose the three settings, the light meter might show you that it thinks you are underexposed by one stop (look in your viewfinder for a + 0 – scale, press the shutter button part-way down to activate it). Keep an eye on this because it can help you, but also try to not pay too much attention to it. The point of Manual shooting is to learn the numbers yourself without relying on the camera. You can rely more on the camera later.

Conclusion and practice

The only way to learn these things is to experiment and do them. Shooting in Manual at first will make you screw up much more than in Shutter or Aperture Priority, but a handful of dedicated days of doing this will have you understanding the settings in a much more intuitive way. Then if you decide to shoot in Shutter or Aperture Priority, you will have a strong understanding of how to use those modes to the best of their ability.

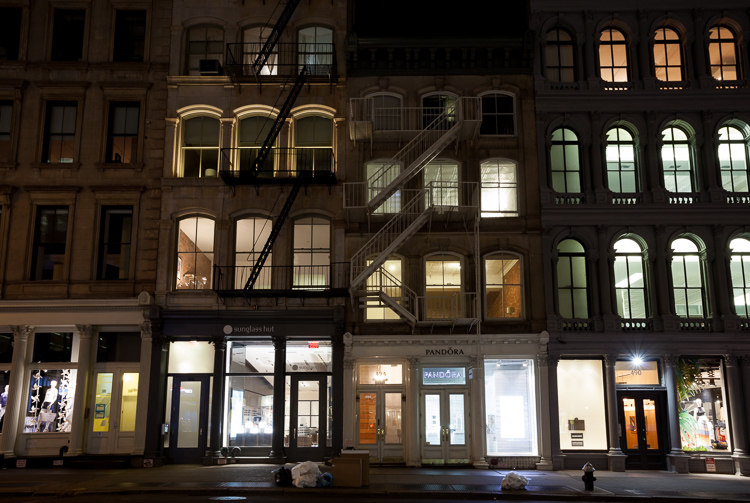
SoHo at Night

googletag.cmd.push(function() {
tablet_slots.push( googletag.defineSlot( “/1005424/_dPSv4_tab-all-article-bottom_(300×250)”, [300, 250], “pb-ad-78623” ).addService( googletag.pubads() ) ); } );

googletag.cmd.push(function() {
mobile_slots.push( googletag.defineSlot( “/1005424/_dPSv4_mob-all-article-bottom_(300×250)”, [300, 250], “pb-ad-78158” ).addService( googletag.pubads() ) ); } );

The post How Playing With Manual Mode Can Help You Learn Exposure Faster by James Maher appeared first on Digital Photography School.


Digital Photography School

 
Comments Off on How Playing With Manual Mode Can Help You Learn Exposure Faster

Posted in Photography


Playing the Ace? Sony a7R II Review

18 Nov

Though it’s the fifth model in Sony’s full-frame E-mount lineup, the a7R II arguably represents just as much of a technological leap forward as its first mirrorless full-frame predecessors did. Its 42MP full-frame BSI CMOS sensor, 399 on-sensor phase detection point AF system and 5-axis IS are just a few reasons why the a7R II is one of the most talked-about cameras of the last year. See how it performed in our comprehensive testing. Read more

Articles: Digital Photography Review (dpreview.com)

 
Comments Off on Playing the Ace? Sony a7R II Review

Posted in Uncategorized


Photographer creates picture of 100-man orchestra… with the same person playing each instrument

06 Jun

An Oslo musician and photographer has created a photo stitched together using 400 images, showing an entire orchestra with every instrument played by the same person. Violinist Alexander Light created the 200MP picture by shooting percussionist Heming ValebjØrg in every seat on a stage while he played the appropriate instrument for that position. Read more

Articles: Digital Photography Review (dpreview.com)

 
Comments Off on Photographer creates picture of 100-man orchestra… with the same person playing each instrument

Posted in Uncategorized


Playing with Perspective in Paris: New Optical Illusion Art

25 Apr

[ By Steph in Art & Street Art & Graffiti. ]

varini optical illusion 1

Two-dimensional shapes seem to hover weightlessly in space like a projection, but step slightly to your right or left and the whole image falls apart, becoming a chaotic assemblage of lines painted onto various surfaces in a room. Swiss painter Felice Varini has been transforming public spaces with his single-vantage-point illusions since 1978, and now he’s brought them to the Grande halle de la Villette in Paris’ Parc de lab Villette.

varini optical illusion 2

varini 7

varini 8

Varian invites us to look at the spaces around us in a new way, taking a closer look at the physicality of the world we have constructed around us through his somewhat disorienting optical illusions.

varini 4

varini 5

varini 6

The spaces themselves are Varian’s true media, more so than the paint. Even when certain shapes and motifs are repeated, the result is different every time. “My work evolves in relation to spaces that I am in contact with,” he says.

varini 3

The installations will be up through September 13th, 2015, and guided tours are available.

Share on Facebook


[ By Steph in Art & Street Art & Graffiti. ]

[ WebUrbanist | Archives | Galleries | Privacy | TOS ]


WebUrbanist

 
Comments Off on Playing with Perspective in Paris: New Optical Illusion Art

Posted in Creativity


Playing With Food: Fruits & Vegetables as Temporary Art

24 Jan

[ By Delana in Art & Sculpture & Craft. ]

food photography

Romanian photographer Dan Cretu loves to play with his food. His series of food-themed photographs takes everyday foods and turns them into something that looks far more permanent.

food photography dan cretu

Cretu takes normal pieces of food, then cuts and bends and twists them into shapes that make up objects we see and use every day. The exceptional food sculptures are created without the use of Photoshop or other digital manipulation.

regular objects made of food

What Cretu does require, however, is speed. All of his sculptures have to be constructed and photographed within a few hours before the food begins to get squishy and unattractive.

photography with food

One of the more interesting aspects of Cretu’s series is the juxtaposition of the very temporary pieces of food and the far more permanent objects they become in the photographer’s hands. Cut oranges which right now look just like bicycle wheels will, very shortly after the photograph, look like withered piles of decaying fruit.

Share on Facebook


[ By Delana in Art & Sculpture & Craft. ]

[ WebUrbanist | Archives | Galleries | Privacy | TOS ]


WebUrbanist

 
Comments Off on Playing With Food: Fruits & Vegetables as Temporary Art

Posted in Creativity