RSS
 

Posts Tagged ‘Photographs’

Some of the oldest American photographs were found in a workshop in New York

16 Oct

You never know where or when significant historical artifacts will turn up. Some very early photographic portraits were recently found in an unheated shed on Long Island in New York. The found photographs may be some of the very first portraits captured in the United States.

In 1839, the daguerreotype process was introduced by its namesake, Louis Daguerre, in France. It was the first publicly available and commercially viable photographic process. Although eventually replaced by more affordable, easier processes, many daguerreotypes were made in the 1840s and 1850s. In the US, the race was on to turn Daguerre’s process into a money-making venture.

‘Henry Fitz Jr. (1808-1863). The ‘Profile View’ taken with the Wolcott mirror camera, January-February 1840. Housed in a heavy brass frame identified in pencil on verso “Henry Fitz Jr. of New York and Baltimore. 1808-1863.’ Image and caption credit: Hindman Auctions

Henry Fitz Jr., Alexander Wolcott and John Johnson pulled it off. Fitz Jr. patented the first American camera and opened the first photographic portrait studio in the country. Fitz Jr. was a telescope maker in New York City. His understanding of optics gave him a significant advantage over would-be competitors.

The trio began collaborating on their photographic venture in late 1839. In early 1840, Fitz was the subject of some of the earliest successful photographic portraits ever taken. In June of 1840, Fitz opened a portrait studio in Baltimore, Maryland, cornering the market, at least for a time.

‘The ‘Eyes Closed’ Portrait of Henry Fitz Jr. (NMAH Cat No. 4114A). Probably taken in JanuaryFebruary, 1840 with the Wolcott mirror camera.’ Image and caption credit: Hindman Auctions

Some of the earliest photos taken by Fitz, Wolcott and Johnson were housed in that shed on Long Island. The photos will be going up for sale by Hindman Auctions. The auction house says, ‘The cache of daguerreotypes offered here – along with the existing Fitz group at the National Museum of American History – is the largest group of images produced by a single photographer from the pioneering era of photography in America (1839-1842). In this regard it is unique. While single images from this period exist, most are anonymous, undated and orphans floating in the historical ether. By contrast, the Fitz archive can be quite tightly dated to have been produced between about January 1840 and the fall of 1842. It was during these 36 months that photography in America sprang to existence and emerged as a commercial enterprise.’

‘Julia Wells Fitz (1814-1892), wife of Henry Fitz. Ninth plate daguerreotype, housed in red leather side opening case, with heavy brass mat. With delicate tinting of cheeks and lips; dress with fugitive blue tinting. Not removed from case. The identification of this image is based on the similarity between the sitter and the oil painting of Julia Wells Fitz included in this archive.’ Image and caption credit: Hindman Auctions

The collection holds immense historical and cultural significance. While Fitz, Wolcott and Johnson were not the creators of the daguerreotype process, of course, they were at the forefront of its adoption and growth. It’s also one of the more complete collections of photographs from that time frame.

You can read the full details about the auction listing by visiting Hindman. A digital catalog about the listing is available for viewing here. In-person bidding will begin on November 15 by appointment only.

Articles: Digital Photography Review (dpreview.com)

 
Comments Off on Some of the oldest American photographs were found in a workshop in New York

Posted in Uncategorized


Bill Dane Pictures …it’s not pretty. 50 Years of Photographs I’m Still in Love

21 Feb

“It seems to me that the subject of Bill Dane’s pictures is the discovery of lyric beauty in Oakland, or the discovery of surprise and delight in what we had been told was a wasteland of boredom, the discovery of classical measure in the heart of God’s own junkyard, the discovery of a kind of optimism, still available at least to the eye.” John Szarkowski, director of photography, Museum of Modern art 1962-1991

I received Bill Dane’s wonderful book, Bill Dane Pictures …it’s not pretty.  50 Years of Photographs I’m still in love, in the mail today.  

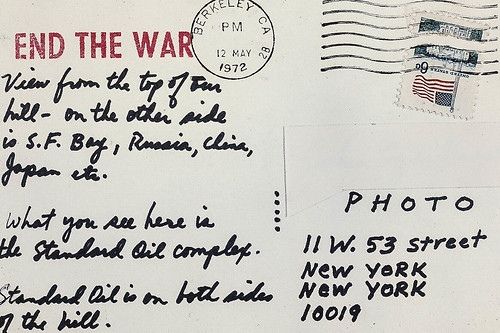
For those unfamiliar with his work, Dane has been actively photographing the world around him for over 50 years.  Since 1969 he has generously mailed over 50,000 of his photographs as postcards to people.  More recently he has been active on Flickr where he continues day in and day out to share his world with the rest of us.

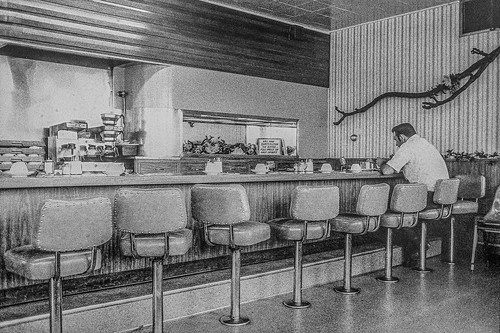
Yesterday he shared a diner scene from Tracy, California in 1970, earlier today he shared a bit more abstract flower from Oakland in 2011.  

As you work through his flickstream you find yourself moving from Las Vegas in 1972 to Mexico City in 1974 to Olympia, Washington in 2018.  The one constant thing is that Bill is there with his camera walking you through his unique view of the world.  His view of the world, as his book title admits, is not always pretty, but it is like no other photographer you’ve probably ever seen.  It’s not easy work to get through but it’s rewarding when you do.

Accompanying his images in the book are his own sttaccato like typed words.  Like a beat poet Bill opines on his own photographic path as well what he sees around him — words to go with the pictures.  It’s part personal history/biography, part documentary, part politics, part life vision — always poetic.

“Hunt treasure   strike-snap-gather   edit   judge

I still photograph like it’s 1969   sort of

Advancing  weaving  focused scanning   dam  Bill  hold still

Leica Rangerfinders  straightforward refinement  guess settings real good

Film has wonder dept   forging Tri-X  darkrooms   mail

Costco for color prints to edit  send

2007 My last film camera  Contax SLR zoom-macro

Digital  Nikon D80 with the 28-105 macro”

In my own artist’s statement, I quote the great Charles Bukowski who once said that endurance is more important than truth.  As far as endurance goes Bill’s got it.  He’s got it in spades and you have to admire that.  Bill’s spent time hanging out at workshops with Friedlander and Arbus.  He’s had shows at MoMA, his photographs hang in the permanent collections of MoMA, SFMOMA, the Art Institute of Chicago — and yet here he is day in and day out still putting work up out there for the public where?  At Flickr? Yes, at our beloved Flickr.

Interestingly enough the title of Bill’s book actually comes from Bukowski’s poem “I Met A Genius.”  The poem is about a 6 year old boy on a train ride with Bukowski who sees the sea for the first time and remarks upon seeing it that “it’s not pretty.” It’s the sort of innocent honest insight that can come from a child who has not been saddled down with society’s version of the sea as a remarkable and beautiful scene, the way most artists might present it.

Bill gives us a messy world, it’s not always pretty, but it’s worthwhile to see it as he shares it. It is a bit of a junkyard as Szarkowski suggests, but there is beauty in the junkyard as well.

Weighing in at over 300 pages of high quality printing and limited to only 500 copies, do yourself a favor and pick this one up before it sells out and before one of these big name museums decides to do a retrospective. You’ll have an original collector’s item. Bill Dane is a treasure — and so are his flickrstream and book.

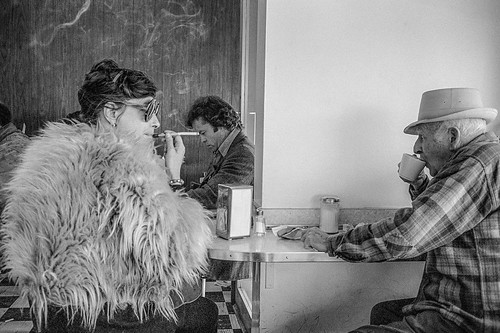
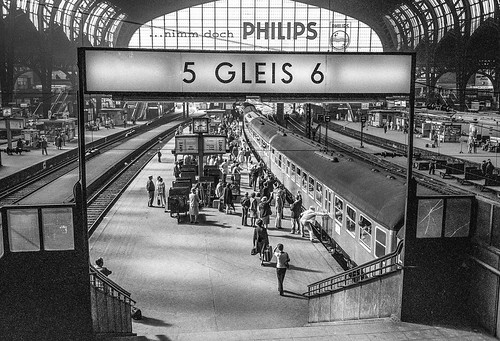
Some photos from Bill’s Flickrstream below.

1974 Mexico City
1970 Tracy
1974 Berkeley
1970 Point Richmond_
Hamburg 1971


Thomas Hawk Digital Connection

 
Comments Off on Bill Dane Pictures …it’s not pretty. 50 Years of Photographs I’m Still in Love

Posted in Photography


7 Tips for Taking Better Photographs of Cars

13 Dec

The post 7 Tips for Taking Better Photographs of Cars appeared first on Digital Photography School. It was authored by Desmond Louw.

car photography

Taking photos of cars is such an interesting activity; it’s like doing science. Every time you shoot a car, you’ll learn something from it!

That’s why I would like to share some basic guidelines to get you started with car photography.

And by the time you’ve finished this article, you should be one step closer to getting gorgeous photos of cars!

1. Shoot at the right time of day

This is by far the most common mistake people make when shooting cars.

You see, the best time to do car photography is a few minutes after sunset (or a few minutes before sunrise). Use a tripod and get that perfect soft light on the paint.

This photo was taken for Top Gear a few minutes before sunrise:

Car photography BMW M135i

2. Be on the lookout for reflections

You must carefully control what reflects in the car. Have a look around you, then look closely at the car and see what reflects off its surface.

A car (especially a new, shiny one) is like a mirror. So try to have an open space behind you, like a field. Also, try to avoid shooting with buildings or trees in front of the car. One of the most important things you want to show in your car pictures is the design lines of the car. But reflections can spoil these lines very quickly.

Also, be very careful not to include your own reflection in the photo. If you can’t avoid your own reflection, it’s best to put the camera on a tripod, set the timer, and move out of the shot. Just look at this photo I took of a dark shiny BMW 428i (below); behind me was nothing except the horizon. In fact, you can clearly see the horizon reflecting in the car:

Car photography tips BMW428i

3. Take driving shots

One very easy way to get a cool image is to shoot the car out of another moving car. (Please be super careful when doing this!) 

For instance, try shooting the car out of a window while driving at 37 mph (60 km/h) with a shutter speed of 1/100s or so.

By doing this, you’ll get some nice movement on the road and on the wheels. You can even decrease the shutter speed further, though this will increase your chances of ending up with blurry photos.

This Audi S3 was shot before sunset; it was driving at 70 km/h (43 mph), and I used a shutter speed of 1/125s:

Car photography tips S3 driving shot

4. Pay attention to the color of the car

All types of paint react differently at different times of the day with different light. Most colors hate direct sunlight, but some colors actually handle direct sunlight really well.

Just look at this baby blue Beetle shot in the middle of the day:

Car photography tips beetle

5. Choose your background carefully

Make sure your background suits the car and the theme. Avoid including objects in the background that will distract the eye.

Things like dustbins, power lines, and other cars can kill a picture. For this Aston Martin shot (below), I used a simple background. The yellow paint matches the car’s color:

Car photography aston martin

6. Pan for motion blur

A cool way to get some motion in your car photography is to stand next to the road and let the car drive past you.

Follow the car with your lens in one smooth action and set the shutter speed to 1/125s. You will be amazed by how easy this is!

This Ferrari was shot at 1/125s at 200mm. The car was driving roughly 37 mph (60 km/h):

Car photography tips ferrari

7. Let the car interact with nature

Here’s another way to capture a photo that speaks to you:

Make the car interact with its surroundings.

Examples of this could be a car creating dust or a 4×4 driving over an obstacle. Look at this Chevrolet Trailblazer climbing over a rock:

Car photography tips trailblazer

And this G-Class AMG drifting on loose sand:

Car photography tips G AMG

8. Shoot at night

Photographing cars at night might sound daunting, but you will be amazed by how easy and awesome it is! The biggest secret here is to find a spot where it’s completely dark; any streetlights or even a full moon could make life tricky.

Once you’ve found the right spot, set up your camera on a tripod. Set your ISO to 100, the shutter speed to 30 seconds, and the aperture to f/9.

When the shutter opens, take a strong constant light source and walk around the car, “painting” it with your light. A normal household flashlight works for this.

There are no rules here. Paint the car in different ways to get different effects, and you will be blown away by the results! Here are some examples of this technique:

Car photography tips Opel Astra
This is an Opel Astra shot next to Table Mountain with Cape Town in the background.
Dodge Charger with the skyline of Detroit City
This is a Dodge Charger with the skyline of Detroit in the background. The photo took me no longer than five minutes to set up and capture.

Tips for taking better photos of cars: conclusion

Car photography may seem difficult, but with these handy tips, you’re well-equipped to take some stunning car photos of your own.

So pick your favorite technique from the article, get outside, and start shooting!

Do you have any other car photography tips or favorite images you’ve taken of cars? Please share them in the comments below.

  • Light Painting Part One – The Photography
  • Showing Speed: Using Panning When Shooting Action
  • 3 Tips for Creating Dramatic Images Using Motion
  • Do You Pack Up and Leave After Sunset and Miss the Fun of Night Photography?

The post 7 Tips for Taking Better Photographs of Cars appeared first on Digital Photography School. It was authored by Desmond Louw.


Digital Photography School

 
Comments Off on 7 Tips for Taking Better Photographs of Cars

Posted in Photography


How to Use Photoshop to Add Lightning to Your Stormy Photographs

18 Nov

The post How to Use Photoshop to Add Lightning to Your Stormy Photographs appeared first on Digital Photography School. It was authored by Ana Mireles.

Did you know you can use Photoshop to add lightning bolts to your images?

use photoshop to add lightning before and after

Thunderstorms are a great photographic subject, and bolts of lightning can add drama to your photos. Unfortunately, they don’t necessarily occur when you want them.

And you can’t always base your photoshoots around natural events. That’s when post-processing comes to your aid.

How to use Photoshop to add lightning

Have you ever seen a thunderstorm and wished it had happened the day before when you were out doing an urbex photoshoot? Or have you ever you looked at one of your photos and thought that a thunderstorm would have added the perfect ambiance?

how to use photoshop to add lightning tutorial

Unless you’re a professional that specializes in this kind of photography and purposely chases storms, you’ll rarely have a thunderstorm when you’re in the right location with the proper equipment.

And even if you are in the right place at the right time, it’s not always easy to photograph lightning.

Not to worry.

Because there are several different ways to use Photoshop to add lightning – and create the perfect thunderstorm in your photos.

how to use photoshop to add lightning Intro

In this tutorial, I’ll show you two ways of adding lightning to your images. The first way is by making a composite. The second way is to create a lightning bolt inside Photoshop.

So choose the one that’s better for you, and let’s get started.

Use Photoshop to add lightning via compositing

This technique is very easy to do, but you must already have a lightning photograph on hand.

Step 1: Choose and open your images

Use Photoshop to composite a thunderstorm

First, you need to choose the two images that you’re going to use. One of them will be the background where the lightning bolt is going to be added.

This method will work best if the image has a moody sky. You can always place a bolt of lightning into a clear blue sky, but an already-moody sky will look more realistic and have more drama. So pick an image with lots of clouds and contrast.

The second image is the one with the lightning bolt in it. If you’ve photographed thunderstorms in the past, then you can use one of those images. If not, you can always get a lightning bolt from a free stock photography website.

Open both images in Photoshop. Then drag the lightning photo onto the new background; this will automatically paste it into a new layer.

Alternatively, you can use the commands Edit>Copy and Edit>Paste.

Step 2: Use Photoshop’s blending modes to add lightning

Photoshop simple composite technique

Your new layer should be covering the background, so you need to blend both layers together and integrate the lightning bolt.

I prefer to keep the original color, but you can also make your lightning image black and white and then make it darker to make the blending easier.

Whether you decide to leave the lightning in color or change it to black and white, you need to change the blend mode. You can do this by opening the drop-down menu in the Layers panel and selecting your desired mode.

For my example, Overlay is the most appropriate. And it can be a good starting point for you, too, but feel free to experiment with other options.

Step 3: Fine-tune your composite

use Photoshop blending modes to add lightning

Move and adjust the lightning bolt until it’s positioned the way you want it in the background image. Once everything is in place, you need to do some advanced blending in the Layer Style dialog box.

To open the Layer Style box, just double-click on the layer next to its name. Don’t click on the thumbnail or the name itself, because those are different tools. A pop-up window will appear; that’s the Layer Style box. At the bottom, you’ll find the Blend If option.

Here, you need to move the sliders to the right. Start with the top slider (which controls the current layer). Hold Alt while you drag to split the slider and create a more gradual effect. Then, if necessary, do the same with the slider on the underlying layer. Once the lightning looks integrated into the photo, you can click OK to close the dialog box.

You can now add a layer mask to further fine-tune the effect. The source of the lightning is always lighter than the rest of the sky, so you might need to add a gradient to create that effect.

You can also color black any residual elements that didn’t disappear via the Blend If settings.

That’s it! Your composite is now ready. You can add other filters or do some more editing to finalize your picture.

How to use Photoshop to add (and create) lightning bolts

For this method, you only need to have a background image. Again, the choice is yours, but a cloudy day or dramatic scenery will help create more impact.

Step 1: Create a lightning bolt

add lightning using Photoshop - before

Open the background image in Photoshop and create an empty new layer at the top of the layer stack.

To fill it, grab the Gradient tool, set it to Linear Gradient, and drag the tool across the canvas. Make sure that your gradient goes from black to white. These choices can be found in the Options bar at the top of the screen.

With the same layer selected, go to Filter>Render>Difference Clouds. There are no settings (or previews) for this kind of filter; it just generates a pattern using random values.

Use Difference Cloud filter

Now invert it by going to Image>Adjustments>Invert. You can also use the shortcut Ctrl/Cmd + I.

Then go to Image>Adjustments>Levels. In the pop-up window, you’ll find a histogram with a slider (this is the Levels adjustment). Drag it to the right until the background is all black and only white lines are visible. You’ll notice that some of these white lines resemble lightning bolts.

Create fake lightning bolts

Pick a “lightning bolt” and start painting with black to cover the other lines using the Brush tool. Keep going until you leave only a line that looks like lightning. The size and shape are up to you; there’s no specific formula.

If you only want to add that lightning bolt, then just adjust the blend mode of the layer and position it where you want it (see the composite technique explained in the first part of this article).

If you’d like to add several lightning bolts or one lightning bolt with a more complex shape and multiple branches, then I recommend you make a brush.

Step 2: Make a custom brush

Create a custom brush

To create a brush, you have to select the lightning bolt you just made. To do that, you can use any selection tool that is comfortable for you. In this case, I’d recommend using Color Range.

Once you’ve selected your lightning bolt, click on Edit>Define Brush Preset and give it a name. To make the lightning more dynamic, you can adjust the settings and make it change size and direction.

Now you have a lightning bolt brush that you can use in any photograph without having to create one again and again. At this point, you can hide or delete the lightning layer.

Step 3: Add lightning bolts in Photoshop

create a thunderstorm in Photoshop

Create a new empty layer on top of the background. That way, you can have the lightning bolts in a separate layer to edit and modify them as required.

Start painting one or more lightning bolts until you’re satisfied with the thunderstorm effect.

Step 4: Fine-tune the effect

add lightning using Photoshop - after

You can add a layer mask to integrate the lightning using a gradient to make it look more natural.

You can also add a Solid Color layer above the lightning layer. You can then use the Blend If tool to color only the lightning bolts.

Your thunderstorm is ready now! However, you can continue to post-process the final image if you want to give it a specific look. Black and white usually works very well for these type of images, so give that a try.

How to use Photoshop to add lightning: conclusion

I hope this article helped you see how easy it is to use Photoshop to add lightning.

Feel free to share tips and your own amazing images in the comments section below!

The post How to Use Photoshop to Add Lightning to Your Stormy Photographs appeared first on Digital Photography School. It was authored by Ana Mireles.


Digital Photography School

 
Comments Off on How to Use Photoshop to Add Lightning to Your Stormy Photographs

Posted in Photography


Easily Create 2D Illustrations from Photographs Using GIMP

14 Oct

The post Easily Create 2D Illustrations from Photographs Using GIMP appeared first on Digital Photography School. It was authored by Ana Mireles.

From advertising campaigns to cartooning your profile photo, 2D illustrations are used much more than you realize. Creating 2D illustrations can be a lot of fun, but they aren’t necessarily easy to do. Here’s an uncomplicated way to use photography as a template to get great 2D illustration results.

Create 2D illustrations from a photograph

Create 2D illustrations in GIMP

There are tons of programs for visual artists and graphic designers that specialize in digital drawing and 2D illustrations, but have you ever tried to actually create an illustration from scratch?

Graphic design software can be amazing and, for some great professionals, this can be the way to go. But many of us need a starting point to get us going, especially if our talent is in photography and not design.

That’s why I’m going to show you how to use GIMP to create 2D illustrations out of a photograph.

1. Draw the subject

First, choose the photo you want to draw. There are no restrictions here; you can use a portrait, a landscape, still-life, or anything else you want. I do suggest you start with images that are simple and don’t have too many details.

Create 2D illustrations using photographs

Imagine you’re creating an illustration from a photo in real life. You would place some tracing paper on top of your image and then start tracing and coloring on it, right? Well, this is the same thing.

First, create a new transparent layer. You can do this by going to Layer (in the menu) and then choosing New Layer. Make sure you select Fill with Transparency and press OK.

Next, you need to select the outer part of your subject. You can use any selection tool that works best for you; GIMP has many solutions for this.

For example, you can use the Path tool because it gives the most control. Just click every time you want to create an anchor point around your subject. Then move the path handles to adjust the curvature.

Make a selection with the Path tool

Once you’re done outlining your subject, click Selection from Path on the left-side Options panel. This will turn your path into a selection, which is what you want. But note that this is only necessary if you used the Path tool; with any of the other selection tools, you can skip this step.

Now you can use the Bucket tool to color your entire subject. You can use the color picker to select a color that matches the original color from the photo.

Of course, you can also use a color different from the original object. Get as creative as you want.

Finally, click inside the selection to fill it with your chosen color.

2. Color the inside shapes

Now that you have your main shape, you can start adding some shapes on the inside of your subject using different colors.

To do this, disable the top layer by clicking on the eye icon next to it. That way, you can see the original image.

Select the area you want to color. Then come back to the top layer and use the Bucket tool with a new color to fill it.

Draw shapes to create a 2d illustration

Repeat this process for all the shapes you want. Keep in mind that 2D illustrations are not as detailed as a realistic 3D model. So keep going only to add enough information to your subject to make it recognizable.

You don’t have to be extremely precise with your selection when you’re working inside a shape. GIMP will automatically stop at the edge. Notice in the next image how my selection is over to the yellow part, but the new color doesn’t spill there; it stops at the edge of the dark brown shape.

Selecting and coloring shapes

3. Add some details

Working on the top layer, turn down the Opacity so that you can see the original image underneath to use as a template for drawing details. Keep in mind that only you will see both versions (the illustrated and the original), so you don’t have to copy everything exactly as it is.

If you want to add details with thin lines and you don’t have a steady hand, you can use the Path tool to trace them. Then choose Stroke Path from the Options Panel. This will draw a line using the current Brush or Pencil settings.

Stroke path to simulate pencil lines

Of course, you can draw the details freehand using the Pencil or the Brush tool, as well.

To add some thicker decorations, you can use the selection tools again to make things faster. In this example, I used the Color Selection tool to select the blues on the original photo. I then painted the flower:

Use the selection tools to paint the details

The specific tools and strategies that you use will depend on the illustration you are creating and your own drawing skills.

4. Fill the background

If you want to draw a background, then add a New Layer in between the original photograph and the first drawing layer.

Choose the color you want, then go to Edit>Fill with FG color. FG stands for “foreground.”

You can leave the background as a solid color or add some decoration by drawing lines and shapes the same way you did for the subject.

Create 2D Illustration with creative backgrounds

Final thoughts

As you can see, by using a photograph as a template it’s really easy to create 2D Illustrations.

When you’re saving your file, remember that GIMP has its own format that will be the default setting when you use the Save or Save As choices. To use a universal file format such as JPEG or TIFF, you need to select Export As.

I hope you enjoyed the tutorial! The next time you want to create 2D Illustrations, let your photography skills help you out.

The post Easily Create 2D Illustrations from Photographs Using GIMP appeared first on Digital Photography School. It was authored by Ana Mireles.


Digital Photography School

 
Comments Off on Easily Create 2D Illustrations from Photographs Using GIMP

Posted in Photography


Slideshow: Winning photographs of the 2020 iPhone Photography Awards

23 Jul

Winning photographs of the 2020 iPhone Photography Awards

The winning photos of the 2020 iPhone Photography Awards (IPPA) have been announced, showcasing incredible imagery from around the world captured on iPhone devices.

Founded in 2007, the IPPA was the first and is the longest-running iPhone-specific photography competition. This year marks the 13th annual contest, which drew images from thousands of photographers from across the globe.

In the following gallery, we’ve rounded up the the Grand Prize winner and the first place winners for each of the 19 categories (Abstract, Animals, Architecture, Children, Floral, Landscape, Lifestyle, Nature, News & Events, Other, Panorama, People, Portrait, Series, Still Life, Sunset, Travel and Trees). The Grand Prize winning photograph in the following slide, ‘Flying Boys,’ also adorned photographer Dimpy Bhalotia as winner of the Photographer of the Year award.

You can find the rest of the runner-up images on the IPPA website, as well as a collection of the winning photographers. You can also sign up for the 2021 iPhone Photography Awards contest.


Image credit: All photos used with permission from IPPA.

Grand Prize Photographer of the Year Winner

Flying Boys — Dimpy Bhalotia

Location: Banaras, India

Gear: Shot on iPhone X

First Place Abstract Winner

Untitled — Tu Odnu

Location: China

Gear: Shot on iPhone 7 Plus

First Place Animals Winner

Horses in the Storm — Xiaojun Zhang

Location: Iceland

Gear: Shot on iPhone X

First Place Architecture Winner

Duomo di Milano — Haiyin Lin

Location: Milan, Italy

Gear: Shot on iPhone X

First Place Children Winner

Cotton Candy — Ekaterina Varzar

Location: Vorontsovsky Park, Moscow

Gear: Shot on iPhone 6

First Place Floral Winner

Untitled — Peiquan Li

Location: China

Gear: Shot on iPhone 8 Plus

First Place Landscapes Winner

The Wave — Liu Dan

Location: Marble Canyon, Arizona

Gear: Shot on iPhone XS Max

First Place Lifestyle Winner

Culture Fusion — Audrey Blake

Location: Cancun, Mexico

Gear: Shot on iPhone X

First Place Nature Winner

The Surface of the Alien Planet — Lisi Li

Location: Skógafoss, Iceland

Gear: Shot on iPhoen 7 Plus

First Place News & Events Winner

Demons Lighting the Sky — Fernando Merlo

Location: Paterna, Spain

Gear: Shot on iPhone X

First Place Other Winner

Beach Chair — Danielle Moir

Location: Westhampton Beach, New York, USA

Gear: Shot on iPhone 6

First Place Panorama Winner

Plaza de Toros de Las Ventas — Bojan Pacadziev

Location: Madrid, Spain

Gear: Shot on iPhone 8

First Place People Winner

Knitting to Heal Wounds — Omar Lucas

Location: Ayacucho, Peru

Gear: Shot on iPhone 4

First Place Portraits Winner

Beautiful Isolation — Mona Jumaan

Location: Ouarzazate, Morocco

Gear: Shot on iPhone XR

First Place Series Winner

Tattooed Women — Liu Dan

Location: Mindat, Myanmar

Gear: Shot on iPhone 11 Pro Max

First Place Still Life Winner

The Wine Bottle and the Seven Chouric?os — Joao Cabaco

Location: Santa Maria dos Olivais, Portugal

Gear: Shot on iPhone XR

First Place Sunset Winner

Nightfall at the Dolomites — Leo Chan

Location: Auronzo di Cadore, Italy

Gear: Shot on iPhone 11 Pro

First Place Travel Winner

Free from the Past — Kristian Cruz

Location: Varanasi, India

Gear: Shot on iPhone X

First Place Trees Winner

Alone — Glenn Homann

Location: Queensland, Australia

Gear: Shot on iPhone 11 Pro

Articles: Digital Photography Review (dpreview.com)

 
Comments Off on Slideshow: Winning photographs of the 2020 iPhone Photography Awards

Posted in Uncategorized


Slideshow: The prize-winning photographs of the 2020 Audubon Photography Awards

11 Jul

2020 Audubon Photography Awards

The National Audubon Society (NAS) has announced the winning images for its 2020 Audubon Photography Awards competition, including the mesmerizing grand prize-winning photograph titled ‘Double-crested Cormorant’ by photographer Joanna Lentini.

The winning photographs, which include six prize-winning photographs and four honorable mentions selected from a panel of six judges, were whittled down from more than 6,000 photographs captured across North America. In addition to the grand prize winner and the three main divisions (Professional, Amateur and Youth), The NAS also selected two winners for its Plants for Birds Prize and Fisher Prize, both of which are explained in the NAS press release:

‘The Plants for Birds Prize highlights the essential role of native plants and the natural habitat and food sources they provide for birds. The Fisher Prize, named after former creative director of Audubon Kevin Fisher, is awarded to the photo that exemplifies a blend of originality and technical expertise.’

Below is a breakdown of the prizes each winning photographer will receive for their respective works:

  • Grand Prize: $ 5,000
  • Professional Prize: $ 2,500
  • Amateur Prize: $ 2,500
  • Plants for Birds Prize: $ 2,500
  • Fisher Prize: $ 1,000
  • Youth Prize: Six days at the Hog Island Audubon Camp in Maine to become a better birder or bird photographer during the 2021 season (transportation included)

Below are the judges that pored over the photographs, who selected the winning images based on technical quality, originality and artistic merit:

  • Steve Freligh, publisher, Nature’s Best Photography
  • Melissa Groo, wildlife photographer and winner of the 2015 contest’s Grand Prize
  • Sabine Meyer, photography director, National Audubon Society
  • Allen Murabayashi, chairman and co-founder, PhotoShelter
  • John Rowden, senior director of bird-friendly communities, National Audubon Society
  • Jason Ward, bird expert and host of “Birds of North America”

You can find out more about the National Audubon Society and its photo contests by visiting the Audubon.org website.

Grand Prize Winner: Joanna Lentini

Double-crested Cormorant by Joanna Lentini/Audubon Photography Awards/2020 Grand Prize Winner

Category: Professional
Species: Double-crested Cormorant
Location: Los Islotes, Mexico
Camera: Canon EOS 7D Mark II with Tokina 10-17mm f/3.5-4.5 AT-X 107 DX AF Fisheye lens; 1/640 second at f/6.3; ISO 320

Story Behind the Shot: I’ve spent many hours underwater at this California sea lion rookery in the Bay of La Paz, but I had never before encountered diving cormorants there. Shifting my focus from the playful sea lions, I watched in awe as the cormorants plunged beak-first into the sea to snap at the sardines swimming by. Although I spent a long time admiring these birds, I didn’t see a single one catch a fish. Adding insult to injury, curious sea lion pups would zip by the hunting birds and nip at them from behind.

Bird Lore: Cormorants are superb divers, well adapted to rapid pursuit of fish underwater. Their bodies are heavy but streamlined, with dense plumage. When they dive, they hold their wings tightly to their sides, propelling themselves with their powerful legs and webbed feet, steering through the water with their tails. Some cormorants may be capable of diving more than 300 feet below the surface, but most of their hunting is done at shallower depths.

Fisher Prize Winner: Marlee Fuller-Morris

American Dipper by Marlee Fuller-Morris/Audubon Photography Awards/2020 Fisher Prize Winner

Category: Amateur
Species: American Dipper
Location: Yosemite National Park, California
Camera: Canon EOS 70D with Canon EF 100-400mm f/4.5-5.6L IS II USM lens; 1/2000 second at f/5.6; ISO 800

Story Behind the Shot: I followed a little-known trail in Yosemite to the top of a small waterfall and sat at the edge of the pool. A moment later, a dipper flew in. The river was ­moving quickly, but it wasn’t too deep. So instead of diving, the bird stuck its head underwater in search of prey. I thought the spectacular splash would make an awesome photo. The bird kept getting closer and closer as I sat snapping ­hundreds of shots of that splash. I will treasure that afternoon as one of my favorite moments in Yosemite!

Bird Lore: The American Dipper lives on the edge—on the boundary between air and water, on the border between streams and their banks, and even on that vague margin between songbirds (it is one, technically) and water birds. Above the surface or below, it can either walk or fly, demonstrating a mastery of all its elements, and attracting the admiration of the most creative photographers.

Professional Winner: Sue Dougherty

Magnificent Frigatebird by Sue Dougherty/Audubon Photography Awards/2020 Professional Winner

Species: Magnificent Frigatebird
Location: Genovesa Island, Ecuador
Camera: Canon EOS 7D Mark II with Canon EF 100-400mm f/4.5-5.6L IS II USM lens; 1/1250 second at f/8.0; ISO 1250

Story Behind the Shot: The sun was setting behind a frigatebird breeding colony in the Galápagos. The birds were very active and stunningly close, and the experience was all the more special because I was with great friends who were equally mesmerized by the scene. We got on the sand, lying on our bellies and handholding our cameras, composing silhouettes and starbursts on birds’ wingtips. I noticed this male, with his throat pouch lit up by the sun, and zoomed in to capture his portrait.

Bird Lore: Frigatebirds are among the most aerial of all birds, by necessity: Seabirds that don’t swim, they are almost incapable of taking off from the water’s surface, so they soar on long, angular wings over tropical seas, sometimes for weeks. Males in courtship displays inflate huge, balloon-like red throat pouches, vibrate their wings, and make rattling noises to attract females.

Professional Honorable Mention: Gene Putney

Greater Sage-Grouse by Gene Putney/Audubon Photography Awards/2020 Professional Honorable Mention

Species: Greater Sage-Grouse
Location: Jackson County, Colorado
Camera: Nikon D500 with AF-S VR Zoom-Nikkor 200-400mm f/4G IF-ED lens; 1/400 second at f/5.6; ISO 1600

Story Behind the Shot: In spring 2019 I made my first venture to watch the Greater Sage-Grouse perform its courtship ritual. Late one afternoon
I set up my camera at the edge of a rural road and used my car as a blind. This male was the first bird I saw, and he proved to be a great model. As he faced away from me, he provided a nice profile pose, and I thought it was a neat perspective to get his photo from behind.

Bird Lore: After their spectacular springtime courtship dances, Greater Sage-Grouse seem to disappear into the vast sagebrush steppes of the West. Studies have shown that they may move many miles with the seasons, often shifting to higher elevations in summer, lower elevations in winter, so they need large, continuous tracts of habitat to survive.

Amateur Winner: Gail Bisson

Bare-throated Tiger-Heron by Gail Bisson/Audubon Photography Awards/2020 Amateur Winner

Species: Bare-throated Tiger-Heron
Location: Tárcoles River, Costa Rica
Camera: Canon EOS-1D X with Canon EF 600mm f/4L IS III USM lens; 1/800 second at f/4.0; ISO 1600

Story Behind the Shot: After a torrential rainstorm, I went out on a late-afternoon boat trip on the Tárcoles River. It was still raining when we left the boat ramp, but once the sky finally cleared, we spotted this Bare-throated Tiger-Heron walking along the river. As the boat drifted by, the bird leaned over the bank to watch us. I raised my camera and quickly switched to a portrait orientation to capture the beautiful post-storm sky behind it.

Bird Lore: Stocky and chunky, suggesting bitterns in shape, the three species of tiger-herons lurk in mangrove swamps and along rivers in the American tropics. The Bare-throated Tiger-Heron is the northern­most of these species, found mainly from Mexico to Panama. It is often most active at dawn and dusk, but fortunate observers sometimes spot one hunting fish and frogs in bright daylight.

Amateur Honorable Mention: Bibek Ghosh

Anna’s Hummingbird by Bibek Ghosh/Audubon Photography Awards/2020 Amateur Honorable Mention

Species: Anna’s Hummingbird
Location: Ardenwood Historic Farm, California
Camera: Fujifilm X-T3 with Canon 600mm f/4L II lens and Fringer EF-FX Pro II Lens Mount Adapter; 1/4000 second at f/4.0; ISO 3200

Story Behind the Shot: Near my home in Fremont is a historic farm with a water fountain that’s a magnet for birds. I was by the fountain looking for warblers and other migrants when I saw this hummingbird, a year-round ­resident, exhibiting some very interesting behavior. It swooped in for a drink and then stuck around to play in the water, as if trying to catch a droplet. After several frames, I finally captured the bird succeeding at its game.

Bird Lore: Human activities aren’t always beneficial for birds, but Anna’s Hummingbird has taken full advantage of changes we’ve made to the landscape. Formerly a resident of Southern California and Baja, it has expanded its breeding range east, to Arizona, and north, to British Columbia. Planting of year-round gardens has allowed it to thrive across this vast new territory.

Youth Winner: Vayun Tiwari

Northern Jacana by Vayun Tiwari/Audubon Photography Awards/2020 Youth Winner

Species: Northern Jacana
Location: New River, Orange Walk District, Belize
Camera: Canon EOS 7D Mark II with Canon EF 100-400mm f/4.5-5.6L IS II USM lens; 1/320 second at f/5.0; ISO 1250

Story Behind the Shot: On a boat ride on the New River, I noticed a few Northern Jacanas on a patch of water lilies and asked the captain to stop. I hoped our vessel wouldn’t scare away the birds. I couldn’t believe my luck when one walked closer and closer to us. The boat was rocking, but when the bird stopped for a ­moment to peer into a water lily, I was able to set up and get this special shot.

Bird Lore: Distinctive marsh birds of the tropics, jacanas have very long toes, enabling them to walk across floating vegetation as they seek insects and seeds. The Northern Jacana is common from Mexico to Panama and the Caribbean, and sometimes wanders to Texas.

Youth Honorable Mention: Christopher Smith

Greater Roadrunner by Christopher Smith/Audubon Photography Awards/2020 Youth Honorable Mention

Species: Greater Roadrunner
Location: San Joaquin River Parkway, California
Camera: Panasonic Lumix FZ80 4K with 60X Zoom DC VARIO 20-1200mm f/2.8-5.9 lens; 1/500 second at f/5.6; ISO 200

Story Behind the Shot: While on a walk through a nature preserve in Fresno, I heard a roadrunner cooing to its mate. I followed the sound to find the bird clutching a gift for its partner: a really big fence lizard! The roadrunner perched on a post above me for nearly 10 minutes. The lighting was harsh and it was difficult to get the proper camera setting, but I managed to take this shot. I like how the photograph shows a small predator with its prey.

Bird Lore: Ritualized feeding is a part of courtship for many birds, from cardinals to gulls to hawks. For the Greater Roadrunner, it’s no challenge for the male to catch a lizard to give to the female. At times, though, he will present to her a large insect or a piece of nest material, or go through the motions of bestowing a gift with nothing at all. Apparently, it’s the thought that counts.

Plants for Birds Winner: Travis Bonovsky

American Goldfinch on a cup plant by Travis Bonovsky/Audubon Photography Awards/2020 Plants For Birds Winner

Species: American Goldfinch
Location: Minneapolis, Minnesota
Camera: Nikon D7100 with Tamron SP 150-600mm F/5-6.3 Di VC USD Model A011 lens; 1/160 second at f/10.0; ISO 320

Story Behind the Shot: Through frequent visits to North Mississippi Regional Park, an area restored with native plants, I became familiar with the cup plant and learned that its leaves can hold rainwater, as the name suggests. I read that birds and other wildlife like to drink from these plants, so I always keep an eye out for bird activity when I pass by them. Finally one late July day I was lucky enough to witness a female American Goldfinch plunge her head into a plant.

Bird Lore: Few birds are total vegetarians, but American Goldfinches come close. While other seed eaters feed their young on insects, goldfinches serve mashed-up seeds to their nestlings. The flowers on this cup plant will go to seed later, but in the meantime the plant acts as a watering hole for the birds: Its large, opposite leaves, joined at their bases, surround the stem and create the rain-trapping cup.

Plants for Birds Honorable Mention: Natalie Robertson

Tennessee Warbler on an eastern prickly gooseberry by Natalie Robertson/Audubon Photography Awards/2020 Plants For Birds Honorable Mention

Species: Tennessee Warbler
Location: Point Pelee National Park, Ontario, Canada
Camera: Canon 7D Mark II with Sigma 150-600mm f/5-6.3 DG OS HSM Contemporary lens; 1/1000 second at f 6.3; ISO 500

Story Behind the Shot: This warbler was difficult to photograph as it frantically hopped from branch to branch while foraging on a native gooseberry—one of the plants that flower in early spring in this part of Canada. Gooseberries are an important source of food for exhausted songbirds migrating north over the Great Lakes, and I was thrilled to get a clear image of this warbler drinking nectar from the tiny flowers.

Bird Lore: Warblers are mainly insect eaters, but some also have a taste for nectar. On their main wintering grounds in Central America, Tennessee Warblers often show splashes of bright color on their faces, the result of probing in red or orange flowers. Their attraction to nectar continues as they migrate north. In the open woods of southeastern Canada and northern states, the inconspicuous blooms of eastern prickly gooseberry appear in late spring, just in time for migrating warblers to seek them out.

Articles: Digital Photography Review (dpreview.com)

 
Comments Off on Slideshow: The prize-winning photographs of the 2020 Audubon Photography Awards

Posted in Uncategorized


15 Quick and Easy Poses for Family Photographs

04 Jul

The post 15 Quick and Easy Poses for Family Photographs appeared first on Digital Photography School. It was authored by Jackie Lamas.

dps 15 poses for family photographs

In this article, we’re going to share 15 quick and easy poses for family photographs to try at your next family photo session to keep it moving smoothly. You will also have great poses to choose from when it comes time to deliver the images to your clients.

These poses are useful for all family sizes and types so that you have a great variety to deliver once complete.

15 Quick and Easy Poses for Family Photographs
Canon EOS 5D, Canon EF 85mm F1.8 USM, 1/250th, f/2.8, ISO 250

1. Standing poses

When it comes to photographing families, a standing pose is a great choice. This way, you’ll be able to see all family members in the portrait.

15 Quick and Easy Poses for Family Photographs
Canon EOS 6D, Canon EF 50mm F1.8 USM II, 1/1250th, f/2.2, ISO 400

You can vary the standing pose with the family close together, connecting in one way or another with hands. Having the family get close can help to create more of a connection between the family members.

15 Quick and Easy Poses for Family Photographs
Canon EOS 6D, Canon EF 28-105mm F3.5-4.5 USM, 28mm, 1/160th, f/8, ISO 400

Another great standing pose is where you give each person a little bit of space and take a wide shot. This works for small and large families!

2. Group squeeze

A group squeeze is another of the great poses for family photographs given that it can bring about some genuine smiles from the family, which is the real focus of the pose.

15 Quick and Easy Poses for Family Photographs

Ask your clients to get close and hug each other while still facing the camera, then ask them to squeeze tight and watch the laughter happen! Take as many photos as possible of the moment as the family will love to see these natural expressions caught on camera!

3. Sitting pose

Sitting is another great pose to try. First, ask if there is anyone who has problems sitting or getting low. If there are family members with issues, try and use a chair or a posing stool.

15 Quick and Easy Poses for Family Photographs

Otherwise, have the family sit comfortably and get variations of the family looking at the camera, looking at each other, perhaps sitting a little further apart, or try to have the children behind the parents sitting a bit taller.

15 Quick and Easy Poses for Family Photographs

If you are going to use a chair or stool, it can bring about many different levels in a photograph that will make the poses more interesting. Try people behind the person sitting on the stool, move the stool/chair to the side, and have everyone fill in around.

15 Quick and Easy Poses for Family Photographs
Canon EOS 5D, Canon EF 50mm F1.8 USM II, 1/1000th, f/2, ISO 400

If you’re photographing a big family, you can even pose family members beneath the stool/chair to add to the levels.

4. Walking together

When looking for poses for family photographs, you can’t go past them walking together. It is a great pose for all families, especially if they feel a little nervous or stiff. Have them line up and walk towards you while they look at each other and laugh.

15 Quick and Easy Poses for Family Photographs

Encourage them to talk and joke amongst themselves to make the shot look a little more natural.

5. Smaller groups

This pose is for big family sessions where you’re photographing smaller groups that make up the big family. Get each smaller family alone and photograph them in two to three different poses each. Use the same poses for each family to keep the session consistent. When all the family photos are put together in a wall gallery, for example, the photos fit well together.

15 Quick and Easy Poses for Family Photographs

You don’t have to use the same pose for all, you can change it up depending on the feeling each smaller group gives you. However, when we say keep it consistent, we’re talking about the lighting, background, and focal length.

6. All mixed up

A fun way to photograph the family is to have them mix it up and then get together for a portrait. This can get the family scrambling and laughing; allowing you to get more natural smiles from the entire family.

15 Quick and Easy Poses for Family Photographs
Canon EOS 6D, Canon EF 50mm F1.8 USM II, 1/320th, f/5.6, ISO 250

7. Jumping

Jumping is another of the great poses for family photographs. Capturing a jumping shot is a great way to loosen up client nerves. More than actually getting the best shot, the jumping photo is to get everyone laughing and having fun.

15 Quick and Easy Poses for Family Photographs

You can photograph the jump with the family facing you or away from you. Make sure you get low so the jump looks more dynamic.

8. Just the kids

It’s good to also get a few photographs of the children without any adults in the photos. For siblings, get them playing or hugging.

For larger groups of children, like grandchildren, get them all in a group squeeze or on different levels like piggyback, sitting/standing, or all lined up so that everyone is seen in the portrait.

15 Quick and Easy Poses for Family Photographs

You can also break down the groups of children into girls, boys, older and younger, and maybe all playing together.

9. Exploring

Nothing says meltdown like telling children to hold still and pose. To avoid a potential meltdown, allowing kids to explore their surroundings helps to keep them moving and engaged in the session.

15 Quick and Easy Poses for Family Photographs

Get the parents involved in exploring the location. It could be smelling flowers, picking up sticks, and taking in the surroundings.

This works perfectly for kids who are more sensory and for younger children. It can also help older kids feel less nervous and less focused on during the session.

10. Playful

Having fun is one of the best parts of the client experience. Making sure that your clients, especially the children, have a good time is really important.

15 Quick and Easy Poses for Family Photographs

Photograph the children building sandcastles, enjoying the playground, throwing a ball, or playing a game with their parents to help keep everything light and fun. It’s not a pose exactly that you direct, but you can choose where to have them play.

Having playful photos of the family completes the story of the session and also shows a more lighthearted side to the family. It also makes the session less stiff and serious.

15 Quick and Easy Poses for Family Photographs
Canon EOS 6D, Canon EF 50mm F1.8 USM II, 1/120th, f/5.6, ISO 400

Even if you’re in a studio, you can blow bubbles, play songs, have a dance party, and play with sounds to make the session more playful. Toys are a wonderful idea for smaller children.

11. Just the adults

While getting photos of the whole family is important, getting one or two poses of the adults by themselves also works to add variety to the whole session.

If the adults are a couple, pose them together in the same location. Take one with them looking at the camera and one looking at each other. Then have them walk a little while as they talk to each other.

15 Quick and Easy Poses for Family Photographs

If they are able to sit, get a couple of photos of the couple sitting, either on steps, benches or on the grass/ground.

12. Holding hands

Holding hands is a good way to show a connection among the family members. Choose different poses, either sitting or standing, where the family is holding hands. You can vary it with big groups where some are holding hands and others are not.

15 Quick and Easy Poses for Family Photographs

This works for children to get them to stand in the same place together. It can also help to hold hands with younger children so that they don’t stray too far and are engaged in the session.

13. Being themselves

Allowing your clients to simply be themselves as a family can be just the thing to calm nerves and help the session flow much more naturally. Help them by choosing where you want them to sit or stand and then have them talk amongst themselves.

15 Quick and Easy Poses for Family Photographs

Perhaps tell a joke, dance or play. Allow the family to get natural expressions, which adds more variety to the final gallery.

14. Kisses

Families love each other and often show affection for each other. Kisses are natural and can show a real connection. You can choose to have the parents kiss while the kids make funny faces, have siblings kiss and hug, or have grandparents give kisses on the cheek.

15 Quick and Easy Poses for Family Photographs

This works best with young children like babies and toddlers to show affection and draw the baby’s attention to the parents. It also works with group squeezes with smaller family units.

15 Quick and Easy Poses for Family Photographs

15. From behind

Complete your session images with a final shot of the family from behind. This can be a silhouette or have the family overlooking the location where they are, like a beach, for example.

15 Quick and Easy Poses for Family Photographs

It can be a great photo to finish your client’s gallery with a nice contemplative photo of the family simply looking and being themselves.

In conclusion

15 Quick and Easy Poses for Family Photographs

It’s great to have 15 poses for family photographs that work for all families and all situations. Use these 15 poses, and you’ve already got a great start to your client’s gallery! Do you have any go-to poses that work for all family sessions? Share in the comments!

The post 15 Quick and Easy Poses for Family Photographs appeared first on Digital Photography School. It was authored by Jackie Lamas.


Digital Photography School

 
Comments Off on 15 Quick and Easy Poses for Family Photographs

Posted in Photography


Video: How to capture abstract macro photographs using little more than paper and lights

07 Apr

Considering most of the world is well into a few weeks of self-isolation, you’ve probably photographed nearly everything you can in your household, leaving little left to document. Now, it’s time to get really creative and to help make the most of a rough situation is Ben from Adaptalux, who’s shared a 15-minute video showing how you can capture abstract macro photographs using little more than a few lights, a few sheets of paper and a little bit of creative thinking.

Throughout the 15-minute video, Ben walks through a number of different setups and other variations you can experiment with to capture the macro abstract photographs, but the basic tools you’ll need on hand include a camera, a close-up capable lens, a tripod (not necessary, but will very much simplify the process), at least one light source, several sheets of white paper, paper clips (or bobby pins) and a flat surface that’s either transparent or translucent.

While Adaptalux lights are unsurprisingly mentioned in the video, any lights should do and if you have a few gels sitting around, you can get extra creative by mixing up colors.

If you prefer a non-visual explainer, Adaptalux has also published an accompanying blog post on its website that details the process. You can find more tutorials on Adaptalux’s YouTube channel, where it offers up a complete playlist dedicated to ‘Macro Photography Tutorials.’

Articles: Digital Photography Review (dpreview.com)

 
Comments Off on Video: How to capture abstract macro photographs using little more than paper and lights

Posted in Uncategorized


Slideshow: Sony World Photography Awards 2020 finalist and shortlisted photographs

13 Feb

Sony World Photography Awards 2020 finalist and shortlisted photographs

The World Photography Organisation has announced the finalists and shortlisted photographers for its 13th annual Professional competition. The Sony World Photography Awards, 2020, received 345,000 entries from 203 territories for its 4 competitions, with 135,000 entered across 10 categories for Professional – the highest number to date. A new category, Environment, was introduced this year to raise more awareness around this increasingly important topic.

Photographers submitted entries as a series that consisted of 5-10 photographs. Finalist and shortlisted projects represent a diverse array of techniques, subject matter, and presentation methods that shed light on critical and little-known issues around the world. Projects from the Professional competition, along with Sony Professional Grant 2019 recipients, will be on display at Somerset House from April 17th to May 7th. The overall Photographer of the Year 2020 will be selected from the pool of Professional finalists and announced at the Sony World Photography Awards 2020 ceremony in London on April 16th.

The 15 images presented in this slideshow were chosen from a group of 123. You are highly encouraged to check them all out. The 2021 competitions for Professional, Open, Youth and Student will start accepting entries on June 1st.

Professional competition, Sport, Shortlist, 2020: ‘19.01.19’ by Anton Dotsenko (Belarus)

Image Description: For an instance, the one approach that was chosen by Kirill Tereshin in form of injection into his arms consisting of substances only known to him, removal of which could lead to fatal outcome. Bodybuilding is the most practical form of Bigorexia nowadays.

Series Name: Bigorexia

Series Description: Bigorexia (arlso known as muscle dysmorphia) is a new phenomenon in the sports and fashion industries. This anxiety disorder causes individuals to believe that their bodies are small and lacking in muscle, despite the fact that many sufferers could be described as big and muscular. The condition can affect both men and women, but often goes undiagnosed.

Sufferers choose different approaches to build up muscles, from compulsively working out in the gym to injecting themselves with mystery substances. Some of these methods are dangerous, and occasionally deadly.

Professional competition, Still Life, Shortlist, 2020: ’04_Specimen07′ by Cecilia Manzanares Vargas (Mexico)

Image Description: “Log entry.

The specimen has reached its adult stage. Awaiting to be classified.”

In one of his aphorisms, Nietzsche states that “The real world is much smaller than the imaginary.” By that premise, which I return to constantly, and the curiosity I have had for the vegetal world, its textures and shapes since I was a child, is that ‘Specimen 07’ is born; a photographic series in which the apparently defined boundaries between vegetal and animal are diluted, get mixed, giving birth to beings from the imaginary that I have built in a kitchen, made by vegetable fragments that lose their original identity and acquire another one when joined.

In this series, the stages of development of one of these specimens is shown.

With this project, I question the way in which we see the ordinary and how we perceive reality.

Series Name: Specimen 07

Series Description: ‘Log entry. The specimen has reached its adult stage. Awaiting to be classified.’ In one of his aphorisms, Friedrich Nietzsche states: ‘The real world is much smaller than the imaginary’. I return to this premise constantly, as it expresses the curiosity I have for the textures and shapes of the vegetal world – something that has intrigued me since childhood. Specimen 07 is a photographic series in which the apparently defined boundaries between vegetal and animal are diluted and mixed together, giving birth to beings that originate in the imagination, and are created from vegetable fragments in my kitchen. These fragments lose their original identity, acquiring a new one when joined. This series shows the stages of development of one of these specimens.

Professional competition, Portraiture, Finalist, 2020: ‘Sephora’ by Denis Rouvre (France)

Image Description: My name is Sephora, I live in Kinshasa in the Democratic Republic of Congo. One morning, a prophet came to our house and accused me of being a witch. At Mama Olangi’s Church, I went through all kinds of exorcism rites, with the agreement of my aunt who made me fast every day from 6 am to 6 pm. She hit me, I had become the slave of the house. I was no longer even allowed to sit beside her children: she was afraid that I would “eat” them or that I would initiate them.

One day my aunt made me sit by her side. She suddenly became very loving and maternal and served me food. I had doubts and managed to spill a glass of water in the food. In his anger, cruel confessions escaped from his mouth: “If you had eaten, you would have ended up in the morgue today.”

I ran away and went to live on the street. I’ve been on the street since the age of 10. One day, boys older than me approached me. I refused to follow them, they took me by force and raped me, I became pregnant. Today I have two five year old twins.

Series Name: Unsung Heroes

Series Description: ‘Unsung Heroes’ is a project about violence against women around the world. In 2019, with support from international humanitarian association Médecins du Monde, I visited five continents and met more than 100 victims of violence. The women agreed to testify, their faces uncovered, in front of my camera. Some subjects had suffered violence linked to displacement following the war in Syria and in Colombia, others had survived domestic abuse, or the use of collective rape as a weapon in the Democratic Republic of Congo. Still more had faced moral violence, sexual exploitation, or discrimination against gender identity in Nepal, Cameroon and Uganda.

The women I met are shadows that enter the light. The bruises and creases on the surface of their skin tell a story. Added to this are the voices, the words, the intimate experiences of violence that were shared. I wanted to show the suffering experienced by these women, but also their strength and resilience – in short, their ability to get up and fight again.

Professional competition, Portraiture, Shortlist, 2020: ‘Hanoi fish man’ by Jon Enoch (United Kingdom)

Image Description: A man poses with his scooter in Hanoi with a delivery of pet fish, taken at the start of 2019. The riders have an amazing ability to transport all wonder of goods in amazing quantities. I spent a week chasing down amazing looking riders and their cargos and convincing them to pose for the camera.

Series Name: Bikes of Hanoi

Series Description: Delivery drivers on the streets of Hanoi, Vietnam, use their amazing balance skills to deliver goods to shops and vendors across the city. Some riders sell directly from their bikes. New legislation plans to ban motorbikes from the city by 2030 in a bid to improve air quality and reduce congestion.

In addition to this, the country’s rapid economic expansion is leading to an increased use of vans for commercial deliveries. When I read about this, it struck me that the age-old art of riding an overloaded bike might be coming to an end. As a result, I spent a week in Hanoi, chasing down riders and convincing them to pose for the camera. Their cargoes included footballs, water, car parts, eggs, pet fish and ice.

Professional competition, Natural World & Wildlife, Shortlist, 2020: ‘At the Pink planet’ by Yevhen Samuchenko (Ukraine)

Image Description: Lemurian salt lake, Ukraine

Series Name: At the Pink planet

Series Description: The first time you see the pink salt lakes of the Kherson region in Ukraine it feels as though you are looking at another planet. During the summer months, microscopic algae causes the water to turn pink and red. The view from above is literally out of this world, which is why I chose to use a drone to convey the atmosphere of this unusual place.

Professional competition, Natural World & Wildlife, Finalist, 2020: ‘robber fly 5x’ by Adalbert Mojrzisch (Germany)

Image Description: A robber fly viewed at 5x magnification

Series Name: Macro

Series Description: Most of my subjects are found dead on windowsills or in zoological gardens – in that sense you could say they are unremarkable. At first glance the insects appear grey and dirty, but when viewed at high magnifications (usually between 5x and 80x) interesting structures and beautiful colours begin to emerge.

Recording such fine detail requires specialist equipment, some of which I have developed and assembled myself. I use a homemade photo-tube, and microscope-lenses corrected to infinity, mounted on a homemade rail. The subject is lit via four flashes triggered by a homemade controller. Each image is a composite of between 200 and 600 individual pictures stacked and stitched together. The calculations are made using Zerene Stacker.

Professional competition, Landscape, Shortlist, 2020: ‘Urban Explorers – tunnel/05’ by Jeroen van Dam (Netherlands)

Image Description: Within this daunting urban landscape, there is always a human factor: a single person in his or her (un)natural habitat.

Series Name: Urban Explorers

Series Description: This project is about the secret life of urban explorers – people who venture into hidden manmade landscapes. The places these individuals explore are often in the middle of cities, and yet off-limits and unknown to the public. There are risks involved in accessing these locations, but urban explorers like to leave a place as they find it – their motto is ‘Take nothing but pictures, leave nothing but footprints.’

I follow these people all over the world documenting their adventures. This particular series features tunnel systems, which are often intriguing and architecturally pleasing due to their circular shapes and massive scale. Photographing someone in such an unnatural setting really appeals to me. These urban locations lend themselves to aggressive postproduction, moody tones and vivid colours – the overall effect is one that questions our relationship with the city.

Professional competition, Landscape, Finalist, 2020: ‘Japanese concentration camp site #05’ by Chang Kyun Kim (United States)

Image Description: The lower part of the image shows the massive grids where the prison barracks of Topaz War Relocation Center that incarcerated 10,000 Japanese people living in U.S. were constructed. I tried to show the long lasting artifact and the harsh landscape that surrounds the camp site. It was taken with my drone in Nov 2019 in Delta, Utah.

Series Name: New Home (Japanese concentration camp sites in U.S.)

Series Description: This series is about Japanese internment camps that were built in remote and harsh areas of the United States during the Second World War. These camps imprisoned 120,000 people of Japanese ancestry – more than 60% of them were U.S. citizens.

Working on the project reminded me of the racial antagonism we have witnessed in recent history, and led me to consider how radically our view can alter when war and terror affect our lives. History can always be repeated if not properly recalled or told. The pictures here were taken between 2018 and ‘19 in California, Arizona and Utah. For the aerial shots, I used a drone to capture the camp sites – these locations are so harsh and remote that no one would try building anything here.

Professional competition, Environment, Finalist, 2020: ‘Siberia Lettuce’ by Luca Locatelli (Italy)

Image Description: The great indoors provides optimal growing conditions for lettuce and other leafy greens at Siberia B.V. in Maasbree, Netherlands. Each acre in the greenhouse yields as much lettuce as 10 outdoor acres and cuts the need for chemicals by 97 percent.

Series Name: THE FUTURE OF FARMING

Series Description: By 2050 our planet will be home to as many as ten billion people. If increases in agricultural yield are not achieved, a billion or more people could face starvation. Today, however, technology proposes a solution. For centuries, greenhouses have been used to shield crops and maximise yield, but in recent years technological advances have led to a revolution in food production.

This series portrays some of the most promising high-tech agro farming systems in the world – systems that may allow us to reduce dependency on water by as much as 90% and, in some cases, almost completely eliminate the use of chemical pesticides on plants in greenhouses. It’s a possible solution to the hunger crisis that may emerge in future decades, but a dystopic view of the future of farming.

Professional competition, Environment, Finalist, 2020: ‘Wahala 7’ by Robin Hinsch (Germany)

Image Description: Natural Gas Flaring Site in Ughelli, Niger Delta, Nigeria.

Series Name: Wahala

Series Description: Covering 70,000 sq km (27,000 sq miles) of wetlands, the Niger Delta was formed primarily by sediment deposition. The region is home to more than thirty million people and 40 different ethnic groups, making up 7.5% of Nigeria’s total land mass. It used to boast an incredibly rich ecosystem, containing one of the highest concentrations of biodiversity on the planet, before the oil industry moved in. The Nigerian department of petroleum resources estimates that 1.89 million barrels were spilled in to the Niger Delta between 1976 and 1996. What’s more, a report from the United Nations suggests there have been a total of 6,817 spills between 1976 and 2001, amounting to some three million barrels of oil.

So far, the authorities and oil companies have done little to clean up and neutralise the Delta, and oil spills are still very common. Half of the spills are caused by pipeline and tanker accidents, while others are the result of sabotage (28%), oil production operations (21%), and inadequate production equipment (1%). Another issue in the Niger Delta is gas flaring, a byproduct of oil extraction. As the gas burns it destroys crops, pollutes water and has a negative impact on human health. Wahala was shot in Nigeria in 2019 and draws attention to untamed economic growth and its negative impact on ecology.

Professional competition, Documentary, Shortlist, 2020: ‘SN7’ by Nicholas Moir (Australia)

Image Description: a lone fire truck with a wall of flame and a fire tornado when the Green Wattle fire erupted out of the bush and hit properties in Sydney south west

Series Name: The burning

Series Description: A three-year drought, combined with staff cuts and political debate over the effectiveness of hazard-reduction-burn (a deliberately-lit fire intended to reduce the fuel available for a wildfire) has led to a series of catastrophic bushfires in Australia. These fires have killed 20 people, destroyed thousands of homes, and led to the deaths of hundreds of millions of native animals. These pictures show several of the largest and most intense fires in South East Australia.

Professional competition, Discovery, Shortlist, 2020: ‘sand elephants memories’ by Massimo Gurrieri (Italy)

Image Description: Memories, dust, religion and pollution, kumbh-mela 2019.

Series Name: Tutto Scorre, India’s flow

Series Description: India is a country that never sleeps; a land that reawakens the senses and encourages people to embark on a journey of self-discovery. Traveling the roads here is as much an inner as an outer journey. Daily life unfolds, interspersed with religious rituals. Embarking on a walk allows thoughts from the depths to rise to the surface. The cold, the night, the fog, an awakening – anyone who visits India can choose to see metaphor or reality. I choose both, following the flow of events as I transform my experiences into images.

Professional competition, Creative, Shortlist, 2020: ‘Rumi and Scarlet, 2019’ by Joseph Ford (United Kingdom)

Image Description: I’ve photographed a range of ages for this project, and the idea of recreating a messy teenager’s bedroom appealed to me.

I prepared by posing a model in a jumper covered in gaffer tape. I added accessories around him, drawing matching lines on the taped jumper. I then photographed the annotated top and marked it up with colour indications. This gave me a model to brief the knitter, allowing precise placement of lines to match the accessories.

Series Name: Invisible Jumpers

Series Description: I’m a big fan of optical illusions. For this series I matched people to their surroundings through custom-made knitwear. Knitting is the ultimate analogue medium, complete with imperfections and replete with detail. At a time when it’s often assumed that any photographs out of the ordinary are the result of Photoshop or CGI, it’s satisfying to work with a slow, hand-crafted medium. The results aren’t perfect – there are often bits that don’t match up. Each of these pictures took weeks to research and plan. I worked with an amazing knitter, Nina Dodd, who hand-made all of the knitwear.

Each picture began with an idea – could I photograph someone blending into cherry blossom, or disappearing into a cliff edge, for example. With a concept in mind I would then set out in search of the perfect location, before coming up with a brief detailing how the design should match the background. The locations needed to be eye-catching, but simple enough to be translated into knitwear. They also needed to be places that weren’t going to change too fast, as the knitting takes a few weeks. It would be terrible to prepare a sweater and then not be able to get the shot because the location has altered beyond recognition.

Professional competition, Creative, Shortlist, 2020: ‘XT1876’ by Reuben Wu (United States)

Image Description: Salar de Uyuni

Series Name: FIELD OF INFINITY

Series Description: Field of Infinity is a continuation of my personal project, Lux Noctis, a series of photographs depicting landscapes unbound by time and space. These pictures are influenced by ideas of planetary exploration, 19th century sublime romantic painting and science fiction. Every day we are overwhelmed by beautiful images of the familiar. In my work, I imagine these scenes transformed into undiscovered landscapes that renew our perceptions of the world. I recently had the opportunity to continue my series in Bolivia during a week-long road trip. I photographed in remote and extreme locations using a Phase One XT camera and a drone modified with a powerful LED light to illuminate the landscapes at night.

Professional competition, Architecture, Finalist, 2020: ‘IX – Of the Formalisms I series’ by José De Rocco (Argentina)

Image Description: Walls to the step…

Series Name: Formalisms I

Series Description: As a graphic designer, I’m drawn to bold colours and shapes. Formalisms I is the result of three years walking the streets and searching for beauty in places that most people pass by. I tend to take a record shot when I spot something interesting, and then return repeatedly until I get what I need. Form is the main theme for this series, but colour is really important too. Most of the pictures were taken in Argentina, except one that was made in Uruguay.

Articles: Digital Photography Review (dpreview.com)

 
Comments Off on Slideshow: Sony World Photography Awards 2020 finalist and shortlisted photographs

Posted in Uncategorized