RSS
 

Posts Tagged ‘Photographers’

Tamron 150-500mm f/5-6.7 Review: A Wildlife Photographer’s Dream Lens?

06 Sep

The post Tamron 150-500mm f/5-6.7 Review: A Wildlife Photographer’s Dream Lens? appeared first on Digital Photography School. It was authored by Suzi Pratt.

Tamron 150-500mm f/5-6.7 review: a wildlife photographer's dream lens

Tamron just released the 150-500mm f/5-6.7 Di III VC VXD lens for Sony E-mount cameras – but while it seems impressive, is it the right lens for you?

In a hands-on Tamron 150-500mm review, we’ll go over the specs, first impressions, and sample photos taken with this zoom lens. It’s Tamron’s first Sony full-frame E-mount lens with Vibration Compensation (VC), and thanks to the built-in image stabilization and the impressive zoom range, it sounds like a wildlife photographer’s dream. But how does it actually perform?

Let’s find out.

Tamron 150-500mm: overview

The Tamron 150-500mm telephoto zoom lens is designed for full-frame Sony E-mount cameras, but it also works with APS-C cameras (for an effective 225-750mm focal length). The lens features a variable aperture of f/5-6.7 to f/22-32 and a front filter size of 82mm.

Pros

Solid design and build

Considering its extreme zoom range, the Tamron 150-500mm is relatively compact. It weighs in at 60.8 ounces (1725 grams) and is 8.3 inches (21 centimeters) long. Like many other telephoto lenses, it extends when zooming. There are several physical switches on the lens, including a focus range limiter, AF/MF switch, VC switch, and VC mode switch. The lens comes with a removable hood and a tripod mount.

Built-in tripod mount

The tripod collar was one of my favorite features, thanks to its Arca-Swiss compatible tripod mount. You can quickly and easily mount the lens to a tripod without fiddling around with the usual tripod plate. Also incorporated into the tripod collar are strap attachment loops. And for those who want to save on some weight, the tripod collar is removable.

Tamron 150-500mm tripod collar

Moisture-resistant

The Tamron 150-500mm offers moisture-resistant construction for shooting in inclement weather conditions. There are leak-resistant seals on the mount and throughout the edges of the lens. And the front lens element includes a fluorine coating to deter dirt, dust, and fingerprints.

Vibration compensation

Historically, the biggest drawback to buying a Tamron lens has been the lack of image stabilization (i.e., Vibration Compensation). Thus, Tamron’s decision to add VC to the 150-500mm is a big deal and goes a long way toward reducing blur caused by camera shake. There are three VC modes on the lens, including Standard (Mode 1), Panning (Mode 2), and Framing Priority (Mode 3). In fact, the inclusion of VC makes this lens more viable not only for still photography but also for video.

Good macro capabilities

Despite being a super-telephoto lens, the Tamron 150-500mm can shoot at impressively high magnifications. It features a minimum object distance (MOD) of 23.6 inches (59.9 centimeters) at the 150mm end and 70.9 inches (180 centimeters) at 500mm. The lens also offers a magnification ratio of 1:3.1 at 150mm. In other words, you can maintain a reasonable shooting distance when capturing macro and close-up images with this lens.

close-up of a sand dollar
194mm | f/6.3 | 1/640s | ISO 400

Compatible with Sony in-camera features

Though it’s a third-party lens, the Tamron 150-500mm plays well with Sony cameras, especially when it comes to autofocus. Not only is the focusing snappy and accurate, but eye autofocus is available on relevant Sony cameras. All in all, the Tamron offers a very similar shooting experience to native Sony lenses.

Good price

The Tamron 150-500mm costs $ 1399 USD, and while this might seem steep, it’s actually a fair price considering the competition (more on that below).

Tamron 150-500mm review moon
500mm | f/6.7 | 1/250s | ISO 320

Cons

Variable aperture

The Tamron 150-500mm uses a variable aperture, which means that the maximum aperture changes based on the focal length. This can be a dealbreaker for those seeking a constant aperture throughout the zoom range – namely, those shooting in low light. However, a constant aperture telephoto lens would cost significantly more and be much larger in size.

Zoom lock

The Tamron 150-500mm has a flex zoom lock that holds the zoom at any focal length by simply pushing the zoom ring forward. Some users might appreciate the convenience, but I found it too easy to activate the flex zoom lock by mistake. My preference is to keep the zoom switch instead, which does the same thing, but is much harder to trigger on accident.

Cannot be used with teleconverters

Many who shoot with telephoto lenses like to add teleconverters for additional focal length reach. Unfortunately, teleconverters are not currently available for use with the Tamron 150-500mm.

Tamron 150-500mm review deer in a field
478mm | f/6.3 | 1/500s | ISO 640

Image quality

Overall, the photos produced with this lens are crisp and sharp (with peak sharpness at f/8). Shooting at such a slow aperture does require ample lighting, and this can potentially affect image quality if you need to raise the ISO in dark shooting conditions.

Because the lens is long and heavy, it is best to use it with a monopod or tripod for maximum sharpness. Vibration Compensation does help when shooting handheld, but the lens is still hard to stabilize without additional assistance.

Great Blue Heron on a post
500mm | f/6.7 | 1/250s | ISO 100

Tamron 150-500mm alternatives

The closest competitors to this lens are the Sony 100-400mm f/4.5-5.6 and the Sigma 100-400mm f/5-6.3. Of these lenses, the Sony is the most expensive (at $ 2,398 USD), and the Sigma is the cheapest (at $ 949 USD).

Both the Sony and the Sigma offer a slightly wider focal length compared to the Tamron but lose out by 100mm on the long end. The Sony 100-400mm’s higher price tag is likely due to lens build, performance, and overall optics. The Sony is also compatible with teleconverters.

Who should purchase the Tamron 150-500mm f/5-6.7?

The Tamron 150-500mm lens is ideal for wildlife, nature, and sports photographers. You’ll need ample light and a monopod or tripod to get the best performance and image quality – but its flexible focal length range and reasonable price tag make this a no-brainer zoom lens for Sony E-mount shooters.

The post Tamron 150-500mm f/5-6.7 Review: A Wildlife Photographer’s Dream Lens? appeared first on Digital Photography School. It was authored by Suzi Pratt.


Digital Photography School

 
Comments Off on Tamron 150-500mm f/5-6.7 Review: A Wildlife Photographer’s Dream Lens?

Posted in Photography


Photographer’s Dress Code: What to Wear to a Photoshoot

22 Aug

The post Photographer’s Dress Code: What to Wear to a Photoshoot appeared first on Digital Photography School. It was authored by Suzi Pratt.

what to wear to a photoshoot

As a budding photographer, one of the biggest questions that will eventually come to mind is, “What should I wear to a photoshoot? Is there a photographer’s dress code?”

In truth, the answer varies widely – depending on the type of photoshoot you’re conducting, the specific client you’re working with, your overall style and brand as a photographer, and the culture of the region where you’re shooting.

A portrait photographer, for example, may have more flexibility in how they dress compared to a corporate event photographer. Similarly, a photographer shooting on the West Coast of America will likely be able to dress more casually than an East Coast photographer.

That said, here are some general photographer dress code guidelines you can use to get started.

photographer with camera

1. Invest in a solid, comfortable pair of shoes

Regardless of what kind of photoshoot you’ll be conducting, start with shoes. Consider that you’ll likely be standing for hours on end, so comfort and ergonomics are key.

Also, think about the terrain you might encounter during your shoot, and think about the seasonal weather. Will there be grassy fields, sandy shores, or other outdoor elements you might walk into? If so, shoes that can take a light beating and still look good will be of utmost importance.

As a female photographer who shoots mainly for corporate clients, I generally opt for black leather flats during the warm season, black leather boots for colder weather, and dressy black leather sneakers for extra long shoots with outdoor elements. In any case, try to stay away from sandals, high heels, and flip flops.

shoes on the ground

2. Cover up

As a photographer in constant search of creative angles, consider your possible physical maneuvers, such as bending, stooping, and squatting, then dress accordingly.

Make sure to wear an outfit that will allow you to be physically flexible without giving your clients an eyeful, or worse yet, causing a wardrobe malfunction.

Ladies, this means avoiding low-cut tops, ultra-short skirts and dresses, and skimpy outfits. At the very least, bring a blazer or sweater to cover up. Gentlemen, don’t forget a belt and a longer shirt that can be tucked in.

3. Dress in all black

This is a contestable point, as it can also be argued that dressing according to your brand is a better strategy. However, it’s a general rule of thumb that wearing all black is best for a photoshoot.

Why? Black ensures you won’t stand out and take attention away from the main subject. Not to mention that dressing in all black makes you look more official – like a staff member – which can be helpful in navigating around a venue.

Personally, I opt for the all-black rule for my photoshoots, simply because a pre-assembled uniform gives me one less thing to worry about. My uniform consists of mixing and matching from the following selection: one pair of black skinny jeans, one pair of black slacks, a black leather belt, several button-down black blouses, several black polo shirts, and a black blazer. Whenever possible, I try to buy my black clothing in lightweight, moisture-resistant fabrics rather than cotton to avoid sweat absorption.

what to wear to a photoshoot photographer dressed in black

4. Add a personal touch

Some photographers might contest the above point of dressing in all black with the argument that it’s important to dress according to your brand. This is something I definitely believe in as well, but you can infuse brand elements into your style of dress while wearing all black.

For example, I always make sure to wear a few pieces of statement jewelry to accent my outfit and serve as a conversation starter. I have a couple pairs of unique earrings, necklaces, and watches that almost always attract comments or questions, but they are small enough that they don’t stand out too much.

Another idea is to custom-order black clothing that has your logo on it, such as a polo shirt with a subtle branding element. A photography colleague of mine has done this with huge success; it further reinforces his brand while also making him look and appear more official at photoshoots.

photographer sitting by water

5. When in doubt, ask

If you’re truly stumped on what to wear to a photoshoot, ask your client if they have any preferences. This is likely less important if you’re doing an intimate portrait session, but for event photographers in particular, it never hurts to ask the client.

I once had a corporate photography client who forgot to send over their two-page document detailing their dress code for photographers. Had I not asked, I would never have received proper instruction.

At the very least, it’s important to find out if the dress code for your shoot is formal, semi-formal, or casual, and what exactly those terms mean to the client.

photographer's dress code shooter in coat

What to wear to a photoshoot: conclusion

To some photographers, what you wear to a photoshoot may not seem like a big deal. But I firmly believe that how you dress is a reflection of your brand, so considering every element of your outfit is crucial.

Now over to you:

What do you wear when you’re conducting photoshoots? Do you have any photography dress code tips? Let me know in the comments below!

The post Photographer’s Dress Code: What to Wear to a Photoshoot appeared first on Digital Photography School. It was authored by Suzi Pratt.


Digital Photography School

 
Comments Off on Photographer’s Dress Code: What to Wear to a Photoshoot

Posted in Photography


PortraitPro 21 Review: A Comprehensive Editor for Portrait Photographers

14 Jan

The post PortraitPro 21 Review: A Comprehensive Editor for Portrait Photographers appeared first on Digital Photography School. It was authored by Carl Spring.

PortraitPro 21 review a comprehensive editor for portrait photographers

It was only a few months ago that I reviewed Anthropics PortraitPro 19, where the ease of use, the speed, and the AI technology really impressed me. Here we are only a few months later, and Anthropics has introduced PortraitPro 21. I was lucky enough to get my hands on a copy to see what has improved, what is new, and whether the updated software is worth the investment.

Also, spoiler alert: We have a special offer at the end of this PortraitPro 21 review, so make sure you take a look!

PortraitPro 21 review

What’s new in PortraitPro 21

As always with Anthropics, there’s a long list of new features that really make PortraitPro 21 stand out. These include:

  • Sky replacement
  • Lighting brushes
  • Clone tool
  • Denoising/Sharpening
  • History tool
  • Color styles
  • Color copying
  • Hair highlights

There are actually even more new features, including a master slider for skin lighting and coloring, layer presets, optimized color-space handling, the ability to move catchlights, SVG backgrounds, new layers, backgrounds and overlays, free stock photos, and new tutorials from the creators.

If I offered an in-depth discussion of every new feature, you would probably be reading this for days. Instead, why not go and download your free trial of the software on the website? That way, you can check out the program for yourself. 

In the meantime, let’s look at some of the new PortraitPro 21 features in greater detail.

PortraitPro 21 review before and after

Sky replacement

This feature is one that portrait photographers will love. There is nothing worse than capturing amazing shots against a blank sky, knowing you will need to edit them later. Swapping the sky on multiple images can be laborious and time-consuming. But in PortraitPro 21, replacing skies can be done with the click of a button.

Using technology from Anthropics LandscapePro software, this feature does not simply mask and drop in the new background. It also changes the color and tone of the image to match the new sky, giving a more natural result.

PortraitPro has quite a few skies for you to choose from, but if you are looking for something specific, you can always add in your own. 

Sky replacement examples

Lighting brushes

PortraitPro 21 includes a series of lighting brushes. These can be used to create specific effects such as light streams or realistic relighting elements. 

You are able to select exact colors and alter the strength of the brushes, which allows you to quickly get the perfect effect. These brushes are able to separate the background and foreground for you, so you can really get creative. 

Lighting brush effects PortraitPro 21

Clone tool

The addition of the Clone tool means you can remove troublesome areas from your photos. And the presence of the Clone tool means there is no reason to use other software to perfect your edits.

As with all tools in PortraitPro 21, the Clone tool is easy to use and allows completely adjustable precision so you can get the exact result you want.

Ultimately, it’s a great addition to the feature set of PortraitPro. And while it is a tool that most will recognize and is not as groundbreaking as others, it’s one that will be hugely appreciated by all users.

Using the clone tool in PortraitPro21

Denoise/Sharpening

Denoise and sharpening tools are another new addition to this version of PortraitPro.

Yes, these tools are available in other editing programs. But as you are probably beginning to see, the addition of these features to PortraitPro 21 means that you have no real need to switch between programs to get your final result – making PortraitPro 21 a more all-in-one editing solution for portrait photographers.

PortraitPro 21 review

History tool

The History tool continues the trend of the Clone tool. It’s a feature that users of other editing software will be well aware of, and it’s highly valuable.

Specifically, it allows you to move back to a specific point in your edit so you can rework an image without needing to start over. 

The history brush in PortraitPro 21

Color styles

Filters will be familiar to everyone who reads this, because we frequently have these in our social media apps.

PortraitPro now includes a series of color styles that can dramatically change your image in just a few clicks.

Color styles examples in PortraitPro 21

Hair highlights

PortraitPro 21 features a variety of new tools for working with hair.

These include tools that add highlights, as well as change hair color and vibrance. And you can fine-tune these to achieve “salon-level” results.

Hair highlights in PortraitPro 21

PortraitPro 21 review: Performance

As always, I spent some time getting to grips with PortraitPro 21. Having used previous versions, I was familiar with the interface. But as with PortraitPro 19, I was amazed by Anthropics’s excellent tutorials. 

In fact, there are many more tutorials in PortraitPro 21, which give new users confidence right away. Even as a previous user of PortraitPro, it was good to go through a series of tutorials on the new features. These allowed me to immediately understand what is possible in PortraitPro 21. 

I started with the hair tutorial, which gave convincing results quickly and easily. From there, I fine-tuned to my liking. 

Hair features
I loved how the tutorials helped me get started, but then I fine-tuned to my own taste.

After that, I experimented with the new sky replacement feature. Due to my lack of outdoor photography over the last 12 months, I used the tutorial image as a starting point for this feature, and the results were impressive.

Changing the sky on the test image highlighted the importance of choosing your replacement sky wisely. Certain skies won’t work on certain images.

However, Anthropics has included so many different skies for you to choose from that, for every situation, there will be a replacement sky that matches your scene. Again, the ability to fine-tune really allows you to dial in the detail and increase the realism. 

Sky replacement in PortraitPro 21
There are so many different sky options built into the software.

Using TIFF files

After working on the many image tutorials, I wanted to use some of my own images. I always feel this is the real test.

And I was hugely impressed.

My images worked exactly the same as those in the tutorials. Everything was fast, and the software’s AI technology picked features out flawlessly. The highest compliment I can pay the software is to say that I didn’t notice any slowdown between the images I used myself and those in the tutorials. 

Face selection AI demo in PortraitPro 21
Even with a shallow depth of field, PortraitPro 21 picked out the face almost perfectly.

To push the software, I used 16-bit TIFF files in the Adobe RGB color space. The images opened fast, and PortraitPro 21 picked out the features flawlessly. Applying presets took a little longer than the test images, but considering I was working on 16-bit TIFF files, I was really impressed. 

I loved the fact that little tips popped up in the bottom corner of the screen, reminding me of how to tweak things. I used an image with an incredibly shallow depth of field to test the feature-finding abilities, and again, I was very impressed.

For the first image I tested, I used the Clone tool to remove a couple of small blemishes. Even though I was editing TIFF files, the software worked perfectly.

With the blemishes cloned out, I simply added a preset and tweaked it to taste. I had a finished image in less than 5 minutes. This was much quicker than when I edited the image manually. One quick and simple export later, I had a beautiful image ready to go.

Before and after retouch
This full retouch only took 5 minutes.

The only thing I will say is that some of the presets are a little more extreme than my personal style. However, the great thing about PortraitPro is that you can create your own presets simply and easily.

In fact, I tend to do this on a shoot-by-shoot basis, starting with a preset and tweaking it to suit the shoot I am working on. I can then apply these presets quickly and easily to the whole set of images from the shoot before sending proofs to a client.

Working with presets is taken to a whole new level with the Studio Max version of PortraitPro 21, where you can batch process several images in seconds.

Batch processing

Setting up a batch of images in PortraitPro
Import images, select your style, and click Go. Batch processing is an incredibly powerful feature in PortraitPro 21.

For a working photographer, the batch processing in Studio Max is a huge timesaver when you need a consistent retouch across a range of images. PortraitPro’s face recognition means that you can trust the software to pick up the face and apply the retouch for you automatically.

To test this feature, I exported full-sized JPEGs from a styled shoot. After creating a look with a single image, I used the batch feature of Studio Max to apply this style to a group of ten images. In less than one minute, all the images had saved and were ready to go. I simply clicked two buttons.

This feature alone changes how I deliver portrait and headshot proofs to clients. For so many working photographers, batch processing is going to be a game-changer. Imagine being able to deliver headshot proofs to clients with such little effort.

batch of images from a wedding photoshoot
A variety of poses didn’t fool the software. Everything was ready to deliver in under a minute.

Who is it for?

In my last review of PortraitPro, I said, “PortraitPro is an amazing tool for those who are new to retouching portraits. It is simple yet incredibly powerful, and gives you pleasing results within seconds. However, it offers much more and encourages you to go back to the software and personalize your retouching.“

So much has changed since then. In fact, PortraitPro 21 has more features that make it even easier for me to recommend. It is possibly the most feature-rich portrait editing software out there. 

If you’ve loved previous versions of PortraitPro, then you will love this even more – especially with the special offer for dPS readers (see below!).

Note that there are three PortraitPro 21 versions: Standard, Studio, and Studio Max.

PortraitPro 21 Standard is great for many people. It is a standalone software that allows you to work with JPEG or 24-bit TIFF files. For many photographers, this will be perfect. 

By upgrading to PortraitPro Studio, you get the Photoshop/Lightroom plugin that so many of you will love, as well as the ability to work with RAW, DNG, and 48-bit TIFF files. It also has color-space conversion. 

Finally, for those who shoot professionally or need the ability to retouch a batch of images in a few clicks, the Studio Max version of PortraitPro 21 will save you so much time (and professionals all know time is money!) that I cannot help but recommend it. 

Sounds amazing! How do I get it?

You can download your free trial of PortraitPro 21 right here.

But if you’re thinking about purchasing the software, note that there is a 50% off launch offer, plus dPS readers get an extra 15% off with the coupon ZC1990. So click here to grab your discounted copy of PortraitPro 21!

Anthropics is a paid partner of Digital Photography School.


The post PortraitPro 21 Review: A Comprehensive Editor for Portrait Photographers appeared first on Digital Photography School. It was authored by Carl Spring.


Digital Photography School

 
Comments Off on PortraitPro 21 Review: A Comprehensive Editor for Portrait Photographers

Posted in Photography


List of Helpful Software For Photographers of Any Level

09 Jan

There is no doubting the fact that this year is going to be very competitive for photographers. This means that if you are not well-equipped with the proper software, there is a chance that your business may suffer. Many photographers don’t know how to remain competitive. They have yet to understand the fact that rendering top services requires some of Continue Reading
Photodoto

 
Comments Off on List of Helpful Software For Photographers of Any Level

Posted in Photography


XP-Pen Artist 24 Pro Review: A Gorgeous Graphics Tablet for Photographers

08 Jan

The post XP-Pen Artist 24 Pro Review: A Gorgeous Graphics Tablet for Photographers appeared first on Digital Photography School. It was authored by Sime.

XP-Pen Artist 24 Pro graphics tablet review

I’ve been using Photoshop for many years – primarily as a photographer that works in Lightroom and sometimes exports images into Photoshop for editing. But using Photoshop with a mouse is something that takes a lot of practice; it’s not really a natural way to post-process, which is why many serious editors turn to graphics tablets.

Now, when the team from XP-Pen reached out and offered us a review unit of the XP-Pen Artist 24 Pro, a 2K, 23.8-inch QHD graphics tablet, I’ll admit I was a little dubious. I’d only ever owned one graphics tablet – a tiny little Wacom that didn’t get a lot of use. I was certainly keen to try a new tablet, but I’ll admit that I was a little worried about not liking it.

Fortunately, as you’ll soon see, I needn’t have worried. As I share in this review, the XP-Pen Artist 24 Pro is a powerful graphics tablet, one that both looks and works great.

So to discover all the nitty-gritty details, including both the benefits and the drawbacks of working with the Artist 24 Pro, read on.

First impressions

The package that arrived was much larger than I expected. I knew the Artist 24 Pro featured a 24-inch display, but I had clearly not managed to comprehend just how large the tablet would be.

I have a desk with two 27-inch displays, which meant that the XP-Pen Artist 24 Pro would need an extra bit of real estate. So after I MacGuyvered something together with a Kupo light stand and my Tether Tools Aero, it was time to get the new tablet set up!

XP-Pen Artist 24 Pro graphics tablet review
The XP-Pen Artist 24 Pro standing on the makeshift work table.

I tried using the tablet in two different configurations:

First, on a stand with my Macbook sitting behind it. This is a great setup for shooting tethered, as you can perform quick edits there and then with the tablet while using it as your main display.

The second configuration, as shown in the photograph above, was with the tablet adjusted to the height of my standing desk, ready to go!

Design

The XP-Pen Artist 24 Pro offers one HDMI and two USB host ports (so you can charge things like phones, etc.), as well as the power input on the back of the unit.

There’s also a USB-C port, which allows me to connect my iMac to the display. This was very quick and convenient; it worked straight out of the box with very little configuration required.

XP-Pen Artist 24 Pro graphics tablet

The rear of the tablet sports a flappy-paddle stand that, when depressed, moves a foot into the desired position. This lets you adjust the unit to stand up or lay almost flat, as though you’re writing in a nice big notepad.

XP-Pen Artist 24 Pro graphics tablet tilting

I love how I can stand up the tablet to use as a regular second monitor for my 13-inch Macbook Pro, before laying it flat and working on photographs.

XP-Pen Artist 24 pro setup
The XP-Pen Artist 24 Pro lying almost flat.

Ease of use

The XP-Pen Artist 24 Pro comes with a piece of software (a download) that adjusts the settings of the tablet, pen controls and functions, monitor configuration, express key setup (more on that in a bit), calibration, and other general features. I’ve found it very easy to use with no what-the-heck-am-I-doing moments to speak of!

XP-Pen Artist 24 Pro settings

However, when you first set up your tablet and open Photoshop, make sure you have the correct monitor mapped. Otherwise, you’ll find yourself deeply frustrated; I speak from personal experience.

XP-Pen Artist 24 pro settings tab

Performance

There are many technical reviews of the XP-Pen Artist 24 Pro on the web, and most of them will tell you, in superbly technical terms, that the tablet is a very capable tool.

In fact, my conclusion is similar – the large screen, the 2560×1440 resolution, the 90% AdobeRGB color gamut, and the tilting stand makes for a very usable tablet.

When you get the XP-Pen Artist 24 Pro custom buttons all configured using the two easy-to-control red dial wheels and the 20 customizable shortcut keys, it’s very easy to open and control many different graphics packages, as well as a lot of other options (depending on which software you like to use on your computer).

In truth, I hadn’t previously used a tablet much. I thought that I’d always just edit with my mouse. I guess that comes from having a less-than-pleasant time with the first tablet I tried (and I hadn’t used another tablet until the Artist 24 Pro).

I’ve now had the XP-Pen Artist 24 Pro for quite a while. And when working in Photoshop, while I would have once happily used my mouse, I now whip out the tablet and do my editing on the screen – a testament to the great performance and ease of use of the tablet.

Granted, the 24-inch tablet isn’t the smallest device, and you do need to have space for it. But the tablet only requires one USB-C (or HDMI) and one power cable, so you can have your laptop tucked behind the tablet, using the tablet as your main display with a wireless keyboard and mouse to give your laptop that “big screen” feeling.

I’ve used the tablet as the main display for my 13-inch MacBook Pro for almost everything from movies to editing since I received it.

The XP-Pen Artist 24 Pro review: Conclusion

The XP-Pen Artist 24 Pro offers solid build quality combined with a simple-to-navigate interface, great on-screen performance, visual clarity, and ergonomics.

There was only one thing I thought could be improved, and that was the rear foot of the big screen. It has a couple of rubber stoppers that hold the device nicely in place, but it’s easy to scratch your desk if you’re not careful.

Overall, I like almost everything about the Artist 24 Pro; it’s packed full of features that make it one great tablet!

You can purchase the XP-Pen Artist 24 Pro right here.

The post XP-Pen Artist 24 Pro Review: A Gorgeous Graphics Tablet for Photographers appeared first on Digital Photography School. It was authored by Sime.


Digital Photography School

 
Comments Off on XP-Pen Artist 24 Pro Review: A Gorgeous Graphics Tablet for Photographers

Posted in Photography


14 Guidelines for Photographers to Live By

17 Dec

The post 14 Guidelines for Photographers to Live By appeared first on Digital Photography School. It was authored by John McIntire.

guidelines for photographers to live by

It doesn’t matter if you’re brand new to photography or a seasoned pro with decades of experience; at some point or another, you’re going to develop some habits and behaviors that are counterproductive.

Without getting these habits in check, they can have a negative effect on your photography, whether on your portfolio in general, your love for the medium, or your workflow. Sometimes these behaviors can even be destructive to other people in ways you didn’t realize.

In this article, I’ll share 14 guidelines for photographers – designed to deal with some of these counterproductive behaviors and habits that I’ve come across.

Now, none of these are rules, and I am not presenting them as such. If you feel that a guideline doesn’t apply to you, I am not saying or implying that you are wrong for feeling that way. These are merely my thoughts based on my experiences.

So without further ado, here are 14 guidelines for photographers to live by.

1. Shoot often, show few

guidelines for photographers Lightroom catalog
Whether you shoot 10 photos at a time or 100, try to whittle your portfolio down to the very best and only show those.

One of the best things any photographer can do for their portfolio is reduce the number of images from any given session that they share with the public. By showing only the very best of your work, the quality of your portfolio and its impression on your viewers will increase.

Let’s say that you have a portrait session, and you normally share 10-15 photos from a set. All of the images might be good, but chances are that one or two of those images are much better than the rest. By sharing every photo, you are only diluting the quality of the best ones. Instead, only share the very best shots – this is what will make them shine.

Of course, it also means that you will have fewer images to share. How do you counteract this deficit in content?

Shoot more!

Now, this doesn’t mean you should shoot more images of the same subject. It means you should shoot more in general. For instance, if you’re a portrait shooter, then you should conduct more portrait sessions with more people.

This will give your portfolio more variety, as well as ensuring that you have plenty of images to share.

2. Shoot outside your genre

guidelines for photographers architectural black and white
As a portrait photographer, long exposures of buildings in the middle of the day are way outside my normal range. Shooting outside your niche every once in a while can help to give you realizations that you wouldn’t have come to otherwise.

Canon 5D Mark III | Canon EF 16-35mm f/4L IS USM | 35mm | 326s | f/11 | ISO 100

Even if you don’t specialize in a single particular niche with your photography, you will probably wind up shooting the same genre (or a couple of genres) over and over again.

While you may be perfectly happy photographing the same subjects repeatedly, you also might start developing habits that guide how you photograph things. When you get set in your ways like this, it can become increasingly difficult to shake those systems and try things in new ways.

One way to counteract this is to shoot in a genre outside of what you normally photograph. Photographing subjects that require a completely different skill set than what you are used to will force you to actively think about what you are doing instead of going through the motions. This has helped me to come up with a solution to an unrelated problem more than once, as it helps you think about things from a completely different angle.

Shooting outside of your genre can also act as something of a palette cleanser. As a portrait photographer, when I do a long stretch of shooting nothing but portraits, it can feel a bit monotonous and stale. Getting out and shooting a landscape feels like a breath of fresh air and helps get me excited about portrait photography again.

3. Share your knowledge

guidelines for photographers portrait thumbs up
Sharing your knowledge with other photographers (whether it’s lighting setups, post-processing techniques, or general camera-craft skills) can help to reinforce your own knowledge and strengthen the community.

There’s an old negative cliché about photographers shutting down when asked how something was done (and mentioning the words “trade secret”). Fortunately, I haven’t noticed any of this in recent years, and things have opened up quite a bit. That’s a great thing for everybody.

Don’t be afraid to share what you’ve learned. Not only will you be able to help someone else, but the act of trying to communicate something to somebody else only reinforces your understanding of it.

Everybody wins here. And I genuinely believe that when one of us grows, we all grow.

4. You are not special, so don’t act like it

person with camera
Hey, look at me! I have some fancy equipment. Perhaps I should lord that over others who don’t! No, that is definitely not what you should do.

The barriers to entry for getting started in photography are lower than ever. The only thing that could be considered a real barrier is money, but only if you want to go all-in from the start and buy the fanciest camera and lenses.

Ultimately, this means that there’s pretty much nothing stopping anyone interested in photography from getting into it.

So owning a camera does not make you special. Calling yourself a photographer does not make you special. Having a great portfolio opens doors that other photographers can’t access, but it still does not make you special.

All too often, there are stories about photographers treating other people like dirt, acting entitled in public, and trashing landscapes. Photography forums can be some of the most toxic places on the internet. Yes, I know the vast majority of photographers aren’t like that, but it doesn’t excuse the poor behavior of the minority.

There is no reason to act that way. Be respectful to people. Be polite. Contrary to another old cliché, your photos do not speak for themselves, and acting decent will only help to strengthen people’s impression of your photography.

If you don’t want to be decent and you choose the other route, you may find that it closes a lot of doors – and there are a hundred other photographers right behind you, ready to take your place.

5. Learn constantly

model in studio with flash and continuous lighting
Make it a point to learn new things. Here, I was trying to see what happened if I mixed flash and continuous lighting. The troubleshooting that followed gave me a better understanding of my equipment.

This is one of those things that is preached often in all walks of life and is critical for photographers to remember.

The world of photography is constantly changing. New technologies make it easier than ever to create images and get them out in the world. Therefore, new techniques and methods are popping up all the time.

By ensuring that you put regular effort into learning new skills (or into reinforcing old ones), you will stay ahead of the curve as things continue to change. Not only will this help improve your photography, but it will also help to enhance the skills that you already have. Things will take less time, and you will get more efficient.

By the way, this doesn’t just apply to image-making. It also applies to other important aspects of photography, such as marketing.

6. Do the things you’re sure won’t work

person with busy background
Before I set up this shot, I was certain the background was too busy, but I liked the light. I was right about the background, but what did it cost me? A bit of memory and a few minutes, plus there was always the chance that I could have been wrong.

As you learn new things, you are going to have a lot of ideas.

Many of those ideas are going to be ridiculous. There’s no way they could ever work out.

So do them anyway.

Taking on difficult, unlikely, or even impossible challenges is one of the fastest ways to learn. To get what you want, you must put your problem-solving skills through their paces. Even if the result isn’t up to scratch, you will almost certainly have learned something from the process that you can use in the future.

This is something I wish I had learned much sooner than I did. Take those crazy ideas and run with them. If nothing works out, don’t show anyone!

7. Embrace clichés

guidelines for photographers shoot what you want, even iconic views
This view of Staithes has been photographed by just about every photographer who has ever set foot here. It’s about as clichéd as cliché gets. Does that mean you shouldn’t bother taking your own shot? No, not at all. Shoot whatever you want and enjoy it.

Canon 5D Mark III | Canon EF 16-35mm f/4L IS USM | 28mm | 1/30s | f/6.3 | ISO 400

Okay, I can already hear you groaning, but hear me out.

Every genre in photography has concepts that have been shot over and over again by just about anybody that’s ever picked up a camera.

It doesn’t matter if we’re talking about portraits, landscapes, wildlife, or any other genre. If you need a visual example, search any photosharing site for “Derwent Water.” This is a lake in England’s Lake District National Park. What you should find is the exact same shot of a certain jetty a couple of thousand times over. Want another example? Search for “Skógafoss.”

So what?

Have they been done to death? Yes, definitely. Should you go there and take the same photo if you want to? Yes. Absolutely.

Should you take photos of birds perched on sticks? Should you take pictures of interesting doors? Should you take photos of swaddled newborns? Should you take photos of a ring on a book so the shadow looks like a heart?

Do you want to? Then the answer is “Yes.”

When it comes to clichés in photography, photographers get bored with them because we see them all the time. What you have to ask yourself is why they have become clichés in the first place. What has drawn people to photograph these things again and again? The answer is usually because they resonate with an audience.

In other words:

These things are clichés because people love them.

The audience for your photography should not be photographers (more on this later), so don’t be afraid to shoot something you like, or that might resonate with your viewers, even if another photographer might brand it as clichéd.

8. Shoot for fun

have fun taking photos guidelines for photographers
Going out and taking photos for the sheer pleasure of taking photos is a great way to help ensure that your interest remains fired up.

Once you’ve been doing photography for a while, it is likely that, at some point, it’s going to stop being fun for one reason or another. This happens all the time and it usually happens more than once.

This can result in a lack of motivation that can lead to feelings of contempt for a hobby you used to love.

To help stop this process before it starts, regularly shoot something just because it would be fun to do so. You don’t have to use the images for anything, but doing fun photoshoots will help make sure you are still connecting with the reasons you got into photography in the first place.

If you’re already experiencing a lack of motivation, do whatever you can to make sure that, the next time you pick up a camera, it is to do something solely for the sheer pleasure of photography.

9. Strive for consistency

consistent Lightroom catalog
Being able to provide a consistent output using a range of techniques is a good goal to strive for.

A consistent output might just be one of the most underrated things a photographer can focus on.

To be clear, in this instance, I am talking about consistency in quality. I’m talking about ensuring that every time you pick up a camera for a purpose beyond self-gratification, you are producing the best photos you can with a variety of techniques.

(There is a lot of value in consistency of style and presentation across a portfolio, but that is another point for another time.)

It will not serve you well as a photographer to have a well-curated portfolio that you show to potential clients if you are unable to reproduce the same quality of photos over and over again.

Having a good portfolio is only the first step. If you get something good that you feel is portfolio-worthy, hammer down the techniques and make sure you can get similar results whenever you need to.

10. Learn to love the process, not the output

model lit by softbox
Once you put an image out into the world, you have zero control over how it is received. Instead of worrying about how other people react, focus on and learn to love the process instead of people’s reactions.

Is there a part of the image-making process that you don’t like? Perhaps retouching? Early sunrises? Do you just slog through it to get to the end result? Have you gone through steps you don’t like to get an image that you love, only to upload it somewhere or add it to your portfolio and find that it gets no response, or that people hate it?

I suspect something similar has happened to every photographer at one point or another. But what do you do when an image or a body of work doesn’t get the response you like or the one you expect?

Nothing. There is nothing you can do. You cannot control how other people react to things. If you can learn to accept that the only thing you can control is the process of creating the image, and then learn to love and focus on that process, you will be able to detach from the things you can’t control.

When the inevitable does happen and you don’t get the response you expected or wanted, you can shrug it off and move on to creating the next image.

11. Embrace harsh feedback

dog jumping in a field
This is one of my most favorite images. I wouldn’t change it for the world. Yet if I put my photography cap on, I can nitpick it until the end of time. That’s good. I can still love this image and know to look out for things I could do better (like the awkward crop, the overly contrasty subject/background, and the slightly too-slow shutter speed) in the future.

One of the fastest ways to learn as a photographer is to solicit feedback from other photographers. Often, the best sort of feedback can also be the harshest, and it can be utterly deflating. Have you ever asked for a critique only to receive a huge list of errors? It can feel soul-crushing, especially to a new photographer. Unfortunately, embracing that sort of feedback remains one of the best ways to improve fast.

The trick is to learn how to detach from the emotional attachment you have with the image you created.

How do you do this? I wish I could say. The answer is different for everyone. Once you have managed to do it, you’ll find it much easier to take on even the harshest feedback.

Now, harsh feedback does not always mean good feedback. A critique should never include prescriptive mandates, personal attacks on character or motivation, unsolicited criticism, or abusive comments toward people in the images.

Also, take statements such as “I would have done such and such” with a grain of salt and judge their relevance on a case-by-case basis. If you come across any feedback like that, feel free to ignore it. The sort of person who behaves in that way does not have you or your photography in their best interests. They are only stroking their ego at your expense.

12. Don’t force your ways onto others

model in front of lights
In the studio, I like to bring the lights in as close to the subject as I can. This works for me, and I encourage other photographers to try it. Does that mean it’s the right way to do things? Not a chance. It’s one of a million ways and none of them are the single right way.

As photographers, we learn in different ways from different sources at different speeds. And we take the bits that work for us and apply them in a way that gets the results we want.

Everybody is different. It doesn’t matter if we are talking about lens choice, lighting choices, or retouching techniques. There is no right way, or proper way, to do anything in photography.

The only right way is the way that gets the job done.

I like to do my dodging and burning on separate gray layers. Other photographers like to do dodging and burning with curves layers. There are about a dozen other options that I can think of that all result in the same thing. It doesn’t matter what your preference is. If someone prefers a different method to you, great.

Yes, you can and should advise others on how you go about things; that’s all a part of sharing your knowledge, after all. Just try to leave the prescriptive mandates such as right and proper out of it.

13. Stop marketing to photographers

If you are trying to get attention for your photography and you want to build an audience, then there is one demographic you should stop targeting:

Photographers.

Photographers rarely buy photography. A lot don’t even consume it for any reason other than comparison. Sure, peer recognition and validation feel nice, but when it comes to getting your work out there or starting a photography business, it has very little tangible value.

It’s as simple as that. Instead of posting your images where only photographers see them, look for the places where people are interested in the sort of subjects you cover.

Is this easy? No. If marketing were easy, then we’d all be rich and famous!

14. Your work is neither as good nor as bad as you think it is

portrait of woman with red top
To be honest, my own impression of my photography is not great. It goes with my overly self-critical nature. Whenever my images place in a contest (as this image did), it always comes as a surprise. It is hard to have an objective view of your own images.

Canon 5D Mark III | Canon EF 50mm f/2.5 Macro | 50mm | 1/125s | f/6.3 | ISO 100

Most of us don’t have a good grasp on how other people see our work.

Some photographers think everything they produce is fantastic. Some think everything they produce is utter rubbish. (Before anyone asks, I’m in the “utter rubbish” category.)

The problem is that we, as humans, are rarely objective judges when it comes to ourselves, and both extremes have serious downsides to them.

For the more confident personalities, it can be disheartening or downright depressing to think a photo is great only to have it be rejected by a wider audience. If this happens enough times, it can spell the end of your passion for photography.

For the self-critical camp, that’s only the beginning of the battle. I mean, what’s the point in even trying when you know that whatever you do is going to wind up terrible, anyway?

If you fall into one of these extremes, one answer is to try your best to remove any self-judgment from the process, good or bad. Try to come at your images with an analytical approach, and as mentioned above, focus on the process – because you have no control over how anyone else might react.

14 guidelines for photographers to live by: Conclusion

I hope this article has provided you with some food for thought on how some of the habits and tendencies we can develop as photographers negatively affect our output.

Even if you feel none of this applies to you, I hope you can see how evaluating your habits can lead you to a deeper understanding of how what you do and think affects your photography.

So remember these 14 guidelines for photographers; that way, you can learn and grow as much as possible.

Now over to you:

Are there any guidelines that I missed? And are there any additional negative behaviors that you often witness from photographers? Share your thoughts in the comments!

The post 14 Guidelines for Photographers to Live By appeared first on Digital Photography School. It was authored by John McIntire.


Digital Photography School

 
Comments Off on 14 Guidelines for Photographers to Live By

Posted in Photography


Sony’s new Visual Story iOS app is designed for wedding and event photographers

02 Dec

Sony has announced Visual Story, a new iOS application for Sony camera users. The app has been designed with wedding and event photographers in mind and provides users with simplified gallery creation, cloud storage, and web delivery solutions.

Visual Story offers automated image transfer from compatible Sony Alpha cameras to the cloud. From there, users can edit and deliver curated digital albums directly to their clients. To speed up image selection and organization, the app also utilizes AI and reads the metadata of your images.

‘The voice of our customer is at the center of everything we do. Today’s professional photographers constantly challenge themselves to deliver higher quality content faster than ever to their clients,’ said Neal Manowitz, deputy president of Sony Imaging Products and Solutions Americas. ‘Visual Story allows them to streamline their workflow, ultimately giving them the ability to edit, select and send photo galleries to their clients on the day of the ceremony or event. Sony continues developing innovative hardware and software solutions empowering content creators to capture, communicate and share in ways never before possible.’

With Visual Story, photographers can quickly and easily create, edit, curate and deliver a photo gallery. When your camera is connected to the app, images are automatically transferred from the camera to the connected smartphone or tablet in addition to Sony’s cloud service. Images are automatically organized using AI and can be sorted based on metadata, star ratings, shooting timeframe, focus position and additional parameters.

AI can also sort based on different types of images from an event. For example, AI can detect cake and ring ceremony images from a wedding, identify photos of speeches and dances, and more. The app can also detect when a subject’s eyes are shut, reducing the number of images you must choose from when creating a gallery.

Visual Story includes auto presets as well. Photographers can automatically apply custom edit presets or utilize built-in fixed presets. You can register an edit preset prior to shooting, such that all transferred images are automatically applied as the images are transferred, ensuring a consistent look across all photos. Additionally, the app includes a variety of editing functions, including controls over exposure, white balance, contrast, hue, saturation, and luminance.

By utilizing cloud storage, images can be synchronized across multiple devices. Further, ‘Visual Story also allows wedding photographers to automatically create an online gallery for their clients, which can be delivered instantly on site. This can be offered to their client as an additional service, or complimentary and included in their wedding or event package.’ You can also embed a selected logo and social media information directly into the images in the photo gallery, making it easier to market your business when clients share images online.

When creating a photo gallery in the app, your ratings and selections can be saved as an XMP file as well, meaning you can transfer your ratings/selections to your computer for easier processing later.

Visual Story is available now for iOS in the Apple App Store. It is a free download. Your iOS device must be running iOS 13 or newer. Visual Story is compatible with select Sony cameras, including A7C, A7R IV, A7S III, A9, and A9 II. The Sony A7 III will be supported in a planned firmware update in Spring 2021.

Articles: Digital Photography Review (dpreview.com)

 
Comments Off on Sony’s new Visual Story iOS app is designed for wedding and event photographers

Posted in Uncategorized


Treat yourself 2020: The ultimate photographers’ gift guide

27 Nov

A gift guide just for you

It’s been a doozy of a year but thankfully, it wasn’t all sour grapes. While many aspects of society ground to a halt, manufacturers still had cool and exciting products in their pipelines that they managed to bring to market.

And while opportunities to get and out shoot may be limited at the moment, we can still dream big. And what better way to do that than by ‘browser window shopping’. What follows is a rundown of the headiest products of 2020, the ones photographers really want. So pour a tall cold one and get ready to treat yourself!

Canon EOS R5

There’s no two ways about it, the gold award-winning Canon EOS R5 is our favorite mirrorless camera over $ 3000 and perhaps Canon’s most impactful full-framer since the 5D Mark II. And while the RF mount is still relatively new, there’s no shortage of fast aperture primes and F2.8 zooms available, including ‘the holy trinity’ of the 15-35mm, 24-70mm and 70-200mm.

Well-suited to enthusiasts and professionals alike, the R5 offers outstanding image quality, excellent ergonomics, fast burst shooting and fabulous autofocus performance, not to mention lovely oversampled 4K. In short, if you really want to treat yourself to the best of the best, it’s the camera to get.

View our Canon EOS R5 sample gallery

Fujifilm X100V

Of course, not everyone wants or needs an interchangeable lens camera, for some of us, the simplicity and GAS-reducing nature of a fixed lens camera offers greater appeal. Lucky for folks in this camp, two new large-sensor, fixed lens cameras are featured on this year’s list including the glorious Fujifilm X100V.

Which begs the question: What do you get when you take a wonderfully designed camera and tweak it over the course of four generations based on user feedback, without straying from the original ethos? Why, the X100V of course. Building on its legacy, the ‘V’ bring all sorts of lovely refinements to the series including a newly designed lens with better corner/close-up sharpness, an updated sensor and AF system, better build-quality, a tilting touchscreen and more!

View our Fujifilm X100V sample gallery

Leica Q2 Monochrom

Another fixed-lens, large-sensor camera launched this year is a ‘Monochrom’ version of the Leica Q2, a staff favorite here at DPR. The camera’s B&W-only sensor offers improved dynamic range and noise performance over its color sensor counterpart. Plus, the super sharp 28mm F1.7 lens and moody monochrome output make it the perfect all-in-one option for street photographers, live music shooters and/or anyone who loves shooting after the sun goes down.

And while some may find 28mm a tad too wide, the camera’s 47MP full-frame sensor provides ample resolution for cropping. Plus the Q2 Monochrom handles just like the standard Q2, which is to say it’s built like a tank and both straightforward and immensely gratifying to shoot with. And immense gratification is what ‘treat yourself’ is all about.

View our Leica Q2 Monochrom
sample gallery

GoPro Hero9 Black

GoPro’s latest flagship, the Hero9 Black, is a seriously impressive piece of kit and easily the most compelling action camera to come out in quite some time. For filmmakers, it can shoot up to 5K/30p, offering room to crop in post, assuming you’re outputting 4K, or 4K/60p. And GoPro’s Hypersmooth video image stabilization is jaw-droppingly good. On the stills side, resolution has jumped from 12MP on previous models to 20MP on Hero9 Black.

The camera isn’t just capable though, it’s also well-designed: control/menus are accessed via the rear touchscreen and the whole unit is water/freeze/dust-proof without the need for a case. It also provides improved battery life over predecessors, a front-facing ‘live’ screen and even the option to attach an accessory wide angle lens. In short, it’s the perfect companion for anyone’s extreme lifestyle, whether that means leisurely bike rides to the park or free-climbing rock faces. Treat yourself!

iPhone 12 Pro & 12 Pro Max

iPhones, like GoPros, tend to see iterative yearly updates, but occasionally a new model drops with enough advancements that it’s impossible to ignore. The iPhone 12 Pro is that model and the ultimate ‘treat yourself’ device, not just from a photo/video shooting perspective but also when it comes to displaying and viewing your work.

Apple devices have been able to shoot HDR photos and videos for some time, but this new model (like all iPhone 12 models) can now display 10-bit Dolby Vision HDR on a beautiful OLED screen, right from within the photo app: an industry first!

The camera is also impressive. It consists of three 12MP modules, including standard wide-angle (with a 47% larger sensor than its predecessor), an ultra-wide and telephoto options. Additionally, the phone will make use of Apple’s new Raw format, ProRaw, in beta now and coming soon. And, as if that’s not enough, Apple claims the device has enough processing power to make it 50% faster than any phone currently on the market (not to mention, it’s 5G-enabled). Now that’s a treat!

View our iPhone 12 sample gallery

Sigma 85mm F1.4 DG DN Art

Everyone needs a good 85mm portrait lens and Sigma’s latest 85mm offering for mirrorless full-frame E-mount and L-mount makes a strong case for inclusion in your kit.

One thing that truly sets it apart from others like it, including 2016’s Sigma 85mm F1.4 DG HSM Art, is its compact and lightweight design. However, despite a comparatively smaller footprint, this lens remains optically outstanding, offering really good sharpness at all apertures (including in the corners), minimal chromatic aberrations and well-controlled ghosting and flare.

It’s also ‘dust and splash proof’ and impressively well-built. And at $ 1200, the Sigma is priced more affordably than the competition, too. Which is to say, it checks all the boxes for what make an outstanding F1.4 portrait lens – a difficult feat and a major treat.

Watch our video review of the Sigma 85mm F1.4 DG DN Art

DJI Mavic Air 2

Have you been holding out for the right moment to spread your wings and treat yourself to a drone? Well my friends, the moment is now. DJI’s new Mavic Air 2 represents the most lust-worthy enthusiast drone to launch in some time.

The perfect balance of size and capability, Air 2 fits in the palm of your hand but can deliver great stills image quality from its 1/2″ 48MP CMOS sensor, including both Raw and JPEGs formats. It can also shoot up to 4K/60p video and offers a variety of accident avoidance technologies as well features like subject tracking, HDR video and a panorama mode. Battery life is a useful 34 minutes and perhaps most importantly, the Mavic Air 2 is easy and enjoyable to fly.

Read our DJI Mavic Air 2 review

Olympus 150-400mm F4.5 TC1.25x

I’ve tried my best to keep this year’s ‘Treat Yourself’ guide somewhat mount-agnostic, but certain new glass is just too darn difficult to ignore. Take, for instance, the new Olympus 150-400mm F4.5 TC1.25x for Micro Four Thirds bodies. It’s not for everyone, but for a certain type of photographer, this is the the ultimate optical treat!

I’m talking of course about nature and wildlife photographers. Olympus’ king of tele-s packs a whopping 300-800mm equiv. focal range into a surprisingly well-sized, well-weighted body. But that’s not all! A 1.25x built-in teleconverter bumps that reach to an impressive 1000mm (at the cost of 2/3 EV of light). And, as is the case with most high-end Olympus gear, this lens is sealed against dust and moisture, and built to take some punishment – just be sure to protect that big, beautiful 95mm front element!

View our Olympus 150-40mm F4.5 TC1.25x sample gallery

DJI Pocket 2

The second iteration of DJI’s pocket-friendly vlogging machine is a real winner. This little unit is easy-to-use, offers a nice wide 20mm field-of-view (wider than its predecessor) and shoots high quality, super-smooth 4K video. It also features an updated four-way directional in-camera microphone, capable of recording good quality audio without the need for an accessory mic. And did we mention it’s pocketable?

Basically, the Pocket 2 is the perfect no-fuss, all-in-one vlogging machine and the right piece of kit for sharing your adventures with the world. And while now might not be a great time to leave your house and embark on any adventures, the Pocket 2 will be waiting for you when it’s safe to travel again. So go on and treat yourself to this tiny wonder.

Watch our DJI Pocket 2 video review


There you have it, our favorite lust-worthy gear of the year. Here’s hoping 2021 has even more treats in store. Until next time, Treat yourself!

Articles: Digital Photography Review (dpreview.com)

 
Comments Off on Treat yourself 2020: The ultimate photographers’ gift guide

Posted in Uncategorized


The Best Black Friday Deals for Photographers in 2020

26 Nov

The post The Best Black Friday Deals for Photographers in 2020 appeared first on Digital Photography School. It was authored by Jaymes Dempsey.

If you’re looking for the best Black Friday and Cyber Monday deals for photographers, then you’ve come to the right place.

We’ve put together a huge crop of discounts, from incredible savings on cameras, lenses, photography courses, photo editing software, and more.

black friday deals for photographers in 2020

We’ve even included a few coupon codes, so our readers can have access to the best exclusive deals on the internet.

Here’s the bottom line:

If you want to level up your photography, then you need to take advantage of these deals while they’re still available.

So without further ado, let’s look at the current best Black Friday deals!

You can click below to go directly to the product category you’re interested in:

  1. Special Deals and Courses
  2. Cameras
  3. Lenses
  4. Software

Photzy’s Snap Cards (at 86% off!)

Have you ever been out taking photos and wished you could have your training materials open in front of you? Or, better yet, for a photography expert to be standing next to you, giving you advice as you choose your settings and press the shutter button?

Thanks to Photzy’s Snap Cards, it’s possible.

black friday deals for photographers in 2020 Photzy Snap Cards

Because the Snap Cards are designed by experts to do exactly that:

Tell you what you need to know about photography – when you need to know it. Not when you’re sitting in your room reading about photography, but when you’re actually out in the field taking pictures.

The Snap Cards consist of 44 printable cheat sheets, including all the key information about:

  • working with your camera
  • creating perfect exposures
  • arranging perfect compositions
  • photographing people
  • working with flash
  • and much more!

They’re easy to read, they offer quick solutions in the field, and they’re wildly effective. But don’t take our word for it; here’s what Snap Card customers have said about this one-of-a-kind product:

  • “I printed the set and laminated them straight away, took the applicable sets on specific shooting sessions, as designed. They helped remind me of details I had forgotten over the years.” – John M.
  • “Easy way to access good information during the learning process. I really enjoy the cards and the other emails I have received since buying the cards! ” – Ryan S.
  • “These are excellent, well-paced tips. Good for both beginners and advanced photographers. These cards reinforce known facts and add a lot more.” – Dilip R.

Normally, the Snap Cards cost $ 220 USD.

But for a limited time, you can grab the Photzy Snap Cards at an insanely low price:

Just $ 29 (or less than $ 1 per card).

Oh, and here’s another little tidbit:

Simply enter the code “BF20” during checkout, and you’ll get another 20% knocked off the price.

So make sure you grab the Snap Cards at this ultra-discounted price while you still can. Because the deal certainly won’t last!

Click here to get the Snap Cards at over 89% off, right now.

Contrastly’s Decoding Lightroom Video Course (Just $ 49)

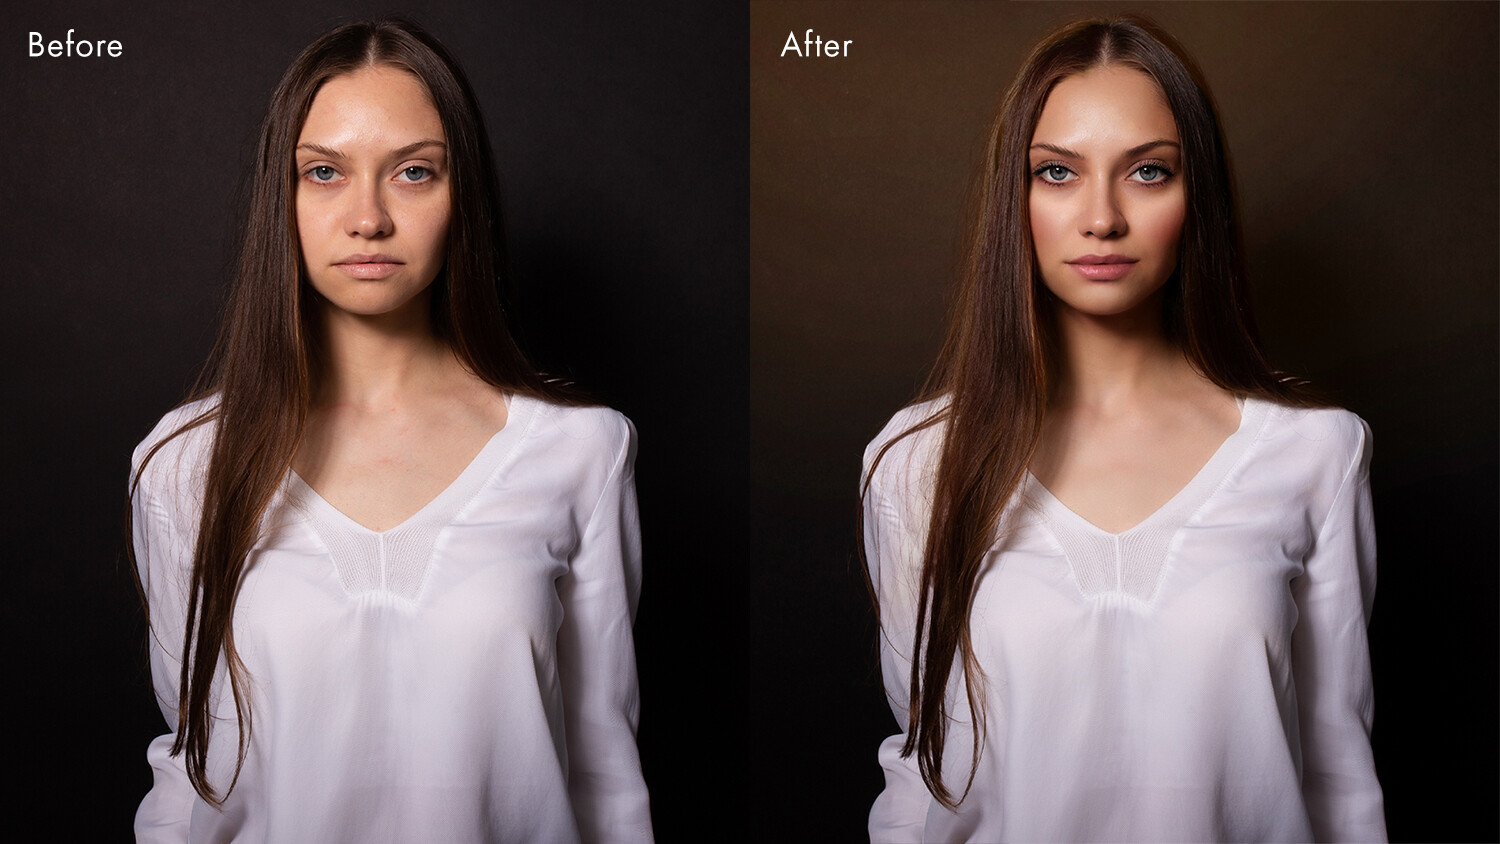
If you’re looking to create stunning photography, then editing your images is essential. After all, editing is how you take a decent photo and turn it into a masterpiece.

Unfortunately, learning to edit can be overwhelming. Many photographers give up before getting anywhere at all. And they never manage to make their photos shine.

Fortunately, there’s an easy way forward:

Contrastly’s Decoding Lightroom Video Course.

It’s an instant-access online course, one that gives you everything you need to start editing your photos in Lightroom Classic (one of the most powerful photo editors on the planet!).

Decoding Lightroom video course from Contrastly

Simply sit back and watch as professional landscape photographer Adam Welch takes you through the ins-and-outs of Lightroom, explaining everything you need to know – from making colors stand out to making details pop to exporting your photos for printing. There are over five hours of videos, plus several helpful bonuses including Lightroom presets (for one-click edits that will instantly improve your photos).

Normally, you pay $ 129 for this course.

But for the next few days only, you can get it at over 50% off, for just $ 49.

To grab Decoding Lightroom before the deal disappears, just click here.

So get the course. Try it out. Once you’ve mastered editing in Lightroom, your photos will never look the same again.

Also note that Contrastly’s other products, including The Lightroom Mastery eBook and The Cameras in the Wild eBook, are also over 50% off during the Black Friday period, so I highly recommend you check them out.

Capture Landscapes’ Into the Light Landscape Photography Course (Over 24% Off!)

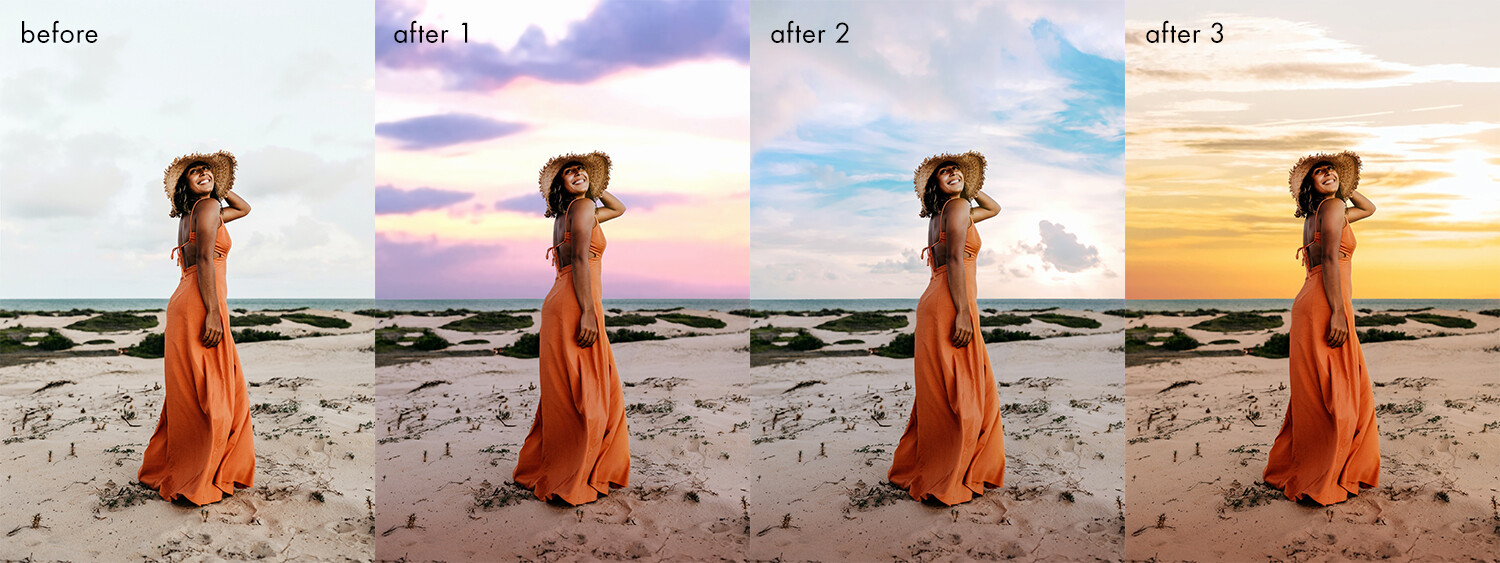
Do you wish you could take stunning landscape photos, day in, day out?

That’s what Capture Landscapes’ Into the Light landscape photography course will show you how to do.

Into the Light offers 9+ hours of instantly-downloadable video content, instructing you on camera settings, composition, gear, and more.

black friday deals for photographers in 2020

It even includes several post-processing videos, so you can learn how expert landscape photographers edit their images (and so you can start editing your photos like an expert, too!).

Plus, you get a whole bunch of bonuses, including vlogs, membership to a private Facebook group, and RAW landscape files to practice on.

The course is taught by the incredible William Patino, one of the best landscape photographers in the world – so don’t miss this opportunity to learn from a master.

While Into the Light generally goes for $ 169, it’s currently available for $ 127, at over 24% off.

You can purchase it here.

Also note that Capture Landscapes is currently offering a host of other Black Friday discounts, so make sure you check out their other courses and eBooks!

All Visual Wilderness Learn to Shoot Courses (50% Off)

Visual Wilderness offers nature photography tutorials by some of the best photographers around, which will show you how to:

  • use slow shutter speeds for breathtaking results
  • create jaw-dropping colors, consistently
  • nail focus (so your images are tack-sharp)
  • use your camera’s aperture setting to take your photos to the next level

And much, much more! There is literally days of nature photography video content just waiting to be watched, designed for beginners and advanced photographers alike. So why not take this opportunity to improve your photos?

Visual Wilderness video courses

For the next few days, dPS readers can get any of the Visual Wilderness Learn to Shoot video tutorials for 50% off. At checkout, simply enter the code “dps50” to claim your discount, and gain access to some of the most valuable nature photography instruction available today.

To see the Visual Wilderness Learn to Shoot courses, and to claim your 50%-off discount, click here.

SLR Lounge Premium Membership (28% Off)

If you’re interested in portrait photography, creative photography, engagement photography, or artificial lighting of any kind, then you need to take a look at SLR Lounge’s video courses.

Peek at the course catalog, and you’re bound to see something you’d love to watch. For instance, there are workshops on posing, headshot photography, flash photography, and much more. 

black friday deals for photographers in 2020 SLR Lounge

Each course offers hours upon hours of high-quality, practical advice – which will jumpstart your photography and get you shooting on a whole new level, fast. 

Now, you can purchase the courses individually; each one goes for around $ 100. 

Or you can grab a Premium membership, which gives you access to all SLR Lounge courses. Normally, you pay $ 348 for a 12-month membership – but, as part of the SLR Lounge Black Friday sale, you can currently purchase a 12-month membership for $ 248. 

Alternatively, you can buy a 6-month membership for just $ 178 or a lifetime membership for $ 598 (note that these two memberships aren’t available at other times of the year).

So click here to start your SLR Lounge photography education!

Cameras and Camera Bundles

Black Friday always comes with stellar camera deals, and this year is no exception.

While there are too many excellent camera discounts to list, here are a few that we think you’ll really love:

Canon EOS M50 With 15-45mm Lens (15% Off on Amazon)

The Canon EOS M50 is one of Canon’s most eye-catching mirrorless cameras, offering great handling, beautiful images, and 4K video – all in a tiny package. It’s perfect for photographers aiming to upgrade from their point-and-shoot models, as well as anyone looking for an affordable entry into mirrorless.

Canon EOS M50

Thanks to the articulating screen and the recording capabilities, the Canon EOS M50 is also an excellent choice for vloggers, especially those that aim to shoot a mix of videos and photos.

Plus, in addition to a handful of EF-M lenses, Canon sells an adapter that lets you use the entire suite of EF lenses.

Not bad for an inexpensive mirrorless camera, right?

So if you want a nice little camera that packs quite the punch, give the EOS M50 a try. It’s currently selling at 15% off with a 15-45mm kit lens, which puts the price at just $ 549 on Amazon.

Canon EOS RP With 24-105mm Lens (29% Off on Amazon)

The Canon EOS RP is Canon’s cheapest full-frame mirrorless camera, but don’t let that fool you; it can go toe-to-toe with models that cost far more, thanks to its powerful image sensor (26 MP), fully-articulating screen, and 4K video capabilities.

Canon EOS RP

For those who are thinking of going full-frame but aren’t sure where to start, the EOS RP is a perfect choice. Or if you’re a Canon user but haven’t made the jump to mirrorless, this EOS RP package has got you covered.

After all, you get the powerful EOS RP, plus the ultra-useful 24-105mm lens, which is perfect for all kinds of shooting (from street photography to landscape photography to walkaround photography and more).

So grab the Canon EOS RP plus the 24-105mm f/4-7.1 while it’s still on sale, because you can get it for an ultra-low $ 999 on Amazon!

Sony a6000 With 16-50mm and 55-210mm Lenses (15% Off on Amazon)

Are you thinking about getting your first mirrorless camera?

If so, then I highly recommend you consider this Sony a6000 package, which gives you everything you need to get started in mirrorless photography.

black friday deals for photographers in 2020

It offers a compact body, an electronic viewfinder, and excellent image quality, plus you get two highly-useful lenses. The 16-50mm is perfect for sweeping landscape and wider portrait photography, while the 55-210mm is the better option for tighter portraits, action photography, and the occasional street shot.

Usually, the Sony a6000 bundle goes for $ 999, but you can currently grab it for just $ 848 on Amazon.

Sony a7 III (15% Off on Amazon)

The a7 III is one of Sony’s most popular professional cameras, combining outstanding low-light capabilities, in-body image stabilization, class-leading autofocus, a 24 MP sensor, and 4K recording capabilities into one ultra-powerful package.

black friday deals for photographers in 2020

If you’re looking for a standout full-frame mirrorless camera that can do just about anything, the Sony a7 III is a great choice.

And it’s currently available for 15% off on Amazon, at just $ 1698 (versus the usual $ 1998).

Sony a7R IV (14% Off on Amazon)

The Sony a7R IV is a resolution monster, packing 61 megapixels into its gorgeously crafted full-frame sensor. It also includes a stunning electronic viewfinder, excellent autofocus, and a line of brilliant lenses that you won’t want to miss.

black friday deals for photographers in 2020

If you’re a landscape photographer or a commercial photographer in need of mind-blowing levels of detail, then the Sony a7R IV is the perfect pick, especially at its current discounted price:

$ 2998, versus its normal $ 3499 price tag.

Nikon Z50 Plus a 16-50mm Lens (10% Off on Amazon)

The Nikon Z50 is a user-friendly, high-performing APS-C mirrorless model from Nikon, perfect for photography beginners, casual photographers, and Nikon DSLR users looking to upgrade.

Nikon Z50

While the Nikon Z50 doesn’t include any true standout features, you get a very respectable 20 MP sensor, 4K video, a tilting touchscreen, and decently-fast shooting speeds.

And there’s also the 16-50mm lens, which offers a nice range of wide-to-standard focal lengths, so you can smoothly shoot landscapes, portraits, street photos, and much more.

Grab the Nikon Z50 plus the 16-50mm kit lens for just $ 896 on Amazon, down from its usual $ 996 price.

Fujifilm X-T30 With 15-45mm Lens (10% Off on Amazon)

The Fujifilm X-T30 is one of the best APS-C cameras to debut in recent years, and that’s saying something; Fujifilm managed to combine a beautiful design, a great shooting experience, excellent autofocus, and blazing-fast shooting speeds for a do-it-all camera that you won’t be able to put down.

Fujifilm X-T30

If you’ve never tried a Fujifilm camera before, you’re going to be in for a treat. Honestly, it doesn’t matter if you’re a beginner, an enthusiast, or a professional – as long as you’re a fan of the retro design, then you’re going to love this model.

The Fujifilm X-T30 normally sells for $ 899 – but you can currently purchase it, with the excellent 15-45mm kit lens, for just $ 799 on Amazon.

Lenses

These are some of the best Black Friday lens deals that you’ll come across:

For Canon

  • Canon EF 70-200mm f/2.8L USM (7% off for $ 1249 on Amazon)
  • Canon EF 40mm f/2.8 STM lens (10% off for $ 179 on Amazon)
  • Canon EF-S 10-22mm f/3.5-4.5 USM (34% off for $ 429 on Amazon)
  • Canon EF 17-40mm f/4L USM (25% off for $ 599 on Amazon)
  • Rokinon 35mm f/1.4 for Canon (15% off for $ 339 on Amazon)

For Sony

  • Sony 70-200mm f/2.8 GM (5% off for $ 2398 on Amazon)
  • Sony FE 50mm f/1.8 (20% off for $ 198 on Amazon)
  • Sony 35mm f/1.8 (11% off for $ 423 on Amazon)
  • Sony 16-35mm f/2.8 (9% off for $ 1998 on Amazon)
  • Tamron 28-75mm f/2.8 for Sony (9% off for $ 799 on Amazon)

For Nikon

  • Nikon AF-S 70-200mm f/2.8E VR (19% off for $ 1896 on Amazon)
  • Nikon AF-S 14-24mm f/2.8G ED (23% off for $ 1347 on Amazon)
  • Nikon Z 14-30mm f/4 S (15% off for $ 1097 on Amazon)
  • Nikon AF-S 28-300mm f/3.5-5.6G VR (11% off for $ 847 on Amazon)
  • Sigma 35mm f/1.4 ART for Nikon (27% off for $ 656 on Amazon)

For Fujifilm

  • Fujifilm XF 16-55mm f/2.8 (25% off for $ 899 on Amazon)
  • Fujifilm XF 55-200mm f/3.5-4.8 (29% off for $ 499 on Amazon)
  • Fujifilm XF 50-140mm f/2.8 (19% off for $ 1299 on Amazon)

For Panasonic

  • Panasonic Lumix 45-150mm f/4-5.6 (41% off for $ 148 on Amazon)
  • Panasonic Lumix 35-100mm f/2.8 (18% off for $ 898 on Amazon)

Software

Every year, the Black Friday software deals just seem to get better and better. Check out the incredibly low prices on these powerful editing programs:

ACDSee

ACDSee Photo Studio Ultimate 2021 is an all-in-one post-processing program, offering cataloging, basic editing, and advanced editing in a single package. You get all the power you expect from a serious Lightroom competitor, plus the streamlined workflow that comes from using a single image editor with dozens of capabilities.

ACDSee Photo Studio Ultimate 2021

If you’re looking to enhance your images with post-processing and you’re tired of the hassle of going between Lightroom, Photoshop, and various plugins, then ACDSee is a fantastic choice – one that’s currently available for a fantastic low price. 

Currently, you can buy the ACDSee Photo Studio Ultimate 2021 with ACDSee’s Luxea Video Editor for just $ 109.95 (normally priced at $ 229.98).

So don’t miss out on this excellent Black Friday opportunity from ACDSee; make sure to grab your Photo Studio Ultimate 2021 package before the deal disappears.

Adobe Creative Cloud

We all know Adobe’s products, but did you know that you can currently purchase Lightroom, Photoshop, and all the other Adobe CC apps for 25% off, at just $ 39.99 per month?

The deal includes both versions of Lightroom – CC and Classic – as well as Adobe’s industry-standard video editing apps, graphic design apps, and more. 

Adobe Creative Cloud

If you’ve been on the fence about going all-in with an Adobe subscription, then now is the time to do it. Lightroom Classic is amazing, Lightroom CC is beautifully built, and Photoshop is on another level entirely. Plus, the video apps you’ll get as part of the full Creative Cloud subscription are perfect for vloggers, YouTubers, and videographers of all stripes. 

So start taking your photos – and videos – to the next level, today. Click here to get your Adobe CC subscription!

ON1 Photo RAW 2021

ON1 Photo RAW 2021 is an easy-to-use, feature-packed alternative to Adobe Lightroom Classic. It combines streamlined image organization with pretty much all of Lightroom Classic’s editing functionality, plus a beautiful interface to boot.

ON1 Photo RAW Black Friday deal

There are die-hard Lightroom fans out there who won’t want to consider ON1 Photo RAW, but the fact is that the software is genuinely great. ON1 Photo RAW 2021 is a pleasure to use, mostly because it just feels right, thanks to ON1’s focus on user experience over advanced editing functions. 

ON1 Photo RAW 2021 could easily take the place of Lightroom, and it’s way cheaper, too: 

Normally $ 99.99, and now – thanks to Black Friday – just $ 79.99. So click here for the deal!

Oh, and for those who are interested in really taking your ON1 Photo RAW 2021 software to the next level, you can also grab the ON1 Professional Plugin Bundle (including ON1 HDR, ON1 Resize, ON1 Effects, and ON1 Portrait AI) for just $ 59.99.

Affinity Photo

Affinity Photo Black Friday deals

These days, Serif’s Affinity Photo is the most popular Photoshop alternative available. It goes toe-to-toe with Adobe’s advanced photo editor in pretty much every way, packing an incredible amount of power for a surprisingly cheap price ($ 50).

And that cheap price just got even cheaper, thanks to Serif’s Black Friday sale, which makes Affinity Photo available for an ultra-low $ 34.99.

Honestly, I can’t think of any reason you shouldn’t buy Affinity Photo at that price. At the very least, I recommend you grab the free trial to see what you think, because the program truly is exceptional.

You can purchase Affinity Photo, or download the free trial, right here.

The Best Black Friday Deals for Photographers: Conclusion

I encourage you to grab these great discounts while they still exist. 

Because while there are plenty of amazing deals, they won’t stick around for long. Pretty soon, Black Friday will be over and prices will go back to normal.

So take advantage of these deals while you still can!

Know of any fantastic Black Friday deals for photographers that we missed? Share them in the comments!

The post The Best Black Friday Deals for Photographers in 2020 appeared first on Digital Photography School. It was authored by Jaymes Dempsey.


Digital Photography School

 
Comments Off on The Best Black Friday Deals for Photographers in 2020

Posted in Photography