RSS
 

Posts Tagged ‘Perfect’

‘Perfect’ sensors may be possible, but might not come to cameras

24 Feb
Fossum’s team has created a prototype chip with a variety of pixel designs and readout methods. This included combinations with sufficiently low read noise to allow individual photons to be counted.

The future could include sensors that perfectly describe the light in the scene, that offer new computational possibilities and give film-like latitude in the highlights. And yet we may not ever see them in cameras, says father of the CMOS sensor, Professor Eric Fossum.

We spoke to Fossum shortly after he received, alongside three other pioneers of digital photography, the Queen Elizabeth Prize for Engineering for his work on CMOS sensors. But the topic of our conversation is the future, rather than his past achievements. He now leads a group at the Thayer School of Engineering at Dartmouth, New Hampshire, working on what he calls Quanta Image Sensors (QIS). The team has recently published a paper announcing a breakthrough using the same fabrication process used to make CMOS image sensors.

The perfect sensor?

The principle is to use nanoscale, specialized pixels, called ‘Jots’ to capture light at the level of individual photons. They work in a binary fashion: they’ve either received a photon or they haven’t (as opposed to conventional sensors which accumulate the charge generated by lots of photons during exposure). These jots are read repeatedly to see whether another photon has arrived since they were last checked.

While Fossum is keen to stress that other teams are having some success in the same field (using a slightly different approach), his own team’s work is looking very promising. The paper in the journal Optica shows the team’s technology has been refined such that a 1MJot chip can be read 1000 times per second while still exhibiting sufficiently low read noise that it can distinguish between individual photons.

We can count every photon: you can’t do any better than that

“The Holy Grail is no read noise,” says Fossum: “so that the read signal is proportional to the signal as it arrived.” And the team’s latest paper says they’ve got very close to this, with noise levels so low that the sensor can distinguish between individual photons without getting confused by read noise. This opens up the possibility of cameras that could perfectly describe the light in the scene, even in near total darkness.

A mathematical model showing how noise levels (measured in the root mean square of the number of electrons), affect the ability to interpret small signals. The lower the read noise, the more accurately you can distinguish between individual values in the signal.
Diagram from the team’s paper in Optica

Eliminating read noise from the sensor wouldn’t mean totally noiseless photos, since the randomness of the light being captured is a key source of noise, but it’s the best any sensor can possibly achieve. “We can count every photon: you can’t do any better than that,” he says.

The paper, perhaps conservatively, says the technology could be suited to scientific, space, security and low-light imaging applications, but Fossum has clearly also been thinking about conventional photography.

A classic response

“Because it’s binary in nature, its response is comparable to old photographic film,” he says. “In film, when the silver halide was hit by a photon, it’s reduced to a silver atom that isn’t washed away [during processing]. If it’s hit by two photons, it doesn’t make any additional difference.”

This ends up meaning that in bright regions of the image there are ever fewer unexposed silver ions as the exposure goes on. This, in turn makes it less likely that the last few ions will be hit by a photon, so it becomes increasingly difficult to fully saturate the system. The same is true for the tiny, binary Jots: as more of them become saturated, it becomes increasingly difficult to saturate the last few.

“The response is linear at moderate exposure but it trails off to give significant overexposure latitude. It’s a pattern first observed by Hurter and Driffield in 1890,” says Fossum: “they showed the same curve that we measure, experimentally, in our QIS devices.”

Diagram showing the Jots’ exposure response, in comparison to mathematical models of different read noise levels. Note the roll-off at high exposures, comparable to the Hurter Driffield response curves of photographic film.
Diagram from the team’s paper in Optica

“That has obvious interest both for still photographers who’re used to shooting film and for cinematographers who’re looking for that kind of response.”

The use of such tiny pixels has other benefits, too: “Jots are below diffraction limits in size. This means the resolution of the system is always higher than the resolution of the lens, which means we never have to worry about aliasing.” While the group’s prototype sensors feature one million Jots, Fossum says their target is one billion.

Beyond conventional photography

Fossum isn’t just thinking about photographic history, though. The tiny size and the approach of repeatedly reading out the sensor challenges the existing concept of single exposures. “At the moment we make motion pictures by shooting a series of snapshots. With QIS it’s more like the reverse process,” he says: constructing still images from precisely captured movement.

Professor Fossum has already been responsible for one revolution in photography: the invention of the CMOS sensor. In December 2017 he was awarded the Queen Elizabeth Prize for Engineering for his work.

Essentially, taking lots of short, sub-frames during an exposure gives you an extra dimension to your images: time. “If you take a single frame, you get a bunch of ones and zeros. If you take another, you quickly build up a cube of ones and zeros,” Fossum says: “For example, if you shoot 100 frames at 1000 frames per second, you get a cube that’s x pixels wide by y pixels tall, but also 100 frames deep.”

This presents some interesting questions, he says: “What do you do with that data? How do you create an image from that very faithful map of where photons arrived?”

“You could choose a number of pixels in x and y but also in the time axis. If you wanted a very sensitive pixel in low light you could combine 10 x 10 Jots in x and y and then maybe combine the data from 100 frames: it’s essentially like increasing the grain size in a more sensitive film.”

Of course you can achieve something comparable to this in conventional digital photography by downscaling an image, but Jots allow greater flexibility, Fossum says: “your pixel size could vary between different parts of the image, so in some places you’d have bigger but more sensitive grains.”

What is the object of photography? Is it artistic or an attempt to perfectly recreate the scene as it was?

The time component also opens up additional possibilities, he says: “if an object moves during these hundred frames, instead of adding all the values from the same location, you could add them at an angle that corresponds to the movement,” so that all the pixels relating to the same object are combined. “We could take out motion blur or remove the scanning effect of a computer screen in video.”

The idea of combining multiple frames in interesting ways is, of course, already becoming a core part of mobile photography, and Fossum says finding all the things that are possible is a challenge he is leaving for others: “From my point of view, we’re building a platform for computational imaging, it’s for others to develop all the ways to use it. A camera would have to take account of the new sensor capabilities.”

But it’ll ask interesting questions, he believes: “What is the object of photography? Is it artistic or an attempt to perfectly recreate the scene as it was? Some of the things we associate with photography are artifacts of the way we capture them.”

Not the only future

With all this going for it, it might seem odd that Fossum isn’t promising to deliver a second revolution in digital imaging. But, having devoted a career to developing technologies and teaching about the challenges, he’s realistic both about the work left to do and the competition any product would face.

“What we’ve already achieved is wonderful. The next challenge is adding color [awareness], but I don’t think that’s going to be particularly problematic. Then there’s power: we’ve shown we can produce a large chip that doesn’t consume or disperse a prohibitively large amount of power. We’re currently at around 27mW but scale it up by 1000 [to get to one billion Jots] and that’s 27W, so we need to cut that by about a factor of ten.”

His concern is more about the current state of the rival technologies: “In order to bring a new technology to replace the existing one, it has to be compellingly better in a number of ways,” he says. “For a few niches, [our technology] is already compelling.” But for photography, the bar is already set very high.

I don’t want our startup to be another esoteric imaging product that fails to find a market

“CMOS technology is pretty awesome right now,” he says, before almost embarrassedly stressing that he’s not claiming the credit for this: “where it is today is the result of the input from thousands of engineers from different companies who’ve contributed towards where we are now.”

Professor Eric Fossum pictured with Dr Jiaju Ma, one of the co-authors of the Optica paper and a co-founder of the spin-off company, Gigajot Technology.

But, for all his cautious words, Fossum is convinced enough by the technology’s potential to have created a company, Gigajot Technology, with his co-researchers. “Finding a sweet spot in the market is a really important part of challenge. It comes back to the things I teach: ‘who is your customer?’ ‘what is your market?’ ‘how are we going to get there?'”

“I don’t want our startup to be another esoteric imaging product that fails to find a market,” he says.

While it’s by no means certain that QIS sensors will make their way into mainstream cameras, it already looks like the technology has tremendous potential for niches such as scientific measurement. This alone shows just how far the technology has come from Fossum’s original idea. As he readily admits: “When we first started this project I wasn’t even sure it could be made to work.”

Articles: Digital Photography Review (dpreview.com)

 
Comments Off on ‘Perfect’ sensors may be possible, but might not come to cameras

Posted in Uncategorized


Designer imagines the perfect keyboard for Adobe software

23 Nov

Designer Vinicius Araújo has created a series of concept images that imagine what a keyboard may look like if it were made by Adobe specifically for Photoshop and its other specialized software. Araújo shared the images on Behance under the handle VA Designer, where he shows a concept that containing half a dozen touch shortcuts, a scroll wheel, colored LED lighting, and a high level of sensitivity.

While various DIYers have developed their own enhanced control methods for some Adobe products—such as using a PS3 gamepad to control Lightroom—and some interesting options do exist, a perfect hardware companion to the software suite remains elusive.

Araújo’s concept imagines what that companion device might look like should one ever be developed.

$ (document).ready(function() { SampleGalleryV2({“containerId”:”embeddedSampleGallery_0008864831″,”galleryId”:”0008864831″,”isEmbeddedWidget”:true,”standalone”:false,”selectedImageIndex”:0,”startInCommentsView”:false,”isMobile”:false}) });

Rather than using color-coded shortcuts, this concept presents a sleek low-profile keyboard with several customizable touch pads on the left, and a small display in the upper right-hand corner. That display shows which tool is currently active in the software, and is joined by a smaller display just above it that shows the application in use.

Above the keyboard’s function keys resides a display somewhat similar to the Touch Bar found on some MacBook Pro laptops. The concept’s upper display, however, is used to present the logos for Adobe software not currently in use; tap one of the logos, and the related application will launch on the computer.

Finally, the concept also includes a scroll wheel that could be used to precisely adjust sliders or select colors in programs like Lightroom and Photoshop. The inclusion of a scroll wheel on a keyboard isn’t a new idea, though; Logitech, for example, recently introduced a keyboard with a scroll wheel for use with products like Adobe Photoshop.

Because this is simply a concept design, it isn’t available to purchase as an actual product, but we’d be curious to hear your thoughts on Araújo’s keyboard. How would you improve upon it? And would you buy it if it were to become reality?

Articles: Digital Photography Review (dpreview.com)

 
Comments Off on Designer imagines the perfect keyboard for Adobe software

Posted in Uncategorized


3 Powerful Tips for the Perfect Vignette in Lightroom

08 Oct

The vignette is one of the most powerful ways to boost your photos. It reduces your photo’s brightness at corners and sides compared to the image center. It’s mainly used to highlight elements in the center even more. Besides, you can also use it to cover distracting details on the sides of your image.

As popular as it is, it’s just as common to not apply vignettes properly using Lightroom or Adobe Camera Raw. Let me show you three powerful tweaks to squeeze out 100% of its potential and present your photos in a better light!

1) How to decide which photo is suited for a vignette
The vignette shifts the focus to the center of your frame. That’s why you’ll ideally have a photo where your subject is placed in the middle. Otherwise, the vignette will make your subject darker and take away the spotlight.

To make the vignette even more powerful, it really helps to have the light in the center of the frame as well. Your subject is either lit up from the front or illuminated by some backlight. Of course, it depends on how strong you apply the vignette. If you use it lightly around the sides and corners, then the subject can also be a bit to the top, bottom, left or right of the frame.

3 Powerful Tips for the Perfect Vignette

Take a look at the two photos above. The one on the left has the subject on the far left. The vignette not only covers the subject, it also highlights the less important wall in the middle. The right photo, however, has the subject in the center. The vignette blends out the unimportant details of the office and highlights the person and the view in the center. Do you see how the vignette works much better in the example on the right?

Whether you are capturing buildings in a city, trees in the countryside or animals in the zoo, the same rule of thumb applies: place the most important element in the center.

2) How to make the vignette as smooth as possible

The best vignette in the world is the one you barely notice. That’s why you always need to make sure that the transition is as gentle as possible. Once you notice the transition from dark to bright, it’s not done right. Do you see the circle of the vignette in this photo?

3 Powerful Tips for the Perfect Vignette

The reason for this is generally that the feather slider is too far to the left side. As you can see in the screenshot below, it’s at 33. The more you go to the left, the more visible the transition will be.

Transition Bad - 3 Powerful Tips for the Perfect Vignette

Always make sure to move the feather slider to the right side. For most of my vignettes, I slide it all the way to 100. That way, you will achieve the smoothest transition for your photos.

Transition Bad - 3 Powerful Tips for the Perfect Vignette

Once you’ve applied the feather more generously, the vignette’s border will largely disappear. As a result, your vignette will blend more smoothly into the natural light of the scenery. In case the transition remains too strong, you can always reduce the amount a bit as well.

3 Powerful Tips for the Perfect Vignette

3) How to create a custom vignette

Although the post-crop vignette works best with subjects in the center, you will also use different placements. Luckily, you can always create a custom vignette that is tailored to your composition. The easiest way to do this is to use the Radial Filter.

The following photo could really need a vignette. That way, we could highlight the sunset and the silhouette even more. In order to create a custom vignette, open the Radial Filter (Shift + M) first. Then you decrease the exposure to a level between -0.20 and -1.0. In this case, I set it to -0.64.

Radial 3 Powerful Tips for the Perfect Vignette

Click on the subject in your photo, hold and drag the circle around your subject. Everything outside of the circle will become darker.

3 Powerful Tips for the Perfect Vignette

Remember the first tip how the transition always needs to be smooth? We will do the same for the custom vignette. With the feather slider, you can make the transition from dark (outside the circle) to bright (inside the circle) smoother. The further you slide it to the right, the gentler the transition becomes. For this photo, I changed it to 81 instead of 50.

Radial 3 Powerful Tips for the Perfect Vignette

When you compare the original photo (left) with the custom vignette (right), you can clearly see the difference. The light atmosphere in the right photo is more intense and the vignette guides the viewer to the subject.

3 Powerful Tips for the Perfect Vignette

Conclusion

I hope these three tips for better vignettes will you take your images to the next level. Of course, practice makes perfect. Play around with the sliders as much as possible to get a feel for the right amount. If you have any questions, let me know in the comments and I’m more than happy to help you out!

The post 3 Powerful Tips for the Perfect Vignette in Lightroom by Marius Vieth appeared first on Digital Photography School.


Digital Photography School

 
Comments Off on 3 Powerful Tips for the Perfect Vignette in Lightroom

Posted in Photography


Lizard Strikes a Pose for a Perfect Contrast

27 Sep

Warning: preg_replace(): The /e modifier is no longer supported, use preg_replace_callback instead in /home/forge/content.photojojo.com/content.photojojo.com/wordpress/wp-content/plugins/ozh-better-feed/inc/feed.php on line 134


Photojojo

 
Comments Off on Lizard Strikes a Pose for a Perfect Contrast

Posted in Equipment


No Edits Needed for a Picture Perfect Moment

27 Sep

Warning: preg_replace(): The /e modifier is no longer supported, use preg_replace_callback instead in /home/forge/content.photojojo.com/content.photojojo.com/wordpress/wp-content/plugins/ozh-better-feed/inc/feed.php on line 134


Photojojo

 
Comments Off on No Edits Needed for a Picture Perfect Moment

Posted in Equipment


Tips for Location Scouting to Get the Perfect Sunset Photograph

12 May

Location scouting to find the ideal spot is just as important as what camera settings you use. Don’t miss this important first step in order to get your perfect sunset photograph.

Scouting is part of the photography process

“Hi. Are you a photographer?” a young voice called to me.

“Hello,” I turned back and replied to a smiling and inquisitive face. It was a little girl with a point-and-shoot camera.

“Yes, I am,” I nodded in affirmation. The backpack and tripod were a dead giveaway.

“This is so beautiful,” and after a moment of watching me, “Aren’t you going to take a photo?” the girl continued, as she scrutinized me searching for something in between granite boulders on the beach but not taking photos.

location scouting

Composing for the water channel.

Mother Nature had put on a mesmerizing show of stormy clouds and light at Camps Bay Beach in Cape Town, and it seemed that almost everyone had their cameras and cell phones pointed towards the far horizon. Our brains are programmed to do routine work subconsciously, like changing gears of a car.

For a landscape photographer, scouting for a good location is part of the job. It can be a challenging, albeit fun routine, and I was doing exactly that an hour prior to what was going to be a stunning sunset. In fact, I find it quite therapeutic to search for a good spot. You pay attention to details and discover small wonders in the process.

Tips for Location Scouting to Get the Perfect Sunset Photograph

Lightning strike while location scouting.

The question from the little girl triggered a lot of possible answers in my mind. “I am trying to make a good photo,” could be one of the answers, but it would have confused her even more, so I told her that I was looking for an interesting pattern of rocks for my sunset shot. My quest resumed after she and I finished chatting.

Tips for Location Scouting to Get the Perfect Sunset Photograph

Nature’s wonder.

What makes a good photo?

In my journey of landscape photography thus far, I have learned that the main characteristics to look for are good light and composition. After you find these, you need good camera settings and technique to capture the moment.

What can you do to take a better photo?

The light is not within your control. But you need to gain knowledge of the terrain, keep an eye on the weather and clouds, and possibly go around dawn or dusk to get softer colors and light.

The choice of composition is yours based on your own style and preferences. As a landscape photographer, you need to have an aesthetic sense that attracts viewers to your images, a style that will become your own. Composition is a topic in itself, but obviously, the key is choosing a location that provides good subjects (e.g. a waterfall, mountains, icebergs, boulders, trees, rocks) or something that appeals and possibly tells a story.

Camera settings and techniques come with experience. Do not compare it to the value of the equipment you own – the simplest equipment can take a great shot. The only way you can get better is by taking photos, learning more about the basics, and correcting yourself after making mistakes. If you can invest in the best camera, filters, tripods and other accessories, then that’s a bonus. Whatever equipment you own, you must know its full capabilities and how to make good use of it.

Tips for Location Scouting to Get the Perfect Sunset Photograph

Camp Bay boulders.

How did I make a good photo that day?

The day I met the girl, I was at one of the most picturesque beaches in the world, Camps Bay. The location and subjects were there, but I still had to work to narrow down my composition for the sunset.

I needed to make decisions such as; Am I going to set up on the sand or in between the boulders? Should I go on the mossy rocks or stand in the water?

The light, as per my assessment of the weather forecast, was going to be perfect if the clouds allowed the sun to peek through the horizon. I brought the lens and camera of my choice, filters, shutter release, and tripod to take photos in low light.

After some exploration, I settled upon a water channel between two massive granite boulders. My test shot looked promising. My hunt for an agreeable foreground was finally over. The water would make interesting patterns through that small ally, and the leaden clouds and orange sun would be my background.

Tips for Location Scouting to Get the Perfect Sunset Photograph

Test shot with minimal post-processing.

I took another test shot and soon realized that the sun was going to be behind the boulder on the left, and I would miss it in my photo as I had miscalculated the angle. I re-evaluated the scene and adjusted my perspective to align the composition with the drowning sun. Careful use of camera settings, a polarizer, and a soft graduated ND filter yielded a result that I was satisfied with. Mission accomplished!

Tips for Location Scouting to Get the Perfect Sunset Photograph

The water channel.

Conclusion and video

As you will see in the video (and image) below, I took an additional photo of this channel from a higher vantage point as well.

So the next time you see a landscape photographer rushing to and fro on a location, you must know that he is busy making a photo, as pressing the shutter button is only the last part of the job!

I hope these tips are helpful. Please share your questions and comments below.

Tips for Location Scouting to Get the Perfect Sunset Photograph

Water channel from above.

The post Tips for Location Scouting to Get the Perfect Sunset Photograph by Mujahid Urrehman appeared first on Digital Photography School.


Digital Photography School

 
Comments Off on Tips for Location Scouting to Get the Perfect Sunset Photograph

Posted in Photography


Lighting Tips for Perfect Portraits

09 May

Snapping a portrait, is much more complex than than pinning up a laser backdrop and requesting your subject say “cheese.”

The key to a polished look is lighting!

Read our tips for making your pals look their best in any light (you might just want to add some shine to help them look their best).
(…)
Read the rest of Lighting Tips for Perfect Portraits (301 words)


© laurel for Photojojo, 2017. |
Permalink |
No comment |
Add to
del.icio.us

Post tags:


Photojojo

 
Comments Off on Lighting Tips for Perfect Portraits

Posted in Equipment


How to Capture the Perfect Action Shot in Sports Photography

08 Oct

Sports photography is a fun challenge for any photographer. There is plenty of intensity and emotion to be found at any competitive event. These elements combine to create the potential for some truly memorable images.

At the same time, the speed and unpredictability of some games can be intimidating. Especially if you are used to dealing with slower-moving subjects, like portraits or landscapes.

Never fear! This article will arm you with helpful knowledge so that your next brush with sports photography will result in some fantastic captures.

Getting your settings right

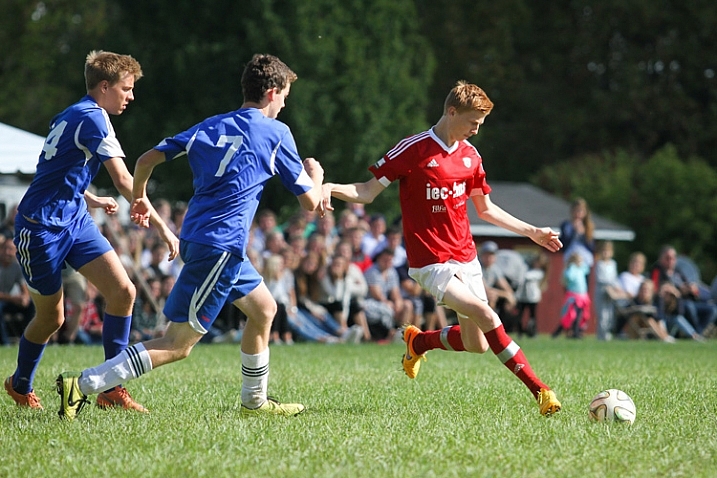
A soccer player about to kick a soccer ball, captured with a high shutter speed

This image was taken at 1/1600th of a second, which freezes the action completely. This super fast shutter speed is possible because there is a lot of sunlight.

Chances are that you’ve probably taken your fair share of blurry sports photo. Typically, players or athletes are moving at high speeds, and your camera doesn’t necessarily know for itself how to compensate.

Freezing the action

If you want to freeze the action in a photo, you’ll need to use to choose a fast shutter speed. But, how fast does it need to be? Well, that depends on the sport. 1/250th of a second should be enough to freeze kids playing soccer, but you’ll need to go a lot faster if you want to capture a baseball in mid-flight. Experiment and find what shutter speed you need to use in order to produce sharp images.

Adding motion

On the other hand, you can also experiment with slowing down the shutter speed and panning your camera throughout the picture to create a sense of speed and movement. It takes a bit of practice to get right, but if you match the speed of your subject, you can hold them in focus while the directional blur emphasizes the sense of movement.

Whenever possible, you will want to use a wide aperture, such as f/3.5 or lower. This will create a narrow depth-of-field, and helps the players to stand out, as the background distractions will be blurred.

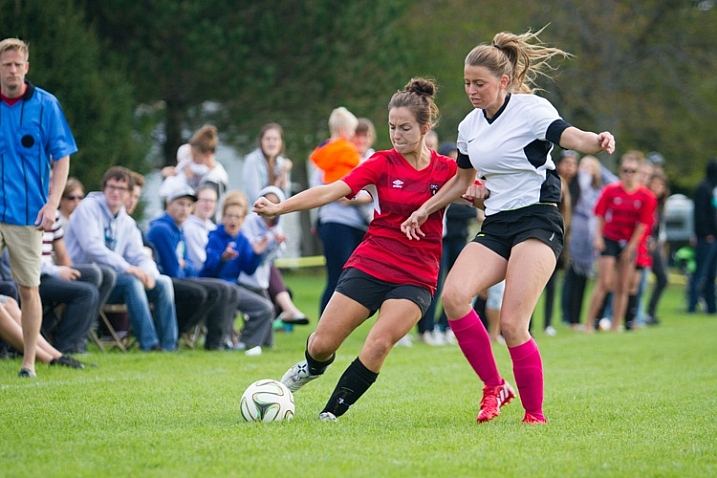
Two soccer players fighting for the ball with spectators watching the game behind them

This image was shot at an aperture of f/2.8 so that the spectators in the background don’t distract from the players chasing the ball.

If the sport is being held outside during overcast conditions or indoors with consistent lighting, consider using manual exposure mode and settings. It may take a bit of time to figure out, but you’ll get much more reliable and consistent images.

Pick your spots

When you first arrive at the field, arena, gym or track, consider all of your potential angles and options. Your options will be different depending on whether you have a short or a long zoom lens.

For many sports, you won’t be able to cover every angle. Getting up close with a wide-angle lens means you won’t be able to capture plays on the other side of the field. While using a long zoom means you may struggle to capture play right in front of you.

Find the “sweet spots” – the places on the field of play which are the perfect distance away for your camera and lens combination. You’re going to get your best images when the play is in these areas. Rather than trying to get an incredible picture when play is far away on the other side of the field, be patient and prepare so that you make the most out of every opportunity when play is in your sweet spots.

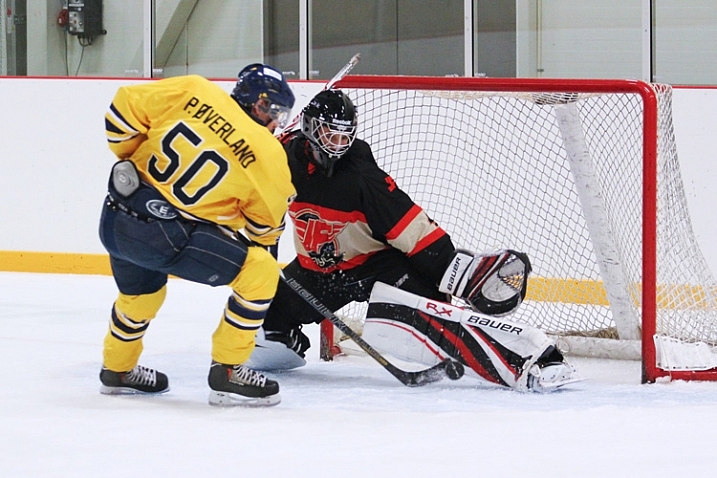
A hockey player tries to deke around the goaltender

When I stand near the benches with a 70-200mm lens, this play in front of the net is right in my sweet spot, which allows for strong composition.

Where possible, it’s a good idea to put yourself in a position where the players will be coming towards you. This allows you to see faces and get a better sense of depth than if you shoot from the sidelines and get a side profile view of everyone.

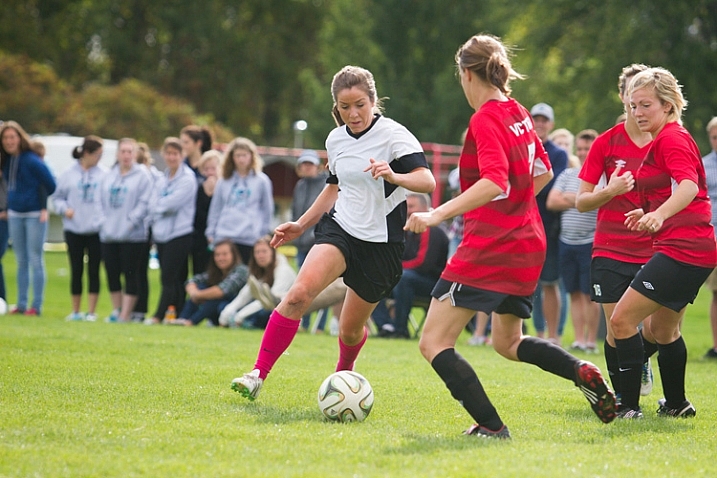
A female soccer player attempts to dribble the ball through two defenders

Get in the middle of the action

If you want to take a sports photo that will be memorable, you need to bring the viewer in as close as possible. Typically, this means using a zoom lens like the 70-200mm. If you don’t have a long zoom lens, simply get as close as possible to the field.

Perspective changes quite a bit as you zoom in. A wide-angle shot looks very different than a shot with full zoom (long telephoto). Consider how you can use this change in perspective to find some unique captures.

Many first-time sports photographers are nervous to zoom right into the middle of the action. Yes, it does come with some risks. You’re likely to snap plenty of frames where an unexpected zig or zag took the player partially out of the image. This is part of sports photography. Even the professionals aren’t able to nail the perfect shot every time.

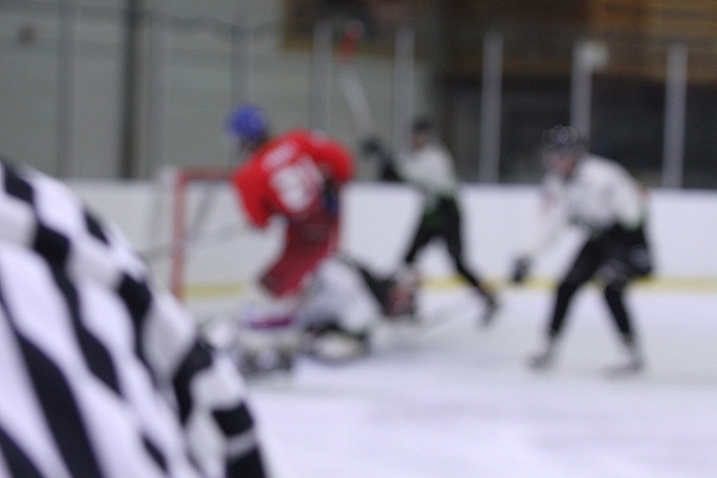
A hockey picture where the focus has missed

In this shot, the referee passed in front of the camera and messed up the focus. Don’t feel upset if some pictures turn out like this! These kinds of images will be very familiar to any sports photographer.

Risks sometimes pay off

If you have trouble following the play, it definitely is an option to play it safe by taking a wider shot and then cropping in closer afterward. But by taking a high risk, high reward approach to composition will result in some magnificent images!

Another reason to use zoom: To capture expressions!

The most memorable sports shots show faces full of emotion – whether that is the joy of the game, the thrill of victory or the agony of defeat.

Image of hockey players celebrating on the ice after a goal

Image of two soccer players laughing while preparing for a corner kick

Timing is everything

There seems to be a furious competition between manufacturers to see who can make a camera that takes the most images per second.

Burst mode is an incredibly useful tool for sports photography, but all too often it can be a crutch. Just because you can take 10 pictures in one second doesn’t mean you should.

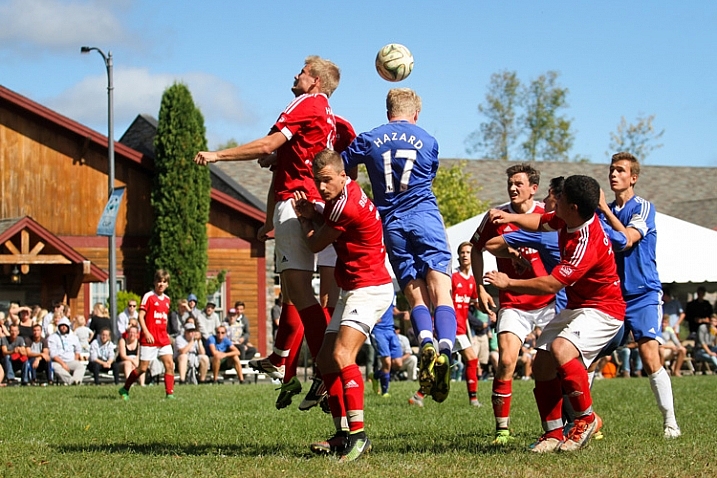
Soccer players attempting to head the ball into the net from a corner kick

Having the ability to take pictures in bursts should be secondary to anticipating the action. Understanding of the game and having a sense for what is going to happen next is more important than burst mode in every case. If you return from every event with thousands of pictures, all taken a fraction of a second apart, it’s going to be a strenuous job of sorting and finding the keepers.

With that said, burst mode can be a great tool if you don’t want to miss any opportunities and have lots of room on your card.

Lastly, don’t spend the whole game chimping! Chimping is when you get so caught up checking out all of your sweet pictures on your camera’s LCD screen that you miss an incredible play that happens right in front of you. Your pictures will still be there when the game is over. Focus on getting your shot!

Hitting your focus

Having the perfect settings, composition and timing won’t count for anything if you miss your focus.

With the possibility for spectators, colourful advertisements, and other players in the background of your images, your camera’s focus might wander and lock onto the wrong target.

For sports photography especially, you might want to consider using back button focus. With this method, your focus is controlled by a button on the back of your camera, which you can reach with your thumb. The shutter button doesn’t influence the focus at all.

By separating the actions of focusing and taking the picture, you will have greater control and independence over both roles. You may need to consult the manual for information on how to switch your camera to back button focus.

An sports action shot of hockey players fighting for the puck

Focus modes

Your camera comes with different focus modes that you can use to get more reliable results, even when dealing with fast and unpredictable subjects. The process for selecting these modes will be a bit different for every camera, so consult your manual for information on how to switch to these options.

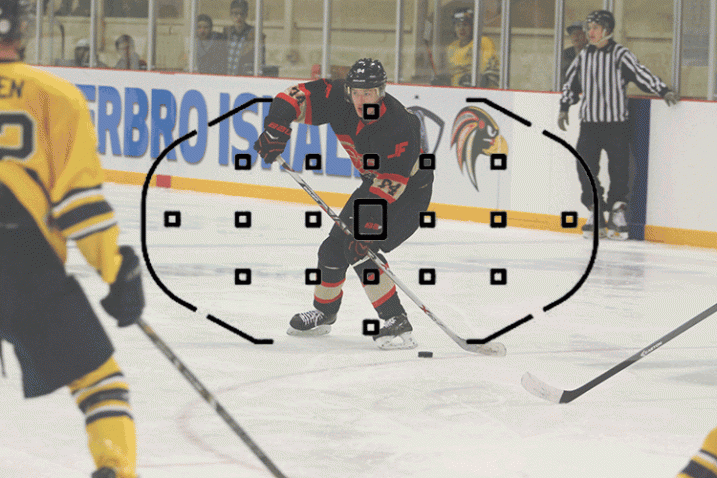
First off, you can allow your camera to use all the focus points to determine the best target to lock onto. This can often go wrong, however, as the camera may choose the wrong point, leaving you with an out-of-focus image.

You can get a bit more specific with zone focus, which allows you to select a group of focus points that the camera uses to determine what it focuses on. This focus mode gives up greater control over what the camera locks onto, but still leaves some room for error.

If you want to be very precise, single point focus allows you focus based on just one point of your choosing. This is great if you want to focus on a specific player in a group. The drawback is that is may not be as accurate, and you may need to be very steady in order to stay locked on target.

Shows all the different focus modes

This image shows three different focus modes as seen through a Canon 7D: Full Auto Focus, Single Point Focus, and Zone Focus

You can also select how the focus will track. These settings may have different names from manufacturer to manufacturer, but they do the same thing.

Continuous or AF-C (Nikon) / AI Servo (Canon):  In this mode, your focus will constantly seek for as long as you are holding your focus button down. This is ideal for moving subjects, and should be your first choice for sports.

Single or AF-S (Nikon) / One Shot (Canon):  In this mode, your focus will find a target and lock, even if you continue to hold down your focus button. While this is often slightly more accurate than servo focus, your subject may have already moved out of focus by the time you take the shot.

AF-A (Nikon) / AI Focus (Canon):  This mode is an intelligent blending of the two previous modes – it will determine if the target is moving and will lock or track accordingly.

Making the most of the focus technology your camera has to offer will play a big role in snapping some excellent sports shots!

Bonus tips and tricks

If you are photographing a car race or a long jump event, it can be a real challenge to track your subject in action. A fast moving car or runner isn’t an easy target for a lot of cameras.

One surefire way to hit your focus even under these tricky conditions is to prefocus. When using this technique, you pick a spot somewhere ahead on the track to carefully set your focus. Then, when your subject comes through, you simply snap the picture and voila!

Two hockey players in mid air after a body check collision

If you want to add drama and action to your images, consider shooting from a lower angle. This perspective can often make athletes seem heroic or larger than life. Shooting from a lower angle also means the background will show spectators or the opponents behind the player, giving a better sense of the setting and action.

Take Lots of Pictures!

When you get home and load the images on your computer, you’re going to find that many of your shots have missed focus, have players in awkward or unflattering angles, or other annoying distractions. This is perfectly normal! It isn’t easy to capture the chaos of sports, and you’re going to need to throw out a lot of shots.

Over time, as your feel for the game from behind the camera improves and as you begin to master these techniques, you will find yourself coming home with more and more keepers!

googletag.cmd.push(function() {
tablet_slots.push( googletag.defineSlot( “/1005424/_dPSv4_tab-all-article-bottom_(300×250)”, [300, 250], “pb-ad-78623” ).addService( googletag.pubads() ) ); } );

googletag.cmd.push(function() {
mobile_slots.push( googletag.defineSlot( “/1005424/_dPSv4_mob-all-article-bottom_(300×250)”, [300, 250], “pb-ad-78158” ).addService( googletag.pubads() ) ); } );

The post How to Capture the Perfect Action Shot in Sports Photography by Frank Myrland appeared first on Digital Photography School.


Digital Photography School

 
Comments Off on How to Capture the Perfect Action Shot in Sports Photography

Posted in Photography


6 Tips for Planning the Perfect Landscape Photo Shoot

15 Sep

How many times have you shown your pictures to someone and said, ”You should have seen that sunset in person to understand how magic it was!” We can make many excuses as to why the photo doesn’t look the same, complaining about our equipment, settings or post-production, but let’s face reality, maybe there was something wrong with our landscape photo!

Before you open Photoshop, and even before you press the shutter button, you need to plan the kind of image you want to create. Planning plays a key role in landscape photography. Here are some things that are useful to think about if you want to capture the perfect light and transmit some feelings with your images.

Tip 1: Check the weather forecast

landscape photography

Calton Hill – Edinburgh, Scotland

Landscape photography is one of the most difficult genres, or at least among the most unpredictable, as you don’t have any control over the weather at the scene.

What kind of atmosphere do you want to create with your image? The weather can completely transform a landscape, so think carefully about what mood you want to evoke. If you want to create a bright, cheerful image you might already know that a blue sky with fluffy white clouds would be better than a flat blue sky, or even worse a grey one.

So, before you drive for two hours and you arrive to see is a dull landscape, use the only weapon at your disposal: the weather forecast.

Tip 2: Choose the right time of the day and year

The perfect weather condition alone is useless without proper light. In landscape photography, the light is given by the position of the sun in the sky in relation to your subject. Fortunately, this is something more predictable than the weather. Calculate where the sun will be at particular times of day, and it will be easier for you to foresee how the scene will be illuminated. Again, think about the atmosphere you want to create. Light and peaceful? Dark and moody? Are there any particular landmarks you want to highlight? The answer to these questions will inform where you want your light to be, and consequently what time of day to shoot.

landscape photograph Groningen, Netherlands

Groningen, Netherlands

Bear in mind that the sun’s position doesn’t change only during the day, but also throughout the year. As a result, in one year there are many different lighting conditions for the same place. It would be a shame not to use them to your advantage. You can use many websites and apps for this; the one that I use the most is PhotoPills, which is very well outlined in this article.

Tip 3: Be inspired by other photographers

When you plan your holiday, after booking the tickets and the hotel, you may buy a travel guide with detailed information about the location. Like where to go and what to eat, to make sure you won’t miss anything. Or you might just ask some friends who have been there before. In both cases, you’re relying on someone who went there before you, and who therefore knows what’s worthwhile to visit, or what’s a good typical (local) dish to try.

Even if you can’t do exactly the same thing with photography, you can get pretty close, thanks to the multitude of photography websites and social networks full of pictures from all over the world. The ones I personally use most of the time are; Google Images, 500px, Instagram, Flickr, and Pinterest. Obviously, the list doesn’t end here.

Feel free to use whatever sites you want, as long as you do it. It doesn’t matter if the picture isn’t the best quality, after all, you don’t want to copy it, but you’re just looking for some inspiration

landscape photograph Zaanse Schaans, Netherlands

Zaanse Schaans, Netherlands

Tip 4: Enjoy the place and get familiar with it

When arriving somewhere, especially if it’s for the first time, it’s really tempting to take your camera and shoot whatever you see! This isn’t wrong in itself, but remember you’ll probably take dozens of nice pictures and lose the opportunity to take that single outstanding one. Because when the moment comes you’ll be tired of taking other pictures, or even worse, the battery is dead. (By the way, do you have a spare battery, don’t you?)

It’s better to be patient and spend more time exploring your location and the surrounding area. This way you are more likely to discover some interesting spots, hopefully different from the classic ones. You can use your smartphone for your normal tourist pictures, so don’t worry about anything but composition. This way, you can enjoy the place where you are, instead of spending all the time behind your camera. After all, landscape photography should be the happy ending of a good day outside, not the only reason for being there.

landscape photograph Land’s end - Cornwall, England

Land’s end – Cornwall, England

Tip 5: Use both golden and blue hours wisely

I’m sure you already know what the golden hour is: the time of the day around dawn and dusk when the sun gives its best warm light and long soft shadows. Hence the adjective golden. Many photographers, including me for a while, consider it as solely the right moment for obtaining good photos. This is wrong, because there is another one, called blue hour, which occurs just before the golden hour at sunrise, and just after sunset.

As you can imagine from the name, its particularity is in the blue colour of the sky, not warm anymore and not totally dark like in the middle of the night. It is very effective for urban landscapes, because it emphasizes artificial lights that wouldn’t be as visible during the golden hour. Furthermore, since the sky is not totally dark, you’ll have a better contrast with the warmer colours of the city, which will add drama to your picture.

landscape photography Manarola - Liguria, Italy

Manarola – Liguria, Italy

Tip 6: Take location related issues into account

So, you’ve planned your shoot by choosing the right day, with good weather and explored the place properly. Is that all?

Almost… There’s still something to be considered and it depends on the place. For example, in the case that you want to photograph a coastline, you will need to consider tides. It can be useful for composition purposes, but most importantly it’s for your personal safety. Tides in the ocean are really rapid and wide, and in some cases, it could be difficult (if not impossible) to escape from the waves if you decided to shoot from the rocks along the shore, with a rocky wall behind you.

In the case of very famous landmarks, a common issue is that it will be full of other photographers and tourists that want the same shot as you. This can obviously create problems for your composition, or you won’t have enough space for your tripod. So, try to be in that place before it gets too busy. This not only reduces the risk of finding other photographers who have decided to photograph from your same spot, it also permits you to slow down and avoid making mistakes.

landscape photography London, England

London, England

Conclusions

When I started taking pictures several years ago, I didn’t have anything in my mind other than to take pictures of what I liked. But looking at other photographer’s work I realized that I was missing something. In my opinion, proper planning is the most important thing that I could have learned.

Obviously learning new techniques is useful, but it’s the most obvious. Planning is often underestimated, but it can really help you to go somewhere already having a picture in mind. If this isn’t the case, remember again: landscape photography is just the happy ending, you can still enjoy the place!

Do you have any other tips for planning your landscape photography shoots? I’d love if you shared them in the comments below as well as your images.

googletag.cmd.push(function() {
tablet_slots.push( googletag.defineSlot( “/1005424/_dPSv4_tab-all-article-bottom_(300×250)”, [300, 250], “pb-ad-78623” ).addService( googletag.pubads() ) ); } );

googletag.cmd.push(function() {
mobile_slots.push( googletag.defineSlot( “/1005424/_dPSv4_mob-all-article-bottom_(300×250)”, [300, 250], “pb-ad-78158” ).addService( googletag.pubads() ) ); } );

The post 6 Tips for Planning the Perfect Landscape Photo Shoot by Luigi Trevisi appeared first on Digital Photography School.


Digital Photography School

 
Comments Off on 6 Tips for Planning the Perfect Landscape Photo Shoot

Posted in Photography


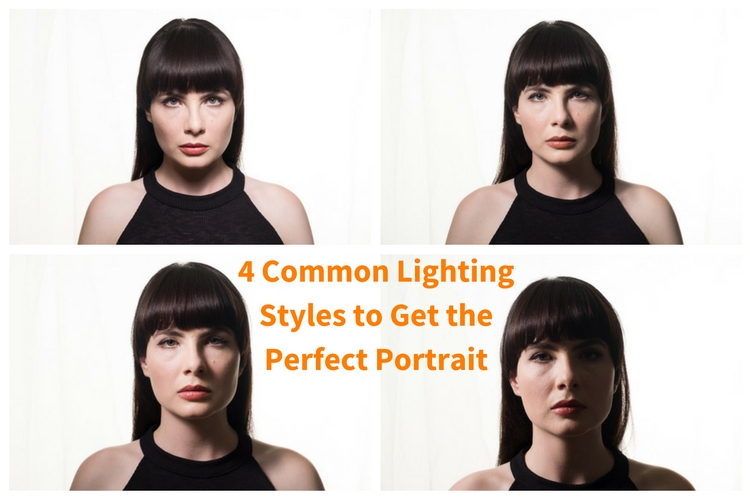
4 Common Lighting Styles to Get the Perfect Portrait

01 Sep

When you begin doing portrait lighting for the first time, the general advice you get is to put your light at 45º to your subject, and aim it down at 45º. It’s a quick way to get something reasonably good, without a lot of understanding. With a little more knowledge, you can make better lighting decisions, and get more dramatic images.

4 Common Lighting Styles to Get the Perfect Portrait

Light has four main properties:

  1. Quantity
  2. Quality
  3. Color
  4. Direction

In this article, we’re looking at direction of light only. If you look at the work of the Masters in painting, you’ll notice that they go to great pains to create light and shadow through their brush strokes. You can of course translate these to your own lighting. So let’s look at the different portrait lighting styles or patterns you can use.

To be able to see these patterns, your subject should be facing the camera. The key to seeing what’s happening is to pay attention to what the shadow is doing, especially the nose shadow.

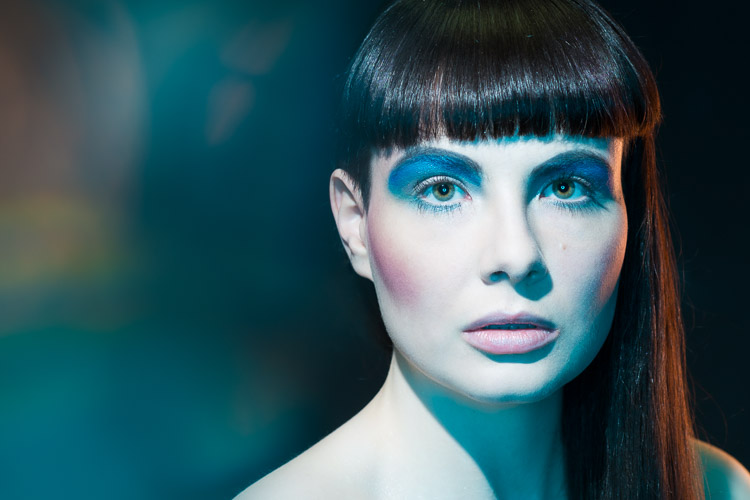
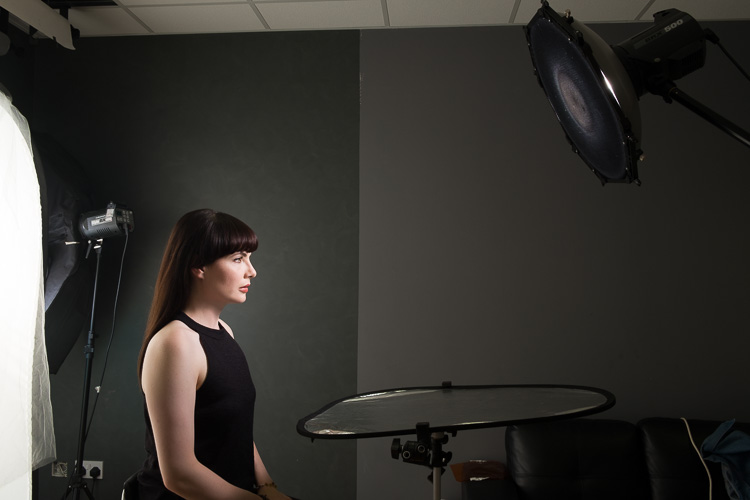
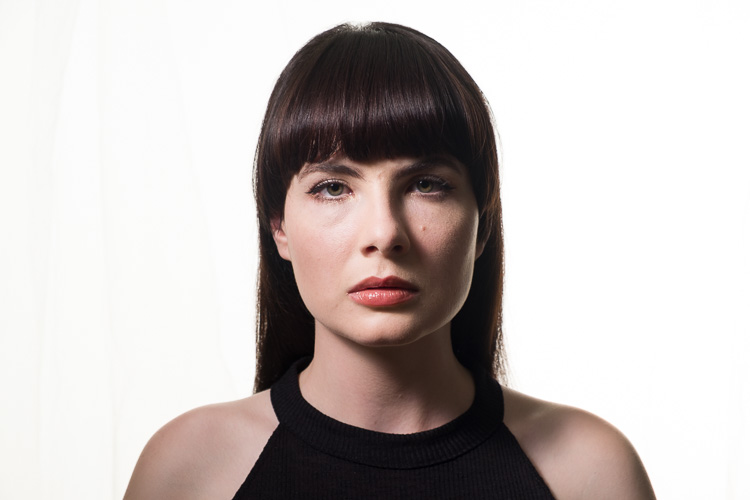
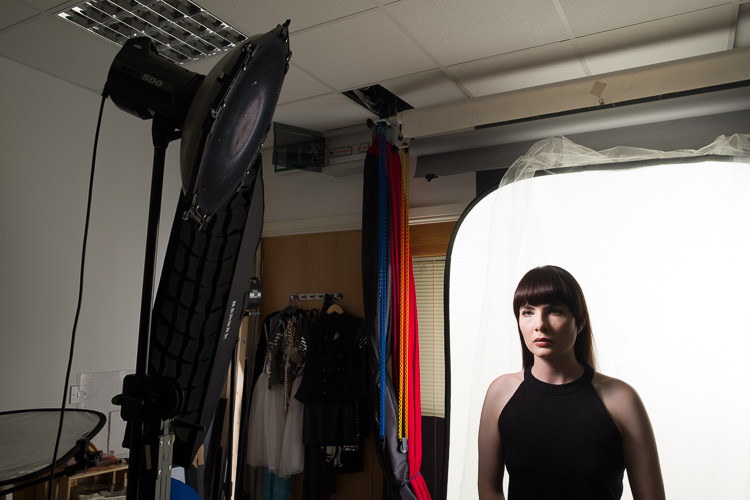
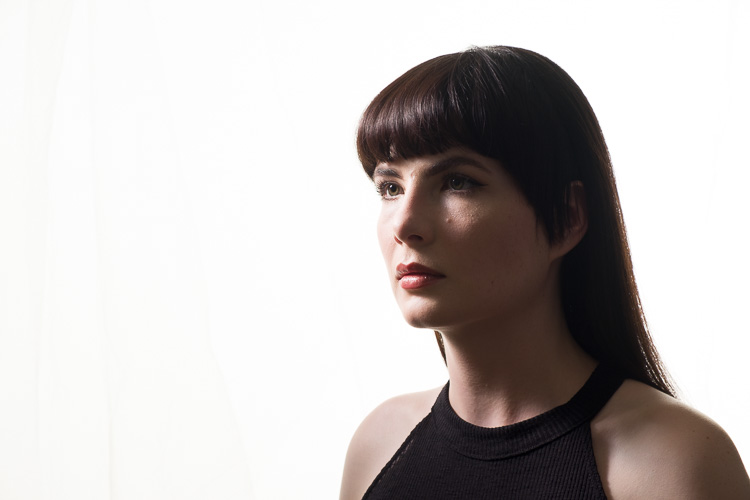
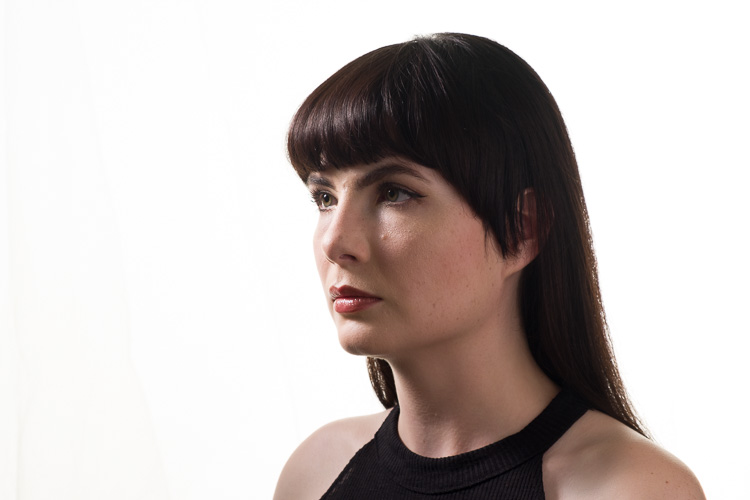
Short Lighting with a Butterfly pattern.

Short lighting style

For this setup, I’ve used an Elinchrom BXR500 with a 44cm white beauty dish. The deflector is translucent, and I’ve added a grid to control the spill of the light. The Camera was a Fujifilm X-T10 with a Fujinon 18-55 lens.

The Portrait Lighting Styles

1. Butterfly Lighting

Butterfly lighting refers to the shape of the shadow under the nose that this pattern creates. It’s meant to look like a butterfly in flight, viewed from straight on. It’s also called Paramount lighting when used with guys to sound more masculine. If you look at the work of 30s and 40s Hollywood photographers like George Hurrell, you’ll see this lighting style in operation.

Classical Lighting Patterns 01

The basic butterfly portrait lighting, with no reflector.

First you should place your light on a boom stand, and position it so it creates a line between you, the light, and your subject. Your light should be high enough to create the butterfly shadow. If it’s too low, you won’t get a shadow and the light will be too flat. If it’s too high, you’ll have the nose shadow will cut into the lip.

As you look into the eyes of your subject, make sure you can see a reflection of your light. This reflection is called a catchlight, and helps give life to the eyes. If you cannot see the catchlight, lower your light a bit.

Classical Lighting Patterns 02

The basic butterfly portrait lighting, with silver reflector.

With Butterfly Lighting, it’s common practice to put a reflector (or even another light at lower power) underneath the chin to bounce light back up. This helps soften the look, and reduces the shadows caused by your light position. You’re not trying to overpower the light from above, as doing this will cast shadow upwards on the face, which isn’t particularly flattering.

Classical Lighting Patterns 03

Behind the scenes shot of the basic butterfly lighting, with a reflector.

2. Loop Lighting

For Loop Lighting, you’re looking for a loop shaped nose shadow. Move your light to the left, or light from the centre. You’ll see the shadow change shape. With Loop Lighting, the nose shadow shouldn’t touch the shadow side of the cheek.

Classical Lighting Patterns 04

Loop Lighting

You should aim to have the bottom of the nose shadow about halfway between the lip and the nose in position. With Loop lighting, you’ve got two main options for filling in shadows. You can use a reflector, or a second light from the opposite side of the face as the key light, or you can use an on axis (behind the camera) fill light (like a ring light or an Octabox).

3. Rembrandt Lighting

If you move the key light around a farther, the nose shadow will meet the cheek. Some refer to this as closed loop lighting, with the normal Loop Lighting being referred to as open loop lighting. From a technical standpoint, Rembrandt Lighting usually has a higher light position than closed loop lighting, but for most the term Rembrandt refers to any light that creates a triangle of light below the eye opposite the light source.

Classical Lighting Patterns 05

Rembrandt Lighting

You can probably guess that the name is based on the work of the painter Rembrandt. A lot of his portraits were painted while the subject was lit from a skylight or high window, giving that famous look.

Classical Lighting Patterns 06

Behind the scenes making a Rembrandt Lighting.

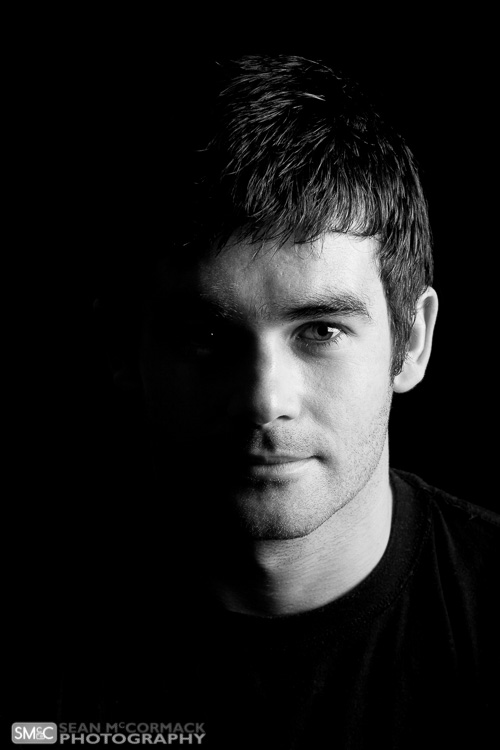
4. Split Lighting

You’ve moved the light slowly from straight on, and your final light style is when the light is perpendicular to the camera. You’re lighting only one half of the face. One of the most famous uses of this is The Beatles album ‘With The Beatles’, where all four members are split lit. You should only be able to see one eye in the shot for this pattern (the other will be in shadow).

Classical Lighting Patterns 07

Split Lighting.

Classical Lighting Patterns 08

Behind the scenes for Split Lighting.

Broad and Short Lighting

To show how the patterns work, you’ve shot straight on to your subject. In real life this is only one view that you’d capture. By turning the face to the side you get even more options. When the face is at an angle, there are two parts of the face visible, the broad side, and the short side. The broad side is the one nearest you, from the ear to the nose. The short side is the small bit of the side facing away from you, that you can actually see.

By aiming the light at the broad side of the face, you see the face in detail, with very little shadow. On the other hand, if you light the short side of the face, you get more shadow. These lighting positions are referred to as Broad and Short Lighting respectively.

You can use Short Light to flatter heavier subjects, as the shadow tends to hide weight in the face. Broad lighting is better for thinner people, and is often used in fashion. For the Short Light example, the light was in the same position as our Split Lighting, the model has just been turned towards the light. For Broad Lighting, you can have it any where in front, though for this example, it was off to camera right.

Classical Lighting Patterns 09

Broad Lighting (main light is to camera right).

Classical Lighting Patterns 10

Short Lighting (main light is to camera left, closer to the background than the subject).

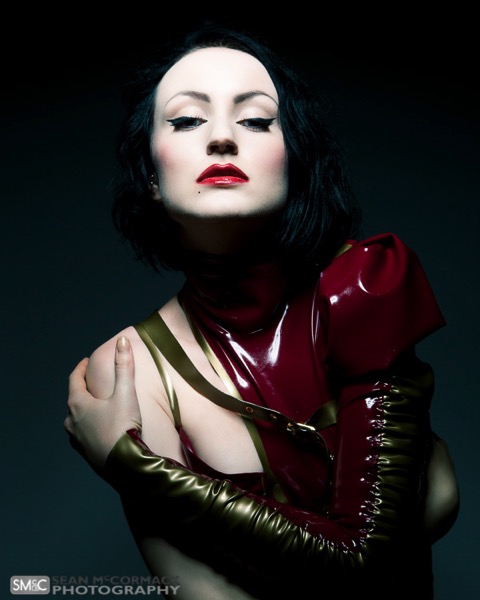
Creating Drama

The trick to creating drama is to use shadow effectively. For this reason Short Lighting is the best option. You can use each pattern in a short light fashion.

Remember at the start, you were told to pay attention to the nose shadow? For Butterfly, you’re still looking for the butterfly shadow. The light will be directly in front of your subject’s nose to get this. As you move the light away, towards Loop position, it’ll start to become more dramatic. You can even do a Rembrandt portrait for really dramatic effect.

Classical Lighting Patterns 11

Rembrandt Lighting, Short lit with no fill.

Classical Lighting Patterns 12

Rembrandt Lighting, Short lit with silver reflector fill.

So that’s how to use common portrait lighting styles or patterns. You should get familiar with them, and as you look at magazines and online, you’ll start to see them in use.

Examples of Portait Lighting in photos

Classical Lighting Patterns 16

Short Lit Loop Light

Classical Lighting Patterns 14

Split Lighting

Classical-Lighting-Patterns-13.jpg

Butterfly Lighting

Short Lighting with a Butterfly pattern.

Short Lighting with a Butterfly pattern.

googletag.cmd.push(function() {
tablet_slots.push( googletag.defineSlot( “/1005424/_dPSv4_tab-all-article-bottom_(300×250)”, [300, 250], “pb-ad-78623” ).addService( googletag.pubads() ) ); } );

googletag.cmd.push(function() {
mobile_slots.push( googletag.defineSlot( “/1005424/_dPSv4_mob-all-article-bottom_(300×250)”, [300, 250], “pb-ad-78158” ).addService( googletag.pubads() ) ); } );

The post 4 Common Lighting Styles to Get the Perfect Portrait by Sean McCormack appeared first on Digital Photography School.


Digital Photography School

 
Comments Off on 4 Common Lighting Styles to Get the Perfect Portrait

Posted in Photography