RSS
 

Posts Tagged ‘Patch’

Photographing on Your Home Patch and Why You Need One

19 May

The post Photographing on Your Home Patch and Why You Need One appeared first on Digital Photography School. It was authored by Jeremy Flint.

dps-photographing-on-your-home-patch

Photographing on your home patch is an exciting way to practice your photography. Making a long journey to take photos can seem like a daunting task because of the travel times involved. Photographing closer to home is a much easier and inexpensive prospect and doesn’t require venturing too far.

What is a home patch

You may be wondering what a home patch actually is? Well, it refers to “a local area that is close to home and is easy to access year-round.”

A local patch can be almost anywhere nearby, and for most people will be on public land. It can be a location that is close by that you can visit with minimal efforts, such as a field, woodland, park, city, or river. Being nearby, you can ideally walk, bike, or use a vehicle to get there.

Why do you need a home patch?

There are several reasons why you need a home patch. Firstly, good photos can be achieved close to home with minimal effort. I took this shot less than five minutes from my home. I simply drove down the road, parked the car, and took the picture.

Photographing on your home patch
Misty morning, Oxfordhsire

By
photographing on your home patch, you can focus your efforts in one area, you can
re-visit the location anytime and you can spend more time enjoying your
photography and taking pictures.

Advantages of a home patch

Some great advantages of photographing locally include saving on time, as traveling is minimal, and the area is close by and relatively easy to get to. Going local by photographing on your home patch saves on costs as all you need is your camera. It is also a great way to practice your photography skills.

Focussing your photography on an area close to home will help you to keep your technique sharp whilst improving your images over time. You can even find a local project to capture.

Having traveled to several countries around the world to photograph amazing places, there is nothing I find more satisfying than capturing strong images close to home. You don’t need to travel far to create good photos.

For this shot, I visited the field of dandelions at first light to capture the early morning glow.

Photographing on your home patch
Dandelions in mist

When shooting close to home, you have the added benefit of being able to visit your local patch when the weather is more favorable. You can also visit at any time during the year, which is difficult to do when you visit somewhere abroad for a week on holiday, and the weather is unpredictable.

Other advantages of photographing on your home patch are that it enables you to practice your photography more frequently rather than waiting for a trip. You will also be better prepared for when you do go on a long journey with your camera.

What
to look for?

You may be wondering what you should look for when photographing on your home patch?

Well, once you have identified a great location nearby, you just need to decide what you will photograph. Your approach could be to photograph wildlife, landscapes, street scenes, or even architecture depending on your favorite photography subjects.

Photographing on Your Home Patch and Why You Need One
Deer, Oxfordshire

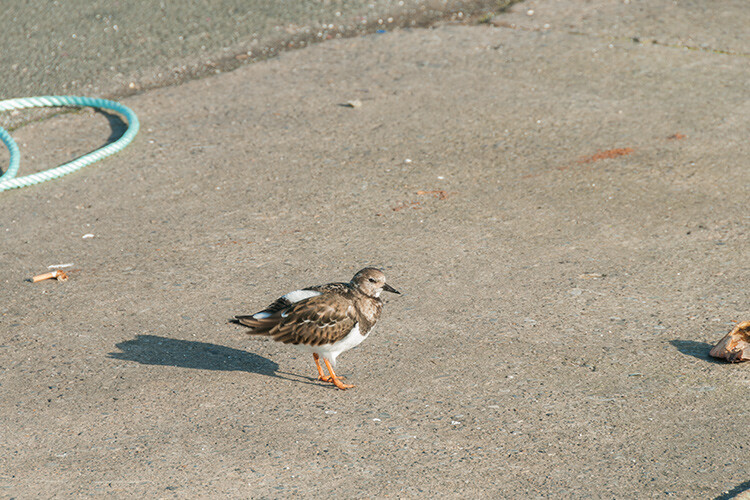
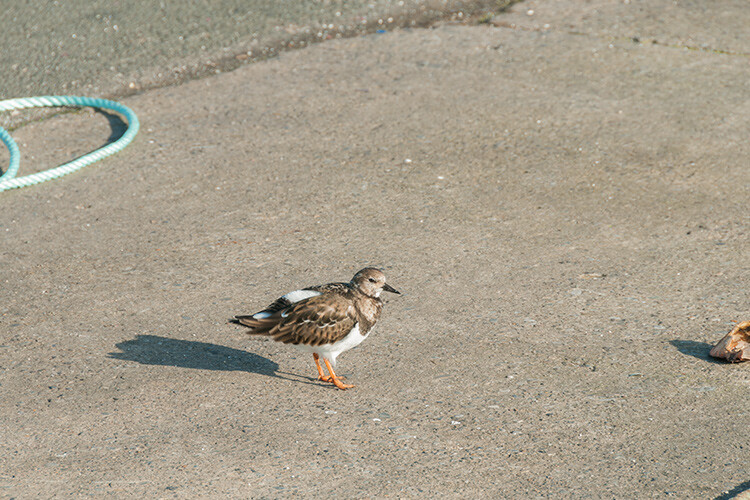
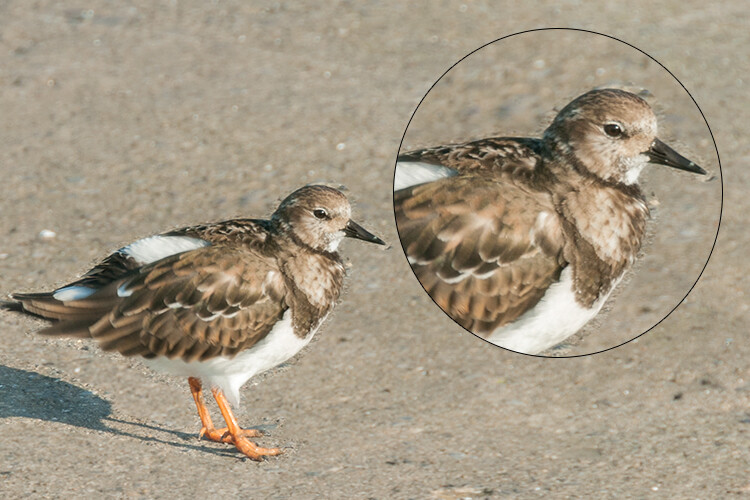
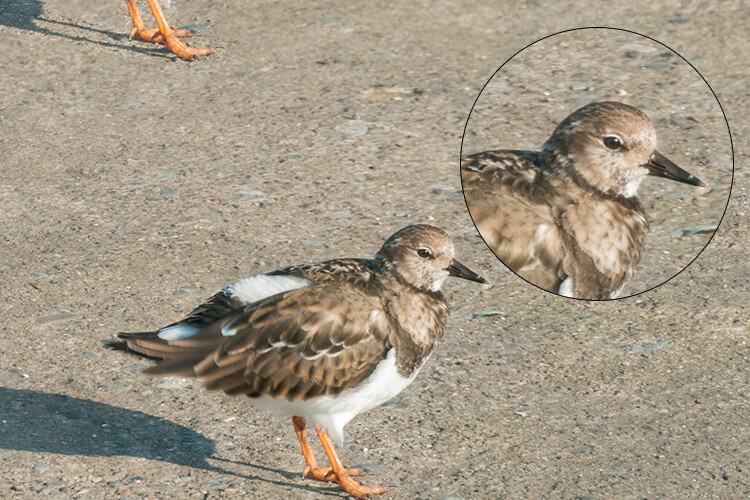
Finding great subjects close to home is easier than you may think. You don’t need to go on an African safari to take great wildlife photographs, for example. In the UK, we are lucky enough to have deer, rabbits and foxes for wildlife photography. When out in the countryside, observe nature and look for any clues of wildlife being present. You may find animal tracks or signs of life on show.

Local
woodlands and fields can be great places to visit and photograph too whilst
getting some fresh air in the great outdoors. In the UK, they are a haven for
birds and mammals such as squirrels and deer.

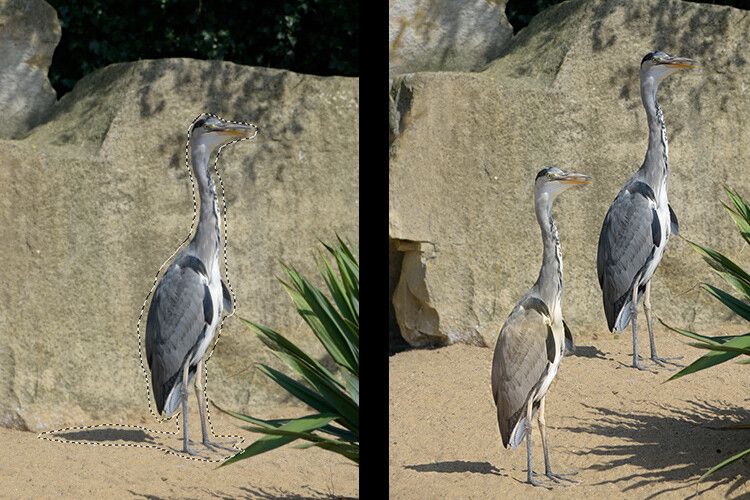
Rivers and riverbeds provide homes to otters, herons, and fish too, which you may be lucky to photograph.

Photographing on Your Home Patch and Why You Need One
Oxford, England

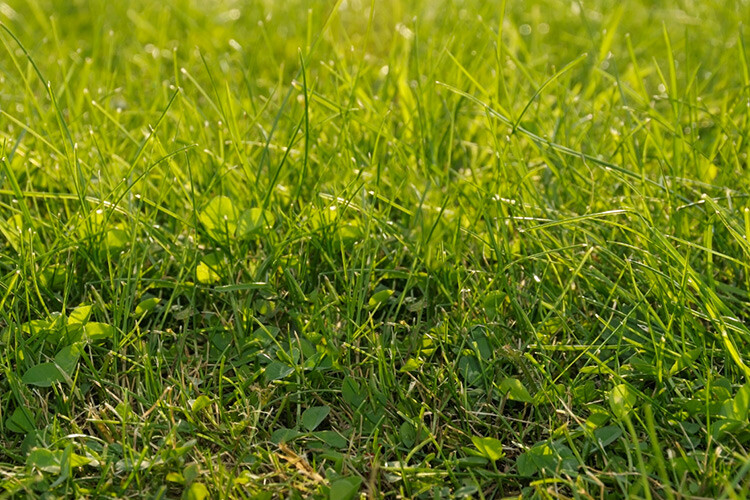
Some other ideas for things to look for in nature are beautiful landscape scenes such as valleys, trees or hedgerows, and details such as insects and plants. Shooting close-ups can give a more intimate view of a flower or insect.

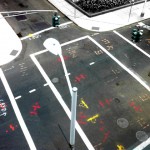
If you live in a city, your home patch can include street photography, architecture photography, capturing reflections in windows, doing panning, or light trails to capture movement of traffic.

Working your local patch helps you to gain a
better understanding of your environment and become familiar with your
surroundings, the lie of the land, the buildings and their inhabitants. 

Whenever you visit, remember a familiar location can look very different in diverse light, contrasting weather and variable times of the day and year.

Conclusion

In summary, photographing on your home patch is a great way to practice your photography closer to home and generally requires minimal effort. Finding a local area to photograph that is easy to get to also saves on time and cost. Look to photograph something you enjoy such as landscapes, woodlands, wildlife present in nature and urban scenes in local towns, or cityscapes and night photography.

Be sure to share the images you capture on your home patch with us below and any other tips you may have.

The post Photographing on Your Home Patch and Why You Need One appeared first on Digital Photography School. It was authored by Jeremy Flint.


Digital Photography School

 
Comments Off on Photographing on Your Home Patch and Why You Need One

Posted in Photography


No dual-cam? No problem: Patch app for iOS uses neural networks to create fake bokeh images

11 Nov

Most dual-cam equipped smartphones offer a ‘fake bokeh’ feature. Thanks to the slightly offset position of their two lenses, cameras in devices like the Apple iPhone 7 Plus, Huawei P9 or LG G5, can distinguish between objects in the foreground and background of an image. By applying digital blur to the latter they can simulate effects of shallow depth-of-field you would typically achieve with a DSLR and fast lens.

If your phone just has one camera, there are still a few pure software solutions out there to achieve the same effect. The Patch app for iOS is the latest and uses neural networking to identify the foreground subject in an image and isolate it from the background. If the scene is too complex for the algorithms to work automatically, there is also a manual selection tool that can be used to optimize the results. You can paint in areas that should be sharp, and remove areas that should be blurred. A zooming function allows for greater precision in this task. 

Once the selection is finalized users can choose from 5 different blur strengths to generate the desired effect. Patch does not have any particular camera hardware requirements and therefore works with most iOS devices. If you want to try the app you can download a free version that will leave a watermark on your images from the Apple App Store. A $ 1 in-app purchase will get you an upgrade to the watermark-free version.

Articles: Digital Photography Review (dpreview.com)

 
Comments Off on No dual-cam? No problem: Patch app for iOS uses neural networks to create fake bokeh images

Posted in Uncategorized


How to Use the Patch Tool in Photoshop

23 Apr

There are tools in Photoshop that I use more than others, and some not at all. The Patch tool is one of my favourites. It is so easy to use and with each version of Photoshop, it has gotten even better.

title-Patch-tool-in-Photoshop

The Patch Tool is located under the fly out menu of the Spot Healing Brush.

What exactly is the Patch Tool for?

The Patch Tool is part of the healing brush set of tools. These are the go-to tools for retouching and repairing your images. The Patch Tool is primarily used to repair larger areas of an image, or get rid of any distractions or blemishes.

The patch tool was introduced into Photoshop at the same time as the Healing Brush. It is similar to the Healing Brush Tool, in that it matches the texture, lighting and shading of the sampled pixels to the source area. But, the Patch Tool uses selection-defined areas instead of a brush.

Prior to Photoshop CS6, you could not work on a separate empty layer when using the Patch Tool, unlike the Spot and Healing Brushes. This meant that you had to duplicate the layer that you were working on. However, in Photoshop CS6, Content-Aware was introduced to the Patch Tool. So you can now work on an image using an empty layer. This has made it quite powerful indeed.

What makes the Patch tool unique is that each time you use, it will give a slightly different result even on the same selection. It is great for retouching larger areas of your image, very fast and quite seamlessly. Or if you are in Destination Mode, this can also duplicate, or clone an object. Although, I rarely use it for that, it’s still an option. I will illustrate this further on in the article. There is also an option to use a pattern or Transparent, neither of which I’ve had a use for yet to date.

What does the Patch Tool look like?

The Patch Tool can be found hidden behind the Healing Brush tool in the Tools panel.

patch tool highlighted in tools panel in photoshop

By clicking on the Spot Healing brush in the tools panel. A fly out menu appears, the Patch tool is the third one down.

How does the Patch Tool work?

  1. Select the Patch tool and draw an area around your selection. It works in a similar way to the Lasso selection.
  2. Move the cursor over the selected area and drag it to the left, right, or in any direction.
  3. Choose whether you choose Source or Destination mode in the Options Bar. You will see a preview of the image as you drag it.
  4. When you release the mouse or stylus, Photoshop does the magic of blending the pixels from the source or the destination area, to merge the pixels with the original selection seamlessly. Deselect by hitting Cmd+D on a Mac. Ctrl+D on a PC.
original image before using the patch tool

Image showing definite areas that needs to be removed.

simple-distractions-removed-patch-tool-normal-mode

The Patch Tool in normal mode removed some unwanted things (cigarette butts) in this image very easily and quickly.

It’s that easy, but you probably won’t get a 100% accurate result every time. You may have to make a few attempts. Just make sure you are working on a duplicate background layer, or using a separate empty layer – not your original background layer.

Tip: You don’t have to use the Patch tool to define a selection. You can use any selection tool and then select the Patch tool.

Before I show you how to use the Patch Tool with Content-Aware, I want to demonstrate how the it can be used to clone an isolated area of your image.

Duplication

In the following example, I want to duplicate the bird and add another one. Similar to the steps above:

  • Make a selection around the bird.
  • Choose Destination in the Options Bar.
  • With the Patch tool selected, position the cursor over the selection and move it into place.
  • It doesn’t do a bad job, however, if you look closely the surrounding pixels of the selection haven’t blended in so well.
patch-tool-options-bar

Click on the Destination radio button to duplicate or clone a specific area.

Bird3-duplicated

Using the Patch tool to clone or duplicate an area of an image in Destination Mode. However, the results can produce a noticeably pixelated edge.

Here’s an alternative method in getting a better result. Once you have made the selection for duplicating an area.

Press Cmd+Alt+T on a Mac (Ctrl+Alt+T on a PC). This brings up the free Transform tool. Now move the selection to a new area on the image. Click on the tick box to commit, or press Enter. The selection is still active as the marching ants are visible around it. With the Patch tool selected, move the cursor over the selection, hold down the mouse or stylus and move the selection slightly and then release. You will notice the surrounding pixels are blended better.

Bird2-duplicated-free-transform

There is a definite improvement using the free transform tool, then holding down the mouse or stylus and moving the selection slightly at the same time just before releasing it.

bird-duplicatedx3-after

And voila, three birds!

Another example of using the free transform tool along with the Patch tool set to Destination Mode.

I like to use the Patch Tool in both the normal mode and content-aware. In normal mode the Patch Tool does a great job for general clean up. However, where there are areas close to the edge of the image, the Patch tool struggles to blend or repair the selection. This is where the Patch tool in Content-Aware mode really shines.

When an area has a sharp contrast, or is up against the edge of a photo, the Patch Tool in normal mode is less effective than using the Patch with Content-Aware. (notice the selection on the right here)

In this image. I removed the unwanted areas using a combination of the Patch Tool in normal mode and Content-Aware.

Content-Aware Mode

In order to use the Patch Tool in this mode, go up to the Options Bar and change it from Normal to Content-Aware. If you want to work using an empty layer above the image, make sure Sample All layers is checked. As well, in the Options Bar, you will also see Adaption.

switching-patch-tool-content-aware

Switching the Patch Tool in the Options Bar from Normal to Content-Aware.

By clicking on this, a drop down menu appears with five options. Your choices range from Very Strict to Very Loose, depending on how much blending is required. You will need to experiment to see which one looks best. Before you deselect, press Cmd+H to hide the marching ants and toggle between each option to see which one you prefer.

Patch-tool-content-aware-5-options

The five options for the Adaptation setting of the Patch Tool in Content-Aware.

You can see quite clearly the differences between the two modes in the images below.

The Patch Tool in Normal Mode is trying to remove the golf ball on the tee from the image.

The Patch tool in Content-Aware has successfully removed the golf ball and tee from the image.

I hope you found this article useful. Do you use the Patch Tool in Photoshop? Please let me know in the comments below.

googletag.cmd.push(function() {
tablet_slots.push( googletag.defineSlot( “/1005424/_dPSv4_tab-all-article-bottom_(300×250)”, [300, 250], “pb-ad-78623” ).addService( googletag.pubads() ) ); } );

googletag.cmd.push(function() {
mobile_slots.push( googletag.defineSlot( “/1005424/_dPSv4_mob-all-article-bottom_(300×250)”, [300, 250], “pb-ad-78158” ).addService( googletag.pubads() ) ); } );

The post How to Use the Patch Tool in Photoshop by Sarah Hipwell appeared first on Digital Photography School.


Digital Photography School

 
Comments Off on How to Use the Patch Tool in Photoshop

Posted in Photography


How to Correct Skin Blemishes Using the Patch Tool in Photoshop

11 Nov

There are many articles that discuss the overuse of skin smoothing in portrait photography. Photographers strive to find a balance between realistic skin and fixing the imperfections. Obviously, one way to minimize the use of Photoshop for skin issues is to hire a phenomenal makeup artist who can make the skin look realistic and flawless all at the same time. For the times when there are issues with a client’s skin I try to not go overboard and fix every little thing. I want my client to still look like themselves when I am done editing.

UsingPatchToolSidebySideBeforeandAfter_DigitalPhotographySchool_LoriPeterson600

Some photographers use the spot healing brush religiously. I never use it. Instead I use the patch tool. My reasoning is that the Patch tool actually takes samples of the pixels and closely matches them to what you are trying to fix. If the results are not quite right, you can tweak them to suit your needs.

Step 1. Open your image

As you can see my model is absolutely beautiful, but she does have a few blemishes on her skin and we are going to fix those before we give the image to her.

Step 2. Select an area and apply a path

Hit Ctrl or Command + J to duplicate your layer. You can add a Layer Mask in case you want to undo anything later.  Then select the Patch tool and draw around the part of the skin that you want to replace (make sure the “Source” setting is selected to patch the source from the destination so it will use information from the area you drag to fix the blemish). Once selected, keep holding your mouse down and move it over to better spot of brighter skin. The skin does not have to be in the same area where you are working. You can use skin from the neck, shoulder, hand, or wherever you find better, smooth skin.

1UsingPatchToolEdits_DigitalPhotographySchool_LoriPeterson600

Step 3. Repeat and refine

Repeat the process for any other skin issues. Just keep circling the area you want to replace and dragging the circle over to a clean area. If you change something you did not want to or it doesn’t look right you can use your layer mask to hide it or you can click undo (Cmmd/Ctrl+Z).

Step 4. Reduce dark circles under eyes

Most of the time you will find that some dark circles under the eyes are showing. While it’s actually normal, we want our clients or models to look bright eyed.  If you want to decrease these, simply use the patch tool and circle the under eye area. Drag that circled area over to better skin. The result will be very harsh if left like that, so fade the technique. Go to Edit > Fade Patch Selection and a pop up window will appear. Lower the slider until the fade looks like it will blend in. Repeat the process for the other eye. The percentage of fade you use may not be the same on both sides, depending on the lighting.

2UsingPatchTool_DigitalPhotographySchool_LoriPeterson600

Step 5. Review and merge layers

Once you finish, you will see that the skin looks much better and smoother, but the details of the skin are still there without being overly fake looking. If you are satisfied, merge your layers. If you are going to do any further edits, go to your History in the Layers Palette and make a snapshot of the image so you can always come back to it.

Step 6. Brighten eyes optional

Optionally, you can brighten up the eyes a bit. Duplicate your layer again using Ctrl or Command + J. Again, add a Layer Mask in case you might want to change anything later. Select the Dodge Tool and make sure your exposure is set to around 30%. Take a big brush that covers the eye and the brow and in one motion with your mouse sweep over the eye and the brow. You can adjust the layer if it’s too bright or use your Layer Mask and remove the parts that might be too overdone.

3UsingPatchTool_DigitalPhotographySchool_LoriPeterson600

The Patch Tool can be one of the easiest and quickest ways to clean up skin and still retain the overall look of your client without making the image seem overdone. After a few times, using the Patch Tool can become like a second nature and skin edits will go quicker. Here is the before and after showing that with just a few motions with the patch tool you can achieve an overall better image where skin looks smoother, brighter, and still looks natural.

UsingPatchToolSidebySideBeforeandAfter_DigitalPhotographySchool_LoriPeterson600

The post How to Correct Skin Blemishes Using the Patch Tool in Photoshop by Lori Peterson appeared first on Digital Photography School.


Digital Photography School

 
Comments Off on How to Correct Skin Blemishes Using the Patch Tool in Photoshop

Posted in Photography


Urban Infill: Colorful Tile Mosaics Patch Potholed Streets

07 Jun

[ By WebUrbanist in Art & Sculpture & Craft. ]

pothole filled city street

In a city with over a half-million open potholes, one artist is helping address the problem and raising awareness by installing his own creative patches, filling them piece by piece with colorful tiles.

pothole with phone digits

pothole artist bachor studio

Jim Bachor has been making mosaics for years, and has turned his craft toward the pressing and persistent problem of dangerous potholes in the Chicago area, particularly bad after an especially cold winter.

pothole with hotline number

pothole fixed in context

Variations on the colors and overall design of the Chicago city flag frame text and digits, from self-titled ones (reading simply ‘POTHOLE’) to phone numbers of local car repair shops or individual identification strings.

pothole mosaic tile art

pothole patched city street

At dozens of dollars per fix, the work itself is hard to scale but does bring the broader problem to the attention of passers by, as well as the city itself as the project makes its way into the media.

Share on Facebook


[ By WebUrbanist in Art & Sculpture & Craft. ]

[ WebUrbanist | Archives | Galleries | Privacy | TOS ]


WebUrbanist

 
Comments Off on Urban Infill: Colorful Tile Mosaics Patch Potholed Streets

Posted in Creativity


Retouch images faster with new Content-Aware Patch

14 Jan

Bringing imaging magic to Adobe® Photoshop® CS6 software, the acclaimed Content-Aware family of tools lets you retouch or recompose images with astonishing ease, control, and speed. One of the newest of these intelligent editing tools, Content-Aware Patch, was just introduced in Photoshop CS6.

What is Content-Aware Patch?

Content-Aware Patch is designed for times when you want to remove unwanted content from a photo and then replace it with a precise and seamless patch. The tool automatically creates the patch for you, but only after you’ve shown it exactly which area of your image you’d like it to sample from.

And it uses Content-Aware technology to blend the patch into the surrounding area.

Patching challenges

The Content-Aware Fill option introduced in Photoshop CS5 is a great choice when you want to remove unwanted content from an image. Once you’ve deleted your selected content, it can analyze the surrounding pixels and then fill the space with content that matches those pixels. In some cases, though, Content-Aware Fill doesn’t return the desired results. For example, it can fill the space with poorly matched content if the area surrounding the deleted content lacks consistency or a discernible pattern.
How does Content-Aware Patch solve the problem?

Content-Aware Patch gives you superior results by letting you determine the area it will sample from to create your patch. For example, if you want to remove an object from a tight row of similar objects, you can tell Content-Aware Patch to sample from a nearby background area to create a precise and natural-looking patch.

Retouch with greater precision

Content-Aware Patch gives you a fast and easy way to perfect your images. Simply delete the content you don’t want, direct the tool to the patch material you think will work best, and then watch as it uses Content-Aware technology to magically create a stunning result.

Any suggestions, ideas? Feel free to comment on this article!

Back to Top

BlogPhoto

 
Comments Off on Retouch images faster with new Content-Aware Patch

Posted in Equipment


Healing brushes, Patch tool tricks: Photoshop retouching

23 Mar

High Quality www.youtube.com Hi def version at tutorialbucket.googlepages.com Knowing how to use the Spot healing brush and regular Healing brush can make retouching a breeze. See the tricks to get these two working at maximum speed!


CS4 Patch tool changes: Photoshop

13 Mar

High Quality www.youtube.com Learn why the Patch tool in CS4 works differently to the earlier versions and how to to use correctly.
Video Rating: 4 / 5


Tattoo removal with the Patch tool: Photoshop retouching

05 Feb

Hi rez version at tutorialbucket.googlepages.com Hidden features of the Patch tool revealed as we wipe out some nasty looking tattoos.
Video Rating: 4 / 5