RSS
 

Posts Tagged ‘Overcoming’

Tips for Overcoming the 5 Biggest Photography Fears

26 Jan

The post Tips for Overcoming the 5 Biggest Photography Fears appeared first on Digital Photography School. It was authored by Tim Gilbreath.

overcoming-photography-fears

“Most inventors and engineers I’ve met are like me. They’re shy and they live in their heads. The very best of them are artists. And artists work best alone…” – Steve Wozniak

While fear can affect anyone and cause undue stress in their daily lives, creative people (including photographers and other artists) are often introverted and can be susceptible to fear more than others.

Whether it is simply a hobby, passion, or profession, photography involves proficiency in both the artistic and technical realms, creating a perfect environment for anxiety and fearfulness to form.

But like with most other things in life, knowledge is a powerful ally. Learning what anxiety-inducing things you might deal with, as well as what you can do to alleviate them, can help you with overcoming photography fears. It also allows you to better and more confidently enjoy the craft.

Let’s take a look at 5 of the biggest fears we might encounter as photographers.

1. Interacting with people

This is something I can definitely speak to personally. Many of us have difficulty being comfortable interacting and communicating with others for several different reasons. It could be anything from simple shyness or a lack of confidence, or in my case, social anxiety disorder, where fear of social interaction can cause physical symptoms and impede daily life.

Because photography is something we choose to do, we can also choose our level of involvement and what facets of the hobby (or job) we participate in.

For me, I know that I don’t always feel comfortable communicating with people. Because of this, I don’t do many portrait sessions as I know that communicating in real-time with the client is necessary to produce photos that they will love.

overcoming-photography-fears

Many photographers deal with the fear of interacting with clients. (50mm, f/4, ISO 100, 1/250 sec)

Instead, my photography focuses on landscape and nature scenes, which lets me be comfortable while enjoying my work. I take on the odd portrait job when I feel ready to do so.

Of course, many of us want to learn to embrace that fear and conquer it. The best way to do this is to expose yourself to the thing that makes you uncomfortable. Learn what about it makes you feel that way until you no longer have the same fear for it.

Work on becoming more comfortable around people on a small scale, so that you’ll be ready to speak confidently to your clients.

Know your gear well, and be knowledgeable about the particular service you’re providing. This will give you something stable to hold onto while interacting with your customers.

2. Shooting in public

Street photography is a popular form of photography, and some of the biggest names in our hobby dabble in it, at one time or another.

However, it also exposes the photographer more than some other forms and can make us feel nervous and vulnerable. This is because many people don’t care to have their photograph taken. Knowing that can make the photographer reluctant to open themselves up and capture the beautiful moments they see before them, for fear of being called out or confronted.

Many street photographers deal with these issues by using gear that is better suited for those situations. Small, light, and inconspicuous mirrorless cameras and smaller lenses are readily available. These make the photographer and their actions less visible. It allows them to be more comfortable and focus on making great images.

Fishermen walking down a long fishing pier.

Shooting in public, in view of others, is another common fear of photographers. (50mm, f/8, ISO 400, 1/640 sec)

It is also helpful and important to know the rules and laws regarding photographing people in public or other spaces. That way, if someone does confront you or question what you’re doing, you’ll be well-prepared to answer them.

The bottom line is to respect everyone’s wishes, whether it’s a legal issue or not. If someone is uncomfortable with you photographing them, be a decent person, and just stop. You don’t have to delete the images or anything that extreme, as they are your images, but don’t continue photographing them. An upset subject isn’t going to make for a good photo anyway.

At the end of the day, keep in mind that there are thousands of people out there right now, taking pictures of daily life, people, places, and events. Chances are, you’ll go out and enjoy the experience without any problems, and you’ll bring home some unique images.

3. Rejection and failure

This is a common fear for many people, and unfortunately, it is one that we all experience at times. Rejection of your work or failure to produce work that you consider great will be a commonplace occurrence throughout your relationship with photography. Even the great ones dealt with rejection at times, and they often used these failures to learn more and make adjustments to be even better.

Although there is nothing you can do to completely avoid rejection or avoid producing an imperfect image, you can certainly learn to cope with it and overcome photography fears.

A photographer sets up a shot with difficult lighting.

Conquer your fear of failure by tackling challenging situations. (iPhone, 4mm, f/2.2, ISO 640, 1/4 sec)

Firstly, don’t try to block out the emotions that come with rejection or failure. You need to know what it feels like and embrace that feeling. It will make you stronger, and you will be better for it.

Keep in mind that failure is an exception, not the norm.

Also, remember that repetition is the key to improving.

Tackle some challenging situations, such as a dark and challenging lighting scenario. Go through the possible solutions and execute them until you’re confident that you can solve that problem in a dynamic, on-demand environment.

And, talk to someone.

Talk to anyone who knows you and understands how passionate you are about your craft. Friends, family, and colleagues who lift you up and encourage you can provide tremendous help. They can remind you that rejection can happen to anyone, and is a learning tool to improve your skillset.

4. Cameras and gear

The title of this section might need a little explanation. Of course, we’re talking about the fear of using your cameras and gear, not fear of your camera itself! That would be weird.

The equipment we use can come in various levels of complexity. Regardless of your familiarity with cameras in general, it may inadvertently become another source of anxiety.

Fortunately, the days of being stuck with nothing more than a printed manual are gone (isn’t it nice when we still see them, though?). The current digital age allows us to learn everything we need to know about our cameras from many sources.

Blogs like Digital Photography School, digital manuals and online resources from camera manufacturers, Forums such as Reddit, and YouTube all provide endless means of learning about the ins and outs of your equipment.

A photographer takes a picture of a beach scene.

Knowing your camera and other gear inside and out can help bolster your confidence. (50mm, f/4, ISO 100, 1/640 sec)

The bottom line is, the more you know about the equipment you’re using, the more confident you’ll be in the field or studio. The more informed you are about the camera, the less an arising problem will shake you.

Learn all you can as early as you can. Like one of my favorite old sayings goes, knowledge is power.

5. Knowledge of business and marketing

Last in the tips for overcoming photography fears is our knowledge of business and marketing. Many of us have a fear of the business side of our passion for photography.

If you intend on working as a professional (meaning you make any amount of money off of your photography, regardless of your time input), you are going to need to understand the basics of how business works.

You need to know how to price your products and services, and how to interact with clients on all levels.

Again, through the wonder of technology, the internet is a treasure trove of information (often free) that can give you a good background and bolster your confidence with knowledge.

Many people feel that it’s tough to get a good working understanding of how small business works without taking classes or even having a business degree.

Fortunately, that’s not the case. A quick Google search will reveal many free blogs and other resources that can help you, and many of these are even specific to the business side of photography.

dPS has a great e-book on Going Pro – Making Money from Your Photography.

Fear not, my friends

Overcoming your photography fears may not seem simple, but I hope this article has helped you identify some of your fears and worries when it comes to being a photographer. Maybe it even pointed you in the right direction of overcoming those photography fears.

Remember, this is your passion, and you do it because you love to, not because you have to.

At the end of your day, there is nothing to be afraid of, because you’re doing something that makes you happy.

Are there other fears you experience that we didn’t cover here? Sound off below and share them with the rest of us. You’ll probably be surprised to find how many other people feel the same way!

The post Tips for Overcoming the 5 Biggest Photography Fears appeared first on Digital Photography School. It was authored by Tim Gilbreath.


Digital Photography School

 
Comments Off on Tips for Overcoming the 5 Biggest Photography Fears

Posted in Photography


12 Tips for Overcoming Common Wedding Day Setbacks

23 Sep

Weddings are filled with love, laughter, and a lot of pressure. Brides and grooms put a lot of thought into every detail of their day and even the most perfectly planned wedding can encounter problems that can affect you, the photographer. There are no two weddings alike, however, there are common setbacks that can happen at any wedding or event that you may be photographing.

wedding portrait couple on by the ocean

1. Running short on time

The photography timeline is set out so that everyone involved can stick to a schedule. That allows all of the important details and people to be photographed. Unfortunately, running late or short on time because of any reason can be a cause of stress to everyone involved. 

wedding day photography - groom getting ready

If you are caught with less time, the first thing you should do is to assure your client that everything is okay and these setbacks are really common on the wedding day. Make sure that you mention you can make up time later and offer suggestions to the problem.

For example, if the bride has taken a little longer than was originally planned to get ready and now you only have 10 minutes for family photos, suggest to the bride that you can snap a few in that 10-minute window and also after the ceremony.

wedding day photography - 2 bride photos

If you are waiting for someone to arrive for photos, make use of the time and photograph details, other people with the bride and groom, individual photos, or more photojournalistic photos. It’s important to keep taking photos no matter the setback, this will keep the bride and groom calm knowing that you aren’t missing any detail and it can distract from the problem.

Usually, you can make up the time later and get the photos you need either during cocktail hour or during the reception. You can photograph details, portraits, and even get some interesting lighting using flash during the reception.

bridal party - wedding day photography

Photos of the bridal party during the reception because we ran out of time beforehand. You can always try and take photos later in the day if the time runs short.

2. Having too much downtime

It is rare to have downtime when photographing a wedding but it can happen. Having downtime usually occurs during the getting ready phase, waiting for the bridal party, or reception parts of the day. It’s okay to have downtime, however, there is nothing worse than seeing vendors, especially photographers, sitting down and waiting it out during these times.

Sure, it’s perfectly fine to use this time to go to the bathroom or take a snack break. Your break just shouldn’t be more than 10 minutes.

wedding dress hanging up - wedding day photography

Make sure to use the downtime wisely. Prep for the next round of photos, check batteries or set up off-camera lighting. You can also do test shot in the next location where you’ll be photographing.

Even though you’re waiting for the next event to come, never stop photographing any and all of the little details. In short: there is always something to photograph and do while you’re waiting.

3. The bride is full of emotions

I will not use the term “bridezilla” because I don’t believe it’s fair to the bride. Wedding days are high pressured days and brides are usually nervous and full of emotions before walking down the aisle.

It doesn’t matter if the couple is doing a first look or are getting ready in the same room, some brides are more nervous than others.

bride and her girls having fun - wedding day photography

If this is the case, don’t mention anything! Even if the bride is nervous, anxious, or even angry, just redirect the focus on something else like her dress or that she looks beautiful. Reassure her that everything will be okay and tell her to just enjoy the moment now.

As the photographer, it’s your responsibility to help the bride relax and feel very natural as the day unfolds. Always keep a positive attitude and try to transmit that same vibe to the bride and groom. If they feel like you are there for them, it will make all the difference in the photos. If you’re excited about the wedding, then they’ll be excited.

4. Family telling you how to do your job

Unfortunately, it doesn’t matter how long you’ve been photographing weddings, you will encounter a family member or friend who wants to tell you how to do your job at least once.

wedding couple in the grass - wedding day photography

When you encounter this type of setback, don’t make any negative or sarcastic remarks. Thank them for the idea they offered and move on. You can also comment that you’ve been photographing weddings for X number of years and are experienced in taking photos. Better yet, just go along with what they are saying and don’t say anything in return.

If they are asking for a particular photo, take the photo. If you already have, kindly let them know that you got the shot earlier in the day. This will keep them at bay knowing that you are taking all of the most meaningful photos.

wedding rings and hands - wedding day photography

At the end of the day, the guests will remember you more than you realize and if you make snarky or sarcastic remarks it may result in a negative view of your professionalism. You are there to photograph your bride’s day and that also means tending to the requests of her guests (they’re well-meaning).

5. When there is no planner or coordinator

If the couple has opted to not have a planner or coordinator, it is up to you to make sure to assist the couple during the wedding day.

Technically it isn’t your responsibility, however, helping with putting on boutonnieres, adjusting centerpieces, and placing the veil will always help you to capture the best photos possible.

girls wedding party - wedding day photography

Work with your couple before the wedding to make a schedule of the most important parts of the day that you’ll be covering. This way, everyone knows what time the family photos are happening, what time the dance starts, and what time you’ll be photographing the dress. Knowing when and where all the events will take place will give your couples peace of mind.

Having a schedule, or itinerary, will also help to move things around. For example, if the bride is late for her bridal party photos, you can take photos of the people who are there so switch to the groom’s family photos.

wedding couple leaving the church - wedding day photography

Photography is service based and as such, you should always strive to give your clients the best service possible. If that means acting as coordinator for the day to capture the best photographs possible, by all means, do it.

You can also have a family member or member of the bridal party to help to coordinate and fix any problems that may come up during the day.

6. Vendor Meals

There is nothing worse than working a wedding and having to eat a vendor meal during dinner. Everyone works differently, yet vendor meals can be a huge setback, especially if it consists of a sandwich and an apple. 

You can prepare for this by taking snacks or even a full meal. Pack an icebox or lunch bag with your favorite snacks and perhaps a little something more just in case you will be having a vendor meal.

wedding day photography - wedding cake

Try asking the couple if they are okay with you taking an empty seat during the reception or getting in line for the buffet at their event. Most guests won’t mind because, by that time, they will have seen how hard you’ve been working all day. Luckily, most couples now invite their vendors to eat dinner or make sure that they’ve had something substantial.

In any case, take your snacks and water because you’ll need them throughout the day, whether you get a vendor meal or real dinner.

7. Little time with bride and groom

Sometimes, wedding day timelines can get a little compressed leaving less time for the most important photos (next to the ceremony). However, you can create stunning photos of the bride and groom all in one spot without having to move them to different locations.

To achieve this, download 10 of your favorite poses for couples onto your phone and photograph each one from different angles. Take individual photos of the bride and groom, including details of their wardrobe.

6 wedding couple poses - wedding day photography

Without moving the couple very much, you can get many different poses and photos in a short amount of time.

When you take advantage of posing in one spot, you can get lots of different photos from different angles in less time. Subtle changes to posing like facing the bride toward the groom and then facing the bride away from the groom can offer more variety.

Using one location can maximize the time you have for photos because moving from one location to another can often waste time. This way you can focus on them and getting great expressions.

wedding couple - wedding day photography

For example, pose the couple in front of a plain wall, facing each other, hands around the bouquet. Take one photo of them in this pose full length. Take another mid-shot asking the groom to kiss the bride on the cheek while the bride smiles and looks down at her bouquet; that’s two photos.

In this same pose, get close and take a photo of the kiss. Next, go behind the couple and photograph mid-shot. Still in the same pose, get a close-up of the groom’s hand around the bride’s waist from behind the couple; the makes five photos without moving the couple.

After you have worked through one pose, choose another and work through it until you have all possible photos. This technique will ensure you get the most photos out of each pose in little time, without moving the couple.

8. Rain

Depending on where you live, what time of the year you’re photographing, and weather conditions, it could be that you get hit with rain on the day of the event. If this does happen, maintain a positive outlook and always try to help find solutions to work around the rain.

wedding day photography - b/w bride

When rain strikes, switch to an indoor location or a location with covered walkways.

Change locations for photos. If you were going to do the family photos outside of the church, try moving the family inside the church or better yet, to the reception location. Look for options where you have awnings, covered walkways/breezeways, and inside a home or venue. 

two wedding photos - wedding day photography

Sometimes, the weather clears and you’re able to go outside for the remaining portraits.

You can also take advantage and get creative with the wedding photos. Ask the couple if they are willing to pose in the rain under an umbrella. You might be surprised how many are willing to get something a little different!

9. Drunken guests

It’s not uncommon for wedding guests to want to start the party early. Work with the coordinator or the bride and assign a family member to take care of the drunken guest. If they are part of the family, try and keep them away until it’s time for them to be in photos.

shot of alcohol - wedding day photography

Try as best as you can to be nice and not comment on their state of being. Drawing attention to their behavior can upset the couple more and ruin the time you have for photos. Be really direct in posing and communication and always stay positive.

10.  Clashing with the wedding coordinator/planner

Although it is rare when vendors don’t see eye-to-eye during an event, it is really important to stay close to the couple. If you need something particular make sure to run it by the couple first. They have the final say on everything that goes on during the day.

couple poses - wedding day photography

Always maintain a high level of professionalism and make sure that you aren’t seen being rude or speaking rudely to the other vendors. If the clash worsens, tell the bride that you and the coordinator/planner have differences and suggest options to help maintain order.

Communication is key and it’s always best to go to the couple if you experience backlash or trouble with another vendor.

11. Other photographers/weddings at the same portrait location

This is probably the most common setback in the wedding industry. Many couples tend to choose the same locations for the portrait session.

If there are other photographers at the location before you arrive, simply introduce yourself and let them know that you’ll also be photographing a wedding. Ask them if they plan on using another location for photos and if they’d be willing to switch it up after a certain amount of time.

wedding Pasadena - wedding day photography

This location in Pasadena, California is really popular for bridal portraits. There were at least 3 other photographers there at this time.

If there are a lot of photographers and events, simply choose a spot at the location that is free of people. Staying clear of other photographers’ background and watching out for people walking into your frame will keep the portraits clean.

12. Guests taking photos during the ceremony

Keep in mind that the wedding guests are an important detail in the couple’s day. Each was given an invitation to share and be a part of the wedding.

Having said that, some guests will take it upon themselves to take photos of the most important parts of the day, namely, the ceremony.

lady taking a photo at a wedding ceremony - wedding day photography

When this does happen, gently tap the guest on the shoulder, with a smile and motion to them that you need the spot in order to take a great photo of the couple. Most guests will move out of the way and not be bothered by this gesture.

This also asserts that you are the main photographer while staying positive and professional with guests. This non-verbal gesture also works with other vendors like videographers.

bride's maid and bride selfie - wedding day photography

It’s also a good idea to let the guests take their photos first and then position yourself to take the profession photos afterward. This way, you’re letting guests take and share their own shots but also letting them know that you need to take these important photos as well.

couple kissing - wedding day photography

The more photos the couple has of their day, be it from your camera or from their guests, the better. They’ll appreciate you for letting guests enjoy themselves by taking their own photographs.

In Conclusion

couple dancing - wedding day photography

Wedding photography is the most important take away from a couple’s wedding. However, it is not free from mishaps during the day of the event.

Each wedding can have one or more setback, it’s up to you the photographer to work around them and find solutions quickly. Maintain a positive attitude and always reassure the client that everything is photographing beautiful.

Have you experienced any of these or other setbacks at a wedding you photographed?

The post 12 Tips for Overcoming Common Wedding Day Setbacks appeared first on Digital Photography School.


Digital Photography School

 
Comments Off on 12 Tips for Overcoming Common Wedding Day Setbacks

Posted in Photography


6 Tips for Overcoming Self-Doubt and Building Confidence in Your Photography

28 Sep

Let’s all agree that photography is one of the most frustrating yet creatively satisfying art forms out there. We all remember the passion we felt when we first started out on our photography journey. The thrill of clicking the shutter and excitedly looking at the back of the camera (if you started with digital photography) and that feeling like opening gifts on Christmas morning when you got your prints back from the developing lab (if you started with film). You know you couldn’t get enough of capturing life through a lens. Nothing quite beats the rush of knowing that you have created something cool! Right?

6 Tips for Overcoming Self-Doubt and Building Confidence in Your Photography

My lovely clients – they have been with me for through many of their most important moments, and I love them for trusting me and my creativity.

Why is it, then, that most of us eventually fall into the comparison trap and start to lose confidence in our skills? Our creativity, authenticity, and confidence get shaded in our own eyes by self-manifested doubts and shortcomings. It leaves us dejected, uninspired, and sometimes even angry. We all seem to judge ourselves against someone else’s successes – be it money, opportunities or even social media fame (yes, that seems to be quite the rage these days).

So how does one overcome those self-doubts? Here are some tips I’ve found helpful when the ugly head of self-doubt cripples my creativity.

#1 Take a break from it all

Stop obsessing about photography and go do something else you really enjoy. It could be something big like taking a trip without your camera to something small and simple like going to the movies, cooking your favorite meal, meeting up with friends, or even dancing with your kids.

No matter what you choose, find something that you really enjoy and do it just for the sake of enjoyment. It will help clear your head and allow happiness based endorphins to flow through your body leading to more positive thoughts and feelings. Personally, I pack away my gear and read a book – old romance novels from the 1970s always manages to help me bounce back and feel happy. Other times, we load up the car and head out to the mountains. So my books and hiking shoes are two of my most prized possessions.

K6 Tips for Overcoming Self-Doubt and Building Confidence in Your Photography - Olympic National Park Backcountry Hiking

There is just something about photographing tiny humans among big landscapes that seems to put the whole world and all my personal problems into perspective.

#2 Play on your strengths

When I used to work in Corporate America, we were encouraged to create yearly goals based on our strengths and weaknesses. Try and apply similar principles when you think about what you want to accomplish from a photographic perspective. Think about what multiple people or clients have complimented you on. Focusing on strengths will help you set realistic goals with achievable results and give you that boost of confidence you need.

I have been told that I am good at natural posing. Helping my clients get comfortable in front of the camera is one of my skills. I am good at making the photographic experience easy, comfortable, and convenient for my clients. These are some of my personal strengths. I know that I don’t do high fashion and in-studio sessions well. I am much happier and progress faster when I focus on what I am good at rather than trying to be someone or something I’m not.

6 Tips for Overcoming Self-Doubt and Building Confidence in Your Photography

Happy clients always makes for great pictures. These are the ones that will get shared and hung on walls for years to come – the best compliment for any photographer.

#3 Tackle your weaknesses one at a time

This goes in line with working on your strengths. Now that you have documented both – strengths as well as weaknesses – pick one weakness and really focus on that one area to prevent getting overwhelmed and discouraged.

Do you lack any technical photography skills? There are numerous workshops, articles, and YouTube videos that you can watch to try and get up to speed. Digital Photography School is also a great learning resource.

Do you struggle when interacting with clients? Stand in front of a mirror and practice your introduction pitch. Round up your friends and ask them to help you practice your interaction skills. Do you struggle with building your portfolio? Volunteer your services to organizations that need help.
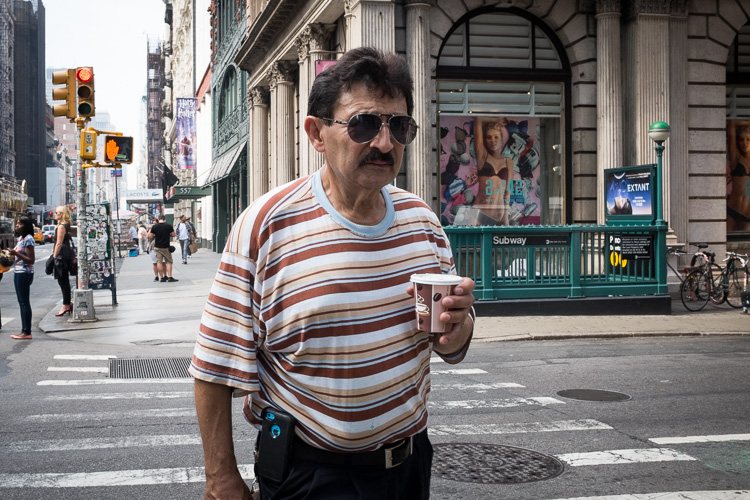
Apply and practice the things you learn even if it is just with your family, kids, or the family pet. Remember, also, to be patient with yourself. As you improve, take time to appreciate your growth and celebrate your accomplishments. The best morale booster is your own internal vote of confidence. Remember accomplished photographers have all been where you are at some point in their lives. Success takes a lot of hard work and time.

6 Tips for Overcoming Self-Doubt and Building Confidence in Your Photography

I have my own share of weakness that are a mile long but to keep my perspective and love for the art of photography I chose positively over negativity and so far that has worked in my favor.

#4 Have a competitive spirit for the right reasons

A little bit of competition is healthy. As humans, it is what keeps us going at times. But be careful not to confuse competition with jealousy. And never try to compete with other industry peers on price. That is a battle that can quickly go south. You have to just understand that there will always be someone who is willing to work longer hours, for cheaper rates. That’s just the reality of life in any field.

Understand what you bring to the table is unique and there are clients who want to work with you because of the experience and end product that you (and you alone) provide. Focus all your energy on finding those clients and not the ones that pick price over quality.

6 Tips for Overcoming Self-Doubt and Building Confidence in Your Photography

A couple of weeks ago, I set up a styled shoot seminar at my local camera shop with a few of my favorite vendors. All the photographers in attendance shot the same setup, but we each put our own spin to the images based on our shooting as well as editing style. – Community over competition is a very powerful thing.

6 Tips for Overcoming Self-Doubt and Building Confidence in Your Photography

My favorite images from the styled shoot reflect my brand and style. Plus this gave me more confidence in working with studio lighting – one of the areas I am not super confident.

#5 Health is the best kind of wealth

Nothing is worth sacrificing your health – both mental and physical. I have learned that lesson the hard way. Now I don’t overwork myself to the point of exhaustion nor do I sacrifice my sanity over difficult clients.

I always take a day off after photographing a wedding because it is physically exhausting and mentally draining. I avoid scheduling photography gigs one after the other because I know I get mentally exhausted and cannot produce my best creative work. We have to all acknowledge that sometimes self-doubt arises due to our poor health (either mental or physical) and the only way to overcome it is to get our mind, body, and soul in a much better space.

6 Tips for Overcoming Self-Doubt and Building Confidence in Your Photography

Weddings are emotionally and physically draining but are so creatively satisfying for me. I love photographing them but would never do a tripleheader weekend, that would just about kill me.

#6 Remember your why

Why do you love photography? What is it about this art form that has you up at night trying to make it work? What’s your story? Is it the money? Is it the glory? Take the time to figure out your why and write it down.

Then when you start doubting yourself, go read your story. It will help you get things in perspective and ground you. I learned photography so I could:

  1. Document my own family and their crazy and unique personalities.
  2. Spend time at home with a more flexible schedule.
  3. Explore my creativity.
  4. Run my own business and work for myself

Hence my mission as a photographer is to provide my clients with creative images that are a true and authentic reflection of their own individual personalities while running a profitable business.

6 Tips for Overcoming Self-Doubt and Building Confidence in Your Photography

I find that I produce my best work when I am creatively fresh and mentally refreshed.

Remember that your why will be specific and unique to you and it is what will push you to overcome your setbacks and mental roadblocks as you continue on your photography journey.

Conclusion

I hope some of these tactics help you navigate the choppy photography waters. Remember there is nothing like a free lunch! Success in any shape or form takes time and hard work – lots of it. Roll up your sleeves, work your hardest, and you will get there. I look forward to hearing your successes and cheering you on.

The post 6 Tips for Overcoming Self-Doubt and Building Confidence in Your Photography by Karthika Gupta appeared first on Digital Photography School.


Digital Photography School

 
Comments Off on 6 Tips for Overcoming Self-Doubt and Building Confidence in Your Photography

Posted in Photography


Three Tips for Overcoming a Photographic Plateau

11 Aug

Let’s face it…growing up isn’t always easy. There are lots of hurdles to overcome during our journeys as photographers. At one time or another, we all hit rough spots with some aspect of photography. Take heart though, whether it’s a problem with technique, gear, or simply finding your own creative uniqueness, I can personally guarantee that someone else is struggling with that same problem.

But there’s one situation too often encountered by beginners and even pro photographers alike – the dreaded “plateau”. This is a stage that often happens when we feel like our photography has a reached a point where it is no longer improving. It’s a terrible feeling.

Three Tips for Overcoming a Photographic Plateau

Fortunately, overcoming a photographic plateau is easy once you identify and diagram the source of the problem. It’s here where you can run into trouble because critiquing your own performance in order to self-diagnose why you have plateaued is an exercise in self-realization. Here are three common reasons why photographers plateau in their work and some solutions that can push you into a new phase of growth.

Here are three common reasons why photographers plateau in their work and some solutions that can push you into a new phase of growth.

You’ve stopped learning new techniques

I get it. I really do. There comes a time when you reach a level of confidence in your craft. You feel comfortable in the techniques you practice and more and more of your images turn out just as you imagined them in your head. In itself, confidence that you know what you’re doing is a huge accomplishment in itself. The problem arises, and thus the plateau happens when you stop looking for new things to learn.

Three Tips for Overcoming a Photographic Plateau

How to overcome it

I used the word “comfortable” earlier. Becoming comfortable in your photography can be a creative death sentence. Simply put, don’t become overly comfortable to the point where you think there’s nothing else to learn. There are always advancements being made in the world of photography.

Three Tips for Overcoming a Photographic Plateau

Someone is refining a new method of shooting with a filter. There are more things to learn in the digital darkroom during post-processing. There’s always something new to learn. Learning new techniques not only keeps your mind limber but also improves your craft and the potential of your photographs.

Ignoring needed gear upgrades

I’ll admit it, I love photo gear. There are few artistic mediums where technology advances more quickly than it does in photography. The way your gear facilitates your work is a careful balance between mechanical capability and your personal skill level.

Three Tips for Overcoming a Photographic Plateau

The most expensive camera in the world will not make you a top notch photographer. At the same time, there may come a moment in your journey where your skill legitimately surpasses the capability of your gear. This can cause a plateau due to the fact that your lens will not become physically sharper and your camera’s maximum ISO rating of 6400 will never be able to shoot at 24,000.

How to overcome it

Learn what gear meets your current skill level and still leaves room to grow. However, the remedy for gear top out is not to automatically run out and buy the latest and greatest camera or lenses or anything else for that matter.

The very first thing you need to do if you’re a gear shopping photographer is to begin researching. Research and research some more. Read unbiased gear reviews and talk to other photographers who shoot with the same equipment you’re considering purchasing. The reason for this is so you know exactly what you need and you spend your money ONLY on those things and nothing more.

Shooting the same thing over and over

We all have certain things we love photographing. There are genres of photography which draw us in for one reason or another. For me, it is landscape and wilderness/adventure photography.

Three Tips for Overcoming a Photographic Plateau

For others, street photography is their love, while still others thrive on doing portraits in the studio. Whatever your passion may be, there will likely be a point where you find yourself shooting the same thing over and over and over again. While this is not always a bad thing, it can cause you to hit a creative wall and ultimately, plateau.

How to overcome it

This problem perhaps has one of the most polarized solutions of all. Simply go photograph something that you normally wouldn’t consider shooting. I know, sounds easy, right? It practically is, but completely switching gears and branching out into new areas of photography can feel unnatural, awkward, and downright scary.

Three Tips for Overcoming a Photographic Plateau

Still, shooting a few portraits here and there when you’re used to shooting only landscapes can be a great creative palette cleanser. Getting out into nature and slowing down can be a welcomed break for street photographers who generally shoot only in concrete jungles. Whatever change of pace you temporarily switch to, it will usually breathe new passion into your original modality and help you move past that plateau.

Some closing thoughts

Sooner or later, to some degree, we all will hit a plateau in our photography. How we handle that moment when it comes can make all the difference.

Usually, understanding the problem is a huge step in solving it and moving on with your photography. Try new things. Research and see if your work does, in fact, need that full frame camera sensor. Branch out and try a style of photography that you generally don’t practice. The key to overcoming a photographic plateau is the realization you need recharging once in a while. It’s a normal part of becoming a stronger and more capable photo maker.

The post Three Tips for Overcoming a Photographic Plateau by Adam Welch appeared first on Digital Photography School.


Digital Photography School

 
Comments Off on Three Tips for Overcoming a Photographic Plateau

Posted in Photography


7 Tips for Overcoming Nerves When Doing Street Photography

17 Feb

Good street photography can sometimes look deceptively easy to do yourself. All you have to do is be in the right place at the right time, get a little lucky, and bam – you have an incredible, one-of-a-kind photograph.

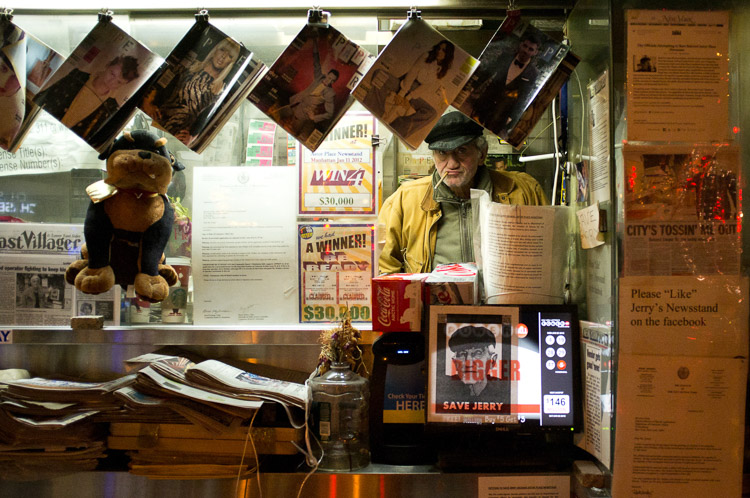
Astor Place Newsman, New York Street Photography

However, the reality is much more difficult than that, and it’s something that can surprise photographers when they try it. Suddenly, everything is moving so fast. You look around, but you don’t actually see any amazing moments. Then when you do capture something that you thought looked good, it didn’t turn out anything like you imagined.

These are all things that take time and practice to improve at, but the hardest obstacle for people to overcome with street photography is fear. Suddenly, you’re in the middle of it all. People are looking at you. Even the people who you aren’t photographing are watching from the side. You freeze, you have trouble putting the camera to your eye, and it doesn’t feel as fun as it should because you are so nervous! Fear stops too many people before they start, and this is a shame because it’s a very enjoyable type of photography.

Here are some tips to help you get over those street photography fears so you can enjoy yourself out there.

1. Think about what you will say if someone stops you

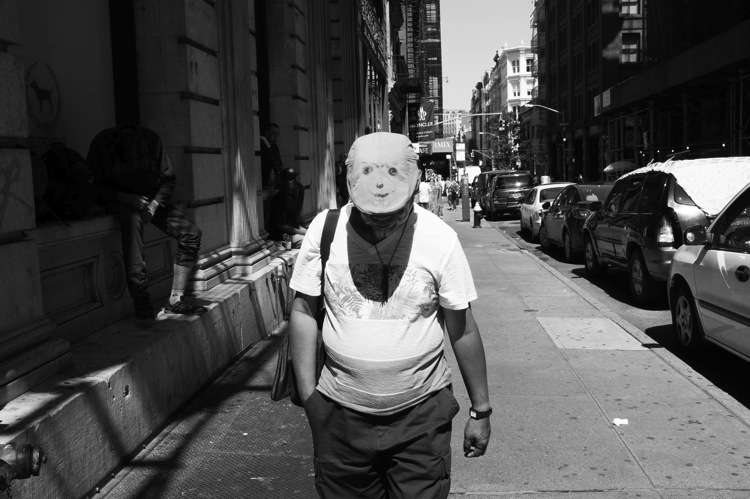
SoHo, New York Street Photography

The thing that will make you the most comfortable out there is knowing that you have a plan if someone stops you after you have taken their photograph. This rarely ever happens to me, but when it does, I feel confident in how I can handle myself.

First of all, if someone notices me, I always smile. Acting confident and like you’re not doing anything wrong will make the subject more comfortable. If you’re sneaky and look sheepish, they will see that you look guilty and be much more inquisitive.

Then if someone asks you why you took their photograph, tell them the truth. I say that I am a photographer doing a cultural project on the people and streets of New York, and I thought they looked fabulous. Flattery will help you get out of most situations. Or tell them you are a student. Offer to email them the photograph. Explain that you find people and fashion and things of that nature just as interesting as the buildings. If the person then continues to seem uncomfortable or angry, apologize and say that you didn’t mean to make them uncomfortable and you are happy to delete the photograph. That will diffuse most situations.

2. Choose your subjects wisely

SoHo, New York Street Photography

If someone looks angry, stressed, scary, or in any way that makes you uncomfortable, you are NOT to photograph them. More subjects will come soon after. By picking the right people, you will make things much easier for yourself, and that will also make you feel more comfortable.

3. Go to a busy place and let people come to you

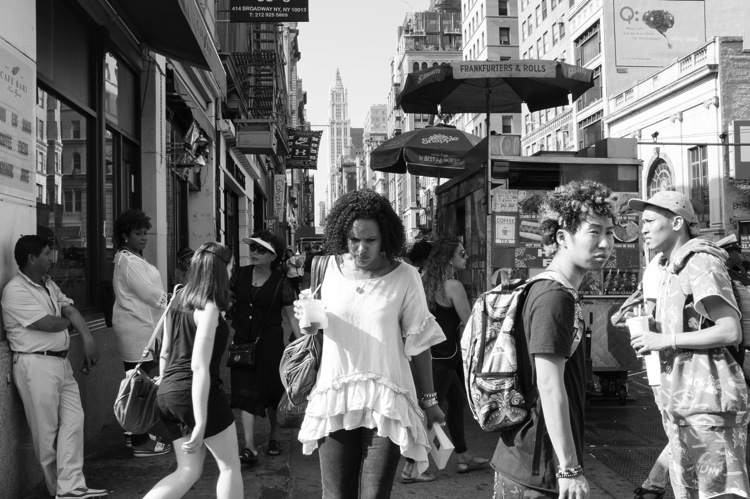
Canal Street, New York Street Photography

This is one of my favorite tips. While street photography can and should be done in areas without many people, one of the best things you can do is to photograph where a lot is going on. Go to busy street corners, markets, or festivals. Go at times when things are happening. Follow the action.

This will immediately ease your fears somewhat. In those areas, people will be too busy to notice you and will be used to people with cameras. It will give you time to practice and to get comfortable with the act of shooting street photography.

Take this a step further, by picking a spot and letting things happen around you. You do not always have to walk around to search for a photograph. By staying in the same location, you will be quicker to notice moments as they occur, you will already be in position, and people will be entering your personal space instead of you entering theirs. This will help to make you feel a lot more comfortable.

4. Try some street portraiture

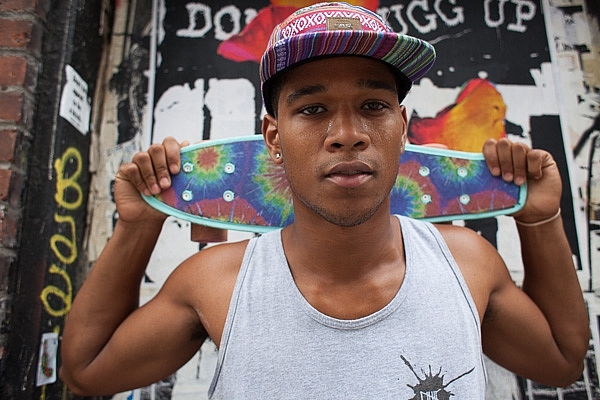
Skater, Street Portrait, New York Street Photography

Start out the day with some street portraits. Stop someone, tell them they look great and that you’re doing a project on people in the area, and ask if you can take a few quick photographs. Some photographers will then just capture a couple quick photographs, mumble a thank you, and run off, but I want you to interact with them.

Make conversation as you photograph and capture them from a couple angles. Compliment them and make their day. Doing this will make both you and the subject happier, and it will help remove the creepy feeling that can happen when shooting street photography.

5. Learn to be candid

No matter how comfortable you become shooting in these environments, it is important to learn to act candidly. If everyone stops you to ask if you took their photograph or if everyone notices you right away to ruin the moment, you will not get anywhere. Learning to act candidly will make you feel much more comfortable.

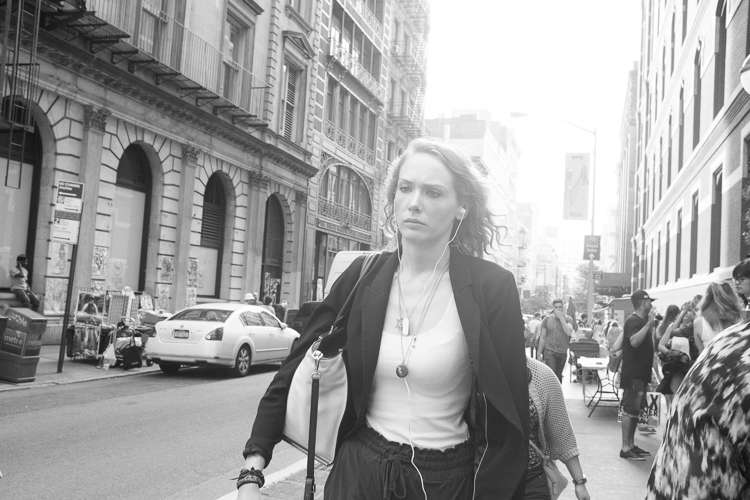
SoHo, New York Street Photography

The camera snap

The most important tip, probably in this whole article, is what I call the camera snap. As photographers, one of our instincts is to slightly take the camera away from our eye right after we take a picture. Everyone does this, and this is how people notice that you have taken their photograph – it’s the main thing that tips them off. So instead, take the photograph and keep the camera to your eye as they pass completely by. This will make them think that you are just photographing the background and that they got in your way.

This way of shooting works fantastically well in busy areas, but in areas with fewer people, it can help to change it up a bit. Instead of aiming the camera at a subject right away, this time, aim the camera at a building above or a scene to the side of them. Then at the last second, act like you took the photograph and are moving your camera down, take the picture of them, and move on.

It cannot hurt to play a role as well. Some of the best street photographers are fantastic actors; they have a way of looking the dumbest with their cameras. They furrow their brow and act like they don’t know how to use the camera at all, are testing it out, and don’t even notice that the person is right where they are photographing. Some even act like tourists. It’s hilarious and it works.

6. Don’t shoot from the hip

SoHo, New York Street Photography

Shooting from the hip is an important practice in street photography. I do it about 30-40% of the time, but I do it with my camera right below my eyes, looking like I’m standing there waiting for something to happen instead of putting the camera very low down. If you are just starting out with street photography, particularly with a large DSLR and zoom lens, this will be your first instinct.

It can be important to learn to shoot from the hip, particularly for the moments that you really want to keep candid, but I suggest staying away from it at first. It can become too much of a crutch and it can make you more uncomfortable in the long-run as you will always feel like you are sneaking around. You need to learn to put the camera to your eye at first to both get good photographs and to improve your confidence. Force yourself to shoot with your camera to your eye as much as possible, and as you get more experienced, then you can experiment with shooting from the hip some of the time.

7. Repetition

5th Avenue, New York Street Photography

Nothing will get you more comfortable out there than shooting frequently. Even if it is only ten minutes here or there, try to not go too long without photographing. These skills are like any other in that you will quickly get rusty, and this will make you feel more self-conscious. Turn your photography into a routine, even if it is only once every two weeks, and you will become much better.

Now that you’ve read all of this, just get out there and go for it. Put a smile on your face, enjoy the walk, and have fun with it!

googletag.cmd.push(function() {
tablet_slots.push( googletag.defineSlot( “/1005424/_dPSv4_tab-all-article-bottom_(300×250)”, [300, 250], “pb-ad-78623” ).addService( googletag.pubads() ) ); } );

googletag.cmd.push(function() {
mobile_slots.push( googletag.defineSlot( “/1005424/_dPSv4_mob-all-article-bottom_(300×250)”, [300, 250], “pb-ad-78158” ).addService( googletag.pubads() ) ); } );

The post 7 Tips for Overcoming Nerves When Doing Street Photography by James Maher appeared first on Digital Photography School.


Digital Photography School

 
Comments Off on 7 Tips for Overcoming Nerves When Doing Street Photography

Posted in Photography


Post-Processing Tips for Overcoming Beginners Acts of Omission

02 Apr

In an old dressmaking shop in Paris, a master-tailor has finished stitching a bridal gown. He is eager to show it to the world, but he knows that the job is not yet done. He has a few thoughts passing through his mind, and he has to make sure that the dress is presentable before the bride arrives. He tells himself that these threads dangling from here and there need to be trimmed, the ruffles need to be neatened, and the seams still need to be pressed. The master in him criticizes the dress until the tailor in him fixes the final details.

When it comes to photography, the story is no different. You must lose ownership of your image for a few seconds, and look at your own work with a fine-tooth comb. As beginners, we often rush to upload or print our photos, eager for appreciation and likes from others.

I have also been impatient in this way, though with time, I have now made it a habit to review my image critically at the end of post-processing. Here are some tips I hope that will help you taking your post-processing experience to the next level and pick up on some things that beginners often miss. I use Adobe Lightroom and Photoshop, so I will be talking about both where applicable.

Crooked images

There is nothing more embarrassing than your client telling you that the photo is a bit askew. Once spotted, it is an eyesore that will forever jar when you look at your image. It is not easy to judge tilted images when it comes to mountains and forests, but landscapes are also more forgiving when it comes to a tilt. With seascapes, however, one needs to ensure that the sky meets water on the perfect horizontal for a harmonious and balanced image. Similarly, check the angles of your doorways and buildings, that they are aligned appropriately. Adobe Lightroom has a useful Straighten tool, as well as options in Photoshop.

Skew Horizon

A crooked horizon is not always obvious; verify it using the proper tools.

Spots

Zoom-in and inspect your photo to make sure that there are no spots. Dried water droplets and dust become more visible when you increase the contrast of colors in your post-processing. Adobe Lightroom has a Spot Removal tool, and Adobe Photoshop also provides various ways to remove spots from your image.

Spots

Imagine printing a large image with these spots. These are very visible.

Chromatic aberration

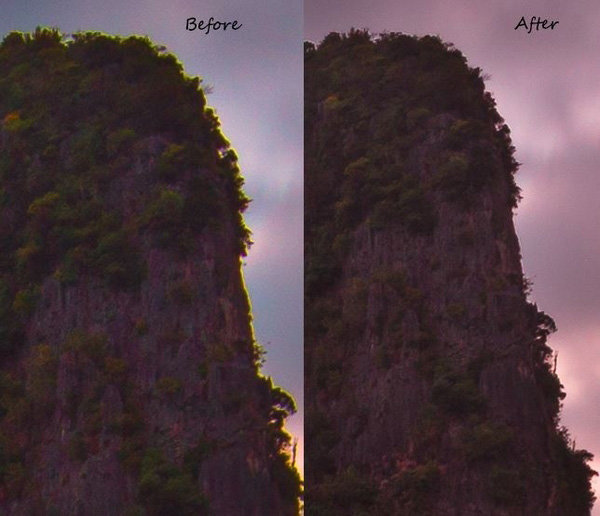
Chromatic aberration, or color fringing, often happens around the edges of objects in your images. Why this happens is a technical topic on its own related to your lens, but what you need to know is that modern tools help remove this problem. Adobe Lightroom has a Remove Chromatic Aberration tool that you can use to overcome this issue.

Chromatic_Aberration

With just one click, I was able to remove the color fringe from the edges.

Barrel distortion

Barrel distortion is associated with wide angle lenses. It causes your image to look more like a sphere. You might get away with it if the elements in your scene are uneven, and not particularly familiar to the eye. However, you need to be aware that the wider your focal length, the more distortion your image will have. Adobe Lightroom allows you to remove barrel distortion using the Lens Corrections feature. In the following image, people standing on each side of the image have elongated faces. I did not, of course, include this in the bridal album!

Raaiqah & Taariq Wedding, November 2014

Unwanted objects

Look for unwanted objects in the scene. Remove shopping bags, cans, tins, ships on the horizon, and even people if they are not desired in the scene. I use Adobe Photoshop’s Content Aware fill tool to achieve the desired results.

Image in black and white

Before and after post-processing, I usually check my images in black and white. By not allowing yourself to be distracted by colours, this is a good way to see if an image is flat. I do this for several reasons. Some images are just meant to be black and white, especially the ones in which the colour adds little by way of interest, and in fact may distract from the subject. You might also want to turn an image into black and white because the sky is overexposed, in this way salvaging, rather than discarding the image altogether. By converting an image to black and white, sometimes unwanted distracting elements in the background of your image can be de-emphasized, with some additional light adjustment (e.g. a person standing behind your main subject in a portrait).

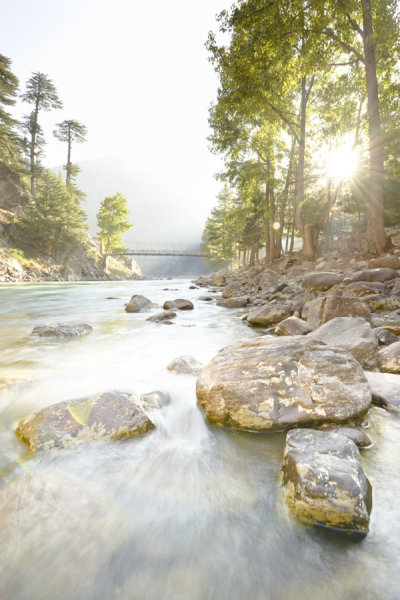
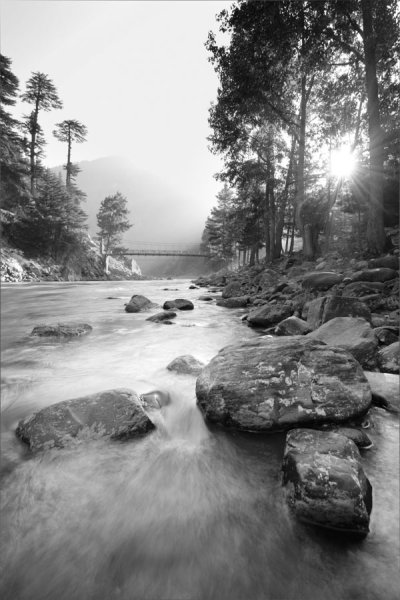
Color_Landscape BW_Landscape

Black and White allows you to appreciate the landscape with emphasis on the harmonies and lines rather than on the colours.

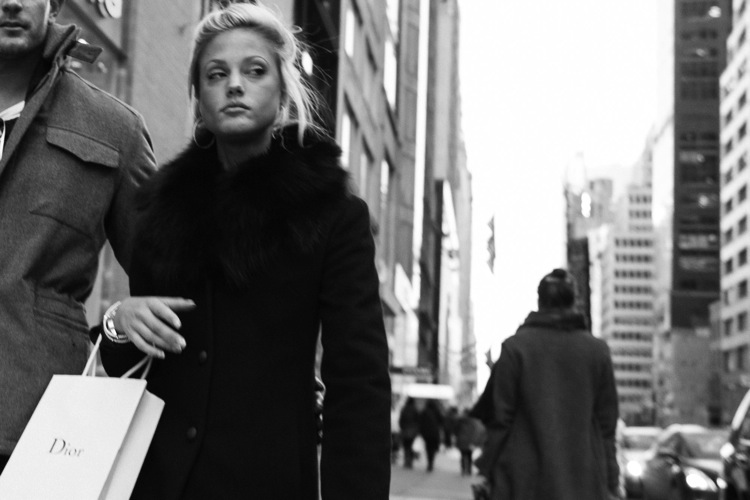
Color_Portrait BW_Portrait

In black and white, the background is not as distracting.

Tip: Walk away

Once you have finished editing your image (or a batch of images), step back and give review it full screen. Turning off the room lights and leaning back is a good idea. Without the mouse and the keyboard in my reach, I can think about the image critically. I sometimes even walk away and let the image lie there for some time before returning for a fresh approach.

Whether you are a beginner or a professional, after putting effort into post-processing, you tend to think that you have done enough to make the image ready. You focus on certain areas too much, and your mind forgets to tell you that you need to look in other areas to see if the image is balanced and harmonious. So, take your time and allow the image to fully absorb without patience in the post-processing phase. A lovely image can be converted into a magical one by proper processing.

Though these steps may sound pedantic, a good image needs loving care.

I hope these tips are helpful. Your feedback and comments are welcome.

googletag.cmd.push(function() {
tablet_slots.push( googletag.defineSlot( “/1005424/_dPSv4_tab-all-article-bottom_(300×250)”, [300, 250], “pb-ad-78623” ).addService( googletag.pubads() ) ); } );

googletag.cmd.push(function() {
mobile_slots.push( googletag.defineSlot( “/1005424/_dPSv4_mob-all-article-bottom_(300×250)”, [300, 250], “pb-ad-78158” ).addService( googletag.pubads() ) ); } );

The post Post-Processing Tips for Overcoming Beginners Acts of Omission by Mujahid Urrehman appeared first on Digital Photography School.


Digital Photography School

 
Comments Off on Post-Processing Tips for Overcoming Beginners Acts of Omission

Posted in Photography


Overcoming Fear in Photography

06 Nov

Fear. It’s an emotion to which we all can relate. Luckily, nervousness or fear in photography can be overcome with practice and patience. After speaking with a few fellow photographers and borrowing from my own experiences, I have listed some shared fears among photographers and ways you can learn to overcome them.

Overcome Fear

1. The fear: I’m afraid I don’t know what I’m doing.

Every photographer at some point feels a little out of their depth when encountering a new situation or problem. Whether it’s learning to use a new piece of equipment, a lighting conundrum, or simply making a careless mistake during a shoot – we all can feel a little lost from time to time. This is especially true when a person first begins to learn the art. There’s a lot of somewhat technical information to absorb and it can be frustrating to understand new things. I recall shooting my first large wedding. I was so nervous that I was sweating more than the groom. There were some hiccups but overall the shoot went smoothly and the client was pleased.

How to beat it:

Acceptance. That’s the best way to overcome your fear of being inexperienced. The most effective thing you can do as an aspiring photographer is to constantly remind yourself that we all start somewhere. At some point, even the most celebrated of photographers didn’t even know how to operate a camera. You will learn as you go and you will make mistakes. You will also have successes. The key to beating the fear is the determination to keep going.

2. The fear: I’m afraid people won’t like my work.

The fear of rejection is a biggie. We all feel it to some extent and we all struggle with the fact that some people simply will not like the work we produce. This is the beauty and the bane of any art form. Art, by its very nature, is extremely subjective. Each person will view a piece with there own eyes and make judgements based on their experiences.

Here is one of my personal favorite images and one of the least liked by the public.

Ferns

How to beat it:

When I first began my photographic journey I was easily discouraged. It seemed that for every roll of film I used there would be only one or two decent exposures. I would get so frustrated to point I would just put down my camera. Fortunately for me, I stumbled upon this quote from Ansel Adams:

“Twelve significant photographs in any one year is a good crop.”

That sentence hit me hard. I realized that if one of the most influential American photographers of all time was happy with twelve good images in an entire year, then I should be thrilled of the progress I was making! As painful as it can be, failure is an essential learning tool. Seldom do we gain new knowledge only from our success. Do your work as best you can and show it to the world. The rest is out of your control.

3. The fear: I’m afraid to photograph people.

Making photos of people can be compared to public speaking. Very few people (I haven’t met any) are able to hit the ground running when it comes to street or event photography. It’s just not easy. Anxiety is a constant, at least it was for me. I would worry about how the subject might react to being photographed or if I looked strange photographing a stranger on the street. Even the act of carrying my SLR around in public made me feel out of place.

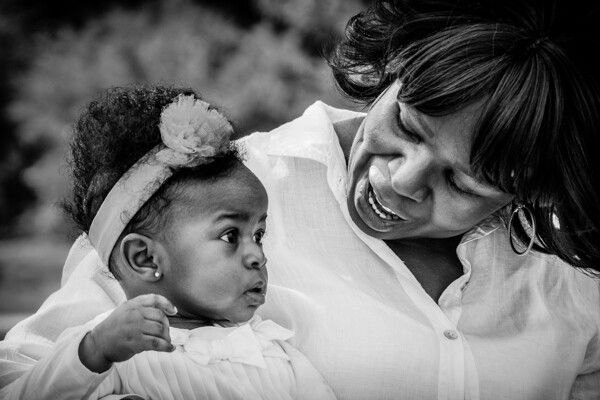
Child and Grandmother

How to beat it:

The short answer – just do it. Go out and confront your fear. It sometimes helps to begin in a place where other people will likely be carrying cameras such as a public park, farmers market, or other large gathering. You will feel more at ease knowing that you aren’t the only one making photos. As you become more relaxed, begin taking your camera with you on a daily basis.

Practice short excursions around your street or neighborhood and get used to being around people while using your camera. The more you do something the less frightening it will likely become.

Boston Common

Before you know it, you will be able to approach public situations with confidence.

Party

4. The fear: I’m afraid my gear isn’t good enough.

Gear envy. That nagging notion that if you only had this lens or that filter or if you could afford the newest whatever – we all experience it to some degree. It’s a basic condition of humans to want what we don’t have and photographers (most, not all) are notorious for never having enough. We can sometimes let ourselves be afraid that our gear just isn’t up to the task and become convinced that all we need is more and better equipment.

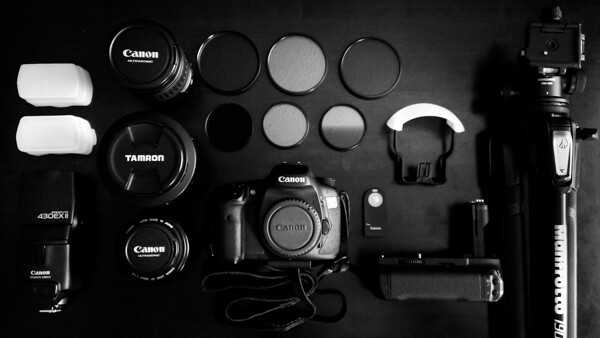
Gear

How to beat it:

The best way to overcome the fear of gear inadequacy is to understand that you will never have the best gear because the best gear hasn’t been made yet. Everything is evolving and you only have to do a quick internet search to realize most camera gear updates every couple of years. Stop focusing on what you don’t have. Instead, learn to make the most of what you do have. Study the capabilities of your gear and know what it can do. More importantly, understand what it can’t do. Constantly I see eager photographers become disappointed and discouraged because their expectations grossly overwhelm the capability of their gear. If you have realistic expectations then you won’t be so prone to doing the worst thing a photographer can do – which is quit.

Do you suffer from any of these fears? Do you have others not listed here? Share with us in the comments – we’re all friends here and support each other in getting over our fears.

The post Overcoming Fear in Photography by Adam Welch appeared first on Digital Photography School.


Digital Photography School

 
Comments Off on Overcoming Fear in Photography

Posted in Photography


Overcoming the Fear – Creating Better Travel Photography Portraits

22 Jul

Pick up Oded’s new Snapn Guide (a dPS sister company) Snapn Travel here for only $ 7. A lifetime of travel memories in a Snap.
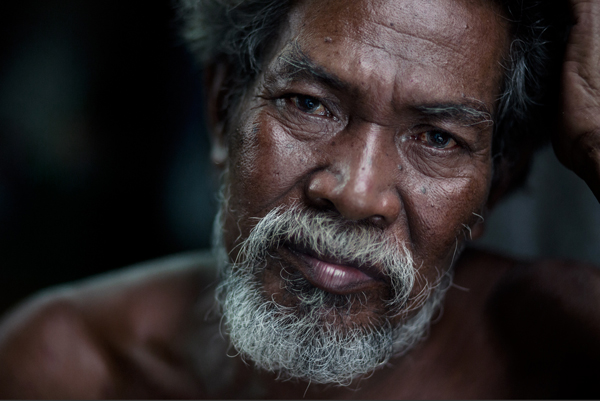
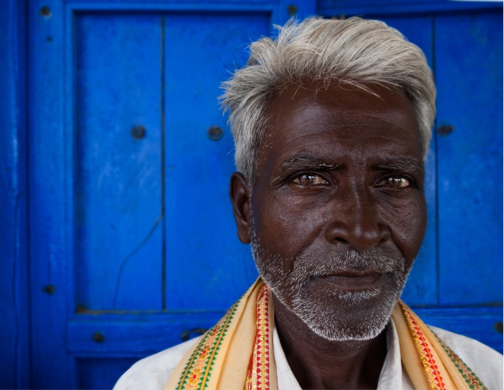
Traveling is fun and rewarding, but sharing memories of your journeys with friends, family and the world through your own beautiful images can be even better. Especially rewarding are images of the interesting people you meet along the way, because creating travel photography portraits can be an amazing addition to your portfolio.

But, if taking pictures of strangers while interacting with them makes you uneasy, maybe even feeling a bit of fear? GOOD! Then this article is for you.

F11A1011

The world of photography is divided between two groups of people: those who enjoy creating portrait photography and those who do not. Through discussion with my own students I have realized that only about ten percent of those who avoid portrait photography actually do not like it. The remaining ninety percent, so I discovered, are hiding, deep down inside, a photographer who really desires to shoot portraits, especially when he or she travels to interesting and distant places, meeting people from other cultures.

But it is not that easy. Let’s be honest, sometimes it’s super hard. So what we do is we wrap ourselves with excuses like: “I do not feel comfortable with this”,”I do not want to invade a person’s privacy” and as the “golden excuse” we used that one story of someone who shouted at us at some market in Morocco.

Blue guy

First, from my experience, getting yelled at (and all kinds of other problems) only starts when you take photos of someone from a distance and they catch you in the act.

Paprlika princeBut here is another fact: there is nothing like photographing someone from a close distance. The eyes, the feelings and the huge visual story potential within. Besides, when we work from a close distance while interacting with the person, we gain control of our tools as photographers: composition, background, the “decisive moment” and we also have that amazing ability to tell the photographed person: “you know what, let’s take one more shot”.

In 99% of my travel photography work with magazines, I photograph portraits from a close distance, without hiding myself or hiding the fact I am taking a photo. Now, some will say that when a person sees a camera, it affects the authenticity of the moment. I will address this issue later.

First rule: tell, do not just show

This is the # 1 mistake of bad travel photography: trying to show a story, instead of telling it. Creating a diary instead of evoking feelings. Here is the unpleasant truth; apart from our family and close friends, no one cares where we travel and who we meet along the way. If you want to succeed in exciting your viewers, you need turn to a different approach.

10

Before the digital era, it was enough if you traveled to the other side of the world and came back with images of people from some exotic tribe. You know, those “colorful” images, of people with a bone stuck in their nose. Today, when almost every corner of our planet has been photographed, this is not enough anymore and we have to return to the basics; to that one element that hasn’t changed since the beginning of time – a story.

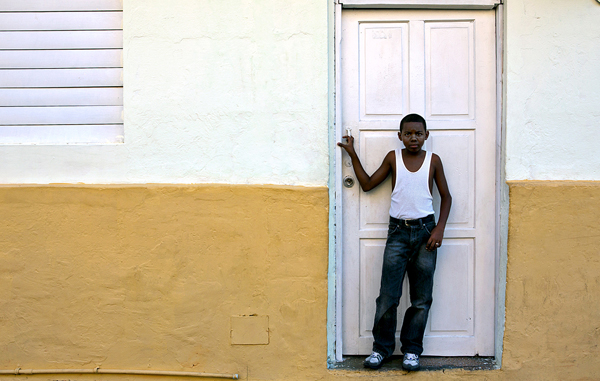
We are just obsessed with stories. A person is not only clothes, a Cuban cigar or colorful sari; a person is an entire story. A story is a complex thing to create, so for the first step I will ask that your images be able to answer this question: how does the person in the image feel? Is it a comedy or a tragedy? Has he just finished a day of hard work or is he enjoying a vacation? Look at the person’s body language and listen to his voice. Try to convey the type of feeling you had while meeting this person.

134.jpg

Choose the right equipment

Remember the following equation – if you have a telephoto lens, you will to use it, because that is the easiest way of shooting people, from a distance. Instead, go with a wide lens (up to 50 mm for full frame, 35mm for cropped sensor). Also, try to avoid complicated and sophisticated equipment like flash and tripods. This will attract unwanted attention in the streets and you will be busy handling the gear instead of focusing on the story in front of you.

73 08

Read about the culture

Yes, in India they wear sari and in Cuba they smoke cigars. To get a more in-depth story of the culture, you have to learn about it first. Prior to your trip, do a brief study of the place you are about to visit. View images, read material and mainly, answer important questions like:

  • How will people react to the camera?
  • Do I need to pay for taking a picture?
  • Are there things that I should not photograph?

In order to answer these questions you can ask someone who visited the destination or look for information on the web. If you do not know anything about the culture, you will fall into the cliché of photogenic tourist traps. But if you come with knowledge, it will affect your photography. My editor at the National Geographic Traveler magazine calls this “photographic intelligence”. Go the extra mile and read about the history of the place, the religious system, the food and the local music, which leads me to our next tip.

F11A7455

Use the local music to your advantage

Recently I photographed a story on the Dominican Republic. It was the first time I worked on this side of the world and suddenly I felt as if I almost forgot how to take pictures. I did not approach anyone and at first, my photography did not come out well at all. So, I just listened to some local music on my headphones. I do not recommend staying with headphones all the time, because it cuts you off from the environment. But for the first day, it’s a great tip; it puts you in the groove and makes you feel good. In conclusion, on the first day of your trip, do not trouble yourself with approaching strangers. Relax, listen to the local music, get into the groove and warm up with easier image making: buildings, landscape, food, etc.

71

Get outside when the lighting is right

The meaning of “Photography” is drawing with light. Even the most photogenic person will not look good in unsuitable light. There are no rules about lighting – no “good” or “bad”. There is appropriate and inappropriate lighting, because light has varying qualities: color, direction, strength, softness, etc. According to most photographers, the best light for most situations is within the “golden hours”: around sunrise and sunset. If this is your first time approaching people in order to photograph them, let the light be on your side. Try adjusting the correct time to go outside. If you cannot control the time (like when on an organized tour) try to photograph people in the shade.

34

Force yourself – get out of your comfort zone

After a day of listening to the local music, getting the groove and warming up with easy shots, it is time to start working. Do not delay it, even if it is very hard for you. Just fake it until you make it:

  1. 72Choose: choose a person you would like to photograph. Don’t use excuses like: “I can’t find anyone special”. Just make the shot, even if it’s only for practice. It is very important that you choose a person who is not on the move, because you need to get ready BEFORE approaching him, so it will be easier in a static situation (a seller in market stand, or someone relaxing at the park)
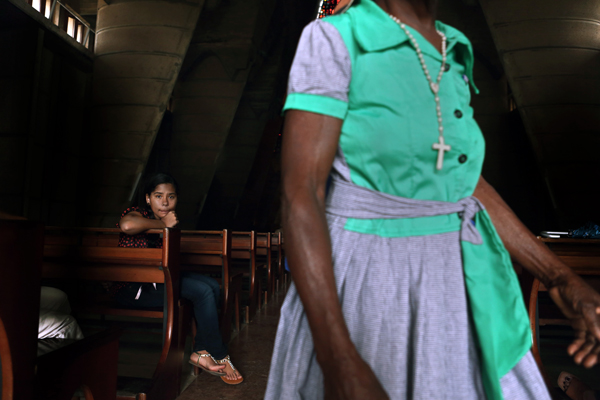
  2. Get ready: know your lens and exposure. Think about the composition and background.
  3. Approach: ask the person if you can take their photo. You can ask verbally or just by lifting the camera and smiling, waiting for a smile back.
  4. Explain: it doesn’t matter if you are in NYC or Tibet; people want to know why you are taking their photo. You can tell them how much you liked their shop, pet, hair, etc., or just mention that you like portrait photography and you would like to take their photo. Usually this kind of good feedback will be enough.

Now, you might get a NO for an answer. That’s okay! Say “thank you” and then just “get back on the horse”, move on to the next person. You might get a YES. That’s wonderful! Relax, think about the framing and make the image.

F11A9627

So what about the authenticity of the moment?

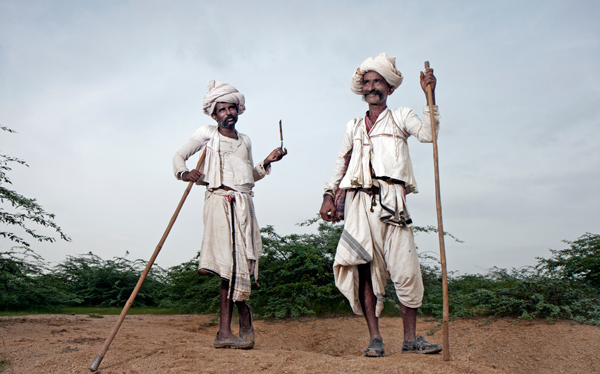
It’s True. Usually when a person is asked to be photographed, they will put on a “mask”. You can call it their pose. Sometimes this pose might be the thing you are looking for. When photographing two men for a story I did in India for the National Geographic Traveler magazine, that pose (image below), which is so typical for the Rabari tribe men, was perfect for the story I wanted to tell.

Page 29 b

If you don’t want the pose, my solution – give your subject time and space. Do not stop him or her from making that pose. Give them a positive feedback and show them how nice the first photo came out. From my experience, after a minute or two, the masks fall. That is because someone eventually will enter your subject’s shop, or they will receive a phone call or anything that might make your subject forget you are still there. This is the moment of magic. This is when the best pictures happen.


Pick up Oded’s new Snapn Guide (a dPS sister company) Snapn Travel here for only $ 7. A lifetime of travel memories in a Snap

  • Learn how to bring the emotion of your trip home with you, not just a memory card.
  • Become a travel photographer instead of a photographing traveller.


The post Overcoming the Fear – Creating Better Travel Photography Portraits by Oded Wagenstein appeared first on Digital Photography School.


Digital Photography School

 
Comments Off on Overcoming the Fear – Creating Better Travel Photography Portraits

Posted in Photography


Overcoming camera phone snobbery with a 1.3MP camera

17 Nov

joelGrey.jpeg

Smartphone photography is taking increasingly seriously as a medium, but this isn’t because the devices have reached a certain standard. In an interview from 2009, actor and photography Joel Grey discusses the work he’s done using a 1.3MP phone camera. He discusses the snobbery surrounding cameraphones (including his own), and points our that ‘pictures are pictures…the subject, light and framing is everything.’

News: Digital Photography Review (dpreview.com)

 
Comments Off on Overcoming camera phone snobbery with a 1.3MP camera

Posted in Uncategorized