RSS
 

Posts Tagged ‘Overcast’

Photographing on Overcast Days: The Light Simply Doesn’t Get Any Better

17 Nov

The post Photographing on Overcast Days: The Light Simply Doesn’t Get Any Better appeared first on Digital Photography School. It was authored by Herb Paynter.

photographing-on-overcast-days

Lighting is everything in photography, but some “poor” conditions may surprise you. Am I alone here? Does anybody else get excited about photographing on overcast days?

I use to think I was a contrast junkie, but I discovered that my passion is for detail, more of an internal contrast issue than one of overall contrast. Internal contrast (the clear distinction between tones inside the extremes of white and black) is what delivers the distinctions we call detail.

Hot highlights and deep shadows

Photographing on Overcast Days: The Light Simply Doesn't Get Any Better

When you consider the dynamic range of most digital camera image sensors, typical bright sunny days can present two challenges right off the bat: hot highlights and deep shadows. When the highlights in the original image are very hot, and the shadows are very deep, extracting detail in the “near shadows” and “near highlights” turns into an editing issue.

This is why photographing on overcast days is the easiest lighting condition to deal with.

photographing-on-overcast-days

The holy grail of photographic exposure range is located well within those bookend extremes. On a typical Florida day, with the Sun blaring on a scene, the trick is to keep the quarter, middle, and three-quarter tones ideally balanced in order to capture critical detail.

With highlights too “hot,” the inevitable shadows cast by the tropical Sun tends to push critical three-quarter tones (shadow detail) into the mud. Shooting in RAW mode allows most images to recover all but the most severe edges of dark and light, though it can take a careful adjustment to do so.

Filtering effect of clouds

Photographing on Overcast Days: The Light Simply Doesn't Get Any Better

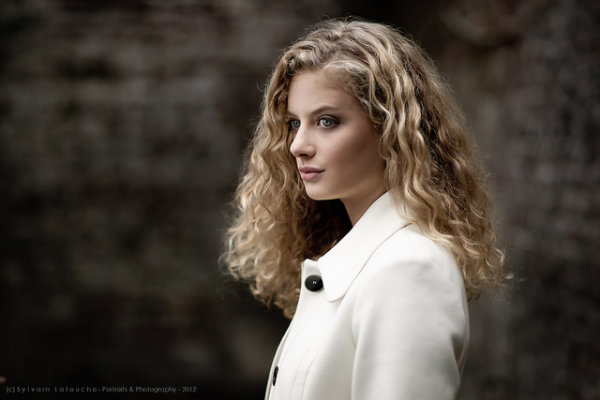
When photographing on overcast days, the filtering effect of clouds mellows the Sun’s harsh light, revealing significant quarter tones (highlight detail).

The wonderful byproduct of this softer “diffused” light is softer shadows, which in turn deliver more shadow detail.

It is much easier to boost the highlights and deepen the shadows with a little help from overcast weather. On very sunny days, you might have to use a reflector or fill flash to open up the shadows, but on cloudy days, they’re already open! This natural diffuser renders rich colors and a full range of tones from the deepest shadows to the lightest highlights.

This lighting is the ideal time to press your 18% gray card into action.

Gray card

photographing-on-overcast-days

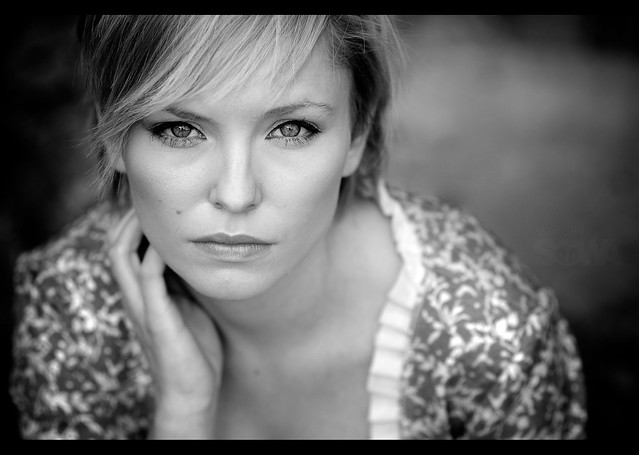
There is a reason why photographers like to balance their lighting around an 18% gray card. That 18% value just happens to be the same reflective value as average Caucasian skin color. And that value is the sweet spot of all photographic exposure.

Your camera’s image sensor is tuned to record skin tones in the very center of the contrast range. Image sensors do their best work when you point them at this reflective value. Once the camera knows this value, the lighter and darker tones fall quite naturally in line. And when the outdoor lighting falls neatly within the camera sensor’s “cruising range” (with headroom on either side of the scene’s histogram), that my friends, delivers top drawer results.

Photographing on overcast days may well become your favorite lighting.

Middle tone emphasis

Photographing on Overcast Days: The Light Simply Doesn't Get Any Better

Don’t be afraid to put the scene’s tones well within the middle of the histogram.

There is no hard, fast rule that says that every image has to contain extreme highlights or near-black shadows. Real-life simply doesn’t appear that way to your eyes. Not even high-key photography mandates that the lightest tones must be extremely bright. Some of the most moving photos are nearly void of overall contrast.

Don’t fall into the trap of “optimizing” every photo’s range so that it produces bright highlights and deep shadows. Allow nature to dictate the visual mood. Realistically speaking, the only thing in nature that is truly “black” is the inside of a cave at midnight. The only thing pure “white” is a direct view of the Sun at noon.

Auto levels

photographing-on-overcast-days

It’s okay to have highlights that aren’t pegged up against the right side of the histogram. Please think twice before you hit the dreaded Auto button in the Levels dialog of Photoshop. That kind of cookie-cutter photography should be left to those who don’t know any better. Let the scene set the mood and simply convey what you experienced.

Occasionally, dynamic adjustments within software applications tempt us to automatically force nature into conditions that aren’t natural.

White balance

photographing-on-overcast-days

The next time you find yourself in the shadow-free lighting of a clouded sky, go and get your camera. Great color (and fabulous black and white) photography is there for the taking. However, do keep in mind that outdoor shots under cloud cover will appear slightly bluish because those clouds are absorbing the shorter wavelengths.

Set your camera’s white balance to Overcast or Cloudy. This setting will compensate for the bluishness of the scene. If you are using a gray card and have the time to set a situational white balance, you can zero in on the color even more accurately.

Conclusion

Photographing on Overcast Days: The Light Simply Doesn't Get Any Better

Next time you shoot outdoors in overcast weather, search the scene for something interesting and unique, something that will bring a smile to your face. I’ve found that I find whatever I’m looking for in life, and that includes dismal weather. There is a bright spot in just about every situation if you keep your eyes (and your mind) open.

I hope this inspires you to look forward to photographing on overcast days. These special days deliver great natural lighting and provide many opportunities to see a different side of life.

Do you photograph on overcast days? What are your thoughts? Share with us in the comments!

The post Photographing on Overcast Days: The Light Simply Doesn’t Get Any Better appeared first on Digital Photography School. It was authored by Herb Paynter.


Digital Photography School

 
Comments Off on Photographing on Overcast Days: The Light Simply Doesn’t Get Any Better

Posted in Photography


Tips for Portrait Photography in Overcast Weather [video]

25 Jan

The post Tips for Portrait Photography in Overcast Weather appeared first on Digital Photography School. It was authored by Caz Nowaczyk.

In this video by Julia Trotti, you’ll learn tips for portrait photography in overcast weather that can give you more even, soft light on your models.

Overcast weather can be a great time to do portrait photography because the light is soft and doesn’t create as many of the harsh shadows that bright midday sunlight creates.

If you are doing a shoot with a model and the weather is overcast, keep in mind the following tips:

1. Make the most of it by using locations you normally wouldn’t

Keep in mind, depending on the type of overcast weather it is, you may still get some shadows if it is a bright overcast day.

If you find there is not quite enough light getting to your model’s eyes, ask them to bring their chin up a little to capture the light on their eyes.

Bear in mind that the direction your model is facing also has an effect on the light and contrast to the background.

Shoot in a few directions at the start as test shots to decide which is the best angle for light.

When photographing on overcast days, you may want to find a location that has a pop of color so that your images are not flat. Green locations such as gardens and forests work well. If in a location that is not as vibrant in color, consider dressing your model in colorful clothes.

2. Be mindful of including the sky in your photos

When the sky is dark and overcast, it can add great drama. However, if it is a bright overcast day, the sky can look blown out. In this case, use varied composition and camera angles to eliminate distracting over-blown white sky (unless your purpose is to have high contrast between your model and background).

3. Keep an eye on your camera settings

When overcast, your scene may be quite a bit darker, and your camera settings need to reflect that. Also, depending on your location, you may need to tweak your camera settings too.

If you want to capture sharp hair in windy conditions, use a faster shutter speed to avoid motion blur on your models’ hair. If you want to show the effect of some slight motion, use a slower shutter speed.

You may also find the following articles helpful:

6 Portrait Lighting Patterns Every Photographer Should Know

13 Tips for Improving Outdoor Portraits

10 Ways to Take Stunning Portraits

How to Create Awesome Portrait Lighting with a Paper Bag an Elastic Band and a Chocolate Donut

How to Pose and Angle the Body for Better Portraits

The post Tips for Portrait Photography in Overcast Weather appeared first on Digital Photography School. It was authored by Caz Nowaczyk.


Digital Photography School

 
Comments Off on Tips for Portrait Photography in Overcast Weather [video]

Posted in Photography


Portraits on an Overcast Day? Use a Reflector

02 May
Photographer: Sylvain Latouche. Shot with a Sony A850 and a 105cm silver circular foldable reflector.

Photographer: Sylvain Latouche. Shot with a Sony A850, 85mm lens and a 105cm silver circular foldable reflector.

As we head into Autumn here in Australia the days are becoming shorter and we’re seeing more and more overcast days. While some might say the weather is poor – this is one of my favourite times to shoot portraits out doors.

Overcast cloudy days present photographers with some beautiful soft and even light with the loads acting as a big natural diffuser.

This also means you can position your subjects almost anywhere as there’s little direct light which can open up great creative possibilities.

One of the key tools to have at your disposal on these kinds of days is a reflector (they come in all kinds of shapes, sizes and colours – grab one of the affordable 5-in-1 sets here if you’re just starting out) to help to bounce some of that lovely soft light up into the face of your subject.

This adds more light into the scene to help with exposure but also fills in any shadows that may be cast (often under the chin, nose etc).

In general you’ll want to position your reflector below and angling the reflected light back up towards the subject to fill in what shadows their may be – but do experiment with positioning the reflector at different distances and angles from your subject to see what impact that has.

Check out some of the following examples – all shot on overcast days with nothing more than a reflector (click the photos to be taken to the photographers page).

Photographer: Sylvain Latouche. Shot with a Sony A850, 85mm lens and 105cm silver circular foldable reflector.

Photographer: Sylvain Latouche. Shot with a Sony A850, 85mm lens and 105cm silver circular foldable reflector.

wondering...

Photographer: Marcin Sowa. Shot with a Nikon D300, 85mm lens and reflector.

Photographer: Casey Lee. Shot with Canon EOS 30D, 50mm lens and a Gold Reflector.

Photographer: Casey Lee. Shot with Canon EOS 30D, 50mm lens and a Gold Reflector.

Senior Portrait 1 - Tamara (Color)

Photographer: Paul Ryan. Shot with Canon EOS 5D, 24-70mm lens and a Silver Reflector.

Post originally from: Digital Photography Tips.

Check out our more Photography Tips at Photography Tips for Beginners, Portrait Photography Tips and Wedding Photography Tips.

Portraits on an Overcast Day? Use a Reflector


Digital Photography School

 
Comments Off on Portraits on an Overcast Day? Use a Reflector

Posted in Photography