RSS
 

Posts Tagged ‘outdoors’

Black and White in the Outdoors: Learning to see in Monochrome

06 Dec

The post Black and White in the Outdoors: Learning to see in Monochrome appeared first on Digital Photography School. It was authored by David Shaw.

1 - Black and White in the Outdoors

To determine when black and white is the best option in nature photography, you need to learn to see your scene in black and white. Most beginner photographers arrive at their monochrome images by experimenting with post-processing. While this occasionally works, shooting with black and white in mind results in far better images.

In other words, you need to SEE in black and white.

Look for Contrast

Highlights

In color photography, there are almost unlimited options to juxtapose contrasting and complementary colors or to provide an attention-getting subject in a flashy tone. But in black and white, you lose the ability to use color in the traditional way and are instead left with shades of gray. Contrast, rather than color, is our compositional tool.

Most of us see the world in rich color and there is no saturation slider in our eyes or brains with which we can switch color on and off. But we can train ourselves to see contrasts.

As I’m writing this, I’m looking out my window onto the spruce trees in my front yard. The sun is shining on a layer of fresh snow which fell over the past few days. The limbs of the spruces are draped in white. Looking south, toward the low sun, I can see flashes of perfect white where the sunlight is illuminating fresh snow. Those bright highlights contrast sharply with the dark, shaded trunks and exposed branches of the trees. In fact, even in the shaded areas, the difference between the snow and the dark needles is remarkable. With little color in the scene to begin with, it doesn’t take much to “see” this scene in black and white.

Because I can “see” this scene clearly in black and white, I can recognize that images like this will translate well from color. Here, let me step outside for a few minutes and make a few photos, to show you what I mean.

(A few minutes later…)

I’m back. I’ve pulled a few images and did a quick black and white conversion in Lightroom. Here are a couple of shots; first color, and then black and white.

2 - Black and White in the Outdoors

3 - Black and White in the Outdoors

4 - Black and White in the Outdoors5 - Black and White in the Outdoors

This is a straightforward example. As most people can see, lacking many colors, the snowy trees were a likely subject for black and white. However, the next step is harder.

Color Contrast

I had another black and white shooting session a few months back when “seeing” in black and white was much more difficult.

Each fall, I make a pilgrimage from my home in Alaska’s interior to the Kenai Peninsula. This year, I spent a day exploring the forest and mountains of Kachemak Bay State Wilderness Park, across the bay from the town of Homer. I hiked for several miles through the wet forest making images of the rising autumn colors, and the fog-draped mountains. It was a sea of greens and yellows, red highlights, grays, and browns. Some images were perfect for color, others not so much. Telling the difference in the field was a game I played as I walked.

6 - Black and White in the Outdoors

Some black and white images were clear in the gloomy forest. The dull yellow, jagged leaves of Devil’s Club against the muted greens and browns of the forest floor were an obvious contrast that I knew would translate well into black and white.

Others, like the pale green of fern fronds, were less contrasty in the field, and yet translated beautifully into shades of gray.

7 - Black and White in the Outdoors

These ferns were dying back at the end of the season and were largely a dull brown. Kind of ugly really. However, the color doesn’t matter in black and white, and the contrast between the pale brown fronds, and the deeply shaded background worked.

8 - Black and White in the Outdoors

This patch of ferns was pale green and popped against the darker green background. This is my favorite image of the series. It was a shot that took me a moment to “see” in black and white.

Another shot of an autumn stalk of bright red fireweed, I thought would look good in black and white when I first made the image, but upon examination of the back of my camera in the field. There was actually little contrast in brightness between the greens and red. That image didn’t work quite as well.

9 - Black and White in the Outdoors

10 - Black and White in the Outdoors

Lighting Contrast

Later that same afternoon, bright sunlight started to filter through increasingly thin clouds. It wasn’t yet hard light, but it was bright enough to be directional. The sun came through the forest canopy in patches, illuminating and shading different areas.

And this brought about a third option for black and white: lighting contrast. In the differing light, even similar colors will contrast in black and white.

11 - Black and White in the Outdoors

Beyond Details

12 - Black and White in the Outdoors

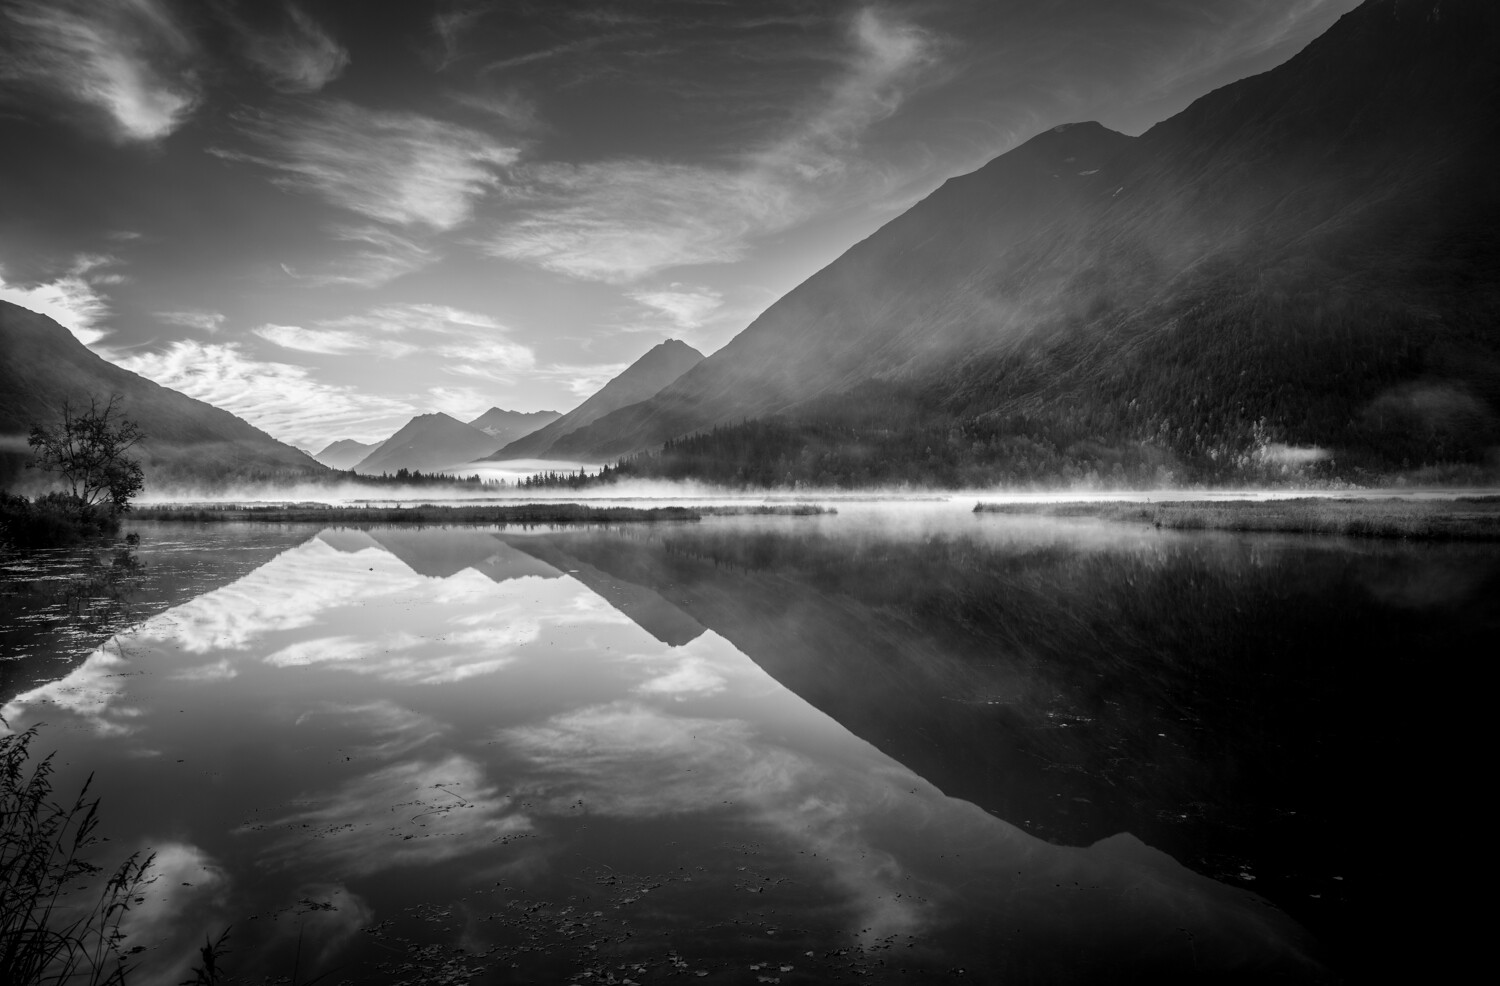
Seeing a large scene in black and white is the next step. I was photographing by a lake this fall. It was early in the day, the sun not yet far above the horizon, but any lingering sunrise color had faded. Most of the lake, some rising fog, and the surrounding mountains were in shadow. Aside from the sky, there wasn’t a lot of contrast. I was about to pack it in for the morning when the sun got high enough to illuminate a patch of fog, which flashed white in this scene of muted blues. Not much for color, I thought, but in black and white? That, I realized, would work.

13 - Black and White in the Outdoors

Terrible Light

At times, when photographing in harsh light, black and white can also salvage an otherwise impossible situation. A number of years ago, I was shooting in the altiplano of Bolivia. I arrived at mid-day at the spectacular and weird Laguna Colorado. It was savagely bright; cloudless skies, high elevation, middle of the day, and within a few degrees of the equator. Lighting conditions couldn’t have been worse.

While the landscape was uniformly drenched in harsh, ugly light, there was contrast in the colors of the desert. A polarizer darkened the sky and removed the worst of the glare. The resulting black and white conversion, was if not perfect, at least the best of a very bad situation.

14 - Black and White in the Outdoors

15 - Black and White in the Outdoors

Frequently traveling photographers find themselves in beautiful locations at bad times, and we don’t always have the freedom to return when the light is better. In such situations, consider black and white. It’s not a cure-all, by any means, but nasty light will often translate better into monochrome than full color.

The situation I described above was not unique on my trip through Bolivia. The sweet light of morning and evening lasted only minutes in the high desert, quickly replaced by glaring light. And yet contrasts in the landscape salvaged many a scene for me.

16 - Black and White in the Outdoors

Conclusion

If you can recognize a black and white subject in the field, it will open up your eyes to new compositions you may have previously ignored. Black and white photography is not simply the removal of color, it is a way of seeing.

When next you venture outdoors with your camera, look at the way colors and even shades contrast with one another. Look for lighting conditions that cause contrast to appear and embrace those situations in the form of black and white photography. Even on those days with rotten, bright light, consider how removing those washed out colors might help your final image, sometimes black and white can salvage an otherwise desperate moment.

Give it a try and then share your results in the comments below.

The post Black and White in the Outdoors: Learning to see in Monochrome appeared first on Digital Photography School. It was authored by David Shaw.

Digital Photography School

 
Comments Off on Black and White in the Outdoors: Learning to see in Monochrome

Posted in Photography


Tips for Using a Reflector the Right Way Outdoors

20 Jul

A reflector is easy to use, right? Just open it and put it under your model’s chin. WRONG!

Using a reflector may seem really simple but most new photographers make one big mistake with them. They put them in the wrong place to make flattering light on their subject.

Tips for Using a Reflector the Right Way Outdoors

In this video from Joe Edelman, see how NOT to do it, and get some tips on how to use a reflector the right way.

Items mentioned in the video:

  • California Sunbounce Mini-Reflector – $ 149
  • 32″ Soft white/silver reflector by Rogue – $ 29.95

Find other dPS articles about reflectors here:

  • 6 Ways of Using Reflector to Take Better Portraits
  • 10 Ways to Use a 5-in-1 Reflector
  • Tips for Using Reflectors to Create Beautiful Portraits
  • DIY How to Build and Use a Reflector to Take Better Portraits
  • Choosing the Right Color Reflector for Your Photography

The post Tips for Using a Reflector the Right Way Outdoors appeared first on Digital Photography School.


Digital Photography School

 
Comments Off on Tips for Using a Reflector the Right Way Outdoors

Posted in Photography


Two Videos With Photography Ideas to do at Home and Outdoors

27 Apr

Whether the temperature outside is not cooperating and you’re stuck at home, or it’s warm enough to get outside to shoot – here are some photography ideas for both occasions. We got you covered with these two video tips!

Get outdoors

Time to get outside with these creative photography ideas.

Stuck inside?

Never fear, here are seven ideas of what to shoot when you’re stuck at home.

Do you have any other creative photography ideas you can share with us? Please tell us in the comments below.

The post Two Videos With Photography Ideas to do at Home and Outdoors appeared first on Digital Photography School.


Digital Photography School

 
Comments Off on Two Videos With Photography Ideas to do at Home and Outdoors

Posted in Photography


SLC-1L-01: One Speedlight Outdoors — Find Shade

15 Dec

There is an inherent tradeoff when using small speedlights outdoors in daylight. They are light, and convenient and cheap. But they don't have a ton of power.

And the aggravating factor is the relationship between a small flash and a bright environment. Which is, in turn, governed by our sync speed. And by this I mean our natural speed limit for flash, absent power-robbing gimmicks like high-speed sync (HSS).

At a sync speed of 1/250th of a second, even at a low ISO, you are probably going to be at f/16 in full sun. That's a small aperture, which means your flash will be working hard to create a full exposure.

Because of that, working in full sun with speedlights usually means we lack the power that we need. Certainly, we don't have enough power to push the flash's light through a softening modifier to look nice.

The solution: Get more power… or find some shade. Read more »
Strobist

 
Comments Off on SLC-1L-01: One Speedlight Outdoors — Find Shade

Posted in Photography


How to Photograph People Outdoors Without Using a Reflector

28 Apr
How to Photograph Outdoors Without Using a Reflector

Subject: Kota Wade

You just got booked for a marvelous portrait photo shoot out in a gorgeous natural landscape. You run out the door, with camera gear in tow. Then you arrive at the location, the fresh air filling your nose, the beautiful natural world flourishing all around. You meet with your lovely portrait subject. The sun is beating down on you from above. Then it hits you… you forgot your reflector at home.

Or maybe you don’t have a reflector, maybe you just never felt the need to spend money on one. All of this is totally okay because there are some tips and tricks to take stunning photographs without the use of a reflective disc! Keep reading to learn more.

How to Photograph Outdoors Without Using a Reflector

Subject: Bina Monique

What is a reflector?

A reflector is a simple tool that redirects existing light. A reflector does not illuminate, it merely allows you to manipulate the light that you already have.

Photographers use reflectors to fill shadows, which is why you often see them used in outdoor settings where you cannot control the light. Being at the mercy of the sun, you add a level of control to your situation with the use of a reflector. However, there are ways to take advantage of your situation without one.

How to Photograph Outdoors Without Using a Reflector

Subject: Skylar Roberge

Find even lighting

Essentially, part of the trouble with shooting outdoors comes from the lighting. Clients often see a clear blue sky with the beaming sun and think that is an absolute joy for photographers. But we shooters silently scream in agony at the prospect of overblown highlights, underexposed shadows, and the dreaded contrast.

What’s the best solution for this? Find some even lighting!

Positioning your subject under a tree, in the shadow of a building, or simply positioning yourself so that the sun hides behind a mountain can all make for some nice even lighting. Although the background might be overexposed if you are simply using a small patch of shadow, try to change your perspective to make the most of the situation.

How to Photograph Outdoors Without Using a Reflector

ISO 400 – Shutter Speed: 1/100 – Aperture: f/2.8
Even Lighting: Rooftop overhang

Make even lighting

Are you out in a field or a desert and don’t have access to any form of even lighting? Is the sun too bright to have on your subject’s face? Then it’s time to get creative!

You can make your own even lighting utilizing things you may already have in your car. Use an umbrella and position that over your subject, or to block out the sun in your frame. You can use a vehicle windshield cover or shade to do the same.

How to Photograph Outdoors Without Using a Reflector

ISO 1250 – Shutter Speed: 1/500 – Aperture: f/2.8
Even Lighting: Umbrella

Use the contrast to your advantage

Are neither of the aforementioned tips applicable to your scenario? Well then, this is where we get inventive.

Photography is an art form, and artists are creative, imaginative, and inspired. Instead of fighting against the contrast, why not use it to your advantage? Work your shoot around the contrasting shadows and highlights, and create dramatic photographs. Several well-known clothing designers, such as Prada and Dolce & Gabbana, use contrast in their fashion editorials to stage a theatrical scene and illicit an intense response in the viewer.

How to Photograph Outdoors Without Using a Reflector

ISO 200 – Shutter Speed: 1/1000 – Aperture: f/2.8

Shoot at the right time of day

When a choice presents itself, shooting at the correct hour of the day can ease your lighting woes. The golden hour is infamous for being an excellent time to photograph. Aiming to photograph when the sun is low and producing a more even light removes the need for a reflector.

How to Photograph Outdoors Without Using a Reflector

ISO 1600 – Shutter Speed: 1/640 – Aperture: f/2.8

Fill shadows by finding a natural reflector

Various surfaces can double as reflectors, such as water or windows from a building. Positioning your model just right can garner the same effect as if you had a reflector yourself.

How to Photograph Outdoors Without Using a Reflector

ISO 2000 – Shutter Speed: 1/320 – Aperture: f/2.8
Reflector: Car windshield, parked to his right side

Fill the shadows in post-processing

The computer is your friend, and it is okay to use programs to help you bring your vision to light (no pun intended). Shooting in RAW format (an image file that contains minimally processed data from the image sensor of a camera – Raw files are named so because they are not yet processed) gives you better control over your image when you edit it. RAW files have more shades of colors compared to JPEG files, higher image quality, significantly better control over editing lightness, white balance, hue, saturation, etc., and all of the changes made on a raw image file are non-destructive. You can use any post-production software to lighten the shadows in your image and darken the highlights.

Original image before processing.

How to Photograph Outdoors Without Using a Reflector

After processing.

There you have it, sounds like you have a solution to your no-reflector problem.

The post How to Photograph People Outdoors Without Using a Reflector by Anabel DFlux appeared first on Digital Photography School.


Digital Photography School

 
Comments Off on How to Photograph People Outdoors Without Using a Reflector

Posted in Photography


5 Easy Tips for Photographing Babies Outdoors

10 Oct

When it comes to photographing babies under two years old (and newborns), most people immediately think of studios with elaborate backdrops and lots of available headbands, hats, and props. There’s nothing wrong with that type of photography for children, but if you don’t have access to a studio space of your own, you have to get a little creative.

outdoor-newborns

More and more, I’m discovering that I love to photograph both newborns and young babies outdoors. Yes, I often take even 5-10 day old little babies outside for at least part of their session. If you’d like to give it a try as well, here are five simple tips to help get you started while also keeping the little guys and gals safe.

1. Settle them inside

photographing-newborns-outs

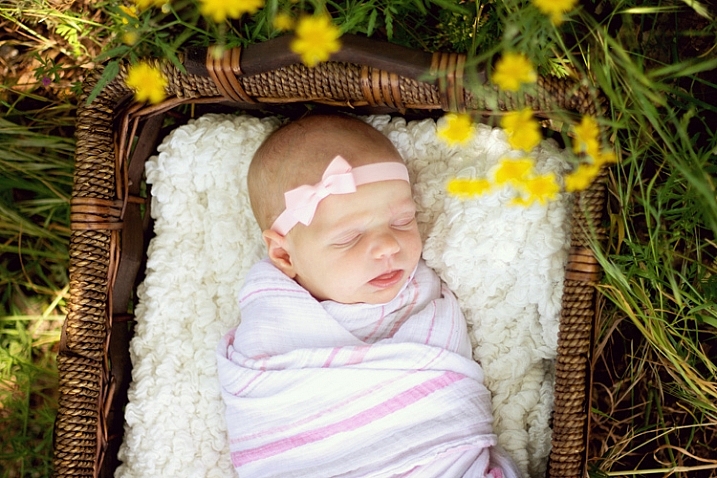
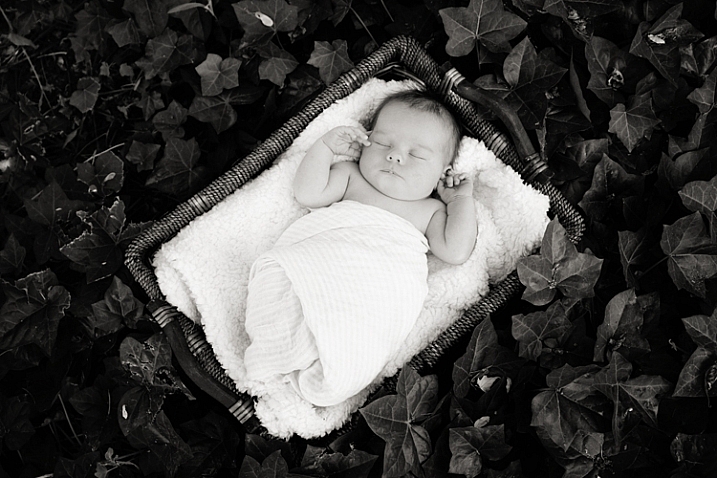
When it comes to newborns, you’ll find that they settle best when they’re very warm. This means that if you want to photograph a baby outdoors, you will typically be more successful if you begin indoors. Inside, swaddle the baby up tightly. Keep in mind that babies like to be warm, so you may want to leave them in pyjamas under the swaddle. Then rock them while playing white noise or making sushing sounds until they are nice and sleepy. Next, lay the baby in a basket or bowl that has been lined with a fluffy blanket and let them settle. Once the baby has settled in, carry the whole thing outdoors.

newborn-photos-outside

Sometimes, photographing babies outdoors can be a bit of a race against time, as any big gust of wind or loud noise can startle them awake. For best success, scout out a location that’s close to the house before you begin. Also, even in the most ideal situations, there are times when a baby just won’t stay settled outdoors. If you experience that, don’t sweat it, just move on.

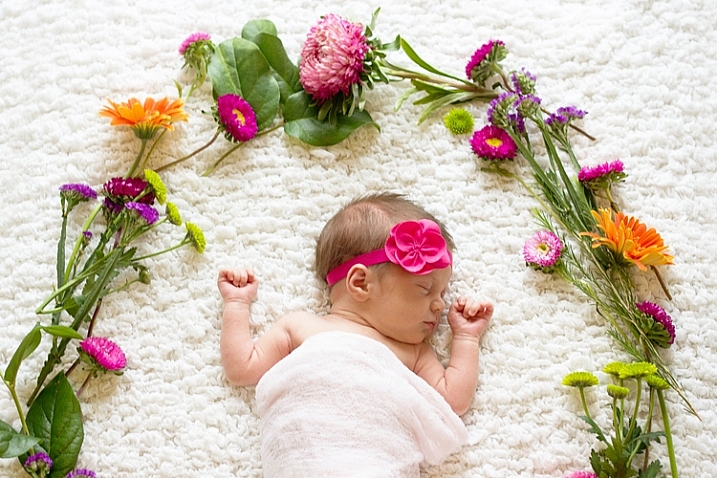
Recently, I tried to take a baby outdoors on several occasions, and each time she woke up crying before I could get even a single shot. So with permission, I cut a few flowers and brought them inside, and photographed the baby inside with the flowers instead (see photo above). Just be flexible. If you can’t bring the newborn outside, consider ways to bring the outdoors in.

2. Have someone hold them

newborn-session-outdoors

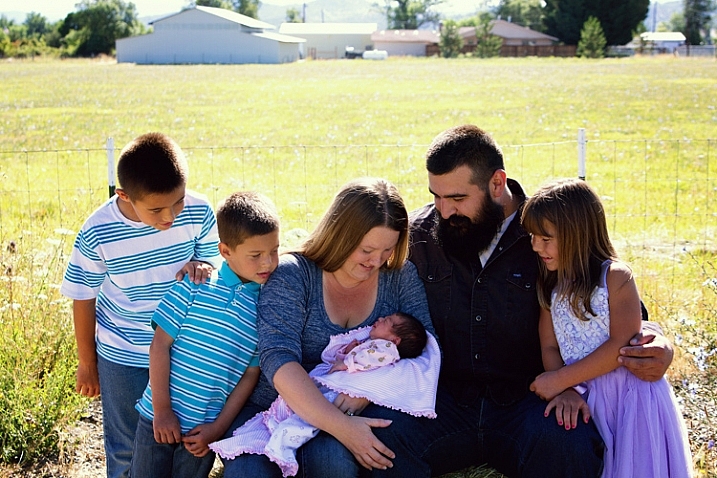
If you primarily shoot on location, you’ll find that not all families have a great space for family portraits indoors. Sometimes the physical shape or size of the room isn’t particularly conducive to a group portrait, or the decor doesn’t quite match the desired aesthetic. Sometimes families just have beautiful outdoor spaces that I love to showcase.

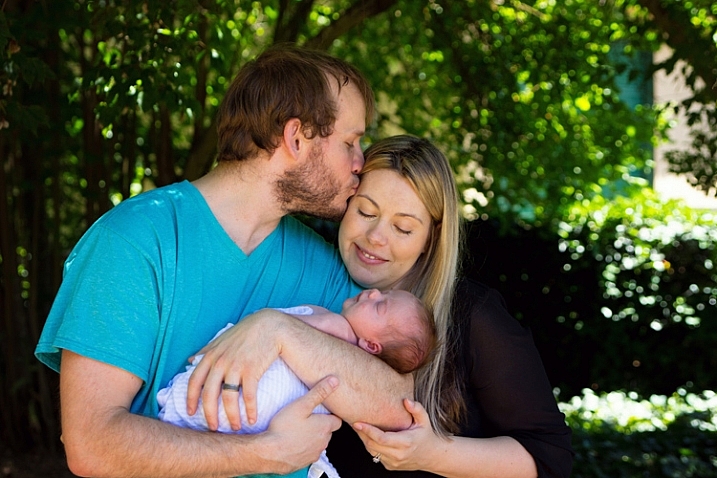
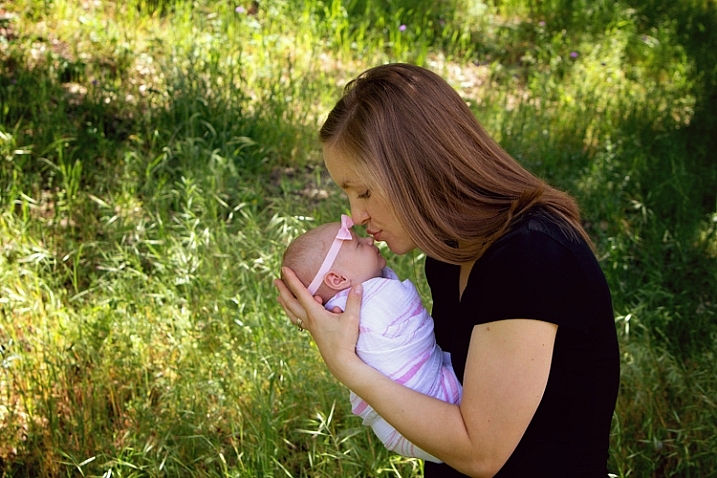
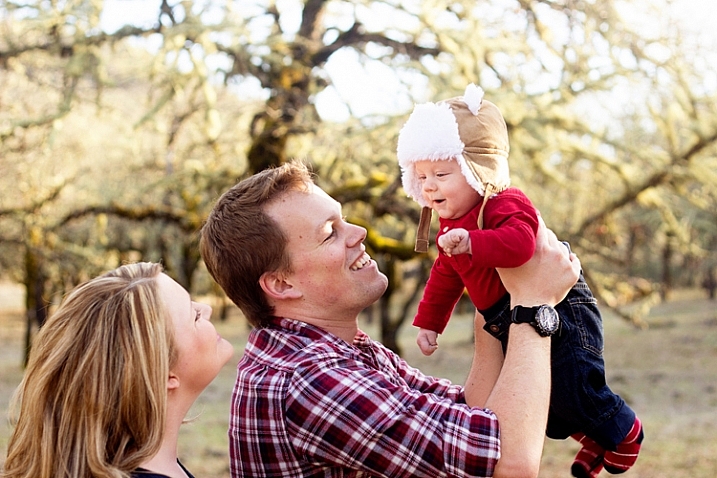
Regardless of the scenario, I often find myself asking mom or dad to hold the baby during a few family portraits outdoors. Particularly if the family has expressed an interest in “lifestyle” or “candid” images, as nature can tend to feel less stuffy and conservative than an indoor studio setup.

outdoor-newborn-session

Even if you experience a baby that won’t settle outdoors in a basket or bowl, keep in mind that being held in mom or dad’s arms may be an entirely different story. Sometimes babies just want to be held. Don’t be afraid to experiment with both scenarios until you discover what works best for each individual baby and family.

3. Shade them appropriately

outdoor-newborn

Whether you’re placing a baby in some vessel or having a parent hold them outdoors, it is really important to make sure that they’re shaded appropriately. Both newborns and older babies have very sensitive skin, and the last thing you want is for them to get a sunburn for the sake of some photos (it’s also better light for portraits). If you’re not able to find shade naturally available, some alternative options are a large umbrella (patio or beach umbrellas work well), or even a reflector held directly overhead.

When dealing with dappled light through trees, I sometimes position mom or dad strategically just out of frame so that they block any light that may fall on baby’s face or body.

4. Try to contain walkers and crawlers

photograph-babies-outdoors

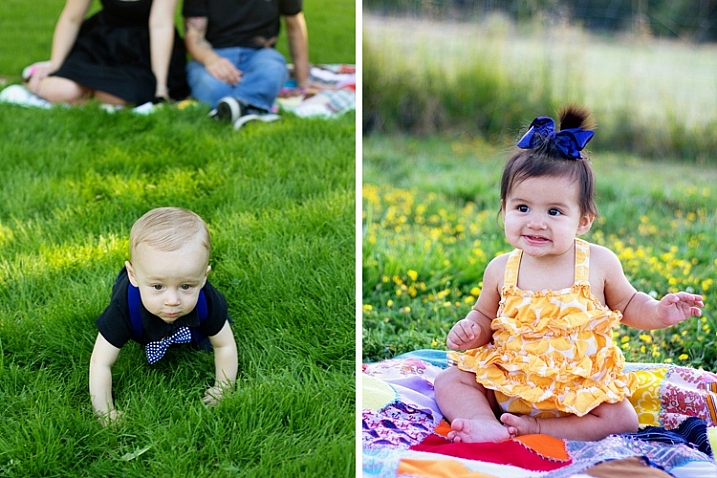
When it comes to photographing older babies outdoors, there’s a sweet spot between sitting babies and crawling babies when outdoor photography is easiest. That said, you won’t always be working with the ideal developmental stage because all babies hit those stages at different ages. So, it’s best to be prepared with a few tricks up your sleeve to make photographing walkers and crawlers a little bit easier.

photograph-babies-outside-3

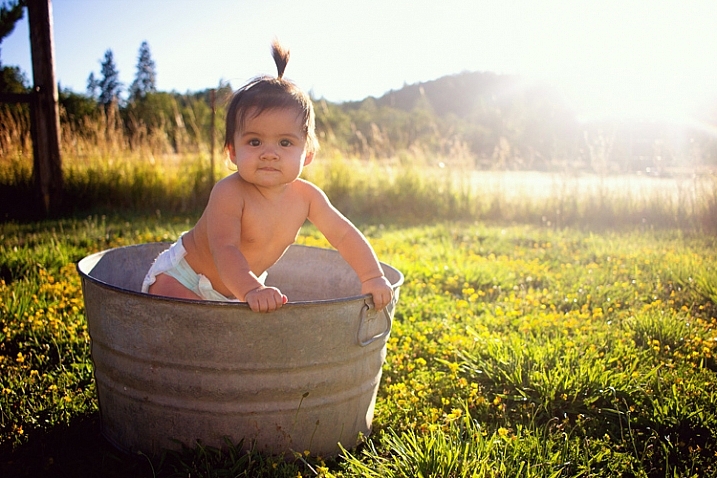
I usually start by laying a quilt or blanket down on the ground. Some babies will not crawl off the blanket because they hate how the grass feels on their bare hands and feet. This is typically not a solution that lasts for the duration of the session without causing frustration, but can sometimes buy you a few stationary minutes. Other than the blanket trick, I have used galvanized wash tubs, old crates, toddler sized chairs, and wagons, to help contain older babies outdoors.

When using any of these props, please be safe. Use a spotter if necessary to prevent tumbles, and don’t be afraid to use composite images (combine two shots) if needed so that someone can have a hand on the baby at all times.

5. If you can’t contain them, entertain them

photograph-babies-outside

If sitters, walkers, and crawlers aren’t happy being contained, your next best bet is to just roll with it. Don’t push things, or you’ll likely to end up with a baby in tears, and nobody wants that at a photo session.

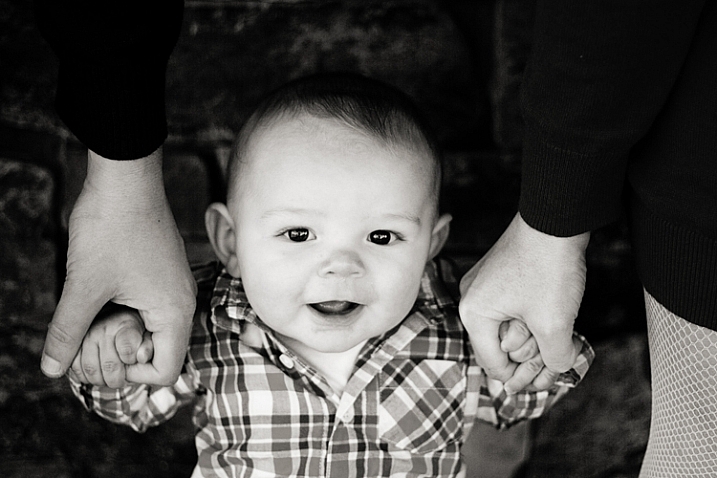
At the first signs of frustration, transition to games or activities that will entertain the baby, then keep taking pictures. Many babies and early walkers love to hold hands and stand or walk, so let them. Have mom or dad pick up the baby overhead and play airplane. Play a game of chase. You’ll be surprised at the opportunities for candid images of the family having fun together, as well as the number of opportunities for images that have a portrait feel to them as well.

photograph-babies-outdoors-

Do you have any other tips for photographing newborns or young babies outdoors? If so, please chime in the comments below.

googletag.cmd.push(function() {
tablet_slots.push( googletag.defineSlot( “/1005424/_dPSv4_tab-all-article-bottom_(300×250)”, [300, 250], “pb-ad-78623” ).addService( googletag.pubads() ) ); } );

googletag.cmd.push(function() {
mobile_slots.push( googletag.defineSlot( “/1005424/_dPSv4_mob-all-article-bottom_(300×250)”, [300, 250], “pb-ad-78158” ).addService( googletag.pubads() ) ); } );

The post 5 Easy Tips for Photographing Babies Outdoors by Meredith Clark appeared first on Digital Photography School.


Digital Photography School

 
Comments Off on 5 Easy Tips for Photographing Babies Outdoors

Posted in Photography


The great outdoors: Canon EOS 5DS and 5DSR Field Test

07 Nov

Mikey Schaefer is no stranger to the great outdoors. As a professional photographer who specializes in shooting in some of the most extreme environments on earth, he tests his body – and his gear – to the limits. In this field test we’re following Mikey on a sports lifestyle / editorial shoot with Canon’s EOS 5DS and 5DSR, near his home town in Oregon. Read more

Articles: Digital Photography Review (dpreview.com)

 
Comments Off on The great outdoors: Canon EOS 5DS and 5DSR Field Test

Posted in Uncategorized


5 Secrets to Create a Perfect Silhouette Portrait Outdoors

22 May

DPS Silhouette 1

1) SHOOT LOW AND HEAD TO TOE

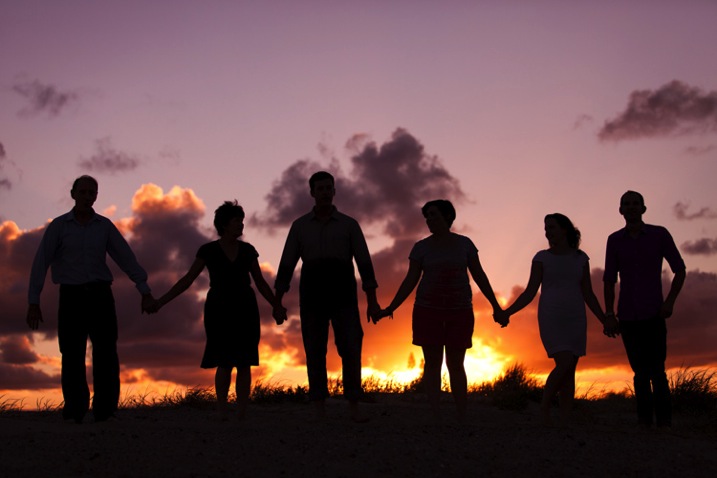
Place the subject’s entire body, from head to toe, against the sky. In order to do this, you will need to be lower than the subject. You can do this by laying on your back, or stomach, while taking the shot.

If you are unable to get low enough, you may need to have your subjects get higher, such as on the very top of a rock, small hill or sand dune. This will hopefully allow you, in most circumstances, to get an angle that places the subject’s entire outline against the sky. You can see a variety of landscapes utilized in the examples below.

DPS Silhouette 2

Hint: It’s so, so, SO important that their feet are against the sky! Legs in a silhouette portrait that are cut off above the feet look like weird, short stumps. If you can’t find a suitably spot at a location, you can play with silhouettes of a closer composition.

DPS Silhouette 3

2) IT’S ALL IN THE TIMING

Silhouettes work best around 20-30 minutes before sunset. However, it does vary with the angle you are able to achieve – the greater the height difference between you and the subject(s), the earlier you will need to take the shot.

If you wait any longer, the sun will be hidden behind whatever your subjects are standing on, and the sky might not be bright enough to make a silhouette. If you do it too early, the sky’s colours can be a bit boring and you will be dealing with other issues, such as sun flare.

DPS Silhouette 4

Tip: Silhouettes can be taken earlier before sunset if the sun is partially blocked or filtered through strong clouds.

3) SILHOUETTE SETTINGS ARE SIMPLE

Set your camera to Aperture Priority (AV) mode, with an aperture of f/2.8, and ISO of 400. Have Evaluative Metering selected, which means that the camera will take into account the whole scene when deciding how to find a balanced exposure.

If you fill the frame with your subjects’ faces or bodies, then the camera will expose for their skin, even with a bright background (see example below).

If you fill the frame mostly with a very bright sky, than the camera will expose for the bright sky, brining out the natural sunset colors and making everything else in the photograph dark.

So, if you place your subject directly against the sky (bright), than the subject (which is darker) will be heavily underexposed. The result – a silhouette!

DPS Silhouette 5 DPS Silhouette 6

Both photographs were taken on the exact same setting mentioned above, only seconds apart. The difference? Composition, and what is filling the frame – subject or sky.

4) SILHOUETTE PORTRAIT POSING IS SPECIFIC

Silhouettes are very forgiving of poor facial expressions (simply because you cannot see them), but very harsh when it comes to outlines. After taking each shot, check to make sure that nothing looks odd in the photograph.

Here are a few things to keep in mind when posing subjects in a silhouette:

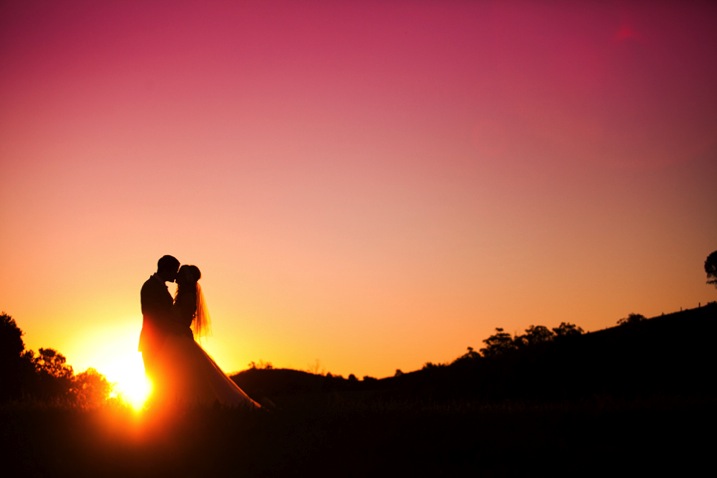
  1. Hugging poses do not work – A hug silhouette looks like a great big blob monster. All subjects need to be clearly defined, which means they need to be at least a couple of inches apart from each other. It’s nice for subjects to still be connected, through holding hands, or kissing, but their bodies should still be defined.
  2. Have your clients look away from camera – It’s much nicer and more natural to have poses where the faces are profiled.
  3. Watch the clothing – Very baggy clothing will not work as well for a silhouette, as the shape can become unflattering. It is best for females to wear dresses or skirts in silhouettes, as it brings a feminine shape and helps clearly define them against the male’s figure. – Very baggy clothing will not work as well for a silhouette, as the shape can become unflattering. It is best for females to wear dresses or skirts in silhouettes, as it brings a feminine shape and helps clearly define them against the male’s figure.

DPS Silhouette 7

5) SILHOUETTES SELL

Try to capture at least one silhouette at every photo shoot, whether it is a family portrait, maternity, engagement or wedding. Why? Because they sell!

Here are some reasons why clients love to purchase silhouettes:

  • Silhouettes add variety to your shoot. Silhouettes are so different in nature, in their colouring and style, that the variety they give instantly makes any shoot more interesting and saleable. As the silhouette is quite unique from all other photographs, it also makes it easy to sell individually as a unique piece of artwork.
  • Silhouettes are perfect for shy clients. Some clients hate the idea of their faces hanging up on their walls, making silhouettes the perfect objection handler. As the focus of the photograph is not on the subjects’ faces at all, it can be marketed to them as the perfect piece of personalized artwork, without battling their self-conscious nature.
  • Silhouettes look better bigger! If you capture silhouettes on a wide composition, it’s all too easy to sell them as very large piece of artwork. Because the subjects are relatively small within the frame, silhouettes can encourage a larger, more impressive piece of artwork for the client and a more profitable sale for you.

DPS Silhouette 8

We hope this guide gives you the confidence to go out and try your own silhouettes.

googletag.cmd.push(function() {
tablet_slots.push( googletag.defineSlot( “/1005424/_dPSv4_tab-all-article-bottom_(300×250)”, [300, 250], “pb-ad-78623” ).addService( googletag.pubads() ) ); } );

googletag.cmd.push(function() {
mobile_slots.push( googletag.defineSlot( “/1005424/_dPSv4_mob-all-article-bottom_(300×250)”, [300, 250], “pb-ad-78158” ).addService( googletag.pubads() ) ); } );

The post 5 Secrets to Create a Perfect Silhouette Portrait Outdoors by Alana Orth appeared first on Digital Photography School.


Digital Photography School

 
Comments Off on 5 Secrets to Create a Perfect Silhouette Portrait Outdoors

Posted in Photography


A Guide to Shooting Outdoors in Low Light Conditions

22 Jun

A Guest Post by James Farley.

1

Shooting in low light as for many other forms of photography requires a bit of thought beforehand in order to get the most from the time you have, first and foremost will be making sure you have the right equipment with you.

Besides your camera and lenses, top of the list of things you will need will be a tripod, sturdier the better as exposures can get up to 30 seconds and sometimes even longer which is where even the slightest vibration or movement of the camera can ruin a shot.

2

Other items that you can get by without but if you have them will be very helpful include:

  • Remote release, these come in many forms, infra-red/wired/wireless, I’ve used all of them at some point or another and would now always opt for a wireless trigger, can be inexpensive and give you a good mix of reliability and range.
  • ?There are now also apps that you can use on your smartphone with a suitable cable that act as a release and can offer some great features above and beyond being a simple trigger, one I’ve used that is worth a look is called TriggerTrap

  • A torch – trying to get your camera to autofocus in very low light can be a right headache at times, shining a torch on your desired area of focus will allow it to lock on quickly (but remember to switch to manual focus when it has!)
  • ?Also useful for changing settings on camera and just generally seeing your way around!

  • ND Grad filters – by no means essential, but if still a bit of colour in the sky these can be helpful to ensure things in foreground are correctly exposed, particularly if already in shadow when beginning to shoot.
  • Warm clothes! Depending on where you are in the world, it can get very cold very quickly as it goes dark, nothing worse than standing round shivering as your 60 second exposure ticks very slowly by!

3

Personal safety is also very important to mention if you are out to shoot in limited light conditions, ideally take someone along with you, not least to give you someone to talk to, can get very boring waiting for long exposures to finish!, or at least tell someone where you plan to go and what time you expect to return. Carry a mobile phone and try not to make it obvious you have valuable equipment with you where possible.
You will probably already have locations in mind that are suitable for low light photography, I tend to find that cities offer the best opportunities and will set out with the intention of shooting specific buildings from various viewpoints, and then improvise as the night progresses and other things present themselves.

4

Artificial lighting can greatly enhance a dark scene, and if you use a narrow aperture, f/16 for example you should capture lights with a starburst effect to add some drama to the image.

Once you have found the composition you like the look of, set your tripod up ensuring it’s not in the way of others, if it has a bag hook as some do then hang your camera bag from it to give you a bit more stability.

Compose the scene in your viewfinder and use the torch as mentioned if needed to focus, then switch to manual focus which will stop the lens from ‘focus hunting’. At this point I will wait for any moving light sources such as vehicles to leave the composition so I can check the settings selected by the camera before then plugging these into the cameras manual mode to ensure they do not change when shutter is triggered.

5

If the scene is very dark, it may be the case that your camera cannot meter it sufficiently well to give a correct exposure (DSLR’s generally will not automatically select an exposure longer than 30 seconds), if this is the case, you will need to go into manual mode, choose your aperture and then select the cameras ‘Bulb’ mode which will open the shutter when you use the remote release, and keep it open until you press it again, this is where guesswork comes into it, you will need to try out some exposure times until the image is sufficiently exposed, use the histogram on back of camera to give you some idea of how far under/over your exposure is.

Longer exposures can also produce ‘noise’ within an image, similar to when using higher ISO’s, to reduce this most DSLR’s will have some sort of ‘long exposure noise reduction’ setting somewhere within the menu system, if you turn this on when you have taken your image, the camera will then close the shutter and take a similar length exposure. You won’t see this second exposure and it doesn’t get saved to your memory card, but the camera will use it to subtract any hot pixels showing from your original image which can greatly reduce noise, can get annoying though as every exposure will then take double the time to capture!

White balance can be tricky in low light with all kinds of artificial light spilling across your scene, for this reason I would suggest shooting in RAW to give you the flexibility to adjust this later, plus it will capture more detail in the image which can sometimes be an issue in very dark areas.

Don’t let rain put you off either, wet surfaces can look brilliant as light bounces off them!

And if you are feeling really creative, timelapse sequences can look fantastic as the light slowly disappears, this clip was made from about 140 photographs taken on Tower Bridge in London.

Now just grab your coat and get out there!, love to see what you get if you’d like to share some links in the comments below.

James Farley is a semi professional photographer in the UK covering a wide range of genres, recently including wedding photography, and a self confessed ‘kit geek’.
More of his work can be found on Facebook and at www.jamesfarley.co.uk

Post originally from: Digital Photography Tips.

Check out our more Photography Tips at Photography Tips for Beginners, Portrait Photography Tips and Wedding Photography Tips.

A Guide to Shooting Outdoors in Low Light Conditions


Digital Photography School

 
Comments Off on A Guide to Shooting Outdoors in Low Light Conditions

Posted in Photography


3. Using the D90 outdoors – Interactive Tutorial

04 May

Another segment dealing with shooting with the D90 outdoors