RSS
 

Posts Tagged ‘Northern’

How to Photograph the Northern Lights (Aurora Borealis)

17 May

The post How to Photograph the Northern Lights (Aurora Borealis) appeared first on Digital Photography School. It was authored by Christian Hoiberg.

how to photograph the northern lights

Want to know how to photograph the northern lights?

In this article, I’m going to share plenty of northern lights photography tips and tricks – so that you can capture stunning aurora shots of your own.

This advice comes from lots of experience; I’ve had the pleasure of watching and photographing the northern lights, also known as the aurora borealis, for years (and I still find myself shouting in awe when I see them elegantly dancing in the sky!).

So if you’re ready to become an expert, then let’s get started.

How to see the northern lights

The first step in photographing the northern lights is, obviously, finding them. It’s simply not possible to see the aurora whenever and wherever you want – you must be in the right region and follow a few simple steps, as I discuss below:

1. Be in the Northern Hemisphere

The northern lights aren’t visible all over the world. As the name indicates, they are a phenomenon visible in the Northern Hemisphere. 

Places such as northern Norway, Iceland, and Alaska are typical areas you can witness the northern lights.

While you generally want to be north of the Arctic Circle (or close to it), you can witness the lights further south during extreme solar storms. But this is not as common and the display is rarely as impressive compared to “northern” northern lights.

When planning your trip to the north, you’ll need to bear one more fact in mind:

The northern lights season lasts from late fall to early spring. After all, northern lights are only visible in the night sky, and in the Arctic, the sun doesn’t set during the summer months – so there’s no darkness and no northern lights.

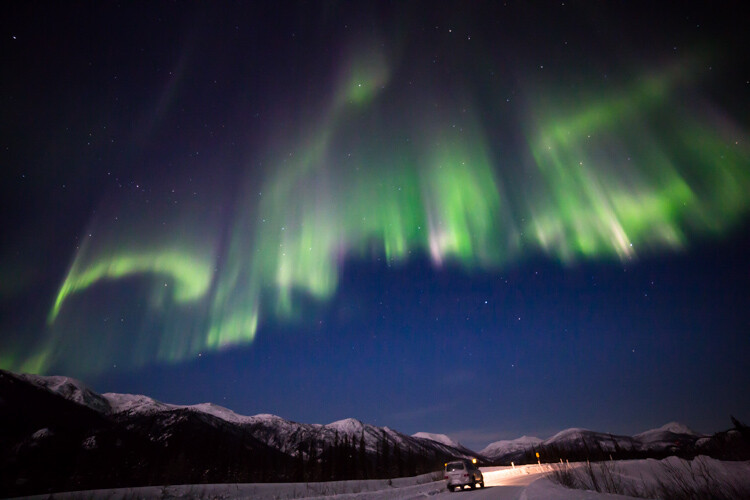
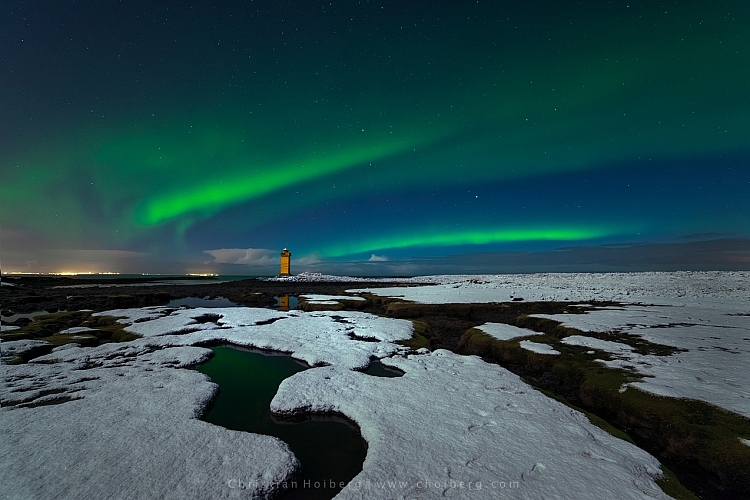
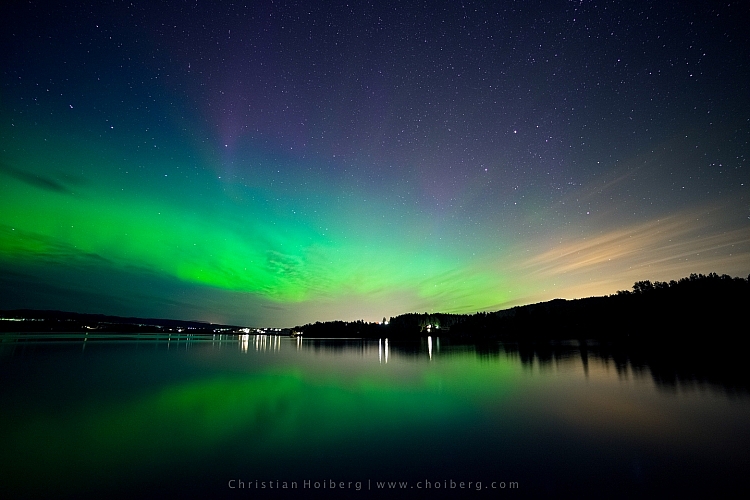
the northern lights over the ocean

2. Get away from light pollution

It’s nearly impossible to see the northern lights from the downtown of a large city. You might catch a glimpse if the northern lights are strong, but the display won’t be nearly as impressive as if you leave the city lights behind.

To increase your chances of capturing the northern lights, you should get away from light pollution and find a location where you can clearly see the stars.

There are a few different tools you can use to find areas with minimal light pollution. Dark Sky is a great website for this purpose; it shows a detailed map of light pollution.

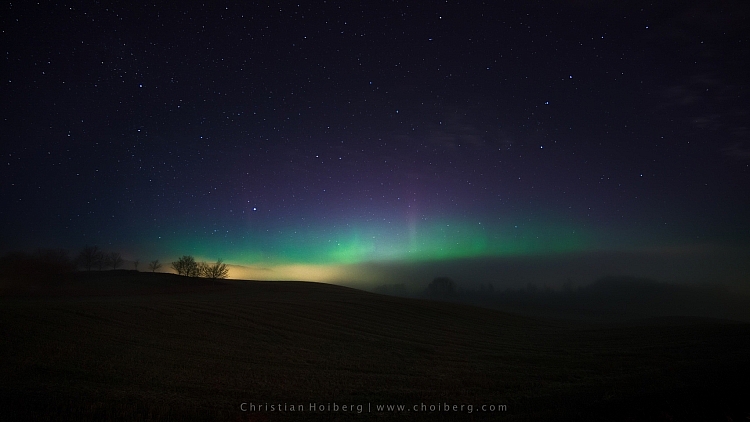
the northern lights over ice

3. Look for clear skies (and a high Kp-index)

In order to see the northern lights, you need to see the stars – so cloudy nights aren’t good for aurora borealis photography. If the sky is cloudy, you might as well enjoy the comfort of a warm cabin.

Fortunately, when you’re north of the Arctic Circle, clear nights typically mean you will get a glimpse of the northern lights. The display might not always be strong, but chances are high that you’ll at least get a nice arch across the horizon. 

Keep in mind that weather conditions change quickly in the Northern Hemisphere. Just because it’s cloudy one moment doesn’t mean it’ll be cloudy in an hour, so you should keep a close eye on the forecast and stick your head outside from time to time. 

Also, a quick tip: To predict the aurora display strength, refer to the Kp-index. Note that the higher the Kp-index, the stronger the display. (There are other factors involved in predicting the northern lights, but the Kp-index is the easiest and most convenient.)

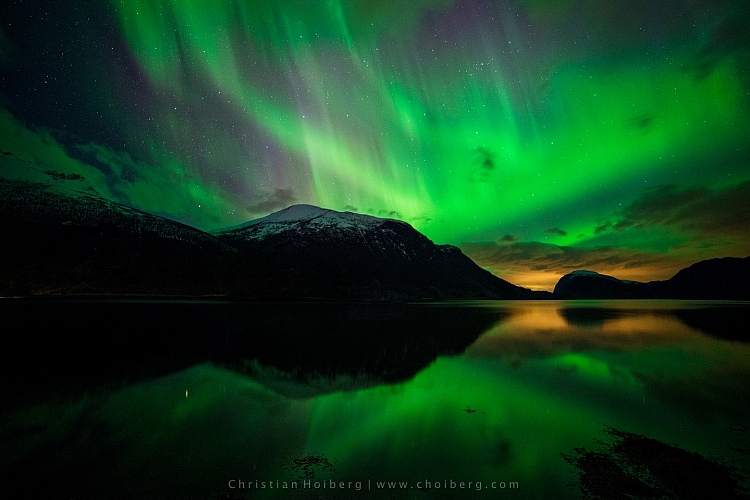
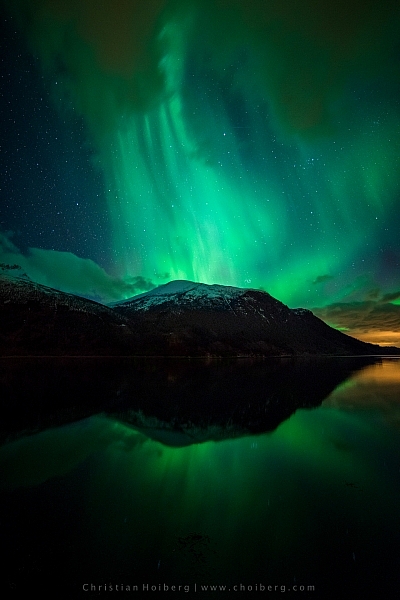
the northern lights over a mountain

How to photograph the northern lights

Once you’ve found the northern lights, how do you actually photograph them? It’s easy to get overly excited and forget about the technicalities – after all, the northern lights are stunningly beautiful – but I urge you to study the next few steps so that you’re as prepared as possible when the sky explodes.

1. Use a tripod and a remote shutter release

Photographing at night means that you’re working with long exposures (i.e., slow shutter speeds). It’s therefore essential that you mount the camera on a tripod. This will make sure that your camera stays still for the duration of the exposure.

You should also consider using a remote shutter release when you’re photographing the northern lights. This removes any chance of the vibrations caused when you press the shutter.

An alternative is to use the camera’s self-timer – but sometimes you want to capture the image at an exact moment with no delay, which is why I highly recommend a remote release.

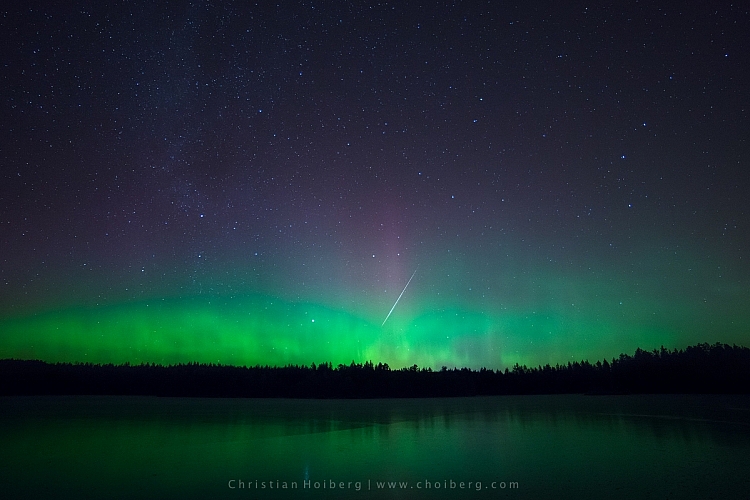
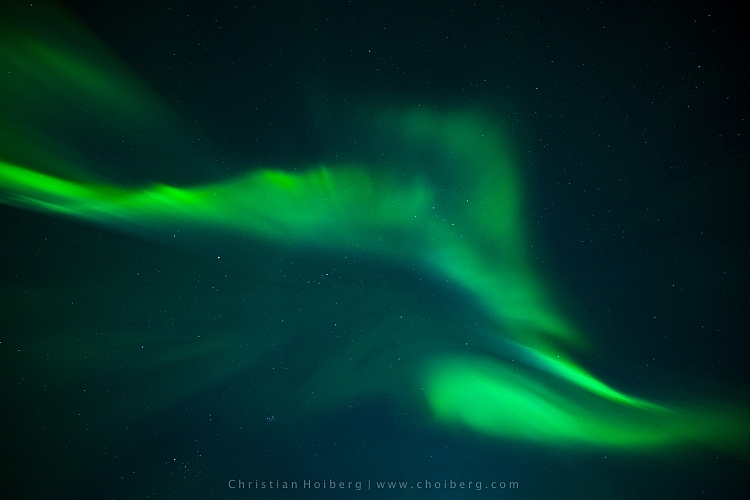
the moon and the aurora borealis

2. Use a wide-angle lens with a large aperture

I generally encourage photographers to experiment with different focal lengths, but there’s no getting around it: an ultra-wide-angle lens is ideal for photographing the northern lights. 

A wide-angle lens allows you to capture both the landscape and the sky in one shot. That way, you can incorporate the northern lights into a good composition.

Also, when you first experience the northern lights, you’ll realize that they can fill up the entire sky. It’s impossible to capture all this beauty with a narrow focal length lens (in fact, even wide-angle glass isn’t always enough!).

It’s also important to use the widest possible aperture. A wide aperture means more light reaches the sensor, allowing for a brighter exposure.

For that reason, apertures such as f/2 and f/2.8 work well for night photos. You can get away with f/4 if your lens doesn’t open to f/2.8 – but you’ll need to increase the ISO or extend the shutter speed to pull it off, neither of which are great for northern lights photography.

aurora borealis over a river

3. Adjust the shutter speed and ISO according to the northern lights

Guides such as the 500 rule or the NPF rule are great indicators of the shutter speed you should use for night photography – but these do not work for northern lights.

Why?

Because the best shutter speed completely depends on how active the northern lights are. I’ve experienced extreme displays where I’m using a 1/2s shutter speed and an ISO of 200, yet I’m still overexposing the sky!

Therefore, you need to adapt the shutter speed to the situation and make changes throughout the night. I typically use a shutter speed between 4 and 20 seconds. 

Now, a fast-moving northern lights display requires a faster shutter speed. The bright light moving across the sky will quickly get overexposed. But when the display is slower, you get away with a longer shutter speed.

The ISO also depends on how bright the night sky is. I typically use a value between ISO 1600 and ISO 6400. That said, on rare occasions, I go all the way down to ISO 200.

I’ll admit that it does require some experience to get your settings right from the very beginning. But keep an eye on the image preview between every few shots, and you’ll learn exactly what to adjust for great results.
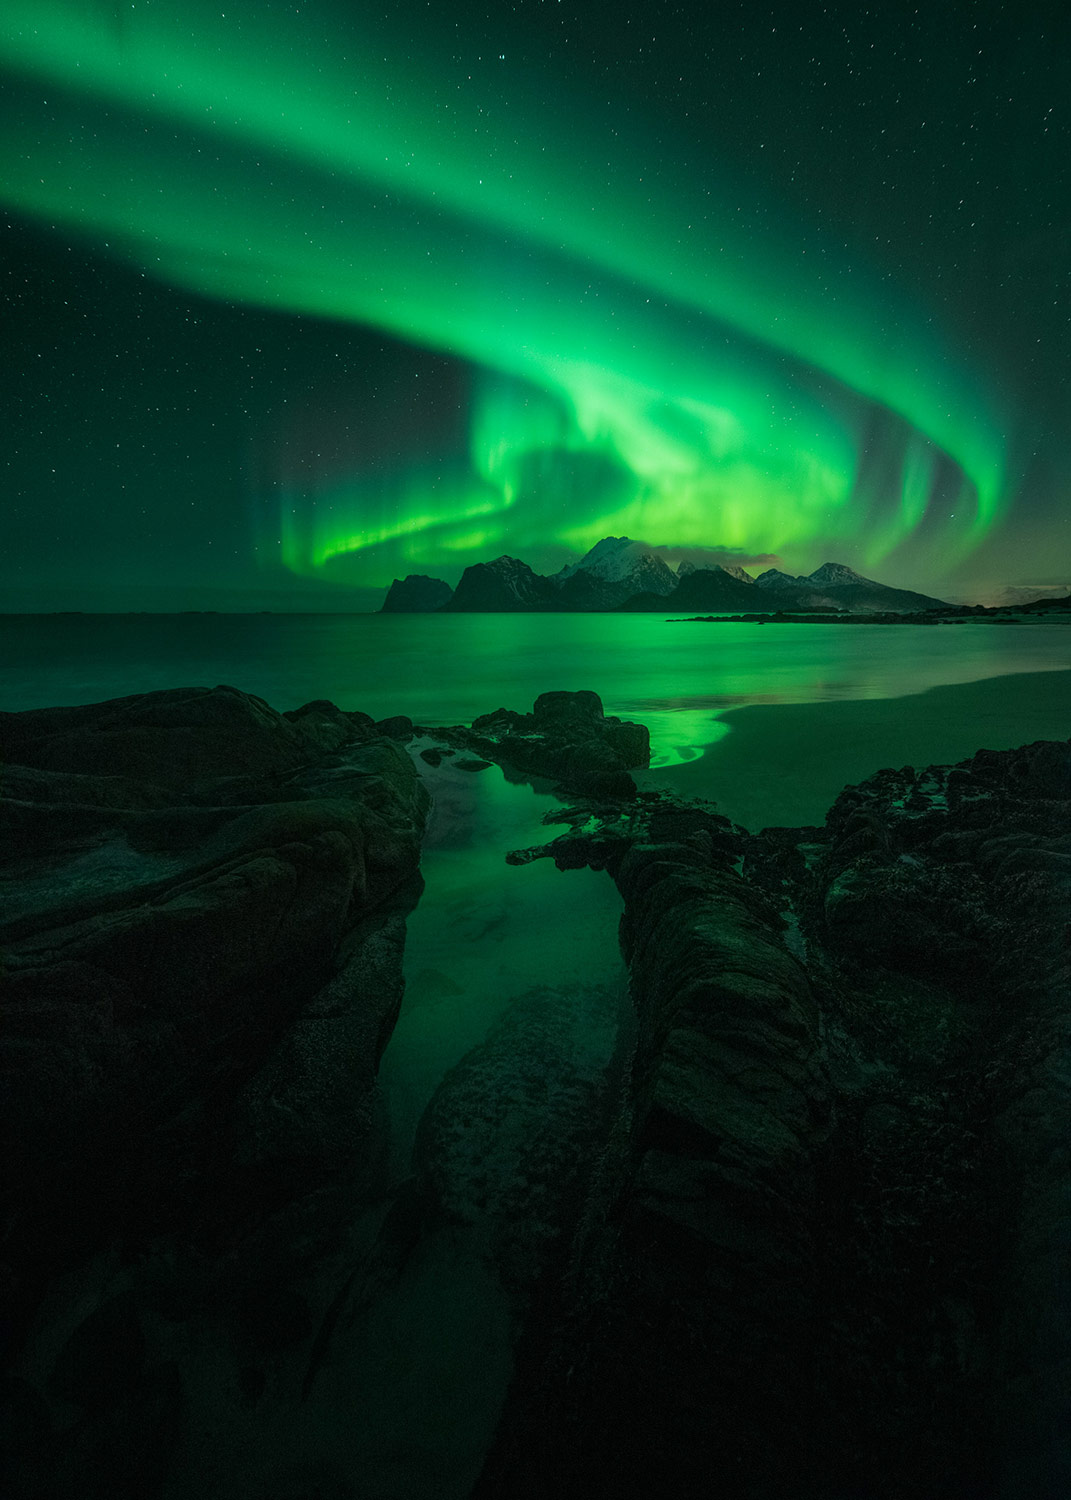
the aurora borealis over a mountain how to photograph the northern lights

4. Use a cold white balance (3000-4000K)

I know that the white balance technically doesn’t matter if you’re shooting in RAW, but I’m someone who prefers to make the photo look as good as possible in-camera.

So when photographing the northern lights, avoid using Auto White Balance or preset modes. While these often do a great job during the day, they’re less consistent at night. You might get some okay results with Auto White Balance, but it won’t always work.

I recommend that you set the white balance manually – use Kelvin mode and chose a value somewhere between 3000K and 4000K. This will produce a colder and more natural-looking sky.

(Using values above 4000K makes the green in the northern lights look muddy and strange, which is something you want to avoid.)

purple and green aurora borealis how to photograph the northern lights

5. Bring something warm to drink!

The winter nights in the Northern Hemisphere can be quite cold and miserable. It’s essential that you stay warm when you’re outside waiting for the northern lights. Good clothes (and several layers) help a lot, but it’s also nice to bring a thermos with a warm drink.

Once you get too cold, it’s hard to stay motivated. Especially if you’re planning to shoot for a while or make a timelapse.

How to photograph the northern lights: conclusion

Now that you’ve finished this article, you should be well-equipped to photograph the northern lights.

That said, if you want to learn more about northern lights photography – so you can start creating images like those in this article, fast – I highly recommend my course, Northern Lights Photography Made Easy. I teach all the essentials of capturing and processing stunning images of the night sky’s most amazing feature. So check out the course here!

how to photograph the northern lights

The post How to Photograph the Northern Lights (Aurora Borealis) appeared first on Digital Photography School. It was authored by Christian Hoiberg.


Digital Photography School

 
Comments Off on How to Photograph the Northern Lights (Aurora Borealis)

Posted in Photography


How to photograph the northern lights

17 Dec

After publishing my recent 2017 Gear of the Year article, in which I highlighted a lens I used for shooting the aurora borealis, numerous people reached out to ask if I would write a follow-up article on how to photograph auroras. So, I decided to team up with DPReview contributor, astrophotographer, and aurora tour guide, José Francisco Salgado, to share some insight into capturing this amazing natural phenomena.

The aurora is the Earth’s own special effects show, seen here from Grundarfjörður, Iceland.
ISO 2500 | 30 sec. | F2.8
Photo by José Franciso Salgado

What causes the lights?

The Northern Lights, or aurora borealis, are natural displays of light that occur in the upper part of Earth’s atmosphere due to interaction between charged particles from the Sun and the Earth’s magnetic field and atmosphere.

The Sun releases charged particles (including electrons) into space in a continuous stream, called solar wind, as well as in sudden and violent releases called Coronal Mass Ejections. Several days after leaving the Sun, these particles can reach our planet. Most are deflected by the Earth’s magnetic field, but some find themselves inside the magnetic field and populate reservoirs within the field. Different events, including interactions with the solar wind, accelerate these particles towards an oval around the magnetic poles.

The Northern Lights are produced when these charged particles, guided by the magnetic field of the Earth, precipitate through the atmosphere and collide with nitrogen and oxygen. These collisions lead to atomic processes called ionization and excitation, which result in the emission of lights of varying color. A corresponding phenomenon in the southern hemisphere is called the Southern Lights, or aurora australis.

The aurora occurs when charged particles, guided by the Earth’s magnetic field, collide with nitrogen molecules and oxygen atoms in the upper atmosphere.
ISO 6400 | 3 sec. | F2.8
Photo by José Francisco Salgado

Getting to where the auroras are visible

Auroras are typically produced in a band known as the auroral zone, which can be 3° to 6° wide in latitude and between 10° and 20° from the geomagnetic poles. This means that auroras are normally seen at very high latitudes (north and south). The region where auroras occur at any given time is called called the auroral oval. Auroras are also produced in the dayside of the Earth, but since sunlight is about a million times brighter this renders them invisible during the day.

Although it’s easier to see auroras at higher latitudes, solar activity can cause the auroral oval to enlarge, making them visible at lower latitudes, including the northern regions of the continental US. Since geomagnetic activity responds to solar activity several days later, it’s possible to forecast auroral activity to help with your planning.

NOAA provides long-term (3 days) and short-term (30 min) aurora forecasts online. Also, there are several alert systems including email notifications from spaceweather.com or smartphone apps that can provide alerts when the aurora is active at your location, such as My Aurora Forecast & Alerts (iPhone; Android) and Aurorasaurus (iPhone; Android).

NOAA’s 30-minute forecast shows the intensity and location of the aurora forecast for the time shown at the top of the map.

When Northern Lights are forecast to be visible, find an open field with an unobstructed view of the north. If you don’t want to wait for that to happen, or if you want to see the most intense aurora, you’ll need to move to higher latitudes. Before traveling to a particular northern location, consider three factors:

  • Is the location within the auroral zone?
  • Is the weather usually clear at that location during the month you’re planning to visit? (Clouds occur at much lower altitudes than auroras, which occur above 100 km.)
  • Will local light pollution impede your observations and photography? The website Lightpolutionmap.info can be of assistance here.

Some locations to consider are:

  • Fairbanks, Alaska
  • Yellowknife, NT, Canada
  • Churchill, MB, Canada
  • Outside Reykjavik, Iceland
  • Norwegian Lapland, Norway
  • Swedish Lapland, Sweden
  • Finnish Lapland, Finland
  • Stewart Island, New Zealand
  • Ushuaia, Argentina
  • Antarctica
Photographing the Northern (or Southern) Lights is not very difficult, but you do need to get to a location where you can see them. One of the advantages of shooting from frozen lakes in Yellowknife, Canada, is the unobstructed views they provide of the entire sky.
ISO 5000 | 5 sec. | F2.8

Remember, locations at extreme latitudes will have almost no nighttime close to the summer solstice, so avoid visiting these place from mid-April to mid-August in the northern hemisphere, or mid-October to mid-February in the southern hemisphere.

Equipment

There’s no ‘correct’ gear for taking pictures of the auroras, but having the right equipment can translate into higher quality images and provide more creative options.

Camera: A camera with a full frame sensor will provide better high ISO performance than those with smaller sensors. That said, modern sensors are extraordinarily good, and it’s possible to get great aurora photos even if you don’t have a full frame sensor, so don’t let that stop you. On a recent trip, some friends of ours captured great aurora pictures using a Sony RX100 III, a camera with a 1”-type sensor.

This photo was captured using a Sony RX100 III, a camera with a 1″-type sensor. The Big Dipper and Ursa Major can be seen in the sky behind the aurora.
ISO 3200 | 6 sec. | F1.8
Photo by Steve and Colleen McClure

Lens: A fast, wide lens will let you capture as much light as possible. Anything wider than 24mm will work, though a 14mm or 16mm lens will allow for more dramatic shots. A lens with a maximum aperture of F2.8 is a good starting point, but faster is better. For example, a lens with an aperture of F1.8 has 2.5x the light gathering ability of a F2.8 lens. That’s a big difference in low light.

Tripod: Exposures are usually measured in seconds, so a sturdy tripod is a must. ‘Sturdy’ is the key word. It doesn’t have to be a fancy, state of the art carbon fiber model. As long as it holds your camera steady it will do the trick.

There are some optional accessories worth considering as well. If you plan to capture time-lapse sequences, an intervalometer is required, and these are included on many cameras today. A remote trigger, such as a cable release or smartphone app, will make it easy to trigger the shutter without touching your camera. Finally, since you’re working in the dark, a headlamp that allows you to see what you’re doing while leaving your hands free to work will be useful. (Fellow observers will appreciate you using a headlamp with a red light.)

Footage from The Legend of the Northern Lights, a film shot and produced by José Francisco Salgado to augment symphony orchestra concerts. These time-lapse sequences were shot in 2014 with the Nikkor 14-24mm f/2.8G lens on a Nikon D4 and D3s.

Taking photos

Shooting aurora isn’t technically difficult, but every night is different and you may need to experiment a bit. It’s best to operate your camera in manual mode, with manual focus, for predictable, consistent results.

File format: Set your camera to capture Raw files. This provides the best image quality and the most latitude for making adjustments in post processing, particularly useful if you need to tweak settings like exposure or white balance. Don’t depend on a manufacturer’s baked-in Jpeg profile.

Focus: Focusing directly on the aurora is little bit like trying to focus on smoke. Fortunately, relative to your position, the aurora is effectively at infinity. It may be tempting to just rotate the focus ring on your lens to the infinity marker, but on many lenses that’s really more of an approximation.

Aurora in Canada’s Northwest Territories.
ISO 3200 | 4 sec. | F2.8
Photo by Dale Baskin

If you’re focusing at night, use your camera’s live view feature. Point the camera at the brightest star you can see, magnify the view to the maximum, and rotate the focus ring until the disk of the star looks the smallest. Once you think you’ve achieved critical focus, take a test shot and review the image for sharpness. If adjustment is needed, repeat.

Once focus is achieved, a useful technique is to lock the focus ring in place with gaffer’s tape to prevent it from moving. Alternatively, you can place marks on the lens with a marker in order to return the ring to the same position. These methods can also be used if you want to focus on a distant object during the day and save the focus position for later.

Aperture: Set your lens to its widest aperture to let in as much light as possible. If you’re concerned about optical performance wide open you can stop the lens down a bit, but doing so will quickly reduce the amount of light reaching the sensor. If at all possible, shoot at F2.8 or wider.

Shutter speed: Optimal shutter speed will depend on the brightness of the aurora and how quickly it’s moving. A short shutter speed will capture detail and structure that would otherwise be averaged out over a longer exposure. On the other hand, a slight motion blur can make an aurora photo more aesthetically pleasing. Take a few test shots to find the optimal balance, but 5-10 seconds is a good starting point to work from.

If the lights are dancing around quickly, shorter shutter speeds will let you capture more of the detail and structure of the aurora that would be otherwise be averaged out in a longer exposure.
ISO 1600 | 3.2 sec. | F1.8
Photo by Dale Baskin

ISO: Set your ISO to the highest level that gives you acceptably clean results on your camera. This will allow you to keep shutter speeds as low as possible in order to capture more detail in the aurora. Depending on conditions, you may be able to get by with ISO 800, though you may have to go to 6400 or higher.

Long exposure noise reduction: If you’re planning to take individual photos, turning this on will provide some benefit; however, it will effectively double exposure time while the camera shoots a dark frame. If you plan to shoot time-lapse sequences, leave this feature off to avoid long delays between exposures.

Other considerations

Embrace the landscape. Part of what makes the aurora interesting are the remote places where it’s frequently seen. In Alaska, photos may contain mountains. In northern Canada, it might be silhouettes of trees in the taiga forest. Iceland might present you with glaciers. Each place is unique and part of the story behind the photo.

Embrace landscape features and even man-made objects to enhance your aurora photos.
ISO 6400 | 8 sec. | F2.8
Photo by José Francisco Salgado

When creating compositions, think about other features or objects you could include. Snow and water can reflect light from the aurora, though in very different ways. Man-made structures can provide interesting elements in a scene or silhouettes. Since a wide aperture will produce a shallow depth of field, avoid objects close to the camera unless you want them to be way out of focus on purpose.

Know your equipment. Depending on where you are, aurora can quickly go from being a slow, undulating wave to a rapidly moving, multi-colored light show. Be prepared to shift gears and adjust your settings quickly to avoid missing great photo opportunities.

Finally, be patient. Mother Nature works on her own schedule, and you’ll need to work around it. If at first you don’t succeed, keep trying. It’s worth it.


José Francisco Salgado, PhD is an Emmy-nominated astronomer, science photographer, visual artist, and public speaker who creates multimedia works that communicate science in engaging ways. His Science & Symphony films through KV 265 have been presented in 200 concerts and lectures in 15 countries.

José Francisco is a seasoned night sky and aurora photographer and filmmaker. If you would like to view, photograph, and learn about the Northern Lights then you can inquire about his Borealis Science & Photo Tours in Yellowknife, Canada.

You can follow him on: Flickr, Instagram, 500px, Facebook, and Twitter

Articles: Digital Photography Review (dpreview.com)

 
Comments Off on How to photograph the northern lights

Posted in Uncategorized


10 pictures from Fat Bike Riding in Northern Colorado

20 Nov

I enjoy a variety of outdoor activities. Of course, paddling in different flavors (SUP, kayak, canoe, packraft) comes first. It includes long distance racing. But, there is also biking, hiking, inline skating, drone flying and 4WD driving. The common theme […]
paddling with a camera

 
Comments Off on 10 pictures from Fat Bike Riding in Northern Colorado

Posted in Photography


Photo of the week: Shooting the northern lights in Norway

02 Jul

This image was taken in Skagsanden beach is—my favorite location in the Lofoten Islands—with one of my Lofoten workshop groups earlier this year. The Northern Lights were dancing wildly all over the sky, and I arrived at the beach after having shot another location earlier that night.

This time around, I decided to try and shoot the Aurora with this beautiful stream and its black & white sand patterns in the foreground. Luckily, the lights were reflecting on the stream, emphasizing those patterns.

To get the whole scene in the frame, I used the Canon EF 11-24mm F4L, one of my favorite lenses. Even though the lens is only an F4, the Aurora was very bright and there was some moonlight as well, both of which gave me enough light for a decent exposure.

The final image above was focus stacked from two shots, both taken at 11mm and F4, with my Canon 5D Mark IV set to 8 seconds and ISO3200.


Erez Marom is a professional nature photographer, photography guide and traveler based in Israel. You can follow Erez’s work on Instagram, Facebook and 500px, and subscribe to his mailing list for updates.

Articles: Digital Photography Review (dpreview.com)

 
Comments Off on Photo of the week: Shooting the northern lights in Norway

Posted in Uncategorized


How to Photograph Northern Lights (The Aurora Borealis)

15 Apr

A trip to photograph Northern Lights (also called The Aurora Borealis) often tops the wish list for many photographers. For good reason too; the aurora is a natural phenomenon unlike any other. Lights dancing over the frozen winter landscape is ethereal, beautiful, and at times, jaw-dropping. Living in Alaska has provided me the opportunity to shoot the lights more often than most, and yet more than once, I’ve had to stop clicking and just watch the curtains shift and dance. In fact, let that be my first tip if you are planning an aurora

In fact, let that be my first tip if you are planning an aurora photo shoot – occasionally just stop and watch. Seriously, put that camera down for a moment and relish the sight. Okay, now let’s figure out how to photograph the Northern Lights.

How to Photograph Northern Lights (The Aurora Borealis)

Gear

Tripod

You need one. There is no faking this one, get one and use it. If it’s brutally cold (which, let’s face it, it probably will be) you’ll appreciate carbon over cold-channelling aluminum, but either will work. Bring it, use it, no excuses.

Camera

I’ve seen beautiful images of the Northern Lights made with everything from good point and shoot cameras to high-end mirrorless and DSLRs. So don’t feel too restricted by your choice of camera. That said, a camera with low noise at high ISO is definitely preferable. Though not absolutely necessary, the ability to change lenses, too, is a major asset.

Lenses

As a general rule, you want a lens that is wide and fast (has a large maximum aperture). The faster the better. My primary aurora lens is a 14mm f/2.8, but I’m eyeing a 20mm f/1.8 for the extra speed. All lenses will need to be manually focused, so make sure that is straight-forward. A variety of focal lengths, either in the form of a zoom, or a choice of lenses is also helpful. I’ve used everything from a 70-200mm to my fixed 14mm to photograph Northern Lights.

How to Photograph Northern Lights (The Aurora Borealis)

I’ve got to admit, living in the far north has its advantages. I merely needed to step out my front door to make this image. (If you are wondering what that strange U-shaped white form in the sky is, it’s the exhaust trail from an aurora research rocket fired off by the University of Alaska Fairbanks).

Remote Release

Though not absolutely necessary, a cable or wireless release for your camera will help reduce camera shake when you click the shutter. A jiggly blur in the stars can ruin an otherwise good shot. If you don’t have a release, use the camera’s self-timer, many have a 2-second setting which is useful. Keep in mind that using a timer rather than a release will slow you down.

Clothing

Maybe I should have put this one at the top of the gear list, because it is probably the most important thing for a successful winter shoot of any kind. Right now, as I’m writing this article, I’m sitting in a cabin 70 miles north of the Arctic Circle in the Brooks Range of northern Alaska. I’m leading an aurora photo tour, and the warmest night-time temperature we’ve seen so far was -35F (-37c). Good clothing has not just been important, but vital.

How to Photograph Northern Lights (The Aurora Borealis)

Right now, as I’m writing this article, I’m sitting in a cabin 70 miles north of the Arctic Circle in the Brooks Range of northern Alaska. I’m leading an aurora photo tour, and the warmest night-time temperature we’ve seen so far was -35F (-37c). Good clothing has not just been important, but vital. I don’t want to go into too much detail here, but a thick down coat with a hood, down or synthetic fill pants, mittens, liner gloves, face masks, and warm hats should all be on your list.

That said, I do want to take just a second to talk about footwear. Trips like the one I’m currently leading are not the time to toy around with light winter boots. This is not the time for fashion. Pack boots, god-ugly bunny boots, mukluks, and other extreme-cold footwear, a couple sizes too big (to account for thick socks and toe warmers) are what you are looking for. Nothing will wreck a night of photography more quickly than painfully cold, or (please no) frost-bitten toes. Enough said.

How to Photograph Northern Lights (The Aurora Borealis)

Interesting foregrounds are an important part of any image, and aurora shots are no different. In this case, I climbed a rock outcrop and used a wireless trigger to make this image.

The Day Before

Prefocus – autofocus rarely works in the dark, so you’ll need to manually set your focus. The first thing I do when I’m leading a photo workshop or tour is to take my clients out in the daylight, before our first night chasing the lights, and have them set their focus to some distant mountaintop. After making sure it is tack sharp, I hand out small pieces of electrical tape and have everyone tape the focus in place so it won’t shift around accidentally.

With the excitement of the first aurora show, no one has to worry about messing with their focus points, or worse, find their shots heartbreakingly soft. A caveat: You still need to check your focus periodically. I’ve found that some lenses will shift their focus point slightly when there are extreme temperatures. Pixel-peep occasionally and adjust as necessary.

How to Photograph Northern Lights (The Aurora Borealis)

When the lights are directly overhead, sometimes pointing your camera straight up can be the best option.

In the Field

Have patience. The aurora is a fickle lover, and she only appears when she wants. Even when the forecasts are coming together and everything seems set for success, the lights may take awhile to appear, they may erupt when you don’t expect it, or clouds may obscure the sky. Plan several nights to account for bad weather or uncooperative conditions. Be prepared to stay up late, and again, be patient.

Exposure

How to Photograph Northern Lights (The Aurora Borealis)

This is one of my first images of the aurora. The lights were bright, and while I managed to capture some color, the 20-second exposure blurred the details into an indistinct curtain. I know better now.

In the days of film and early days of digital, long exposures of 15 or 30 seconds for the aurora were the name of the game. This allowed the lights to appear bright and colorful, but details within the aurora, the pillars, and beams blurred away leaving behind an indistinct curtain. Technology has moved beyond this.

You want the shortest shutter speed possible that allows sufficient brightness and low noise. ISOs in the 1600-6400 range are typical. I start with a setting of f/2.8, ISO 1600 or 3200, for 5 seconds. From there, depending on what the lights are doing, the amount of moonlight, and other factors, I’ll adjust up and down.

Last night, for example, for about 10 minutes the lights brightened and started moving VERY fast. Sacrificing some noise, I went to ISO 6400, f/2.8, and a 1-second exposure. The shots needed a bit of noise reduction in post-processing, but I was able to capture the details of the curtains, and that sharpness in the aurora makes the images successful. A shutter speed just a second or two longer would have blurred the lights.

How to Photograph Northern Lights (The Aurora Borealis)

In contrast to the previous image, for this shot of a very fast moving display, I used a shutter speed of just one second at ISO 6400, f/2.8. As a result, the pillars of light and details in the curtains are sharp.

Composition

When the aurora is hopping, your attention will shift to the sky and away from the foreground. This is natural, but try to pay attention to your composition, just as you would with any landscape image. In the dark, a poorly framed image may not stand out the way it does in daylight. But, I’ll guarantee that you’ll notice when the photos appear on your computer the next morning, and you’ll kick yourself.

Consider where you are, provide some context, avoid distractions, and compose carefully.

How to Photograph Northern Lights (The Aurora Borealis)

A red aurora is a very rare thing indeed. Of the hundreds of nights I’ve spent shooting the Northern Lights, this one had the deepest, brightest reds I’ve ever seen. (FYI, I used my headlamp to light paint the trees in this image.)

Where and When to Photograph the Northern Lights

Choosing the right location for an aurora trip is a big decision. The Aurora Borealis can be seen around the planet’s northern regions. Scandinavian countries, Iceland, northern Canada, and of course Alaska, are popular destinations. While your budget and available time may limit you, it is important to consider the likely weather conditions, local tours, lodging and transportation options, and seasons.

The aurora is primarily a winter phenomenon. In the far north, nights don’t get dark enough in the summer for the lights to appear. Here in Alaska, you can see the lights from late August or early September through mid-April, but prime time is late September through early April.

How to Photograph Northern Lights (The Aurora Borealis)

The nearly full moon in this image was not enough to blow out the bright display of lights, but it takes strong aurora to overcome a full moon. Moonlight is great for foregrounds but can cause issues with visibility of the Northern Lights. If you are shooting the aurora for the first time, I recommend making your trip around the new moon.

Research weather patterns. Some months are more likely than others to have clear skies. In Alaska, March is the driest month with the best chance for clear skies, but other locations will differ.

Moonlight is another thing to consider. While great lights can occur regardless of how bright the moon is, during the dark nights of a new moon, even low-grade aurora displays will appear more distinct against the darker sky.

Getting Help

How to Photograph Northern Lights (The Aurora Borealis)

One of my clients on an aurora photo workshop photographs the northern lights in the Brooks Range of northern Alaska.

Like any discipline of photography, learning to shoot the aurora takes practice. This can make aurora photography a frustrating pursuit for people new to it or with limited time. Organized workshops or tours, or private photo-guide services are a great way to assure some success. Even if you prefer to shoot independently, hiring a local expert for a night to get you started may help you dodge the usual pitfalls and find the best locations to shoot.

How to Photograph Northern Lights (The Aurora Borealis)

Patience Pays Off

Last night it was bitterly cold here in the Brooks Range. We started the night about 9:00 p.m. by driving 50 miles north to a spot high above tree line, a stone’s throw from the continental divide. There, we waited in the moonlight for the Northern Lights to appear. They didn’t, not for the three hours we sat patiently watching the sky. I had a sinking feeling that we were about to get skunked.

Half past midnight we gave up, turned around, and headed back to our rented cabin. Another hour later we pulled in and started unloading the gear. I glanced toward the sky, and there, sure enough, was a single, pale band of northern lights. It was nearly 2:00 a.m., and I’ll admit, my warm bed was sounding really good. But stubbornly, we reloaded our camera bags and tripods and drove a few miles back up the road where the mountains loomed close. When the lights exploded 20 minutes later, we were ready. Our cameras popped in the frigid air as the aurora swirled. We made some of the best images of the trip there.

How to Photograph Northern Lights (The Aurora Borealis)

Be Ready

We were patient, had the right clothing to handle the -40 temperatures, and had our cameras and settings ready. That’s really the core lesson here: be ready. The lights sometimes don’t last long and if you are fiddling with camera focus, or clothed improperly, you’ll miss it. However, preparation and research will greatly increase your chances of success. A chance to photograph Northern Lights, or simply observe them, is not an opportunity to squander.

The post How to Photograph Northern Lights (The Aurora Borealis) by David Shaw appeared first on Digital Photography School.


Digital Photography School

 
Comments Off on How to Photograph Northern Lights (The Aurora Borealis)

Posted in Photography


How to Photograph the Northern Lights or Aurora Borealis

16 Aug

Tips for seeing and photographing the Northern Lights:

Northern Lights, also known as Aurora Borealis, might be one of the most fascinating phenomena to photograph during the night. Watching the sky turn green, blue, pink and even red, is something that will change you forever. After seeing The Lady in Green countless times, I still find myself shouting in awe when she’s elegantly dancing in the sky.

Innfjorden-Aurora-Horizontal-Reflections

Seeing, and photographing, the Northern Lights aren’t something you can do all over the world. The truth is that even if you’ve booked a flight to northern Norway or Iceland, there’s no guarantee that you will see the northern lights at all.

How to see the Northern Lights

Be in the Northern Hemisphere

Unfortunately, the Northern Lights aren’t visible all over the world. As the name might indicate, they are a phenomenon visible in the northern hemisphere. Places such as northern Norway, Iceland and Alaska are typical areas where people travel to witness the Aurora Borealis.

Lauarvann-Aurora-Metorite

That being said, during extreme solar storms your might be able to see the phenomenon further south too, but not as powerful as in the north.

So, the first step in seeing the Northern Lights is to travel to the north. Remember that the Aurora Borealis is a night phenomenon and since summers in the north have up to 24 hours of sun, you should plan your visit for late fall or winter.

Get away from light pollution

It’s nearly impossible to see the Northern Lights if you’re standing in the downtown of any larger city with light pollution. Yes, it is possible; if the KP Index (the strength indicator for Northern Lights) is at its highest. However, to increase the chances of seeing, and capturing a good shot of the Northern Lights, you should get away from light pollution, and find a location where you can clearly see the stars.

vatnsleysustrandar-aurora-borealis

I have lived in a small town not far away from Oslo, Norway for most of my life. Yet, it wasn’t until a few years ago I realized that even here in southern Norway we can see the Northern Lights. In fact, it happens more often than you realize.

There are a few different tools you can use to see what area close to you is dark enough to see the stars, and possibly the Northern Lights. Dark Sky is a great website for this exact purpose, and it shows a detailed map of the light pollution.

How to photograph the Northern Lights

Now that you know where, and how to discover the Aurora Borealis, let’s see how you can capture it with your camera.

Use a tripod and remote shutter release

Since you will be photographing in the dark you’ll be working with long exposures (long shutter speeds), and it’s therefore essential that you use a tripod to ensure you get a correctly exposed image that is still of usable quality.

fiskumvannet-northern-lights

You should also consider using a remote shutter when you’re photographing the Northern Lights. This removes any chance for vibration caused by pressing the shutter. Optionally, you could use the 2-second timer, but sometimes you want to capture the image at that exact moment with no delay.

Use a wide angle lens at a large aperture

When photographing the Northern Lights you want to use a wide angle lens. This lets you capture both the landscape and the sky in one shot. When the Northern Lights are strong you’ll also notice that they stretch all over the sky and it’s impossible to capture all of it in one image, unless you use a wide angle.

northern-lights-hedenstad

During nighttime photography you want to use an open aperture such as f/2.8 to allow enough light to reach the sensor. When using my 14mm I more or less always have it at f/2.8, as I rarely use it at any other time than during the night.

Set the shutter speed according to the KP Index

The shutter speed depends on the strength of the Northern Lights. I’ve experienced when one second at ISO 400 has blown out the green (I’ve never seen the Aurora as powerful as that since) but then it can be barely visible at ISO 3200 and a shutter speed of 20 seconds at other times.

You should also keep in mind the movement of the Northern Lights. If they area quickly changing shape, a long exposure might blur them out too much, and you’ll lose detail. It’s better in that instance to increase the ISO, and lower the shutter speed, so you freeze the motion and capture all its textures.

corona-aurora

Another factor you should keep in mind when you choose the shutter speed is the movement of stars. If you go beyond 25 seconds you’ll start seeing small startrails. Sometimes this can give an interesting effect, but if you want to have a sharp and crisp image, be sure to use 25 seconds or less as your shutter speed.

Set a cool white balance (3000-4000K)

I’ve experienced that the ideal white balance is somewhere between 3000-4000 Kelvin when photographing at night. This results in a cooler, and more natural look in the dark sky. If you go above 4000K you’ll also notice that the green in the Northern Lights gets a muddy look, which you want to avoid.

Avoid using Automatic White Balance and other preset modes such as cloudy. While these often do a great job during the day, they’re more of a gamble at night. You could get some okay results with AWB but generally you won’t.

Innfjorden-aurora-vertical

Bring something warm to drink!

I had to include this last tip. Remember, when you’re photographing the Northern Lights that it’ll most likely be winter or late fall. That means that temperatures drop, and since you’ll be out during the night, there’s no sun to warm you.

Bringing a thermos with something warm to drink could be wise during these long winter nights. Especially if you’re planning to stay out for a while or even make a timelapse.

googletag.cmd.push(function() {
tablet_slots.push( googletag.defineSlot( “/1005424/_dPSv4_tab-all-article-bottom_(300×250)”, [300, 250], “pb-ad-78623” ).addService( googletag.pubads() ) ); } );

googletag.cmd.push(function() {
mobile_slots.push( googletag.defineSlot( “/1005424/_dPSv4_mob-all-article-bottom_(300×250)”, [300, 250], “pb-ad-78158” ).addService( googletag.pubads() ) ); } );

The post How to Photograph the Northern Lights or Aurora Borealis by Christian Hoiberg appeared first on Digital Photography School.


Digital Photography School

 
Comments Off on How to Photograph the Northern Lights or Aurora Borealis

Posted in Photography


Secrets to Shooting the Northern Lights

15 Jan

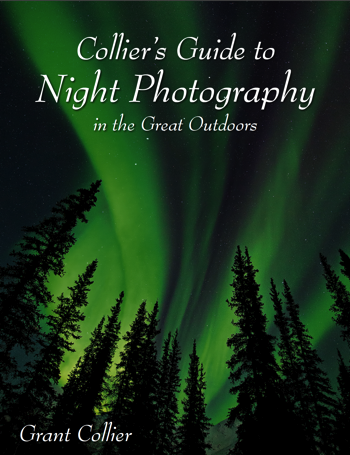
One sale now 32% OFF at Snapndeals: Collier’s Guide to Night Photography in the Great Outdoors eBook. Now only until January 26th, 2016


Of all the phenomena you can view in the night sky, the Northern Lights may be the most spectacular. The lights are created by charged particles from the sun, interacting with gaseous particles in our atmosphere. These lights also appear in the southern hemisphere, where they are known as the Southern Lights. Another name for both is the Aurora Borealis.

Grant Collier Northern Lights 1

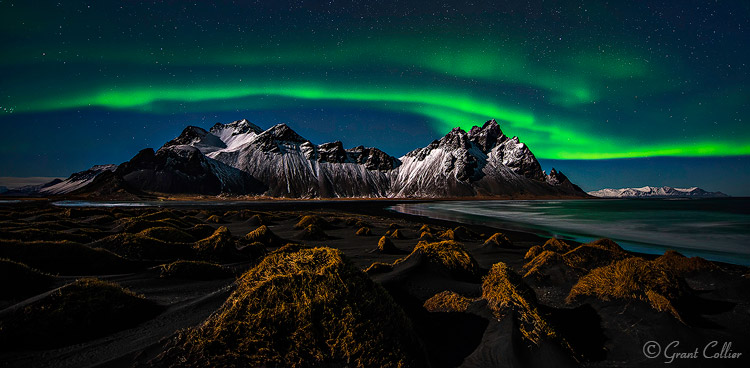
Vesturhorn Mountain, Iceland – 14mm lens, f/2.8, for 10 seconds at ISO 1600

How to find Northern Lights

You can view a forecast for the Northern Lights online here. This website gives you a general idea of where the Northern Lights will be visible on any given night. For example, if you are in the northern continental United States, you might be able to see the Northern Lights if the forecast is 5 or higher. However, to get the best chance of viewing the Northern Lights, you’ll need to travel even farther north. To discover the best locations, try to find a day when the forecast on the above website is a 1 or 2. Anywhere within the bright green circle is a prime viewing spot for the Northern Lights. Some places that are somewhat easier to access in prime viewing areas are Wiseman, Alaska; Yellowknife, Canada; Iceland and northern Norway.

What lens to use

When shooting the Northern Lights, it is very helpful to use a fast lens that has an aperture of f/2.8 or wider. These lenses can let more light into the camera, which will yield higher quality images at night. A good option is the Rokinon 14mm f/2.8, which costs round $ 300. This is an ultra-wide angle lens, which is important when photographing something as expansive as the Northern Lights. Another option is the Nikkor 14-24mm f/2.8. This is a phenomenal lens, but it does cost almost $ 2,000.

Grant Collier Northern Lights 2

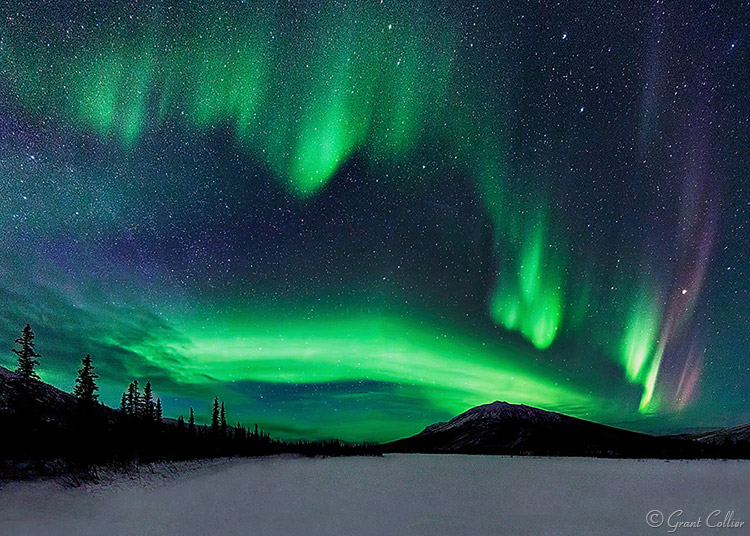
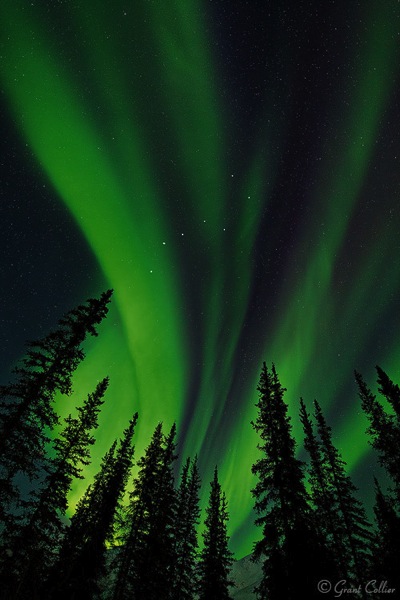
Wiseman, Alaska – 14mm lens, f/2.8, 15 seconds, ISO 6400.

Camera settings and exposure

You’ll typically need to use the widest aperture on the lens, and for shutter speed, you’ll normally want to use exposures between 10-15 seconds. If the lights are moving rapidly in the sky, they can start to blur too much with longer exposures. If the Northern Lights aren’t moving rapidly, you can get away with exposures of 20-30 seconds. You should use the highest native ISO on your camera that doesn’t cause the highlights to be overexposed (a native ISO is one that is represented by a number, as opposed to letters, like H1 or H2). Be careful, though because when the Northern Lights become really bright, it is possible to overexpose the shot.

I recommend underexposing the images a little, so that you won’t risk blowing out the highlights, if the lights suddenly brighten. You’ll want to frequently check your histogram to make sure you’re not coming close to clipping the highlights. If you are, you’ll need to lower the ISO or exposure length.

Grant Collier Northern Lights 3

Wiseman, Alaska – 14mm lens, f/2.8, 8 seconds, ISO 6400.

Stitching images

The Northern Lights can fill up most of the sky, and even ultra-wide angle lenses may only capture a portion of the display. To overcome this problem, you can create stitched images to capture more of the scene. A stitched image is one where you take multiple shots, each comprising a small part of the scene you want to photograph. You then later use computer software, like Lightroom or Image Composite Editor (Windows only), to stitch these images together, to produce an image of the whole scene. The great thing about stitched images is that they will also produce larger images with more detail, and less noise.

If the aurora is bright and moving fast, you’ll typically want to use a very wide lens, like 14mm, to create a single-row stitched panorama. You’ll have to take all of the images pretty quickly, otherwise, the aurora can move so much that the images won’t stitch together seamlessly. If the aurora is relatively dim, it doesn’t tend to move as fast. In this situation, it’s possible to do multi-row stitched panoramas with up to 20 images. These large stitched images can help minimize noise, which is more noticeable when the aurora is fainter. I recommend a 24mm lens to capture such images.

Grant Collier Northern Lights 8

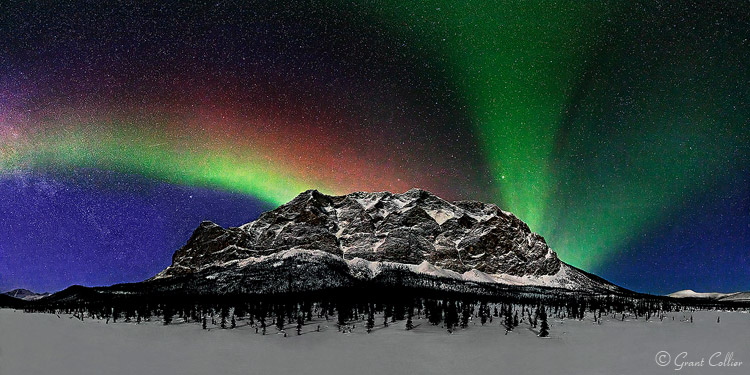
Supapak Mountain, Alaska – 24mm lens, f/2.8, 10 seconds, ISO 6400, 9 images stitched together.

When to look for the lights

The best time of the year to photograph the Northern Lights is near the spring and autumn equinoxes, in March and September. The Northern Lights tend to be somewhat more active during those months than others. Never plan a trip to photograph the Northern Lights between late-April and early-August. During this time, it isn’t dark for very long, if at all, at the far northern latitudes. If you plan a trip in December or January, it will be dark much of the day, if not all of the day. However, it can be bitterly cold during this time, so spring and autumn is still preferable for all but the most adventurous photographers.

Grant Collier Northern Lights 5

Yellowknife, Canada – 15mm lens, f/2.8, 30 seconds, ISO 1600.

Grant Collier Northern Lights 7

Brooks Range, Alaska – 14mm lens, f/2.8, 10 seconds, ISO 6400.

Other considerations

Since it can be so cold when shooting the Northern Lights, it’s possible that your lens will fog up over the course of the night. Lenses fog up much faster when they are taken from a warm location to a cold one. One way to prevent this is to keep your camera equipment cold, by storing it in the trunk of your vehicle rather than in a warm room. You will, however, want to store your batteries in a warm location, as cold batteries do not last as long as warm ones, so this can help maximize battery life. Another option to prevent a lens from fogging up is to attach hand warmers to the side of it using rubber bands to help keep it warm.

Grant Collier Northern Lights 6

Jokulsarlon Lagoon, Iceland – 19mm lens, f/2.8, 20 seconds, ISO 3200.

You can shoot the Northern Lights under almost any moon phase. The aurora will be brighter under no moon, but any foreground in your shot will likely be rendered as a dark silhouette. Under a full moon, the foreground will be well-illuminated and the aurora will be fainter, but this may not matter. The Northern Lights are often so bright that they will be easily visible under a full moon. My favorite time to shoot the Northern Lights is under a moon that is 20%-50% illuminated. It will be dark enough to see the stars and aurora a little better than under a full moon, and you’ll still be able to render a lot of detail in the foreground. In order to be able to shoot under a variety of conditions, I recommend planning a trip so that you arrive near a new moon, and leave near a full moon.

Grant Collier Northern Lights 4

Yellowknife, Canada – 14mm lens, f/2.8, 15 seconds, ISO 6400.

Practice near home first

One mistake I’ve seen photographers make is to go on an expensive trip to see the Northern Lights without having done any night photography beforehand. They come away with subpar images that are out of focus, or improperly exposed. Unless you live in an area where you can see the Northern Lights, I recommend becoming proficient in night photography before paying for an expensive trip to see the aurora. Photographing the Northern Lights is more difficult than photographing most other night scenes. The lights can move fast and may not appear for very long, so you need to be able to make the most of your time when the lights are out. If you practice with easier subjects beforehand, you should be able to come away some great images!


Screen Shot 2015 12 27 at 5 15 21 PMOne sale now 32% OFF at Snapndeals: Collier’s Guide to Night Photography in the Great Outdoors eBook. Now only until January 26th, 2016


googletag.cmd.push(function() {
tablet_slots.push( googletag.defineSlot( “/1005424/_dPSv4_tab-all-article-bottom_(300×250)”, [300, 250], “pb-ad-78623” ).addService( googletag.pubads() ) ); } );

googletag.cmd.push(function() {
mobile_slots.push( googletag.defineSlot( “/1005424/_dPSv4_mob-all-article-bottom_(300×250)”, [300, 250], “pb-ad-78158” ).addService( googletag.pubads() ) ); } );

The post Secrets to Shooting the Northern Lights by Grant Collier appeared first on Digital Photography School.


Digital Photography School

 
Comments Off on Secrets to Shooting the Northern Lights

Posted in Photography


Natural Luxury: Iceland’s Eco-Friendly Northern Lights Hotel

15 May

[ By Delana in Boutique & Art Hotels & Travel. ]

ion hotel iceland

Iceland has become quite the tourist destination for world travelers thanks to its ethereal landscapes, amazing history, unique culture, and unspoilt views of the Northern Lights. It’s the Northern Lights that draw eco-conscious travelers to the breathtaking Ion Hotel by Minarc Architects.iceland ion hotel

minarc ion hotel

earth friendly luxury ion hotel iceland

The hotel was designed to provide visitors with an unobstructed view of the otherworldy surroundings while itself blending into the landscape. Emerging from the mossy mountain like a natural rock outcropping, the Ion Hotel could almost be mistaken for a body of hardened lava extending out into the mountainous area.

scenic overlook ion hotel

northern lights hotel iceland

glass walled outlook ion hotel iceland

An abundance of floor to ceiling windows were designed to let in natural light while allowing an optimized view of the hotel’s settings. A glassed-in lounge at the building’s terminus lets visitors gaze out on the utterly exquisite Northern Lights after the sun goes down.

eco-friendly ion hotel iceland

locally inspired rooms ion hotel

ion hotel bar

But the Ion isn’t all about looks; it is also a decidedly Earth-friendly place to spend a vacation. The luxury hotel uses locally-sourced materials included repurposed natural materials like lava and driftwood. The huge windows cut down on the building’s electricity consumption by reducing the need for artificial lighting.

interior ion hotel iceland

brown trout ion hotel interior

iceland northern lights ion hotel

Local customs and culture inspired the interior design of the hotel; nods to the country’s history and notable features can be seen in every area of the building. When locally-sourced materials are not available, Fair Trade products are used instead. And as a truly exceptional feature, the hotel utilizes the abundant surrounding natural hot springs as a source of clean geothermal heating and hot water.

Share on Facebook


[ By Delana in Boutique & Art Hotels & Travel. ]

[ WebUrbanist | Archives | Galleries | Privacy | TOS ]


WebUrbanist

 
Comments Off on Natural Luxury: Iceland’s Eco-Friendly Northern Lights Hotel

Posted in Creativity


Flooded Sky: ‘Northern Lights’ Effect Fills Air with Blue Waves

11 Mar

[ By WebUrbanist in Art & Installation & Sound. ]

StudioRoosegaarde_Waterlicht_HR2

Floating above an 18,000-square-foot area of Dutch land that would be underwater were it not for defensive measures, the ethereal effect hovers between simulated aerial floodwater and imitation aurora borealis.

waterlicht surreal sky led

A temporary work in Westervoort, this latest pieced dubbed ‘Waterlicht’ by Daan Roosegaarde was created using LED projectors located on surrounding dykes, highlighting the essential role of flood prevention technology in keeping so much of the Netherlands dry. As the beams cross in the air, moved slowly up and down by motors, the effect seen in these images is created.

waterlicht northern lights effect

Visitors walking along those adjacent barriers perceive the illumination like an eerily lit surface of water below – those passing below the plane of light see something akin to the Northern Lights, normally a natural atmospheric effect reserved for rare and special conditions. “we create a virtual flood. Walking on the dike the light lines are perceived as high water, once in the flood channel you find yourself in an underwater world.”

waterlicht projected at night

The work was commissioned by the Dutch water board to keep up awareness about this vital element of the country’s infrastructure. “In Waterlicht people experience what the Netherlands would look like without its dykes. Awareness is crucial, because the Dutch (water)artworks need every day maintenance and our national water awareness is the foundation of that maintenance.”

waterlicht against the sky

No stranger to working with nighttime illumination, Roosegaarde is famous for other works including a night-lit bicycle path in the style of Van Gogh as well as schemes for glow-in-the-dark highway infrastructure.

Share on Facebook


[ By WebUrbanist in Art & Installation & Sound. ]

[ WebUrbanist | Archives | Galleries | Privacy | TOS ]


WebUrbanist

 
Comments Off on Flooded Sky: ‘Northern Lights’ Effect Fills Air with Blue Waves

Posted in Creativity


French River, Northern ON Canada

06 Aug


Bridge over French River on the Trans Canada Highway

. : LIGHT and SHADOW : .

 
Comments Off on French River, Northern ON Canada

Posted in Equipment