RSS
 

Posts Tagged ‘Normal’

New normal: Sony FE 50mm F1.8 real-world samples

02 Apr

Sony recently updated its FE line, which now offers 20 full-frame lenses for Sony’s E-mount Alpha cameras. Among the new lens introductions is the FE 50mm F1.8, what you might call Sony’s ‘nifty fifty’. We spent some time shooting with it in San Francisco this weekend, paired with the unforgiving 42MP of the Alpha 7R II. See how the lens holds up in our real-world samples gallery.

Articles: Digital Photography Review (dpreview.com)

 
Comments Off on New normal: Sony FE 50mm F1.8 real-world samples

Posted in Uncategorized


Understanding Normal and Cross-Type Focusing Points

11 Feb

Look through the viewfinder of any DSLR camera and you will see several dots, or squares, that represent individual points at which the camera is capable of focusing. The purpose of these focusing points may seem fairly obvious, but not all of them are created equal. When you press the shutter button (or back button) halfway, some of these points will light up, indicating that everything at that specific spot is crystal clear and your photo will be nice and sharp.

However, the speed at which your camera can focus on one of the points, as well as how accurate the focus will be, depends greatly on whether the individual focusing point is a single or cross-type. Understanding the differences in how they operate can help you decide which ones to use to take better photos.

cross-type-focus-sensors-joy-of-the-waters

Most DSLR cameras use what’s called a phase-detection focusing system – whereas most mirrorless cameras, point-and-shoots, and mobile phones use a separate system called contrast-detect. In a DSLR, most of the light coming through the lens is reflected upwards by the mirror, to the optical viewfinder, which lets you see precisely what the camera lens sees.

However, a tiny bit of light is also sent downward to a series of sensors that are capable of figuring out whether the image is in focus. The science behind this involves splitting the incoming light, and comparing two beams, to essentially see if they match up. If not, an electronic signal is sent to the focusing motor, to adjust the lens until the image is in focus. All this happens in a fraction of a second, but these fractions matter in photography, and can often be the difference between a tack-sharp image and a blurry shot.

I used my camera's cross-type focusing points to make sure this picture of a holstein cow was tack sharp.

I used my camera’s cross-type focusing points to make sure this picture of a holstein cow was properly focused.

The problem with traditional phase-detecting systems is they get a bit stumped if there are a lot of vertical lines in the spot where they are trying to focus. To see how this works for yourself, print a sheet of paper on your computer, with nothing but vertical lines. Tape it to a wall, and try to focus on it with your camera. If you are using one of the focusing points on the outside edge of your camera’s viewfinder, your lens will likely spend a few seconds hunting for focus but will probably never find it. However if you turn the paper sideways and try again your camera will likely get things focused fairly easily. This is because when light is sent to the phase-detection sensors in your camera, the sensors don’t have enough information to determine focus, if all it sees is vertical lines.

While most of the time when you are out taking pictures, you are probably not shooting images of vertically-lined paper, this example does illustrate how your camera’s autofocus can get slowed down, and become unreliable under certain conditions. Ironically, in this test, your camera will find focus much better if you use the live view function. That employs a contrast-detection focusing method which is also used in most mirrorless cameras, and while it is a bit slower, can have some advantages over traditional phase-detect systems.

Test your camera's focus sensors with nothing but a lined piece of paper.

Test your camera’s focus sensors with nothing but a lined piece of paper.

To address this issue, most camera manufacturers have implemented cross-type focusing sensors that work fine when focusing on images with horizontal and vertical patterns. On high-end models (like the Nikon D5 or Canon 5D Mark III) there are several clusters of cross-type focusing sensors, but lower-end models (like the Nikon D3200 and Canon Rebel T3i) usually have just one, right in the center. This means that the center autofocus point will likely be significantly faster, and more reliable, than the points on the edge. You can see the results yourself by repeating the test from earlier with the center focus point, instead of one on the perimeter of your viewfinder.

Using your camera's cross-type sensors can help ensure your pictures are perfectly focused.

Using your camera’s cross-type sensors can help ensure your pictures are perfectly focused.

The real-world implications of this are quite significant, and may very well change how you approach your photography. Many people use an automatic setting that allows their camera to look at all the available focus points, and determine which one should be used to set the focus. But, if you know that the the cross-type points will give you consistently better results, you might try using them more often.

This is especially useful with sports and fast action, but other types of photography situations can benefit from utilizing cross-type points also. Portrait, family, and wedding photographers often utilize the focus-and-recompose method to nail focus with a cross-type sensor, then shift their camera’s field of view to get precisely the composition they want. If you shoot landscapes you might not need speedy autofocus, but using your camera’s cross-type sensors may help your focus be more accurate.

Of course all this doesn’t mean that the normal focusing sensors on your camera are worthless, just that knowing which ones are cross-type can often give you an advantage you might not have otherwise had.

My Nikon D750 has 15 cross-type sensors all in the middle. To get this shot I used a cross-type sensor to nail focus and then recomposed by slightly shifting my camera to the right.

My Nikon D750 has 15 cross-type sensors, all in the middle. To get this shot I used a cross-type sensor to nail focus, and then recomposed by slightly shifting my camera to the right.

One other point worth noting is that mirrorless cameras use phase-detection focusing more than they used to, and some are implementing cross-type sensors too. Just because this technology started with DSLRs does not mean it will be forever limited to these types of cameras, and as manufacturers continue to innovate we will likely see more, and better, focusing options in the years ahead.

To help you figure out how many cross-type focusing points your camera has, you can do a little searching online, or look at the list below. I have compiled some data based on the more popular camera models for you:

Canon

  • 70D, T6/T6i: 19 points, all cross-type
  • 60D, T5/T5i, T4/T4i: 9 points, all cross-type
  • T3/T3i, T2/T2i: 9 points, 1 center cross-type
  • 6D: 11 points, 1 center cross-type
  • 7D: 19 points, all cross-type
  • 7D Mark II: 65 points, all cross-type
  • 5DSR, 5D Mark III: 61 points, 41 cross-type in 3 columns (middle, left, and right-side)

Nikon

  • D3300, D3200, D3100: 11 points, 1 center cross-type
  • D600, D610, D7000, D5500, D5300, D5200: 39 points, 9 cross-type (clustered in center)
  • D750, D810, D7100, D7200: 51 points, 15 cross-type (three center columns)

Sony

  • a6000: 179 points, 15 cross-type
  • a77II: 79 points, 15 cross-type
  • a77: 19 points, 11 cross-type
  • a7II: 117 points phase detection, PLUS 25 cross-type points
  • a7R II: 35mm full frame: 399 points (phase-detection AF) APS-C: 357 points (phase-detection AF) / 25 points (contrast-detection AF)

Pentax

  • K-5: 11 points, 9 cross-type
  • K-3: 27 points, 25 cross-type

Have you ever tried using cross-type focusing points? What have your results been like, and what other tips and tricks do you have for other dPS readers? Leave your thoughts in the comments section below.

googletag.cmd.push(function() {
tablet_slots.push( googletag.defineSlot( “/1005424/_dPSv4_tab-all-article-bottom_(300×250)”, [300, 250], “pb-ad-78623” ).addService( googletag.pubads() ) ); } );

googletag.cmd.push(function() {
mobile_slots.push( googletag.defineSlot( “/1005424/_dPSv4_mob-all-article-bottom_(300×250)”, [300, 250], “pb-ad-78158” ).addService( googletag.pubads() ) ); } );

The post Understanding Normal and Cross-Type Focusing Points by Simon Ringsmuth appeared first on Digital Photography School.


Digital Photography School

 
Comments Off on Understanding Normal and Cross-Type Focusing Points

Posted in Photography


Vela One LED promises 1/2,000,000 flash duration for the price of a normal hotshoe gun

02 Dec

An inventor from Bristol in the UK is developing an LED-based light source for high speed photography, promising to produce a burst of flash with a duration short enough to freeze a bullet. The Vela One, which will be priced at a similar level to standard hotshoe flashguns, uses nine LEDs arranged in a bank that generates a million lumens and is powered by just four AA cells that the inventor claims will last a full day’s shooting. Learn more

Articles: Digital Photography Review (dpreview.com)

 
Comments Off on Vela One LED promises 1/2,000,000 flash duration for the price of a normal hotshoe gun

Posted in Uncategorized


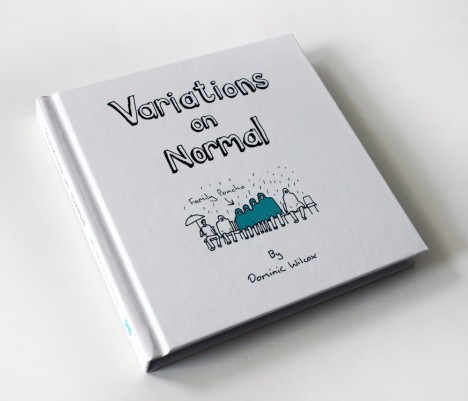
Variations on Normal: Book of Absurdly Brilliant Inventions

29 Oct

[ By WebUrbanist in Design & Products & Packaging. ]

dominic wilcox sleeping bed

The work of Dominic Wilcox is a wonderful blend of out-of-the-box design inspiration that, finally, you can get shipped to your door (in a box, no less!).

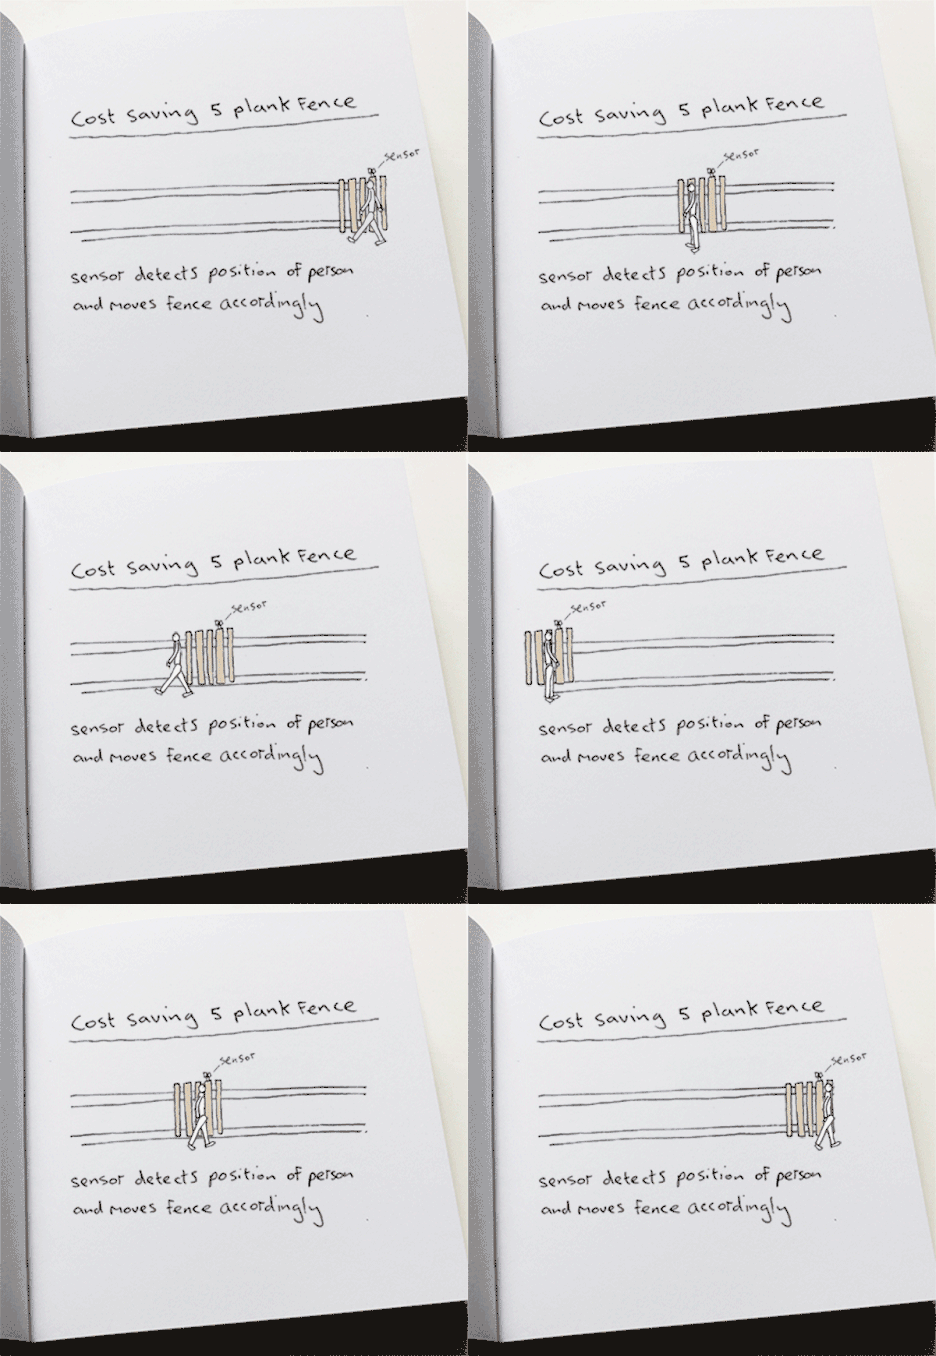
cost saving fence designs

duel use coffin workstation

Often intentionally impractical and definitively theoretical, the ideas found inside this 128-page book (as on his blog) are nonetheless extremely compelling. Presented as something between sketches and comics, they will challenge you to look at the world from fresh new angles, not to mention their pure entertainment value.

variations on normals

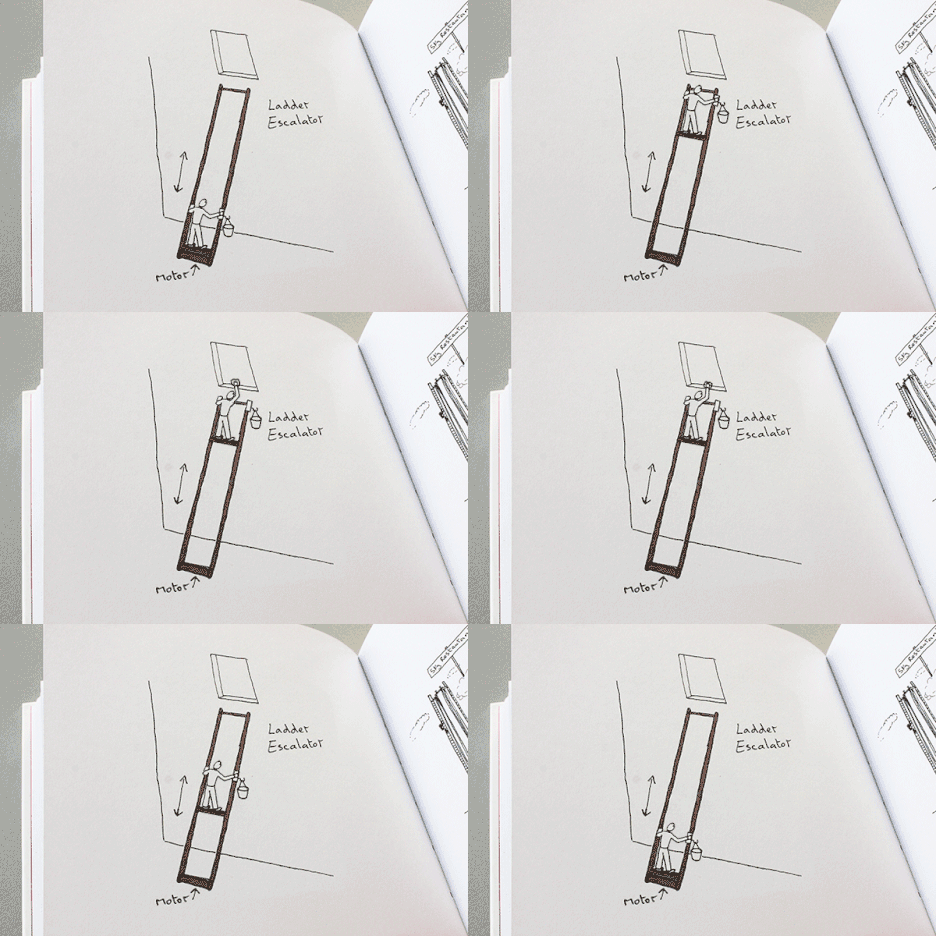
ladder escalator playful design

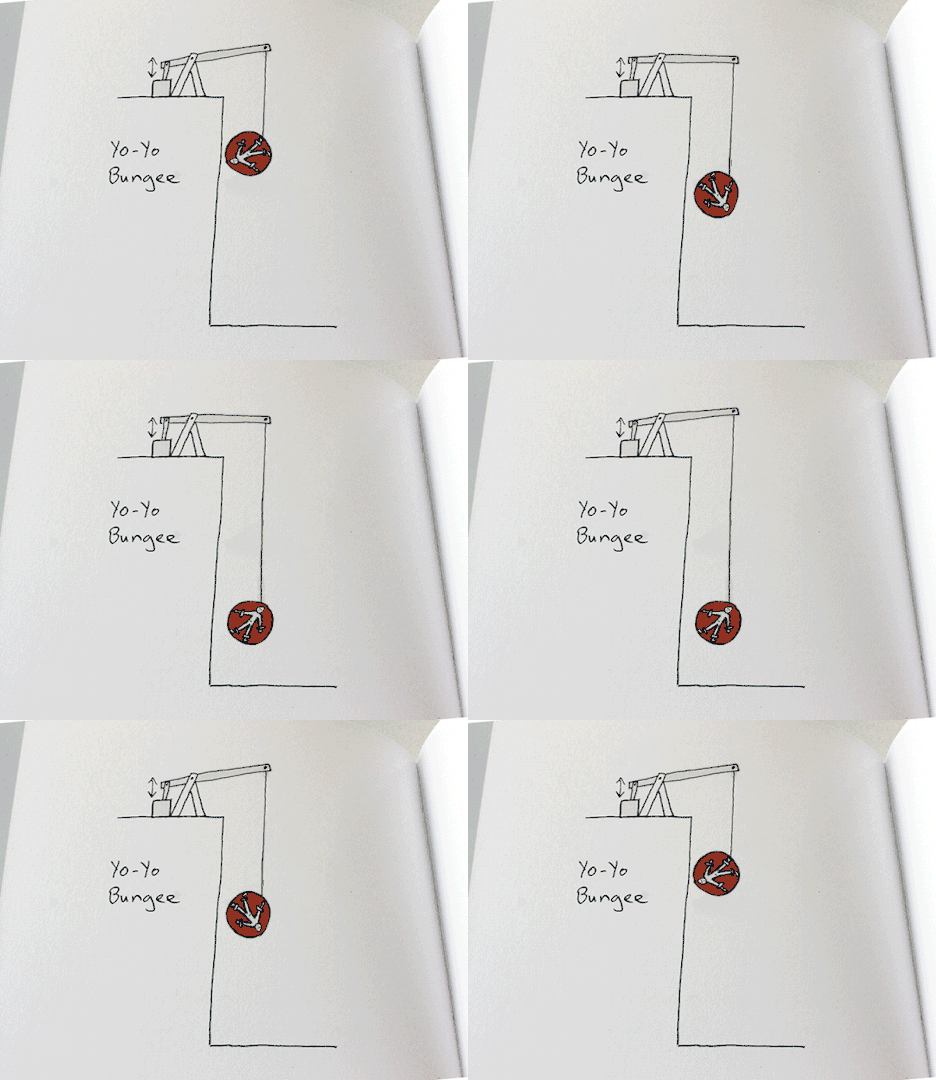
From mobile fences and motorized ladders to square peas and coffin workstations, there is always an element of functionality (hence design, not art) but also a playfulness to each piece.

square peas genetically modified

yoyo bungie system design

About his inspiration: “I’ve convinced myself that within everything that surrounds us, there are hundreds of ideas and connections waiting to be found. We just need to look hard enough. Some of my ideas develop from observations on human behaviour and I express them through the objects I create. I also experiment with materials to try to find surprises that can’t be found simply by thinking with a pen or a computer.”

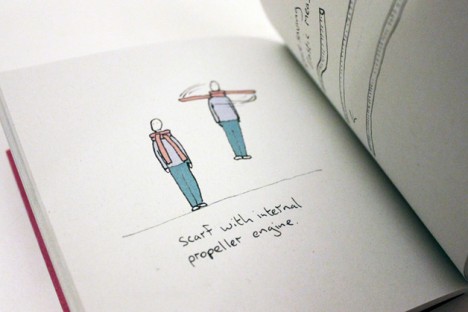
scarf with integral propeller

variations on normal static

Wilcox lives in London but was educated at the Royal College of Art (Design Products MA) and the Edinburgh College of Art (Visual Communication BA).  More about his book and other recent works can be found on his website.

Share on Facebook


[ By WebUrbanist in Design & Products & Packaging. ]

[ WebUrbanist | Archives | Galleries | Privacy | TOS ]


WebUrbanist

 
Comments Off on Variations on Normal: Book of Absurdly Brilliant Inventions

Posted in Creativity


A Buyer’s Guide to Canon Normal and Telephoto Lenses

03 Mar
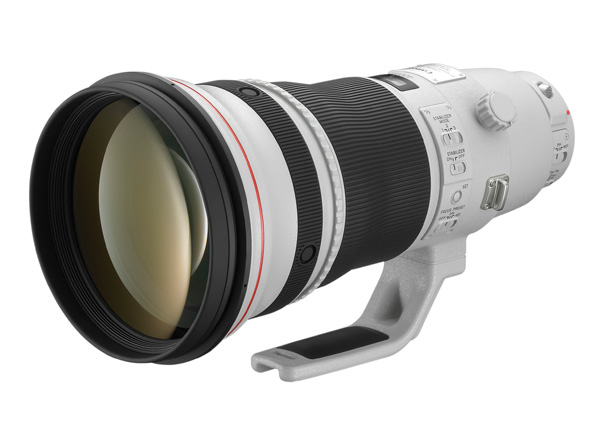
Canon 400mm lens

Canon EF 400mm f2.8L IS II USM lens

Andrew S. Gibson is the author of Understanding Lenses Part II: A Guide to Canon Normal & Telephoto Lenses, on 40% now at Snapndeals for a limited time only.

With so many lenses to choose from, it’s little wonder that photographers become confused about which option is the best. In this article I’m going to take a look at some of Canon’s best or most interesting normal and telephoto lenses, to give you a head start when it comes to understanding just what Canon offers in this part of their lens range.

But first, let’s take a quick look at the state of Canon’s lens line-up. I have no inside knowledge about which lenses Canon may introduce this year, but I do see a couple of emerging trends.

Trends in Lenses

The first is that Canon is not afraid to take an old lens and update it with a newer version. Good recent examples are the new EF 24mm and 28mm f/2.8 IS USM lenses. Both replaced older versions and included an Image Stabilizer (IS) which the previous models didn’t have.

The second trend is that newer lenses tend to be more expensive than the ones they replace. This is reasonable, as the newer lenses are better quality. If a new lens comes out and it seems expensive, you can be patient and wait a year or so for the price to drop if you don’t need it urgently. The two wide-angle lenses mentioned above have dropped in price by over 30% since their release.

That does mean it is possible that Canon will replace some of their aging normal and telephoto lenses in the near future. If you’re thinking about buying one and are worried about this, it’s up to you to decide how badly you need the current version. While the rumour websites like to speculate about forthcoming lenses, and are sometimes accurate, you never really know what will happen as Canon keep the details of new releases under wraps until the official day of release.

A good example of this is the EF 50mm f/1.4 lens. Some rumours sites are saying this is due for an update. But if this is true, and how far in the future it will happen, no-one really knows. Plus the replacement is likely to be more expensive than the current 50mm f/1.4 lens (but it may have IS). In the end, it’s up to you, but my advice is don’t spend too long waiting for new lenses – you could be waiting a long time.

Canon EF 200-400mm f/4L IS USM – the beast!
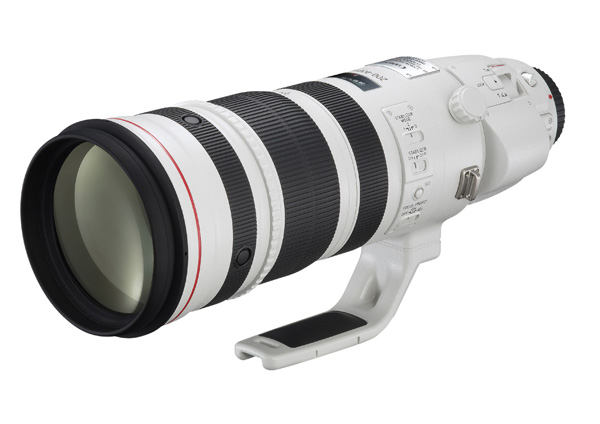
Canon 200-400mm zoom

Canon EF 200-400mm f/4L IS USM Extender 1.4x– only about $ 12,000 USD!

Let’s start off with this beast. It’s fun to speculate who would buy such an expensive lens. A professional sports photographer? Agencies like Getty or Reuters? This L series, super telephoto zoom, comes with a built in 1.4x extender (the only Canon lens to do so), a four stop Image Stabilizer, and a fixed f/4 aperture throughout the zoom range. It weighs over three and half kilos (7.9 pounds), but is not Canon’s heaviest lens. That honour belongs to the Canon EF 800mm f/5.6L IS USM lens (below), which weighs four and half kilos (9.9 pounds) and is another option for those of you with $ 13,000 to spend on new glass.
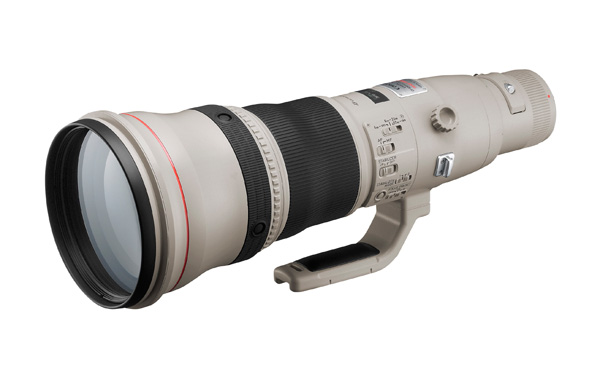
Canon 800mm lens

Canon EF 800mm f/5.6L IS USM Super Telephoto Lens for Canon Digital SLR Cameras

Canon 40mm f/2.8 STM
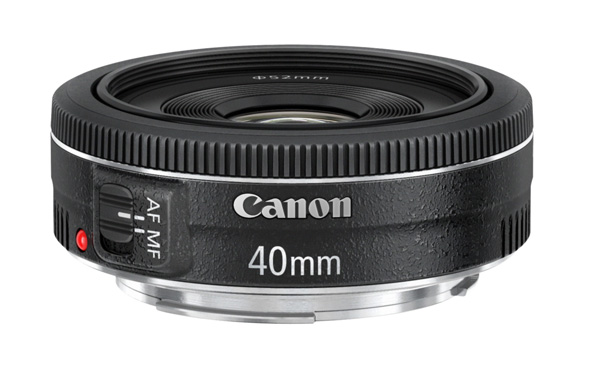
Canon 40mm pancake lens

Canon EF 40mm f/2.8 STM Lens

At the other end of the scale is one of Canon’s lightest, smallest and least expensive lenses. This 40mm pancake lens delivers excellent image quality, and excellent value for money. However it doesn’t have IS or a distance scale on the lens, features which may be important to some people.

How does this lens give such excellent quality for such a low price? It contains just six optical elements that measure little more than a centimetre across (0.4″). They are cheaper to manufacture than the larger elements found in Canon’s other lenses, and the result is a lower price.

This focal length is a short telephoto on an APS-C camera or a normal lens on a full-frame camera.

Canon 50mm f1.4 USM
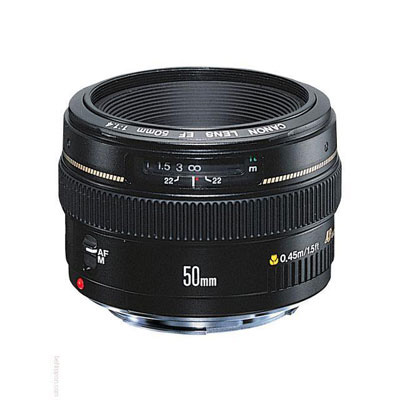
Canon 50mm f1.4 lens

EF 50mm f/1.4 USM

Canon users aren’t lacking for choice when it comes to 50mm lenses. Canon makes four models, including the 50mm f/1.8, the 50mm f/1.2L and 50mm f/2.5 macro. But my favourite is the EF 50mm f/1.4 USM. It’s a third of the price of the more expensive L series 50mm lens, but has better autofocus and smoother bokeh than the f/1.8.

50mm lenses make great portrait lenses on APS-C cameras and deliver value for money in terms of image quality and versatility. You can use a 50mm lens with extension tubes or close-up lenses for close-up photography, or with a reversing ring on a longer lens for macro photography.

Read more about 50mm lens in my article Nifty Fifties – Why I Love 50mm Prime Lenses.

Canon 85mm f/1.8 USM
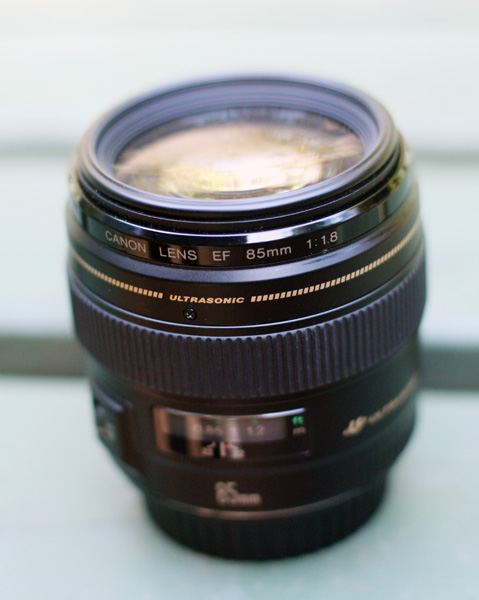
Canon 85mm lens

Another of my favourite lenses is the 85mm f/1.8. It’s an ideal portrait lens for owners of full-frame cameras. It’s also great for close-up photography with the addition of a 500D close-up lens. It’s a shame it doesn’t have IS, but that would push the price up. If you have deep pockets you can also consider the EF 85mm f/1.2L II USM lens, but bear in mind the wide f/1.2 aperture means it has a large front element (to let in the more light) and that makes the lens heavier and slower to autofocus.

Read more about this lens in my article How a Humble 85mm Lens Became My Favourite.

Canon 70-200mm zooms
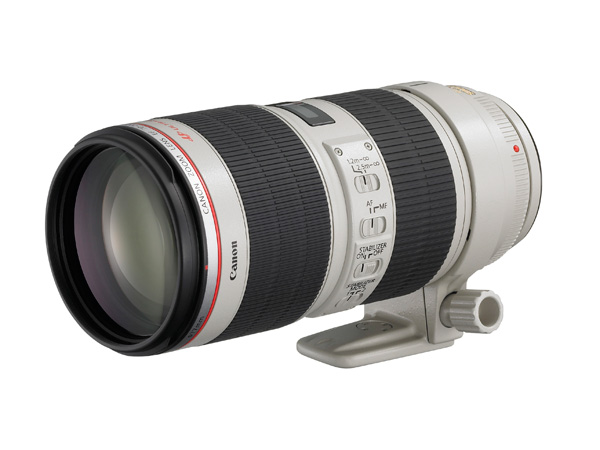
Canon 70-200mm zoom lens

EF 70-200mm f2.8L IS II USM

Canon has four 70-200mm zoom L series lenses. Two of these have maximum f/4 apertures and cost less. The other two have maximum f/2.8 apertures. For each aperture setting there is both a non-IS and an IS model. This gives you plenty of choice, for what is a very versatile focal length. The EF 70-200mm f/4L USM lens is Canon’s cheapest L series lens and a great option for anyone wanting to experience L series quality on a low budget. The EF 70-200mm f2.8L IS II USM (above) is the most expensive and comes with a collar so you can mount it on a tripod.

Canon 70-300mm f/4-5.6L IS USM
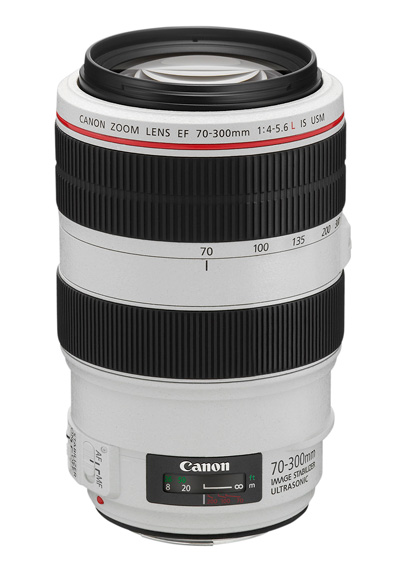
Canon 70-300mm zoom lens

Canon EF 70-300mm f/4-5.6L IS USM UD Telephoto Zoom Lens for Canon EOS SLR Cameras

If 200mm isn’t long enough for you then Canon’s trio of 70-300mm zooms may appeal. The only drawback of these lenses is the variable aperture, but it’s hard to avoid this along such a long focal length range. The EF 70-300mm f/4-5.6L IS USM is the most recent model, but also the most expensive. The EF 70-300mm f4/-5.6 IS USM lens is the least expensive and ideal for those on a tight budget.

The EF 70-300mm f/4-5.6 DO IS USM lens is an interesting alternative. DO stands for Diffractive Optics. The construction of the lens elements in DO lenses means they are smaller and lighter than their non-DO equivalents, making this a good option for photographers concerned with size and weight. In every other respect DO lenses are equivalent to L series lenses. Will Canon make more DO lenses in the future? I hope so, because they are a great idea. The only other DO lens in Canon’s range is the EF 400mm f/4 DO IS USM.

Hopefully that has given you a good overview of some of Canon’s more notable normal and telephoto lenses. It’s impossible to include every model, let alone those made by other manufacturers, but that’s where you come in. What normal or telephoto lenses have you purchased? How have they performed and what would you recommend? Let us know in the comments.


Understanding Lenses Part II: A Guide to Canon Normal & Telephoto Lenses

Understanding Lenses ebookMy ebook Understanding Lenses Part II will teach you how to get the most out of Canon’s normal and telephoto lenses. It contains a buying guide, takes a deep look at aperture and bokeh, and shows you how to focus accurately with telephoto lenses. It’s offered for a special price now on 40% off at Snapndeals for a limited time only.

The post A Buyer’s Guide to Canon Normal and Telephoto Lenses by Andrew S. Gibson appeared first on Digital Photography School.


Digital Photography School

 
Comments Off on A Buyer’s Guide to Canon Normal and Telephoto Lenses

Posted in Photography


How to Simplify and Improve Composition with Normal or Long Lenses

28 Feb

Telephoto lenses and composition

Andrew S. Gibson is the author of Understanding Lenses Part II: A Guide to Canon Normal & Telephoto Lenses, special deal on now 40% off at Snapndeals for a limited time only.

Wide-Angle Lenses

A potential issue with wide-angle lenses is that you try to include too much information in the frame. It takes real skill to create a strong composition with lenses that have a wide field-of-view. It is easier with normal and telephoto lenses, because you can utilise their narrow field-of-view to compose strong yet simple images with little in the background to distract the viewer.

Let’s take a look at how that works:

Field-of-view diagram

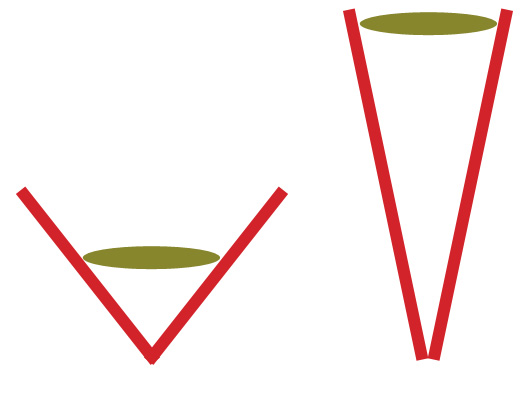
Angle of view from a wide-angle lens (left) and long lens (right)

This diagram shows the difference in field-of-view between a wide-angle lens (left) and a telephoto lens (right). You can think of a wide-angle lens as a lens of inclusion: it enables you to fit a lot of the scene in a photo. You can get close to the subject and still fit in a lot of the background.

The telephoto lens is a lens of exclusion. You don’t get so close to your subject and there is less in the background.

Here are a couple of examples:

Portrait taken with wide angle lens

I took this portrait using a wide-angle lens (24mm on a full-frame camera). I was able to get fairly close to the model and still include a lot of the background.

Portrait taken with telephoto lens

This portrait was taken using a short telephoto lens (85mm on a full-frame camera). I was able to get in close and exclude most of the background. The effect is emphasized by placing the model against a dark background.

This effect seems to kick in at around 50mm on a full-frame camera (the equivalents are 35mm on an APS-C camera, and 25mm with the micro-four thirds format). Here’s a photo taken with a 50mm lens on a full-frame camera to illustrate:

Photo taken with a normal lens

This means that you can use this technique to simplify composition even if the only lens you have is a kit lens. Just set it to the longest focal length and move in closer to your subject.

There are other ways to simplify composition – you can’t rely just on focal length:

  1. Pay attention to the background. Does it contain bright highlights or anything else that pulls attention away from the subject?
  2. Are the colours in your photo harmonious? If the colours don’t work well together this can also weaken the composition.
  3. Experiment with depth-of-field. Using a wide aperture helps simplify composition by throwing the background out of focus. This works best with prime lenses as they have wider apertures than most zooms.
  4. Move in as close as you can to the subject. One of my favourite techniques is to use a close-up lens (it’s called a lens but looks like a filter and screws to the front of your lenses the same way) to reduce the minimum focusing distance of my 85mm lens and get in really close. Another benefit is that depth-of-field becomes narrower in close up photography, helping create images with beautiful bokeh.

Here’s an example taken with an 85mm lens fitted with a Canon 500D close-up lens:

Photo taken with 85mm lens plus close-up lens

What are your thoughts? Do you use normal or telephoto lenses to simplify composition the same way? What are your favourite focal lengths? Let us know in the comments.


Understanding Lenses Part II: A Guide to Canon Normal & Telephoto Lenses

Understanding Lenses ebookMy ebook Understanding Lenses Part II will teach you how to get the most out of Canon’s normal and telephoto lenses. It contains a buying guide, takes a deep look at aperture and bokeh, and shows you how to focus accurately with telephoto lenses. It’s now 40% off at Snapndeals for a limited time only.

The post How to Simplify and Improve Composition with Normal or Long Lenses by Andrew S. Gibson appeared first on Digital Photography School.


Digital Photography School

 
Comments Off on How to Simplify and Improve Composition with Normal or Long Lenses

Posted in Photography


Verhalte Dich einfach normal, das ist verrückt genug

15 Jan

Ein Beitrag von: Peter de Krom

Vor drei Jahren zog ich in meine Heimatstadt Hoek van Holland zurück. Es ist eine kleine niederländische Stadt, die sich in der spitzesten Ecke Hollands wiederfindet. Man könnte sagen, dass alles, was irgendwie typisch niederländisch ist, in diese enge Ecke getrieben wird und dort einen wunderbaren Cocktail unserer Kulturen und Angewohnheiten kreiert.

Hier scheinen die Menschen ihr Leben nach dem Motto zu führen: „Verhalte Dich einfach normal, das ist verrückt genug.“ Und das ist wirklich so.

In meiner Arbeit versuche ich, die verschiedenen Facetten, die diese Stadt zeigt, herauszuarbeiten. Von meiner eigenen Straße bis hoch zur See fotografiere ich alle möglichen Szenen, die mir begegnen.

Dann füge ich die Bilder zu meinem Online-Notizbuch hinzu und manchmal führen diese zu größeren Projekten, an denen ich dann für längere Zeitabschnitte arbeite. Und irgendwann versuche ich, die Bilder zu publizieren oder auszustellen.

Scootrangers Maassluis © Peter de Krom

Nederland © Peter de Krom

Durch die Fotografie versuche ich zu verstehen, wie sich eine kleine Gesellschaft selbst erhält, indem sie dem Leben von vielen Generationen Struktur gegeben hat. Es passiert immer irgendetwas Seltsames an diesen Orten, an denen jeder versucht, zu einem gewissen Grad in der „Normalität“ zu leben.

Und diese seltsame Stimmung versuche ich sowohl einzufangen als auch zu verstehen. Ungefähr ein Mal pro Woche fahre ich auf einem Moped durch meine Heimatstadt und besuche ungefähr fünf Orte, an denen interessante Sachen passieren. Manchmal suche ich auch nach bestimmten Ereignissen, wenn Leute Dampf ablassen oder irgendetwas feiern.

© Peter de Krom

Hoek van Holland © Peter de Krom

Meinen fotografischen Hintergrund bilden die dokumentarische Fotografie und der Journalismus. Drei Mal die Woche arbeite ich auftragsmäßig für das Nachrichtenblatt NRC Next oder andere Kunden. An anderen Tagen arbeite ich an eigenen Projekten, die ich manchmal mit meiner Arbeit für Zeitungen kombinieren kann.

Ich schätze mich sehr glücklich, einige gute Schreiber und Journalisten zu haben, die meine Bilder mit großartigen Texten ergänzen.

Ich versuche, viele Orte in kürzester Zeit zu besuchen, aber manchmal bleibe ich länger an einem Platz und versuche, aus einer Situation etwas herauszukitzeln. Dabei achte ich darauf, nicht wie ein Fremder auszusehen und ein freundliches Gesicht zu zeigen.

© Peter de Krom

Hoek van Holland © Peter de Krom

Derzeit fotografiere ich mit einer Canon EOS 5D Mark III, die ich mit einer 35mm-Festbrennweite oder dem 24-70 L Mk II bestücke. Der „silent mode“ an der 5D funktioniert perfekt und bewahrt mich vor vielen Gesprächen mit Menschen, die ich fotografiere.

In meiner Arbeit schätze ich den Kontext sehr. Deshalb arbeite ich auch gern mit einer 35mm-Festbrennweite. Ich mag es nicht, Leuten die Kamera ins Gesicht zu halten oder – anders herum – dem Betrachter das Bild unter die Nase zu reiben.

Genauso, wie ich mir Zeit dafür nehme, meine Bilder zu machen, mag ich es, wenn Menschen meine Bilder länger ansehen müssen, um sie komplett zu verstehen.

avondvierdaagse in Hoek van Holland © Peter de Krom

© Peter de Krom

Weiter mag ich es grundsätzlich nicht, wenn man die Gegenwart des Fotografen in einem Bild sehen kann. Die fotografierte Person wird auf den Fotografen eine bestimmte Reaktion haben, die sehr zu dessen Nachteil werden kann.

Dann sagt das Bild mehr über den (nervigen) Fotografen als über den fotografierten Menschen aus. Auf diese Art wird das Ganze zu einem Trick.

Nederland, Eindhoven © Peter de Krom

Ich versuche also, einen Moment so pur wie möglich einzufangen.

Dieser Artikel wurde von Martin aus dem Englischen ins Deutsche übersetzt.


kwerfeldein – Fotografie Magazin

 
Comments Off on Verhalte Dich einfach normal, das ist verrückt genug

Posted in Equipment


ParaNorman | You Don’t Become a Hero by Being Normal

19 Oct

The first in the series of #WEIRDWINS films rises from the set of LAIKA’s new stop-motion zombie adventure. ParaNorman invades theaters August 17 in 3D. weirdwins.com
Video Rating: 4 / 5

 
Comments Off on ParaNorman | You Don’t Become a Hero by Being Normal

Posted in Animation Videos