RSS
 

Posts Tagged ‘Newborn’

How to Edit Newborn Photos Using Lightroom

04 Sep

Cole’s Newborn Photography Workshop is on sale now at Snapn Deals. Save 72% until September 16th, grab a seat now!
BW.jpgNewborn photography requires a tremendous amount of patience, skill, a willingness to be okay with accidents, and even stronger photo editing skills as these precious little newborns often have numerous skin imperfections that can cause you to spend a significant amount of time editing and retouching the photos.

Until recently, to truly excel at editing newborn photos you had to be quite proficient using Photoshop, but now with Lightroom 5′s newest tools you can get great results with far less time!

Here are my top 6 tips for quicker and more effective newborn photo editing in Lightroom:

1. Slightly Overexpose in Camera

To get amazing final edited newborn photos you first need to focus on getting your exposures as close as you can in camera. Since newborns often have some redness to their skin, the best way to help minimize that is to slightly overexpose your photos while shooting. Doing so will help you achieve that soft, creamy and bright skin that we all love!

Slight Overexpose

2. Shoot RAW

I always shoot in the RAW file format. There are many advantages of shooting in RAW, but for newborns which require a lot of touching up and white balance changes, shooting in RAW will help keep the color tones of your images as natural as possible – even when making big adjustments.

3. The Magic “C” Sliders

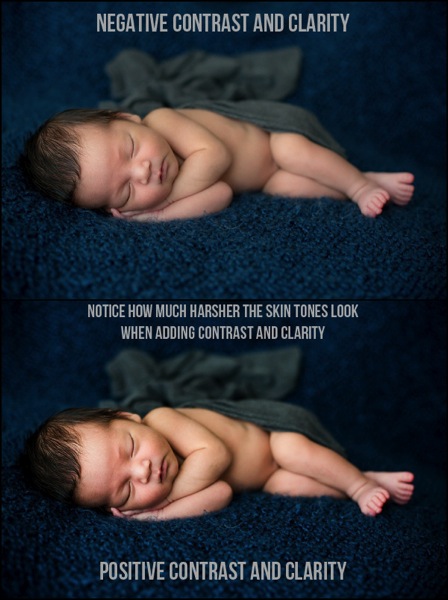
If you’re after soft and creamy skin tones, the two sliders in Lightroom that will help you the most are the contrast and clarity slider. By reducing contrast you will smooth out the tonality of the image (just watch the histogram when you change contrast) and it will help remove the dark shadow areas or even bright highlights. Remember, for most of us, the goal with newborns is soft, airy photos – rather than edgy high contrast imagery. Adjusting the clarity slider downward a bit will help give you the “creamy” factor. Just be very careful to not remove too much clarity! I recommend somewhere between -10 to -20.
Contrast and clarity sliders

4. HSL Sliders for Adjusting Skin Tones

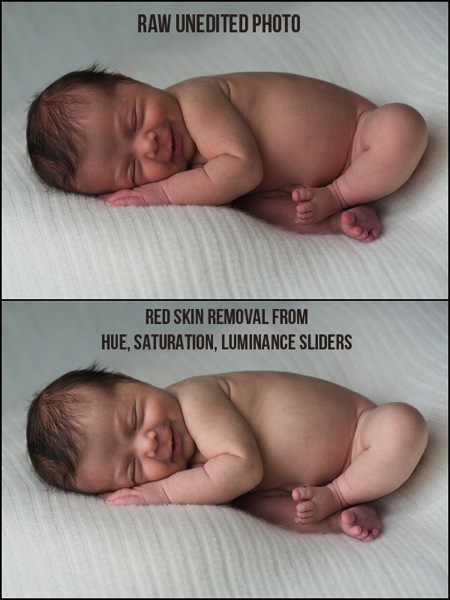
Adjusting the white balance will only get you so far, sometimes you need some fine tuning on the skin tones and that is where the HSL sliders can really help. While you can manually adjust each color slider, the real trick is to use the targeted adjustment tool on each element (Hue, Saturation, and Luminance) to fine tune your skin tone corrections. Simply click on the targeted adjustment tool, go over a part of the image with the skin tone color you want to fix, click (and hold) then adjust with your mouse up or down and you’ll see the sliders adjust.
HSL Sliders

Tip: if you are trying to remove redness, click in the photo where there the skin is red, and follow this sequence with each slider using the targeted adjustment tool:

Hue: move the mouse up and the red/orange sliders will move to the right
Saturation: lower the mouse and the sliders will shift to left lowering saturation
Luminance: raise the mouse to adjust the targeted color sliders to the right, raising the luminance (brightness) of those tones in the photo.

See below for video tutorial of this technique if you are a visual learner.

5. Choose Wraps, Blankets and Props Wisely

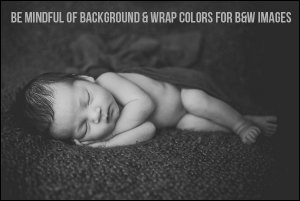
Extremely light colored wraps or blankets can be so cute, and can look great with color images. But, if you are a fan of classic, timeless, black and white images I’d urge you to stay away from blankets or wraps that are too light, or even white in color. There simply isn’t enough contrast in color between the baby and the blankets for an effective, and attractive black and white image, and your photo will often look too washed out.
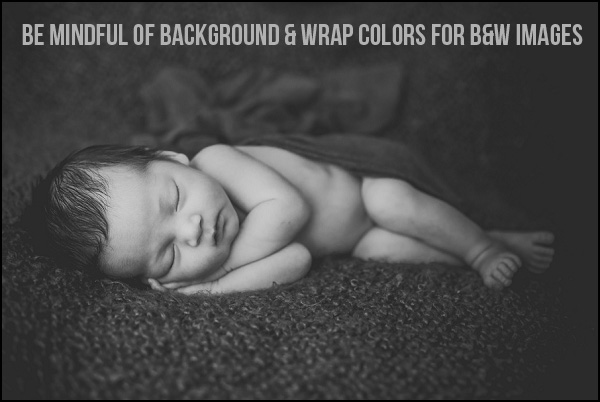
B W

6. Presets for Speed and Consistency

Once you find an edit or a look that you love, make sure to save it as a preset so you can use it on other photos that were taken with similar lighting and settings. Not only are presets vital for saving you a ton of time while editing, but they also will help you create a consistent look to your photos.

Specifically for newborn photography, I created a complete Lightroom presets collection that make soft, creamy and dreamy newborn photos with the simplicity of just one-click.
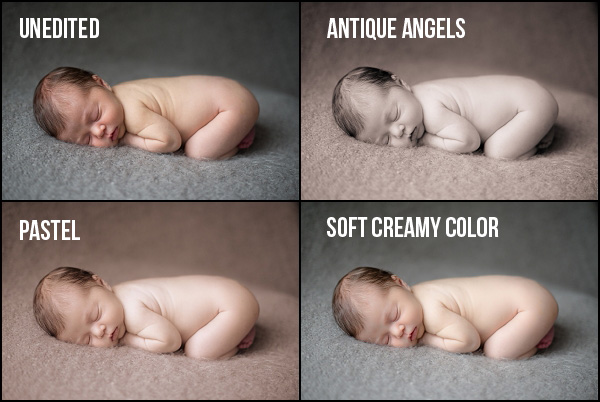
Newborn Lightroom Presets

I sure hope that you can put these six tips into use right away and start editing your newborn photos quicker, with better results. If you have any questions at all, just let me know down below, I’d love to hear from you.

Cole’s Newborn Photography Workshop is on sale now at Snapn Deals. Save 72% until September 16th, grab a seat now!

The post How to Edit Newborn Photos Using Lightroom by Cole Joseph appeared first on Digital Photography School.

Digital Photography School

 
Comments Off on How to Edit Newborn Photos Using Lightroom

Posted in Photography


6 Tips for Lifestyle Newborn Photography

04 Mar

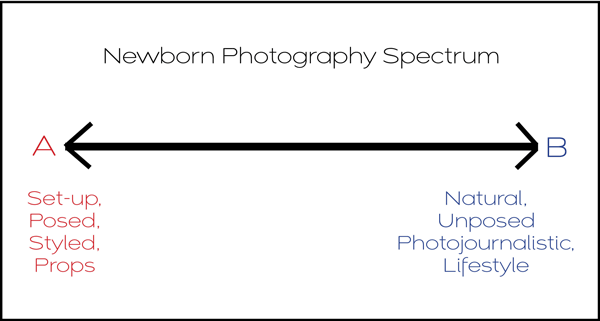
Newborn Photographers fall somewhere on a spectrum between producing posed, styled imagery and natural, lifestyle imagery.

Annie-Tao-Photography-newborn-photography-spectrum2b

While I enjoy looking at styled images of sleeping newborns in costume or appearing as though they are holding their own head up with the use of proficient Photoshop work, the emotions and stories captured in Lifestyle Photography images are what make my heart sing! So I stand comfortably and proudly on “side B” of the spectrum.

After following the rules outlined in The Sensitive Side of Newborn Photography, I follow these six tips for Newborn Photography:

1. Capture every detail

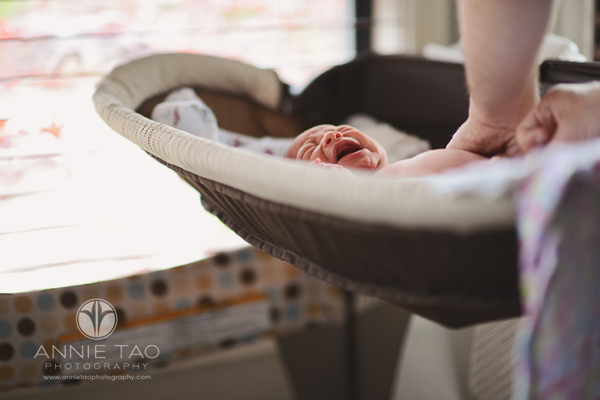
Whether the baby is crying heartily, yawning, or sleeping peacefully, they are all important and precious because the newborn stage is so brief. A yawn of a 4-day new infant, for example, looks different than a yawn of a 4-year old child, so photograph it all!

Annie-Tao-Photography-Lifestyle-Newborn-Photography-article-5b

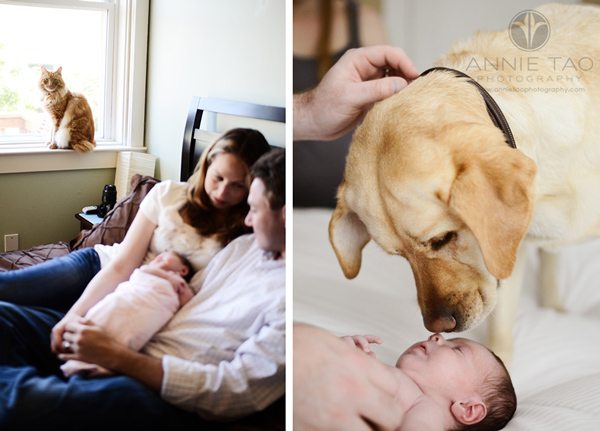
Memorialize the details, including items in the nursery. Talk to the parents and find out what baby items are meaningful to them. Maybe the grandparent knit the blanket or the dog is considered the first-born!

Annie-Tao-Photography-Lifestyle-Newborn-Photography-article-12b

2.  Photograph them at home

Capturing images of the baby in his or her very first home means every backdrop and furniture will be meaningful in the photos. It also means every session will be unique since every home looks different than the other.

Annie-Tao-Photography-Lifestyle-Newborn-Photography-article-6bg

Annie-Tao-Photography-Lifestyle-Newborn-Photography-article-13

3.  Do the newborn photography session within the first 10 days

Annie-Tao-Photography-Lifestyle-Newborn-Photography-article-8Technically, babies are considered “newborns” the first 3 months of birth. However, in the first 10 days, babies sleep most of the day and can more easily handle noises and movement. Though in Lifestyle Photography, newborns do not need to sleep the entire time, the session will run smoother if the baby is calm.

They also have a better chance of not having skin issues, like newborn acne, which will save you time in post-processing after the session.

4. Be well-equipped

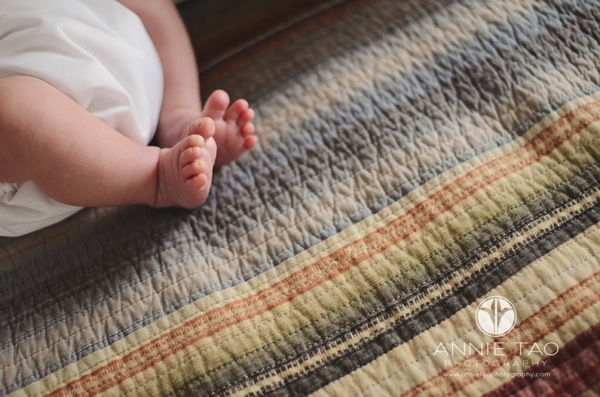
Most of the time, I confidently tell other photographers that their equipment is NOT as important as the person behind the camera when it comes to good imagery. This is still true with photographing newborns, however, you do need to have equipment that performs well in various indoor conditions, such as tight spaces and low light, A wide angle prime lens and a reflector are key. You should also have a macro lens to capture detail shots of the baby.

When I arrive at a client’s home, it usually looks like I’m staying overnight because I have a roller bag and carrying case!

Annie-Tao-Photography-Lifestyle-Newborn-Photography-article-1bg

5. Use natural light

Flash can startle newborns.

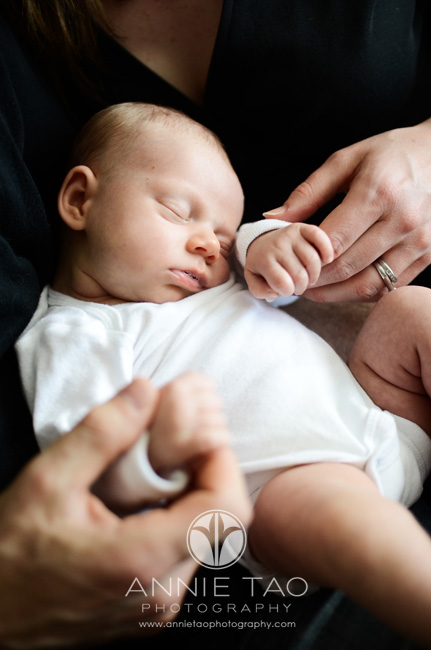
Also, when you are photographing new parents with their baby, using flash or other lighting equipment can take away from the spontaneity and natural tone of the shoot.

Annie-Tao-Photography-Lifestyle-Newborn-Photography-article-3b

6. Be flexible

A lot can happen when you’re photographing a newborn, like having unexpected baby visitors looking over your shoulder or being spit on, pooped on, vomited on! (that has all happened to me.) Just remember, you can’t always prepare for what happens at a newborn shoot, so stay calm and take everything in stride.

The first few days of a newborn’s life can be a hazy memory for new parents who are often sleep-deprived and running on adrenalin. Know that you are capturing a magical time for the family, and your photos of their life in that narrow slice of time will be treasured.

Annie-Tao-Photography-Lifestyle-Newborn-Photography-article-10b

Have you photographed any newborns or small babies? Do you have any additional tips or comments to add?

For more information on photographing babies and kids read these:

  • A Guide to Birth Photography
  • Maternity Photography – 7 Tips for Taking Great Shots
  • 7 Tips for Photographing Newborns without Becoming Clichéd, Derivative or Boring
  • Baby Sessions on a Shoe String

The post 6 Tips for Lifestyle Newborn Photography by Annie Tao appeared first on Digital Photography School.


Digital Photography School

 
Comments Off on 6 Tips for Lifestyle Newborn Photography

Posted in Photography


The Experience of Newborn Photography at the Hospital by Kim Rix

25 Feb

I often get asked what my favourite age to photograph is, and although my honest answer is “it’s difficult to choose’. I would have to say that photographing babies, (especially newborns) is a magical experience. Being part of those first days of life and sharing the journey with the parents at such a special time […]
dslrBlog

 
Comments Off on The Experience of Newborn Photography at the Hospital by Kim Rix

Posted in Photography


Getting Started in Newborn Photography

19 Feb

Newborn photography has been around in the United States for fifteen or so years, but it’s only taken hold here in the UK in the last three to four. And take hold it certainly has!

All professional photography involves a multitude of skills and newborn photography is no different, with one very important exception. It is the only area of photography that involves the photographer being completely responsible for the safety and welfare of the subject – the baby. As a newborn photographer you will hold, comfort, soothe, pose, wrap, and often even feed and clean up after your subject, even with the parents present.

Newborn photography tips 06

It is because of this difference that it is so specialized, and requires the right set of skills. Not having those skills is about more than the risk of poor images – someone’s safety is at stake.

So having decided it’s for you, you’ll have a huge number of questions. Here I aim to answer some of the biggest, and most important ones.

Newborn photography tips 02

DO I REALLY NEED TRAINING?

The short answer is yes. It doesn’t matter how skilled you are at photography, because the skills required to be safe and of a good standard as a newborn photographer are really very different than anything you have done before. If you decide to become a wedding photographer with no training, the worst that may happen is you let down a couple on their big day. As bad as that could be, no one will get hurt.

Newborns are delicate and must be handled correctly. They can suffer circulation problems, are poor at regulating their temperature, and cannot tell you when they are feeling uncomfortable, which means they are relying on you to take care of them at all times. The correct training will teach you safe handling techniques, how to spot signs of baby not being happy for many reasons, as well as general safety and other important areas.

Newborn photography tips 03

WHY DOES A SESSION TAKE SO LONG?

The average session is 3-4 hours, and you will soon realize why when you have done a couple of your own. The session is taken up by everything BUT taking photos. When I do a session my camera is in my hand for less than ten minutes the entire time. The session will involve settling, cuddling, reading baby, soothing for sleep, and gentle posing. They baby runs the show, of that there is little question, and as each baby is different, so is each session. Try to rush it and clock watch, and you’ll put yourself under huge pressure, and babies pick up on stress, which could cause you to have an unsettled baby on your hands. As a general rule, most newborn specialists will do just one session a day.

Newborn photography tips 04

WHAT IS THE BEST AGE FOR A NEWBORN SESSION?

If you have children, you may well remember that newborns sleep a lot, at least through the day, and seem able to sleep through pretty much anything too. But that changes really quickly, and by week three babies are waking more easily, and spending more time awake each day. You cannot pose a baby that is awake, so a sleeping newborn is what you need, meaning you need to aim for under two weeks, and under ten days is even better.

Sleep isn’t the only issue that dictates though. Newborns are gorgeously squishy, floppy and bendy under ten days old, which, coupled with being sound asleep, makes them perfect for gently posing into those adorable positions parents love. Much after two weeks and they begin to gain muscle tone, which means they lose the flexibility that makes such posing possible.

So that covers not doing a session too late, but you need to know why doing it too early isn’t good either. Newborns don’t usually look their best after birth, and it can take time for their faces to settle. Also, feeding needs to be established because until a baby is feeding well, he won’t sleep well. My advice would be don’t do a session under 5 days of age.

Newborn photography tips 01

HOW DO I MARKET NEWBORN PHOTOGRAPHY?

You are selling emotions. That is really the bottom line with newborns. The parents are melting with wonder and love at their new baby, and emotions are running their lives completely. If you can build a relationship with your clients that taps into their emotions, and leaves them feeling that you can truly relate to them and their baby, they will be more inclined to not only book you, but trust you.

Talk in a way that shows their baby means almost as much to you as he does them. Ask them lots of questions about their baby, and life since his arrival. New parents can talk all day about their baby, so showing he interests you will really endear you to them. Use emotive language on your site and Facebook page. Rather than saying “I like doing baby shoots” say “I simply adore capturing images of beautiful, squishy babies!”

Look after the parents when they are with you. Provide drinks and snacks, and comfortable seating. Mum will be sore and they are both likely to be exhausted.

Word of mouth is one of the best marketing tools in this genre. Mums talk, and will recommend you if they came away feeling that their baby was safe, respected and adored. The testimonials that will get you more bookings will not be the ones where mum says the pictures are good, but rather the ones where she gushes about how lovely the experience was while with you.

Newborn photography tips 05

WHAT WILL I NEED AS A BEGINNER?

Keep it simple. Training will show you the basic equipment you’ll need, like beanbag and backdrop stand, as well as a small selection of throws, hats, headbands, and wraps. The most important area for your development as a newborn photographer will be developing safe handling of the baby in your early months. The confidence in posing takes time, and that is where your focus should be, not on having all the props and the biggest selection of hats. What will set you apart as a top newborn photographer will never be the amazing set up you design – it will be how good your posing is, and how comfortable your baby looks in the images.

So in summary, I would suggest you take your time setting up as a newborn photographer. Research good training, and consider that in this area especially, you get what you pay for.

Newborn photography tips 07

For more on newborn photography and business see these articles:

  • The Ultimate Guide to Going Pro as a Photographer
  • How to Photograph Newborns
  • Newborn Photography Tips for Beginners
  • Different ways to Photograph your Baby
  • The Sensitive Side of Newborn Photography

The post Getting Started in Newborn Photography by Maddy Rogers appeared first on Digital Photography School.

Digital Photography School

 
Comments Off on Getting Started in Newborn Photography

Posted in Photography


The Sensitive Side of Newborn Photography

09 Nov

By Annie Tao

Sensitive Side of Newborn Photography

There are many ways you can photograph newborns, but one thing is for certain: it takes a certain amount of finesse to photograph these tiny little creatures that is beyond an ability to operate a camera and knowledge of photography.
?If you’ve had a baby, then you probably know what I am talking about. Newborns are especially fragile with soft bones and unfused plates in their skull, so moving them around should be done carefully. In fact, I will ask the parents to handle the baby during my Newborn shoots, if I want the baby to be in a different place or position.

Newborns are also only recently outside the protection of their mother’s womb, so they are more susceptible to disease, cold and stress than other people you will probably photograph.

Here are 6 tips to the sensitive side of Newborn Photography.

1. Avoid wearing fragrances

Sensitive Side of Newborn Photography 4

That includes perfumed soaps, lotions, perfumes/colognes, after shave, and hair styling products. Babies have sensitive noses. The last thing you’d want is to have your precious subject sneezing. If she (or he) is uncomfortable, then she will be restless and fussy.

2. Wash hands before you begin

Sensitive Side of Newborn Photography 2

The first thing you should do when you enter the newborn’s environment is to wash your hands really well. Even if you don’t plan to touch the baby, you will most likely touch things that the baby has contact with, like the crib.

3. Reduce the chance of bringing germs into the newborn’s environment

Reschedule if you are ill.

There is nothing more stressful than needing to care for a sick newborn. Their bodies are too young for medicine, so do the baby’s family (and the baby) a favor by rescheduling if you are sick – especially if you have a fever.

4. Turn up the heat

Sensitive Side of Newborn Photography 3

Babies are happy and sleepy when they are warm, so turn up the heat, but do this safely. If you use a space heater, be careful not to place it too close to the baby or whatever the baby is on or in.

For instance, if the heater is pointed lower than the baby itself, it can still endanger the baby by heating up the basket she is in.

5. Use your client’s props, if you can

Sensitive Side of Newborn Photography 1

Blankets, hats, stuffed animals, shoes, baskets…they are all so cute to use during your Newborn session.

If you use your client’s props, then the items in the photos will be more meaningful to them (ie, Aunt Mary crocheted the hat, the basket is from the parents’ wedding, the stuffed animal is the same one the dad had as a child).

The photos will also be more unique than using the same props over and over.

6. Don’t force a pose

You or the parents of the baby may want to get a shot of the baby in a certain position or posed on a particular object. Please assert caution when attempting such feats.

Newborns are great to photograph because they can be positioned for a photograph, but they are human beings, not dolls. Take precaution and remember that babies are delicate. If they appear uncomfortable or unhappy, call it quits and find an alternative shot.

Sensitive Side of Newborn Photography 5

Newborns should be comfortable and safe at all times. So do what you can as their photographer to keep them that way during their photography session.

Annie Tao is a Professional Lifestyle Photographer in the San Francisco Bay Area who is best known for capturing genuine smiles, emotions and stories of her subjects.  You can visit annietaophotography.com for more tips or inspiration and stay connected with her at facebook.com/annietaophotography.

Post originally from: Digital Photography Tips.

Check out our more Photography Tips at Photography Tips for Beginners, Portrait Photography Tips and Wedding Photography Tips.

The Sensitive Side of Newborn Photography

The post The Sensitive Side of Newborn Photography by Guest Contributor appeared first on Digital Photography School.

Digital Photography School

 
Comments Off on The Sensitive Side of Newborn Photography

Posted in Photography


Newborn Photography Black and White Conversion in Lightroom

25 Oct

Introduction

The Following is an excerpt from the SLR Lounge Lightroom Preset System v5 and accompanying workshop.  The Lightroom Preset System is designed to take you from Ordinary to Extraordinary photos in just a few seconds and clicks. In this tutorial we’re going to be creating a nice soft black and white portrait for a newborn baby captured from the Newborn Photography Workshop where we teach photographers how to take beautiful newborn with any camera using simply natural window light and a reflector.

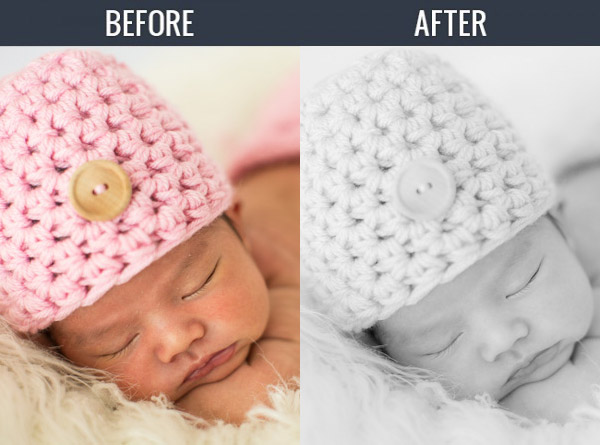
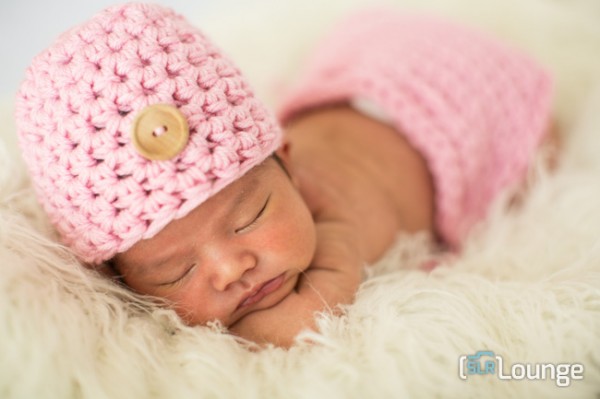
The complete written tutorial is below, and you can also watched the video tutorial at the end of this article. Here’s a sneak peak at what our image will look like before and after our edit.

newbeforeafter


Black and White Conversion for Newborns

The first thing we did to this image was adjust our Color Tempurature to taste, and in this case we used the Eye Dropper Tool (W) taking a reading from the fur that the newborn is sleeping on.

After our Color Temperature adjustment we used our “01-10 Base – Soft: 12b Super Soft – B&W” preset to edit our photo. This preset does all of our work for us and after this preset is applied our photo edit is pretty much finished. So let’s go over exactly what this preset did.

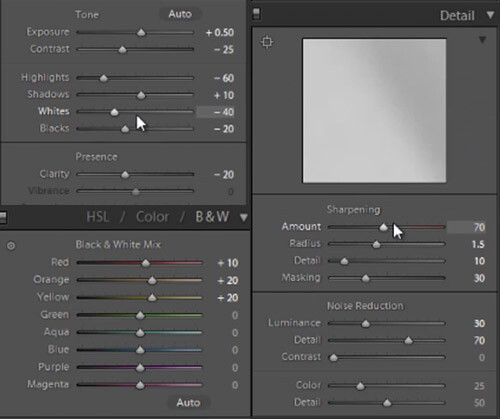
First, the Highlights and Whites have been taken down to -60 and -40. This is to smooth out highlights by bringing them closer to the mid-tones and shadows. This adjustment has the effect of softening highlights over skin tones giving us much more evenly lit skin.

Next, Clarity is being dropped to -20 in order to reduce mid-tone contrast. The reduction of mid-tone contrast again helps us achieve a softer and more flattering look. However, I would caution not to take the Clarity slider down too far as it can create an overly-soft looking image completely lacking in contrast and mid-tone detail.

In this black and white conversion the Reds, Oranges, and Yellows in the HSL are being raised, which again is primarily for skin tones. This brightens up the skin tones, further enhancing the soft flattering look.

We have our standard amount of Sharpening for portraits applied to this image which you can see below.

Also worth noting, the preset we selected dialed in a Noise Reduction Luminance setting of +30. Noise reduction was added to the preset in order to quickly reduce a little bit of the pore detail in the skin giving it a slightly smoother overall look. At an amount of +30, we will see a nice smoothing effect over skin, while retaining the majority of our fine detail in the hair, eyes and so forth.

Below is a snapshot of all of our final settings to achieve this look.

developsettings

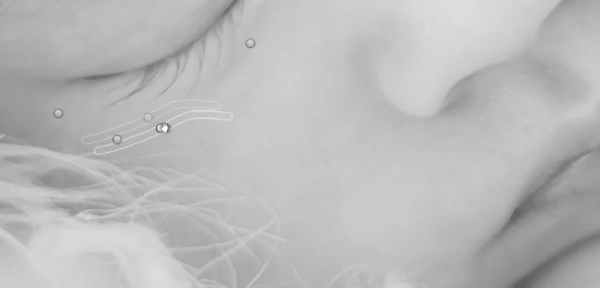
To clean up the skin a little we can use the Lightroom 5 Spot Removal Tool to remove some of the more obvious bits of dry skin and hair. Adobe has modified the Spot Removal Tool in Lightroom 5 to operate more like a brush making the tool much more powerful than in previous editions of Lightroom.

Just remember to keep your Spot Removal Tool size small and just large enough for the area you are working so that it doesn’t look unnatural.

Screen-Shot-2013-07-30-at-9.59.27-PM-650x313

Black and White Conversion for Newborns

Here’s  a look at the final before and after of our newborn black and white portrait.

Before

lightroom-5-tutorial-soft-black-and-white-newborn-0001

After

lightroom-5-tutorial-soft-black-and-white-newborn-0002

Watch the Video Tutorial

If you would like to see exactly how all of the settings and adjustments were applied, please watch the video below from the SLR Lounge YouTube Channel.

Conclusion and Learn More

We hope you all enjoyed this tutorial. If you are interested in learning more or purchasing the SLR Lounge Lightroom Preset System v5 or the newly released Lightroom Workshop Collection v5, please click any of the links in this article. If you are interested in Newborn Photography Workshop please also check out our Newborn Workshop Collection and Lightroom Presets now available via digital download.

Post originally from: Digital Photography Tips.

Check out our more Photography Tips at Photography Tips for Beginners, Portrait Photography Tips and Wedding Photography Tips.

Newborn Photography Black and White Conversion in Lightroom

The post Newborn Photography Black and White Conversion in Lightroom by Post Production Pye appeared first on Digital Photography School.


Digital Photography School

 
Comments Off on Newborn Photography Black and White Conversion in Lightroom

Posted in Photography


Newborn Photo Techniques & Strategies, Part 1, Julie Klaasmeyer, Photovisionvideo

12 Nov

Use code YOUTUBE? to save 75% at www.photovisionvideo.com. In part 1 of this 3 part series, Julie shares with Janine Killian, PhotoVision’s Correspondent, all her tricks of the trade for successful newborn photography, including heating pads, space heaters, heartbeat sound machines and more. Watch as Julie conducts a newborn session with the aid of her assistant making sure they capture a series of well posed, solid images before trying to push the envelope to get that perfect image.

 
Comments Off on Newborn Photo Techniques & Strategies, Part 1, Julie Klaasmeyer, Photovisionvideo

Posted in Photography Videos