RSS
 

Posts Tagged ‘Newbies’

Video: Six lighting tips for flash photography newbies

22 Aug

If you’re taking our advice from this morning and buying your first flash soon, a few beginner tips on mixing flash with ambient light will really help you take advantage of your new gear. Enter Mango Street’s Daniel Inskeep and Rachel Gulotta, who teamed up with photographer and filmmaker Daniel DeArco to share just that.

Mango Street is known for their simple tutorials targeted at beginners, but they mainly use natural light for their photography. So when the topic turned to artificial lighting, they asked DeArco to come on and share some advice. Over the course of two videos, DeArco offers six different tips for getting great results when you mix artificial and natural light.

Video 1

  1. Keep it Simple: Prioritize one light source first. In this case, DeArco prioritizes the natural light.
  2. Have a go-to hard light and soft light setup
  3. Experiment: Knowledge of studio lighting will make you a more well-rounded photographer

Video 2

  1. Use a strobe + reflector as a fill light on your subject to avoid blowing out your background
  2. Look for sun reflecting off buildings to provide a hair light and use your favorite strobe and modifier as a fill
  3. Use a blocked or just-out-of-frame strobe to fake a sunset if you miss golden hour

If you found the tutorials helpful, you can see more from both Mango Street and DeArco on YouTube. And if you’re inspired by these techniques, check out our OpEd from this morning on why your next gear purchase should be a flash, not a new lens:

Don’t buy another lens, buy a flash instead

Articles: Digital Photography Review (dpreview.com)

 
Comments Off on Video: Six lighting tips for flash photography newbies

Posted in Uncategorized


5 Things Newbies Should Know About Getting Started in Photography

01 Sep

Getting started in photography can be quite scary. We all start by investing in a DSLR, and think we are going to take amazing images. In reality it is a bit more difficult, because if it was easy… well everybody would sell prints, quit their day job, and live off photography.

Just like any art, photography has to be learned, and practiced – a lot. It is a trial and error process, we all start at the bottom and build our way up.

5 tips photography 1

If your images do not look like you imagined them, then try a different approach. Just do something. Einstein said that the definition of insanity was doing the same thing over and over and expecting different results.

#1 – Gather information and knowledge

Photography is the best hobby you could have, but it is a lot of hard work. I personally don’t believe in talent. The first tip I can give you is to absorb as much information as possible. How do you do that ? Well you have so many free resources on the internet, the only need to take advantage of it. Since you are reading this, then you’re on the right track.

By resources, I mean articles online, magazines, and YouTube tutorials. You can learn so much in less than 30 minutes. One other tip I can also give is to check multiple resources for the same topic.

5 tips photography 2

Read photography magazines. They have amazing stories and tutorials.

For example you want to learn how take portraits – don’t read or watch only one tutorial. The more you research, the more you will learn, because sometimes one article won’t give you all the answers to your questions, but another article will.

You should also anticipate. What I mean by that, is to learn about it, before trying to do something.

For example, say you want to buy a new DSLR. You should learn how to use it before you actually buy it, read reviews and tutorials. If you are planning a trip to the sea, then learn seascape photography before travelling.

5 tips photography 3

Photography is spending hours and hours on research.

#2 – Try all kinds of photography

This brings me to my second tip: don’t focus on only one type of photography. Of course, if you like portrait photography then do that. What I’m trying to say, is that you should explore all the possibilities, before focusing on only one type of photography. Try to add variation by learning about macro photography, landscapes, portraits, wildlife, etc.

5 tips photography 4

Try super sports car photography. It’s so fun, just protect your ears.

You may be surprised by the results you get, and if you never try, you will never know if you actually like photographing birds or not. From my experience, the more you learn, the more you’ll be able to do things. It’s better knowing how to do five things than only one. Starting photography and only wanting to take portraits is not the right mindset. It’s just like food, if you don’t try new food, you will never know if you like it or not.

#3 – Photography is an investment

The third thing you should know is that photography is a big investment. You will need to buy lenses, camera bodies, tripods, and filters, which will end up being quite expensive. If you are not smart with your decisions, then your bank account can end up in tears.

It may seem confusing when I tell you to try different types of photography, but then warn you about buying too much gear. If you want to try macro photography, don’t buy a macro lens right away. Just buy extension tubes (or close-up filters) until you know if you are serious about macro. They cost a lot less, and increase your focusing distance dramatically.

5 tips photography 5

A very inexpensive $ 30 ND Filter.

For filters, you can buy $ 20 Neutral Density filters for your landscape photography. Of course they won’t have the same quality as the professional ones, but it’s a good place to start.

I started photography with a phone, then moved up to an entry level DSLR, and now I own a full frame camera. But, it took me four years to go from my phone to full frame, so don’t go out and buy the best DSLR ever, find something that will suit where are you starting first.

5 tips photography 6

Phone photography

Make smart decisions, a normal kit lens is enough to get started in landscape photography.

#4 – Post-processing is a good thing

The fourth tip is about post-processing. Most beginner photographers underestimate the power of post-processing. It can make or break an image, that’s why my first point is important. You have to learn and fail in order to succeed – once you learn how to master software like Lightroom and Photoshop, your photography will become more like a process, because you will automatically think about post-production.

5 tips photography 7 5 tips photography 8

For post-production, I also recommend learning about the same topic from different sources. There are a lot of different ways to do the same thing, you just have to find which way works the best for you. It doesn’t matter how you do it, the important thing is the end result.

For example, for dodging and burning an image I prefer using a curves layer with a mask, but that doesn’t mean I don’t know how to dodge and burn using grey layers.

Post-production can be quite scary because there are so many tools, but once you master a certain software, you will be able to work on your worst shots and get the best out of them.

I would say that post-production is almost indispensable. There are a lot of photographers who want natural photography, but that doesn’t exist. Your colours will get interpreted anyway, it’s up to you to decide if you want your camera to do it automatically, or if you want to take control over everything.

5 tips photography 9

Simple snapshot with my own interpretation of colors.

#5 – Good photographers create depth in their images

The last thing you should know is that photography is all about creating depth. There are many ways of creating depth; you can do it with light and contrast, colours, movement, a solid composition, and with depth of field.

You should aim to have at least one of these elements in your images. If you can mix all these elements in one image, then your result will be even better.

With light and contrast you can play around with shadows, and dodging a burning. The main purpose is to have uneven lighting on purpose – try to avoid flat lighting. Some area should be lighter than others, and some darker. You also want to know which lighting conditions will give you the best results. For example, if you like shooting landscapes then you will want to know that you get the best light during the magic hour (blue hour).


Composition is the most important thing, try to use a foreground, middle ground and a background. The rule of thirds is also really useful to frame your subject in a pleasing way.

5 tips photography 10

With colours, the main purpose is to have tones that go together. Always look at your colour palette and see what works best. This is quite difficult to do, but one tip I can give you, is that when the colours do not look good, convert your image to black and white.

For movement, try long exposures, they are a good way to create a surreal images.

The last thing is depth of field. This is very important if you’re taking portraits, the amount of background blur can completely change an image. If you want to learn about it here’s another article I wrote: How to Achieve Background Blur or Bokeh where I explain three easy ways to achieve a nice bokeh.

IMAGE 2

Summary

So if you’re just getting into photography, consider these five things as you begin your journey. Learn everything you can from multiple sources, try different kinds of photography to see what you like, don’t get caught in gear envy, don’t be afraid of post-processing and remember to add depth to make more interesting images.

Are you further along in photography? What other advice would you offer to new photographers? Please share in the comments below.

googletag.cmd.push(function() {
tablet_slots.push( googletag.defineSlot( “/1005424/_dPSv4_tab-all-article-bottom_(300×250)”, [300, 250], “pb-ad-78623” ).addService( googletag.pubads() ) ); } );

googletag.cmd.push(function() {
mobile_slots.push( googletag.defineSlot( “/1005424/_dPSv4_mob-all-article-bottom_(300×250)”, [300, 250], “pb-ad-78158” ).addService( googletag.pubads() ) ); } );

The post 5 Things Newbies Should Know About Getting Started in Photography by Yacine Bessekhouad appeared first on Digital Photography School.


Digital Photography School

 
Comments Off on 5 Things Newbies Should Know About Getting Started in Photography

Posted in Photography


10 Things Nobody Tells Photography Newbies

08 Aug

Every time you read an article or a book, a blog post, or a tutorial, there is always something new to learn about photography. Technology is always moving forward, software being improved, new features and functionality released. Someone has a new technique or tip to share. So many things to learn, yet it is one of the joys of photography as well. Your boundaries are in many ways limitless, it is an artform you can take and develop and make it your own.

Still there were many things on my journey that had to be learned the hard way, as is often the case. There are some fundamental things it took a while to understand, mostly because no one shared these nuggets of information. Maybe they just thought it was so obvious, that everyone would figure it out?

Hopefully these tips from my experiences will help you in your photography journey.

1. Photography is hard to learn

SHILL Article1 buskers

Your camera is a marvel of modern technology and science, with lots of buttons and dials, and all sorts of fancy features. To have control over how it creates your images, you need to learn how to use it with some level of skill. Then there is the art side of the equation; composition, framing, mood, telling a story. So, many new concepts and ideas to learn, both technical and creative.

Dropping $ 3500 on a fancy new DLSR and lens doesn’t make you a capable photographer, any more than buying a set of chef knives makes you a Michelin starred chef. Your camera is a tool, which needs thousands of hours of time invested into learning how to use it. If you aren’t prepared to read books, watch videos, and go out again and again to shoot, then your rate of improvement will be minimal.

2. Photography is an expensive exercise

It starts with the really expensive bits, the camera body and the lens. Before long you will want more lenses. A camera bag is necessary to carry it all. A tripod to hold it still. Filters for long exposure shots. Wireless remotes, flash or other lighting gear, the list goes on. There is always something new and shiny to spend money on.

SHILL Article1 lake pukaki

Don’t forget things like decent footwear and outdoor clothes. Gas and accommodation costs for travelling locally, plus fees to get into parks also need to be accounted for. Travelling overseas is a luxury for many people. Don’t forget insurance too. It all adds up to a lot of money.

3. Camera gear is heavy

Good quality lenses are full of optical quality glass, and as a result they can be quite heavy. By the time you have two or three of them, and a DLSR body and other accessories, your kit can easily weigh 5kg (11 lbs.) or more. The more gear you have, the more you have to carry with you. This is one of the reasons the four thirds (mirrorless) technology is becoming so popular, the cameras (and lenses) are much smaller, and therefore lighter.

4. Having the right gear matters

Long lenses are necessary for wildlife and bird photography. Special gear is needed for astrophotography. For that super close-up shot, a macro lens (or filters) are a must. Studio portrait work means soft-boxes and professional lighting gear. Tripods, filters, wireless remotes etc., it all makes a difference, and having the right gear for the job is important.

SHILL Article1 daisy macro

5. Gear doesn’t matter at all

Composition, framing, creative or artistic imagery, all elements that you, the photographer, bring to the image. It could be shot with your phone or the latest DSLR on the market, but without the creative input, your image may be missing that critical ingredient. Being in the right place at the right time (e.g. sunrise or sunset) or travelling to exotic locations, climbing a mountain, driving for hours to be in just the right spot, these are all things you have to do to capture the image.

Sunrise

Sunrise

Climb a mountain

Climb a mountain

6. It takes a long time to get competent

When you first get your camera gear it’s exciting and fun, so you take lots of pictures. Eventually you may get frustrated at how your images look, compared to those seen online, and one of two things will happen. The most likely outcome is that you give up because it’s too hard. The alternative option is you work even harder at learning your craft, you read more books, maybe join a club, or attend some workshops.

SHILL Article1 bandicoot

Someone clever (quote attributed to Malcolm Gladwell) worked out that it takes 10,000 hours of effort to master a new skill. Ten thousand hours! That’s over a whole year! You have to fit that in around work, sleep, and time with friends or family. That means it could take you years to get good at this.

7. Social Media is not your friend

When you first start sharing your images, your friends and family will like them. That’s because they like you and want good things for you. Getting likes is an instant form of gratification that can be addictive.

The problem with social media is that most of the people viewing your images are not photographers. They cannot give you useful technical advice or critique on your images, the kind to help you improve. If all you want is to get the most likes, then that will have an impact on how you learn and grow as a photographer.

SHILL Article1 cemetary

There are groups and forums online, full of photographers who are often willing to give feedback. But accepting criticism is not something most people are comfortable with, and it can be really challenging. Some people are nicer about it than others too, so you might have to spend some time finding a place that you feel comfortable.

8. If you want a sunrise, you have to get up before the sun does

Yeah it’s easy to read it and nod your head, and go, “Sure, I can do that”. It’s a different story at 4am when your bed is nice and warm, but outside it’s cold and dark. Plus you might have already gotten up 10 times in the last couple of months to go shoot, and none of those mornings paid off.

Want to travel to exotic destinations? You have to save up to be able to afford it, take time off work, maybe travel with non-photographers and have to make some compromises when you travel. That incredible shot in a remote location means you have to hike in, carrying your camera gear, a tent, food, and everything else as well.

Exotic destinations

Exotic destinations

Photography requires a lot of commitment to your craft, learning it, and then going to the places you need, to capture the images you want.

SHILL Article1 CHCH Lightshow

9. Post-processing is just another tool

Little is more divisive in the photography world than the question of post-processing. If you shoot in RAW then it’s necessary to edit the files with some form of software. There are many options available – Photoshop, Lightroom, OnOne, DXO, and the list goes on. Some people prefer the “get it right in camera” and shoot JPG approach instead.

If you do choose to shoot RAW and want to edit your images, that means learning to use the software. Like everything in photography, it isn’t quick or easy to figure out, but once you do learn it, the value it brings to working on your images is valuable. It’s not necessary to spend hours on every image either, with some handy presets or actions, it might only take a couple of minutes for most of them.

SHILL Article1 old farm hut

10. Are you a follower of fashion?

There are noticeable trends and styles in photography, which are in fashion at any given point in time. Astrophotography, long exposure, HDR, silky waterfalls, light painting, and other special effects are all styles seen a lot at the moment. By all means learn from them, there will be valuable skills to obtain, but be careful to keep within aesthetically pleasing limits.

Long exposure

Long exposure

It can be easy to do the same as everyone else, which limits your ability to learn and express yourself. Do you want to travel to an amazing location and stand at the usual viewpoint and capture the same image already taken by thousands of other photographers? If you have time, and there are options for other viewpoints, and it’s safe for you to explore them, consider doing so.

SHILL Article1 dark red rose

Don’t be afraid to try something different, and whatever you do, make sure it gives you images that you are happy to have in your portfolio.

Summary

Some of this will seem perfectly obvious, and some of it you may well disagree with. There may be some uncomfortable ideas in here, or some other things you would have included instead – feel free to share your thoughts in the comment below, as others may well agree with you.

The one thing you can be sure of is that learning anything new is hard work, and the longer you do it, the more there is to learn. There is one more secret to share with you though. If you do the work and keep learning and pushing yourself, it does get better. Once you master the basics and understand your tools, you have a whole new opportunity to have fun and try creative things, experiment with the really cool concepts.

One last final tip – Everybody starts at exactly the same place – at the beginning.

googletag.cmd.push(function() {
tablet_slots.push( googletag.defineSlot( “/1005424/_dPSv4_tab-all-article-bottom_(300×250)”, [300, 250], “pb-ad-78623” ).addService( googletag.pubads() ) ); } );

googletag.cmd.push(function() {
mobile_slots.push( googletag.defineSlot( “/1005424/_dPSv4_mob-all-article-bottom_(300×250)”, [300, 250], “pb-ad-78158” ).addService( googletag.pubads() ) ); } );

The post 10 Things Nobody Tells Photography Newbies by Stacey Hill appeared first on Digital Photography School.


Digital Photography School

 
Comments Off on 10 Things Nobody Tells Photography Newbies

Posted in Photography


Tips to Help Newbies Find Success in the Photography Business

04 Aug

Many dream about becoming a professional photographer, but unfortunately it can be difficult to last longer than two years in business, if you don’t have the right plan. People fail every day. They question themselves, wonder if their work isn’t as good as they thought it was, then pass along the common belief that it’s impossible to make a living in photography.

Corporate Portrait

Corporate portraiture. Every business needs photography.

You commonly hear that everyone is a photographer these days, but that’s just not true. There are lots of photographers, in the same way that there are many people who enjoy writing – as there should be, because it’s an incredibly fun passion. But there are not as many professional photographers pushing themselves in the right way and making a living, and this is solely due to their marketing ability, not the state of the industry.

If anything, there is more opportunity than there used to be. With the Internet, LinkedIn and social media, everyone needs a good portrait. Companies need their events documented to then be shared. People are spending so much money on weddings. Good photography is more important than it ever has been. What people really mean when they talk about the industry being saturated with photographers, is that the old gatekeepers who once sought out the skilled photographers are gone. Now to succeed you have to figure out how to do it on your own, and to raise above the noise.

Here are some tips to help you find success in your photography business.

1. Create a strong and unique body of work

Gowanus, Brooklyn.

Gowanus, Brooklyn. This photograph sells very well due to its uniqueness.

There is no way around it, if you want to succeed as a photographer, you have to learn how to create strong work. There are no excuses these days. Everything you need to learn is on the Internet. There are videos, courses, ebooks, YouTube, you name it. Map out what you need to learn, particularly where you feel your weaknesses are, and seek out content to address them. Maybe it’s posing, or studio lighting, or printing. Everything’s out there, and it’s not hard to locate. Go to town.

Train your eye. Find 10 photographers whose work you love, and figure out how to do what they do. Study them, go deep into their archives, and then try to recreate the look of their images. Use friends as models, do whatever you need to do. Recreating their look is not copying, it’s learning, and eventually as you continue to improve, you will take elements from all of your favorite photographers, and mesh them into your own style.

Plan creative days. It’s not good enough to say that you will find time within your schedule. Set aside entire creative days, and put them in your calendar. Turn off all other distractions and treat it as a job, because it is a job. Plan what you are going to do ahead of time and execute it. This is where your portfolio will begin, and what you will use to get jobs.

2. Realize that nobody notices you or your work

Polka Dots and Pink Shoes, Subway, 2012.

Another New York print that sells well.

It’s important to understand how people see you, and they don’t. Everyone is being bombarded with imagery everyday from so many sources. Even if you put yourself out there, people aren’t going to notice you. It takes time and persistence, so keep at it.

The reason that you need to understand this, is because you have to grind at first. The beginning is always a grind, particularly as you’re trying to get to an income that can stabilize you for the long term. People may not notice you the first time, or the second, and when they do first notice you, they will probably write you off. It’s common for some people’s first reaction to be negative and dismissive about you, before they even give you a chance. But, the more they see you, the more they will notice you and warm up to you. It takes time, and people appreciate seeing others work hard for it. One try is not enough. Neither is two.

3. Reach out to your community

Every successful photographer that I’ve spoken to has received their first smattering of jobs through word of mouth. Who else is going to hire you right away? Your personal community is so important to your early and ongoing success. Your friends and colleagues know you and trust you. They will give your work more of an eye and a chance right away, and they will recommend you. Be social, surround yourself with a strong community, and your professional life will benefit.

Facebook Event

A job I received through a fellow photographer.

However, these word of mouth referrals are not going to happen on their own. Your community isn’t going to help if they don’t understand what you are doing. Make it official. Create an email list and send out an official announcement about your business. Explain, and show what you do, and make it clear how you can help people. If you are building a portraiture business, explain that you do photography for engagements and families, businesses, law firms, actors, and artists. You know who that covers? Everybody. Suddenly, everyone will have you at the top of their mind. They will understand how you can help them when they are in need of your services. People will not know this unless you tell them.

Start fostering a community of other photographers around you. It can be easy to think of other photographers as competition, but that is so far from the truth. The only one keeping you from getting jobs is yourself, and photographers are the ones that you can bounce ideas off. If you need to gain experience, offer to assist for them whenever they need. This is particularly popular in wedding and commercial businesses, but every photographer can use a hand. This will teach you more than any Internet website or tutorial can. As you get closer, this community of photographers will give you advice in times of need, and will pass you jobs when they are booked. It’s a win-win for everybody involved.

4. Active versus passive marketing

Local Business Photography

The owner of my favorite local restaurant.

Passive marketing is the act of putting yourself out there over and over again, while waiting for the jobs to come to you. This is so important for the long term, but it takes time to come to fruition, and in the short term it does nothing. Instead, take an active approach to your marketing and directly reach out to your potential clients.

If you want to work with local businesses, contact them and introduce yourself and your services. Make an appointment to show them your portfolio, or call them on the phone. If you want to work with restaurants, start with the ones you eat at, and work the town. If you want to do portraits of actors, go to acting schools, and the places where the actors hang out. If you want to sell your prints, seek out interior designers, art consultants, and businesses without art on their walls. Figure out who your clients are, where they are, and then plan out the best way to approach them.

5. Create a business plan

Engagement Photography.

Engagement and family photography can be a great business to start off and gain skills you need.

Creating a business plan is vital to your success. Figure out the income number that you will need to earn in the first year, and create a plan for how to achieve it. How much will your expenses be? How much will you charge, and how many jobs will you need to book to reach your desired income? Who are you marketing to? What are all the ways that you can reach your potential clients, and which have the potential to pay off the best? What promotional material will you need? Do this in a spreadsheet, map it all out, and continue to reference and tweak it as you go.

6. Contact people!

Corporate Portraiture.

Corporate portraiture.

Once your portfolio and website are ready, start contacting the people on your list. Do this consistently, and not all at once, so you don’t burn yourself out. Try a few, see how your pitch went, then refine it. The first few might not go so well, and if that happens, try to figure out what went wrong. If they do not seem to have a strong reaction to your work, then maybe you need to improve or tweak it. As you achieve more success, you can start to contact additional people. This is the grind phase of your career, and it is the only way to succeed.

You will fail more often than not, but be elegant in failure. Someone who rejects you now could be doing it for so many reasons, and could be a great client down the road. Even if they can’t work with you now, make a good impression and don’t give up on them.

7. Follow through

Every step that you did before this is how you got hired for the job. Don’t screw it up. You want your career to snowball, and the only way it will do that is if you impress everyone. Jobs are the quickest way to get more jobs and new referrals. Unfortunately, as some photographers start gaining jobs consistently, they can become cocky or complacent. You know how much work went into gaining these clients, and you want the grind to pay off.

Event Photography.

Event photography.

Respond quickly. Under-promise and over-deliver. Plan out jobs, communicate well with clients in the planning phase, and don’t mess up details. Always keep a smile on your face and look confident, even during the many times when you will be freaking out inside. Make sure to talk to the clients when you have the chance, and get to know them. Send thank you notes, and don’t be afraid to ask for referrals.

Do you see from all of this how a career can take off when you approach it in the right way? It’s not rocket science, but unfortunately it often takes newer photographers much longer to figure all of this out than necessary. It took me a long time. Now you know it, so go do it. Fight the fear, and kick some butt.

googletag.cmd.push(function() {
tablet_slots.push( googletag.defineSlot( “/1005424/_dPSv4_tab-all-article-bottom_(300×250)”, [300, 250], “pb-ad-78623” ).addService( googletag.pubads() ) ); } );

googletag.cmd.push(function() {
mobile_slots.push( googletag.defineSlot( “/1005424/_dPSv4_mob-all-article-bottom_(300×250)”, [300, 250], “pb-ad-78158” ).addService( googletag.pubads() ) ); } );

The post Tips to Help Newbies Find Success in the Photography Business by James Maher appeared first on Digital Photography School.


Digital Photography School

 
Comments Off on Tips to Help Newbies Find Success in the Photography Business

Posted in Photography


8 Tips for Food Photography Newbies

08 Apr

Making food look appetizing, is not quite as simple as photographing your plate. There are a number of tricks that you can use to really enhance the subject. By using your camera creatively, you can capture the scrumptious side of food. Whether it’s your favorite dessert, or a full meal, these tips will help take your food photography to the next level.

8 Tips for Food Photography Newbies

1) Use a very shallow depth of field

When you’re about to take a photo, the first technical question you want to ask is, “What kind of background would be best?” With food photography, you typically only want a sliver of the subject sharp, and the rest of the plate to be a soft blur. To do this, choose the widest aperture your lens allows. At f/2.8 the opening in your lens is physically wide open, creating what’s known as shallow depth of field. If you’re using a kit lens, the effect will be enhanced if you use your lens at a longer focal length, and get closer to the food.

2) Less is more

N I C O L A

By N i c o l a

Irudayam?

By Irudayam?

While looking at the scene through your camera, ask yourself, “What’s really the subject here?” This simple question will help to shape your composition. While this may seem rudimentary at first, the impact is undeniable once applied. For a helpful reminder, consider taping a small note to the inside of your lens cap. Check all four corners of the frame carefully. Anything that does not work towards emphasizing the chosen subject should be eliminated. The goal is to create a clean frame as opposed to visual clutter.

3) Design your composition

Think beyond the obvious subject, and consider shape and form when crafting your composition. Adding a knife for instance, can balance a composition if placed in the rule of thirds. By shooting from directly overhead you create an elegant frame. In the image above, the towel in the left hand corner adds a pop of color, while the parsley, lime and avocado all add various shades of green. To add more shine to your silverware or reflective objects, in this case the knife, use a reflector board to bounce in extra light.

4) Get messy

Tracy Benjamin

By tracy benjamin

Stefano

By Stefano

To make your food photography look real and not staged, try adding crumbs to the set. This imperfection may seem odd at first, but it adds visual appeal. A bit of cheese sprinkled over the plate is an easy way to accomplish this. A little bit goes a long way here, so be subtle with your approach.

5) Use a high ISO

Simply put, the higher the ISO number is, the faster light can get into the camera. At ISO 800 you will get light into the camera faster than you would at ISO 100 or 200. When shooting food indoors you will often need to be at 1600 or even 3200. I generally do not recommend using ISO 6400 or higher as they will show an increased amount of digital noise, also known as grain. If noise is an issue for your camera, try using Lightroom’s noise reduction tool.

Editor’s note: as this article is aimed at newbies the author assumes you’ll be shooting handheld. If, however, you will be shooting with a tripod, it is recommended to use the lowest ISO possible to keep noise to a minimum and get the sharpest, crispest images possible.

6) Use natural light to your advantage

Felipe Neves

By Felipe Neves

Terence Lim

By Terence Lim

Rather than adding flash, or working with harsh artificial light, take advantage of the beautiful natural light available. This can give a food picture a feeling of bright airiness. Look for spaces where sunlight streams through a window to set up your shot. The morning is typically the best time of day for this, as the light is softer, with less contrast. You can keep shooting in the afternoon but you’ll want to move the food into an area with even light, to avoid harsh shadows.

7) Try black and white

David Pacey

By david pacey

Jazz Guy

By Jazz Guy

Perhaps the most famous food photo of all time is Edward Weston’s “Pepper No. 30”. It was captured in black and white, and shows the shape and form of the subject beautifully. In your food photography, try shooting in monochrome from time to time. Not only does the lack of color simplify the shot, but it also works well to reveal contrast, highlight, and shadow. If shooting in RAW, convert the shot to black and white in post-production. One of my favorite tools to do this is Exposure X by Alien Skin, as they have a large array of creative options.

8) Take a bite

DLG Images

By DLG Images

Xsomnis

By xsomnis

Great food photography doesn’t need to be staged. Once you are done with your shoot, go ahead and take a bite. This photo adds a sense of authenticity to your shoot. If you’ve made the viewer want to take their own bite, you’ve succeeded in your goal of creating scrumptious food photographs.

googletag.cmd.push(function() {
tablet_slots.push( googletag.defineSlot( “/1005424/_dPSv4_tab-all-article-bottom_(300×250)”, [300, 250], “pb-ad-78623” ).addService( googletag.pubads() ) ); } );

googletag.cmd.push(function() {
mobile_slots.push( googletag.defineSlot( “/1005424/_dPSv4_mob-all-article-bottom_(300×250)”, [300, 250], “pb-ad-78158” ).addService( googletag.pubads() ) ); } );

The post 8 Tips for Food Photography Newbies by Chris Corradino appeared first on Digital Photography School.


Digital Photography School

 
Comments Off on 8 Tips for Food Photography Newbies

Posted in Photography


Camera Modes Explained for Newbies

12 Jan

Okay, so for one reason or another you’ve decided to step up to a new, more capable camera. Maybe you’ve moved up from a point and shoot, or maybe your phone just doesn’t cut it for you anymore. But now what? There are all these buttons and dials to make sense of – where do you even start? Not to worry, read on!

Your Mode Dial Explained

Manual Mode is used to capture long exposure images such as this.

The Camera Mode Dial

Well, the first place to start, is by learning about camera modes. This is where you’ll tell the camera how you want to capture an image. Very likely, you’re looking at this dial, or it may be a display on the screen, and you’re wondering what all those different camera modes are.  I’ll explain all of that in a moment, but first I’ll need to go over a few definitions:

Aperture

This is the opening in the lens, that determines how much light enters the camera. The aperture also affects depth of field, which is the range of objects that are in focus – from those that are closest to you, to those farthest away. A smaller aperture setting will give you greater depth of field, while a larger aperture setting gives you shallower depth of field. Aperture settings work a bit backwards, in that the higher the number, the smaller the opening. For instance, f/4 is a larger aperture than f/11. Of those two, a setting of f/11 will give you greater depth of field. For more on how the aperture works, see How to Take Control of Aperture and Create Stronger Photos.

Shallow-DOF

Use of a large aperture creates a shallow depth of field as in this image, where only a small portion is in sharp focus.

Shutter Speed

The shutter speed determines the amount of time that light is allowed to enter the camera. It also determines how movement is recorded in an image. A faster shutter speed will freeze motion, while a slower one will blur motion. Faster shutter speeds are often referred to in fractions of a second, such as: 1/125th, 1/60th, 1/500th and so on – while longer shutter speeds can be one second, 5 seconds, or even 30 seconds long. For more on shutter speed, check out Demystifying Shutter Speed.

ISO

Your camera’s ISO determines how sensitive it is to light. Lower numbers, such as ISO 100 or 200, mean your camera is less sensitive, and are used in bright situations, such as outdoors on a sunny day. Higher numbers, such as ISO 800 or 1600, make your camera more sensitive to light, and are used when there is less available light, such as outdoors on a cloudy day, or indoors when you can’t use flash. Read 6 Tips for Using ISO Effectively With Your Camera for more on setting your camera’s ISO.

Every camera’s mode dial is a bit different. The major manufacturers all tend to have the same, or similar basic modes, but each may have their own spin on things, or even throw in a few of their own special modes. In this article I’ll deal with the basic modes that are common to pretty much everyone.

The Basic Modes

Mode Dial

The Mode Dial (a Nikon dial is shown here)

Your camera will have a few basic modes, where the camera takes control of everything, and all you have to do is push the shutter button to take the picture. These modes can be a good place to start if you’re unsure of how to get a specific type of picture.  Keep in mind that when using these modes, the camera is controlling everything, including: color, contrast, white balance, shutter speed, aperture, and ISO. The most common of the basic modes are:

Auto Mode

Depending on your camera’s brand, this will be indicated in one of several different ways. Sony uses a green camera icon, Canon uses a green box, and Nikon uses a camera with the word Auto above it. What you need to know about this mode, is that the camera is making all exposure decisions for you. If the camera is a recent release, it may also be using a type of Intelligent Auto mode, where it analyzes the scene you are taking a picture of to determine the best settings. The flash may pop up if needed. The camera will set an appropriate aperture, ISO, and shutter speed to allow you to hold the camera and get a good exposure.

Portrait Mode

Portrait Mode is usually indicated by a head icon of some kind. When this mode is selected, the camera optimizes your settings for taking pictures of people. It will select color settings, choose a fairly shallow depth of field, and a fairly fast shutter speed, to ensure that your subject is not blurry. The camera may decide that flash is necessary, and fire if it is needed for exposure. Want to learn more about shooting portraits? See 10 Crucial Things You Need To Think About for Portrait Photography.

Portrait Mode

Portrait mode is great for capturing images of people. Be aware your camera’s flash might fire if there’s not enough light!

Landscape Mode

This mode is generally indicated by an icon containing mountains. When you select Landscape Mode, you are telling the camera you’re shooting scenery. The camera will record vivid colors, and set a small aperture for maximum depth of field. You may also need a tripod, as the shutter speed may be too slow to handhold the camera without blurring the image. The flash will not pop up in this mode. For more on photographing landscapes, take a look at 7 Landscape Photography Mistakes That Could be Ruining Your Photos.

Landscape mode is used for scenes like this where you want a lot of depth of field.

Landscape mode is used for scenes like this where you want a lot of depth of field.

Sports Mode

An icon of a running man indicates Sports Mode. This setting is best for capturing subjects that are moving, such as children playing, or a sporting event. The camera uses a faster shutter speed to freeze the motion of the subjects, and will use a wider aperture for shallower depth of field. The ISO may be raised to accommodate the faster shutter speed, and the flash will not fire. If catching action is your thing, Catching the Action: Photographing Youth Sports has some tips for getting started.

Sports Mode

Sports mode will set a shallow depth of field and a fast shutter speed to stop action.

Night Portrait Mode

That picture of the person with a star or moon behind them? That’s night portrait mode. This mode is used to capture pictures of people at night, usually firing the camera’s flash to illuminate them. However, the camera will also use a slightly slower shutter speed, and a higher ISO, to allow any ambient light to record in the image as well. Think of it this way – if you want to take a picture of someone at night in front of a neon sign, and you want the glow of the neon to show up in the image, this is the mode to use.

Close-up Mode

Almost invariably, an icon featuring a flower indicates Close-up Mode. Many people incorrectly call this Macro Mode. I say incorrectly, because macro generally means you are recording the objects you are photographing at life size, or larger. Close-up mode is used when you are photographing an object very close to the camera. Each manufacturer uses this mode a bit differently. While Nikon states that the camera will use a small aperture to maximize depth of field, Canon states that it will use a wide aperture to blur the background. The camera will also attempt to focus on the nearest subject to the camera. In each case a tripod may be necessary to work with a slower shutter speed.

Close-up Mode

Advanced Modes

The advanced modes on your camera’s mode dial grant you more control over exposure choices to some degree, depending on which mode you select. In addition, you’ll have the flexibility to choose picture styles, white balance, and other settings as well. Let’s start with the more basic of the advanced modes, and move on from there.

Program Mode

Contrary to popular belief, the “P” on the mode dial does not stand for “Perfect”. It stands for Program, and is Auto Mode’s big brother. Program mode is a good general use option. The camera will select the ISO, aperture, and shutter speed for you. Sounds like Auto Mode, right? It’s similar, but in Program mode, you have the ability to choose the white balance you want, the picture style you want, and you have the ability to shift the exposure, so if the camera selects a shutter speed or aperture you don’t want, you can shift that setting, and the camera will adjust the others accordingly. Your Guide to Understanding Program Mode on Your Camera can provide further insight into this setting.

Aperture Priority Mode

Aperture-Priority

Once you know how the advanced modes work, an image like this can be done a number of ways. Either Aperture Priority with a small aperture, or Manual mode with full control, could be used.

On Canon or Pentax cameras, this mode is indicated by an Av on the dial, while other manufacturers simply use an A. This mode is exactly what it says – you choose the aperture setting you want, usually deciding on such a setting to achieve a specific depth of field, the camera will then set the appropriate shutter speed to achieve proper exposure. You will also be responsible for choosing an ISO setting. Many cameras now feature an AUTO ISO setting, which lets the camera choose the ISO, if you’d rather not be bothered with selecting it yourself.

Aperture priority is best used when you know you want a specific depth of field for your image. For instance, if you’re shooting a landscape or grand vista, you’ll likely want the entire scene in focus, so you’ll want to choose a smaller aperture, such as f/16, to achieve that. The camera will then set the appropriate shutter speed for proper exposure. You’ll need to be aware of the shutter speed the camera selects, as you may need a tripod to keep the camera still if a slower shutter speed is necessary.

Shutter Priority Mode

The S on your mode dial (Tv if you have Canon or Pentax) stands for Shutter Priority mode. The Tv stands for Time Value, or the length of time the shutter remains open for exposure. This mode is the opposite of Aperture Priority. You’ll choose the shutter speed, and the camera will set the appropriate aperture, to give you the proper exposure. Remember, you’ll also need to set the ISO to ensure your exposure is correct, or set AUTO ISO so the camera can do it for you.

Shutter-Priority-Panning

Use of shutter priority allows you to select the shutter speed for panning shots like this one.

Shutter priority is useful when you know you want to use a certain shutter speed to capture motion in a specific way. For instance, if you are photographing sports, you know you want a faster shutter speed to freeze the action. You’ll likely set a shutter speed of 1/500th (or faster) to ensure you’re doing that, and let the camera set the aperture for the appropriate exposure. For more information on both Aperture Priority and Shutter Priority modes, see Getting off Auto – Manual, Aperture and Shutter Priority modes explained.

Manual Mode

Universally indicated by an M on your mode dial, in Manual Mode you are truly flying solo. You are responsible for setting your aperture, shutter speed, and the ISO, to achieve the proper exposure. This gives you the ultimate freedom in creating images, as all camera settings are available for you to set, and change as you see fit. You’ll want to keep an eye on your camera’s meter to be sure you aren’t over or underexposing the image. How to Learn Your Camera’s Light Meter and Master Manual Mode is a great primer if you’re ready to take the plunge and learn to shoot manually.

If you’re still not sure where to start, have a look at A Beginner’s Guide to Choosing Shooting Mode for further clarification.

googletag.cmd.push(function() {
tablet_slots.push( googletag.defineSlot( “/1005424/_dPSv4_tab-all-article-bottom_(300×250)”, [300, 250], “pb-ad-78623” ).addService( googletag.pubads() ) ); } );

googletag.cmd.push(function() {
mobile_slots.push( googletag.defineSlot( “/1005424/_dPSv4_mob-all-article-bottom_(300×250)”, [300, 250], “pb-ad-78158” ).addService( googletag.pubads() ) ); } );

The post Camera Modes Explained for Newbies by Rick Berk appeared first on Digital Photography School.


Digital Photography School

 
Comments Off on Camera Modes Explained for Newbies

Posted in Photography


10 Fundamental Tips for Newbies in the Wedding Photography Business

06 Jan

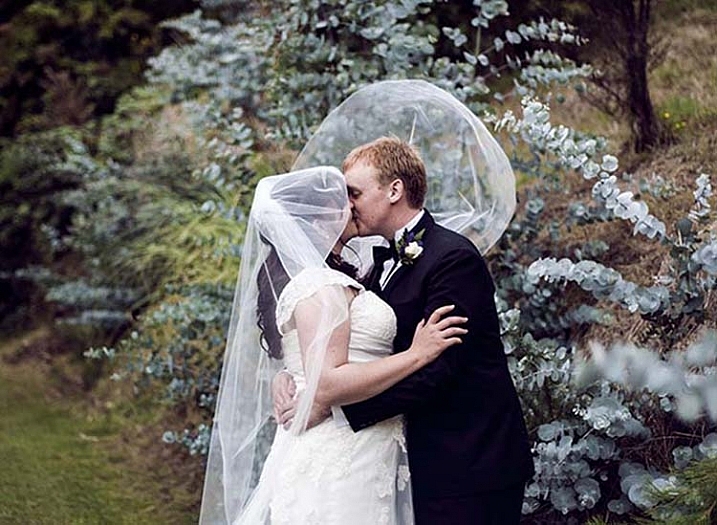
So, you’ve decided you want to enter the wonderful world of wedding photography. Now it’s time to get prepared and arm yourself with as much know-how as possible. After all, you are going to be responsible for capturing the magic of this once-in-a-lifetime event – no pressure!

Here are the top 10 things I have learned on my journey, that are valuable to anybody breaking in to the wedding photography business.

DSC 2518

1) Experience and second shooting

You’re new to the scene, and may not have any experience photographing a wedding, other than that time you used your point-and-shoot camera at your cousin’s wedding. So, how do you get experience photographing a wedding, in a professional setting? Offer your services as a second shooter!

There are a few reasons why this is a highly valuable experience if you’re thinking of becoming a wedding photographer. The most obvious being that you will gain on the job experience, as well as building a wedding photography portfolio. By becoming a second shooter, you will also meet established wedding photographers, and begin to network with other pros. A great way to begin second shooting is to research wedding photographers in your area, and contact three to five that you like the most. You can also use Facebook and search for photographer groups to advertise yourself. Offer your services for free to start, and you should hopefully land yourself a job pretty fast.

When you secure a gig with a photographer, be punctual and polite on the big day. Observe the photographer’s behaviour, and the way they have structured the big day. This will help you get a feel for how you will one day operate your own business. If there is anything you are unsure of, or want to know more about, asking the photographer once the rush of the wedding is over, is a great way to get a better insight.

DSC 2680

2) Compare and prepare

You’ve assisted a few photographers at a number of weddings, and now you want to take the reins. Good job! At this stage, there is a lot to think about, and begin preparing. You need a presentable portfolio to show prospective clients, as well as prices, packages, and a solid contract. A great way to roll two of those things together is to create your own website.

This will allow you to have an online gallery of your images, along with a page outlining all pricing and further information. If you’re not a HTML whizz or web designer, don’t fret – you can sign up to a website that will offer you pre-made themes, designs, and layouts. Wix is a great place to start, you can select a yearly plan, which will give you a domain name, and eliminate all of their advertisements from your website. Plus – their website editing tool is super straight-forward and will allow you to customize your website easily. Another low cost option is Squarespace, starting at $ 8/month.

When you are designing your packages and conjuring up your pricing, comparison is key. Take some time to think about all the expenses involved in your business and compare this to the rate you wish to charge. Depending on your expenses, it might work in your favour to price yourself slightly higher or lower. Things to consider are: your overhead costs (rent, telephone, utilities, web fees, etc.), equipment, price of goods including wedding photography albums and/or prints, and you should also think about your own salary and how much business you hope to accumulate during the year. Remember, you are a novice – clients will not be choosing you because of your years of experience, but because of your passion and artistic flair!

You will also need to think about having a contract ready to go should a client ask to see a copy. There are loads of great wedding photography contract templates online, find one you like and do some adjusting. Important things to consider when writing a contract are: model release, image copyright, illness or injury, pricing and deposits/retainers, sizing/format of images, etc. Always have a lawyer take a look at your contract. Laws vary from place to place, and sometimes it is not my place legal guidance to others. Remember, we are photographers – not lawyers.

DSC 2716

Read these related dPS articles for more on contracts:

  • The Biggest Legal Mistake Photographers Make
  • Wedding Photography Agreement (Contract) Tips

3) Sell yourself

You’ve compared, you’re prepared – now it’s time to don the marketing hat, and get your name out there. There are a few avenues you can explore, but something that always goes down well, is running a promotion or special offer. For example, you could offer a special bonus (such as 20 free 5×7 prints, or a free 16×20 wall print) on your wedding services for the first five people who make a booking. This will cost you a little to produce, but it will benefit you massively and almost guarantee you five weddings.

A great way to utilize social media (again) is to search Facebook for wedding groups in your area, and advertise yourself there. Be sure to read the rules of the group and make sure you’re allowed to advertise your services in the group, some don’t allow it and you will be blocked. Have your website ready to go, so that as soon as you get some interest, you can fire through a quick message with a link to your work and pricing.

DSC 7202

4) Communicate

By now you should have a few people enquiring about your services and wanting to know more. At this stage, quick, friendly, and professional communication is your best friend. Have a script ready, so that as soon as you receive a message, email, or phone call you have a short and informative response ready to go. Remember, this is a script – NOT a sales pitch! Keep it short, sweet, and straight to the point.

My normal script goes along the line of, “Hello! Thanks for the message. Of course, I would be interested in photographing your wedding – please feel free to head on over to my website to see more of my work and pricing (insert website here). Do you mind me asking what is the date of your big day?” By asking for the date of the wedding, you are opening a conversation which is a hugely important part of the process. Once you have had a brief conversation regarding the details of their wedding, say to them that you will be in touch in a couple of days. This leaves the ball in their court so that they do not feel pressured, but also allows you to follow up with a friendly message and hopefully secure a consultation.

DSC 7742

5) Meetings

You’ve secured a consultation with your first potential client – yay! Turn up 5-10 minutes before the scheduled time, this is your only chance to make a first impression, and being late is a BIG no-no. Once you have greeted your clients with a smile on your face, ask them a few things about themselves. This initial meeting is a chance for them to get to know you (and vice versa) and your process, so go in there with a clear mind and plan of action.

Spend five minutes briefly explaining a run-down of how their big day will work from your perspective, and also explain your pricing, packages, and deposit payments. Take a copy of the contract and give it to them to take home and look over, let them know if they have any questions to contact you.

After this initial meeting, follow up with them three days later, and ask if they want to secure a spot. Make it clear that in order for them to secure their date in your diary, the deposit needs to be paid. If the clients liked you, and books you as their photographer, well done! You should always have a follow up meeting at their wedding venue, so that you can explore the grounds together, talk about potential photographic opportunities, and let those creative idea juices flow.

DSC 3417

6) The Essential List

You’ve got your first official booking, the deposit is paid, and the ball is well and truly rolling. Good on ya! Now you need to make a list of the absolute essentials that you need for the big day. These things include:

  • Family and group shot list
  • Bridal party shot list
  • Full itinerary of the day
  • Your own photographic equipment
  • Any post-wedding preparations

Contact the bride and groom and ask them to send you a list of all the must-have group portraits that they want, and also ask them for a full itinerary of the day. Ask them to allow an hour for photos between the ceremony and reception, in order to ensure that they get all the photographs that they want. Make a list of the equipment you will be taking including SD cards, spare batteries and chargers. If you are including prints or albums as part of your package, take some time to do the research and find a reputable, quality printing agency.

DSC 4113

7) Itinerary and planning

The big day is getting closer and you’re getting nervous – use the itinerary of the wedding day to start scheduling your own plan of action. Decide which shots you want, and when is the best time of day to take them. Be mindful of the time of day and position of the sun if you are shooting outdoors. You don’t want the subjects to appear silhouetted – but you also don’t want to blind your clients with the sun, as this will make for very squinty pictures.

Be sure to also schedule your own breaks – after all, this is a job and you will need a break. I find the best time to have a break is during the lunch or dinner, when everybody is busy with the food. Nobody likes being photographed with their mouth full of food, so this is a great time for you to sit down and enjoy a well deserved break and bite to eat as well. In most cases, the bride and groom will feed you (if this is really important, you can even put it in your contract).

DSC 7929

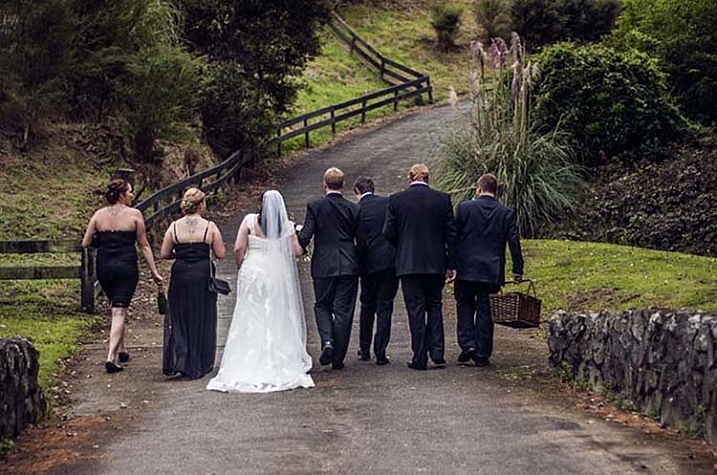
8) Recruit the best man and maid of honour

This will make your life so much easier, and will also enhance the experience of shooting family portraits. The best man or maid of honour are usually familiar with the family members, and will help herd the groups to make sure that everyone is ready for their portrait with the bride and groom. Let the bride and groom know that you intend to do this at your second meeting, and ask for a contact phone number or email address for the maid of honour and the best man. You can then drop them a line and introduce yourself before the big day, and ask them ever so nicely if they would be willing to stick around for family portraits to help you organize the herds of family members. Hopefully, they will see you operating like a well-oiled machine and the whole experience will not be too stressful on anybody. No one likes a stressed out photographer. This will also help you get to know them a bit better before the bridal party photographs, which is a major advantage in getting more natural, down-to-earth photos of the group.

DSC 3917

9) Have a perfectly balanced attitude on the big day

The big day is here – don’t panic! Refer to your equipment check list to double, triple, and quadruple check that you have not forgotten anything. When you turn up to the first location and start shooting, you need to be prepared to wear an infectious smile for the whole day. This will help all of your subjects relax and smile during their photos. Remember – it’s fine to direct people during the staged family portraits, but do it as kindly as you can. Find the perfect balance between friendly and assertive for this part of the day.

Self-check for professionalism, there are a few things that I think of which are absolutely unacceptable. This includes: showing signs of stress, smoking (even if the bride/groom are doing it), chewing gum, spitting, or excessive drinking. Sometimes photographing a wedding can seem a bit like a party, but this is a job and it needs to be treated as such. Be approachable, and just a generally delightful person to be around. People will remember this, and you may even find another engaged couple at that very wedding who like you so much that they decide to make a booking. Word of mouth is truly the best marketing tool ever!

DSC_8003-1

10) Follow up

The big day is over, phew – you survived! Now it’s time to knuckle down and do some editing, you’ve got a whole bunch of beautiful photos that you need to begin post-processing. I use Photos on my MacBook to sort through the images, and add all my best shots to a different album – I then go through that album and spend time editing those images.

How you should follow up as communication is critical, even at this point of the process. Text or email your clients the next day, and let them know you had an awesome time photographing their big day, and that you’ve got some stunning photographs. Some people take a couple of days to edit and send their images, other people take weeks. I tend to give a timeframe of 14 days, although they are usually done within five to seven days. If the photographs are not done in seven days, drop them a line and keep them updated on your progress, something along the lines of, “Hey guys! Just to let you know I have edited around 500 of your images and only have 100 to go. As soon as these are done I will be in touch to schedule a viewing.”

DSC_8089-1

Once your edits are done, schedule a viewing time so that they can choose their favourites, and any potential prints. The final step is simple – once all is said and done, ask the client to provide you with an honest testimonial. This will give you more content to add to your website, and is also a great way for future clients to read about someone else’s experience with you.

From start to finish, the process of starting a wedding photography business takes hard work and determination, but you got there with (hopefully) no hiccups. Nice work!

Want more on similar topics? Check out these dPS articles:

  • 6 Things to Consider Before Becoming a Professional Photographer
  • What Defines an Amateur versus a Professional Photographer?
  • 4 Things You Must do BEFORE Becoming a Professional Photographer
  • 3 Questions to Ask Yourself When Starting a Photography Business

googletag.cmd.push(function() {
tablet_slots.push( googletag.defineSlot( “/1005424/_dPSv4_tab-all-article-bottom_(300×250)”, [300, 250], “pb-ad-78623” ).addService( googletag.pubads() ) ); } );

googletag.cmd.push(function() {
mobile_slots.push( googletag.defineSlot( “/1005424/_dPSv4_mob-all-article-bottom_(300×250)”, [300, 250], “pb-ad-78158” ).addService( googletag.pubads() ) ); } );

The post 10 Fundamental Tips for Newbies in the Wedding Photography Business by Jasmine Monrouxe appeared first on Digital Photography School.


Digital Photography School

 
Comments Off on 10 Fundamental Tips for Newbies in the Wedding Photography Business

Posted in Photography


Mastering the Exposure Triangle for Newbies

03 Dec

When I first got my digital camera, words like Aperture and ISO were foreign to me, and it took me a couple of weeks of reading and studying a lot before the lightbulb turned on in my head. You might be feeling a little confused, and you may even feel like you will never get your camera out of Auto mode, because it’s just too hard to understand.

exposure-triangle.jpg

So, if you are unfamiliar with your camera, or just starting out, you might appreciate a little explanation of the basics. Sometimes reading about these things in slightly different words helps something new to click each time.

Introducing the Exposure Triangle: Aperture, Shutter Speed, and ISO

These three things work together to expose your picture perfectly, and after experimenting for a while, you may even find that you can use your knowledge of these three things to manipulate your picture for different effects.

APERTURE

The aperture or f-stop is how wide open your lens is. Imagine a hole: if it’s open just a teeny bit, there won’t be very much light coming through. If it’s a big hole, lots of light will come through. The tricky thing with aperture is that often confusing numbering system.

  • SMALL numbers (like f/1.8) = wide open aperture (large opening).
  • BIG numbers (like f/22) = small aperture (teeny opening).

That confused the heck out of me at first, but now it’s second nature. It will become second nature to you too, after some practice!

Another thing that can be affected by aperture is depth of field, or how much of your picture is in sharp focus. A wide open aperture (small number) will make less in focus, and a closed down aperture (big number) will make more in focus. Let’s look at some photos that demonstrate depth of field:

aperture-1

With the aperture set to f/3.5 on the left, you have a blurrier background (my favorite). Also notice that the shutter speed (1/640th) is fairly HIGH, we’ll get to this later.

aperture-2

A little bit smaller aperture (bigger number), makes the background come into focus a bit more, and the shutter speed is slowed down.

aperture-3

See what I mean? If you want to play around with Aperture, try putting your camera in Aperture Priority mode (A on Nikon, Av on Canon – if you have a different camera, check your manual).

Now, remember that all three parts work together? You probably started seeing how if you noticed the shutter speed changing with each of those different aperture values in the pictures above.

SHUTTER SPEED

The shutter speed is how fast the shutter opens and closes. If the shutter is open longer, more light is let into the camera. If it opens and closes really fast, less light is let in.

If you have a wide open aperture, your shutter speed will need to be faster, because you’re already letting a lot of light in the lens opening. If your aperture is small, your shutter will need to move slower, so there is more time for light to get to the sensor.

If you want to freeze the action, or hand-hold your camera, then a faster shutter speed is needed. If you want to create blur, then you need a slower shutter speed. For example:

Shutter-Speed

The vehicle in the photo on the left was driving past my house quite fast, but since I had the shutter speed set to 1/2000th of a second, it froze the action. It looks like the vehicle could be sitting still in the middle of the road.

The truck on the right is a blur going past, but everything else is still. 1/10th of a second was slow enough to blur the truck as it sped past. Notice the f-stop. Since the shutter was open for so long, the opening in the lens needed to be smaller to balance the exposure.

Try putting your camera in Shutter Priority mode (S on Nikon, Tv (time value) on Canon) to experiment with different shutter speeds. As you play with these different priority modes, notice what the camera chooses for the rest of your settings. The more you pay attention to these things, the more knowledge you’ll have to be able to set everything yourself in the future.

Okay, so now you’re probably asking, how does ISO fit into all of this?

ISO

The ISO is your camera’s mood. It can be all uptight and picky, or it can be easy-going and laid back. If you have the ISO set to a low number (100) your camera will want light, and plenty of it, because it’s going to take a smooth, crisp picture, and this requires perfect conditions. If you have your ISO set to a high number (3200) it can handle low light, because it’s not going to work as hard – a noisy (grainy) picture is good enough for Mr. High ISO.

So, how does this apply to your photography? Let’s say you wanted to take a picture in the evening, and you don’t want to use a flash. Just bump the ISO up, and it will allow you to have a faster shutter speed, or a smaller aperture (bigger number) and still accept the light conditions to expose correctly. Or, if you’re taking pictures at a sporting event, and you want to make sure you catch that action, but the light isn’t great, bump the ISO up. Or you may even want that moody grainy effect (it can be really cool)!

If you ever get frustrated because there’s just not enough light, and your pictures are blurry because the shutter speed isn’t fast enough, and you’re about to scream – just remember to bump the ISO. You could also leave this on Auto, but I usually don’t. My camera always seems to choose a higher ISO than I feel it needs. However, don’t forget to put it back down after you’re done. You don’t want to take a whole bunch of photos in the middle of the day at a 3200 ISO because you forgot to change it after your evening indoor party photos the night before.

Here’s a little demonstration:

ISO3200clock

ISO 3200

The photo above was taken in a very dimly lit room. Notice the digital noise?Notice the crispness of the photo below?

ISO100clock

ISO 100


Conclusion

Well, that’s the exposure triangle in a nutshell. I hope this helped, especially if these three exposure factors have been confusing to you in the past. Please ask any questions in the comments, and I’ll answer them the best I can.

googletag.cmd.push(function() {
tablet_slots.push( googletag.defineSlot( “/1005424/_dPSv4_tab-all-article-bottom_(300×250)”, [300, 250], “pb-ad-78623” ).addService( googletag.pubads() ) ); } );

googletag.cmd.push(function() {
mobile_slots.push( googletag.defineSlot( “/1005424/_dPSv4_mob-all-article-bottom_(300×250)”, [300, 250], “pb-ad-78158” ).addService( googletag.pubads() ) ); } );

The post Mastering the Exposure Triangle for Newbies by Melinda Smith appeared first on Digital Photography School.


Digital Photography School

 
Comments Off on Mastering the Exposure Triangle for Newbies

Posted in Photography


5 Practical Lightroom Tips for Newbies

13 Sep

One of Lightroom’s most important assets is also its Achilles Heel. It is such a powerful program that many of its useful features can take a long time to discover, and are often hidden beneath a blanket of keyboard shortcuts and obscure menus.

When I first started learning Lightroom I was already a longtime user of Apple’s image processing program Aperture, and for a while after making the switch I was overwhelmed by the sheer number of options available. With so many menus, buttons, and sliders at my fingertips I thought there was no way I would ever be able to make sense of them all. After much experimenting, online searching, and good old-fashioned trial and error, I have figured out a workflow that suits my needs; the same holds true for most photographers. You may not use every single feature and option available to you in Lightroom, but the key is to find the tools that work for you and learn to master them.

five-lightroom-tips-for-beginners-sunrise

Adjusting the RAW file to arrive at this final image took a while, but was a lot easier thanks to some simple tips and tricks described below.

That being said, here are five of the most practical, useful features that I use on a daily basis. Try them out and they may greatly enhance your own experience with Lightroom as well.

1. Create import presets

five-lightroom-tips-for-beginners-Presets
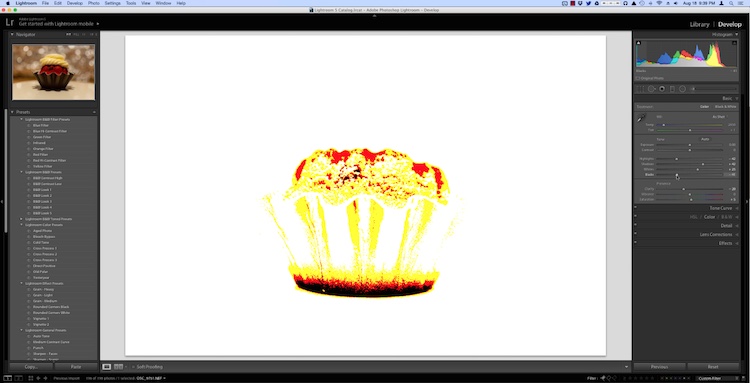
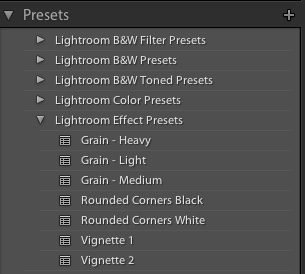
You probably already know that Lightroom contains dozens of presets to get you started when editing your photos, which can be quite handy when you need a quick adjustment or effect such as Aged Photo, Bleach Bypass, or any number of black and white conversions. These presets are not special filters like what you might find in Instagram or other such image-sharing programs, but in fact are pre-made manipulations of the various sliders and controls available to you in the Develop module. The Cold Tone filter, for example, is a collection of saved values for the White Balance, Tone, and Presence adjustments in the Basic Develop pane.

You might also be aware that you can create your own presets by adjusting any of the Develop parameters and then choosing New Preset from the Edit menu. But you can extend this functionality a step further by automatically applying a given preset, even one you create yourself, to all your pictures upon import. This is incredibly useful if you have a given set of values that you like to use as a starting point. Rather than making similar adjustments to things like Highlights, Shadows, and Clarity for every image you can simply apply default values to every picture you import. To do this, use the Apply During Impor” pane in the Import dialog, and select any of Lightroom’s existing Presets or one that you have made on your own.

five-lightroom-tips-for-beginners-D7100-Import-Preset

As an example of how this can be useful, I often found myself applying similar adjustments to every picture that I took with my Nikon D7100 because I was not happy with Lightroom’s interpolation of my RAW files. This became somewhat time-consuming, so I saved my common adjustments as a Preset called, D7100 Import. Now every time I import photos from my D7100 memory card, I apply that Preset. I have a unique Preset saved for each of my cameras, and applying these settings on import has saved me untold hours and a great deal of frustration. It’s a fantastically useful feature that could greatly improve your own workflow as well.

2. Use number keys to fine-tune adjustments in the Develop Module

When working in the Develop module it can be a bit tricky to get the exact values you want by manually moving the sliders. One way to fix this is to give yourself a bit more real estate by hovering your cursor over the left side of the panes and dragging until the panels are much wider.

five-lightroom-tips-for-beginners-develop-sliders

Another handy trick is to use the arrow keys to adjust the number values in very small increments. For example, click on the White Balance numerical value, and press the Up or Down arrow keys to change it in increments of 10. Or highlight Clarity and press Up or Down to change it in increments of 1. For greater adjustments, hold down the Shift key while you press Up or Down, which will alter White Balance in increments of 200, Clarity in increments of 10, and so on.

3. Customize the Develop Module

If you’re like me, you may have been overwhelmed at the massive number of options in the Develop module, but thankfully there is a way to tame this beast by right-clicking anywhere in the adjustment panels. Doing so brings up a menu that allows you to disable the adjustments you don’t want so you have a cleaner and less cluttered working environment, and don’t waste time clicking on features you never use.

five-lightroom-tips-for-beginners-hide-panels

One especially useful element of this right-click menu is called Solo Mode, which is a way to de-clutter the Develop module even more by collapsing all the panels except the one you are currently using. I used to waste all sorts of time scrolling up and down through the various open panels, expanding or collapsing them to get to the one I really wanted. But by using Solo mode every time I click on a new panel, the other one I was using is automatically shrunk to just its title. This one little feature has single-handedly saved me not just a lot of time, but a great deal of headache medicine as well.

4. Create Smart Collections to automatically sort photos in the Library Module

Lightroom’s Library module is a great way to help you keep your images organized. You can create virtual folders called Collections (e.g. Ceremony, Reception, and Speeches for a wedding) that can even be placed inside of Collection Sets (e.g. Smith-Miller Wedding).

But what I find even more useful is the Smart Collections feature which allows you to dynamically organize your images, based on any number of conditions you specify. To create a Smart Collection, choose New Smart Collection from the Library menu and specify the parameters you want to use. Any picture that meets these criteria, at any point in your editing process, will automatically be placed inside the virtual folder you have just created.

five-lightroom-tips-for-beginners-smart-collection

In the above example I have created a Smart Collection that automatically sorts through all my photos, including any that I import after the Smart Collection is created, that meet specific criteria. Using Smart Collections are a great way to enhance your organization process, and help you sort through your images to focus on the ones you really want to work with.

5. Hold down the Option/Alt key when adjusting Develop sliders

The effects of many of the adjustments in the Develop module are self-evident; increase the Exposure and your image will get lighter. Increase the Saturation and your photo will lose a bit of color. But what about the adjustments that are not so easy to see? One particular set of sliders I use all the time is under Sharpening in the Detail pane, but the exact effects of the Radius, Detail, and Masking are sometimes difficult to see. This problem can be solved by holding down the Alt/Option key when moving almost any slider in the Develop module, which will show you a realtime display of exactly what is happening when you make the adjustment.

five-lightroom-tips-for-beginners-pastry

As I was editing this photo I needed to make some adjustments such as dialing down the Black levels, but I didn’t want to go so far so as to make any part of the image completely black. (That is, I did not want to clip anything in the picture.) By holding down the Option key as I adjusted the Black slider I was able to see a realtime display of what areas of the image were being affected:

five-lightroom-tips-for-beginners-pastry-option-key

In the above image the bottom of the pastry has become completely black, which means it cannot get any darker while the red areas will soon become entirely black if I continue to move the slider to the left. The yellow areas are being affected, but not so much just yet that I am losing my color data. This works for almost every adjustment slider in the Develop module, and can greatly assist you in making sure you are doing the edits precisely how you mean to.

These five Lightroom tips and tricks have been a major boon to me as I have worked with the program over the years, what about you? What are your favorite aspects of Lightroom that you find particularly handy? Or do you have any hidden gems that others might not know about? Leave your thoughts in the comments below.

googletag.cmd.push(function() {
tablet_slots.push( googletag.defineSlot( “/1005424/_dPSv4_tab-all-article-bottom_(300×250)”, [300, 250], “pb-ad-78623” ).addService( googletag.pubads() ) ); } );

googletag.cmd.push(function() {
mobile_slots.push( googletag.defineSlot( “/1005424/_dPSv4_mob-all-article-bottom_(300×250)”, [300, 250], “pb-ad-78158” ).addService( googletag.pubads() ) ); } );

The post 5 Practical Lightroom Tips for Newbies by Simon Ringsmuth appeared first on Digital Photography School.


Digital Photography School

 
Comments Off on 5 Practical Lightroom Tips for Newbies

Posted in Photography


Photography Branding: Pinterest Marketing Guide for Newbies

13 Oct

Pinterest has grabbed the attention of many social media marketers and for good reason. The image sharing site has gathered millions of fans since its debut two years ago. With Pinterest you can easily share photos you’ve found around the web and interact with people from all over the globe. I previously wrote on Photodoto about Pinterest photography boards worth Continue Reading

The post Photography Branding: Pinterest Marketing Guide for Newbies appeared first on Photodoto.


Photodoto

 
Comments Off on Photography Branding: Pinterest Marketing Guide for Newbies

Posted in Photography