RSS
 

Posts Tagged ‘near’

How to Find Inspiration Photographing Locations Near Home

20 Nov

Everywhere you look there are thousands of images depicting beautiful places in the world. How many times have you thought to yourself, “I wish I could travel so I could take the same photographs?” The reality is that most of those photos were taken by people who live close to the locations, or have the ability to travel there multiple times.

It is a statement that you hear from many photographers. It may be true, but the truth is most of us live in wonderfully rich photographic areas. The problem is that you see it every day, so it no longer seems interesting.
leanne-cole-photographing-home-008

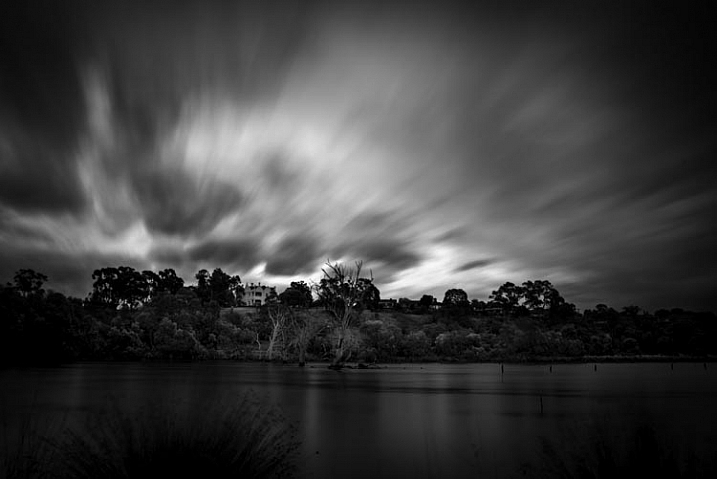
Knowing that a storm is coming, then being able to get to a good location quickly, is an advantage when you photograph near where you live.

What would you recommend to a visitor

If another photographer was coming to your area and wanted to know places to go, what would you recommend? Think about what someone else might be interested in, that is a way you can photograph it. Try to look at your area from another point of view.

How to find something to shoot

There has to be something unique or different about where you are located. Look at the history of your town or area. See if you can find out about an event that happened where you can visit the place. Use the history as your motivation for photography. Google the area around you, and see what you can find.

Think about interesting buildings, ones that are abandoned or still in use. There may be some interesting landmarks that can help tell a story. Perhaps there was an industry there that no longer exists.

For example, suppose in your area the local hospital started as a home for incurables. Then the land was given to the city for a permanent hospital. How has that hospital shaped the town? Is the original hospital still there? Has the hospital gone, but now something else is in its place?

There is always the possibility that nothing has ever happened. Maybe your location is devoid of that, and in which case you could photograph the normality of it. What makes it boring? What does the main street look like? Is there anything interesting there at all? There will always be something.
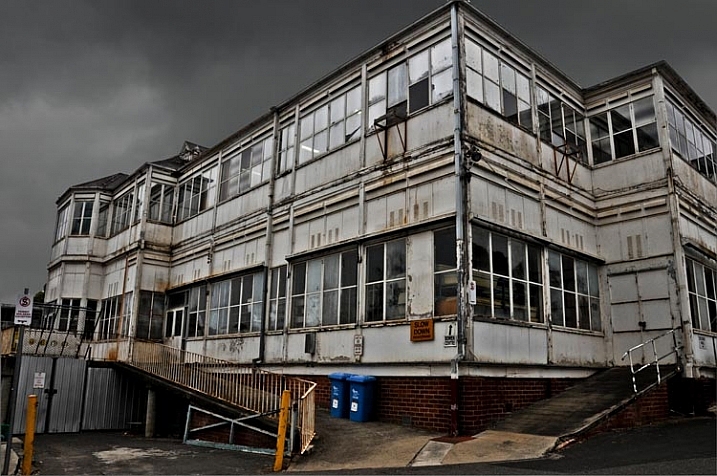
leanne-cole-photographing-home-001

An older part of the Austin Hospital in Heidelberg.

How far are you willing to travel?

Mark a circle on a map of where you would be willing to travel to in a day. For instance, you might be prepared to travel at least two hours to get somewhere. Perhaps time isn’t on your side, and you can only travel 15 minutes in any direction. That becomes your zone, and the area you are going to photograph.

My area is two hours, or around that. I will travel somewhere for the day and take photos. I will go back to the same areas. There is a lot that is within that area near where I live.

Find the story

Perhaps instead of finding individual images of the place you might be better off trying to do a whole story on it. Find the story of the area. What makes it important to the people who live there? Why have they stayed? Why do you live there?

The answers to all these questions will help you find the story, and can inform your photography.
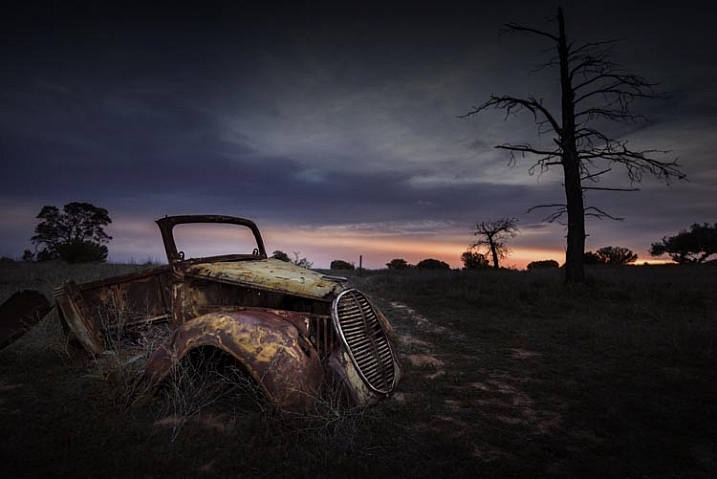
leanne-cole-photographing-home-002

An old car left to rust in the Mallee.

Advantages

When you photograph where you live, you have nothing but all the advantages:

1 – You can take photos at the best time of day

One definite advantage you have over visitors to your area, is that you can work out when the best time to photograph that spot. Then, you can go back as many times as you need.

If it is very close, you can get up early and see if it is worthwhile going there for a sunrise. Perhaps in the afternoon you can see if there are clouds in the sky, which might make it a good opportunity to get a sunset. You will be able to look out the window and figure out when you want to go.

Most people have to hope that the one time they go, the conditions will be perfect for what they want to photograph. You know how often that happens.
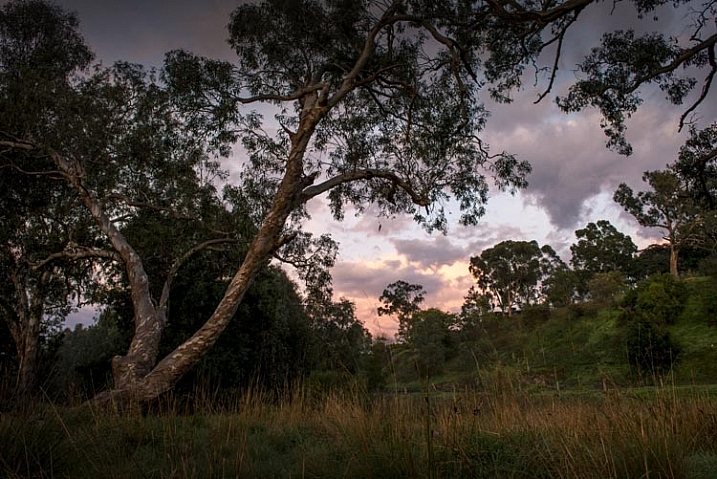
leanne-cole-photographing-home-003

Getting sunrises is easier when you can wake up and go down the road to capture it.

2 – Experiment with different techniques

You can try a lot different techniques to take photos. You can go home and see what you have, then go back and experiment with other angles or conditions another time. You can try more experimental types of photography, that other people who only have one opportunity to go there, might not want to try.

Every time you go, try to shoot it that spot a different way.
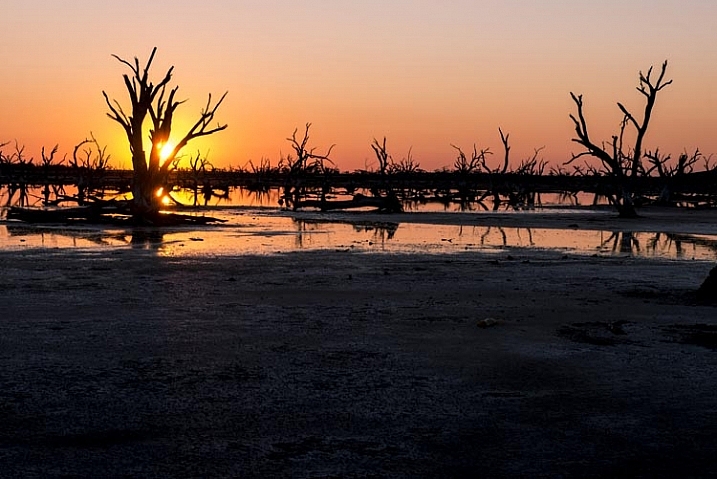
leanne-cole-photographing-home-004

Sunset over a salt pan in the Mallee. Being able to get back to the same spot to get the best photos is a bonus.

3 – Visiting the location multiple times

How often have you gone somewhere, put your photos on the computer when you got home and thought, “I wish I had noticed that tree” or something else on the side of the image? Maybe you wished you could have taken it at a different angle.

If you live there, that will never be a problem for you again. You can visit that spot as many times as you like, to get exactly the photos that you want.
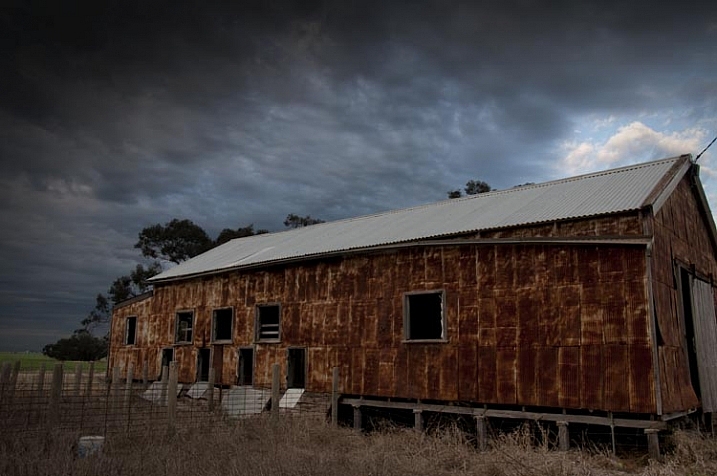
leanne-cole-photographing-home-005

Old towns can have great buildings that have just been left, like an old shearing shed make from kerosene tins.

4 – Have access to local knowledge

Visiting any places where you might only go once, you have to be content with information from the internet, or with what you see when you get there. However, when you live in an area, you can talk to people you know, who may be able to introduce you to others. If they know you are interested in the local area and taking photos, then you might find people coming to you, to tell you about places that you didn’t know existed.

Disadvantages

Are there really any disadvantages? Perhaps the fact that you aren’t going anywhere exotic to take photos, unless you already live somewhere like that.

When you decide to photograph the area you live in, you get all the advantages that so many others don’t have for that place. It is up to you to make the most of it. Some examples:

A Mallee Town of not much consequence

Take a small town in North West Victoria (Australia) where my mother lives. I go up there to visit all the time. According to the locals there is nothing there. But when I drive around, I see shops that are now empty, or a train station that has closed, and stopped being used many years ago. There are things that give hints to a time past, that was industrious. The town had a past where it was bigger, where those stores were open for business.

It would be easy to agree with the locals that there is nothing there, but that would be a mistake. The story is there in those closed buildings and what is left of the town. As a photographer you can then show what is happening there.
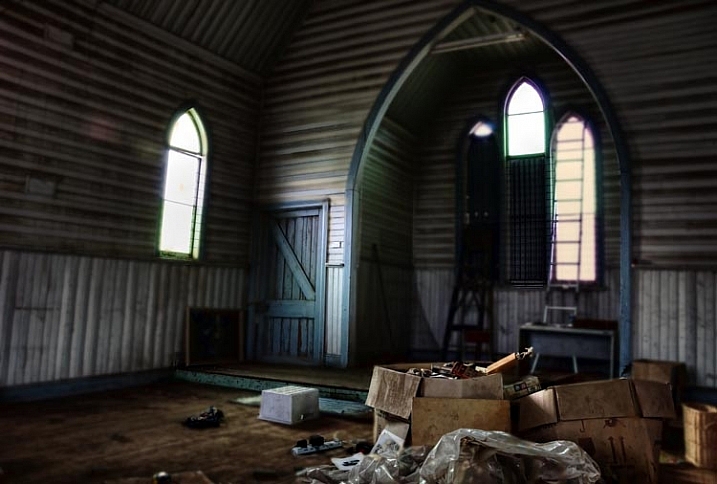
leanne-cole-photographing-home-007

Getting to know locals in towns can give you access to buildings, like this old church in a Mallee town.

Finding the history of where you live

For many years I always travelled to other places, in the city, or in the state of Victoria, to take photos because I was convinced that what was around me was boring. Who would be interested in what’s here?

I started to realize that this area has a rich art history. Some famous Australian artists have painted this area, and perhaps that was where I needed to start looking. Once I started looking with different eyes, a lot of new places started to open up to me. This area has some great parks. It is quite old so there are ancient homes, hospitals, cemeteries. Now I photograph it all the time.
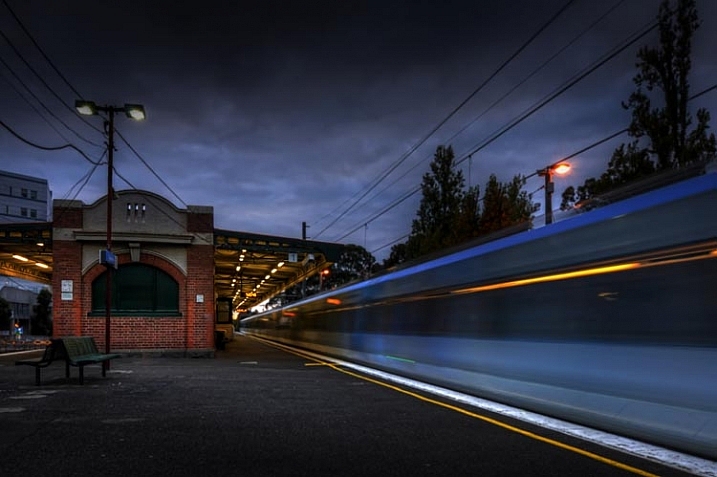
leanne-cole-photographing-home-006

Knowing the local train station and timetable, can be great for getting to the station at a good time to take photos.

When you photograph somewhere you live or a place you travel to often, you really get so many wonderful opportunities.

Many photographers dream of travelling to other places and photographing the world, but sometimes your best subject is right outside your door or within a stone’s throw of where you live. You just need to get out there and see what you can find.

Please share your local photography finds and your images in the comments below.

googletag.cmd.push(function() {
tablet_slots.push( googletag.defineSlot( “/1005424/_dPSv4_tab-all-article-bottom_(300×250)”, [300, 250], “pb-ad-78623” ).addService( googletag.pubads() ) ); } );

googletag.cmd.push(function() {
mobile_slots.push( googletag.defineSlot( “/1005424/_dPSv4_mob-all-article-bottom_(300×250)”, [300, 250], “pb-ad-78158” ).addService( googletag.pubads() ) ); } );

The post How to Find Inspiration Photographing Locations Near Home by Leanne Cole appeared first on Digital Photography School.
Digital Photography School

 
Comments Off on How to Find Inspiration Photographing Locations Near Home

Posted in Photography


7 Uncommon Tips for Winter Sunrise Photos Near Water

26 Feb

DPS3

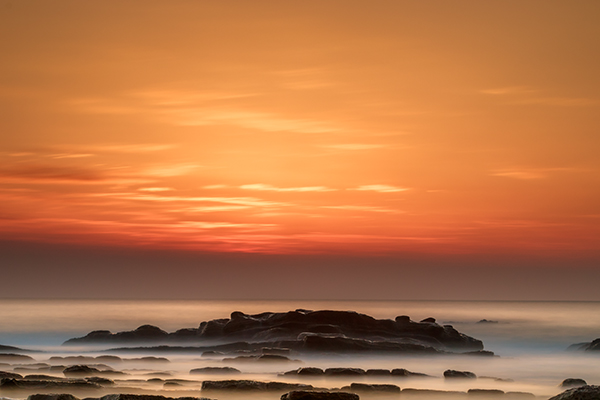
There are few things in photography that people love more than dreamy sunrise shots full of bold oranges, big suns, washing waters, and burnt horizons. The dawn of a new day is a spiritually significant event as our past misdeeds of yesterday are forgotten under the promise of fresh beginnings. Sunrise also affords us some of the best light to work with in photography.

However, if you live near the coast and you plan to get up early to take some sunrise shots that involve you being in or around rocks on the water’s edge, there are some key things you must remember, especially in the cold, winter months.

1. Set the alarm earlier than you think.

This is stage one. You’ve calculated that the sun rises at 6:00 a.m., you want to get there by 5:30 to set up, it takes you 10 minutes to get there, so you set the alarm for 5:10. But be honest, it never works like this does it? The alarm goes off at 5:10, it’s cold, you’re snug in bed, it’s dark outside, you were in the midst of a dream, and you roll back over. Missed sunrise. How often do you ever jump straight out of bed at 5:10 to take photos, in the midst of winter? By learning this mistake, I set the alarm for 4:40 then give myself three hits on the snooze button to take me to 5:10. It never fails (unless it’s cloudy!!)

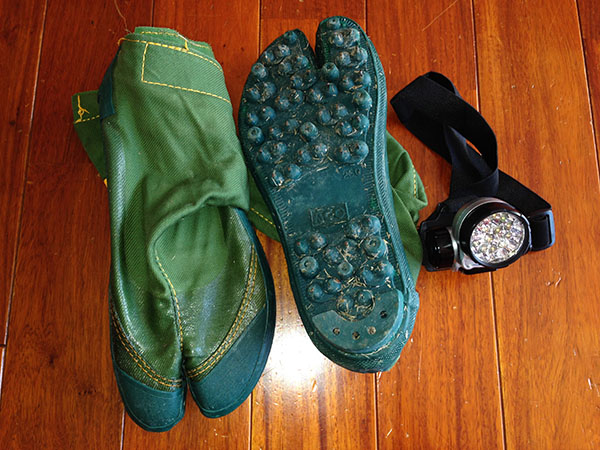
2. Make sure you have shoes with spikes on the bottom.

Think about it – you’re an avid photographer who has set up a kit to your liking with lenses, filters, batteries and your camera. You put it in your bag, put your shoes on, head to the wet, rocky location then bammo, you fall over on the freezing, slippery moss. Either you or your bag gets wet, and neither is a desired result. There’s nothing scarier than trying to keep your bag on your back and out of the water as you slip around the rocks on ill-equipped shoes.

I have fisherman’s boots that cost $ 40. They have small metal spikes on the sole, perfect for getting across the rocks, and for scurrying to new locations quickly. They’re waterproof too. Alternatively, you could try the little clamp-ons that hikers use in icy conditions. They work well too, but your shoes will get cold and wet.

3. Use a head torch (headlamp).

The first time I brought mine I felt utterly ridiculous, like I was a miner heading down into the pits. Now, I wouldn’t dream of not having one. The convenience of having both hands free to see where you’re going, to open and close your bag, and set your camera up in the dark is without comparison. Especially if you are trying to get filters and holders attached to the ends of lenses.

DPS5

4. Have at least two lens cloths and other lens cleaners or pens.

Imagine this scenario: you are changing your lens out on the rocks and you put your cleaning cloth down to free your hands. There is a little bit of residue on the rocks so when you pick up your cloth and started wiping the lens, it gets coated in a film of goo. You may be able to clean the lens with different parts of the cloth (depending on the type of rock goo!) but it will likely leave most of the cloth dirty. Therefore, you will be unable to clean other lenses later on when they inevitably get hit by sea-spray.

How can I picture such a scenario? Sadly, I have lived it, and there is nothing worse than getting up early to a prime location, only to have your single cleaning cloth ruined before your shooting appetite has been satisfied, leaving you unable to do anything with other lenses that need cleaning. Now I always carry at least three cleaning implements in my bag.

5. Study the tides.

Ideally, you should know exactly what you want to shoot, so you can frame the shot before you go and know where the water will be. This is not always possible, but at least you should know what the tide will be at sunrise. You might go somewhere the day before and see a perfect shot in your head, only to return at dawn the next day and find those beautiful rocks covered in two metres of water. There’s no point setting the alarm for 4:40am if the subject you want in your shot is submerged like a sunken ship.

DPS1

6. Know where the sun rises. This may seem ridiculous – east you say! Well yeah, the sun rises in the east, but exactly where on the horizon will it rise for you? The angle changes every day. I once woke at 4:00 a.m. to get a shot in at sunrise only to realize after setting up that even my Sigma 10-20mm couldn’t get the sun and subject in my frame. East isn’t just east. Know exactly where the sun rises on the horizon in order to frame the shot you want.

DPS2

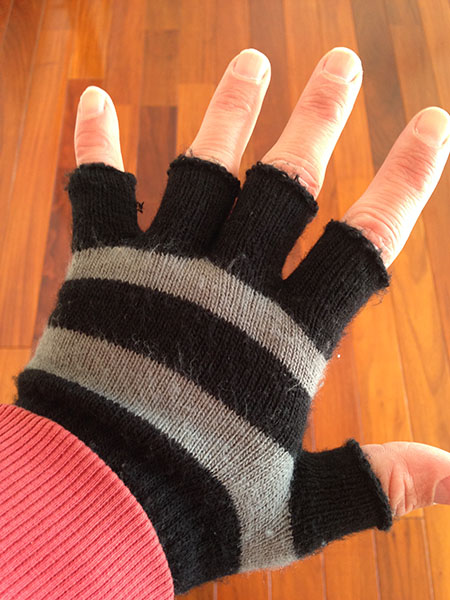
7. Mittens not gloves.

In the wintertime, near the coast, you need something to cover your hands. But not gloves. Mittens are those cute, little gloves that have all the tops of the fingers cut off. The very reason you need mittens is to keep the tips of your fingers free to play with the camera and to get everything set up. This is very difficult with padded, woolly gloves on. Also, don’t make the mistake of buying woollen gloves, then cutting the tops off yourself. This leaves threads hanging that get longer and longer every day, and more and more annoying.

DPS6

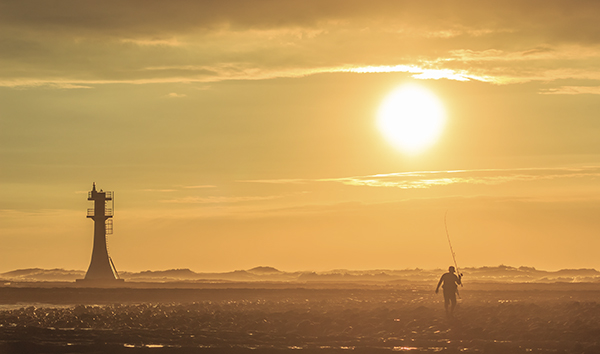
The joy of getting those early morning shots makes a perfect start to the day. Follow these tips and all you’ll have to worry about is framing that perfect shot.

googletag.cmd.push(function() {
tablet_slots.push( googletag.defineSlot( “/1005424/_dPSv4_tab-all-article-bottom_(300×250)”, [300, 250], “pb-ad-78623” ).addService( googletag.pubads() ) ); } );

googletag.cmd.push(function() {
mobile_slots.push( googletag.defineSlot( “/1005424/_dPSv4_mob-all-article-bottom_(300×250)”, [300, 250], “pb-ad-78158” ).addService( googletag.pubads() ) ); } );

The post 7 Uncommon Tips for Winter Sunrise Photos Near Water by Iain Stanley appeared first on Digital Photography School.

Digital Photography School

 
Comments Off on 7 Uncommon Tips for Winter Sunrise Photos Near Water

Posted in Photography


Photokina 2014: Canon interview – Mirrorless ‘in the very near future’

25 Sep

DPReview attended the Photokina trade show last week in Cologne Germany. As well as getting our hands on this season’s newest photo gear we also sat down with executives from several major camera manufacturers. One of them was Masaya Maeda of Canon. Our time with Mr Maeda was brief, but in our conversation he shared reactions to the 7D Mark II, and explained that Canon is very serious about mirrorless, and is also committed to making higher-resolution sensors. Click through to read more

Articles: Digital Photography Review (dpreview.com)

 
Comments Off on Photokina 2014: Canon interview – Mirrorless ‘in the very near future’

Posted in Uncategorized


Almost There: Signs from the Near Future May Blow Your Mind

13 Jun

[ By WebUrbanist in Conceptual & Futuristic & Technology. ]

no synthetic biology allowed

A few are far-fetched, but most of these notices are shocking in part because they are nearly believable – some may be an accepted reality within the next few years (click to enlarge).

contact lens selfie alert

disable your holographic companion

exoskeleton scanning in progress

driver free taxi cab

Collected on signsfromthenearfuture, a Tumblr blog, their subjects range from driverless cars and solar roadways to cryogenic stations and hyperloop trains.

jetpack station future sign

oversharing cell phone alert

preconition training classroom sign

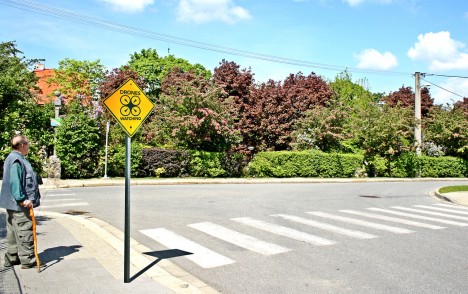
drones watching alert

Some are clearly tongue-in-cheek commentary on current social behavior and perceived threats to privacy, or based on science-fiction principles unlikely to materialize, but who knows. Others you may be seeing very soon on streets and in other public places (alas, probably not the one about jetpack rentals).

Share on Facebook


[ By WebUrbanist in Conceptual & Futuristic & Technology. ]

[ WebUrbanist | Archives | Galleries | Privacy | TOS ]


WebUrbanist

 
Comments Off on Almost There: Signs from the Near Future May Blow Your Mind

Posted in Creativity


Rolling Hills Near Morro Bay, California

01 Aug
Rolling Hills Near Morro Bay, California

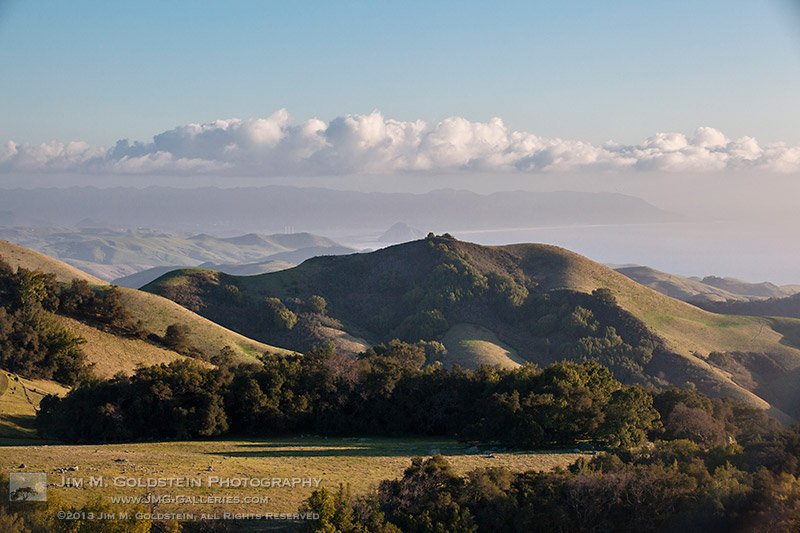
Golden light falls on rolling hills near Morro Bay, California

Having just returned from central California where the grass has turned golden brown, I thought it might be nice to take a moment to go back in time a few months and revisit the views while it was green. Pictured in late afternoon light are the rolling hills near Morro Bay, California.   If you look carefully you can make out the view of the monstrous Morrow Rock, a 581-foot volcanic plug, in the distance. As always I’m awed and inspired by California’s diverse geology.

Copyright Jim M. Goldstein, All Rights Reserved

Rolling Hills Near Morro Bay, California

The post Rolling Hills Near Morro Bay, California appeared first on JMG-Galleries – Landscape, Nature & Travel Photography.


Related Stories

  • Rolling Hills Near Morro Bay, California – Enclosure
  • Primitive Coast IV
  • Primitive Coast IV – Enclosure


JMG-Galleries

 
Comments Off on Rolling Hills Near Morro Bay, California

Posted in Equipment


Rolling Hills Near Morro Bay, California

08 Jul
Rolling Hills Near Morro Bay, California

Golden light falls on rolling hills near Morro Bay, California

Having just returned from central California where the grass has turned golden brown, I thought it might be nice to take a moment to go back in time a few months and revisit the views while it was green. Pictured in late afternoon light are the rolling hills near Morro Bay, California.   If you look carefully you can make out the view of the monstrous Morrow Rock, a 581-foot volcanic plug, in the distance. As always I’m awed and inspired by California’s diverse geology.

Copyright Jim M. Goldstein, All Rights Reserved

Rolling Hills Near Morro Bay, California

The post Rolling Hills Near Morro Bay, California appeared first on JMG-Galleries – Landscape, Nature & Travel Photography.


JMG-Galleries – Landscape, Nature & Travel Photography

 
Comments Off on Rolling Hills Near Morro Bay, California

Posted in Equipment


Bird Photography Near Feeders

30 Oct

A Guest Post by Lithuanian Photographer Tadas Naujokaitis.

Bird photography is quite difficult because birds don’t do what a photographer wants. Moreover, it’s often hard to get close to them. And when you have more experience in photography, you realize that it’s even more difficult to take a good bird photo, because you need a good background and a beautiful environment. However, there are a number of ways you can improve the bird photos you take. In this article, I’ll explain some tips on photographing birds near feeders.

The place

The place is the first thing you need to consider. You need to decide what bird species you want to photograph, and work out where you’ll find that kind of bird.

Depending on your location, even your backyard can be a great place for a feeder to attract the species you’re after. I wanted to photograph forest birds, so I chose a local forest. I searched for the exact place in that forest quite a long time—mainly, I needed to consider the background, and the amount and direction of the light that reached the feeder.

Ideally, your location will have a smooth background (when I search for a background, I use manual focusing at ~4m and take many test shots) and enough light. I’ve found it’s best when the sunshine reaches the feeder in early morning. Also, be sure to ask for a permission to feed and photograph the birds if you are not the land owner.

The hide

Once you’ve worked out the exact place where you’ll put your feeder, you need a hide. I recommend using a permanent hide, because birds will understand it as a part of environment, and you won’t need to set it up and then wait while the birds get used to it each time you decide to take photos.

You can build the hide from whatever you like—even an old door can be very useful. I built my hide from the branches I found in the area. It required a bit more work, and it isn’t waterproof, but I didn’t want to use expensive materials because there is always the risk that your hide can be damaged by other people if you don’t build it in your own backyard.

One more thing to note: the hide should be large enough for you to stay in it comfortably, because you may spend many hours in it. This is how my hide looks:

2-birdphotography.jpg

The feeder and food

The construction of the feeder itself isn’t very important. I prefer the platform feeder because, if you like, you can put many decorations on it when you’re photographing birds.

However, the food is very important. I recommend using sunflower seeds, peanuts, and suet cakes. Other similar products should be fine, too, but be sure the food you choose won’t harm the birds you’re photographing. The food must not be tainted, salted or smoked. And if you feed birds in the colder seasons of the year, you must feed them constantly until the weather becomes warm and the snow melts—otherwise many birds can die. Be prepared to spend some money on food. As am example, you may need even more than 100kg of sunflower seeds for one winter if you use them as the main food.

3-birdphotography.jpg

The perch

If the birds have already found the food, you can start shooting. Find a beautiful perch, twig or rotten stump and put them on the feeder or near it. If you’d like, find some decorations to add to the scene—berries, for example. They will make the composition of your shots more lively.

Be creative: try using various perches, or put the food in such place that you don’t see it though the lens. You can use holes in the feeder, put the food on the side of the perch that isn’t visible, or simply place it below the perch on which the bird will sit.

The food can also be put in such location that the perch becomes an intermediate stop for birds moving towards the food. Often it’s difficult to photograph the bird without food in its bill. If this is your goal, try to hide some food so the bird will need to search for it. You can also take some pictures of birds without food, when the food has just run out, but you won’t have much time to shoot before the birds realise that there’s no more food and fly away.

My recommendation, however, is to always have plenty of food in the feeder, which will attract more visitors to the feeder, and be ready to quickly take a photo before the birds take any food.

4-birdphotography.jpg

Equipment

You should get good results with any DSLR and a 100-200mm lens. However, with longer focal length, you’ll get a better background. A tripod is usually necessary, too.

5-birdphotography.jpg

Camera settings

Exposure: 1/50-1/500 or even shorter, depending on how fast the birds are (faster birds need a shorter exposure), and how much light you have (if there isn’t much light, you may need to set longer exposure if you don’t want to use high ISO settings).

Aperture: if you don’t have enough light and want the best possible background, select the largest aperture (the smallest number). If it’s difficult to get the whole bird in focus, close the aperture a bit.

ISO: use as low an ISO speed as possible. However, if you don’t have much light, it’s better to set ISO 800 and get sharp pictures than ISO 200 and take blurry ones.

The light

The best time for photography is morning or evening because the light is soft and has a pleasant hue, shadows are not so distinct, and it’s easier to get details from very bright and dark areas. Overcast days are better than sunny ones because the shadows are less distinct. However the midday sun can be your friend if its rays are diffused by trees.

6-birdphotography.jpg

Composition

It’s usual to leave some space in the direction in which the bird is looking or flying. Try using the rule of thirds in your composition. Avoid any distracting elements and take the picture at the bird’s eye level. Don’t always try to fill the frame with a bird: remember that birds are very fast creatures, so they need space. Even in the photo!

7-birdphotography.jpg

Conclusion

The best part of bird photography near feeders for me is that I have a great time. It’s usually hard to believe that 10 hours have already passed – I always wish I had more time. I hope you will have a good time photographing birds near feeders, too.

8-birdphotography.jpg

About the Author:

Tadas Naujokaitis lives in Lithuania. See more of his work at www.tadasnaujokaitis.tk and connect with him on his Facebook page.

Post originally from: Digital Photography Tips.

Check out our more Photography Tips at Photography Tips for Beginners, Portrait Photography Tips and Wedding Photography Tips.

Bird Photography Near Feeders


Digital Photography School

 
Comments Off on Bird Photography Near Feeders

Posted in Photography