RSS
 

Posts Tagged ‘Myth’

The Myth and Reality of Shooting in Manual Mode

21 Dec

I’ve heard it. You’ve heard it. And it’s a great big steaming pile of…baloney.

Myth – Professionals Only Shoot in Manual Mode

I recently read an account of a new photographer who heard that “expert” photographers only shoot in manual mode, so he headed out to shoot. Camera firmly set to M, he shot away, happy as could be. However, the results from that first exploration were, needless to say, disappointing; overexposures, under-exposures, and a lot of crappy, blurred photos.

Professionals Shoot in Manual Mode

I had about 10 seconds to make this image of a grove of Baobabs in Botswana. Had I been fiddling with finding the right manual settings, I likely would have missed the shot.

Here is the reality: Professionals and other experienced photographers use just about every shooting mode on their camera.

Those modes are there for a reason. Settings provide simplicity, speed, flexibility, or full control. Depending on the conditions in which you are shooting, any one of these may be appropriate. While other articles here at dPS discuss how to use each of the settings on your camera, I want to talk about the myth of Manual Mode, but also why it’s important to use it

Professionals Shoot in Manual Mode

Moving subjects and quickly shifting scenes are not conducive to manual mode.

The Professional Reality

Try shooting on full manual control while making images of birds in flight. Go on, try it. I’ll wait.

Professionals Shoot in Manual Mode

On the off chance that you actually went out and tried that exercise, I suspect you ended up with a lot of really bad photos. As birds passed quickly in front of different backdrops, as the sun darted in and out from behind clouds, the lighting conditions were undoubtedly in constant change. To adapt to those changes on the fly would be a nearly impossible task.

Professionals Shoot in Manual Mode

Rather, any professional would use one of the other settings. I, for example, would probably choose Shutter Priority mode under those conditions. That would assure I could maintain sharp (or artfully blurred) images as I shot, and leave the decision on aperture up to the camera. If I wanted a brighter or darker exposure I’d adjust the exposure compensation.

Now, if I was carefully shooting a landscape and had a particular vision for the final image, that’s when I’d make the switch to Manual Mode. In manual, I can take full control of the scene. I can adjust the depth of field, the exposure, incorporate blurs, or selective focus. In Manual Mode, I own all aspects of the final image, for better or worse.

Professionals Shoot in Manual Mode

My point here is simply this – professionals use all the tools at their disposal. If it were true that pros only use Manual Mode, then pro-level cameras would only have one setting. Quite obviously, that is not the case.

You Still Need to Shoot in Manual

Shoot in Manual Mode, but not all the time. But understanding exposure, focus, shutter speed, and aperture and their effect on the final image is the heart of photography. To master the technical aspects of image-creation, you need to be able to put all these together without the help of your camera.

Professionals Shoot in Manual Mode

Manual Mode is perfect for landscape photography because you have the time to dedicate to creating the image you envision.

Manual means full control

I regularly practice the art of manual settings. When a scene is in front of me, I’ll imagine a particular way to portray it. I’ll envision how bright I want the image to appear. I select the focal point, whether motion blur is incorporated or eliminated, and how deep the depth of field should be.

Once I’ve got the image in my mind. I’ll select the ISO, shutter speed, and aperture without using the camera’s light meter to help me. Then I click the shutter and have a look.

Professionals Shoot in Manual ModeThis exercise reminds me of light and settings and how the camera works, sure. But more so, it turns every aspect of the image into a purposeful decision. There is no “spray and pray” photography when you are shooting in Manual Mode. Setting your camera to that scary “M” means you grant yourself full control and full responsibility for whatever emerges.

Professionals Shoot in Manual Mode

Aurora borealis and most other night photography require the use of Manual Mode.

There is no better way to learn about your camera, light, and about thoughtful photography than to set your camera to Manual Mode, turn off the autofocus, and go make images.

Summary

It’s absolute nonsense that pros only shoot in manual. Utter garbage. Your camera has a bunch of settings for a reason. Shooting in just one would be like only eating one type of food. Each has a purpose, and each has their place in the art of photography.

Professionals Shoot in Manual Mode

Purposefully underexposed images are also well-suited to Manual Mode, particularly when you want to retain a shallow depth of field, as I did with this flower image.

However, and this is a big HOWEVER, shooting in Manual Mode may be the best tool at our disposal for turning our photography into a purposeful exercise. Using manual will force you to understand depth, light, exposure, blur, and focus.

So yes, you should shoot in manual mode. Just not all the time.

The post The Myth and Reality of Shooting in Manual Mode by David Shaw appeared first on Digital Photography School.


Digital Photography School

 
Comments Off on The Myth and Reality of Shooting in Manual Mode

Posted in Photography


Opinion: The myth of the upgrade path

08 Jan

Full frame cameras have never been more accessible but what does that mean for owners of cropped-sensor cameras? DPReview’s Richard Butler argues that the existence of a full frame model in your brand’s line-up doesn’t mean there are intermediate steps you can take on the way there. Or that it’s a destination you should necessarily aspire to. Read more

Articles: Digital Photography Review (dpreview.com)

 
Comments Off on Opinion: The myth of the upgrade path

Posted in Uncategorized


Dispelling the Myth of Good Light and Bad Light

24 Jul

There is no such thing as bad light, there is just light. Take advantage of every situation.

20131206 Bagan 563b

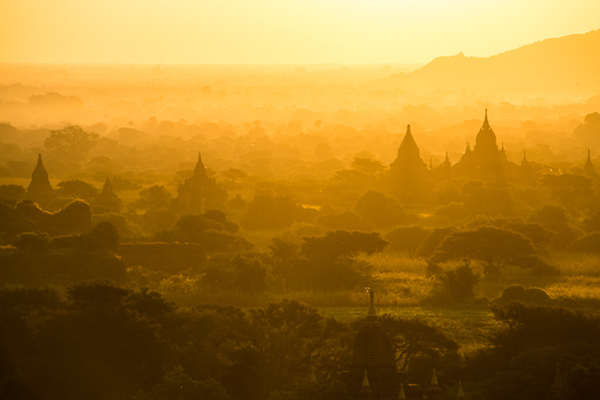
Photography is all about the light. In fact, if there is no light hitting the sensor, there is no photo. Different times of the day, or weather conditions, can create different moods and situations. As you probably know, you can achieve amazing and compelling results by shooting in the early morning, or from late afternoon well into twilight. This is known as the golden hour and the blue hour, respectively.

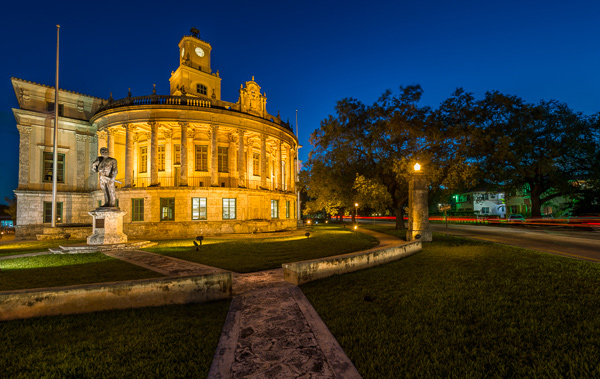
Coral Gables City Hallb

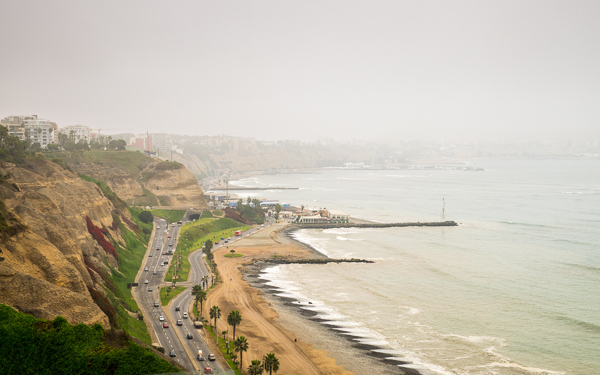
However, there is no such thing as good light or bad light, there is just light. It is not always possible to shoot under ideal conditions, especially when traveling. Yes, you can wake up early; yes, you can skip dinner or eat it later. But what are you going to do the rest of the day or if there is bad weather? If anything, when you are on tour, chances are you’ll be wandering around at midday, in overcast conditions or even in the rain. Here are some tips and examples you can follow to make the most of the situation under any kind of weather or light conditions.

Tips for using any kind of light to make great photos

High sun, midday light

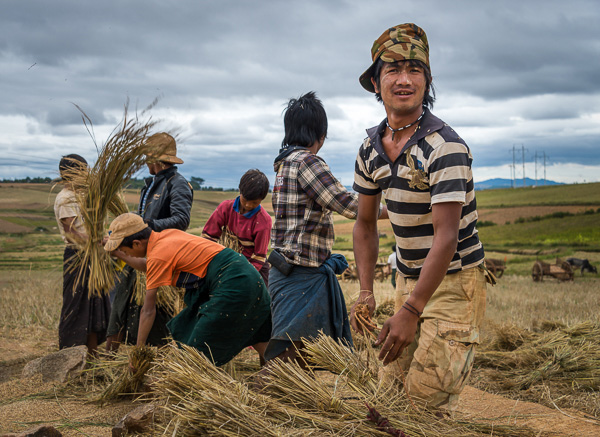
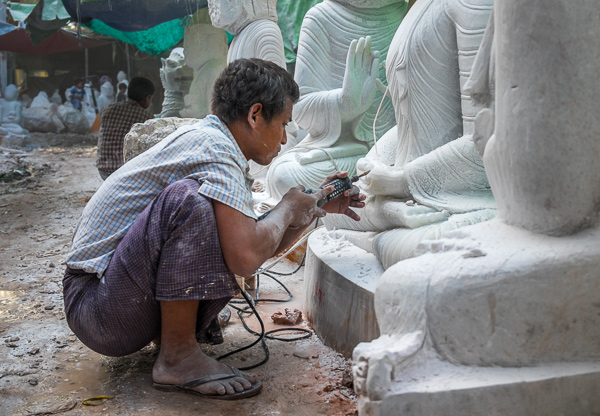
In most cases you’ll be out exploring places during the daytime under midday light. This is not an ideal situation. Direct, harsh sunlight creates hard shadows that are not very flattering. Taking portraits of locals is one of the best ways to capture the essence of places; if you’re going after this, you can try to move your subject into the shade. If they are wearing a hat, you can also position them in a way where their face is under the brim. The key for this is to come close enough to the person and compose your shot right into them. Alternatively, use an off-camera flash to fill the shadows and compensate for the brightness in your background.

20131212 Inle Lake 535b

20140410 Arequipa 267b

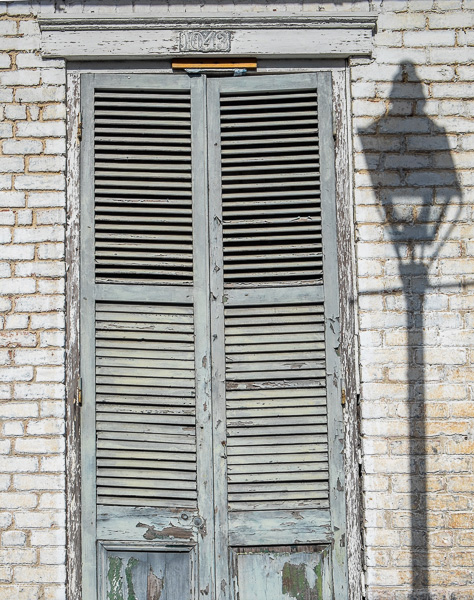
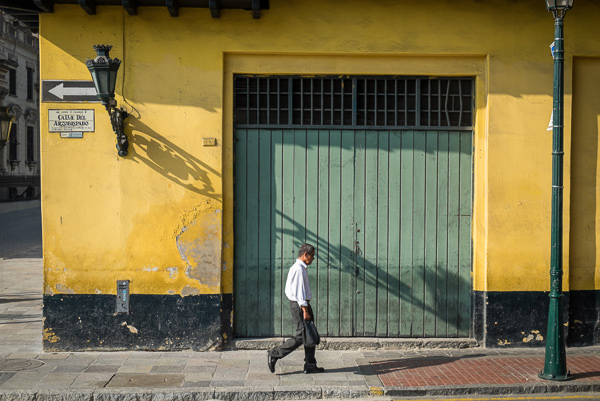
If you are looking for street scenes or iconic locations, you can always use the hard shadows created by the direct sunlight to your benefit and arrange the image in a way that helps to create a compelling composition. You may have to wait for the right moment, waiting for someone to walk into your scene or simply using the shadow element intentionally as part of your photograph.

20140222 untitled 0063b

20140402 Lima 108b

Clouds in the sky, overcast light

Granted, this is not an ideal situation either; however, there is much you can do. In this case, contrary to the high sun, you have a very soft light. This is great for shooting portraits. The light will be even and very soft; throw in some stormy clouds and the effect could be very dramatic. Again, get close to your subject.

Another technique is to avoid the sky. Look for locations and activities for which the sky is not an important element and simply avoid shooting it. A good example for this is local markets or similar indoor activities. By the way, local markets are fun to shoot, and moreover, they’re an excellent way to connect to and experience local culture.

20131211 Inle Lake 13b

20131208 Mandalay 362b

Nevertheless, you can also work with landscape and exterior photos during these conditions. In fact, there are some places where it’s almost impossible to avoid. Due to local weather characteristics you may find that during certain seasonal periods you’ll encounter misty mornings, stormy afternoons, and so on. Go ahead and shoot it. What better way to capture a region the way you see it, the way you feel it?

20140402 Lima 56b

Rainy days

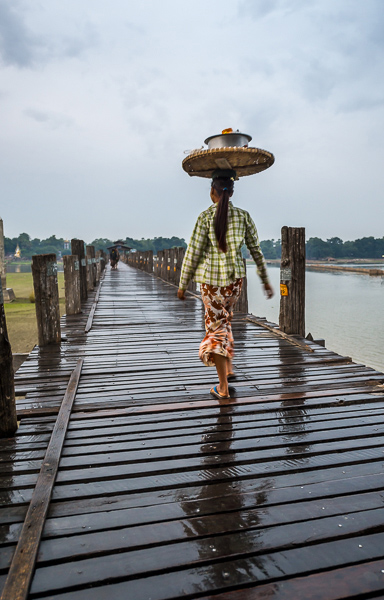
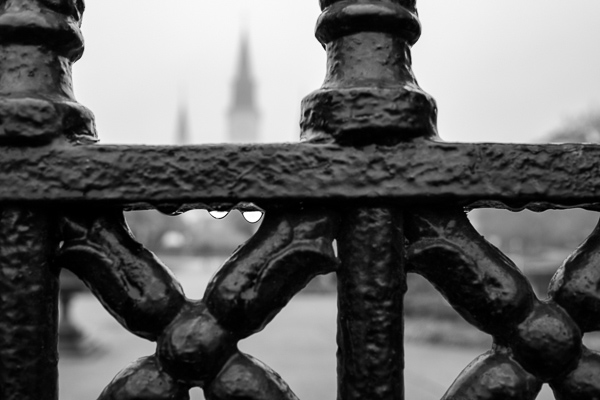
This is the time when most photographers stay inside, but I’d strongly suggest you get out there. It can seem a little bit scary, we tend to overprotect our gear, but with some preparation there is nothing to fear and you’ll get fantastic results. When it starts to rain, good photographers head outside. Downpours bring life, a different look; in certain cases, some areas are just magical in the rain. Think about shooting reflections, ponds, and playing with water drops. The possibilities are endless and you’ll definitely love it.

20131209 Mandalay 772b

20140223 untitled 0022b

As you can see, good light, bad light, is just a myth. There are certainly ideal situations where you can achieve exceptional photos, but it is not always possible to be out during perfect circumstances. So go ahead and take advantage of every condition, try to think how you can leverage and play it to your convenience. In the end, photography is fun, and great images can be obtained under almost any condition.

The post Dispelling the Myth of Good Light and Bad Light by Daniel Korzeniewski appeared first on Digital Photography School.

Digital Photography School

 
Comments Off on Dispelling the Myth of Good Light and Bad Light

Posted in Photography


18 December, 2013 – The Full Frame Myth

18 Dec

Given the advances in sensor technology over the past few years, is Full Frame really necessary? Up until recently I might have said "Maybe not…". The latest generation of smaller sensor cameras have gotten so good, and the appeal of smaller and lighter bodies and lenses is so great, that in many parts of the world DSLR sales are being trumped by Compact System Cameras.

But now with Sony’s new A7 and A7r Full Frame cameras, which are actually smaller than some MFT models, which way are things going to go? Find out more.


New Travel Video Online for Subscribers

Subscribers will find that there is a new travel video online as of today. It is titled The Palouse: A Washington State Photo Trip. You’ll find it in your Video Library of your device, or it can be viewed online in your browser.


You can win an all-expenses paid photographic expedition to Antarctica, along with air fare from anywhere in the world. The value of this prize is $ 15,000.

The Luminous Landscape wants you to try any of our more than 60 training or travel videos and our new free video player. Each purchase is an entry, and an annual subscription that includes all previous as well as new videos counts as six entries. The winner of a free lifetime subscription is also chosen from each month’s entries.

FIND OUT MORE 


The Luminous Landscape – What’s New

 
Comments Off on 18 December, 2013 – The Full Frame Myth

Posted in News


Bursting the Burst Mode Myth: [What I Learned from Shooting with Film]

29 Jul

Over the next week we’ll be featuring a mini-series of posts from Rachel Devine (author of our kids photography eBook) in which she’ll be talking about five reasons learning photography on film cameras made her the digital photographer that she is today.

Here’s today’s on Busting the Burst Mode Myth.

no burst mode here

There are a few things I hear as top advice for budding children’s photographers and parents who want to take better photos of their children. I think that setting the camera to burst mode and holding the shutter down while taking photos is the one I hear most often and makes me cringe hardest. Called the “spray and pray” method, lots of digital photographers rely on taking hundreds of images (I have actually heard of thousands of frames shot for one portrait session) at a sitting to get a handful of good shots.

When keen new photographers ask for advice on how to get better photos of kids (their own or for a client) and are told, “It is digital, it will not cost you anything, just put the camera in burst mode and take as many as you can and you are bound to get a good one in there” they are being fed bad advice…or rather non-advice.

I started my photography career on film 16 years ago and when I did, those who swear by the spray and pray method may be shocked to learn that there were lots of other kid and family photographers who had to get the entire session worth of images for their clients on just a few rolls of film. And they did…every time.

Here is why shooting in burst mode not best for everyone and what I think is better advice for those really wanting to get better at taking photos of kids.

Burst Mode does actually cost something

Time:: It takes time on your end to weed through those hundreds of resulting shots. Culling images is a time sucking and soul zapping process where you will be tied to your computer for hours sorting, comparing and slitting hairs. It may be fun the first few times you go through your images, but it will wear on you over time and if you get into the habit of having to shoot this way, you will also have to allow time for sorting and editing all of those images.

Not learning to see:: If you do have to resort to shooting in burst mode, then things really are on auto. Burst mode does not allow for the photographer to make changes to the image and exposure settings while they are taking the shots. With single images taken thoughtfully, the photographer can fine tune the exposure settings and compose carefully. Learn to recognize what makes a great image and then set out to purposefully shoot that.

no burst mode here

Missing Details:: When the camera is set to burst mode, the focus is on quantity and quality tends to take a back seat. People tend to forget to scan the shot for details and end up with an entire series of cute expressions on a child who seemingly has a tree growing out of the top of their head. That photographer can now tack extra time onto their post processing routine to edit that sucker out. I have seen tags left on clothes, dirty faces, cars parked prominently in the background. Things get missed easily in the rapid fire fury.

Connection with the subject:: Finally, I have heard an argument in favor of burst mode that it helps avoid missing any special moments. Really, the wham-bam-thank you ma’am approach to photography may seem like a good idea for kids because they are fast and have short attention spans, but getting them involved in the whole experience is so much more enriching for both photographer and subject. These are not wild animals on safari, but tiny human beings who can and should bring personality to the table when they are active participants in your sessions, not just being shot at. This is especially true for people who enjoy documenting their own children over and over again. Slow down, take a moment to breathe, observe and photograph and then breathe again…it is then when you will not only be photographing the special moments, but also participating in them.

If that all does not speak to you, let’s talk cash…

Shutter actuations:: Your camera does have a shelf life and it really is not determined by when the latest and greatest new model is released, but more by how many times the shutter has actually clicked. While the total end number can vary by camera model and may seem really quite high, it will be reached faster if you are taking hundreds of images each time you go to use your camera.

Where burst mode does come in handy

no burst mode here

Shooting big group portraits :: Great for getting extra shots of the same scene (especially when mounted on a tripod) where you may need to do a head swap because someone closed their eyes.

Sports :: That is pretty much why it is called Sports Mode

Portraits with a point and shoot camera :: The shutter lag present in point and shoot cameras (the time it takes the camera to actually capture the shot from when you press the shutter button is called shutter lag and is very apparent in point and shoot cameras) can cause you to miss the moment even when you are shooting carefully and are ready for it. Setting the little compact cameras to sports mode can help overcome this technical hurdle.

Back in the days of film, we were limited by budget as we had to pay cash money for the film and processing. That made it necessary to shoot mindfully. We ended up with more images that we loved and fewer wasted frames. Today with digital, the costs are hidden, but there are still costs. Take the time to set up the sessions, meter the light, compose and be present while you are photographing your little subjects. Practice shooting digital with the discipline of film. You just may find that you enjoy the act of photographing kids even more than you thought possible.

For more on the topic of Kids Photogrpahy – Check out Rachel’s eBook Click! How to Take Gorgeous Photos of Your Kids.

kids photography tips

Post originally from: Digital Photography Tips.

Check out our more Photography Tips at Photography Tips for Beginners, Portrait Photography Tips and Wedding Photography Tips.

Bursting the Burst Mode Myth: [What I Learned from Shooting with Film]


Digital Photography School

 
Comments Off on Bursting the Burst Mode Myth: [What I Learned from Shooting with Film]

Posted in Photography


Beach House “Myth” Music Video (UNOFFICIAL)

25 Jul

Directed By: Ryan Smith Starring: Tom Biering Produced By: Ryan Smith & Tom Biering VERY SPECIAL THANKS TO: ~Russell Nygaard for the use of his Purple & Yellow fixed gear bicycle. Camera: Nikon D90 Lens: AF-S DX VR Zoom-NIKKOR 18-200mm f/3.5-5.6G IF-ED beachhousebaltimore.com
Video Rating: 4 / 5