RSS
 

Posts Tagged ‘musthave’

The 3 Must-Have Camera Lenses Every Photographer Should Own

26 Apr

The post The 3 Must-Have Camera Lenses Every Photographer Should Own appeared first on Digital Photography School. It was authored by Guest Contributor.

3 must-have lenses every photographer should own

What are the essential camera lenses every photographer must have?

In this article, I’m going to share the three key lenses that no photographer should be without. These recommendations come from personal experience; I rely heavily on these three lenses in my own photography.

They offer enough versatility to shoot in almost any situation, and they’re available for just about every camera system and lens mount on the market, from DSLR to mirrorless, from Nikon to Sony.

So if you’re ready to discover the must-have camera lenses for every photographer, let’s dive right in, starting with…

1. The general-purpose zoom

must-have camera lens standard zoom

A general-purpose (standard) zoom goes from around 18mm to 70mm. At the wide end, you get an expansive field of view for environmental shots. And at the long end, you get a field of view close to that of the human eye.

These zooms are hugely popular and come in many shapes and sizes. For instance, you can grab an 18-55mm kit lens or a (more expensive) 24-70mm lens.

Out of all my lenses, a standard zoom sits on my camera the most. It lets me shoot fairly wide while also offering decent zoom for objects off in the distance. You can shoot landscapes at 18mm, environmental portraits at 24mm, street shots at 50mm, and tighter portraits in the 60mm+ range.

Ideally, your general-purpose zoom packs a wide maximum aperture for low-light shooting and precise depth of field control (f/2.8 is best, but f/4 also works). Of course, if you can’t yet afford a wide-aperture zoom, that’s okay; a standard kit lens will work fine in most situations.

Consider these general-purpose zooms from Canon:

  • Canon EF-S 18-55mm f/4-5.6 IS STM
  • Canon EF 24-70mm f/4L IS
  • Canon EF 24-70mm f/2.8L II USM
  • Canon RF 24-70mm f/2.8L IS USM

These general-purpose zooms from Nikon:

  • Nikon AF-S DX 18-55mm f/3.5-5.6G II
  • Nikon AF-S 24-70mm f/2.8G
  • Nikon Z 24-70mm f/2.8 S
  • Nikon Z 24-70mm f/4 S

And these general-purpose zooms from Sony:

  • Sony 16-50mm f/3.5-5.6 OSS
  • Sony 24-70mm f/2.8 GM
  • Sony 24-70mm f/4 Vario-Tessar OSS
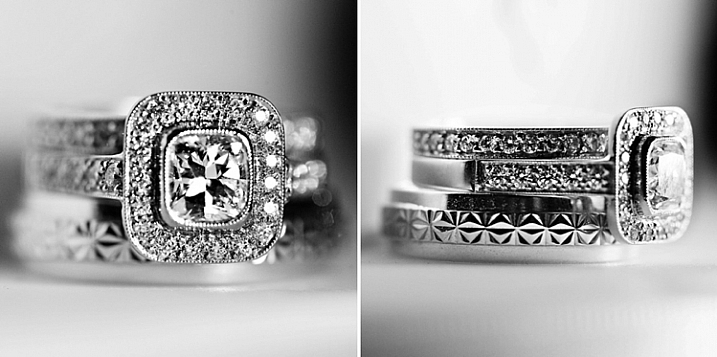
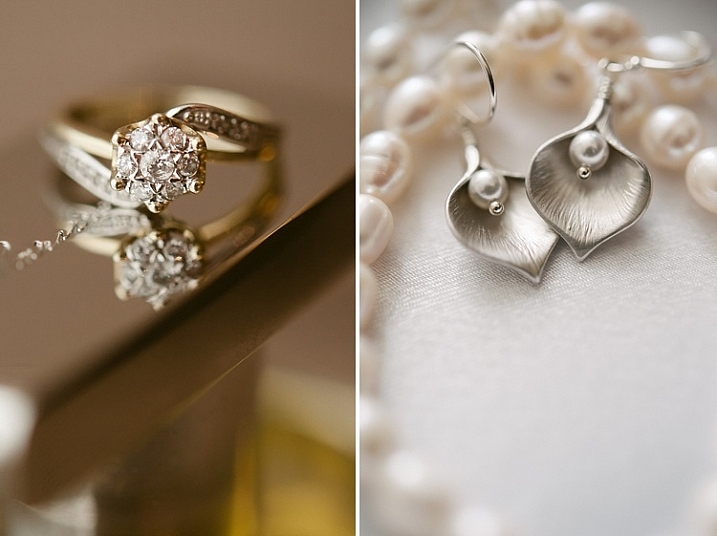
2. The macro lens

must-have camera lens 85mm macro

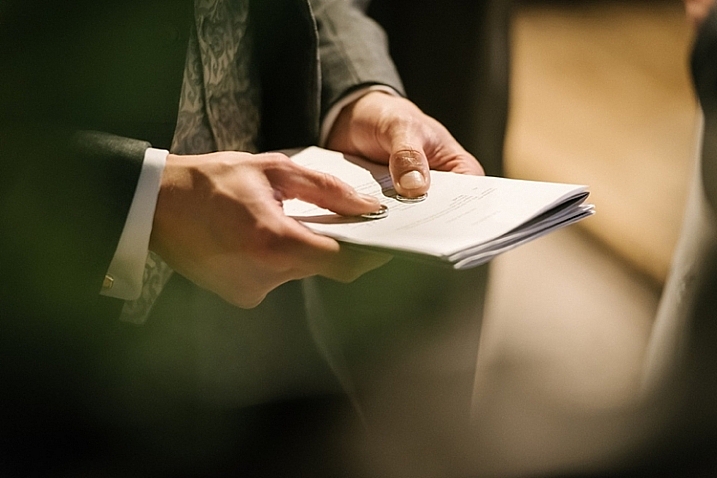
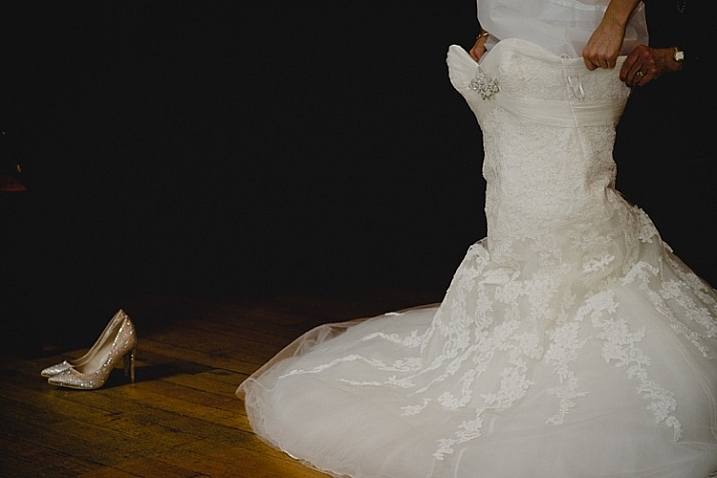
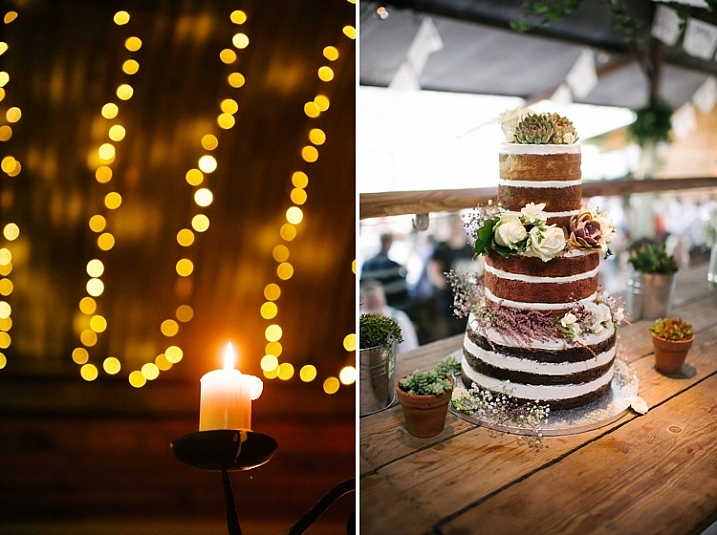
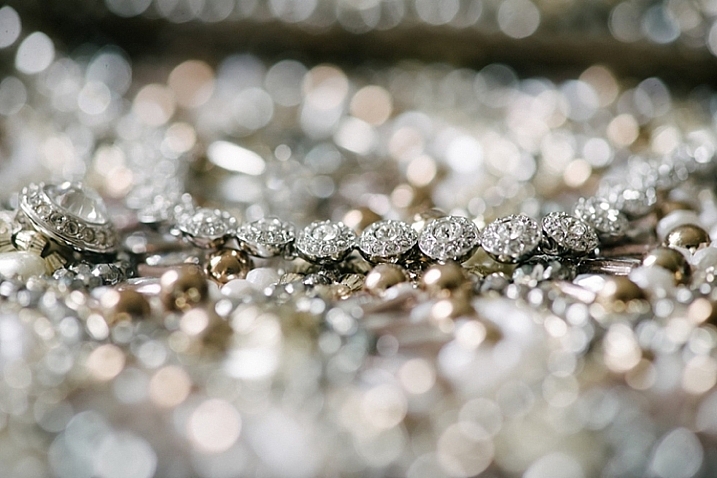
A macro lens lets you get up close and personal to your subject so you can capture stunning details of insects and flowers – as well as close-ups of clothing, jewelry, and more.

Note that the length of your macro lens isn’t as important as its magnification capabilities (a 1:1 magnification ratio or higher is best; it’ll let you get insanely close to your subjects).

I currently keep a 50mm f/2.8 macro in my bag because it’s small and light. I carry it around with me all the time, and when I need it, I whip it out for a detail shot or two. My macro lens also doubles as a decent portrait lens (it’s very sharp and the f/2.8 maximum aperture provides a shallow depth of field). And the level of detail you can get when shooting objects up close is fantastic.

Having a macro lens opens up a whole new world of tiny objects to photograph. Also, if you do any type of product photography (jewelry, food, etc.), this lens will allow you to capture a much greater level of detail than is possible with non-macro lenses.

Consider these macro lenses from Canon:

  • Canon EF 100mm f/2.8L IS Macro
  • Canon RF 85mm f/2 Macro IS STM
  • Canon EF-S 35mm f/2.8 Macro IS STM

These macro lenses from Nikon:

  • Nikon AF-S Micro 60mm f/2.8G
  • Nikon AF-S Micro 105mm f/2.8G VR

And these macro lenses from Sony:

  • Sony 90mm f/2.8 Macro G OSS
  • Sony 30mm f/3.5 Macro

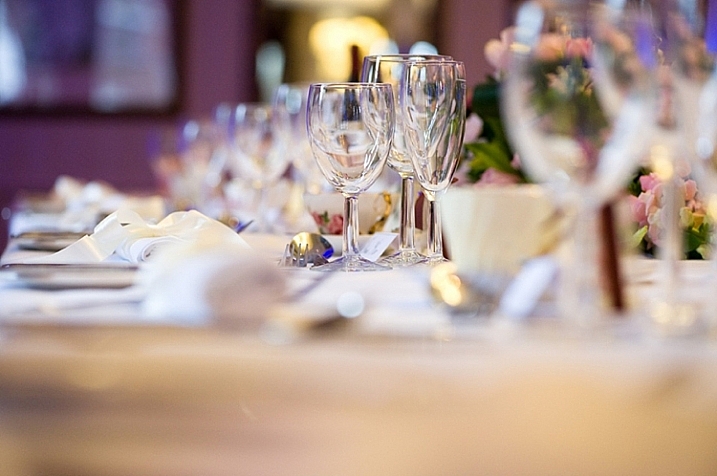
3. The telephoto zoom

telephoto zoom essential camera lens

The most useful telephoto zooms span from around 70mm to 200mm – so you can capture standard field of view shots on the wide end and tight shots on the long end.

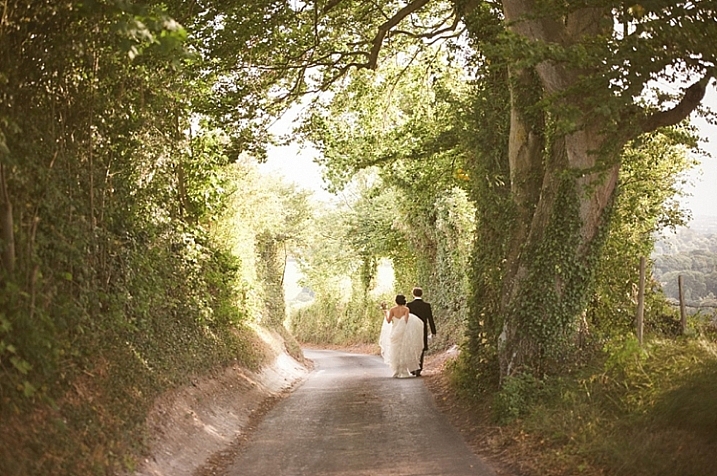
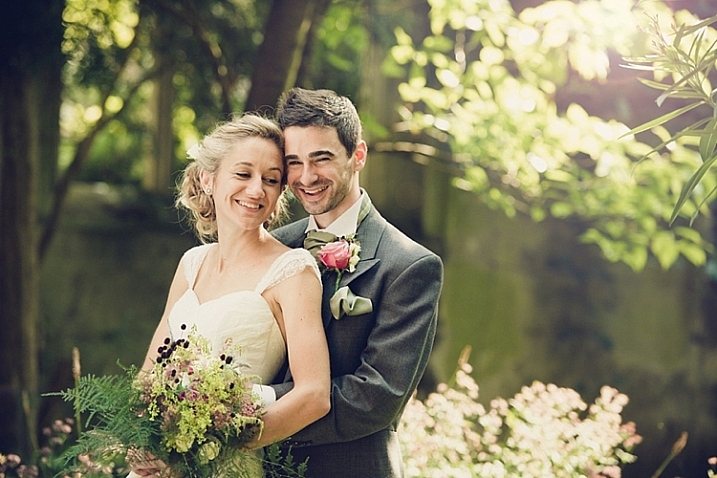
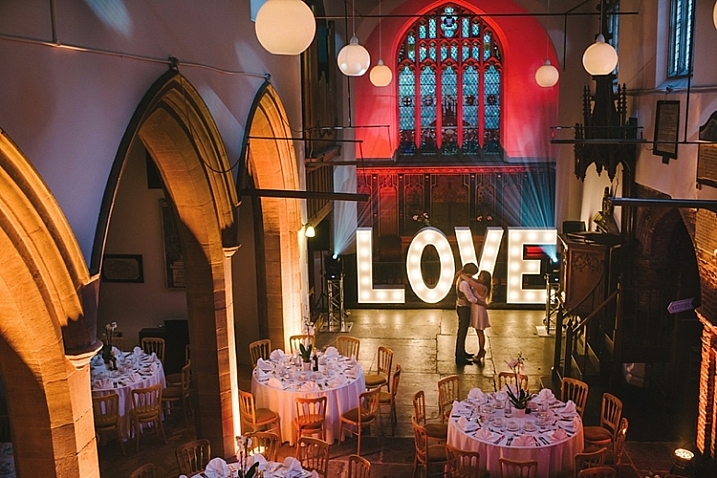
For instance, you might shoot full-body portraits at 70mm, tighter landscapes at 150mm, and headshots at 200mm. You can also use a 70-200mm lens to photograph sports, architecture, weddings, and more.

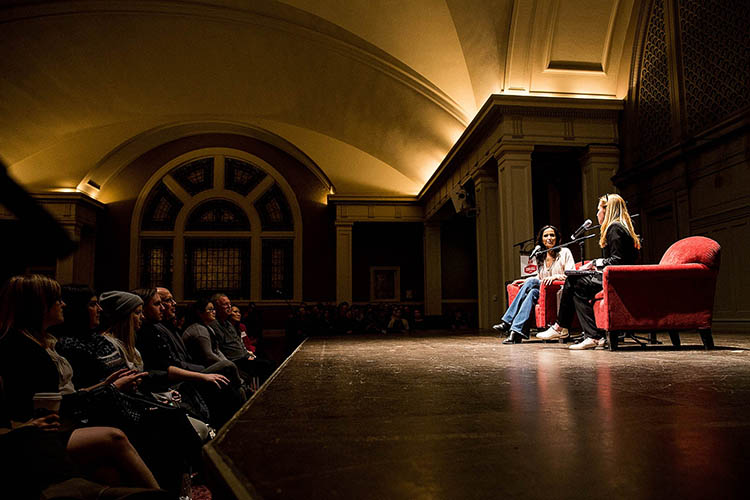
Regarding the maximum aperture: f/4 is acceptable and will get you decent low-light capabilities plus a shallow depth of field (especially when shooting at 200mm). But an f/2.8 maximum aperture is the holy grail of 70-200mm lenses; the depth of field is gorgeous at f/2.8, plus you can shoot indoors for basketball games, wedding ceremonies, graduations, etc.

The wider aperture will also let you shoot at faster shutter speeds so you can capture moving subjects such as birds and other wildlife. And a 70-200mm lens is a handy portrait lens; the focal length minimizes distortion and narrows the field of view to fill the frame with your subject.

So check out these telephoto zooms from Canon:

  • Canon RF 70-200mm f/2.8L IS
  • Canon RF 70-200mm f/4L IS
  • Canon EF 70-200mm f/2.8L IS III
  • Canon EF 70-200mm f/4L IS II

These telephoto zooms from Nikon:

  • Nikon Z 70-200mm f/2.8 S
  • Nikon AF-S 70-200mm f/2.8E VR
  • Nikon 70-200mm f/4G VR

And these telephoto zooms from Sony:

  • Sony 70-200mm f/2.8 GM OSS
  • Sony 70-200mm f/4 G OSS

Wait, what about…?

super-telephoto zoom must-have camera lens

I am sure that many of you reading this have other lenses you would consider essential.

For instance, a fast 50mm prime is great for portraits and street shots. A wide-angle zoom is perfect for landscape, architecture, and environmental portraits. A longer zoom lets you capture ultra-tight landscapes, birds, wildlife, and sports.

And it’s true:

All of those lenses are great to own.

But I’m trying to give you the three lenses that are most useful for every photographer, including folks who are new to photography or who have just bought their first camera.

And if you’re new to photography, these three lenses will give you the versatility to shoot in almost any situation.

You can use them for:

  • Family gatherings
  • Sports
  • Wildlife
  • Insects
  • Flowers
  • Landscapes
  • Events
  • Street scenes
  • Portraits

Then, once you hone in on the type of photography that most interests you, you might find that other lenses are essential for that specific subject – but until then, these are the lenses you should be carrying.

3 must-have camera lenses: conclusion

Well, there you have it:

The three camera lenses that every photographer should have, especially when starting out.

If you already own these lenses, great! And if not, consider adding them to your wish list.

Now over to you:

What lenses would you include on your own must-have lens list? Share your thoughts in the comments below!

About the author: Chris Folsom is a hobbyist photographer who spends much of his time photographing abandoned buildings. His photos have been published in newspapers and on numerous websites.

The post The 3 Must-Have Camera Lenses Every Photographer Should Own appeared first on Digital Photography School. It was authored by Guest Contributor.


Digital Photography School

 
Comments Off on The 3 Must-Have Camera Lenses Every Photographer Should Own

Posted in Photography


5 Must-Have Lenses for Wedding Photographers and Why

11 Oct

The post 5 Must-Have Lenses for Wedding Photographers and Why appeared first on Digital Photography School. It was authored by Lily Sawyer.

Have you ever wondered which lenses for wedding photographers are best?

There is a plethora of choice when it comes to lenses, and lens companies come up with new products all the time. Many photographers are attracted to these bright and shiny things and end up with a huge collection of lenses, many of which hardly see the light of day.

But if you have to pare back to the absolute necessities and are allowed five lenses in your wedding photography bag, these are the ones that I would recommend. I have been a professional wedding photographer for seven years now, and deciding on these five lenses took some time and serious consideration over the course of my career.

They are:

  1. The 70-200mm f/2.8
  2. The 24-70mm f/2.8
  3. The 85mm prime
  4. The 35mm prime
  5. A macro lens (105mm or 60mm for Nikon, 100mm or 60mm for Canon)

Let’s look at each lens individually to see why.

lenses for wedding photographers

1. 70-200mm f/2.8

It’s big, bulky, and heavy, but I wouldn’t do a wedding without this lens. The 70-200 f/2.8 is my workhorse when it comes to weddings. It is a versatile lens that gives you amazing sharpness at all focal lengths. The bokeh is beautiful, especially at 200mm and even with a stopped-down aperture (thanks to the compression created by the long focal length).

A 70-200mm f/2.8 makes a wedding photographer invisible. You don’t have to be close to people’s faces; you can capture candid expressions and serendipitous moments from a fair distance away. This lens is especially useful during the wedding ceremony, when you would rather be far away and out of sight or hidden behind a wall or door. It allows you to capture the exchange of rings, the vows, and the kiss discreetly.

lenses for wedding photographers example photo

If you require an even longer zoom while staying at the same distance, you can choose to photograph using Crop mode (if you shoot full-frame and your camera offers this option). This will generally give you a 1.5x crop factor (it only uses a portion of the image and enlarges it approximately 1.5x). If you do this, make sure that you have enough pixels for the crop in case you feel the need to straighten or change your composition in post-processing.

For example, if you are shooting with a 12 MP camera in its full-frame mode, when you convert to your Crop mode the camera becomes a 5 MP camera. This is below the minimum amount of pixels you need (generally around 6 MP) to enlarge prints to a decent size.

And if you have to crop in post-processing, 5 MP will not offer enough pixels to do so without compromising print output sizes.

lenses for wedding photographers wedding program

However, if you are photographing with a 36 MP camera in Crop mode, it drops to 15.3 MP. While this is a significant resolution reduction, it still leaves you enough wiggle room for minimal and sensible cropping if necessary.

If you use Crop mode, don’t forget that when photographing on a full-frame camera, or when using a lens designed for APS-C cameras, the camera only uses the center of the sensor. So if you forget to compose accordingly in-camera, you will get a nasty surprise after you have taken the image: cut off heads and limbs, and badly cropped compositions are two examples.

When using APS-C lenses on a full-frame body, the rest of the unused sensor area is blacked out. But when using full-frame lenses in Crop mode, this is not the default. You will still see the entire full-frame sensor if you don’t change your settings.

lenses for wedding photographers married couple

70-200mm is an excellent focal length for flattering portraits. When photographing at 200mm, I typically stop down to around f/4 or f/5.6 at a shutter speed of 1/200-1/400th, and the sharpness of the image is stunning against a creamy bokeh background. My 70-200mm f/2.8 lens also has a built-in lens collar you can use to steady your setup when hand-holding (and you also have the option to attach it to a tripod).

Without a tripod, you can steady yourself as much as possible by leaning against something strong like a wall or a stable surface such as a table. You can also keep your arms pinned against something sturdy to reduce camera shake, especially when using your lens for portrait work at the longer end of its focal length.

lenses for wedding photographers couple in golf cart

lenses for wedding photographers beautiful venue

There are also 70-200mm f/4 lenses, which you can purchase at vastly cheaper prices compared to the f/2.8. I personally do not have the f/4 version, but if you’re on a budget and you don’t mind not having the option to photograph at a wider aperture, then I see no reason why you should avoid the 70-200mm f/4. It is lighter and smaller (it has fewer glass elements compared to its more expensive counterpart) which lessens the weight you have to carry around at a wedding.

lenses for wedding photographers golf cart venue

lenses for wedding photographers just married sign

2. 24-70mm f/2.8

The 24-70mm f/2.8 offers the focal length versatility needed when you are photographing on the go, which is what wedding photographers require for most of the day. You can use this lens to capture wider location scenes, candid photos of people, guests arriving, people milling and chatting while waiting for the ceremony to start or during the wedding breakfast, some decorations and details, the first dance, and the leaving photos, to cite just a few.

lenses for wedding photographers 24-70 example

lenses for wedding photographers 24-70 example

I use this lens for photos that do not require close portrait work, although it can definitely be used for that type of image. The 50-70mm range will yield pleasing results, like the image directly below. However, my preference is to use prime lenses for portraits.

The 24-70mm lens sees a whole lot of action on the wedding day, and is definitely my other workhorse for capturing people, wider shots, and behind-the-scenes images.

lenses for wedding photographers girl with flowers

lenses for wedding photographers

Many photographers use a much wider lens for location photographs, such as a 14-24mm f/2.8. But while I would love to add this lens to my arsenal, this is not an absolute necessity. With the 24-70mm, you can photograph location scenes wide enough. And should you need to capture a wider scene, you could photograph a few images and stitch them together in Photoshop as a panorama. This is easy enough to do by making sure the exposure setting for the series of shots is the same, standing on a fixed point, then capturing a set of images while adjusting your composition slightly.

You can do the same for a photograph of all the guests, too. In fact, the two times mentioned above are the only times I need an ultra-wide lens for a wedding, so I cannot yet justify adding it to my list of must-haves.

lenses for wedding photographers people dancing

lenses for wedding photographers people dancing

3. 85mm prime

This is my all-time favorite lens, and the one I use for portraits of the bride and groom, bridesmaids and groomsmen, individual guests and small groups (the list goes on!).

As a fixed lens, an 85mm prime requires more work on your part; you have to zoom in and out with your feet. But the extra effort is worth it. The portraits are cleaner, the backgrounds are creamier, and it is a fabulous lens in very low-light conditions.

lenses for wedding photographers married couple

The best thing about this lens is that it is tack sharp from the sweet spot on. Accurate, light-sensitive, with great results; this is my go-to lens, and it never leaves my bag. As a prime lens, the 85mm is fast, small, and extremely reliable.

lenses for wedding photographers married couple silhouette

I have photographed an entire wedding of a relative (as a guest) using only an 85mm lens. I was asked on the day if I could cover the wedding and I agreed, with only the D700 and my 85mm lens in hand (I generally carry that combination with me for personal snapshots and photos of my family).

The photos from that wedding are published on one of the UK’s top wedding blogs, which is proof that you can photograph a wedding with what you have, given that you know your gear well enough.

lenses for wedding photographers

The 85mm for Nikon F-mount cameras comes in either as an f/1.8 version ($ 480 USD) or an f/1.4 version ($ 1597 USD), with a huge price difference between the two due to the glass elements and optics. You can also purchase the 85mm f/1.8 S for Nikon Z-mount cameras for just under $ 800 USD.

Canon has an 85mm f/1.2 available for $ 1999 USD, as well as an f/1.4 version ($ 1599 USD) and an f/1.8 version ($ 419 USD). For Canon mirrorless users, there’s the Canon RF 85mm f/1.2 (for an admittedly premium price). And Sony offers an 85mm f/1.8 for $ 598 USD and an 85mm f/1.4 for $ 1798 USD.

I have the Nikon 85mm f/1.8 and it has always performed marvelously for me. The f/1.4 has been on my lens list forever, and while I could buy it I have held off, given that I have never felt the need to upgrade.

lenses for wedding photographers

4. 35mm

One of my early serious lens investments was the amazing 35mm f/1.4. If there is a lens I can always rely on, it’s this one.

It’s an ultra-versatile lens that you can use to photograph the bride getting ready, which is the time when wedding photographers are usually under pressure to capture everything. This includes the location, the many accessories, any small details, candid shots, the dress, the natural interactions between the bride and her loved ones, and group portraits. Plus, you must do this in a very short amount of time, often in small spaces like cramped hotel rooms.

A 35mm lens is also perfect for photographing wider scenes, because you can get images without the exaggerated distortions caused by a wider focal length.

lenses for wedding photographers 35mm example

lenses for wedding photographers 35mm example

This lens is super fast and sharp. It has yet to fail me. With this lens, you can get close, which is very handy when you are in a crowded space.

As if that weren’t enough, my 35mm lens opens up to f/1.4, which allows you to photograph in extremely low light, especially if you are too pressed for time and space to use off-camera flashes.

Even though the 35mm focal length is already covered by the 24-70mm f/2.8 (discussed above), the difference between f/1.4 and f/2.8 (two extra stops for four times the light) cannot be underestimated.

lenses for wedding photographers

lenses for wedding photographers

The 35mm is also offered as an f/1.8 version by Nikon, but it’s a DX lens that you can purchase for cheap (under $ 200).

You may wonder about the astronomical difference in price compared to the professional f/1.4 counterpart. First of all, you cannot use the DX lens on a full-frame camera without losing pixels, and the lens becomes 52.5mm which can be very limiting in tight spaces.

Secondly, the 35mm view is close enough to what the eye naturally sees, and I like that view. It allows you to capture images that give the viewer the impression that they could have been there seeing the scene themselves. This is an important element in any wedding photography, specifically wedding photography with a documentary style.

lenses for wedding photographers

If you ever get to physically hold each lens in your hands at the same time, the enormous price difference between the f/1.4 version and the f/1.8 version won’t even be in question. The f/1.4 is considerably heavier and much bigger than the pocket-sized f/1.8. But don’t be fooled by appearances; the f/1.8 is also an outstanding lens with exceptional capabilities in its own right, and for crop-sensor cameras may be more than sufficient. It is definitely easy on the budget.
lenses for wedding photographers

lenses for wedding photographers

If you already have a 50mm lens and your budget is constrained, then a 50mm prime could replace the 35mm prime on this list. It is also an incredible lens.

Although a 50mm doesn’t give you as much room to maneuver in smaller spaces as a 35mm, the bokeh on the 50mm is stunning and it’s impressively sharp too, which is one of the top benefits of prime lenses. Like the 35mm lens, the 50mm is available as an f/1.8, f/1.4 or, for Canon cameras, an f/1.2 maximum aperture. The price difference is small between the f/1.8 and the f/1.4, but it jumps up to a huge number for the f/1.2.

lenses for wedding photographers details

lenses for wedding photographers church

5. 105mm (100mm) or 60mm macro lens

A macro lens is the last of my must-have lenses for wedding photographers. It’s absolutely key if you want to capture detailed images of rings. You can also use your macro lens for photographing jewelry and other accessories while the bride is getting ready.

If the bride’s dress is adorned with jewels, a macro lens would also be ideal for photographing the details.

In addition, macro lenses are also great for portraits if you do not require an aperture wider than f/2.8. This makes macro lenses versatile options to carry around, especially 60mm macro lenses, which look and feel minuscule compared to the 105mm options (100mm for Canon). These macro lenses can generally stop down to f/32, which is handy, especially when photographing location landscapes in extremely bright sunlight.

lenses for wedding photographers

lenses for wedding photographers rings

Some photographers even use the 105mm macro lens as a substitute for the 70-200mm lens if the latter is just too out of reach. You can use the 105mm in Crop mode, which gives you 157.5mm; this is long enough to still be very inconspicuous at a wedding. A 105mm lens is also smaller and lighter, and it opens up to f/2.8. Plus, it doubles as a macro lens.

lenses for wedding photographers details

lenses for wedding photographers

The post 5 Must-Have Lenses for Wedding Photographers and Why appeared first on Digital Photography School. It was authored by Lily Sawyer.


Digital Photography School

 
Comments Off on 5 Must-Have Lenses for Wedding Photographers and Why

Posted in Photography


5 Reasons Why the Canon 10-18mm is a Must-Have Wide-Angle Lens

18 Sep

The post 5 Reasons Why the Canon 10-18mm is a Must-Have Wide-Angle Lens appeared first on Digital Photography School. It was authored by Kunal Malhotra.

After buying a new camera we all start planning for our next lens, which can replace or complement the kit lens. This is when the real confusion starts, you have to choose one out of the so many options available in the market. If you are a Canon APS-C camera user and looking for a wide-angle lens, the Canon EF-S 10-18MM f/4.5-5.6 IS STM could be an ideal choice. I have been using this lens for almost a year now, so I thought of sharing my experience and views with you all. Let me share 5 reasons why I believe that Canon 10-18mm lens is a must-have wide-angle lens.

Canon-10-18mm-lens

1. Ultra-wide angle of view

If you are or have used the 18-55mm kit lens on your Canon APS-C body, there might have been situations when you wanted to go wider than 18mm. This is when having the Canon 10-18mm lens in your camera bag can help you click frames as wide as 10mm (P.S. do apply the crop factor).

Canon-10-18mm-lens

Imagine you are at a rock concert or an event and you wish to capture the entire stage in a frame. Or imagine yourself looking at a beautiful landscape with beautiful clouds and the sun is setting. This is when using the 10-18mm lens can help you capture ultra-wide angle shots even from a short distance.

2. Ideal for Vlogging

With companies such as Canon also focusing on video features, more and more people are adapting to the vlogging culture. Isn’t it fun to capture moments and experiences when you are traveling and at the same time show your surroundings in a single frame?

5 Reasons Why the Canon 10-18mm is a Must-Have Wide-Angle Lens

I have been personally using the Canon 10-18mm lens on my Canon M50 to record almost all my vlogs for the past year, and have never had a second thought about it. The only situation where this lens can struggle is in low light conditions as f/4.5 is the widest it can go, which might introduce noise. But then, at $ 300, you can hardly find such a wide focal length that matches your requirements.

3. Features Image Stabilization

There are very few lenses (as far as I am aware) that feature Image Stabilization, and are priced under $ 300. This lens is equipped with a 4-stop optical image stabilizer which comes in handy while clicking photos in low light conditions. In practical scenarios, I have managed to get a sharp and stable shot handheld at 1/2th sec using 10mm focal length. So even if it is an f/4.5-5.6 lens, you can let in more light using a slower shutter speed in low light situations.

5 Reasons Why the Canon 10-18mm is a Must-Have Wide-Angle Lens

But you must be careful while clicking images at such a slow shutter speed, especially when there are elements in motion in your frame. I usually use it while clicking photos of monuments/buildings or creative images like light trails.

4. Use it for close-up shots

You may be thinking, “why would I want to click macro shots using a 10-18mm focal length?”

Well, this is not the ideal focal length range for macro photography, but that is where the fun starts. If you wish to capture something different and with a unique perspective, you can get some amazing close-up shots.

Canon-10-18mm-lens

In the sample macro shot shared above, you can see that I was able to get close to the insect and at the same time capture wide frame with shallow depth of field. Isn’t that a unique perspective in itself?

5. Ideal for Street Photography

I believe there is no particular focal length that can be termed as perfect for street photography. Every photographer has their own way of capturing photos while traveling. Some may like ultra-wide, some may prefer a standard focal length, and some may go for a 50mm or 85mm lens.

Canon-10-18mm-lens

I tried clicking candid street photos while roaming in my city and to my interest, the 10-18mm focal length range impressed me for the sole reason that I could capture more elements in my frame. If I had shot this photo shared above at 24mm or 35mm focal length, I would either had to move a few steps back or capture only a part of this beautiful moment.

What are your views about the Canon EF-S 10-18MM f/4.5-5.6 IS STM lens? Feel free to comment below.


canon-10-18mm-lens

The post 5 Reasons Why the Canon 10-18mm is a Must-Have Wide-Angle Lens appeared first on Digital Photography School. It was authored by Kunal Malhotra.


Digital Photography School

 
Comments Off on 5 Reasons Why the Canon 10-18mm is a Must-Have Wide-Angle Lens

Posted in Photography


10 Must-Have Photography Accessories

28 Jun

You finally have your new camera and after the first few weeks of taking it out, you begin to realize that there may be other things that you need. Sometimes it is hard to know what photography accessories are really necessary and which are more “nice to have” items. It’s certainly possible to spend a lot of money on extra photography gear so it pays to put a bit of thought into it.

Of course, what you need will depend on the kind of photography you will be doing. A landscape photographer will need lots more things than a city street photographer. A studio portrait shooter will have a whole shopping list of expensive lights and stands required (not to mention the studio space in which to put it all).

But let’s start at the beginning, what are the most basic and necessary photographic accessories.

1. Extra Camera Batteries

Having a spare camera battery is a lifesaver, especially if you have remembered to charge it in advance. There is nothing worse than running out of power for your camera when you are away from home. You can choose to buy the branded battery to suit your camera, but there are also more cost effective third party options. My preference is to stick with branded, I have found they perform better over the life of the battery.  Feel free to run your own experiments though.

For anyone shooting in very cold weather, it’s recommended that you have several batteries and some way of keeping them warm. Very cold weather chews through battery power, as do taking long exposures or lots of burst shooting.

Necessary Photography Accessories

2. Spare Memory Cards

Opinion is divided on whether you should have a few high capacity memory cards, or several smaller capacity ones. The theory is if a card gets corrupted, with a smaller capacity card you run the risk of losing less images. Check which memory cards are recommended or preferred for your camera as there are several brands available, but not all perform at the same level.

Check the speed of the card as well, if you are likely to do a lot of fast shooting. How well the card can process those bursts of images can have impact on the performance of your camera. If a card is too slow you will get buffer overuns as the card struggles to keep up saving all the frames.

Necessary Photography Accessories

Once you have several memory cards, it also makes sense to have some way of organizing and storing them. Some people have different systems to indicate when cards are full or empty. Come up with a plan so you know which cards are exposed and which are ready to go.

Necessary Photography Accessories

3. A Camera Bag

I am quite convinced that the perfect camera bag is like the Holy Grail – impossible to find. Everyone has different requirements which mean there is no one solution. Backpacks, roller bags, sling bags, waist packs, straps, clips, belts, and body harnesses are all available options.

Necessary Photography Accessories

My sling bag for walking around the city, or times I only want to take the very basics.

There are so many choices and it can be easy to get confused, here are a few things to keep in mind when shopping for a camera bag:

  • Look for good padding in the shoulder straps.
  • That the bag is the right length for your back (I am an average height woman and a lot of bags are too long for me).
  • It has enough pockets to keep useful stuff like filters and batteries and for them to be easily accessible
  • The bag is as light as possible.
  • How does it behave when you put it on the ground, does it tip over?
  • That it is waterproof (water resistant material, flaps over the zips and the best bags come with a built in rain cover).
  • There is enough room to store all your stuff safely with sufficient padding and dividers.
  • There are good cheststraps and waist belts on backpack style bags (they take up a surprising amount of the load off your shoulders if you use them).

Over time you will probably try several different styles of bag until you find an option that is the best compromise for what you want versus what you can find.

Necessary Photography Accessories

My main bag is a backpack, the F-stop Kashmir designed for women. This is the closed position.

Necessary Photography Accessories

Backpack in the open position. Different bags can be accessed in different ways.

4. Footwear

Pretty much everywhere you go with your camera will involve some form of walking for able bodied people. This means you need to have good supportive comfortable footwear which is suitable to your conditions. Don’t forget good quality socks as well (my preferred brand is Thorlo). When looking for shoes or boots take into consideration weight, fit, comfort, flexibility, waterproofness and of course the price.

Necessary Photography Accessories

These shoes are very light and breathable, however they are not very waterproof and the soles can be a bit slippery on wet rocks. But they are super comfortable to wear all day, which is the most important thing.

Heavy boots are really tiring to walk in for long periods but you might need them for really cold weather. Depending on the type of walking and situations you will encounter, you may even consider more than one set of footwear.

5. Jackets and Outer Layers

Modern technology has made outdoor clothing very light, and it is recommended that you build up layers to adjust to changing conditions. Being too hot and sweating in very cold conditions is uncomfortable but also may contribute to hypothermia, particularly if wind chill is a factor.

Necessary Photography Accessories

Hunters Element hunting jacket in green, and Kathmandu grey windproof jacket.

So build up a selection of light technical layers you can wear or carry easily in your bag or pocket. I have three jackets, the grey one is very light and warm and scrunches down into all the corners of my pack.  The green jacket is a heavier hunting jacket that has excellent wind protection, with huge pockets in the front. Not shown is a rain shell to layer over the grey jacket for added dryness protection.

6. Extra Protection

Hats and gloves are also a necessity to keep you warm and dry. Particularly if you are outside doing landscapes or nature photography and you are sitting still for long periods. Again, layering up is useful, pictured are my thin windproof but quite warm gloves, with some heavier gloves to put on over top. The heavier gloves make it difficult to use the camera, which is why two layers of protection help me to function and stay warm.

The bottom half also needs protection. These are rain trousers that are designed to pull on over top of your standard leg layers.

Necessary Photography Accessories

Your backpack and camera also deserve consideration for protection as well. Pictured below are my orange backpack rain cover and a rain cover for my camera that allows shooting in the rain.

Necessary Photography Accessories

7. Tripod

Unless you are a hardcore street photographer (needing to be light and mobile) then a tripod will likely be a requirement at some point. Necessary for sharp landscape images, long exposures, astrophotography, macro and all kinds of studio work.

A tripod requires two components to work – the legs and the head. Sometimes you can purchase them bundled together, or you may wish to purchase them separately to suit certain requirements. Here are some key things to look for in a tripod:

  • Are the legs tall enough for you? I was surprised to find many tripods too short for me at 5’6″ – having the right sized legs makes it easier on your neck and reduces the need to use the center pole.
  • Does the center pole adjust to horizontal mode? Very useful for doing still life and macro work.
  • Is it a clip or a twist-lock type of leg extension? People prefer different options – wildlife photographers often use twist-lock legs as they are quieter.
  • How heavy is it? Carbon fiber is the lightest option, but it is also very expensive and in comparison, not always that light. Plus a heavier tripod offers more stability when used outside.
  • Is there at least one leg wrapped? Carrying a bare metal pole on a cold frosty night is unpleasant.

Tripod head

Tripod heads come in many variations as well. Ball and socket are quite common but take two hands to utilize. A good quality head will be made out of solid material and be strong enough to hold your camera and its heaviest lens at a variety of angles. Do your research on weight tolerances and creep before purchasing.

Additional tripod accessories worth considering are L-plates for your camera body, and if you are into macro, nodal rails as well. Also learn how to take your tripod legs apart and clean, especially when used in water or in the ocean.  This will extend the life of your tripod and save you money.

Take time to invest in a good tripod/head combination and it will last you for many years.

Necessary Photography Accessories

Manfrotto legs with an Acratech head. My preference is for click adjustable legs.

8. Camera Manual

It’s small and light and easy to tuck into your camera bag and really handy to have when you need it. It may never get used, but it’s good to have on hand. Take your camera manual with you!

Necessary Photography Accessories

9. Card Reader

There are several different ways to transfer data from your camera to your computer. Some new camera bodies have wireless, or can be connected via a cable to the computer for data transfer. However, that tends to chew up battery power quite quickly on the camera.

My preference is to use a USB card reader. USB 3 or the newer USB-C provide fast data transfer for those in a hurry. Additionally having a small portable reader allows you to take it with you when traveling, allowing you to download on the road.

Card readers are cheap, light, easy to pack and come in really useful when traveling. Get one with lots of different ports to cover any requirements.

Necessary Photography Accessories

Necessary Photography Accessories

10. Other Useful Stuff

There are other non-photo things that are useful to have around as well such as; change for parking meters or entry fees, a compass, sunscreen (mine is on a carabiner clipped to the outside of my backpack for easy access), and a pen and paper is always useful.

Other items that may come in handy are; business cards, model release forms, snacks, your cell phone loaded with a variety of useful apps, and the list goes on.

Conclusion

What you need in terms of photography accessories will depend on the type of photography you do and where you do it. This list should cover the basics that any new photographer is likely to need, or at least might need to think about investing in at some point. Being aware of your options is important as good bags and tripods can be expensive, so you will need to budget for them.

Many people forget about their own personal comfort and think cheaper clothing options will be okay. For general purpose photography that may well be the case, but anyone heading into nature should be as prepared as they can be. Good quality outdoor clothing will last and be an investment. No one wants to miss a sunrise because they were cold and wet and in an unpleasant situation.

Remember to look after yourself as well as your camera gear.

The post 10 Must-Have Photography Accessories by Stacey Hill appeared first on Digital Photography School.


Digital Photography School

 
Comments Off on 10 Must-Have Photography Accessories

Posted in Photography


6 Must-Have People Shots to Capture When Photographing Corporate Events

25 Apr

Corporate events may not be every photographer’s dream, but they can certainly be interesting and maybe even fun depending on the assignment. As a freelance event photographer, about half of my shoots are corporate events, and they are among my favorite things to shoot. There’s always lots to learn from the speakers at these events, and they tend to be relatively easy gigs to shoot if you use a pre-planned shot list and know what to look for. This article details the six key people shots that you absolutely must focus on when photographing corporate events.

#1: Posed shots of VIPs

Every corporate event will have its own form of VIPs, and your client will definitely want lots of images of them. Larger events will typically have recognizable local or national celebrities as their designated VIPs, while smaller events may have harder to recognize internal executives as their VIPs. Either way, it’s important to check with your client ahead of time to get a list of their VIPs in attendance, and ideally someone on-site who will help you identify them. Always make sure you understand the perimeters of photographing these VIPs as some, particularly celebrities, can be image-conscious. Whenever possible try to get posed shots of these VIPs with signage in the background that shows proof that they were present at your particular event.

Seattle Corporate Event Photographer

Actor Billy Dee Williams posing at a step-and-repeat.

#2: Posed and action shots of keynote speakers

Corporate events typically include keynote speakers who may or may not be the VIPs described above. Before you start shooting, grab ahold of the event program, and find out who are the keynote speakers. Work with your client to arrange posed shots of the keynote speakers both alone and posed with VIPs. Also, don’t forget to get plenty of shots of the keynote speaker, from a variety of angles, giving his or her speech.

Sattle Corporate Event Photographer

Actor and activist George Takei giving a keynote address.

#3: Candid shots of VIPs and Keynote speakers

In addition to getting posed shots of VIPs and keynote speakers, it’s also important to get candid shots of them interacting with each other, or event attendees. Depending on the nature of the event, these opportunities could include book signings, meet and greets in the green room, or an organized step-and-repeat photo booth. These days, many candid shots of VIPs will include selfies with guests, which can be a challenge to capture, so be prepared for that!

Seattle Corporate Event Photographer

Seattle Seahawks quarterback Russell Wilson posing for a selfie with a fan.

#4: Posed shots of attendees

Depending on the type of event you’re photographing, most attendees will be looking their absolute best and will want photos of themselves. Always be on the lookout for well-dressed and energetic event attendees, and don’t hesitate to approach them to ask for a posed photo. Along these lines, it’s also not unusual to have at least one event attendee who doesn’t want to be photographed. Sometimes, you’ll be made aware of this by your client, and other times the attendee will explicitly tell you themselves. Either way, respect the wishes of the attendees, and definitely do not photograph someone who doesn’t provide consent.

Seattle Corporate Event Photographer

Corporate event party attendees.

#5: Candid shots of attendees interacting

Most corporate events are held for two main reasons: to give keynote speakers chances to educate and address an audience, and to allow for networking among attendees. Always be on the lookout for attendees chatting or interacting with each other, and get their reactions while they are listening to keynote speakers. Ideally, make sure these shots incorporate some form of your client’s branding materials, such as a brochure or sign, to give the photos context.

#6: Full room shots

A final type of corporate event photo that almost every client will request are shots that show off how many attendees were present at an event. This can be tricky depending on the type of venue you are photographing at, and whether or not the event is actually well-attended. Addressing these two challenges can usually be solved in one of two ways:

a) Get a bird’s eye view

Try to get access to a ladder, stool, balcony, or some vantage point within the venue that will let you shoot from overhead and capture wide-angle shots showing a full room. If the room isn’t really that full, try to find angles or special crops that still hint at a room being moderately full. Your client will appreciate the extra effort.

Seattle Corporate Event Photographer

Shooting from up high to show a different vantage point.

b) Get up close and personal

Whenever possible, I always ask my client to make sure that the first several rows of seats or tables at an event are packed with as many people as possible. This way, I can always make an event feel well-attended, even when it’s not. The approach in this case is to avoid wide-angle shots and shoot as close to the stage or from wherever the keynote address is being made, including as many rows or tables of people as possible.

Seattle Corporate Event Photographe

This was actually a well-attended event, but an example of how to shoot up close with attendees in the frame.

In Conclusion

These are just several types of photos to always capture when photographing a corporate event. Above all, it’s important to understand why clients hire corporate event photographers in the first place. Typically, the reasons involve showing visual documentation of special people who were at the event, the fact that the event was well-attended, and the fact that event attendees were engaged and enjoyed themselves. Always keep these overall goals in mind when photographing an event and be sure to snap photos that help you and your client meet these overall objectives.

People photography week

This week on dPS we’re featuring articles all about different kinds of people photography including portrait, event and travel photography. See all the previous ones below, and watch for more people photography articles over the next few days.

  • How to Take Low Key Head-shots
  • How to Do a One Light Portrait Setup and Use it as Your Back-up Plan
  • Travel People Photography – Tips and Pitfalls
  • 8 Tips for Photographing Men
  • 24 Diverse Images That Showcase People Photography
  • Weekly Photography Challenge – People Photography
  • Tips for Getting Yourself to Relax as a Photographer and Have More Successful Portrait Sessions
  • 5 Good Reasons to Add People into Your Landscape Photography

googletag.cmd.push(function() {
tablet_slots.push( googletag.defineSlot( “/1005424/_dPSv4_tab-all-article-bottom_(300×250)”, [300, 250], “pb-ad-78623” ).addService( googletag.pubads() ) ); } );

googletag.cmd.push(function() {
mobile_slots.push( googletag.defineSlot( “/1005424/_dPSv4_mob-all-article-bottom_(300×250)”, [300, 250], “pb-ad-78158” ).addService( googletag.pubads() ) ); } );

The post 6 Must-Have People Shots to Capture When Photographing Corporate Events by Suzi Pratt appeared first on Digital Photography School.


Digital Photography School

 
Comments Off on 6 Must-Have People Shots to Capture When Photographing Corporate Events

Posted in Photography


Everyday Carry – Must-Have Tools for Photographers

15 Mar

Besides the camera, there are a lot of accessories, tools and gadgets that photographers choose to carry with them to help them get the job done.

Over the years as a professional photographer, there is a lot of stuff I have added to my camera bag that are really useful in those “what if” situations I get along the way, so I decided to put them all together inside a small tin box, and use it as an everyday carry.

01

This is not meant to be a survival kit to use in an end of the world scenario, but rather a go-to tools, that helps me out when I face some problems along the way in my photography work. Here is what’s inside:

02

  1. Silver/white card
  2. Soft cloth
  3. gray card
  4. Eneloop pro AA batteries
  5. Sandisk SD card
  6. Kingston DTSE9 silver pen drive
  7. Ibuprofen tablet
  1. 12-in-1 multi-tool pen
  2. Paracord
  3. Clipper lighter with gorilla tape
  4. Blu-Tack Reusable Adhesive
  5. Elastic bands
  6. Aluminum small carabiners
  7. 1/4” thread screw with ring

03

Tucked inside the lid of the box I carry a silver/white card that I use as a reflector for macro photography, or as a bounce card for the flash, a soft cloth that I use to clean the camera lens, and a gray card that I use as reference for color correcting.

The other things fit inside the box like a puzzle. It’s a snug fit, so there is no rattling, or damage on anything due to bouncing around.

04

  • The Eneloop pro AA batteries are probably the best choice available for photography equipment, because they are high energy, and are advertised as being able to retain 90% of their charge after 6 months, and 70% after 5 years, when stored at 20 degrees Celsius (68F).
  • It might look strange that I carry six batteries, when most pieces of equipment use 4 batteries. But, I use these as a backup for my Canon 600EX-RT flash and the ST-R3-EX transmitter, or I might need them for the battery grip I use on my Canon 5DIII, which holds 6 AAs, instead of the LP-E6 batteries.
  • The Sandisk SD card works along with the batteries as a last resort, because even though I carry backup batteries and cards in my camera bag, it is good to have a backup of the backup inside my tin box, in case something goes wrong.
  • The Kingston pen drive is a handy device to have around, as it doesn’t take up much space in the box, and can help out with backing up, or transferring files.
  • The Ibuprofen pill is something I carry with me all the time, because there is nothing worse thing than having to photograph with a headache, or some kind of pain.
  • The 12-in-1 multi-tool pen was given to me by a friend many years ago, and I carry it everywhere ever since. It looks like a regular pen, but when you open it there are blades, saws, files, tweezers, and screwdrivers that are really useful in many situations.

05

  • The paracord is another very useful thing to have around. I use it often along with the 1/4” thread screw to make a string tripod. It works as a stabilizer when you put tension on the string, wrapped around your foot on one end, and the other end tied to the 1/4” thread screw on the bottom of the camera (see below)

06

  • The clipper lighter is useful for special effects I might want to create with fire, and works great as a wrap-around base, for the gorilla tape I always bring along.

07

  • Gorilla tape has saved me more times than I would like to admit, and besides that, I’m an 80s kid, so I grew up watching MacGyver fixing everything with duct tape.
  • Blu-tack is a reusable, putty-like, pressure-sensitive adhesive, that I use a lot when I photograph food and need to keep things in place.
  • The elastic bands are useful to keep the box closed, and I also use them to hold accessories on my flash like bounce cards or color gels.

08

  • Finally, the carabiners, that I use mostly to attach things to my camera bag, or to hold a sand bag on the tripod.
  • I also use my trusty Leatherman Wave Multi-Tool a lot when I have to deal with nuts and bolts, but the fact is that it’s big, heavy, and is not something I can carry all the time.

So, this might seem like just a tin box with useless stuff inside, but the fact is that it helps me a lot to know I have this stuff with me, in case I need it.

What about you, what non-photographic things do you carry with you when you go out to photograph?

googletag.cmd.push(function() {
tablet_slots.push( googletag.defineSlot( “/1005424/_dPSv4_tab-all-article-bottom_(300×250)”, [300, 250], “pb-ad-78623” ).addService( googletag.pubads() ) ); } );

googletag.cmd.push(function() {
mobile_slots.push( googletag.defineSlot( “/1005424/_dPSv4_mob-all-article-bottom_(300×250)”, [300, 250], “pb-ad-78158” ).addService( googletag.pubads() ) ); } );

The post Everyday Carry – Must-Have Tools for Photographers by Ivo Guimaraes appeared first on Digital Photography School.


Digital Photography School

 
Comments Off on Everyday Carry – Must-Have Tools for Photographers

Posted in Photography


5 Must-Have Lenses for Wedding Photographers and Why

16 Feb

Have you ever wondered which lenses are in a wedding photographer’s bag? There is a plethora of choice when it comes to lenses, and lens companies come up with new products all the time. Many photographers are attracted to these bright and shiny things and end up with a mammoth collection of lenses, many of which hardly see the light of day. If you have to pare back to the absolute necessities, and are allowed five lenses in your wedding photography bag, these are the ones that I would recommend. I have been a professional wedding photographer for seven years now, and deciding on these five took some time, and serious consideration over the course of my career.

They are:

  1. The 70-200mm f/2.8
  2. The 24-70mm f/2.8
  3. The 85mm prime
  4. The 35mm prime
  5. A macro lens (105mm or 60mm for Nikon, 100mm or 60mm for Canon)

Let’s look at each individually to see why.

5-must-have-lenses-wedding-photographer_0001

#1 – 70-200mm f/2.8

It’s big, bulky and heavy but I wouldn’t do a wedding without this lens. The 70-200 f/2.8 is my workhorse when it comes to weddings. It is a versatile lens that gives you amazing sharpness at all focal lengths. The bokeh is beautiful, especially at 200mm, even with a stopped down aperture due to the compression caused by the long focal length.

This lens makes a wedding photographer invisible. You don’t have to be so close to people’s faces; you can capture candid expressions and serendipitous moments from a fair distance away. This lens is especially useful during the ceremony, where you would rather be far away and out of sight, or hidden behind a wall or door. It allows you to capture the exchange of rings, vows, and kiss discreetly.

5-must-have-lenses-wedding-photographer

If you require a longer zoom while being at the same fair distance, you can choose to photograph in DX mode (if you shoot full frame and your camera offers this option) on your camera, and the lens will give you 1.5x distance more, making 200mm into a neat 300mm zoom. If you do this, make sure that you have enough pixels for the crop, in case you feel the need to straighten or change your composition in post-processing.

For example, of you are shooting with a 12MP camera such as the old Nikon D700 on FX mode, when you convert to DX mode the camera becomes a 5MP camera, which is below the minimum amount of pixels you can have – 6MP – to be able to enlarge prints to a decent size. If you have to crop in post-processing, this will not give you enough pixels to be able to safely do so without compromising print output sizes.

5-must-have-lenses-wedding-photographer

However, if you are photographing with a Nikon D810 in DX mode, your image goes from 36MP to 15.3MP but still leaves you enough wiggle room for minimal, and sensible cropping if necessary. If you use this functionality, don’t forget that when photographing in DX mode on a full frame camera, or when using a DX lens, the camera only uses the center of the sensor. So if you forget to compose accordingly in camera, you will get a nasty surprise after you have taken the image: cut off heads and limbs, and badly cropped compositions are some examples. When using DX lenses, the rest of the unused sensor area is blacked out but when using FX lenses in DX mode, this is not the default and you would still see the entire full-frame sensor if you don’t change your settings.

5-must-have-lenses-wedding-photographer

The 70-200mm is an excellent focal length for flattering portraits. When photographing at 200mm, I typically stop down to around f/4 or f/5.6 at a shutter speed of 1/200-1/400th, and the sharpness of the image is stunning against a creamy bokeh background. This lens also has a built-in lens collar you can use to steady it when hand holding, or attaching it to a tripod stand. Without a tripod, you can steady yourself as much as possible by leaning against something immovable like a wall, or on a stable surface such as a table, or keeping your arms pinned against something sturdy to reduce camera shake, especially when using this lens for portrait work at the longer end of the focal length.

5-must-have-lenses-wedding-photographer

5-must-have-lenses-wedding-photographer_0033

You can now get a f/4 version of this zoom lens (for Nikon, Canon has always had one) at a vastly cheaper price compared to the f/2.8. I personally do not have the f/4 version but if you’re on a budget, and you don’t mind not having the option to photograph at a wider aperture, then I see no reason why you should not get the f/4. It is lighter and smaller, understandably so because it has less glass elements compared to its more expensive counterpart, and may not only suit the budget better, but also lessens the bulk you have to carry at a wedding.

5-must-have-lenses-wedding-photographer

5-must-have-lenses-wedding-photographer

#2 – 24-70mm f/2.8

The 24-70mm f/2.8 offers the focal length versatility needed when you are photographing on the go, which is what wedding photographers need for most of the day. You can use this lens to capture wider location scenes, candid photos of people, guests arriving, people milling and chatting while waiting for the ceremony to start or during the wedding breakfast, some decorations and details, the first dance, and the leaving photos, to cite just a few.

5-must-have-lenses-wedding-photographer

5-must-have-lenses-wedding-photographer

I use this lens for photos that do not require close portrait work, although it can definitely be used as one. The 50-70mm range will yield pleasing results, like the image directly below. However, my preference is to use prime lenses for portraits. The 24-70mm lens sees a whole lot of action during the wedding day, and is definitely my other workhorse for capturing people, wider shots, and behind-the-scenes.

5-must-have-lenses-wedding-photographer

5-must-have-lenses-wedding-photographer

Many photographers include a much wider lens for location photographs such as the 14-24mm f/2.8. While I would love to add this lens to my arsenal, this is not an absolute necessity, in my opinion. With the 24-70mm, you can photograph location scenes wide enough – but should you need to capture a wider scene, you could photograph a few images and stitch them together in Photoshop as a panorama. This is easy enough to do by making sure the exposure setting for the series of shots are the same, and you stand on a fixed point, inching your way across the panorama. You can do the same for a photograph of all the guests too. These would be the only times I would need an ultra wide angle lens for a wedding, hence I cannot just yet justify adding it to the list of must-haves.

5-must-have-lenses-wedding-photographer

5-must-have-lenses-wedding-photographer

#3 – 85mm prime

This is my all-time favorite lens, and the one I use for portraits of the bride and groom, bridesmaids and groomsmen, individual guests or small groups, and the list goes on. As a fixed lens, this requires more work on your part – you have to zoom in and out with your feet. But, the extra effort is worth it – the portraits are cleaner, the backgrounds are creamier, and it is a fabulous lens in very low light conditions.

5-must-have-lenses-wedding-photographer

The best thing I love about this lens is that it is tack sharp from the sweet spot on. Accurate, light sensitive, great results on skin, this is my go-to lens, and it never leaves my bag. Being a prime lens, the 85mm is fast, small, and extremely reliable.

5-must-have-lenses-wedding-photographer

I have photographed an entire wedding of a relative (as a guest) using only this lens. I was asked on the day if I could cover the wedding and I agreed, with only the D700 and 85mm combination in hand, which I carry with me most times for personal snapshots, and photos of my family. The photos from that wedding are published in one of the UK’s top wedding blogs: proof that you can photograph a wedding with what you have, given that you know your gear well enough.

5-must-have-lenses-wedding-photographer

The 85mm for Nikon comes in either an f/1.8 ($ 479 USD) or f/1.4 version ($ 1595 USD), with a huge price difference between the two, due to the glass elements and optics (Canon also has an f/1.2 available, it’s $ 1999 USD). However, many photographers are divided between which lens is better. I have the f/1.8, and it has always performed marvellously for me. The f/1.4 has been on my lens list forever, and while I could buy it as the 85mm is on my necessity list, I have held off given that I have never felt the need to upgrade.

5-must-have-lenses-wedding-photographer

#4 – 35mm

One of my early serious lens investments was this amazing 35mm f/1.4. If there is a lens I can always rely on, it’s this one. This is an ultra versatile lens that you can use to photograph the bride getting ready – the time when wedding photographers are usually under pressure to capture everything from location, the myriad of accessories, details, candid shots, the dress, the natural interactions between the bride and her loved ones, and group portraits – in a very short amount of time and more often than not, in small spaces like cramped hotel rooms. It is also perfect for photographing wider scenes, and you get images without the exaggerated distortions that you get with the 24mm.

5-must-have-lenses-wedding-photographer

5-must-have-lenses-wedding-photographer

This lens is super fast and sharp, and has yet to fail me. With this lens you can get close, with 0.3m (11.7″) minimum focusing distance – very handy when you are in in a crowded space. As if that weren’t enough, this lens opens up to f/1.4 which can let you photograph in extremely low light, especially if you are so pressed for time and space to use off-camera flashes. Even though the 35mm focal length is already covered by the 24-70mm, the difference between f/1.4 and f/2.8, in its ability to allow more light in (two more stops of 4x the light), cannot be underestimated.

5-must-have-lenses-wedding-photographer

5-must-have-lenses-wedding-photographer

The 35mm also comes in f/1.8, a DX lens you can purchase inexpensively (under $ 200). You may wonder why the astronomical difference in price compared to the professional f/1.4 counterpart. First of all, you cannot use the DX lens on a full frame camera without losing pixels, and without the 35mm focal lens becoming a 52.5mm, which can be very limiting in tight spaces. Secondly, the 35mm view is close enough to what the eye naturally sees which people say is around 40mm in loose terms, and I like that view. As a wedding photographer, it allows you to capture images that gives the viewer the impression that they could have been there, seeing the same view themselves. This is an important element in any wedding photography, specifically that with a documentary style, in my opinion.

5-must-have-lenses-wedding-photographer

If you ever get to physically hold each lens in your hands at the same time, the enormous price difference won’t even be in question. The f/1.4 is considerably heavier, and much bigger than the pocket-sized f/1.8. But, don’t be fooled by appearances. The f/1.8 is also an outstanding lens with exceptional performance in its own right, and for crop sensor cameras may be more than sufficient, and is most definitely easy on the budget.
5-must-have-lenses-wedding-photographer

5-must-have-lenses-wedding-photographer

If you already have the 50mm and your budget is constrained, then the 50mm could replace 35mm on this list. It is also an incredible lens. Although the 50mm doesn’t give you as much room to maneuver in smaller spaces as the 35mm, the bokeh on the 50mm is stunning and it’s impressively sharp too, which is one of the top benefits of prime lenses. Like the 35mm, the 50mm is also available in f/1.8, f/1.4, and for Canon f/1.2.  The price difference is meagre between the f/1.8 and the f/1.4, then it jumps up to a whopping figure with the f/1.2.

5-must-have-lenses-wedding-photographer

5-must-have-lenses-wedding-photographer

#5 – 105mm (100mm) or 60mm macro lens

A macro lens is a must for you as wedding photographer, if you want to capture amazing images of rings in close detail. You can also use this lens for photographing jewellery and other accessories when the bride is getting ready. If the bride’s dress is adorned with jewels, the macro lens would also be ideal to photograph the details. In addition, macro lenses are also great to use for portraits if you do not require an aperture wider than f/2.8. This makes it a versatile lens to carry around, especially the 60mm which looks and feels minuscule compared to the 105mm (100mm for Canon). Both lenses can also stop down to f/32, which is handy, especially when photographing location landscapes in extremely bright sunlight.

5-must-have-lenses-wedding-photographer

5-must-have-lenses-wedding-photographer

Some photographers use the 105mm as a close substitute for the 70-200mm, if the latter is just too out of reach.  You can use the 105mm in DX mode which gives you 157.5mm, long enough to enable you to still be very inconspicuous at a wedding. It is also smaller and lighter, and opens up to f/2.8, as well as doubles up as a macro lens.

5-must-have-lenses-wedding-photographer

5-must-have-lenses-wedding-photographer

Do you have other must-have lenses in your wedding camera bag? Please share them here below.

googletag.cmd.push(function() {
tablet_slots.push( googletag.defineSlot( “/1005424/_dPSv4_tab-all-article-bottom_(300×250)”, [300, 250], “pb-ad-78623” ).addService( googletag.pubads() ) ); } );

googletag.cmd.push(function() {
mobile_slots.push( googletag.defineSlot( “/1005424/_dPSv4_mob-all-article-bottom_(300×250)”, [300, 250], “pb-ad-78158” ).addService( googletag.pubads() ) ); } );

The post 5 Must-Have Lenses for Wedding Photographers and Why by Lily Sawyer appeared first on Digital Photography School.


Digital Photography School

 
Comments Off on 5 Must-Have Lenses for Wedding Photographers and Why

Posted in Photography


Must-Have Gear forSummertime Photography

28 May

Goodbye tests and 8:00 a.m. classes.

School’s out and summer’s in!

To help you prepare for all those fun-in-the-sun photo ops coming up, we put together a handy list of essential summer photo gear.

From umbrellas to lens filters, you’ll be ready to snap pics whether you’re poolside or in the middle of that long-awaited camping trip.

Slap on some sunscreen and let’s go!

FUNdamental Items for Summer Photos

(…)
Read the rest of Must-Have Gear for
Summertime Photography (874 words)


© Taylor for Photojojo, 2015. |
Permalink |
No comment |
Add to
Summertime Photography”>del.icio.us

Post tags:


Photojojo

 
Comments Off on Must-Have Gear forSummertime Photography

Posted in Equipment


10 Must-Have Camera Settings for Concert Photography

16 Sep
The Rolling Stones

The Rolling Stones: Nikon D800, 185mm at f4, 1/320, ISO 1600

The correct camera settings are key to getting awesome concert photos in low light situations. Maybe you were in this situation before. You used the full automatic mode in front of the stage and – BAM- the little flash monster sitting on top of your camera pops up and throws the ugliest light you can think of onto the singer’s face. At this point, a lot of frustrated concert photography beginners just take their cameras home and never shoot a concert again. But wait, in this article I’ll share the camera settings I use all the time during concert shoots and I promise they’ll help you to immediately boost your career as concert photographer. Let’s start.

1) Aperture Priority Versus Manual Exposure Mode

I started off using aperture priority mode; you tell your camera the aperture you want to use and the camera sets the shutter speed accordingly. This is a great option for a beginner to use, because you’ll be stressed enough with all the other things going on around you. However, I soon recognized that only manual mode would give me the flexibility I was looking for. I set aperture, shutter speed, and ISO and then change them on the fly using the internal exposure bar in the viewfinder. I am constantly checking my LCD screen and have a look at the histogram to see if my exposure is correct.

Fink

Fink: Nikon D700, 14mm at f/2.8, 1/200, ISO 3200

2) Use the Lowest Aperture Number

When deciding which lenses will work best for concert photography, you’ll always come to the same conclusion: use fast lenses and shoot them wide open. Set your aperture to the smallest number on your lens e.g. f/1.8 (which reflects a big aperture). This allows the most possible light to enter your sensor and is a must-have setting in ultra low-light stage conditions. The best zoom lenses have an aperture of f/2.8, the best prime lenses f/1.4 or f/1.8. For Beginners on a budget I suggest to get a 50mm f/1.8, which is cheap and therefore a no-brainer for concert photography.

3) Use a Fast Shutter Speed

Have you ever been on a concert where the artist was hyperactive jumping from one side of the stage to the other? To freeze these movements you have to use a fast shutter speed. In general, I set my shutter speed at 1/200sec and faster. Otherwise you risk blurred photos.

Miley Cyrus

Miley Cyrus: Nikon D800, 340mm at f/4.8, 1/320, ISO 1600

4) High ISO Values

ISO or film speed refers to the sensitivity of an analog film. Today the term is used for the sensitivity of your digital sensor. The higher the ISO setting the less light is needed for a proper exposure, but the more noise you will encounter in your pictures. Depending on the ability of your camera a good starting point for ISO is a setting of 1600. If my shutter speed is too low, I will crank up the ISO setting to 3200 or 6400.

5) Spot Metering

Set your camera’s internal light meter to spot metering. This takes a light reading limited to the center of your viewfinder (a very small percentage, and some cameras allow you to choose where to meter – check your manual). When shooting concerts, you will often find yourself in a situation where the artist is lit by a spotlight and the rest of the stage is almost dark. When using spot metering mode, place the artist’s face in the middle of your viewfinder and you’ll get the right exposure for it. When using the Matrix (or evaluative) metering setting, the camera will take a light reading at several points in the scene and you’ll probably get overexposed faces if the background is dark.

Atari Teenage Riot

Atari Teenage Riot: Nikon D700, 50mm at f/1.8, 1/2500, ISO 1600

6) Use the Middle Autofocus Point

On your camera, only use the central focus point in low light situations. This will be the most accurate one. If you don’t always want to have the artist in the middle of the frame, you have to recompose. Simply push your shutter button halfway down to focus on the artist’s face. By holding the shutter button halfway down you lock focus. Now move your viewfinder until you get the desired framing and push the shutter button fully down.

To use this technique, you have to set your camera to Autofocus single (AF-S for Nikon, One Shot for Canon) mode, otherwise the camera focuses continuously while you’re reframing your picture. You can also set the AF-ON button to focus, which I prefer.

7) Use Auto White Balance

I use the auto white balance setting on my camera. The reason being is that I shoot in RAW format and can therefore adjust the white balance setting in post-production anyway.

Skunk Anansie

Skunk Anansie: Nikon D700, 85mm at f/3.5, 1/500, ISO 1600

8) Multiple Shot (Burst) Mode

Set your camera to multi-shot mode (may be called High Speed shooting mode). It allows you to rapidly shoot three to four photos in a row (depending on the frames per second of your camera model. It’s more likely that at least one of the four photos is tack sharp whereas the others might not be in focus.

9) Never Use Flash

First, you are not allowed to use a flash in concert photography. Imagine ten photographers burst their flashes at the same time. This would be quite annoying for the artist. Second, straight flash pictures don’t look awesome.

Korn

Korn: Nikon D700, 130mm at f/2.8, 1/250, ISO 3200

10) Shoot in Raw Format

Always shoot concerts in RAW format. If you shoot in JPEG mode, the internal camera computer adds contrast, saturation and sharpness to your photos. These files look great when you open them on your computer, but don’t leave much freedom in post-production. If you shoot in RAW format, the camera does not process the photo at all. The advantage is that you can change parameters like exposure, white balance, saturation, contrast, clarity and so on afterwards.

Here is a summary of my ten must have camera settings:

  1. Use manual exposure mode
  2. Use your lowest aperture number
  3. Use fast shutter speeds
  4. Use high ISO values
  5. Use spot metering
  6. Use your middle autofocus point
  7. Use the auto white balance setting
  8. Use burst mode
  9. Never use flash
  10. Shoot in RAW format

With these camera settings you will be able to get great results when shooting in low light conditions such as concerts.

The Prodigy

The Prodigy: Nikon D800, 85mm at f/1.8, 1/320, ISO 1600

Zola Jesus

Zola Jesus: Nikon D700, 50mm at f/1.8, 1/200, ISO 1600

Being a concert photographer can be tough. There are a lot of industry secrets that nobody is talking about and it took me almost six years to reveal them.

So I decided to write the Guide to Rockstar Concert Photography which is a step-by-step guide which will provide you with all the information necessary from shooting your first concert, learning which camera gear and settings you need, how to build an awesome portfolio, understanding the rules of the photo pit, getting signed by magazines, shooting exclusively for your favorite bands, and making money with your work.

This guide is available for the first and only time at SnapnDeals at a 50% off discount to help you getting started to become a Rockstar Photographer too.

The post 10 Must-Have Camera Settings for Concert Photography by Matthias Hombauer appeared first on Digital Photography School.


Digital Photography School

 
Comments Off on 10 Must-Have Camera Settings for Concert Photography

Posted in Photography


Infographic: 10 Must-Have Wedding Shots for Every Bride

25 Jan

Getting married but unsure of what kind of wedding photography you want? Flicking through various online galleries, websites, and blogs for inspiration? Never dealt with a professional photographer and not sure of what questions to ask? We profile the top ten wedding shots every Bride should have. From the wedding morning excitement, to when you finally say ‘I do’. We Continue Reading

The post Infographic: 10 Must-Have Wedding Shots for Every Bride appeared first on Photodoto.


Photodoto

 
Comments Off on Infographic: 10 Must-Have Wedding Shots for Every Bride

Posted in Photography