RSS
 

Posts Tagged ‘Mundane’

How to Create Fine Art Images from the Mundane

02 Oct

It’s easy to feel defeated before you’ve even started when it comes to creating fine art images. A quick search of any of the popular photography sites brings up beautiful and humbling images from the far corners of the world.

However, you don’t need a round-the-world ticket and a six-month career break to shoot beautiful fine art photography. You can do this at home in your living room with minimal expenses if you’re prepared to think a little outside the box!

Physalis color duo - How to Create Fine Art Images from the Mundane

What does fine art mean anyway?

Fine art photography is one of those terms that is tricky to pin down. There are two ways that the term “fine art” is usually used so it’s important not to get confused between the two.

The first is usually in the context of museums and galleries. Fine art in European academic traditions is most often used to describe a work that was created primarily for beauty and has no other function. It is the opposite of “applied art” which describes everyday objects (such as ceramics) which have been decorated to make them more aesthetically pleasing.

When people talk about fine art photography though, they tend to be talking about a style of photography rather than a method of production. In this context, it’s usually art that was created for art’s sake. An image that was always designed to be primarily enjoyed for its beauty rather than its subject matter.

Sometimes there are lighting and processing styles that maybe associated with the term “fine art photography” but fashions and trends come and go, even in the world of art!

Physalis colour triptych

For a more in-depth look at fine art photography read: The dPS Ultimate Guide to Fine Art Photography

Flat Perspectives

Flat lay images have been gaining popularity for a while now. If you scroll through Instagram or Pinterest you’ll almost certainly find them in your feed. But most of the flat lay images out there on social media are heavily focussed on creating a real commercial vibe that sells a product or an experience.

Even those photographers not selling anything have often adopted this commercial style for their personal feeds. While there’s nothing wrong with this approach at all, there is room for a different interpretation of this style of an image by creative photographers who want to shoot fine art.

Searching for Inspiration

It’s always a good idea to start with a vision of how your final shots will look. A close study of the detail and texture of an object was the idea that I had in mind for this image. There’s a real trend in interior design right now for groups of artfully curated objects placed creatively on walls and it was this trend that I wanted to explore.

These images are also heavily inspired by the work of Edward Weston over the past few years, someone who has been inspiring me in my work for years.

Weston used photography to explore natural forms. He strived to capture details of the reality around him with real precision. Between 1927-30 he would shoot a portfolio of images based around peppers, shells, and cabbages. Through these images, Weston translated reality into something much more abstracted and Modernism-inspired.

Physalis - How to Create Fine Art Images from the Mundane

A trip to the supermarket was in the cards as a homage to Weston’s visionary images of food. I auditioned pomegranates, gnarly heirloom tomatoes, and unusually long, thin peppers. But it was finding a bag of physalis (sometimes also called ground cherries or Chinese Lanterns) on the top shelf that really stoked my imagination.

Shooting Techniques

Lighting is everything when it comes to creating close photographic studies of objects. I am lucky enough to have an east-facing bay window in my studio. Around about early afternoon, it has the most perfect light for shooting really natural looking fine art images. You could create similar images using any large window on a bright overcast day.

Place a background onto your shooting table first – I selected a faux-wooden finish – and then set your camera up on a tripod looking directly down at the table (use a spirit level here if you have one).

If you don’t have a tripod that can flip its central column and tilt it horizontally you’ll want to purchase an accessory arm in order to shoot flat lays. Getting the camera directly above the subject without the tripod’s legs getting in the way is crucial to this style.

Physalis bw triptych - How to Create Fine Art Images from the Mundane

Finding the Light

There’s a theory that humans read images in a similar way to how they read written text. For me, because English is my primary language, I read from left to right. That means when I shoot I almost always start with the light coming from the left and the shadows on the right as default.

This way your viewer would be reading the image from the light to dark in the same way that they would read a book. It should feel very natural and easy.

If the light isn’t right for the image then wait until later in the day or even another day altogether. Shooting with available light isn’t always the quickest process but it can be very rewarding. When you’re using available light always have black and white cards on hand to bounce or block the light. Just because it’s not coming from a studio light, doesn’t mean you can’t modify it.

Controlling the Camera, Creating Compositions

One of the best things about the Fuji range of cameras is the iPhone app that goes with them. Although the screen on some cameras, like my Fuji, tilt so that you can see what you’re shooting – when you’re set up for flat lay shots it can still be a little awkward. The app gets around this problem and allows you to see exactly what you’re doing in real time.

Physalis fuji app - How to Create Fine Art Images from the Mundane

When you’re shooting overhead flat lay images, a smart thing to do is to connect the phone and camera, start the app, and then place it on the table next to the arrangement of objects (but out of the shot). That way you can watch the scene as you move objects around to get the perfect composition before you push the shutter button.

It’s an extraordinarily useful feature to have the images transmit live so that you can watch them as you work. It really allows you to perfect your styling in a much shorter time than it might otherwise take.

Look for More Images

It was too easy to be content with the first flat lay group of physalis that I shot, but I knew that there were more images to be had of such a beautifully delicate subject. A physalis is quite small so I grabbed my old DSLR and its macro lens and begun the process all over again of finding a shot.

Changing lenses, especially if you shoot with primes, can really help you find another great image if you’re stuck for ideas or you think you’ve already got “the one.”

An even better image emerged – a single lone physalis still encased in its delicate shell! I shot this image by getting myself between the window and the shooting table and placing a black card behind the fruit.

Physalis05

The soft, beautiful light made the semitransparent physalis appear to glow and I knew at once I had shot an image I’d be happy to print large on my wall. Changing your perspective and getting down low or up high can also stimulate new ideas when it comes to shooting the same subject.

color or Black and White?

Physalis bw color - How to Create Fine Art Images from the Mundane

I once interviewed a great boudoir photographer who was very candid about why people spent money with her. She said it was because she gave them images that they couldn’t easily create at home – and she did that by color grading every image.

It is relatively easy nowadays with modern cameras and phones to get an image that’s in focus with colors which are true to life. Auto settings will get you pretty close most of the time. In that respect, it’s also much harder to make an image stand out from the crowd.

If everyone can shoot images that look like what’s in front of you then you need to go beyond image selection, focus, and composition to get a truly unique image.

Physalis color lightroom - How to Create Fine Art Images from the Mundane

On the color images of the physalis the saturation was dropped, and then blues were added to the shadows and a warm tan color to the highlights using the split toning panel in Lightroom.

For the black and whites, I experimented to find settings that created a deep contrast between the subject and the background, adding some clarity and darkening the shadows. For some of the images, the background texture was removed altogether by selectively decreasing the exposure, thereby referencing Edward Weston’s images that are usually shot on dark backgrounds.

Seeing Art Everywhere

With some practice, you can start to see potential in every object to become a subject for a piece of photographic fine art images. Many artists have preoccupied themselves with close studies of the world around them.

Edward Weston, the painters of The Pre-Raphaelite Brotherhood, even Michelangelo all produced bodies of work that reflected on reality and how best to translate that into art.

You don’t need expensive trips around the world to exotic places or whole teams of people to create fine art photography. You just need a keen eye, your camera, and your kitchen table.

The post How to Create Fine Art Images from the Mundane appeared first on Digital Photography School.


Digital Photography School

 
Comments Off on How to Create Fine Art Images from the Mundane

Posted in Photography


From Mundane to Magical: Tips on Taking Your Photos to the Next Level

05 Oct

You may be at a point with your photography where you are comfortable operating your camera and are capable of taking a good picture. You can work with exposure, you understand composition, and can even enhance your photos in post-processing. You should be pleased with this, as this puts you ahead of the vast majority of other photographers. But at the same time, perhaps you are not seeing the elevation in your results that you expect. You are beginning to wonder why you aren’t getting more stunning pictures. Are you doing something wrong? Is there some part of this you’re not getting?

From Mundane to Magical: Tips on Taking Your Photos to the Next Level

We all go through a phase where we feel like we know what we’re doing but are frustrated by a lack of great results. In fact, for some of us, it always feels like this. You’ll never go through a time where you’re hitting magical shot after magical shot. It just doesn’t work like that. You are after something extraordinary, and by definition that is rare.

How do you maximize your chances of finding these great shots? The short version is, “through a lot of effort,” and – while true – that isn’t very helpful. So here are some areas where I focus my efforts and perhaps they will help you too.

1. It Starts with Location

We all seem to want to take our cameras down to the local park or take a stroll around a nearby lake and then come home with stunning pictures. For the most part, it just doesn’t work like that. You typically need a great location in order to end up with a great picture.

You have likely heard that “you can take a great picture anywhere” – and that is true. But just because it is possible doesn’t mean it is probable. Magical lighting or sheer genius may allow some to get great shots in ordinary places, but it is extremely unlikely. To put the odds in your favor, you need to start with an extraordinary location.

How to Scout Your Photography Locations

From Mundane to Magical: Tips on Taking Your Photos to the Next Level

Everyone from tourists to photographers, to the producers of the Game of Thrones use this location as the background for their shots. Dark Hedges, County Antrim, Northern Ireland.

How do you find such a location? There are lots of ways. If you are going to a well-traveled place such as a large city or a national park, some enterprising photographer has likely done the work for you. They will have written a book on how to photograph that particular place. These guides are invaluable and often all you will ever need. Beyond that, there are a plethora of online resources. I personally start with the 500px World Map and look at where great shots have been taken. I also like to check out the work of photographers who specialize in whatever I am going.

These resources will help you pick out good places to go. But they will also help you pinpoint specific spots to head to once you are in the area. None of this is to say you should slavishly copy any of these people, but rather that you should let their work inspire you and give you an idea of great locations that might serve as a backdrop for your upcoming stunning picture.

2. Getting that Magical Lighting

A great location alone will not result in a stunning picture. I’ve been to countless areas of great natural beauty or stunning urban environments only to walk away empty-handed. To create the stunning picture you are after, you are also going to need great lighting.

Some of you will create your own lighting through the use of flash. In that case, you’ll be able to create your own stunning lighting – and the whole thing is up to you. But that doesn’t work for me since I am always out and about photographing scenes, which aren’t as conducive to using flash.

Assuming you are like me and are relying on natural lighting, you just cannot guarantee great lighting. We all have to deal with bad weather and occasionally things don’t work out. That said, you can put the odds more in your favor.

Photograph at Sunrise and Sunset

From Mundane to Magical: Tips on Taking Your Photos to the Next Level

When you are photographing the outdoors, the sky is often a big part of the picture. A great sunrise or sunset, therefore, goes a long way toward helping you create a great picture.

The first thing to do is make sure you are photographing around sunrise or sunset. I cannot tell you the number of times people have asked me how to elevate their photography and when I look at their pictures I find that they were all taken in the middle of the day. Usually, that’s just not going to work.

Photographing at sunrise or sunset has a myriad of advantages. The sky will often be very colorful. You will also not have to deal with the extreme contrast created by bright light and dark shadows. The diffuse rays of the sun are more pleasing as well. Think about it this way: there is a reason people sit outside and watch the sun come up or go down. Take advantage of that.

Don’t Overlook Bad Weather

Keep in mind that bad weather can often lead to the best shot. It is very much a risk/reward situation. Most of the time, cloudy hazy conditions result in failure. Sometimes, however, the sun might peek through or do something interesting such that you get magical rays in your photo. Typically, nice weather will result in nice pictures. Dramatic weather can result in dramatic pictures, and that is what you are going for.

From Mundane to Magical: Tips on Taking Your Photos to the Next Level

Even an average marina can become a great shot when there is a storm approaching.

3. Creating the Composition

A great scene does not necessarily make a great photo. You’re probably familiar with rules of composition such as the rule of thirds. That is great, but this alone won’t result in the stunning photos you are after. To get there, you need something more. Here are some ideas to think about.

Start with a Center of Interest

The first thing you need is a subject or center of interest. Again, simply capturing a scene in front of you might create a nice picture, but not the shot that will cause people to say “wow” that you are after. You need something to hold the picture together. I cannot tell you exactly what that is since there are so many different things to use in this world, just be on the lookout for that.

Lead the Viewer’s Eye

Another thing that will help you is if you think about leading the viewer’s eye. You might immediately leap to the concept of leading lines, but it goes further than that. Think about where you want the viewer’s eye to start in your picture and then the route you want them to travel around it. Many times this is done in the post-processing phase. Remember that the eye is attracted to areas of brightness and sharpness. You might darken areas where you don’t want the viewer to concentrate while sharpening areas where you do want their eyes to go.

From Mundane to Magical: Tips on Taking Your Photos to the Next Level

A nice view made more interesting by the path leading the viewer’s eye into the picture.

Concentrate on the Foreground

While you’re setting up your picture, be sure to think hard about the foreground. Think of your pictures as consisting of a background, subject, and foreground. The background is already largely set by your choice of location and lighting. The subject might be the thing that caused you to raise your camera to your eye in the first place (or in any event, you will already have thought about it). That leaves the foreground as the final variable. Don’t give it short shrift. Very often, getting low to the ground gives a sense that the viewer can walk into the picture and really enhances the image.

Add Mood and Emotion

Finally, be sure to think about the mood of your picture. A great picture stirs some emotion in your viewer. Therefore you’ll need to think about the emotion or mood as you are creating it. In the field, you might underexpose a bit to add some drama to your shot. Later, when you are on your computer, you will have time to consider this further and tweak your photo with an eye towards setting this mood.

4. Enhancing the Shot with Post Processing

There are photographers who shun the use of post-processing and devote all their time and energy to getting the shot right in the field. I’m not one of them. I have never taken a shot that I didn’t think could be improved with the use of post-processing.

From Mundane to Magical: Tips on Taking Your Photos to the Next Level

Of course, there are a million things you can do to enhance your photos in post-processing. It is not my intent to walk through them all here. Rather, I just want to stress the importance of taking your time and thinking about what you want to accomplish with your picture when you sit down with it at your computer. When you are sitting down in front of your computer, you have time to think it through and work on it. In the field, you may have been rushed – dealing with a moving subject or fleeting light. Now you have as much time as you want.

Think about what your picture is about. If a part of your image does not support that idea, crop it out. Use some selective sharpening and brightening/darkening to lead the viewer’s eye. Set the mood of your picture using brightness values.

The point is not to take a mundane picture and try to post-process it into some masterpiece. Rather, selectively take a few shots and enhance them with an eye towards both (a) what you were trying to accomplish and (b) what you want the viewer to think/feel when they are looking at your photo.

From Mundane to Magical: Tips on Taking Your Photos to the Next Level

5.  Have Realistic Expectations

Finally, it is important to have realistic expectations. You aren’t going to go out and come home with a stunning picture every time. I fail all the time, and to avoid getting frustrated about it, I think about the words of Ansel Adams. He once said that he got about one great picture a month. Only one a month! If this master of photography was forced to settle for that kind of hit rate, then who am I to think I can do better? I ought to be happy with one shot a year.

From Mundane to Magical: Tips on Taking Your Photos to the Next Level

Creating the Magic

This all takes time and effort. In a lot of ways, it is like waiting for the stars to come together. There is no magic formula for going out and getting a stunning picture every time. If there were, we would all do it. Again, the whole idea is that you are looking for the extraordinary – and that doesn’t happen all the time.

Of course, these factors all work together somewhat. You can have magical lighting at a mundane location and end up with a stunning picture. Or the right post-processing can take a B+ picture and turn it into a winner.  The point is not to get you to wait around for perfect conditions. Rather just to keep moving forward with the mindset that it isn’t always going to work, but when it does it is magic.

These are the things I look for in trying to create a great photo. But that’s not to say there aren’t other – even better – ways to go about it. What do you look for in trying to elevate your photos from the mundane into something magical? Please let us know in the comments below.

The post From Mundane to Magical: Tips on Taking Your Photos to the Next Level by Jim Hamel appeared first on Digital Photography School.


Digital Photography School

 
Comments Off on From Mundane to Magical: Tips on Taking Your Photos to the Next Level

Posted in Photography


How to Capture Beauty in Ugly and Mundane Subjects

26 Feb

A huge part of your job as a photographer is to make people pause, and linger over a photograph. Sometimes it could be a stunningly lit portrait, or maybe an epic landscape. But, if you’re like me, more than likely you don’t live in an area that will provide you with daily majestic shots, and you likely don’t have a full studio set up. So, you need to find inspiration around you, in the day-to-day grind, which is not always obvious.

Roots

Albrect Dürer, the masterful Reformation period painter and engraver said, “Nature holds the beautiful, for the artist who has the insight to extract it. Thus, beauty lies even in humble, perhaps ugly things, and the ideal, which bypasses or improves on nature, may not be truly beautiful in the end.” His studies, such as The Great Piece of Turf, are great examples of this concept.

Even if you live in a concrete jungle, or the strip-mall suburbs, there is some sort of nature around you. And in nature lies the capability and potential for endless creativity. Nature may be trees, flowers and plants to you, but it’s also in the weeds, the decay, or in the ugly, neglected bits along the side of the road.

Snail

The other part to this truth of beauty in ugly is this – we are drawn to imperfection and fascinated by it, it’s human nature. Think about it – the last photo that captured your attention, was it a Photoshopped model with flawless skin in a magazine ad, or was it a side-lit portrait of an older man with a grizzled beard, and experience etched into his face? The more interesting things in life are usually the imperfect ones. We connect more to reality, not ideal perfection. So this search for interesting, compelling images in ugly, may turn you towards the neglected and forlorn places, where decay and rust run rampant.

Seed pod

In your search for beauty in ugliness, try to switch your mindset and look past the obvious subject matter.

A great way to start is to take a walk around where you live, or where you work. All the photos in this post were taken either on a 5-minute walk around the neighborhood, or a 15-minute walk around the campus where I teach. The goal is to stretch your mind on what could be an interesting photo. You could easily do this with your smartphone, as a way to actively work on photography at any time.

If you’re having difficulty getting started, think about these tactics:

Look down and look closely

Much of the decay and imperfection is at your feet, or at the edges of things. Peeling paint, rusting hinges, grass and leaves – all can make compelling images, equal or even more so than the roses or pretty blooms. You need to slow down, and look at the things you normally pass by quickly.

Grass

Shoot tight

Are you fortunate enough to have a macro lens? Use it. No such luck? Experiment with your lenses and find the minimal focal distance that works for you. Even without macro or close focus, think about shooting a quality image (ISO, resolution, etc.) that you can crop in on later. And if you’re doing this as a creative exercise, remember that your smartphone has an incredible macro on it–it’ll focus inches away from your subject. Ugly often works best as a subject in small details rather than big, wide shots.

Seeds

Go for contrast

You’re not just looking for tonal contrast, but any contrast is a magical photo trick. Contrasting textures? Check. Contrasting colors? Check.

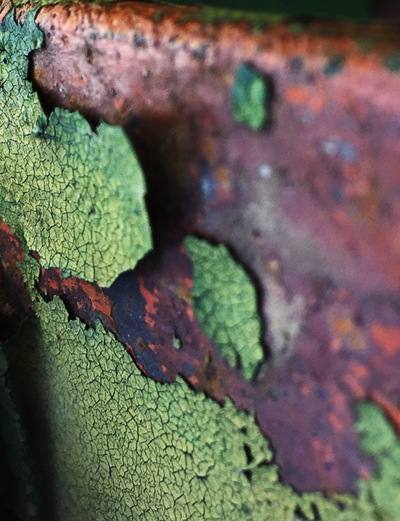
Peeling paint

Texture, texture, texture. It’s really your best friend in the search for interesting shots in not-so-pretty settings.

Think deeper

Don’t underestimate the power of symbolism. You intuitively know that there are inherent themes of loneliness, isolation, or neglect in a powerful stark image of something ugly. There is a huge fascination in current society with photographing abandoned spaces, and areas that have been forgotten. These images resonate within people. Alternately, there is a hope that occurs when you see a small bloom emerging from a pile of rubble. Remember the power of a simple visual.

Sprouted pod

Remember the ultimate subject in photography – light.

Ordinary objects can be transformed through your use of light. When you find an object to shoot, circle around it and look to see if you have shafts of light streaming in, or if there’s misty diffused light to add a mood. Just remember that if you’re shooting at noon with a harsh direct sun, it’s a good time to head for the shaded areas.

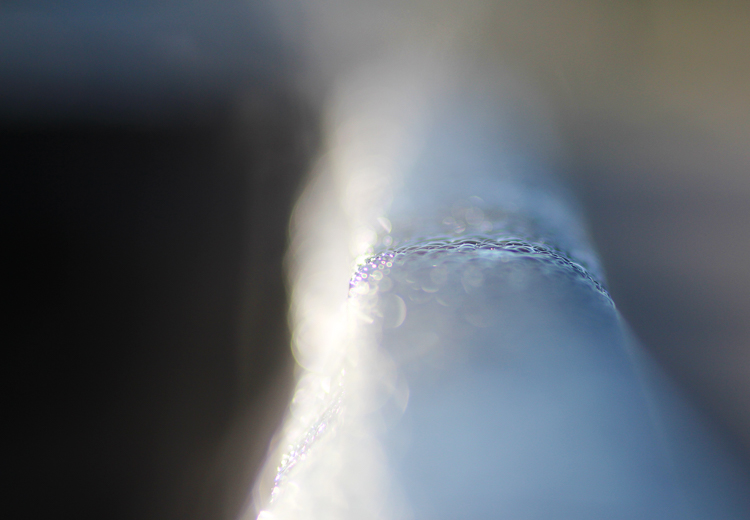
Condensation

In the end, you’ll find that by concentrating on finding interesting images in the weeds and gutters, it will actually help you in your other photography projects as well. By only documenting the ideal, perfect moments in life, you miss out on the whole story. Next time you’re shooting a wedding, or a child’s birthday party, you’ll be better prepared to capture the unplanned, imperfect moments. Those shots will be the ones that get talked about, and laughed over, for years to come.

googletag.cmd.push(function() {
tablet_slots.push( googletag.defineSlot( “/1005424/_dPSv4_tab-all-article-bottom_(300×250)”, [300, 250], “pb-ad-78623” ).addService( googletag.pubads() ) ); } );

googletag.cmd.push(function() {
mobile_slots.push( googletag.defineSlot( “/1005424/_dPSv4_mob-all-article-bottom_(300×250)”, [300, 250], “pb-ad-78158” ).addService( googletag.pubads() ) ); } );

The post How to Capture Beauty in Ugly and Mundane Subjects by Sharon Zoetewey appeared first on Digital Photography School.


Digital Photography School

 
Comments Off on How to Capture Beauty in Ugly and Mundane Subjects

Posted in Photography


Making the Mundane Magnificent: Finding Inspiration in Everyday Objects

29 Jun

Chances are you have a tourist attraction in your town. Each day people crowd around and line up to take photographs of it. If you think of the most photographed tourist spots in the United States, you probably come up with the Statue of Liberty, San Francisco Golden Gate Bridge, or Grand Canyon.

Thousands of pictures a year are taken at these destinations, however despite all of the mundane images some people can still produce incredibly unique and breathtaking photographs of these attractions.

If you study the most impressive photos you will find consistent aspects that make the mundane magnificent. To fully appreciate the qualities of such fine art, you should consider working backwards, finding inspiration in everyday objects.

A simple way to make better photos of ordinary objects

Step one – pick something, anything

Pick a simple object from around your house that you see everyday. It doesn’t have to be anything special, just something you use mindlessly each day. It could be anything from your car keys, to a spoon, or a pencil.

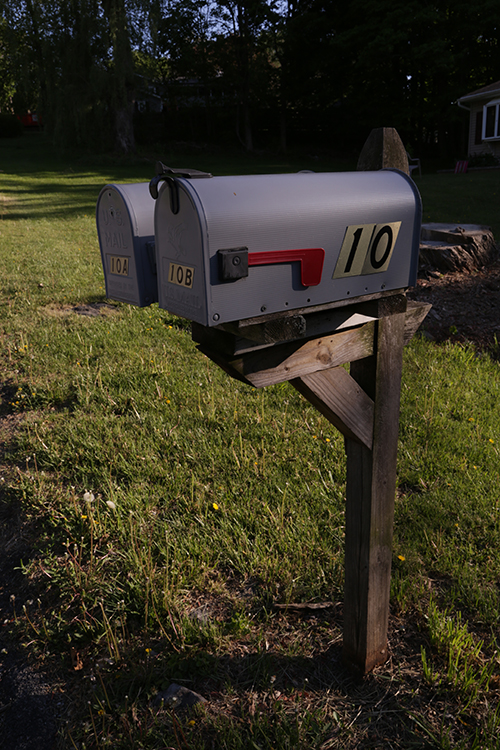
PHOTO 1

In this example we’ll try to make a picture of an ordinary mailbox unique and interesting. This first photo is an example of a mundane run-of-the-mill photograph of a mailbox (above). You should duplicate a similar photograph of your object. Use your camera or camera-phone, and without giving it much thought, just snap a picture of the scene.

Step two – choose a unique camera angle

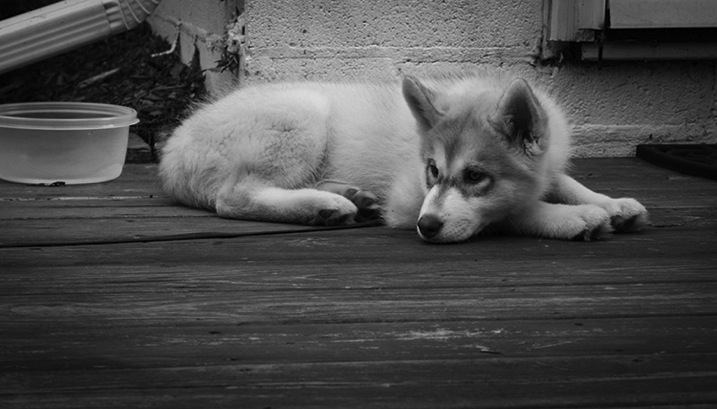
There are a few variables involved in composing a unique image, but an important one we can explore is camera angle. Beginner and amateur photographers tend to take pictures at the angles in which we are used to naturally seeing things (eye level). One example is a photograph of a pet taken from a standing position looking down at the pet. This is the most common perspective of pet photographs, thus it also tends to be the least interesting or unique. While this is a often heard tip, it gets to the heart of why the angle of a photo is so important. Getting down at ground level provides a perspective that adults are not used to seeing of a pet.

PHOTO 2

Start to think about atypical angles to which people are not generally accustomed. In the pet example, simply lying on the floor and taking a photograph from the perspective of the ground, creates a much more interesting perspective.

In the mailbox example, this photograph (below) was taken from the ground, looking up. By shooting the mailbox at a wide angle, the post of the mailbox becomes slightly distorted and creates a powerful and aggressive look. The mailbox looks much farther away than it is in real life. Furthermore, who ever looks at their mailbox from the ground? It’s a perspective most people are not used to seeing so it creates a unique presentation.

PHOTO 3

In this next image you are seeing the mailbox from the perspective of the flag. The subject becomes the flag, and creates a sensation that the flag has a meaningful and powerful purpose; there is mail that needs to be picked up!

PHOTO 4

That’s it!

When taking pictures think about how you can present the photo in a unique fashion. Is there any interesting angle you can get? Can you lie on the ground and look up? Can you get far above and provide a birds-eye view? Look at the people around you, and try to do something different from what everyone else is doing. Often we might see photographers in these awkward positions and think they look silly, but the result is usually a great photograph.

Go beyond just shooting the easy way

Chances are if the picture you are taking is convenient and easy, it won’t be original and breathtaking. Try to get to a place no one else is willing to get to, like climbing a wall, or laying on the ground, or holding the camera high up above your head. These unique angles, blended with the willingness to get into positions others aren’t willing do, typically provides photographic results that are above and beyond the norm.

Even with the most mundane objects, taking some time to think about how you can take the photo differently, can result in a stunning perspective, or unique angle, that makes the ordinary extraordinary and the mundane interesting.

googletag.cmd.push(function() {
tablet_slots.push( googletag.defineSlot( “/1005424/_dPSv4_tab-all-article-bottom_(300×250)”, [300, 250], “pb-ad-78623” ).addService( googletag.pubads() ) ); } );

googletag.cmd.push(function() {
mobile_slots.push( googletag.defineSlot( “/1005424/_dPSv4_mob-all-article-bottom_(300×250)”, [300, 250], “pb-ad-78158” ).addService( googletag.pubads() ) ); } );

The post Making the Mundane Magnificent: Finding Inspiration in Everyday Objects by Justin Varuzzo appeared first on Digital Photography School.


Digital Photography School

 
Comments Off on Making the Mundane Magnificent: Finding Inspiration in Everyday Objects

Posted in Photography


Mundane Music: The Sonification of Everyday Things

11 Dec

[ By Steph in Gadgets & Geekery & Technology. ]

Exploring the world through sound is not limited to simply listening to the audio that’s automatically produced by the people, nature and objects that surround us each day. For designer Dennis P. Paul, anything can produce its own strange music – including Legos, crumpled paper and clown heads. Paul created a device that scans the surfaces of 3D objects and translates them into audible frequencies.

In a sort of reverse of Realität’s ‘Microsonic Landscapes’, which used a 3D printer to turn albums into physical objects, ‘An Instrument for the Sonification of Everyday Things’ translates the size and shape of various items into sound waves.

A laser scans the surface of the object and sends that information through a sound processor. The more convoluted the object is, the more complex and chaotic the music. It took Paul approximately three weeks to build the instrument, which consists of aluminum tubes, black acrylic, a stepper motor, a high-precision distance-measuring laser and “a few bits and bobs.”

“I was a Lego kid, printed my own t-shirts, bought a computer at the age of 10 and started to program it to make music and graphics. If you sum this all up, it is pretty much what I do today: I’m a designer/artist with a geek streak!”


Want More? Click for Great Related Content on WebUrbanist:

Creative Musician Makes Crazy Instruments From Everyday Items

Since childhood, Diego Stocco has played with sound. These days, he sets pianos on fire, plays with staplers, and runs his fingers through sand to make music.
2 Comments – Click Here to Read More »»


The Shape of Sound: New Orleans Village Made of Music

Is this shantytown in New Orleans the most musical neighborhood in the world? Every tiny shack here is a functional musical instrument.
Click Here to Read More »»


Share on Facebook


[ By Steph in Gadgets & Geekery & Technology. ]

[ WebUrbanist | Archives | Galleries | Privacy | TOS ]


WebUrbanist

 
Comments Off on Mundane Music: The Sonification of Everyday Things

Posted in Creativity