RSS
 

Posts Tagged ‘Modifiers’

A Beginner’s Guide to Light Modifiers (For Stunning Portraits)

21 Mar

The post A Beginner’s Guide to Light Modifiers (For Stunning Portraits) appeared first on Digital Photography School. It was authored by Gina Milicia.

a beginner's guide to light modifiers

Light modifiers are a powerful way to shape or control light.

And with the right approach, you can use modifiers to achieve beautifully lit, gorgeous portraits.

In this article, I’m going to share everything you need to know about modifiers. I’ll take you through all the most popular modifiers – and I’ll explain precisely what they do and why you might want to use them.

By the time you’re done, you’ll be a light modification expert!

Let’s get started.

Are light modifiers really necessary?

Technically, you can do portrait photography without modifiers. You can shoot with a subject and an unmodified flash.

However, a naked flash produces hard light and harsh shadows, which I think look really unflattering.

That’s why I rarely work without some sort of diffusion modifier. It softens the light, softens the shadows, and gives you a flattering end result.

Nobody is ever going to tell you, “Wow, I love the way your hard lighting has captured and enhanced every single pore, line, and blemish on my skin. I actually look ten years older. Thanks!”

Hence, it’s often a good idea to start with soft, carefully modified lighting.

There are, of course, many really cool uses for hard lighting, and some photographers can make it look brilliant. I’m just not one of them. I like to control the light and only illuminate certain areas of my shot.

Therefore, for me, modifiers are absolutely essential.

A quick note about light modifier costs

Every kind of light modifier will have a top-of-the-line version and a really cheap version.

The main difference is that the cheaper versions won’t be as durable. This becomes important when you’re using them every single day.

So once you become an experienced studio photographer, it makes sense to invest in high-quality modifiers.

When you’re learning to use modifiers, however, I recommend choosing cheap versions. They’ll perform just fine, and you’ll save yourself a lot of money.

light modifiers

How to choose the perfect modifier for a photoshoot

Different modifiers affect the light in different ways.

Some modifiers broaden the beam to soften the light. Other modifiers narrow the beam to harden the light.

So when selecting a modifier, ask yourself:

What kind of lighting am I trying to create?

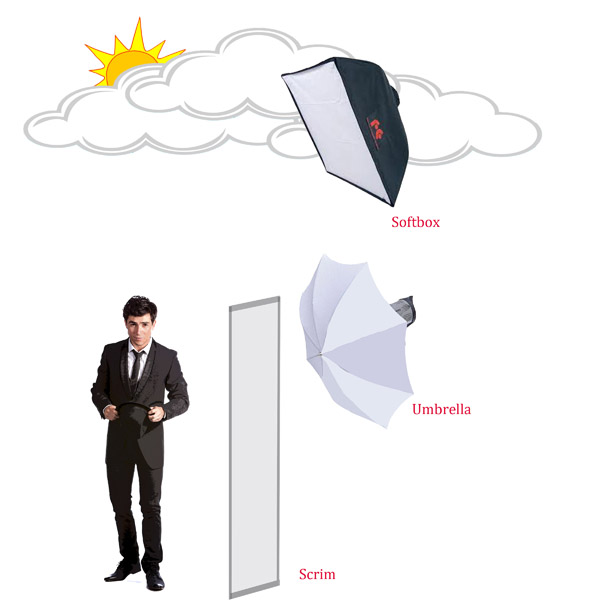
If you’re after the soft, diffused effect you’d get from an overcast sky, you might want to consider one of these modifiers:

fill flash light styles soft
If you want the soft light produced by early morning, twilight, open shade, or overcast skies, then choose a modifier that produces soft light such as a scrim, umbrella, or a softbox.

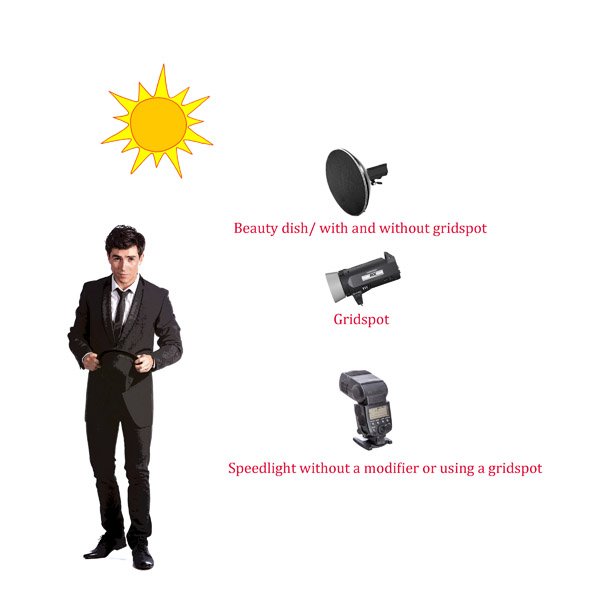
But if you want a harder light source like the sun on a cloudless day, try one of these modifiers instead:

Fill flash light styles hard
As a general rule of thumb, if you are after hard light, then opt for a gridspot, beauty dish, Fresnel light, or even a naked flash.

Note that, if you’re shooting outside or near windows, your choice of modifier should depend on the ambient light. Harsh sunlight should be combined with hard modifiers, and cloudy light should be combined with soft modifiers.

Make sense?

When picking a modifier, it’s also important to consider the mood you’re after. Soft light gives ethereal, beautiful portraits, whereas hard light tends to be more intense, in-your-face, and dramatic.

Now let’s take a look at the different light modifiers in much greater detail, starting with:

The umbrella

An umbrella creates a quality of light that is soft, abundant, and very forgiving.

Umbrellas are a great choice if you want to light a large area with flat, even lighting. Because umbrellas are easy to use and relatively cheap, they are a good beginner’s light modifier.

On the other hand, umbrellas tend to over-light scenes, spreading lots of light around.

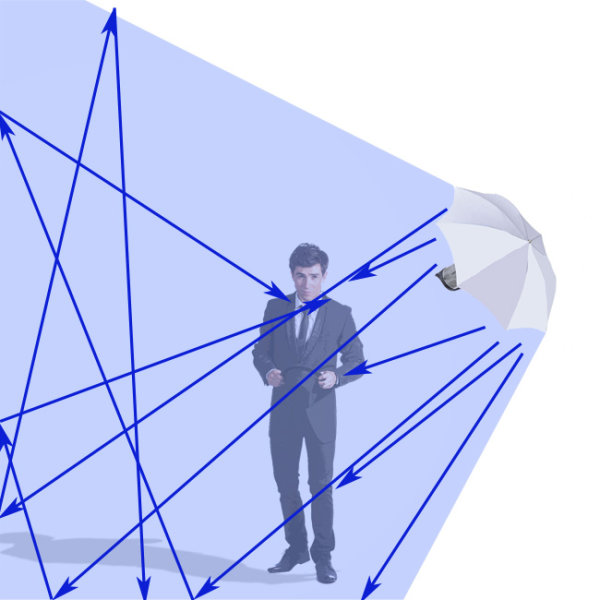
Lots of light. All over the place. Like a hose with its spray nozzle set to “everywhere.”

So think of umbrellas as an only-use-in-case-of-emergency style of lighting. If you overuse them, things tend to get a bit ugly.

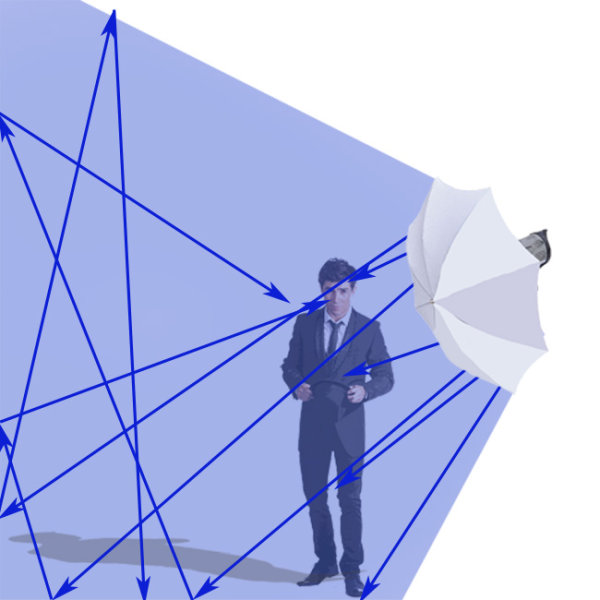
umbrella bounce light
An umbrella throws light everywhere.

Types of umbrella light shapers

There are a few types of umbrellas you should consider:

  • Silver/gold reflective umbrella: These babies throw light everywhere. They are great for lighting large groups of people. The silver umbrella will give you a slightly cooler light while the gold umbrella creates warmer light. Both produce a slightly harder result than the white reflective umbrella.
  • White reflective umbrella: This umbrella creates soft light with slightly less spread and contrast than the silver and gold reflective umbrellas. Because the style of light allows people to move around a lot while staying in a consistently even source of light, white umbrellas are great to use when you are shooting groups and couples under pressure, such as for an event.
  • White shoot-through umbrella: These are perfect as your first light modifier, as they diffuse and spread light quite evenly.
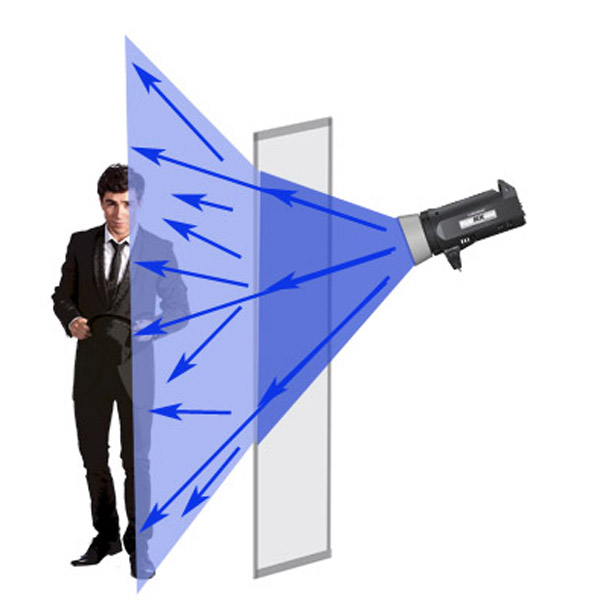
shooting through an umbrella light modifier
White shoot-through umbrella.

Umbrellas are a great first light modifier

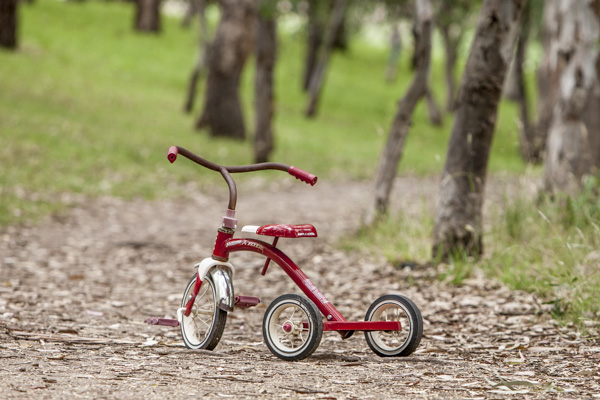
child's tricycle

When my children were young, I taught them how to ride bikes using training wheels. The wheels boosted their confidence. After a while, I took the training wheels off, and they rode on two wheels as if they’d been doing it all their lives.

I think using flash with an umbrella is the same. Use an umbrella as a learning tool until you get your balance, then move on to a better bike.

A final note on umbrellas

Umbrellas are great for indoor lighting.

But they’re tricky – and even downright dangerous – to use outside.

I’ve had countless (expensive) lights blown over when using umbrellas. So if you must use them outdoors, then please make sure you have somebody holding them or sandbags to keep them in place.

The scrim

After you’ve ditched your umbrella training wheels, the next step is to work with a scrim panel.

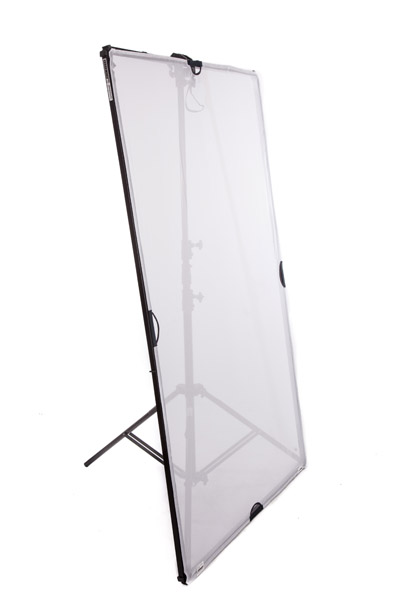
A scrim is a square or rectangular frame with a fabric diffusion material stretched across, like this:

Shapers scrimScrims are a really cool way to create large areas of soft, diffused light as if you’re shooting next to a large window or have clouds over the sun. And they’re great for diffusing flash, continuous light, and sunshine.

scrim lighting modifier

Remember: The larger the light source, the softer the light.

In fact, of all the light modifiers, a scrim is probably the most versatile and a must have in your kit.

This is a piece of equipment that you can easily make yourself. I used a DIY scrim for my first 10 years as a photographer.

The softbox

softbox lighting modifier

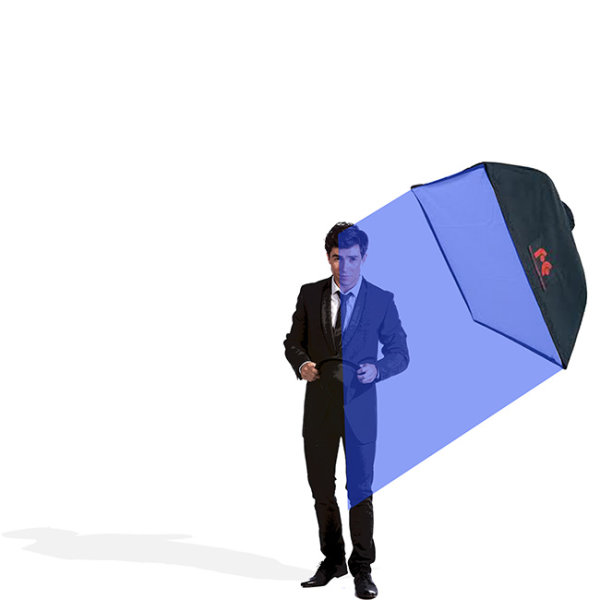
Softboxes are low-cost and versatile modifiers that create a beautiful, soft, easily controllable light source.

If I could only pick one light modifier to take to a deserted island, it would have to be the softbox. Small, medium, or large, this little puppy is my go-to light source for 80% of my shoots.

Why? The quality of light is soft, flattering, and malleable. Changing the angle and proximity of the softbox to the sitter easily changes the hardness of the light and the direction of the shadow.

It’s one of the light modifiers that most accurately recreates the effect of soft daylight coming through a window. I think what I like most about this light modifier is that it’s subtle. Highlights gently merge into shadows.

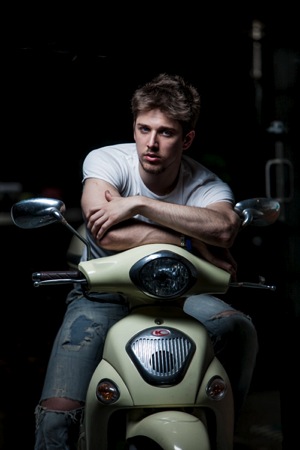
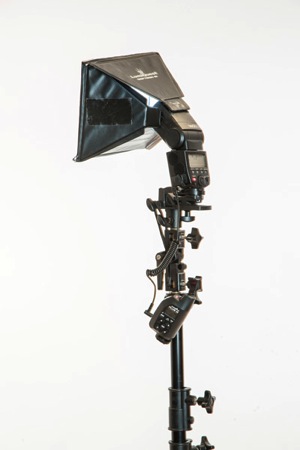
This image of a racecar driver, Glauco Junior Solleri, was taken using a speedlight and a small Lumiquest softbox:

Small softbox 580EX+Lumiquest+stand 1

For the above photo, I only wanted to light Glauco’s face and let the background fade to black. If I had used an umbrella, I would’ve sprayed light everywhere, illuminating the entire background and killing my moody vibe.

In fact, I think I love this light modifier more than Nutella.

(There! I said it.)

Softbox options

I use a few different kinds of softboxes depending on where and what I’m shooting.

If I’m doing a studio shoot, I love using a softbox with a white reflective interior. The white interior creates a softer look, and this particular softbox has an extra layer of diffusion on the inside, adding even more softness to the light.

Some photographers remove the interior panel because they like the added contrast of harder light, but I prefer less contrast.

You can also increase the spread and contrast of your light by using silver or gold interior panels.

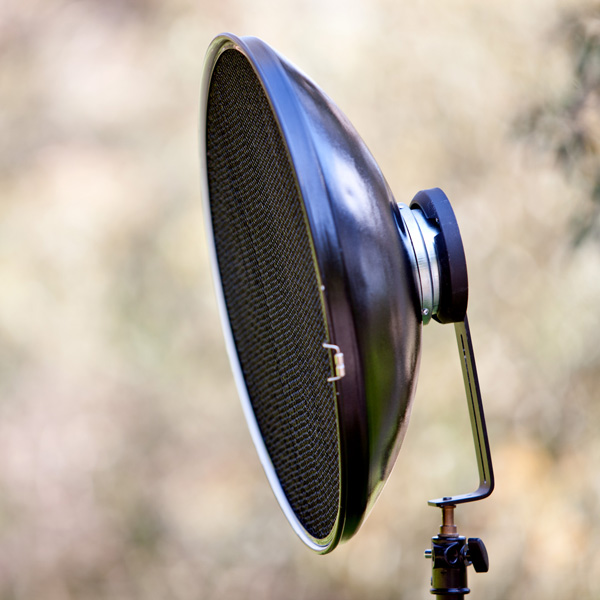
The beauty dish

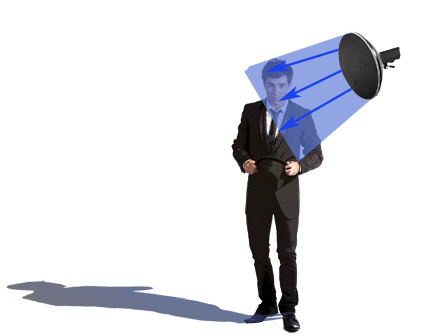
The beauty dish differs from other light modifiers because it gives you a distinctive circular, soft-contrast light, which is perfect for lighting faces and defining bone structures such as cheekbones and chin lines.

Beauty dishes also create a circular catchlight in your model’s eyes, which looks quite natural.

(You can see why these modifiers are popular with fashion/beauty and celebrity photographers.)

beauty dish lighting modifier

The downside of beauty dishes is that the falloff from light to dark is very rapid, so you’ll often get shadows under your model’s chin and nose. You can compensate for the shadows by adding a fill board, like a white reflector, to reflect light up into your subject’s face.

The beauty dish I have was pretty cheap, which goes to show that you don’t need to shell out a lot of money for every piece of equipment. I like mine because it works with my speedlight, my Elinchrom monolight, and my battery flashes.

I like that kind of versatility in equipment because it means I have more options on the day of the shoot and less to carry around!

Why should you use a beauty dish?

A beauty dish gives you a certain look. It will light a small area and flatten out your model’s features.

Beauty dishes make people look great, but you need to light your model in a very specific way – from above – to really pull it off.

The gridspot

Gridspots

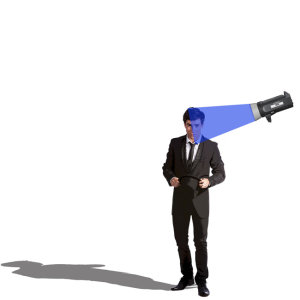
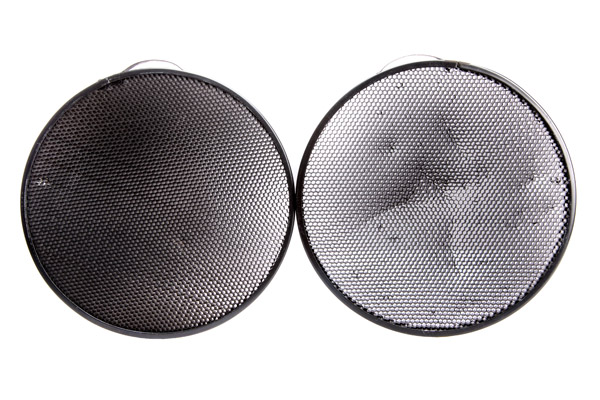
The gridspot is a bit of kit you can use in conjunction with a speedlight, monolight, or battery-operated flash. The width of the grid and the size of the holes will affect the width of the light beam hitting your subject.

A gridspot creates hard, focused light. I love to use gridspots in the same way I use beauty lights.

grid modifier diagram

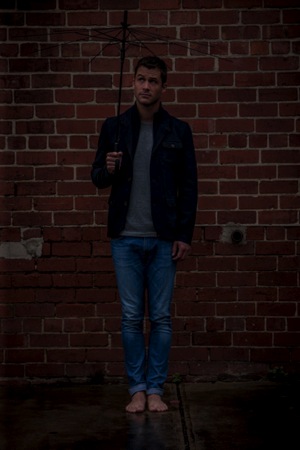
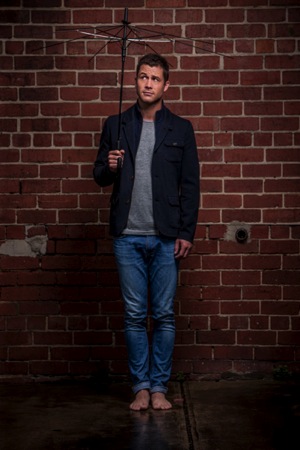
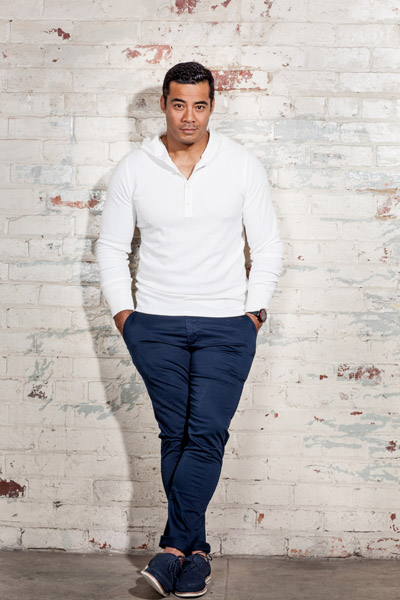
Here are some portrait images I did with Australian actor Scott McGregor, showing lighting without a gridspot (left) and with a gridspot (right):

Gridspot Gridspot 2

Why should you use a gridspot?

I like using gridspots because they create a similar light to beauty dishes. The light is a bit harder, but gridspots are perfect for single portraits; you can pop light onto someone’s face and shoulders without impacting the background mood.

Gridspots are also perfect for outdoor use as they won’t get blown about.

beauty dish with a grid spot
Beauty dish with a gridspot.

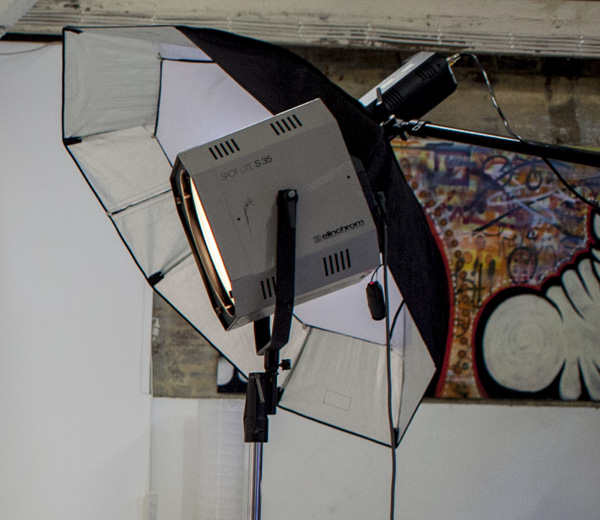
Fresnel light

Fresnel light

A Fresnel is a light modifier that can be focused. They were first used in lighthouses, then the technology was developed in continuous lighting for movies and television.

The Fresnel light modifier gives a soft, crisp, and very distinct look to portraits.

In this photo of Australian actor Robbie Magasiva, I’ve placed the Fresnel light slightly to camera right to create a shadow. I’ve softened the light with an umbrella to increase the amount of daylight fill.

Fresnel light modifier

Fresnel lighting is soft and crisp, reminiscent of 1940s portrait lighting. It’s a style that has become really popular lately, particularly with fashion and editorial photographers.

The downside of this type of lighting is that it’s pretty expensive.

Octabox

Octabox modifier
Octabox with the front panel in.

An octabox is what you’d get if a softbox and an umbrella merged into one.

An octabox serves up soft light just like a softbox. But it spreads its light around more, just like an umbrella.

Octaboxes are fantastic for lighting large groups evenly. Plus, they give round catchlights.

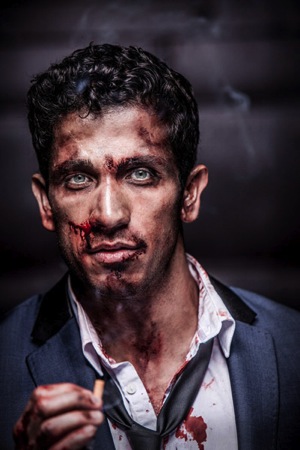
Here are two different ways to use the Rotalux Deep Octabox. The image on the left of actor Firass Dirani is shot with a deep octabox as a beauty dish. The light source is hard and drops off rapidly under Dirani’s chin to add contrast; this not only defines and sculpts his features but also gives the image an edgy look.

Beauty dish Octa

The image on the right, of actor Harley Bonner, is shot using the same Rotalux Deep Octabox. But this time, I’ve added the interior and exterior baffle to give a much softer light, and this blends in with the muted light and low-key feel I was going for.

I don’t own a standard octabox because I’m not a huge fan. But my Rotalux Deep Octabox offers more directed lighting and is a match made in heaven for lighting single portraits.

octabox with interior baffle
Octabox with interior baffle exposed.
octabox as a beauty dish
Octabox as a beauty dish.

Mixing modifiers

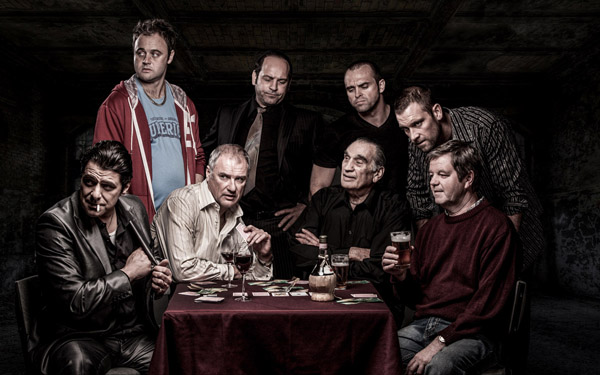
men playing cards studio image
Model credit: Fat Tony and Co. Image courtesy of Nine Network Australia.

I often mix my lighting modifiers to make my images more interesting.

In this television promotional shot I did for Fat Tony and Co., I used a medium-deep octabox as my main light and a gridspot as a hair light. I also added an umbrella for fill light on camera left because the deep octabox alone was too moody, and I wanted more detail in the shadows.

So don’t be afraid to use several different modifiers in a single shot!

A beginner’s guide to light modifiers: conclusion

Well, there you have it!

You’re now ready to use light modifiers like a professional.

So grab a modifier or two, start shooting, and have fun!

Now over to you:

Which of the light modifiers on this list appeals to you the most? Which is your favorite? Share your thoughts (and example images!) in the comments below.

The post A Beginner’s Guide to Light Modifiers (For Stunning Portraits) appeared first on Digital Photography School. It was authored by Gina Milicia.


Digital Photography School

 
Comments Off on A Beginner’s Guide to Light Modifiers (For Stunning Portraits)

Posted in Photography


Profoto’s new $299 OCF Adapter makes it possible to mount OCF light modifiers to A-series speedlights

11 Nov

Profoto has announced the release of the OCF Adapter, a new adapter that makes it possible to use all of Profoto’s OCF light shaping tools with any of its A-series flash units.

Image credit: Profoto

The OCF Adapter looks similar to many other speedlight to speedring adapters: it has a coldshoe mount for securely attaching a Profoto A-series flash and a mounting point for any of Profoto’s OCF light shaping tools, which the head of the flash fits into. Profoto has over a dozen OCF light shaping tools, including the OCF Magnum Reflector, a 24” OCF Beauty Dish, an array of OCF Grids and plenty of OCF Gel attachments.

The unit isn’t necessarily small (120mm (4.7”) wide, 280mm (11”) tall and 90mm (3.5) deep), but it’s certainly a more compact solution than carrying around a larger monolight when an A-series flash will get the job done with an OCF light shaping tool. Below is a hands-on with the OCF Adapter by Adorama:

Being Profoto, it shouldn’t come as a surprise the OCF Adapter isn’t cheap. The 750g (1.65lb) piece of plastic and metal will set you back $ 299 (Adorama, B&H). For a little context, Godox/Flashpoint’s Profoto A1 knock-off can be purchased, with accessories, for $ 229 (Godox at B&H, Flashpoint at Adorama).

Articles: Digital Photography Review (dpreview.com)

 
Comments Off on Profoto’s new $299 OCF Adapter makes it possible to mount OCF light modifiers to A-series speedlights

Posted in Uncategorized


Godox S-R1 adapter lets you fit round magnetic modifiers and filters to regular hotshoe flashes

27 Jan

Chinese flash manufacturer Godox has launched a new adapter that allows users to attach the company’s round magnetic accessories to regular speedlight-style flash units. The S-R1 adapter uses a clamping mechanism to secure itself around the rectangular head of the flash unit, and then accepts the circular accessories from the AK-R1 range.

Godox round magnetic accessories include diffusers, a snoot, honeycomb grid as well as barndoors and a collection of coloured gels. These were originally designed for the Godox AD200 and H200R flash units, but with this S-R1 adapter they can now also be used on the V860ll, V850ll, TT685 and TT600 hotshoe-style flash guns as well.

Although Godox has specified which of its own flash units this adapter will work with, there is no reason it won’t work with flash guns from other manufacturers that share similar dimensions.

Godox says that the S-R1 is available to buy now, but there is no sign of it in the usual dealers yet and no price has been announced. For more information see the Godox website.

Articles: Digital Photography Review (dpreview.com)

 
Comments Off on Godox S-R1 adapter lets you fit round magnetic modifiers and filters to regular hotshoe flashes

Posted in Uncategorized


Side-by-side Comparisons of Basic Studio Light Modifiers

26 Oct

Side-by-side Comparisons of Basic Studio Light Modifiers 1

Have you ever wondered what difference studio light modifiers make to your portraits?

Are you even convinced that they make a difference in the quality of light? I thought I’d do a little experiment to show you the effects that a few basic studio light modifiers can have on your portraits.

For some, the right modifier may make an image great, and the wrong modifier could break it.

Technical terms

Firstly, if you are new to artificial lighting, let’s look at some technical terms.

Flash – an electronic artificial light source which gives out a brief, sudden burst of light. A flash is also known as a strobe in North America.

Reflector – a panel that bounces light back towards the source and comes in silver, gold, black, white, fabric or other material.

Light modifier – an object attached to the front of the flash to change the quality and effect of light entering the camera.

Shoot – through Umbrella – an umbrella made of translucent fabric that allows light to pass through it.

Diffusion – a material that scatters light evenly as it passes through, thereby making the light softer and with less glare and harshness.

Softbox – a closed chamber usually lined in white or silver fabric, available in various shapes (such as a square, rectangle, umbrella, octagon). A softbox confines the light from the flash and releases it through a diffusion material, thereby allowing more control as to the size and spread of light that reaches your subject.

Grid – usually made from fabric strips of material that are sewn together to form a 3D grid that is attached to the light modifier. A grid restricts the focus of light, making it more directional, allowing the photographer more control. It also limits or restricts the spill of light onto other areas.

The studio light modifiers used in this article

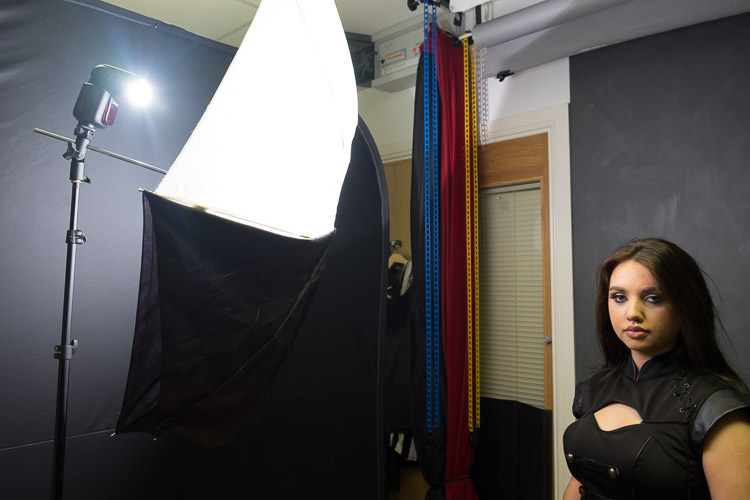
Let’s start with the lighting diagram as shown below. My set-up consisted of 2 lights and the following:

Side-by-side Comparisons of Basic Studio Light Modifiers 2

  • a dark wall
  • a large silver panel reflector on camera left
  • a flash high up on the camera left to give a bit of hair light – I wasn’t after a vast separation from the background as I was using a light colored sofa that separates the background and the subject already. I also wanted a rather dark, moody lighting, so I covered the flash with a few layers of diffuser fabric. Doing this cut light out and limited it to the subject rather than hitting the wall
  • a flash on camera right onto which I attached various modifiers
  • studio light modifiers: flash hood, translucent umbrella, umbrella softbox, 90 x 60 softbox, diffuser fabric, grid

You can also shoot with one light, of course, see here for a beginner’s tutorial on how to create dramatic portraits with one light.

Side-by-side Comparisons of Basic Studio Light Modifiers 3

Left: #1 Shoot-through umbrella facing away. Right: #2 Shoot-through umbrella facing toward.

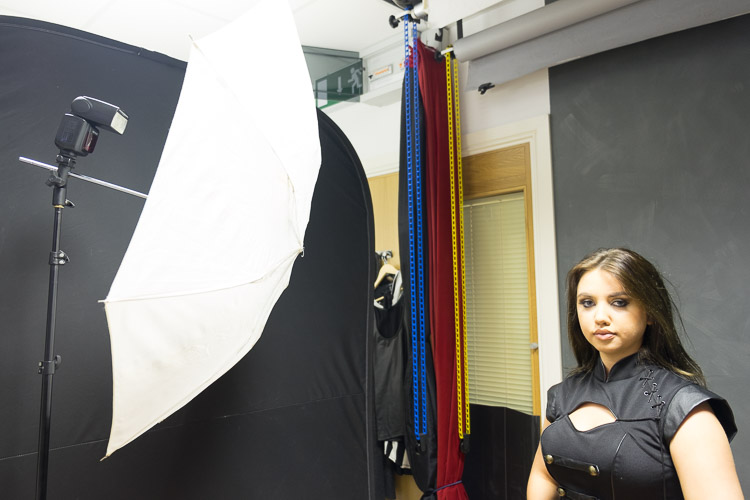
#1 Shoot-through umbrella facing away from subject

For the above-left image, I used an umbrella as a shoot through with the flash facing away from the subject. You can see there is still light hitting the subject’s face, but the shadows on the left side of the face and the neck are a lot more pronounced and harsh. The light was not able to reach the reflector to the left of the subject at all.

#2 Shoot-through umbrella facing toward subject

Compare this with the image on the right. I turned the flash and umbrella 180 degrees so that the flash was facing the subject and shot from behind the umbrella. The shadows are much softer, more light has reached the subject, and you can also see the light hitting the sofa on the far left which means the reflector was doing its job of bouncing some light back.

Side-by-side Comparisons of Basic Studio Light Modifiers 4

Left: #3 Bare flash with hood. Right: #4 Umbrella softbox

#3 Bare flash with hood

For the above-left image, I shot using just the electronic flash and the hood that comes with it. As it is rather small, it restricts the spread of light a little and focuses it more on the area you are lighting.

The light spills only as the light leaves the hood. Shadows on the face here are still defined, and not as smooth as I’d like it, but it is much better than on #1, where the shadows are much darker and harsher.

#4 Umbrella softbox

In the above-right image, I used a deep umbrella softbox allowing me to face both the flash and umbrella away from my subject. The umbrella is silver-lined which bounces all the light back towards the subject through a diffuser fabric. The resulting light quality is softer and more evenly spread due to bouncing and diffusion.

Compare this to image #2 that used only the shoot-through umbrella without the bounce. Notice how the light quality is gentler on the skin and more evenly spread, with softer shadows on the neck and under the nose.

Side-by-side Comparisons of Basic Studio Light Modifiers 5

Left: #5 Softbox Without the Diffusion Panel. Right: #6 Softbox with diffusion panel.

#5 Softbox without the diffusion panel

I switched to a 90 x 60 rectangular softbox for the images above. The one on the left is an example without the diffusion panel that covers the softbox. Shooting your subject without the diffusion panel is like shooting with a hood, as per example #3 (the hood also has a silver lining), only the softbox is larger.

The light is flashed away from the subject onto the silver lining of the softbox and bounced from the silver lining towards the subject without having to go through a diffusion panel.

#6 Softbox with diffusion panel

Comparing both images above, do you notice the softer quality of the light on the subject’s face on the image with the diffusion ‘on’? It is a subtle difference, but I can see it. Look even closer and you see the light without the diffusion is cooler and slightly harsher. It comes directly from the silver lining of the softbox not having gone through any diffusion.

This difference is noticeable on the sofa; the one on the left is a touch sharper and the one on the right darker and even. Compare the subject’s left eye (on camera right) – the shadow on the left image is stronger and deeper than the one on the right.

Such is the modifying effect of even just one diffuser fabric!

Side-by-side Comparisons of Basic Studio Light Modifiers 6

Left: #7 Softbox with the grid. Right: #8 Gridded softbox with the power adjusted.

#7 Softbox with grid

I attached a grid to the light set-up above so that it’s a silver-lined softbox with a diffusion panel plus a grid attached on the front of the diffusion panel. This setup is called a gridded softbox.

Notice just how much of the light has been cut out. Light gets focused on the face, and there are very few spills of light on the clothes, arms and outer areas of the space photographed.

The resulting image is a lot darker, moodier, and warmer in tone. However, I feel this is too underexposed, and details on the dress get lost, when I wanted these to show. The green wall looked too black, and the dress seemed to blend too much into it.

#8 Gridded softbox with power adjusted

On the above-right image, I kept the gridded softbox on and adjusted the flash power to my liking in order bring back the details I wanted. This new flash setting illuminated the face more and brought highlights back onto the hair and eyes. It also allowed a touch of light on the background too.

Finally, the end product I had in my mind used a textured background, so I added this texture to my dark green wall in Photoshop. For a step-by-step guide on how to add textures and creative overlays, see this post. In my opinion, the subtle texture adds more drama to the image and fits in better with the dark and moody lighting I was after.

Side-by-side Comparisons of Basic Studio Light Modifiers 7

Did you find this side-by-side comparison on light modifiers helpful? Please let me know and also share your studio lighting experiments in the comments below.

The post Side-by-side Comparisons of Basic Studio Light Modifiers appeared first on Digital Photography School.


Digital Photography School

 
Comments Off on Side-by-side Comparisons of Basic Studio Light Modifiers

Posted in Photography


How to turn household lights into cheap DIY lighting modifiers

27 Nov

This article was originally published on Jake Hicks blog, and is being republished in full on DPReview with express permission from the author.


There is an almost endless supply of lighting modifiers available on the market right now—some are cheap, and some of the better ones are certainly a lot more expensive. But does cost directly relate to quality?

Well, a lot of the times yes it does, especially if you’re referring to build quality. In general, the more you spend, the better-made and more durable the modifier will be. But does that extra money you spend mean you’re getting a better lighting modifier overall? I would have to say no; in fact, for less than £15/$ 20 you can get some stunningly beautiful light from a homemade lighting modifier.

Read on to see examples of the stupidly cheap DIY lighting modifiers I’m referring too.

I’d like to think that my work is known for its creative approach to lighting. The reason for that is because I strongly believe lighting is the single most important subject in a shot.

I can honestly say that I’ve ‘saved‘ some frankly awful shoots through engaging lighting alone. Terrible locations, inexperienced or even no experience in the model/subject can certainly make a shoot hard, but far from impossible to pull off engaging results. Dynamic lighting can bring a boring room to life and flattering lighting can enhance any subject, lighting really is the one and only tool you need and should have complete control and mastery of.

So what makes good lighting? Well that is probably a topic/article/book/anthology for another day as there are certainly a lot opinions on the subject, but I think no matter how experienced or inexperienced you are as a photographer, we all know what we don’t like and we definitely know what we do like when we see it.

In this article I aim to show you a couple of very cheap alternatives to professional lighting modifiers that I think create some beautiful light that are very functional in a lot of situations.

Regular Household Lights

The lighting modifiers we’ll be taking a look at are the dome-like frosted globes. These can be fantastic at lighting a scene in a shot, as they spread light everywhere very evenly. It also turns out that, not only do they spread light everywhere, but they also create a beautiful portrait light as well. Let’s take a closer look at the lights in question.

I purchased two white frosted dome lights from IKEA. One was small and the other was far larger. The smaller one is intended to be used as ceiling light in a bathroom. The reason it’s intended for this is because it casts light everywhere from a very small source close to the ceiling making it ideal for small rooms and corridors.

Small bathroom ceiling dome light.

The second one I purchased was far larger and is actually originally intended as a table lamp. Again this dome-like design is perfect for casting light over a large area without being overly harsh.

Large table lamp dome.

Where can you get them?

I got mine from IKEA and they are silly-cheap.

The small globe is a ceiling light called VITEMÖLLA and it can be found here for £13. The one in the picture looks slightly different as it has a white base compared to my silver one but the dome (the important part) is the same.

The large dome is a table lamp called FADO and that can be found here for £15. It’s worth pointing out and making sure that you get the white one. There are several of these FADO’s in a variety of tones so just make sure you choose the white one as the others will be fairly useless.

Regular Photographic Modifier

I also wanted to get a bit of a gauge on how the light from these domes looked compared to a regular photographic lighting modifier. For the sake of this test I actually compared them to a few shots taken with a 22″ white beauty dish.

There’s a couple of reasons for this. Firstly, it’s probably my most used lighting modifier so I have a very good idea of how the lighting looks with it. And secondly, the beauty dish is pretty pricey compared to these domes so I thought it would be an interesting comparison.

The image above also gives a nice size comparison and it clearly shows how all three of the modifiers used in the test look when side-by-side.

Getting the Domes ‘Shoot-Ready’

Obviously the domes are designed for an alternative purpose to a photoshoot, so I needed to do make a few adjustments before they were ‘shoot-ready’.

Small Dome

The smaller dome was fairly simple: I just removed the inner wiring and bulb housing and then I simply rested it atop one of my standard dish reflectors. I could have taped it on but there was no fear of it moving or tipping out so I just left it as it was and it was fine.

The small dome was easily made shoot-ready by removing the inner workings and then simply resting it in a current reflector dish.

Large Dome

The larger dome took a little more work, but not much. I simply removed the inner workings once again and then found an old speed-ring to attach it too.

A speed-ring is the metal rotating mount that attaches modifiers like softboxes to your flash head. I’ve acquired a few over the years that I no longer use so I simply taped one of them to the dome. With strong tape like gaffers tape it was surprisingly snug and there was no fear of it coming loose even when mounted on its side.

The large dome was taped snugly onto an old speed-ring which enabled me to attach it to my light horizontally if needed.

The Setup

The actual lighting setup was nothing fancy, but I also wanted to try out some alternative colouring ideas at the same time.

The model was positioned about 5 feet from the white wall behind her. I had the main lights positioned about 2 feet in front of her and above eye level, and then I also had a small softbox on the floor at the models feet with an orange gel* in place for the entirety of the test.

*Obviously you don’t need to the orange gel but I was seeing how much the gel was washed out by the modifiers so that’s why I had it in place.

A very simple setup that involves two lights; a key and orange gelled fill light.

The Results

After I had taken a few shots with the beauty dish, I switched that out for the larger dome. Then, after a few more frames, I changed it too the smaller dome. The resulting images should speak for themselves.

Beauty dish Images

Beauty Dish Shot – Click to Enlarge Beauty Dish Shot – Click to Enlarge

The Small Dome Images

The small dome setup
Small Dome Shot – Click to Enlarge Small Dome Shot – Click to Enlarge

Large Dome Images

The big dome set-up
Large Dome Shot – Click to Enlarge Large Dome Shot – Click to Enlarge

CAUTION: I’m using LED modeling bulbs in my flash heads which produce very little heat. If your flash heads have tungsten modeling bulbs, these globes will get VERY HOT as there is nowhere for the heat to escape when the globes are in position on the heads. Be sure to turn them down or off entirely.

Conclusions

I think you guys can draw your own conclusions from the images above and however you feel about the three looks, I think one thing is very clear that we can all agree on: you don’t necessarily need to spend a lot of money on expensive modifiers to produce beautiful light.

The beauty dish obviously produces a more directional light, and you can see that by how dark the background is compared to the other setups. The other dome shots throw light everywhere so more light is spilling onto the background. Because of this beauty dishes directionality and lack of spill, you should notice that the shadows on the models face are darker too. In contrast, the domes are bouncing light around the room and that spilled light is filling in a lot of the shadows on the models face. This gives the appearance of a far more flattering light as a result.

This dome spill is far from being a bad thing either; in fact, if you’re using the domes in a small space you can use that spill and bounce to really blend the subject into a scene with just a single light. This type of modifier is perfect for location shooting or environmental shots, and it’s certainly something I’ll be using for that type of work.

The small dome actually produced a far better light than I expected. Its small source creates a contrasty light that falls off quite quickly, leaving brighter highlights and darker shadows as a result. I also found that this creates some nice shimmering effects on the skin and makeup as a result of the hard-light properties.

I was really excited to try the big dome, as I thought it was going to be far and away the best looking lighting. Although I wasn’t disappointed, I still feel the resulting light didn’t look like I expected. The light was very clean in that there was a very smooth transition from shadow to highlight, which was nice, but it was still darker overall than I expected.

As a singe beauty light I think the small dome won for me with its look. If I was shooting in a larger area and wanted to illuminate more of the subject in a scene then the big dome placed a little further away would surely be the best choice.

In hindsight, I think I know where I went wrong with this test and what I would like to do differently next time.

You’ll notice that the light stand did not move the entire time, so from the small dome setup to the big dome setup the angling of the flash head caused the light source to get a lot closer to the model, which required me to turn the power of the head down. That’s not a problem normally, but when I turned the power of the head down, I also reduced the amount of light that bounced around the room. This in turn reduced the amount of light falling back into the shadows making the light appear darker than it actually is.

I would like to try this big dome again, but move it further back from the model, thereby allowing that light to bounce around the room and giving a far softer impression to the lighting—perfect for environmental shots.

Closing Comments

So there you have it: a couple of great lighting modifiers and at the cost of just over £25 for the both of them! That’s pretty damn impressive in my book, and you’d be crazy not to grab at least one of them and give them a go. Of course, if you really wanted an excellent dome modifier then you can always grab the Profoto frosted dome one here for a cool $ 177! I’m sure that’s miles better 😉

As always, if you have any questions then let me know. If there was something that didn’t make sense and you wanted clarification on then let me know. Also if you’ve ever tested a DIY modifier that has provided excellent results, I’d love to hear about it. Let me know in the comments!


Jake Hicks is an editorial and fashion photographer specializing in keeping the skill in the camera not just on the screen. To see more of his work or read more tutorials, be sure to visit his website, like his Facebook page, and follow him on Instagram and Twitter.

Articles: Digital Photography Review (dpreview.com)

 
Comments Off on How to turn household lights into cheap DIY lighting modifiers

Posted in Uncategorized


MagMod and MagBeam Speedlight Modifiers – Thoughts and Field Test

07 Apr

MagMod made their debut on the photography scene in 2013 with their original speedlight flash modifiers. Recently, they debuted their latest lighting product for photographers, the MagBeam. Functioning as a fresnel lens for your flash, the MagBeam provides a creative boost by easily adding a blast of color or patterns to your images. This article will highlight some of MagMod’s newest products with a special emphasis on the new MagBeam.

What is MagMod?

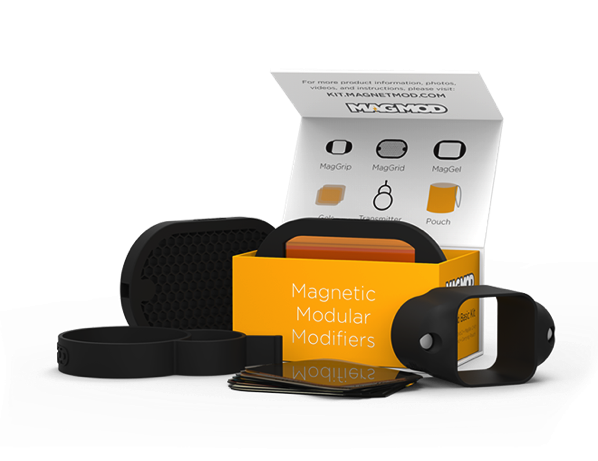
MagMod (short for MagnetMod) is a company which offers a series of compact, super durable flash modifiers that easily attach to your speedlight flash via ultra strong magnets. The magnets make it super simple to switch out modifiers, or even add color gels without having to pause and interrupt your photo shoot for too long. We first introduced this unique speedlight modifier in a MagMod review awhile back (read it to learn more about the MagGrip, MagGrid, and MagGels).

Since that initial review, MagMod has expanded its product line to include the products below (the MagSphere, MagSnoot, MagBouce, and MagGrip). All of them have a built-in slot for easily adding color-correcting gels.

MagMod and MagBeam Speedlight Modifiers - Thoughts and Field Test

Basic MagMod kit with MagSphere, MagSnoot, MagBouce, MagGrip, and color gels.

MagSphere

MagSphere is an omnidirectional modifier that transforms your speedlight’s harsh flash into a bare-bulb light source by increasing the size of your flash over 250%. Use it like a small bounce card or on-camera diffuser.

The MagSphere

MagMod and MagBeam Speedlight Modifiers - Thoughts and Field Test

Food photo, taken with the MagSphere.

MagBounce

Made from a large piece of silicone, the MagBounce increases the size of your flash by 300%. It delivers incredibly soft light and is akin to having a small softbox that is super easy to setup.

MagMod and MagBeam Speedlight Modifiers - Thoughts and Field Test

A portrait, taken with the MagBounce.

MagSnoot

This unique, collapsible snoot can easily be expanded or contracted to deliver a focused beam of light. MagSnoot is perfect for using as a hair light or highlight in product or portrait photography.

MagMod and MagBeam Speedlight Modifiers - Thoughts and Field Test

Left to right: MagSnoot (collapsed), MagBounce, MagSphere.

MagBeam

If you’ve ever wanted to project a variable spotlight pattern as a photography supplement or background, MagBeam has you covered. This compact system gives you a portable Fresnel spotlight that produces an even light with soft edges and a soft shadow. Since this product is a little more complex that the above-mentioned modifiers, we’ll be doing a deeper dive into its features.

Two main uses of the MagBeam

MagBeam can be paired with one of two different lenses that produce very distinct effects. The MagBeam Tele Lens is used to project a focused beam of light, similar to a spotlight. It also gives you two to three extra stops of usable light. This is handy for wildlife photographers to light subjects in the distance. You might also use this Tele Lens to get a tight, concentrated, beam of light for creative portrait or product photography.

The other option is a MagBeam Wide Lens. Use it in conjunction with custom-made metal disks known as MagMasks and you can create projected light patterns for creative backgrounds or lighting effects. You can also stick MagMod color gels into the MagBeam to add a blast of color.

MagMod and MagBeam Speedlight Modifiers - Thoughts and Field Test

MagMod and MagBeam Speedlight Modifiers - Thoughts and Field Test

Taken with MagBeam, wide fresnel lens, MagMask, and creative color gels.

What’s in the MagBeam Kit box?

The MagBeam can be purchased in several different ways, but the most comprehensive way is to order the whole MagBeam Kit. It comes with the MagBeam itself, a tele lens, wide lens, and MagMask Standard Set. You can add on extra MagMasks as accessories, and load up on colored artistic and creative gels as optional accessories.

MagMod and MagBeam Speedlight Modifiers - Thoughts and Field Test

What’s in the box of the MagBeam kit.

MagBeam in Practice

The MagBeam itself is like a bigger, wider version of the MagSnoot. It’s made of black silicone and can be easily collapsed or extended. When collapsed, the MagBeam is super compact and easy to stick in your camera bag. Using the MagBeam is simple. All you have to do is attach the magnetic end to your speedlight flash via a MagGrip (NOTE: this is not included with the MagBeam you need to buy it separately), then stick a plastic fresnel lens on the wide end.

MagMod and MagBeam Speedlight Modifiers - Thoughts and Field Test

Collapsed MagBeam with a patterned MagMask and red color gel attached on one end. The wide fresnel lens is on the other end.

Speaking of the two Fresnel lenses, they look identical but are actually quite technical, so you must use them correctly to get the right effect. As an example, the wide fresnel lens must be used when the MagBeam is fully collapsed in order to use the included MagMasks (described in detail below) to create a light pattern. It’s not complicated, but you might have to do some experimenting and read some manuals before jumping right in.

Pratt_MagMod MagBeam Review_001

Things to Consider

There is only one possible thing to consider about the MagMod before investing in this system. MagMod magnets that attach to your flash are impressively strong. Once you attach the modifier, it certainly isn’t going to fall off by accident. But sometimes the magnets are a little too strong. I often have to use two hands to carefully pull the MagMod modifiers off to avoid accidentally breaking my flash. I also have to make sure the MagMod units aren’t too close to other magnetic items in my camera bag otherwise, they’ll stick together.

NOTE: If you have any concerns about using magnets next to your electronic equipment this video should answer your concerns. Items they do say to keep away from magnets include: 

  • Older spinning hard drives
  • Credit cards and bank cards
  • Older televisions
  • Speakers
  • Most importantly, pacemakers!

In Conclusion

Overall, I love the MagMod system and always have it in my on-the-go photography kit. In particular, I’ve been using the MagSphere for event photography and the MagBounce as a replacement to my Westcott Rapidbox softbox for food and portrait photography. In both cases, I appreciate how compact the modifiers are. They’re so convenient that I can stash them in my camera bag and simply pull them out whenever I need them.

While the MagBeam took a little more trial and error to figure out, I’ve also been using the wide fresnel lens and gobos to add a splash of color and creativity to my product and food shots.

If you shoot a lot with speedlights and are looking for compact and flexible lighting modifiers to add to your kit, I highly recommend the MagMod system!

The post MagMod and MagBeam Speedlight Modifiers – Thoughts and Field Test by Suzi Pratt appeared first on Digital Photography School.


Digital Photography School

 
Comments Off on MagMod and MagBeam Speedlight Modifiers – Thoughts and Field Test

Posted in Photography


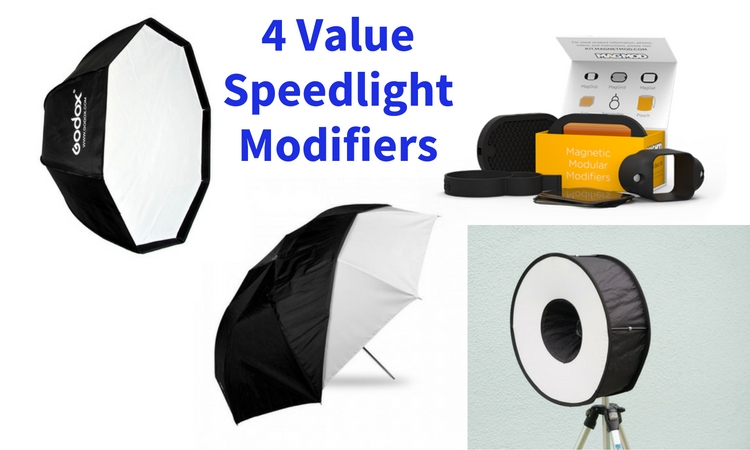
4 Value Speedlight Modifiers that Won’t Break the Bank

18 Sep

Cheap generally means nasty. But in this article, we’re going to look at four different light modifiers that give you a range of looks that definitely fit in the value category.

4 Value Speedlight Modifiers

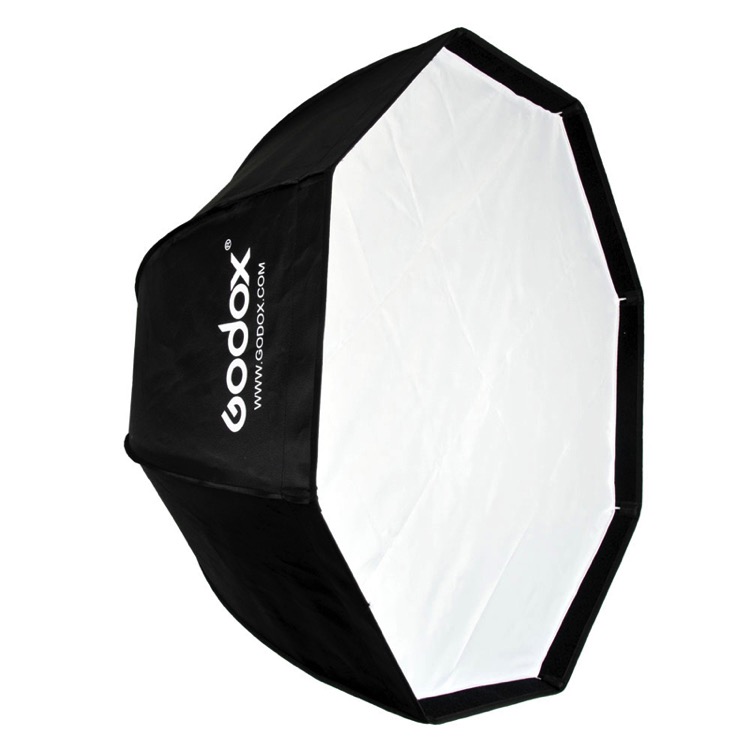
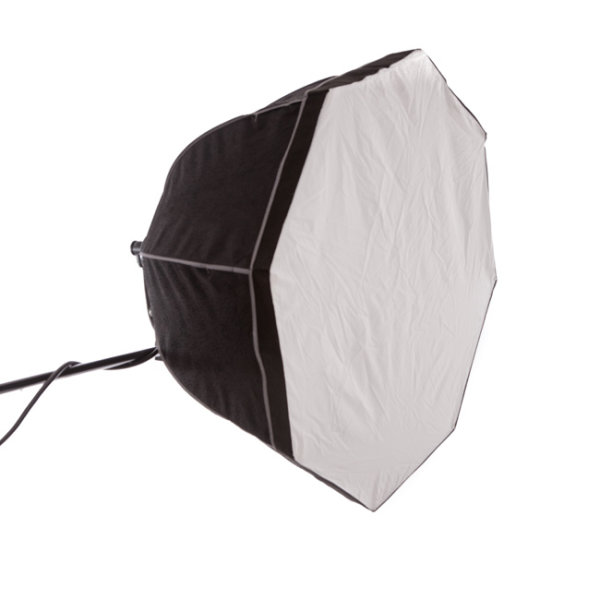
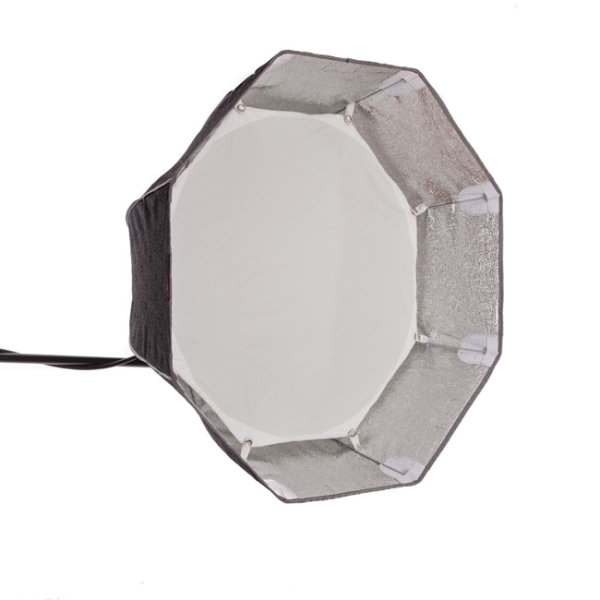
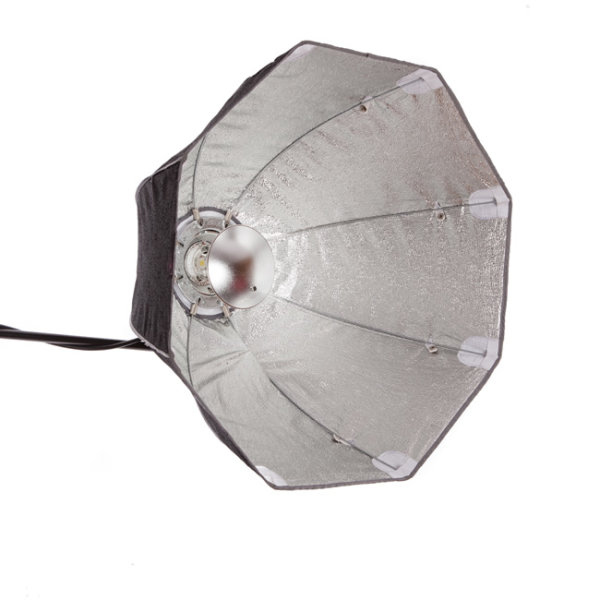
#1 – The Godox 120cm Octagon Softbox

This modifier is a 48″ Octagon Softbox that uses an umbrella shaft to mount to a speedlight. The flash aims into the silver backing, meaning that it’s an indirect source. This gives one layer of softening, and because the flash faces away from the subject, there’s less of a hotspot that with a direct flash Octabox.

The single diffusion panel provides a second level of softness, making for a big beautiful light. There are plenty of similar looking Octaboxes on eBay or Amazon, but the Godox branded ones have one huge advantage: fibre glass rods. Usually the rods are u-shaped metal spines. These provide you with good strength while bending, but very little lateral strength. A blast of wind which knocks the softbox off or over will bend or break a metal rod. Fibre glass, on the other hand, has strength in all directions, making it more resilient.

Godox 120CM Octabox speedlight modifier

Bonus: You can bend the closed Octabox to make it fit into a suitcase. This is easily my most used location light modifier because I can vary the softness and coverage using distance. As the softness of the light depends on the relative size on the modifier to the subject, close means softer, and farther away, the light gets harder. Being four feet in size, it’s super soft in close.

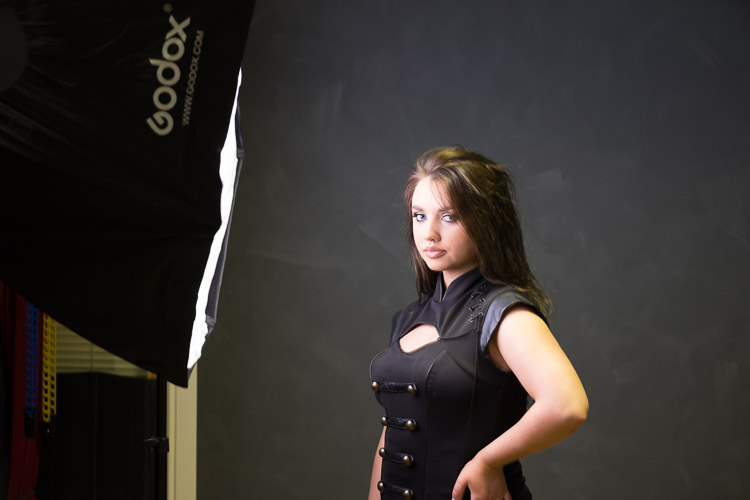
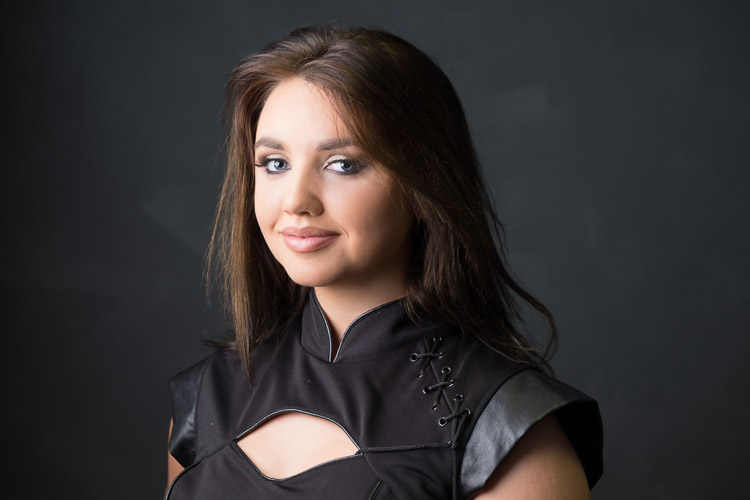
Here’s a typical setup I use with this modifier and the resulting photo. Shot as an example in the studio.

Value speedlight modifiers godox bts

Value speedlight modifiers godox image

Here’s a few more example shot on location:

Value speedlight modifiers godox 2

Value speedlight modifiers godox 3

Depending on the Octabox model you order, you can get it with a grid. This helps make the light more directional. By blocking the light going out the sides, it pushes the light forward. You may have situations where you need to stop spill (on the ground or background), and a grid really helps with that.

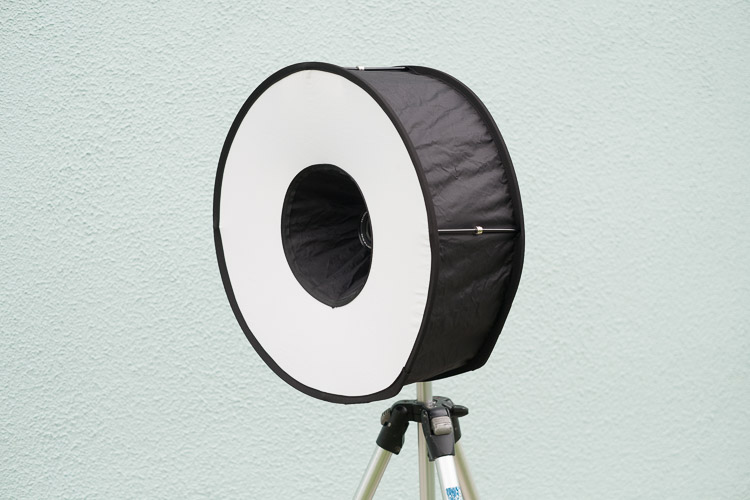
#2 – The Meking Ring Flash

There are a number of ring flash adapters for speedlights. None are perfect, but I really like this $ 30 modifier, the Meking Ring Flash. Firstly, it folds down really compact, so you can always have a modifier with you. Secondly, you get a really soft quality from this, providing a more flattering light. Thirdly, you’re not obliged to use it on camera, you can easily use it as an off camera light, either as a key light or as a fill.

Value speedlight modifiers meking 1

To use it, expand the ring, then push the magnetic separators together, pushing the two sides apart. Finally, mount the ring softbox to your flash using the retained velcro strap.

Here are some examples of  the ring flash use. Notice the shadow that surrounds our model, as well as the classic donut cathchlights in the eyes.

Value speedlight modifiers meking 2

Below I’ve used the softbox off camera, in a hotel foyer. This is two separate photos combined into one image.

Value speedlight modifiers meking 3

#3 – Westcott Double Fold Umbrella

Umbrellas are the staple diet of most speedlight beginners. The Westcott Double fold umbrella offers a little more than a basic one. For a start, it can be used as both a bounce  and shoot-through umbrella.

Using it as a bounce umbrella allows the light to focus a little and is good when the scene is larger and you need the light to fill in but still be out of camera view. You’d use it as a shoot-thru to get really close to your subject for big, soft light. The black backing can stay half on (see image below) to prevent spill onto clothes, making this a really versatile, compact, light modifier.

41G7gGhZ3YL

Here’s the standard bounce look. It’s similar in setup to the Godox (which is effectively a silver bounce umbrella with a layer of diffusion).

Value speedlight modifiers westcott 1

Turning the umbrella around, and removing half the black covering creates this look (below):

Value speedlight modifiers westcott 2

It’s much softer, but notice that the bottom part of the photo is darker. This is because the black covering is blocking light going to her body and clothes. It’s a great tip which comes from the inspirational Joe McNally, for when then clothes are distracting in a portrait. If it’s not clear, here’s what the umbrella setup looks like.

Value speedlight modifiers westcott 4

The final look from the umbrella is using it as a shoot-through. This means removing the black covering altogether.

Value speedlight modifiers westcott 3

As you can see, it’s really soft, and floods everywhere (especially compared to the bounce umbrella). Here’s the setup for this.

Value speedlight modifiers westcott 5

Notice light spills everywhere with this setup which may work for light or high key portraits. If you want more light control use it as a bounce umbrella with the black cover on.

#4 – MagMod Basic Kit

MagMod is a Kickstarter based company whose products use strong rubber and even stronger magnets to make attaching speedlight modifiers a thing of ease. Rather than use annoying velcro, you stretch the MagGrip around your flash to hold the modifiers. You can see a MagGel on a MagGrip in my article How to use Lighting Gels to Change Your Background Color and in the image below.

Changing-your-background-with-gels-magmod

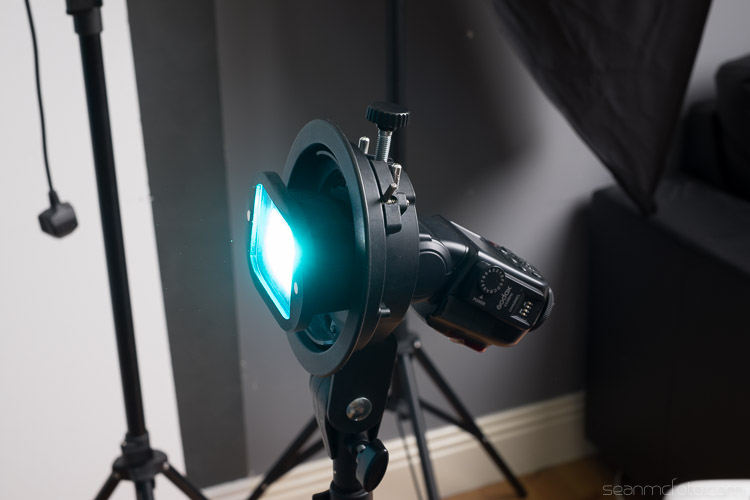
There’s a whole range of MagMod accessories, but the basic kit comes with a grid and a gel holder, along with rigid gels for the holder. These rigid gels are a blessing. A regular gel is essentially a coloured sheet of acetate, so it folds and crumples easily. The rigid nature of the MagGels makes them easy to swap in and out of the holders. There are a variety of colors available. You get a basic set of color correction and ND gels with the kit, but there’s also the Creative and Artistic sets for a larger range of options.

The MagGrids are great for restricting light, letting you aim it with a huge degree of control.

Value speedlight modifiers magmod 0Here’s a shot done with a bare speedlight:

Value speedlight modifiers magmod 1

Here’s the same speedlight with a MagGrid attached. Notice how tight the light is around the model, more like a spotlight.

Value speedlight modifiers magmod 2

Here’s the Aqua MagGel from the Artistic series gels. I’ve set the white balance to daylight to keep the colour correct.

Value speedlight modifiers magmod 3

Combining the modifiers

The beauty of these light modifiers is you can mix and match them to make really creative light.

To achieve the image below, place your on flash on camera, with the Aqua MagGel attached. Next, put the Meking Ring Flash over it to create a soft aqua-colored fill light. Then, place a MagGrid on a second flash and aim it tight on the model’s head. The grid light washes out the gel from her face, but in the shadow areas, the gels fills in for a cool look.

It’s almost like the image has been post-processed for color, but it’s actually done in-camera.

Value speedlight modifiers magmod 4

Another look you can get is a high key portrait. First, set up the Westcott as a shoot-through umbrella on a boom, between you and the model. You’re shooting below the umbrella. For the background, set up the Godox Octabox facing the camera, behind your model. Use a reflector to bounce the light back up to the model for a perfect high key portrait.

Value speedlight modifiers mixed

All in all, this gear is under $ 200 (total if you buy them all) and will give you a good range of creative lighting setups. Even just one of them would make a great addition to your speedlight arsenal.

Do you have any other good value light modifiers you’d like to share? Please do so in the comments below.

googletag.cmd.push(function() {
tablet_slots.push( googletag.defineSlot( “/1005424/_dPSv4_tab-all-article-bottom_(300×250)”, [300, 250], “pb-ad-78623” ).addService( googletag.pubads() ) ); } );

googletag.cmd.push(function() {
mobile_slots.push( googletag.defineSlot( “/1005424/_dPSv4_mob-all-article-bottom_(300×250)”, [300, 250], “pb-ad-78158” ).addService( googletag.pubads() ) ); } );

The post 4 Value Speedlight Modifiers that Won’t Break the Bank by Sean McCormack appeared first on Digital Photography School.


Digital Photography School

 
Comments Off on 4 Value Speedlight Modifiers that Won’t Break the Bank

Posted in Photography


Phottix launches Cerberus adapter for using hotshoe flashes in Bowens and Elinchrom studio head modifiers

19 Apr

Flash manufacturer Phottix has launched a new adapter that is designed to allow hotshoe flash units to be used with standard studio accessories, such as softboxes, umbrellas and snoots. The Cerberus consists of a universal grip that holds the flash directly in the middle of an adapter ring that can be used to attach existing studio flash accessories in the Bowens S, Elinchrom and the Phottix Transfolder softbox range. The idea is that if users already have studio light modifiers they can use them with their hotshoe guns instead of having to buy accessories dedicated to smaller units.

The clamp used is the Phottix Griffin, which has a pair of spring-loaded jaws that close around the head of the flash unit, leaving the hotshoe free for remote triggers. The clamp is attached to a mounting bracket that can be fitted with the adapter ring to suit the mount of the modifiers you want to use. The unit is called Cerberus after the three-headed hound of Hades from Greek mythology because its interchangeable mount can accept modifiers in three different fittings.

The kit comes with a Phottix Varos Pro BG jointed Umbrella Adapter that is used to mount the whole kit on to a lighting stand or tripod. The Phottix Cerberus multi-mount kit, which includes the Bowens and Elinchrom rings, costs $ 92.50. For more information visit the Phottix website.


Manufacturer’s dramatic product video:

Press release:

Meet the Phottix Cerberus Flash Mount

There’s a new mounting system in town – the Phottix Cerberus Multi Mount.

The Phottix Cerberus Multi Mount is your all-in-one mounting solution for hot shoe flashes. Use your hot shoe flashes with Bowens-compatible accessories, Elinchrom-compatible accessories, and the Phottix Transfolder Softbox range.

The Cerberus system comes with:

  • Phottix Griffin with Phottix Easy-Folder-Compatible Mount and Phottix Varos Pro BG *
  • Cerberus Elinchrom-Compatible Mount
  • Cerberus Bowens-Compatible Mount
  • Cerberus Phottix Transfolder-Compatible Mount

Like the mythical Cerberus, the Phottix Cerberus Multi Mount has three heads. The standard round mount works with the range of Phottix Transfolder Softboxes. Add the Bowen-compatible mount – and traditional S-Mount compatible accessories can be used with your hot shoe flash. Swap that out for the Elinchrom-compatible mount and use Elinchrom’s vast array of accessories with your hot shoe flash.

The durable and patented Phottix Griffin Universal Flash Mount holds many popular hot shoe flash models secure in a synthetic-lined spring-loaded clamp. The system was designed to be both durable and easy to use. A Phottix Varos Pro BG Umbrella Adapter is included to mount the Phottix Cerberus Multi Mount to a light stand or boom. The Phottiax Griffin is available on its own as well as being included with the Cerberus Multi Mount set.

Several configurations of the Phottix Cerberus are avaialble. Talk to you local Phottix dealer or buy from the Phottix Online Store.

* Note: The Phottix Griffin Mount with this set is affixed to the Phottix Cerberus Softbox Mount and cannot be removed. Varos Pro BG does not come with metal Coldshoe and male 3/8” and ¼ “ screw.

Articles: Digital Photography Review (dpreview.com)

 
Comments Off on Phottix launches Cerberus adapter for using hotshoe flashes in Bowens and Elinchrom studio head modifiers

Posted in Uncategorized


A Beginners Guide to Light Modifiers

25 Mar

Regardless of the light source you use (daylight, continuous or flash) it’s really easy to use light modifiers or shapers to train the light in any direction you want.

light-modifers

***A quick note about costs

Every kind of light modifier will have a top of the line version and a really cheap version. The main difference between the options is that the cheaper ones won’t be as durable. This becomes important when you’re using them every single day.

When you’re learning how to use them however, I recommend choosing cheap versions. You’ll figure out how they work and save yourself a lot of money.

I rarely work without some sort of diffusion because using naked flash spreads the light around too much. The result is hard shadows that I personally think look really unflattering.

Nobody is ever going to tell you, “Wow I love the way your hard lighting has captured and enhanced every single pore, line and blemish on my skin. I actually look ten years older. Thanks!”

There are, of course, many really cool uses for hard lighting and some photographers can make it look brilliant. I’m just not one of them. I like to control the light and only illuminate certain areas of my shot.

There are a couple of factors I consider before deciding what kind of light modifier to use:

1. What kind of lighting am I trying to replicate?

Fill Flash Light Styles HARD

As a general rule of thumb if you are in hard light conditions like full sun, then opt for a light modifier that creates hard light like a gridspot, beauty dish, fresnel lens or naked flash.

Fill Flash Light Styles Soft

If the light is soft like early morning, twilight, open shade, or overcast then chose a light modifier that produces soft light such as: a scrim, umbrella or softbox.

2. What kind of mood I’m in

What are the best light modifiers to recreate soft light?

The Umbrella

An umbrella creates a quality of light that is soft and abundant, and very forgiving. They are great to use if you want to light a large area with flat even lighting. Because umbrellas are quite easy to use, and relatively cheap, they are great as your first light modifier.

On the downside, umbrellas will over-light your shot spreading lots of light around. Lots of light. Everywhere. Like a hose with its spray nozzle set to “everywhere”.

UMBRELLA_bounce

Bounce umbrella throws light everywhere

Just like I consider eating Nutella straight out of the jar a sometimes food, you should consider using umbrellas as an only use in case of emergency style of lighting. If I overuse either, things tend to get a bit ugly.

Types of umbrella light shapers

  • Silver/gold reflective umbrella: These babies throw light everywhere. They are great for lighting large groups of people. The silver umbrella will give you a slightly cooler light, while the gold umbrella creates warmer light. Both produce a slightly harder light than the white reflective umbrella.
  • White reflective umbrella: This umbrella creates a soft light with slightly less spread and contrast than the silver or gold reflective umbrellas. Because the style of light created allows people to move around a lot and in a constantly even source of lighting, they are great to use when you are shooting groups and couples under pressure, like for an event.
  • White Shoot through umbrella: These are perfect as your first light modifier as they diffuse and spread light quite evenly.
Shoot Through_UMBRELLA

White shoot through umbrella

When my children were young, I taught them how to ride bikes using training wheels. The wheels boosted their confidence more than anything else. After a while, I took the wheels off and they rode on two wheels as if they’d been doing it all their lives.

Training wheels

I think using flash with umbrellas is the same. Use them as a learning tool until you get your balance, then move on to a better bike.

A final note on umbrellas

They are perfect for indoor lighting but become tricky, actually downright dangerous, to use outside. I’ve had countless (expensive) lights blown over using umbrellas! If you must use them then please make sure you have somebody holding them, or sand bags to keep them in place.

Scrim, baby

Scrim

After you’ve ditched your umbrella training wheels, the next step is to work with a scrim panel which is a square or rectangular frame with a fabric diffusion material covering it. Of all the light modifiers, a scrim is probably the most versatile and a must have in your kit.

Shapers scrimThis is a really cool way to create large areas of soft diffused light, as if you were shooting next to a large window, or have light clouds over the sun.

Remember: The larger the light source, the softer the light.

This is a piece of equipment that you can easily make yourself. I used a DYI one for my first 10 years as a photographer and they are great for diffusing flash, continuous light, and sunshine.

Using a softbox

softbox

Small softbox 580EX+Lumiquest+stand 1

This image of race-car driver, Glauco Junior Solleri, was taken using a speedlight and small Lumiquest Pro softbox. This is a low-cost and versatile modifier that creates a beautiful soft light source that you can easily control. In this instance I only wanted to light Glauco’s face and let the background go to black, If I had used an umbrella (and spray light everywhere) the entire background would also be lit, killing my moody vibe.

If I could only pick one light modifier to take to a deserted island, it would have to be the softbox. Small, medium, or large – this little puppy is my go to light source for 80% of my shoots.

Why? The quality of light is soft, flattering and malleable. Changing the angle and proximity of the softbox to the sitter easily changes the hardness of light, and direction of shadow.

It’s one of the light modifiers that, I feel, recreates the effect of soft daylight through a window. I think what I like most about this light modifier is that it’s subtle. Highlights gently merge to shadows. I think I love this light modifier more than Nutella – there I said it.

Different softboxes

I use a few different kinds of softboxes depending on where and what I’m shooting.

If it’s a studio shoot I love using my Chimira Medium softbox with white reflective interior. The white interior creates a softer light and this particular softbox has an extra layer of diffusion on the inside, adding even more softness to the light.

Some photographers remove this interior panel because they like having more contrast of the harder light (because it’s not as diffused as much), but I prefer less contrast. You can also increase the spread and contrast of your light by using silver or gold interior panels.

Shooting using beauty lights

The beauty dish I have is quite a cheap brand, which goes to show you don’t need to shell out a lot of money for every piece of equipment. I like mine because it works with my speedlight, my Elinchrom monolight, and battery flashes.

Beauty-2

I like that kind of versatility in equipment because it means I have more options on the day of the shoot, and less to carry around!

The beauty dish differs from other light modifiers because it gives you a distinct circular, soft-contrast light, which is perfect for lighting faces and defining bone structure such as cheek bones and chin lines. They also create a circular catch light in your model’s eyes, which makes the reflection seem quite natural.

You can see why these modifiers are popular with fashion/beauty and celebrity photographers.

The downside of using beauty dishes is that the fall-off, from light to dark, is very rapid so you’ll often get shadows under your model’s chin and nose. You can compensate for the shadows by adding a fill board, like a white reflector, to reflect light up, onto your subject’s face.

Why would you use this over other modifiers?

A beauty dish gives you a certain look. It will just light a small area and flatten out your model’s features. It makes people look great but you need to light your model in quite a specific way, lighting them from above, to really pull it off.

Using a grid spot

Gridspot Gridspot 2

A portrait shoot I did with Australian actor Scott McGregor shows lighting without gridspot (left) and with gridspot (right).grid

The gridspot is a bit of kit you can use in conjunction with a speedlight, monolight, or battery operated flash. The width of the grid and the size of the holes will affect the width of the light beam hitting your subject. This is a hard focused light. I love to use grid spots in the same way I use beauty lights.

Why would you use this over other modifiers?

I like using grid spots because they create a similar light to beauty dishes. The light is a bit harder but they’re perfect for single portraits because you can pop a bit of light onto someone’s face and shoulders without impacting the background mood.

They are also perfect to use outside as they won’t get blown about.

Gridspot typesjpg

BeautyDish+Grid 1

Beauty dish with a gridspot

Fresnel light (lens)

Fresnel

The Fresnel light modifier gives a soft, crisp and very distinct look to my portraits. In this portrait of Australian actor Robbie Magasiva, I’ve placed the Fresnel light slightly to camera right to create a shadow, which I’ve softened by using an umbrella (Sprays soft light everywhere) to increase the amount of daylight fill.

Fresnel 2

A Fresnel is a light modifier that can be focused. They were first used in lighthouses, then the technology was developed to include continuous lighting for movies and television.

The style of lighting is soft and crisp, reminiscent of 1940s portrait lighting. This style of lighting has become really popular lately, particularly with fashion and editorial photographers. The downside of this type of lighting is you need to hock a kidney to afford one.

Octabox

Beauty dish Octa

Here are two different ways to use the Rotalux deep octabox. The image on the left of actor Firass Dirani is shot using a deep octabox as a beauty dish. The light source is hard and drops off rapidly under his chin to give a hard and contrasty light source, which not only defines and sculpts his features it also gives the image an edgy look.

The image on the right of actor Harley Bonner is shot using the same Rotalux deep octabox as I used with Firass but this time I’ve added the interior and exterior bevel giving a much softer light which blends in with the muted light and low key feel I was going for.

An octabox is what you’d get if a softbox and umbrella got married and had babies. An octabox has soft light, just like its mama the softbox, but spreads its light around more just like his daddy the umbrella.

They are fantastic for lighting large groups evenly. The other advantage some people like is they give round catch lights.

I don’t own an Octabox because I’m not a huge fan but do have a Rotalux deep octabox, which is what you get if a softbox married a beauty dish and made babies. This, as far as I’m concerned is a match made in heaven for lighting single portraits.

Octabox

Octobox with the front panel in.

octabox-interior-baffle

Octobox with interior baffle exposed.

octa_as_beauty_dish

Octobox as a beauty dish.

Mixing modifiers

Combolights

Model credit: Fat Tony and Co., image courtesy Nine Network Australia.

I often mix my lighting modifiers to make my images more interesting. In this television promotional shot I did for Fat Tony and Co., I used a medium deep octabox as my main light and a gridspot as a hair light. I also added an umbrella for fill light to camera left because the deep octabox alone was too moody and I wanted more detail in the shadows.

Do you have a favorite light modifier or do you like working with naked flash? Do you have examples of your favorite images? Please share them in the comments below. I’d love to see them and hear your thoughts.

googletag.cmd.push(function() {
tablet_slots.push( googletag.defineSlot( “/1005424/_dPSv4_tab-all-article-bottom_(300×250)”, [300, 250], “pb-ad-78623” ).addService( googletag.pubads() ) ); } );

googletag.cmd.push(function() {
mobile_slots.push( googletag.defineSlot( “/1005424/_dPSv4_mob-all-article-bottom_(300×250)”, [300, 250], “pb-ad-78158” ).addService( googletag.pubads() ) ); } );

The post A Beginners Guide to Light Modifiers by Gina Milicia appeared first on Digital Photography School.


Digital Photography School

 
Comments Off on A Beginners Guide to Light Modifiers

Posted in Photography


Choosing Soft Modifiers

03 Sep
Editor’s note: In 2011 I wrote a full post on my four favorite soft modifiers. No changes since then. These are still my go-to’s, for reasons explained below. So I am reprinting this in the gear selection module. -DH


With the gazillion or so soft light mods out there, it is easy to be overwhelmed by the choices available. And while I have probably shot with more of them that I would care to admit, there are four soft mods that I go back to again and again.

As it happens, these four are reasonably priced, too. (Which may well be what attracted me to them in the first place, of course.)
__________

Soft is Relative

So, which of the light sources above is the softest? The one in the back, right?

Not necessarily. The 60″ source in back is not as soft at 10 feet away from your subject as the 8×9″ source is at 10 inches away. A good rule of thumb to remember is that a light source is soft when it looks large to your subject. This nets out the two variables of size and distance.

Example: Even a bare speedlight looks soft to a subject only a couple inches away.

Long story short, if you want soft light you will have to consider the working distance at which you’ll be using it. The further back your light source, the larger your light mod will have to be.

So front to back, here is the straight dope on the four mods pictured above.

1. The LumiQuest Soft Box III

At 8×9″, the LumiQuest SB-III can be very soft — as long as you are working the light literally right up next to the subject. Case in point, this headshot of Ben I did for an ad for the SB-III when it first came out.

With a flat front edge, the light is easy to feather. This means you can work in the edges of the beam for more interesting (i.e. uneven) illumination.

Pros: The SB-III is small, and folds flat. This means it travels great, hiding in the back flap of my Domke F3 or just about anywhere else. It is also pretty reasonable, at under $ 50. (Especially considering the SB-III has a lifetime guarantee, unique on this list.)

Cons: It’s small size means it is literally soft in only in the knife-fight range. Back it up more than a couple of feet and it starts to get hard. Actually, I tend to use this to my advantage, making the light more versatile just by varying the distance. That is one of the reasons I use it so much.

And speaking of that, most of the time I use an SB-III, I will do so in combination with a fill light. (Example here.) This gives a combination of both shape and detail.

2. Beauty Dish

The next step up, size-wise, gets us to a beauty dish. A broad, shallow reflector, it throws a modestly soft light at portrait distances. There is nothing particularly “beautiful” about it. The dish just has good PR, I guess.

A light this size won’t wrap as much as a giant octa or umbrella when used at the same distance, which can be a good thing. So while some people may think of it as a beauty dish, I tend to think of it as a character dish.

Again, I almost always use it with fill. The shot above (more here) is a good example.

When used when a giant, on-axis fill light, as in this Martin Prihoda cover shoot, the beauty dish really starts to live up to its name. The shadows from a dish are distinct, and controlling their depth with another light source gives you a wide range of possibllity.

Pros: A dish gives you soft(ish) light that can stand up to a breeze. Soft boxes and (especially) umbrellas can turn into a sail in even a light wind. The beauty dish will hold up in a moderate wind — especially when sandbagged. Also, the fact that the dish is circular gives a signature shape on the face as compared to a rectangular soft box. Some people prefer this, but I find it kinda arbitrary.

Cons: Does not fold in any way, so travels like crap. Expect to have to buy a protective case for it. Which only adds to the next downside. Of the four sources listed here, the beauty dish is the most expensive.

I have a few dishes, including one that I got for free from Profoto in a promotion that would have cost me north of $ 300. I did not know which I wanted (silver or white) so I chose silver for more efficiency. In hindsight I should have chosen white, which I now use far more often.

But I was not gonna pony up for another full-price Profoto dish. So I ended up with the white FTX 22″ Beauty Dish ($ 105.00 – $ 130.00) shown above.

Being an aftermarket universal fit dish (one dish, many mounts) it can be a little quirky in some ways. But overall I have been happy with it. They also do a grid for the dish ($ 85.00). So if you are into controlling the beam of the light, the price difference (OEM vs aftermarket) may be even bigger.

3. Westcott Double-Fold 43″ Shoot-Through Umbrella

Usually recommended as the first soft light mod for a space-conscious photographer, the double-fold umbrella practically disappears in your bag. It collapses down to 15″. (Best of all, they are just silly cheap.)

I started out using it in typical fashion, 45 degrees up and over, as do most photographers. These days I am much more likely to fly it over the top of a subject, as in the falconer shot seen above (more here) or literally on the floor, as in this portrait.

Pros: Hello … dirt cheap. Also, travels extremely well. If you are into guerilla lighting, this is your mod. Also can be very powerful, used right up next to your subject. This is something you cannot do with a reflected umbrella because the shaft can get in the way.

Cons: They are pretty fragile. Between the double folding arms and the telescoping hollow shaft, expect them not to last too long. (A little breeze can get them, too.) Also, the light is hard to control — an umbrella spews out light like a frat boy puking at 2:30am after a party. Very little directional control. Raw light can spill past the edge, too.

But for under $ 20, who can complain? I usually grab a couple to be safe.

4. Photek 60″ Softlighter II


Combining the best features of a shoot-through umbrella and a large soft box, I like to think of the large Softlighter II as a poor man’s octa.

It is a convertible shoot-through umbrella that can double as a reflective one due to the removable black backing. And it comes with a very efficient diffuser screen, turning the umbrella into a wonderfully even light source. As a bonus, the umbrella shaft is segmented, so you can remove half of it after you open it. This makes it possible to use it in very close. It is large-octa light quality, for about $ 100.

Actually, I have a 47″ octa, and it gets very little use compared to the Softlighter. Friends usually ask to borrow the octa, which is fine with me — I’d rather have the Softlighter on hand. (If you are an Annie Leibovitz fan, she frequently uses them as her key light, as seen in this video.)

I own and use both the Softlighter II and the new Paul Buff 64″ PLM (with diffuser). The PLM is more efficient than the Softlighter because of its parabolic design, but that is lessened if you do not use the Paul Buff or Elinchrom mount. (They take advantage of perfect positioning.) For speedlights, I prefer the Softlighter, as it does not require a bare-bulb-type light source to be located at the focal point of the parabola. Just slap an umbrella swivel and a speedlight in there and you are good to go. If you primarily shoot WL or Elinchrom, I would suggest the PLM.

Or if you use big and small lights, maybe get both at under $ 100 ea. That is what I did, and frequently use both together (PLM as a key and the less efficient Softlighter as a fill.)

Pros: Way cheap, compared to the octa it largely replaces. Versatile as an umbrella, as described above. Gorgeous light with the diffuser. Very lightweight — easy to boom without expensive gear. Takes a speedlight well. (That’s how we lit the photo above, as detailed here.)

Cons: They are not as heavy-duty as an octa — but to be honest I have yet to kill one. Also, the front is not a clean light source like an octa. You can see the strobe unit. So if you are shooting reflective objects (glass, etc.) this may not be for you.
__________

So those are my Four Horsemen of soft light. You could choose four completely different different mods, but those are the ones I keep going back to. I highly recommend each, for the reasons above.

The main thing is to look at your working distance and see which light source will create the light you want at that distance. Fortunately, as you can see above, you don’t have to spend a ton of money to get versatile, soft light.

NEXT: Hard and Specialty Modifiers


Strobist

 
Comments Off on Choosing Soft Modifiers

Posted in Photography