RSS
 

Posts Tagged ‘Modifier’

The Isolite intelligent modifier system lets you change a photo’s lighting after it’s taken

01 Dec

An intriguing new lighting system called Isolite just launched on Kickstarter. The system of hardware accessories for strobes and speedlights comprises what parent company Phototechnica calls the “first ever intelligent light modifier.” What does that actually mean? Basically, with Isolite, photographers are able to modify the lighting in an image after taking it.

Phototechnica stresses that this process involves turning on and off actual lighting in the image, not simply lightening /darkening it or adjusting contrast—this is the real deal, not a post-processing trick.

The Isolite system doesn’t require a 3D render or special camera to enable light changes during post-processing. Raw images are converted by the Isolite converter, which enables users to adjust the image’s lighting before outputting it as a raw DNG file. That final DNG file can then be edited with compatible software like Capture One and Lightroom.

Phototechnica lists the following capabilities on its Kickstarter campaign:

  • Turn real lights on and off after the capture has been made.
  • Push, Pull, Paint light after the capture has been made.
  • Hard and soft light in one capture.
  • Adjust the exposure and ratio of each light source after the capture has been made.
  • With selective masking of each light source, difficult or impossible lighting control can be done with ease.
  • Light can be animated after capture turning still image captures into full motion video.
  • Using our proprietary tools, online images can be brought to life with light.

Here’s a video intro the further explains what the Isolite system is and how it works:

As far as hardware is concerned, the Isolite system features the Duolite and Beauty Dish Kit. The gear is designed to work with popular Speedlight sizes, most legacy Speedlights, the newest Profoto and Tri/Bowens Mount Strobes, plus there are adapters for using it with Elinchrom products.

Phototechnica is offering the Isolite Dualite through Kickstarter for pledges of at least $ 195 CAD (~$ 150 USD), a Dualite Speedlight Kit for $ 250 CAD (~$ 195 USD), Isolite Studio for $ 500 CAD (~$ 390 USD), and the Isolite Deluxe Studio for $ 1500 CAD (~$ 1,165 USD). The campaign is also offering early bird versions to backers who make pledges starting at $ 95 CAD (~$ 75 USD).

For now the campaign has a long way to go before its funding goal is met, and only 15 days to get there, so we’re not holding our breath on this one. But if the campaign is successful, shipments to some backers are estimated to start in May 2018.

To find out more or put down your own pledge, head over to the Kickstarter campaign.

Articles: Digital Photography Review (dpreview.com)

 
Comments Off on The Isolite intelligent modifier system lets you change a photo’s lighting after it’s taken

Posted in Uncategorized


LumoPro LP742 LightSwitch Speedlight Case doubles as light modifier

30 Jul

LumoPro has announced the LP742 LightSwitch Speedlight Case and Modifier. The case is made from padded ballistic nylon and is able to accommodate most speedlights on the market. LightSwitch can also be transformed into three types of light modifiers: a reflector, bounce card, and flag. The case features a double-zipper design and a velcro strap on the back. Read more

Articles: Digital Photography Review (dpreview.com)

 
Comments Off on LumoPro LP742 LightSwitch Speedlight Case doubles as light modifier

Posted in Uncategorized


DIY Light Modifier You Can Do With Savage Translum Material

31 Mar

Translum Blue 600

The thing studio product photographers hate the most is when undesirable reflections show up in their images. There are many ways to control these and I’ve got one that you can easily build at home. It’s a DIY project using the Savage Translum material.

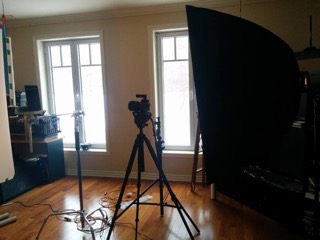
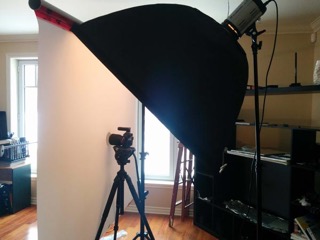
What you’ll be creating is a rollable sheet of Translum with a hole in the middle for your camera lens. That will enable you to set it between the object you’re photographing and the camera which will eliminate the big direct reflections you get by using a softbox pointed straight on the subject.
Compare 600

What is Savage Translum material?

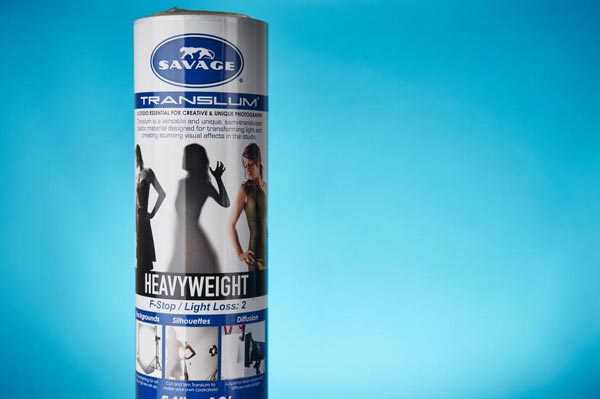
Savage is known for their paper backgrounds. They have a ton of them and are pretty much the industry standard as far as that goes. However, they do make other studio product such as the Translum material. It is a roll of thick white translucent styrene plastic, 54” wide (or 60”, depending on the model you get) by 18 foot long. When you put a light behind it, it gets highly diffused and loses two stops of light (that is, with the heavyweight version).

There are many uses for it such as; creating a pure white background and making DIY light diffusers and reflectors. Currently, there are three options (lightweight, medium and heavyweight). The difference is the quantity of light you lose and, thus, the amount of diffusion. You lose two stops with the heavyweight (it’s the original Translum), 1.5 stops with the medium weight and ¾ of a stop using the lightweight one. I think of the heavyweight for use with flash whereas the lightweight Translum would be to diffuse window light, for example. One thing that makes that material so useful is that is very cuttable and encourages improvisation in the studio, leading to more creative light setups. You can pick some up at all the big camera stores (B&H, Adorama, Amazon).

Build it!

Before you can start building, you’ll need to gather the items you’ll need in the project. They are:

  • A roll of Savage Translum
  • A measuring tape
  • A pencil
  • A pair of scissors
  • A compass (to trace the circle)
  • A X-acto (utility) knife
  • A central vacuum system with 2” PVC pipe the width of your roll (54” or 60”)
  • A handsaw (to cut the PVC)
  • A roll of Tuck Tape
  • A roll of painter’s tape

The very first thing you’ll need to do is determine the length of the sheet of Translum you’ll want. Mine measures 54” wide (the size of the roll) by 50” long. You can have it as long as you want, but I suggest not going less than 50” and also not too long because you may want to use the remaining Translum later and it would be a waste (to the floor is usually sufficient).

Once that’s done, simply measure the desired length and cut it. A pair of regular kitchen scissors works wonder to do so.

Next, decide where to place the hole for the lens to fit through. I would suggest putting it 6-12″ lower than the exact center, because you need a lot less material under your camera than you do up top. Once that’s done, mark that point and grab a compass (if you don’t have one, any round object that’s large enough will work just as well). To select the size of the hole, you want it to be as small as possible but still big enough so that the front of your lens can pass through.

Take the diameter of your lens and add an inch just so you have some play. Then, make the appropriate circle with the compass and grab an X-acto knife and a cutting board. Again, it is surprisingly easy to work with Translum and cutting the circle should be a breeze. The easiest way to do so it is by placing it on the floor (put the cutting board underneath the Translum to protect your floor). Since the plastic is really sturdy and resistant, it’s no problem if you step on it. Try to cut the circle so that you end up with a it in one piece as it will be useful in the future.

Next cut the central vacuum system PVC pipe. These are good because they are light, inexpensive, and available at your local hardware store. I strongly suggest that you take a 2” diameter one. Since they are sold 10 feet long, you’ll need to cut it to the right size for your Translum. A regular handsaw does the job.
TuckTape 600

Once that’s done, you can start assembling everything (see photo above). The best tape to stick the sheet to the PVC is a roll of Tuck Tape. Duct tape is not strong enough and gaffer’s tape is thick and expensive. The PVC will be at the top of the sheet so make sure it is on the end that is the farthest from the hole that’s near the middle. You want to put down a piece about two feet on the Translum. Half of the width of the tape should be on the PVC and the other on the sheet of diffusion. After, just finish taping that side down, flip everything 180° and apply pressure on the sheet of Translum so that the tape you just put on is folded nicely. Finally, you want to to place another row of Tuck Tape on the opposite side of the Translum, so that the construction is rock solid.

The last step is to tape a piece of wood at the bottom in order to add rigidity, and to limit the tendency of the material to curl up. While any diameter will work, I recommend you that you use 5/8 of an inch. The best way to add the wood is to put tape running the full width of the roll with the sticky side facing up (again, half the tape should be on the plastic). Then, just put the wood at the end of the tape and slowly roll up toward the Translum. That way, most of the wrinkles will be eliminated.
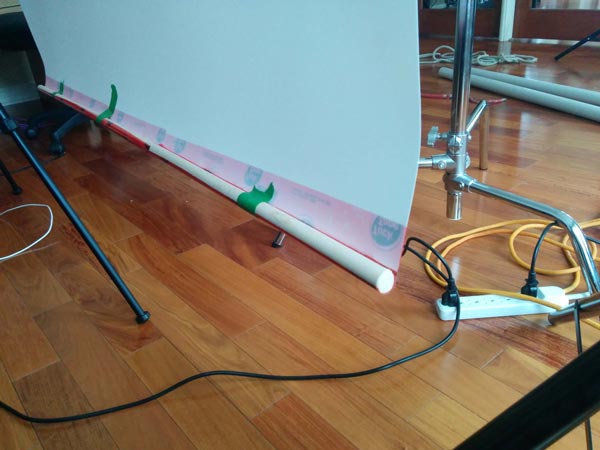
Wood 600

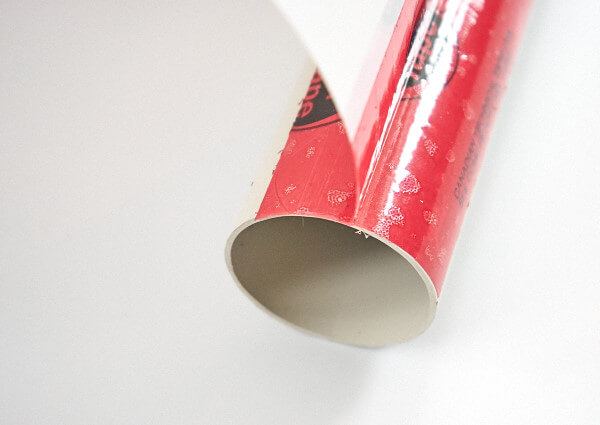
To store the sheet when you’re done using it, just roll it around the PVC pipe and use a few pieces of painter’s tape to hold it in place.

Results and other setups

The most basic, and effective, setup to use the DIY sheet of Savage Translum for catalog product shots on a white background is as follows: place a softbox (or stripbox) at about a 45° angle where the top almost touches the upper edge of the Translum sheet. The horizontal center of the softbox should align with the camera. You can place the Savage roll between the object and the camera lens with the lens through it very slightly. This will create very soft lighting without any big and ugly direct reflections.

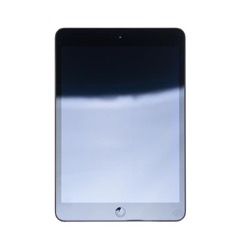
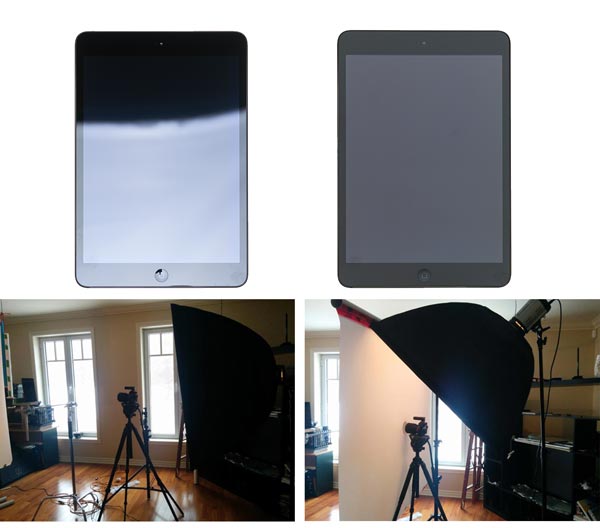
To compare, I shot an iPad (for its shininess) in two ways: one setup without the Translum sheet and one with. The light was moved down in the first image so there is a part with a reflection and one without. In the image just under, you can see the tremendous differences between the two. All of the settings were identical.

No Translum 600 IPad Reflection 600
Translum 600 IPad 600

As much as I like Savage Translum, it is not perfect and will never give you a final image right out of the camera (nothing will). The shot above still need quite a bit a retouching to be complete.

Remember I recommended keeping the hole for the lens away from the middle? Well, for another setup, you can put the lens back into the sheet, hold it in place with a little piece of scotch tape and move the whole Translum sheet to any other position other than in front of the camera. That allows a huge amount of different setups to be created. Experiment with different light modifiers for your flash or even none at all. Try moving the material everywhere and see what it does to the shot. That’s where the fun is!

This is just one of the many uses of the wonderful Savage Translum! What’s nice is that, when you’re ready for another DIY project, you’ll still have more than 13 feet of the stuff left.

Have you used the Translum diffusion sheet before? Did you come up with another DIY light modifier? Tell us below, we all love the share our ideas.

Read more about light modifiers here in this Beginner’s Guide to Light Modifiers

googletag.cmd.push(function() {
tablet_slots.push( googletag.defineSlot( “/1005424/_dPSv4_tab-all-article-bottom_(300×250)”, [300, 250], “pb-ad-78623” ).addService( googletag.pubads() ) ); } );

googletag.cmd.push(function() {
mobile_slots.push( googletag.defineSlot( “/1005424/_dPSv4_mob-all-article-bottom_(300×250)”, [300, 250], “pb-ad-78158” ).addService( googletag.pubads() ) ); } );

The post DIY Light Modifier You Can Do With Savage Translum Material by Tristan Robitaille appeared first on Digital Photography School.


Digital Photography School

 
Comments Off on DIY Light Modifier You Can Do With Savage Translum Material

Posted in Photography


Review: Flash Disc Lighting Modifier by Fstoppers

28 Mar

The more you experiment with off-camera flash, the more you realize that many lighting modifiers are pretty large in size. From softboxes to beauty dishes to umbrellas, many take up space not only in your camera equipment bags, but also on site at a photo shoot. This may be a small price to pay for the dramatic impact these modifiers can have on the resulting image, but sometimes you just want a really compact lighting modifier that can produce great results. One of the answers to this problem is the new Flash Disc by Fstoppers.

Flash Disc Product 02

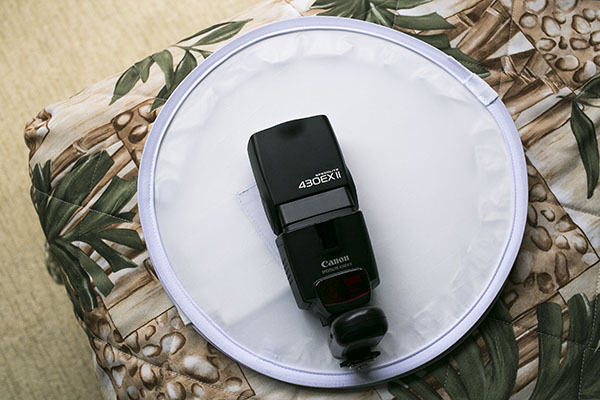
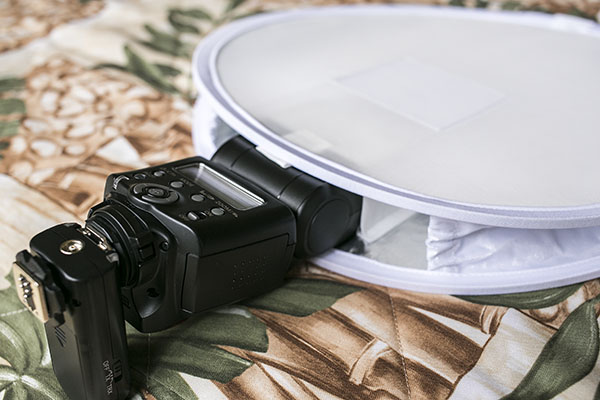
A handy little device made to fit speedlights, the Flash Disc was created by Lee Morris of Fstoppers with the intent of being a portable softbox. It appears at first to be a little white reflector, as it folds up like one into a compact size that can fit into a large pocket or small bag. However, the Flash Disc is actually more like two reflectors that sandwich your speedlight. When a flash is fired, the light bounces between the two reflectors, creating a softer spread of light. Available for purchase online at a price of $ 49.99, the first batch of Flash Discs were so popular they sold out and supplies were only recently replenished.

Flash Disc Product

As a food, portrait, and event photographer, who travels a lot for photo shoots, the main features I’m looking for in a lighting kit are portability and functionality. I generally travel with one Speedlite flash (Canon 430 EXII) and a pair of wireless flash triggers (Yongnuo RF-603 II) for on-location portraits, candid event shots, and food photos in varied lighting conditions. When I have the luxury of space, I’ll bring an octabox softbox or shoot-through umbrella as a lighting modifier, although these devices take up both space in my photography kit as well as setup time while on location. I recently got my hands on the Fstoppers Flash Disc and was very impressed by its compact form, as well as big impact in helping diffuse and bounce my off-camera flash lighting.

Without a lighting modifier, off-camera Speedlight flash tends to be way too harsh.

Without a lighting modifier, off-camera flash tends to be way too harsh and overpowering.

Pro: Small and low-profile

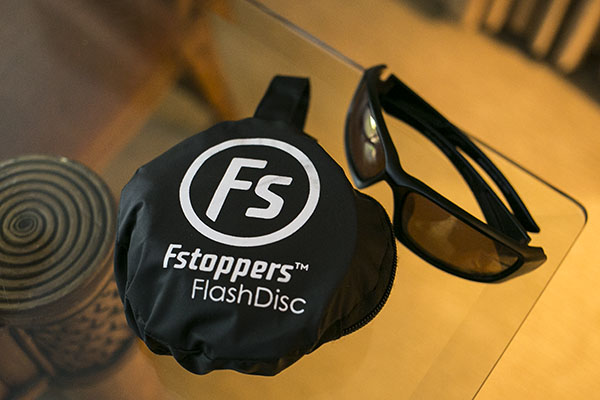
The first big plus about the Flash Disc is that it is incredibly tiny when it folds up like a reflector and is put into its little black carrying case. Dimensions-wise, the Flash Disc is 12 inches in diameter when open, and 4 inches in diameter when closed. It’s very lightweight at less than 1 pound, and it is compatible with most external flash units. It really can fit into a jacket pocket, or be clipped (via a carabiner) to a loop on your belt or camera bag.

Flash Disc 05

Con: Very tight when collapsed

A possible drawback to having two reflectors folded into each other is that the Flash Disc can literally pop opened. I had a close call once when I opened the Flash Disc with my hands right next to an open bottle of water, resulting in said bottle being knocked over and spilled. Be sure not to open it close to your body or camera as it could possibly knock something over.

Pro: Includes a grey card

One side of the Flash Disc is translucent white and the other has built-in strips of white, black, and 18% grey. This is helpful for setting your white balance in post-processing (or doing custom white balance in the field)

Con: Sometimes the lighting is too harsh

Considering the 12″” diameter of the Flash Disc, sometimes the light it emits isn’t the softest, especially when compared to light from a 30″” softbox or umbrella. It’s a size trade-off that can sometimes result in the Flash Disc light still being a tad too harsh, although there are certain situations and photography styles that can benefit from this look.

Best uses

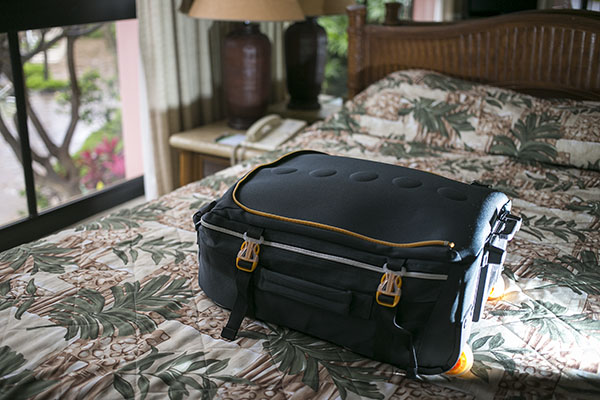
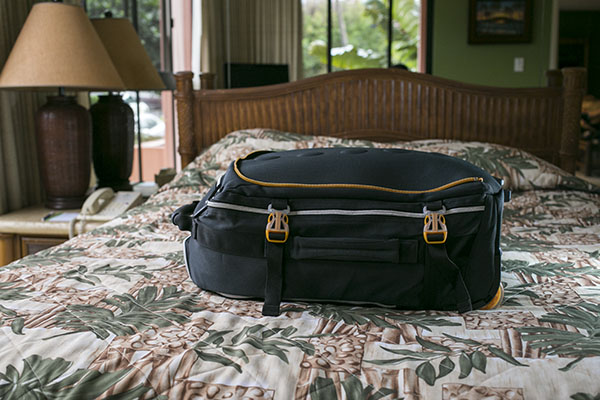
I tested out the Flash Disc during a recent tropical vacation-  using it on food, portrait, and product photography – and was pleased with the overall results. In the below product photo of a carry-on suitcase, the Flash Disc on a Canon 430 EXII was positioned camera right. The flash was in manual mode, dialled down to 1/64 power, and the result is a soft fill light on the bottom of the suitcase.

Flash Disc

For food photography, the Flash Disc’s compact size was crucial as many food photos are taken in restaurants or tight kitchens where there isn’t the space or time to indulge in more elaborate lighting setups. In the image below of a fish taco plate, natural lighting was illuminating most of the dish. The Flash Disc was camera right, fired at 1/64 power to fill in the shadow areas of the dish.

Flash Disc 02

The Flash Disc also came in extremely handy while doing casual location-based outdoor portraits, another scenario in which lugging around a large umbrella or reflector wouldn’t be convenient without an assistant. The portrait below was taken just after sunset, and my subject is lit by the Flash Disc fired at 1/64 power from camera left. This is an example of when the Flash Disc’s light quality is arguably on the harsher side, especially if you’re working as a lone “run and gun” photographer without an assistant, meaning you can only place the Flash Disc as near or far from your subject as your arm can stretch.

Flash Disc Portrait

Has anyone else tested out the Flash Disc? I’d love to hear your thoughts on how useful (or not) you find it.

googletag.cmd.push(function() {
tablet_slots.push( googletag.defineSlot( “/1005424/_dPSv4_tab-all-article-bottom_(300×250)”, [300, 250], “pb-ad-78623” ).addService( googletag.pubads() ) ); } );

googletag.cmd.push(function() {
mobile_slots.push( googletag.defineSlot( “/1005424/_dPSv4_mob-all-article-bottom_(300×250)”, [300, 250], “pb-ad-78158” ).addService( googletag.pubads() ) ); } );

The post Review: Flash Disc Lighting Modifier by Fstoppers by Suzi Pratt appeared first on Digital Photography School.


Digital Photography School

 
Comments Off on Review: Flash Disc Lighting Modifier by Fstoppers

Posted in Photography


The MagMod Speedlight Modifier – a Review

07 Apr
The MagMod speedlight modifier solves several problems and challenges posed by other systems.

The MagMod speedlight modifier solves several problems and challenges posed by other systems.

Until now, most speedlight modifiers on the market have been pretty inconvenient to use. I’m not talking about the quality of their output– just the lengths we’ve had to go in order to attach them to our flashes, and– perhaps more importantly– get them to stay on our speedlights over the course of a photo shoot. If your flash has a permanently attached strip of Velcro, or you have a collection of assorted straps, bands, tapes, attachment accessories, and other DIY solutions for your modifiers, you know what I’m talking about. If you’ve ever had a gel break, tear, bend, or just blow away in a stiff breeze, you’ve probably found yourself wishing for something better at least once or twice.

Enter the MagMod system. Made from high-quality silicone rubber, each piece of the MagMod system is compact, easy to attach, and gets the job done with minimal hassle.

The MagGrip

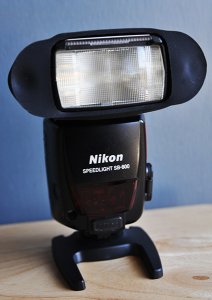
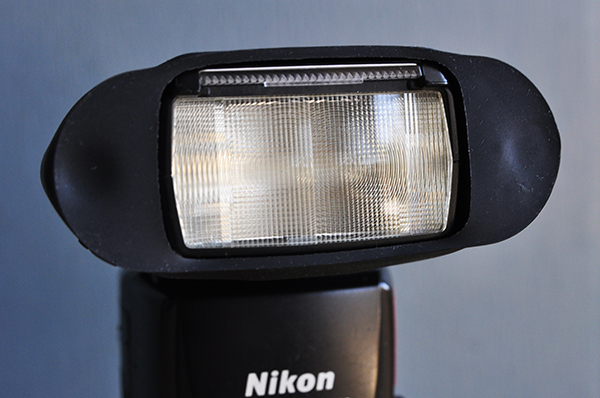
The MagGrip is the foundation of the MagMod system. Designed to fit virtually any hot shoe flash available, the MagGrip fits tightly and securely around the flash head. Despite my best efforts to shake it off or “accidentally” dislodge it from a Nikon SB800, it wouldn’t budge. At all. It’s easy enough to remove when you want it off, but there’s no need to worry about it while on a shoot.

Another key feature of the grip are the two neodymium (rare earth) magnets that hold the actual modifiers in place. I won’t bore you with the research I did into the science of these magnets. All you need to know is that they are the strongest type of permanent magnet commercially available, which means they’ll do their job without losing any of their magnetism over time.

madmod-review-dps-002

The MagGrid

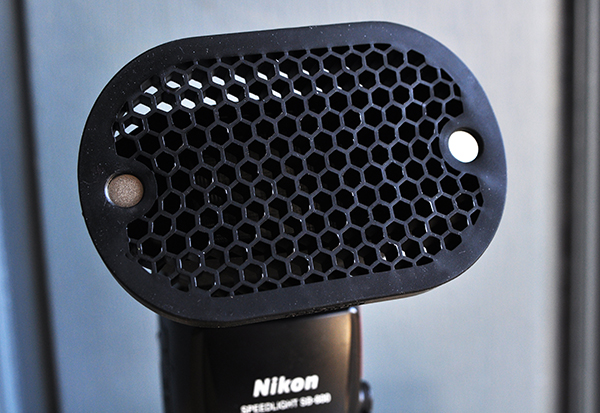
The basic purpose of a lighting grid is to give you more control over where the light falls, either on the subject or the background. It can be a useful tool for highlighting the subject, a specific part of the frame, or for creating interesting background effects. The MagGrid attaches magnetically to the grip in pretty much the blink of an eye. With no need for attachment straps or bands, I was able to spend more time on shooting and less on managing the equipment.

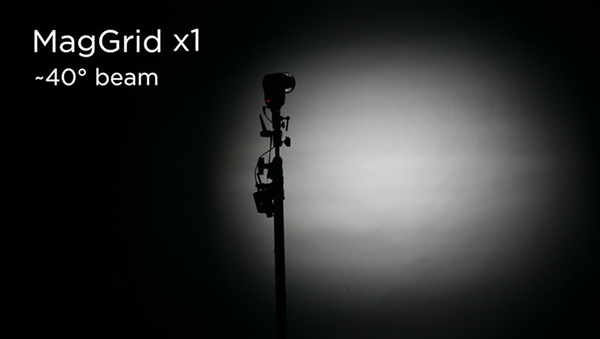
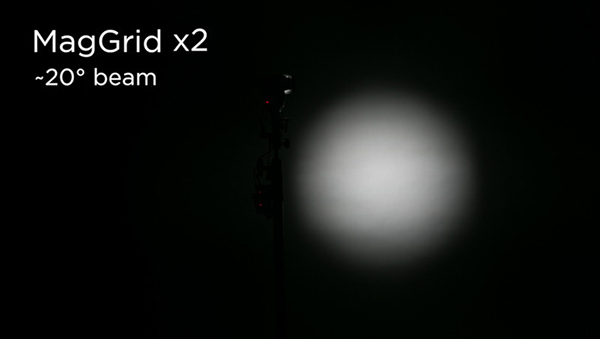
The single grid included in the basic kit casts a -40° beam with minimal spill and hot spots. The beam can be narrowed even further by attaching a second or third grid to the first. The grid is made from the same silicone rubber as the grip, which prevents the grid cells from cracking or chipping–a fairly common problem with hard plastic grids.

madmod-review-dps-003

The images below illustrate how stacking multiple grids affects your ability to concentrate the light precisely where you want it.

madmod-review-dps-008

madmod-review-dps-009

The MagGel Kit

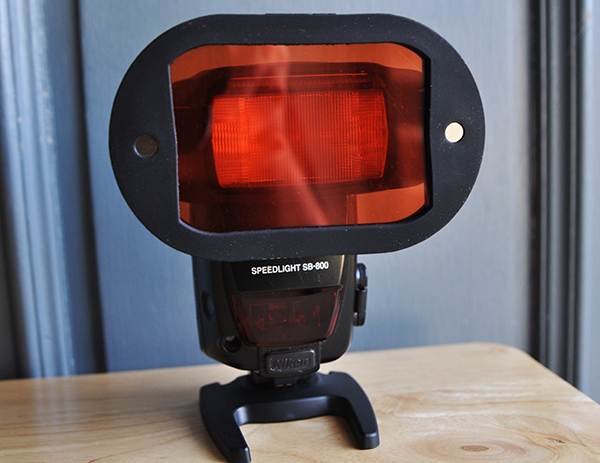
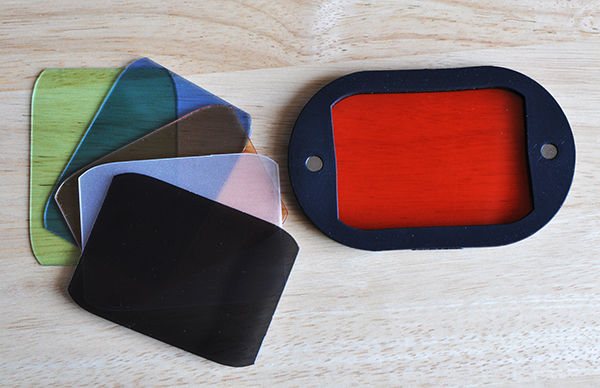
Let’s face it–gels are awesome, but they are also a pain. They help you fine-tune your lighting, but they are also flimsy, often difficult to attach, and need to be replaced fairly regularly. The rigid sheets of the MagGel Kit, however, are made to last and are held securely in place through tension and friction. They are also stackable, giving you more freedom to create different lighting effects.

madmod-review-dps-004

The Basic Gel Kit includes one of each of the following:

  • Full CTO (Rosco #3407)
  • 1/2 CTO (Rosco #3408)
  • 1/4 CTO (Rosco #3409)
  • 1/2 Blue (Rosco #3204)
  • 1/2 Tough Plusgreen (Rosco #3315)
  • 1/2 CT Straw (Rosco #3442)
  • 3-stop Neutral Density (Rosco E-211)
  • Opal Frost Diffuser
madmod-review-dps-006

Gel sheets from the Basic Gel Kit. The MagGel can hold multiple sheets at once. In this photo, it’s holding three warming gels.

The Creative Gel Kit includes one each of the following:

  • Purple
  • Blue
  • Teal
  • Green
  • Yellow
  • Orange
  • Red
  • Magenta
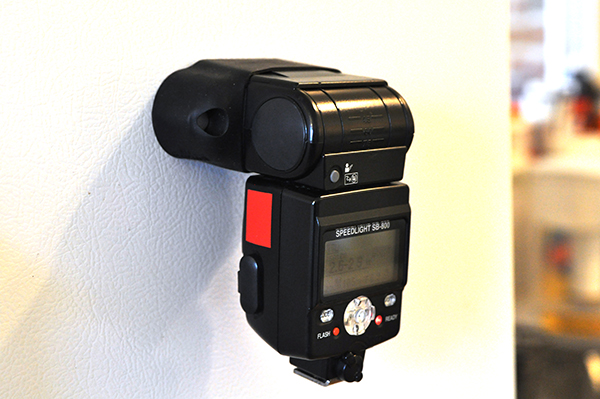
Probably not the smartest idea to use a speedlight as a refrigerator magnet, but you get an idea of how strong these magnets are.

Probably not the smartest idea to use a speedlight as a refrigerator magnet, but you get an idea of how strong these magnets are.

Wrap-up

Speedlights have become more powerful and versatile than ever before. When combined with a solid grasp of off-camera lighting techniques, speedlights can often narrow the technical and creative gaps between small flashes and their bulky studio counterparts. The MagMod system closes that gap even further, simply by making some of photography’s most basic lighting modifiers easier to use. Obviously, it doesn’t address every lighting scenario or every type of modifier. While the gel kit does include a diffuser, for instance, it’s certainly not going to address the needs of the photographer who relies heavily on softboxes or umbrellas for casting a wide spread of light. It does, however, address some of the most common lighting challenges facing photographers who depend on speedlights to tell their stories.

For more information, check out the MagMod website.

The post The MagMod Speedlight Modifier – a Review by Jeff Guyer appeared first on Digital Photography School.


Digital Photography School

 
Comments Off on The MagMod Speedlight Modifier – a Review

Posted in Photography


Photography Lighting Tutorial- Using a Lasolite Light Modifier – Photo Lighting Tips from Light Tec

28 Apr

Light Tec Light Tip #7 – Lasolite “High Key” lighting for studio photography. Lighting tutorials from Light Tec based in Dallas, Texas. Light Tec is your source for professional lighting equipment and training in Dallas.