Modeling is one of those extremely competitive careers complete with its own fairytale-like model discovery stories. We’ve all heard about how Kate Moss was discovered at JFK airport or how Gisele Bundchen was found in a shopping mall. However, actually getting yourself signed to an agency and booking modeling gigs can be (and usually is) more similar to getting any Continue Reading
Photodoto
Posts Tagged ‘Modeling’
Top 65 Modeling Agencies in the US and Tips for Models
19
Mar
Nissin MG80 Pro flash announced with command/slave modes, modeling light and more
07
May
 |
On May 1, Nissin Digital unveiled its new MG80 Pro hot shoe flash with integrated Nissin Air System (NAS) radio commander and slave modes, support for multiple battery types, and a built-in color LCD. The GN60/83Ws flash packs a Quartz flash tube, heat-resistant head, 8W LED modelling light, removable Fresnel lens, and compatibility with both standard AA NiMH and Lithium-ion (Type 14500) batteries.
 |
When used with four Li-ion Type 14500 batteries, the flash offers a 1.5s recycling time, which increases to 3.8s when used with four rechargeable AA batteries. Users can expect around 280 flashes when using four 650mAh Li-ion batteries, or around 320 flashes when using four 2450mAh rechargeable batteries.
 |
The MG80 Pro supports TTL, manual control, and HSS, has a transmission range up to 100m (328ft), and a zoom mode covering focal length options from 24mm to 200mm. Other specs include a metal shoe with ring lock, tilt/swivel head, support for micro SD and SDHC cards for firmware updates, and a weight, without batteries, of 520g (18oz).
 |
The flash will be available for Canon, Nikon, Sony, Fujifilm, Panasonic and Olympus cameras. According to Flash Havoc, Nissin plans to release the MG80 Pro in ‘late May,’ but a price has not been revealed.
Articles: Digital Photography Review (dpreview.com)
Rotolight unveils the Neo 2: A portable LED HSS flash that doubles as a modeling light
06
Sep
 |
Rotolight has announced the launch of Neo 2, an “industry first” high speed sync-capable LED flash that doubles as a continuous light source and boasts no recycle time.
The company says it designed the Neo 2 specifically for videographers and portrait photographers, and that it collaborated with Elinchrom to build its Skyport 2.4GHz HSS wireless flash receiver into the model. That Skyport receiver, in conjunction with the Rotolight HSS transmitter, enables photographers to wirelessly control up to four groups of 10 lights at ranges up to 656ft / 200m.
The Neo 2 light itself is powered by AA batteries and is capable of 85,000 full-power flashes on a single charge. This model’s shutter sync can be set at fast as 1/8000th of a second, and it offers 500% flash output.
 |
Compared to the original model, the Neo 2 is 85% brighter when used as a continuous light, and there’s a built-in kelvin display for adjusting both flash and continuous light color temperature. Rotolight used its AccuColour LED tech with the Neo 2, the result being “perfect color rendering,” according to the company.
The Neo 2 is available now in a £250 (~$ 325 USD) bundle that includes a single light, the power supply, an accessory shoe, belt pouch, and a 4-piece filter pack. Rotolight is also offering a £1,125.00 (~$ 1,465 USD) bundle that features three lights, stands, balls heads, and a hard flight case.
Press Release
ROTOLIGHT UNVEILS NEO 2
A revolutionary all-in-one High Speed Sync flash and continuous light for photographers and filmmakers
The dawn of a new age of on-camera lighting
Pinewood Studios, London, 4th September 2017: Rotolight, award-winning British LED lighting manufacturer, has announced the launch of an industry-first, all in one High Speed Sync (HSS) Flash and continuous on-camera LED lighting innovation, NEO 2. Unlike traditional on-camera flash, NEO 2 has no recycle time, which ensures users never miss a shot, making it the perfect light choice for today’s modern high-frame-rate-capable cameras.
NEO 2 can be simultaneously a continuous ‘modelling light’ and HSS flash, allowing the photographer to easily acquire focus in dimly lit situations and optimise composition. Designed for portrait photographers and videographers on the go, NEO 2 provides the ‘shoot what you see’ benefits of continuous light, and the flexibility of HSS flash (1/8000th sec.) with 500% flash output, whenever users need more power or to freeze action. HSS also enables users to shoot with wider apertures to create beautiful separation between subject and backgrounds.
Rotolight has collaborated with Elinchrom to integrate its ‘Skyport’ 2.4Ghz HSS wireless flash receiver into NEO 2, eliminating the need to purchase a standalone flash receiver, whilst providing rock-solid reliability, range, flexibility and control for multiple off camera lighting setups. Skyport enables users to wirelessly control up to 10 lights, in four groups at up to 200m(656ft) with the new Rotolight HSS transmitter, optimised for Rotolight by Elinchrom. It is available on launch for Canon, Nikon, Sony, Olympus, Panasonic, and, shortly, Fuji camera systems, and compatible with all other Elinchrom Skyport devices.
“The NEO 2 is going to revolutionise how people use light, and eliminate the need for external flash. If you have those moments that you just cannot afford to miss, this is an incredible light for you. You’ll never miss a shot,” says Jason Lanier, a Sony Artisan of Imagery and professional photographer.
“I tested NEO 2 on a Sony A6500 at 11 frames per second,” explains Lanier. “It fired every single time. There’s genuinely no recycle time, no light loss, no power loss. That is just a game-changer, there is no other light in the world that can do that.”
Featuring electronically adjustable colour temperature in both flash and continuous modes, with a built in kelvin display, NEO 2 enables photographers to easily adjust white balance or match ambient light settings to create more natural looking shots.
Lightweight and portable, NEO 2 can be mounted both on or off camera for ultimate creative control. Delivering the longest battery life of any speedlight or flash, ever made, NEO 2 provides 85,000 full power flashes on a single set of rechargeable AA batteries, compared to the 200 flashes of a typical speedlight. Now 85% brighter in continuous mode than its predecessor, NEO 2 is a small light that delivers big results.
“It enables photographers to spend more time composing the perfect shot, rather than spending time on cumbersome lighting setups. For those shooting both stills and video, it entirely eliminates the need for two separate purchases,” says Rod Aaron Gammons, managing director of Rotolight.
Packed with innovative features for video users, NEO 2 is ideal for interviews and filmmaking. It includes an updated suite of CineSFX™ effects, Rotolight’s award-winning feature set for video productions/ filmmaking, (fire, lightning, TV, gunshot, paparazzi and others), as well as Designer Fade mode for custom in-camera fade FX.
NEO 2 also features Rotolight’s AccuColour ™ LED technology that delivers outstanding colour rendering for perfect skin tones. The unique circular shape provides a naturally soft, flattering light output, with Rotolight’s signature catchlight effect.
Rotolight NEO 2 is available as a single light, including a belt pouch, accessory shoe, power supply and four-piece filter pack including diffusion, skin tone and magenta, or as a three-light kit with hard flight case, stands and ball heads. Optional accessories include softboxes, raincovers, and 10-piece colour filter pack.
For more information visit www.rotolight.com
Articles: Digital Photography Review (dpreview.com)
Reaching Out To Modeling Agencies
25
Jan

Hey FashionPhotographyBlog.com readers!
A LOT of people have asked how to approach agencies to work with their models so, here’s a crash course in testing with agency models! First things first, you have to have the type of images an agent would like to see. Agencies like to see clean photographs:
– Images that aren’t too shadowy or weirdly lit
– Photographs with nice hair and makeup- keep it simple!
– No intense, crazy eye-shadow
– No big, teased hair
– NO NUDITY
The whole idea behind testing with an agency is that they want clean, beautiful images of their models to put in the models portfolio. This means images that show the model as they naturally look, not images that show the model with 15 pounds of makeup and Photoshop’ed past recognition. Make sure all your images aren’t of one or two people, have a variety to show the agency that no matter who they send you you’ll be able to take a damn good photo!
Have those clean portrait/fashion portrait images already? I suggest having a website you can link the agency to. If you don’t have a site yet, no worries. Attach around 5 images in your email to the agency so they can view your work and get a sense of your style. (Make sure you have 10-15 good images to show, in case you’re asked to provide more.)
Now you’re ready to reach out!
1. Call the agency you’re interested in working with and ask who you should speak to in regard to testing with their new faces. You’ll probably be given the email address to a booker (model agent) and asked to send over your portfolio.
2. Email the booker:
– Start with a nice introduction, explain who you are and that you’re looking to test with their new faces.
– Include your portfolio: Link the booker to your website or attach 5-6 photos.
3. Wait.
4. Got a response? Congrats! You’ll most likely be sent a package (a listing of available models in need of images for their book) and will have the opportunity to choose who to work with:
– Sometimes the booker will ask if you have a team (aka creative team – hair, makeup and wardrobe stylists) Be honest with them. Don’t lie and say you have a team if you don’t. It will show in the final images you produce. The agency wants to make sure they’re sending their girls out on shoots that will help their books, not waste their time.
– Sometimes you’ll be asked for a mood board. What is a mood board anyways? (Well get into that in another post) In short, a mood board is a compilation of images that show what it is you’re trying to accomplish. Inspiration for hair, makeup, wardrobe, overall outcome of the shoot.
5. No response? That’s okay. Just be persistent, keep shooting and try again. Never take “No” for an answer! There have been plenty of times that I’ve been turned down but I kept shooting and eventually was given a break. I’m currently testing with agencies that had previously not responded to my emails. Believe in yourself and someone will come along who believes in you too!
– Alana
Did you find Alana’s post useful? Please leave your comments below in the comment section. We would like to know what you thought about this post. If you enjoyed this article, do stay tuned as Alana has another post just around the corner on FashionPhotograhyBlog.com. If you want to know more about shooting with models from agencies, check our upcoming post on Tips For Working With Agency Models.
IMAGE SOURCE:
Feature image & images 1: courtesy of Alana Tyler Slutsky.
Anatomy of a Modeling Session
05
Feb
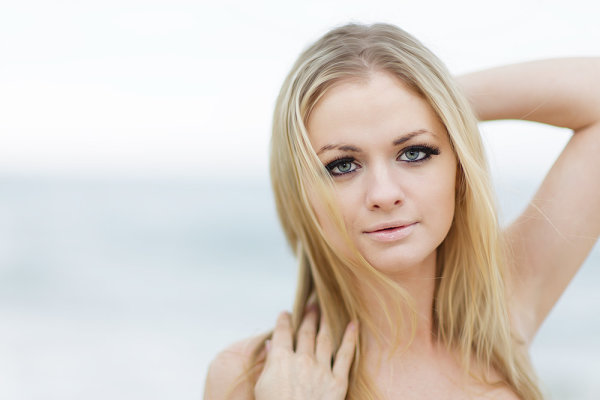
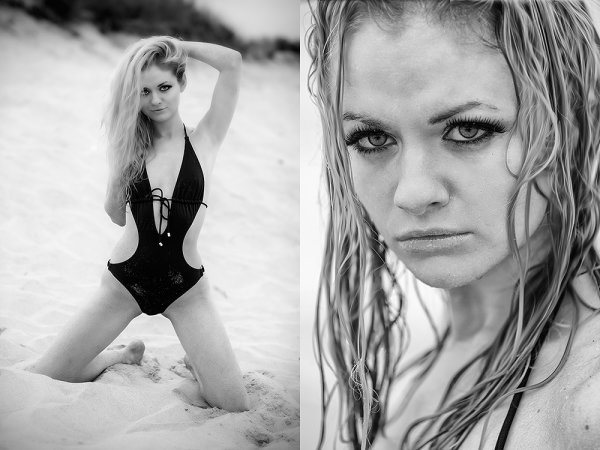
This was taken with the Canon EOS-1D X and EF 85mm f/1.2L II. I had a 600EX-RT speedlite on camera to provide just a touch of fill. Exposure was 1/250, f/1.2, ISO 100.
I am often contacted by people who are interested in modeling, either as a hobby, or to build a portfolio to try and model professionally. It’s one of the more fun things I get to do with a camera, as it allows me to be creative and really direct things a bit. Models can be great to work with- both to build their portfolio as well as your own. Aspiring models are often looking to diversify their portfolio, and are willing to trade time for images. I’ve developed working relationships with several models so that when I want to try something new, they are usually game. In addition, they will call me when they have an idea they want to add to their portfolio. This type of relationship can be liberating, since you are creating portraits for a client who is paying, and depending on your for an image. Rather, it’s a joint collaborative effort that yield phenomenal results.
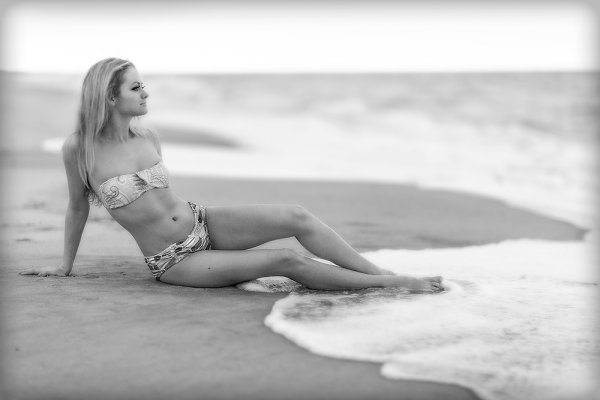
The headshot above was taken within the first few shots of the session. This one was the next sequence. I backed off to shoot her full length. Exposure 1/1250, f/1.2, ISO 100. Lens was the EF 85mm f/1.2.
I enjoy working on location with models because locations can offer a variety of settings. They also offer their own set of challenges. When I begin planning a model session, I propose several locations, as well as an overall concept. It’s important to agree on these things ahead of time so you are both on the same page for overall direction.
Once the shoot and location is agreed on, I always hold a discussion with my subject, discussing the goals of the shoot, as well as any ideas I had. I would ask the model to let me know if he or she had any ideas or shots in particular as well. Once the general concept is down, we discuss outfits. Many times the model will send me photos of outfits they have or want to try, and this will lead to more discussion. Generally, by the time this exchange happens, both myself and the model have a very good idea of what we want, and what the plan is, that when the day of the shoot comes, we’re ready to go with no questions. By the way, this process works great for my portrait sessions as well.
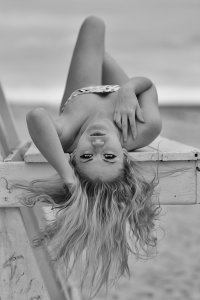
Locations present their own benefits. In this case, the lifeguard stand offered some nice options for posing. A reflector to the right of the model helped kick a bit more light into her face. EOS-1D X, EF 85mm f/1.2L II. Exposure is 1/640, f/2.8, ISO 100.
So we’ve discussed outfits, concepts, and location. Once I know what the model is looking for and what we want to do, I pack my bag. Camera body, speedlites, spare batteries, lenses. Which lenses? Depends on the shots I’m looking for, but my go-to lenses for portraits and models are pretty much the EF 85mm f/1.2L II, the EF 100mm f/2.8L IS Macro, and the EF 70-200 f/2.8L IS II. Depending on what else I’m looking for, I’ll use a EF 24-70mm f/2.8L II for wider shots that become more of a landscape with a model in it than a portrait. If I’m planning on using off camera speedlites, I’ll also bring however many I plan to use- usually two or three- as well as modifiers such as soft boxes. In addition, I ALWAYS have a reflector with me to use with both speedlites or natural light. Right now, my camera of choice is the Canon EOS-1D X.
You’ll notice my go-to lenses are all f/2.8 or faster. The ability to blur the background using a wide aperture is important to me, so anything distracting or unimportant can simply be blurred out. I like to show a context without being literal about it. So while you’ll see the sand and water in the background, it doesn’t have to be sharp. The furthest I’ll stop down, generally, is about f/5.6, but I normally will shoot at anywhere from f/1.2 to f/4.
When I do a model portfolio, or even a portrait shoot, I generally go in with an idea of the look I want to achieve. I try to maintain the same look for every file. When shooting on location, this assumes the light and the weather cooperate. Invariably, there are times when the weather does not cooperate and you have to adjust. The shoot that produced the accompanying photos are a case in point. I planned a sunrise shoot. I envisioned soft, warm, light on the model’s face, with orange glows on the sand and soft pink sunrise skies. Instead I got fog and flat grey clouds. Change of plans.
I pretty much decided when I arrived at the location that I was going to go for a monochromatic look. The light was flat, the sky was grey, everything just “felt” black and white. That’s not to say I didn’t do any color- but overall the look was for black and white. Generally when I’m shooting a model my goal is variety. If it’s for a portfolio, I want to be able to get several shots they can use for their book. I’ll work wider for full body shots, then close in for tighter head shots. I’ll generally let the model pose as he or she feels comfortable, tweaking the poses when I see something that needs to change- a tip or turn of the head, a repositioned hand, a stray hair.
I always have a reflector on hand. Even on a dull, cloudy day, a reflector can add enough punch to the light to create catch lights in the eyes, fill in the soft shadows around the eye sockets, and generally just make things pop better. I use a two-sided reflector by Westcott, with one side silver and the other side uncoated muslin. On a day like the one the accompanying photos were taken on, I used the silver side of the reflector since it kicked more like back up than simply using the white side.
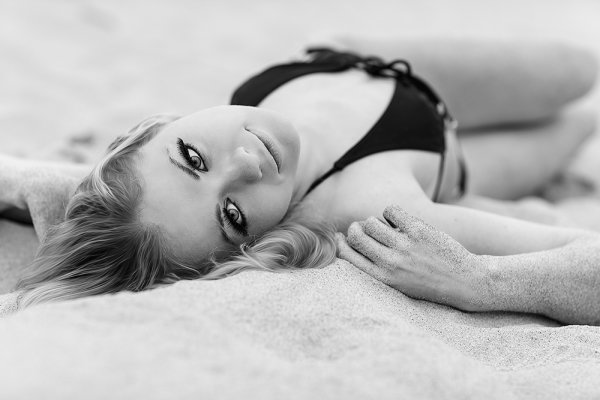
For this shot, I asked Yuliya to just pose in the sand. Rather than have her move, I moved around her 360°. She did her thing and we ended up with a few nice images. EOS-1D X, EF 85mm f/1.2L II. 1/250, f/2.8, ISO 100.
During the session, I try to mix full-length shots with tight closeups. Once I think we’ve captured the essence of the current outfit, I’ll quickly ask the model if there was anything else he or she wanted from it that we didn’t do, and then suggest a change to next one. This avoids belaboring one outfit or using so much time on one outfit that you don’t get to the rest.
I will show the model what I’m getting periodically so they know what we’ve got. The last thing I want to hear is that they wanted something we didn’t get, after the fact. This feedback is valuable because if the model doesn’t feel they look right, it can be changed before it’s too late. It also gives them an idea of what you’re capturing and allows them to modify their posing accordingly.
When it comes to processing the images, I try to make sure the look of all the files is fairly uniform. I want each session to stand alone as its own body of work. I do vary certain things, but generally I will use the same styles. Once all images are downloaded, I go through and choose the keepers. Then I process each, retouching the skin, the hair, and the eyes. To me, portraits and model photography isn’t about reality. It’s about flattery. You want to make your subject look good.
These two images were taken with the EF 70-200 f/2.8L IS II on the 1D X. It's one of my favorite lenses because it allows me to start off loose and then go in tight without being in the model's personal space.
Post originally from: Digital Photography Tips.
Check out our more Photography Tips at Photography Tips for Beginners, Portrait Photography Tips and Wedding Photography Tips.
Anatomy of a Modeling Session
AurumLight: Mixing Flash and Modeling Lights
17
Dec
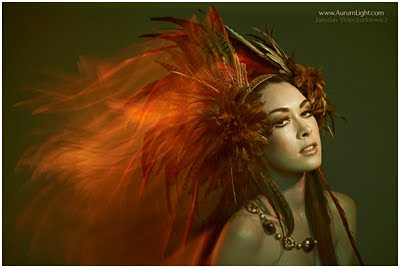
One of my New Year's resolutions is to learn to be more creative and adventurous with mixing color and light. UK-based photographer Jarek Wieczorkiewicz's photograph of Jay Jessop does just that—using daylight flash, gelled flash and tungsten modeling lamps.
I love this kind of thing, and would like to evolve my lighting to the point to where I can have the confidence to almost never use just white light. Below, a full BTS video on how Jarek lit this image. Read more »
Blender Soccerball/Football Modeling Tutorial
06
Nov

This video tutorial was inspired by the 5 minute “Modeling a Football” tutorial by “huangdarenxian” of China which was excellent but doesn’t have a voice over narration. I created this version to help clearly explain what are the steps necessary to model a Soccerball. If you like this video, please rate it 5 stars! Thanks for watching!
Video Rating: 4 / 5
Modeling and Acting Headshot Photographer Lexington Louisville Kentucky Cincinnati Ohio
18
Jul
This is a video about the head shot photography services we provide professional and aspiring models, actors and actresses. We are located in Georgetown Kentucky which is located about an hour east of Louisville on I64 and about 20 minutes north of Lexington on I75 and about an hour south of Cincinnati Ohio. The drive is worth it. www.jamescookphotography.com http
3D Studio MAX – Head Modeling Part 1 of 5
17
Nov
This is a basic tutorial based on modeling a head and face in 3D Studio MAX using a spline bridge’s. Its is a very simple way to get the basic head shape very quickly. For a short tutorial on how to setup the images, please goto : www.youtube.com Thanks Part 01 of 05 The blueprint used was free from www.the-blueprints.com My website is www.iwkya.co.uk – feel free to come and post on my forum.
Video Rating: 4 / 5
Cinema 4D Tutorial Part 2 – Modeling a mp3 player
10
Oct
This is part 2 of the mp3 player tutorial.
Video Rating: 4 / 5
You must be logged in to post a comment.