RSS
 

Posts Tagged ‘Missing’

Photographer uses drone with thermal camera to find missing 6-year-old boy

24 Oct

Photographer Steve Fines helped save the life of a 6-year-old boy who went missing last week on a subfreezing night in Sherburne County, Minnesota.

A group of roughly 600 people showed up to search for Ethan and his dog. As temperatures dropped below 30ºF that evening, the situation became increasingly dire. ‘I heard about the search at 8:00 pm and arrived on site about 9:00 pm,’ Fines tells DPReview. He arrived carrying his DJI m210RTK v2 drone equipped with an XT2 dual thermal camera.

An annotated image shared by Fine showing the location of Ethan and his dog being rescued.

Since Fines uses the drone for business purposes, he already had 10-12 sets of batteries charged and ready to go. ‘I went to the command center and introduced myself. They asked me not to fly until the state police helicopter left the area, which happened about 10:30 pm,’ Fines told us. He also emphasized how important it is for drone operators to yield the right of way to helicopters and other emergency response efforts. Interfering with these critical operations is against the law and can result in fines upwards of $ 20,000. Drone operators need to coordinate with local authorities first before getting involved.

Once Fines received clearance for takeoff, he said ‘I quickly started flying and it was by using a programmed flight path that I could efficiently cover a lot of ground. After quite a few false positives – otters, deer, bear – at 1:40 am, I spotted the six-year-old and his dog. By 1:50 am, a ground rescue team made it to his location and I watched them pick him up on the thermal monitor.’

While Fines has received a lion’s share of the credit from local news station KARE 11 for the success of the rescue, he took to social media and gave thanks to the coordinated efforts led by the County Sheriff along with the hundreds of volunteers that helped guide him in the right direction.

This thermal image shows a stream of volunteers walking a path to find missing 6-year-old Ethan.

While I was running the camera that found him […] I only knew in which direction to look because volunteers on the ground had found a footprint that pointed me in the right direction. I knew which areas had already been searched because of the excellent coordination of the Sherburne County Sheriff. I had other volunteers running radios to coordinate ground search parties – the people moving across really rough ground to find him. There were 600 of us that found Ethan that night.

Below is a video from KARE 11 showing more behind-the-scenes footage of the rescue and a thank you from Ethan:

You can check out more of Fines’ work via his website and follow Fines Aerial Imaging on Facebook and Instagram.

Articles: Digital Photography Review (dpreview.com)

 
Comments Off on Photographer uses drone with thermal camera to find missing 6-year-old boy

Posted in Uncategorized


Report: Adobe Photoshop CC for iPad is missing key features according to beta testers

18 Oct

Late last year, Adobe promised the future arrival of ‘real Photoshop’ for the iPad, something consumers expected would be a desktop-class offering able to compete with Affinity Photo and other apps already available on Apple’s tablets. The Photoshop for iPad app entered private beta testing in late August ahead of its public launch and now details are starting to roll in from testers.

According to Bloomberg News, some Photoshop on iPad beta testers are reporting a lack of key features they had thought would be available in the app. Some of these missing or stunted features are said to involve core aspects of the software, including raw editing, layer styles, filters, smart objects, the pen tool and parts of mask creation.

One tester claimed the beta version of the app is ‘inferior’ to Affinity Photo and Procreate, two apps available on the iPad.

A promotional photo currently on Apple’s website showing off a demo version of Adobe Photoshop CC, which still reads ‘Coming to iPad in 2019.’

Adobe’s Creative Cloud chief product officer Scott Belsky told Bloomberg that the final version of the software will include more features, which are being added close to launch because the company must work with Apple in order to bring the software to iPadOS. Instead of packing as many features as possible into the software before launch, Adobe told Bloomberg that its engineers focused on features they believed would be most desired by iPad users.

Users can expect the ability to sync their work with the desktop version of Photoshop using Creative Cloud, plus there will be support at launch for all Photoshop files and non-destructive editing. As well, users can expect ‘entirely new tools’ that revolve around native iPad features, namely the Apple Pencil and touchscreen.

Adobe says that it will continue to expand iPad on Photoshop’s abilities over time following its launch in the coming months.

Articles: Digital Photography Review (dpreview.com)

 
Comments Off on Report: Adobe Photoshop CC for iPad is missing key features according to beta testers

Posted in Uncategorized


The Leica Q-P is a stealthy, subdued version of the Leica Q that’s missing the iconic red dot

07 Nov

Leica has announced its latest camera, the Leica Q-P. Deemed “an artful statement of understatement,” the Leica Q-P is essentially the Leica Q camera wrapped inside a more discreet, subdued frame.

Much like the Leica M10-P, a higher-priced and more toned down version of the M10, the Leica Q-P drops the iconic red dot in exchange for a classic Leica script engraving on the top plate of the camera and finishes off the stealthy look with a matte-black paint finish.

The Leica Q-P has a redesigned shutter release that Leica says provides “a more positive tactile feedback” and comes with a new brown leather carrying strap and an additional spare battery.

Aside from the aforementioned changes, the Leica Q-P remains unchanged from the Leica Q camera inside and out. It has the same Summilux 28mm F1.7 ASPH lens in front of the 24.2MP full-frame CMOS sensor and a Leica Maestro II image processor to crunch all of the data.

Likewise, it keeps the same 3.68MP electronic viewfinder, 3″ 1.04 million dot touchscreen LCD display on the rear of the camera, and built-in Wi-Fi for compatibility with Leica’s FOTOS smartphone app.

$ (document).ready(function() { SampleGalleryV2({“containerId”:”embeddedSampleGallery_5646286756″,”galleryId”:”5646286756″,”isEmbeddedWidget”:true,”selectedImageIndex”:0,”isMobile”:false}) });

The Leica Q-P is listed on B&H as available for pre-order and is retailing for $ 4,995.

Articles: Digital Photography Review (dpreview.com)

 
Comments Off on The Leica Q-P is a stealthy, subdued version of the Leica Q that’s missing the iconic red dot

Posted in Uncategorized


You Should See what You’re Missing – Disadvantages of Shooting JPGs

31 May

In this article, learn about some of the disadvantages of shooting JPGs. It’s easy to see issues when they are in plain sight, but it’s much more difficult to see things when they are hidden. This situation applies to photographic images containing deep shadows and bright highlights.

When the tonal balance of a scene is unbalanced, some of the critical detail and even emotion of the photo can get lost in the process. The balance and distinction of all five tone-zones (highlight, quarter, middle, three-quarter, and shadow) are critical to image clarity.

Detail

Two Ladies Dresden - You Should See what You’re Missing - Disadvantages of Shooting JPGs

The above shot was captured in Dresden Germany while my camera was in Manual Mode (all the settings must be manually balanced). Obviously, my choice of exposure settings was horribly wrong. For that, I offer no excuses.

When something like this happens and you don’t have the chance to retake the image, you can still salvage most of the colors and tones if your camera was set to capture RAW images. Then you can judiciously adjust the tonal settings in RAW interpreter software (you can see my adjustments for that image below).

Two Ladies CR - You Should See what You’re Missing - Disadvantages of Shooting JPGs

My normal mode of shooting is to capture both JPEG and RAW images for this very reason. Had I only captured the JPEG file, recovery attempts would have been ugly. RAW files capture a latitude of tones well beyond the limited range of JPEGs.

Clarity

Mirror - You Should See what You’re Missing - Disadvantages of Shooting JPGs

Imagine trying to either shave or put on makeup in front of a fogged mirror. This would be a recipe for disaster. As long as water droplets remain on the mirror, the light waves are disrupted and the clarity is diffused. Mirrors, like good photos, rely on clarity. And in photography, clarity is always a product of contrast.

When clear distinctions are not present in the tonal range, detail gets lost. In this case, both the highlight and shadow are indistinct. There is no clear distinction between the highlights (the very lightest zone in the picture) and the shadows (the very darkest zone in the picture).

High Contrast Scenes

This reenactment of Shakespeare’s Macbeth at Atlanta’s Renaissance Festival took place at high noon on a very bright and sunny day (images below.

Renaissance image - You Should See what You’re Missing - Disadvantages of Shooting JPGs

Original image

While the camera correctly recorded both the strong highlight and the deep shadow, the contrast was so intense that detail was lost in both the highlight and shadow areas of the image. High contrast scenes often occur during daylight hours under cloudless or even partly cloudy skies.

The sun’s light was so intense that entire areas of the image are brightly illuminated while others are quite dimly lit. While our eyes can adjust to a wide gamut of light, the digital camera sensor cannot adjust to both extremes at the same time.

Renaissance image after - You Should See what You’re Missing - Disadvantages of Shooting JPGs

After editing

While detail is the product of contrast; I’m not talking about overall contrast, but internal tone-zone contrast. For a full range picture to display detail, there must be a clear separation of these five zones.

5 Zone Histogram

“Tone-zones” is a term I use to describe the five easily identified tones in a digital photograph. Almost all photos contain all five zones. The only exceptions are extreme high-key and extreme low-key photos.

The same lack of detail can be observed in very high contrast scenes; ones whose lighting range covers everything from black to white. The photo below shows a scene typically found in strong sunlight situations. The drama of contrast certainly makes the picture attractive, but significant detail is missing, and it’s missing in broad daylight.

Lost in the Shadows

In the image below left, the camera’s exposure setting averaged the exposure between the darkest and lightest values in the scene. Unfortunately, the strong sunlight cast dark shadows beneath the walkways and the image sensor had no way to distinguish these tones. The image on the right is after processing.


The most common challenge that we all face is when an image is bathed in light and perfectly exposed, but areas of deep shade conceal detail. The camera averaged all the light in the scene but could not compensate for the strong shadows. The image sensor captures the full range of light between highlights and shadows. But it cannot alter the internal contrast of the overall range, as it cannot discern what human eyesight perceives as “balanced” lighting.

Genoa Bridge before - You Should See what You’re Missing - Disadvantages of Shooting JPGs

The bridge pictured above is a prime example of the camera encountering too much light or dynamic range.

Notice that both the highlights (top left) are completely blown out and the darkest shadows (inside the tunnel beneath the bridge) are also plugged up. This situation requires human intervention. Careful adjustments to the shadows and highlights via Photoshop’s Highlights/Shadows dialog restored the detail. I converted the grayscale image to RGB and added the sepia look via the Hue/Saturation dialog.

Genoa Bridge After

Your camera and your eyes see differently

The tonality problem stems from the fact that your eyes can see and your mind can process much more dynamic lighting than your camera is capable of doing. The very scene that your mind pictured before you took the shot appeared a whole lot more detailed than the one that showed up on your monitor. So what happened, and why?

Every time you focus your eyes on a subject, your eye adjusts to the lighting in the portion of the scene that you want to see. Your eye’s pupil opens up to see detail in darker areas and closes (like the aperture in your lens) down to filter out the extremely bright light. Your eye has a distinct advantage over a digital camera though because it adapts to the lighting in each portion of the scene almost instantly.

When your attention shifts slightly, your eye adjusts to render the lighting perfectly. Well, almost perfectly. You still have limitations such as you can’t stare directly into the sun and see detail and you can’t distinguish serious detail under moonlight, but you get the idea.

This visual acclimation happens constantly and quite automatically because your eyes see real life pretty much the same way that a video captures motion; scores of individual “still” shots projected onto your mind every second. They appear and are adjusted by your mind so quickly that you don’t even notice that it happens.

Your camera is at a disadvantage

Your camera, on the other hand, captures one frozen moment of time for each picture. And since the camera cannot adjust to different areas of the scene individually, the current exposure setting only captures as much light range as it can within a single shot. Your camera’s limitations are determined largely by the ISO, shutter speed and aperture settings that you dialed in at the time the shot was captured.

This is in addition to the disadvantages of shooting JPGs.

While your camera does have limitations, there are adjustments you can make to both the internal and overall contrast of each image. Making these adjustments will bring your photos much closer in appearance to what your mind perceived when you clicked the shutter.

Low Contrast and Bad Color Balance

No matter how advanced your camera or how experienced a photographer you are, occasionally you end up with an exposure dud like this one. If the subject is important enough, you’ve got to find a way to rescue and restore the image to its full tonal range, color balance, and detail. The interior lighting of this centuries-old castle chapel was mixed and dark.


Your major adjustments are Hue, Saturation, and Luminance. To make the most of these tools I strongly suggest that you capture your images in RAW format and adjust them in a RAW interpreter (Lightroom, Camera Raw, Exposure X-3, ON1 Photo Raw, etc.). The major controls are very similar in each of these packages.

Conclusion

So do not ever be satisfied with what first appears on your monitor. If you captured the image in RAW format, you’ve recorded all the color and light information possible. On the other hand, if you only saved a JPEG file, your adjustments will be quite limited. Learn to move colors and tones around in your RAW images to see what your missing.

Push pixels around and stay focused.

The post You Should See what You’re Missing – Disadvantages of Shooting JPGs appeared first on Digital Photography School.


Digital Photography School

 
Comments Off on You Should See what You’re Missing – Disadvantages of Shooting JPGs

Posted in Photography


How to Find Inspiration for Your Photography When Your Muse is Missing

15 Jun
How to Find Inspiration for Your Photography When Your Muse is Missing

In a city full of construction sites, concrete walls tucked around a corner not visible from the street are a haven for graffiti artists. You have to go looking for them.

Maybe you just recently bought your camera, or maybe you got it a while ago. But has it been sitting on a shelf for a few months? Perhaps you have been shooting for a while but have just run out of enthusiasm? Feel like you are stuck in a rut? Like you should change it up a bit but don’t quite know how?

Or maybe you are just so overwhelmed with possibilities and potential that you are paralyzed with the indecision of what to try first?

How to Find Inspiration for Your Photography When Your Muse is Missing

Glorious spring cherry blossoms. So many shades of pink.

Inspiration is everywhere

Sometimes it’s a matter of opening your eyes and seeing the world in a different way. Perhaps you need to let go of the fear of trying something new. Lack of equipment can sometimes be an excuse. Difficulty or the cost of travel is another factor that can hold people back.

Trying new things can be scary, especially if you are new to photography and uncertain about how your images will turn out. So let me tell you one really important thing;

It doesn’t matter if you don’t get it right the first time.

Or even the twentieth time, though you might prefer to move on to something new at that point.

What is the worst that could happen if you try street photography? Pick some flowers and have a go with macro photography? Try to capture an awesome sunrise?

How to Find Inspiration for Your Photography When Your Muse is Missing

One of the best sunsets I have ever seen, absolutely stunning. Probably my 127th sunset shot, and worth the effort of the previous 126.

Kickstart your inspiration

Here are a few tips to help you kickstart your inspiration:

  • Actually get out there with your camera. Get your bum off the sofa, camera in hand, out the door in any direction. Make time for your hobby. Do it regularly. Give yourself permission to go out and shoot.
  • Go somewhere different than your usual places. Sit near a busy cafe. Take a walk in a nature reserve. Explore the sand dunes at the beach. Find a stream or river where birds are active.
  • Once you get to your new place, find a good spot and then just sit for five to 10 minutes. Immerse yourself in the sound of the place (yes take the headphones ooff). Watch the activity around you, see where the light and shadows fall, what textures are nearby. Be present and soon you will see all sorts of opportunities for images.
  • Be brave and attend events with your camera. Sports events, local festivals, markets, concerts, fairs, car rallies, agricultural shows – the list goes on and on of places you can go for minimal cost. There are people dressed up, doing interesting things, lots of different stuff to see and photograph. Walk around, watch the people, see the patterns, spot the areas of activity. Hover at the edges if that makes you more comfortable.
How to Find Inspiration for Your Photography When Your Muse is Missing

First time at Roller Derby – the lighting was awful so I decided to experiment with slower shutter speeds for fun.

  • See the small details via macro photography. Good macro lenses are expensive, so see if you can borrow or rent one to see if that is your thing.  Macro or close-up filters are a cost effective option to get you started. Look inside your pantry or fridge. See what is flowering in the garden. Setup a small studio with your tripod, a table and some natural window light and experiment.
How to Find Inspiration for Your Photography When Your Muse is Missing

Take time to see the small interesting details – this is an old cash register.

  • Learn to see in black and white. Look for contrast, texture, shapes, and lines. Try to see the image without color. At the beginning, this will be really hard, but eventually, you will start to see the core compositional elements that make for a good black and white image.
How to Find Inspiration for Your Photography When Your Muse is Missing

It was lightly raining as I took this image. The light was flat and dull, but I knew the sky would look fabulous once processed into black and white.

  • Start a photography project. There are lots of 365 Day or 52 Week Challenges around – some with themes and some just to encourage you to shoot regularly.  Try one of them or develop your own project idea.
  • Work with props. Taking straight portraits can be really challenging. Getting people to relax and smile naturally is hard. Instead, give them something to interact with and take their mind off the camera. A ball, or a hat. Perhaps a pretty shawl or wrap. A book or a bunch of flowers. Be creative, make it fun and light hearted.
How to Find Inspiration for Your Photography When Your Muse is Missing

Three ladies that I ran across and asked to pose in front of these blue statement walls. They did their own posing with no prompting from me.

  • Go out at nighttime. So many new possibilities – light painting, astrophotography, star trails, auroras, steel wool, light trails, fireworks or even kids sparklers.
  • Find a thing, anything, anywhere. Shoot it at different angles, in different kinds of light. Keep coming back and try and find a new and interesting way to capture the essence of a mundane everyday object.
How to Find Inspiration for Your Photography When Your Muse is Missing

Looks simple, try doing it backward in the dark within 30 seconds, ankle deep in snow with freezing feet running back and forth from the camera.

Endless possibilities exist

Landscapes, sunrise, sunset, wedding, portrait, boudoir, food, macro, street, dance, cats, astrophotography, waterfalls, compositing, fine art, black and white, weather, birds, architecture, events, underwater, travel, flowers, sports, product, photojournalism – all options for you to try.

The list goes on, that is just off the top of my head. There are still many more choices. Take any one of those words above, and break it down into smaller elements, and there are even more choices, for example;  travel > people, places, food, color, culture, and experiences.

How to Find Inspiration for Your Photography When Your Muse is Missing

An installation at an outdoor art festival being constructed.

Develop a habit

Some of my best work came after completing a 21-day creativity course. On day five I was to “Allocate a 15-minute time-slot to shoot anything”. The idea is that when you tell yourself it will only take 15 minutes, then you are much more likely to make the time to do it. Of course, it always took much longer, but because the effort is made to get started, suddenly it becomes fun. It doesn’t matter that it actually ends up being an hour instead.

Maybe you have kids to feed, bathe, and wrangle into bed so you feel like you cannot take the time. Instead of sitting down to Facebook or watch TV when you do have time, go get your camera instead. Talk to your family and friends, let them know it is important to you. Ask them to help – maybe they will be a model for you? Maybe they have a cool prop you could borrow?

How to Find Inspiration for Your Photography When Your Muse is Missing

Attendees at a local Zombie Run kindly agreed to lurch for me.

What makes you happy?

Where is your happy place? Is it a library? A cup of coffee at your favorite cafe? Is it down at the beach? At the park with the kids? Walking the dog? Playing a sport?

What could be better than doing your favorite thing and taking the camera along to record the experience? Kids playing in the autumn leaves, or about to push off down the slide. Your dog fetching a stick or racing along the beach. Steam rising off a cappuccino with a cupcake on the side. Frost patterns on a morning walk. Sunset setting the sky on fire. The smell of a new book. What’s your thing?

How to Find Inspiration for Your Photography When Your Muse is Missing

It’s not my thing, but street photography is hugely popular.

Learn to let it go

Don’t try too hard. Have your camera handy but take the time to be in the moment too. Genuine emotions and responses are far more compelling than a contrived situation. Learn to be patient and wait for the right moment. Sometimes just put your camera aside and let it go. Not every day will give you a keeper, or even a reason to shoot.  But you can guarantee that the best shooting opportunities will be the ones that happen when you leave your camera behind.

So in some circumstances, it may be more appropriate to be present, and leave the camera at home. It might be culturally insensitive or just plain rude. It could be more fun to enjoy being part of the event, rather than shooting from the sidelines as often happens with photographers.

How to Find Inspiration for Your Photography When Your Muse is Missing

A gorgeous art graffiti piece with the foundation for a building about to be built immediately in front of it. Taken on a step stool bought from home so I could shoot over the security fence.

Research

My favourite place for inspiration is Pinterest. I have boards dedicated to food, still life, fine art, Gothic, the macabre and pinup photography. All these things that have inspired me one way or another. Some are there to remind me to try a new thing. Others are there to remind me to keep experimenting with a style that is still new and experimental. Some are just fantastic images that delight me.

Instagram is another source of wonderful images.  Both are places you can search for reasonably specific concepts and find images to match. It is also easy to curate your feed for both, so that you get a regular supply of stuff that may inspire you.

Facebook has many groups dedicated to specific photography styles. As well as a good source of image inspiration you can also ask questions or ask for advice. Asking someone how they achieved a certain image can be a simple way of making your learning easier. Many people are often only to happy to help. Quite a few will even have blogged about the image with some backstory around how it was created.

Art galleries, museums, books on the grand masters of painting or photography are all available for viewing – many of them online.

How to Find Inspiration for Your Photography When Your Muse is Missing

A local steampunk lady agreed to pose for me in exchange for an image.

Summary

It can be easy to fall into the same old habits, sticking to one particular style or technique. Making the effort to change that is difficult. Overcoming inertia and breaking out of your comfort zone is hard.

Yet if you keep doing the same things, you will keep getting the same images, the same results. Eventually boredom will set in, causing you to put the camera aside.

My challenge to you is to instead, pick up the camera, open your eyes and give yourself a chance to truly see the world around you. Once you do that, limitless possibilities will become apparent, and your inspiration will be everywhere.

How to Find Inspiration for Your Photography When Your Muse is Missing

A light festival held in mid-winter. It was bitterly cold, but I had so much fun I went back the second night to catch all the things missed first time round.

Still, don’t try to do it all at once either, as creative fatigue and burnout can result. Learn to pace yourself. Break it down into manageable chunks, learn one thing and move on to the next. Some things will have more resonance and stay with you for longer. Others will not click with your style at all.

Conclusion

It’s possible that you could find your niche and want to stick with one particular style.  If so, then congratulations on finding your happy place. But keep in mind, even when you are in that zone, there are still ways to explore it, try different points of view, and push your boundaries.

In Big Magic, Elizabeth Gilbert writes about her theory that ideas are constantly swirling around us. But unless we are in a receptive state of mind, they will fail to find purchase:

“But sometimes – rarely, but magnificently – there comes a day when you’re open and relaxed enough to actually receive something. Your defenses might slacken and your anxieties ease, and then magic can slip through. The idea, sensing your openness, will start to do its work on you. It will send the universal physical and emotional signals of inspiration (the chills up the arm, the hair standing on the back of the neck) (…)”

Inspiration is anywhere and everywhere, we just need to make ourselves open for our muse to find us.

The post How to Find Inspiration for Your Photography When Your Muse is Missing by Stacey Hill appeared first on Digital Photography School.


Digital Photography School

 
Comments Off on How to Find Inspiration for Your Photography When Your Muse is Missing

Posted in Photography


3 Habits Every Outdoor Photographer Should Develop to Avoid Missing Shots

14 Jul

Have you ever been out to photograph a gorgeous sunset, just to realize that you can’t, because your batteries are dead? Perhaps you’ve come home and imported your images, and noticed that all of them are unusable due to hundreds of dust spots?

Don’t worry. Most of us have experienced the exact same things. Luckily, there are certain habits you can develop to avoid ever missing a shot again. None of them are time consuming, so there’s really no excuse not to implement them into your workflow.

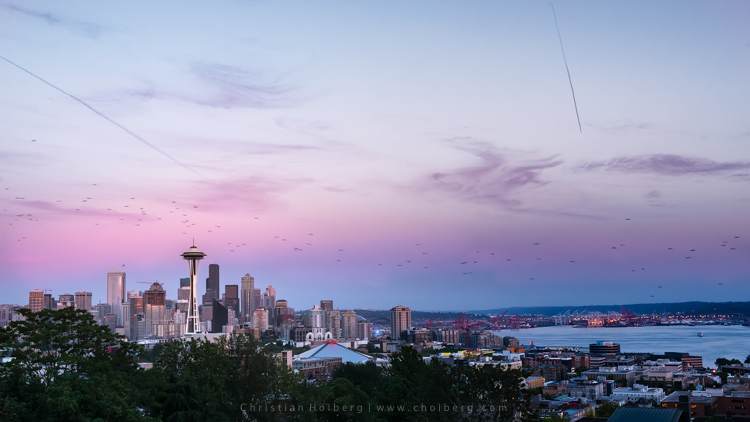
Kerry-Park-Sunset

Habit #1 – Charge your batteries

It might sound obvious that you should charge your batteries but you would be surprised how often I meet people that are out in the field without any battery power. In fact, I’m guessing you’ve experienced this yourself (don’t worry, so have I, and most other photographers too).

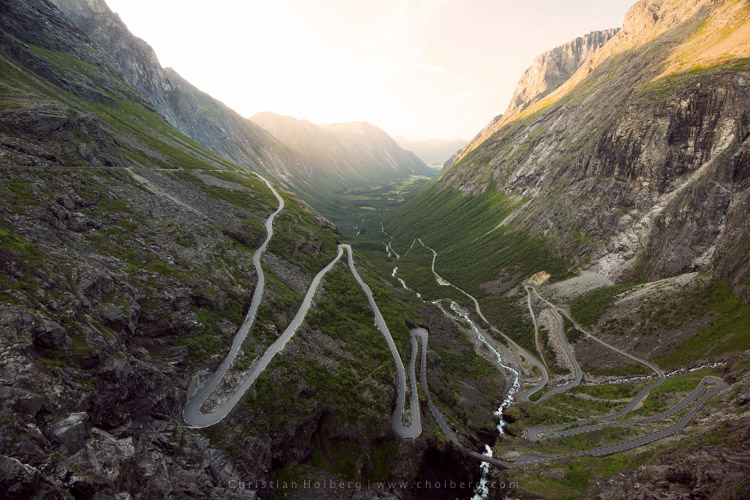
About a year ago I decided to take a seven hour drive to Åndalsnes in Norway, known for its spectacular landscape, in particular the iconic Trollstigen road. I had been there a few times before, but the weather was never ideal, so I wanted to go back and capture at least one good image. When I arrived at the scenic road and walked out to the viewpoint I managed to take a handful of pictures before my battery died. Weird, I thought, but no problem, I still have two spare batteries. Turned out both of them where empty too. I guess you can imagine my frustration when I realized that this entire trip was ruined because I had forgotten to charge my batteries.

trollstigen-sunset-glow

I managed to capture one decent image before my batteries died

I made it a habit after that incident to always charge my batteries after I come home from a trip, or evening out photographing. I set my batteries to charging even before I import my images, because I know if I don’t do it right away I may forget.

Habit #2 – Clean your equipment

Cleaning your camera gear is extremely important (especially for outdoor photographers) not only to lengthen the life of your equipment but also to improve image quality. I always get a bit upset when I view a beautiful image that is broken due to hundreds of small (or a few huge) dust spots. This is so unnecessarily, and easy to get rid of, so why let others believe you’re not as talented as you actually are.

Honestly, you don’t need more than a cheap microfiber cloth to remove dust and dirt from your lens or filters. Even though that is enough in most cases (and something that should always be in your camera bag), I do recommend purchasing a liquid lens cleaner too, as this helps get rid of all smudges and especially salty spots.

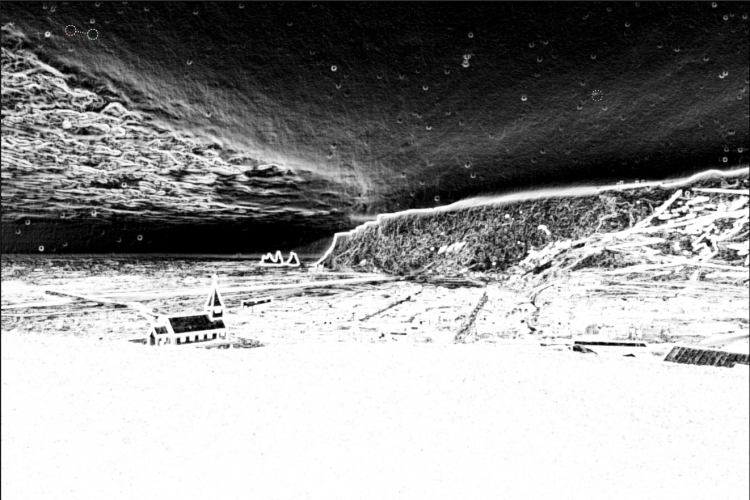
After bad weather on Iceland my lens was filled with dus spots

After bad weather on Iceland my lens was filled with dust spots, as you can see here in Lightroom.

I’ve made it a habit to clean my equipment after each photo trip that lasts more than a day. If I’m out photographing seascapes or in windy/rainy conditions, I usually spend an extra minute afterwards getting rid of the worst. Making this a habit will help save you a lot of time in post-production using tools such as Lightroom’s Spot Removal.

If you’re getting serious with your photography, and perhaps you have even began selling a print or two, it’s even more important to get rid of those nasty spots. Just imagine selling a large print, then seeing that those small spots suddenly look large and take away the attention of the image. Don’t make that mistake!

Habit #3 – Don’t leave before it’s over

My final habit is perhaps one of my most important advice for any outdoor photographer.

Don’t leave before it’s over!

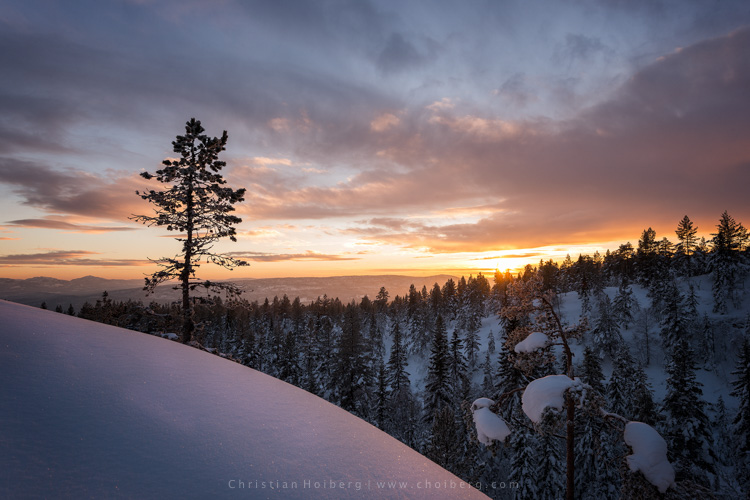
An unexpected sunset this winter in Norway

An unexpected sunset this winter in Norway

This is a habit I had to learn the hard way. It happened many times when I was an amateur photographer that I decided a sunrise or sunset wouldn’t turn into anything good, because the weather looked a bit shabby. Instead of staying at the location longer, I preferred to go home and hope for better conditions next time. What happened as I was driving back home? The sky turned red for just a few minutes.

Even though the conditions look a little dull it doesn’t mean that you won’t have a few minutes of good light. Alright, in most cases it doesn’t turn into something spectacular, but the times it does you will wish you had stayed for that 10-20 minutes extra.

So, remember this the next time you’re considering leaving early: it’s not over before it’s over. Stay a little bit longer, and perhaps you will be treated with great light that results in a portfolio worthy image. It’s worth it!

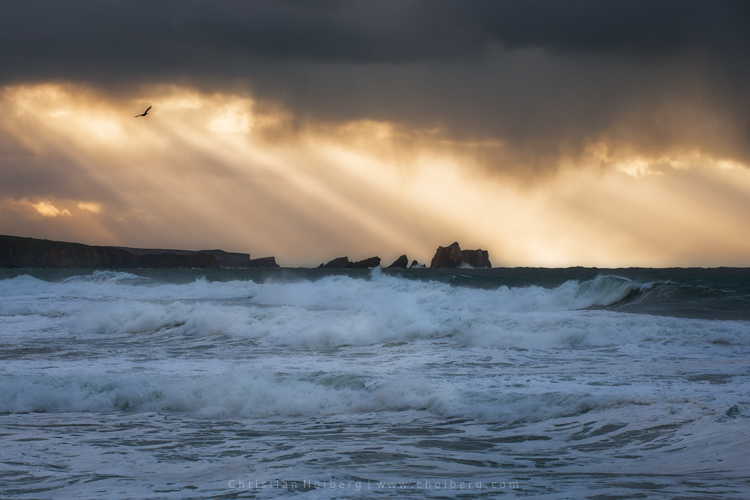
Bird flying through a stormy sunset at Liencres, Cantabria.

Bird flying through a stormy sunset at Liencres, Cantabria.

Are you guilty of missing these 3 habits? Have you developed any other habits, either in the field or when you’re back home? Let us know by leaving a comment below!

This week we are doing a series of articles to help you do nature photography. This is the first – watch for more coming soon! 

googletag.cmd.push(function() {
tablet_slots.push( googletag.defineSlot( “/1005424/_dPSv4_tab-all-article-bottom_(300×250)”, [300, 250], “pb-ad-78623” ).addService( googletag.pubads() ) ); } );

googletag.cmd.push(function() {
mobile_slots.push( googletag.defineSlot( “/1005424/_dPSv4_mob-all-article-bottom_(300×250)”, [300, 250], “pb-ad-78158” ).addService( googletag.pubads() ) ); } );

The post 3 Habits Every Outdoor Photographer Should Develop to Avoid Missing Shots by Christian Hoiberg appeared first on Digital Photography School.


Digital Photography School

 
Comments Off on 3 Habits Every Outdoor Photographer Should Develop to Avoid Missing Shots

Posted in Photography


Missing Pyramid: Louvre Installation Makes Iconic Monument Disappear

27 May

louvre pyramid camouflage 1

In a work of large-scale urban camouflage, French street artist JR has made the iconic glass pyramid standing outside the Musée du Louvre disappear. At least, it seems to disappear, when viewed from one very particular angle, thanks to a massive wrapping printed with a photograph of the museum’s facade. Known for paste-ups on a monumental scale as well as digital projections on architecture, JR transforms the 11,000-square-foot pyramid by I.M. Pei, which became a Paris landmark after its installation in 1989.

louvre pyramid camouflage 2

The illusion convincingly stands in for the entrance to the Louvre palace, despite being rendered in black and white, and matches up perfectly with the facade. Before the Pyramid became publicly accepted as an integral part of the Louvre, it was controversial, with some critics arguing that the clash of architectural styles was an affront to what the museum itself represents. In camouflaging it, JR takes us back to the days before it was built, leaving us with the distinct feeling that something is missing. The display will be in place through June 27th, 2016.

louvre pyramid camouflage 3

“Making the Pyramid disappear is a way for me to distance myself from my subject,” says JR. “The feud between traditional and modern tastes in art and architecture is nothing new. The Pyramid, Buren’s columns at the Palais-Royal, and the Pompidou Center – all of these caused controversy. My work is about transmitting history to better understand the present, and find echoes with our own times. What happened in the past is part of a broader context that can still have relevance for today.”

“By erasing the Louvre Pyramid, I am highlighting the way Pei made the Louvre relevant for his time, while bringing the Louvre back to its original state. The Pyramid is one of the most photographed French monuments. I am redirecting its energy, because people are going to have to move around it. They are going to look for the best angle to get the full impact of the anamorphic image, and really make the Pyramid disappear.”


WebUrbanist

 
Comments Off on Missing Pyramid: Louvre Installation Makes Iconic Monument Disappear

Posted in Creativity


Tips for How to Find Lost or Missing Photos in Lightroom

23 Jan

Lightroom is a popular choice for post-processing software for many photographers. There are many common mistakes newbies make when using it – and losing some of their photos is one of those.

In this video Phil Steele will show you how to find lost or missing photos and prevent it from happening again:

If you enjoyed that and want to learn even more about Lightroom you can check out Phil’s Lightroom course here.

googletag.cmd.push(function() {
tablet_slots.push( googletag.defineSlot( “/1005424/_dPSv4_tab-all-article-bottom_(300×250)”, [300, 250], “pb-ad-78623” ).addService( googletag.pubads() ) ); } );

googletag.cmd.push(function() {
mobile_slots.push( googletag.defineSlot( “/1005424/_dPSv4_mob-all-article-bottom_(300×250)”, [300, 250], “pb-ad-78158” ).addService( googletag.pubads() ) ); } );

The post Tips for How to Find Lost or Missing Photos in Lightroom by Darlene Hildebrandt appeared first on Digital Photography School.


Digital Photography School

 
Comments Off on Tips for How to Find Lost or Missing Photos in Lightroom

Posted in Photography


What’s missing? Ming Thein on the state of mirrorless

07 Nov

Commercial Photographer and camera blogger Ming Thein has shot with almost as many mirrorless cameras as we have, and has put together a list of all the things they get wrong or, at least, all the things he thinks they should all do. It’s a fairly comprehensive list that we very much agree with. Thein echoes a lot of our own concerns about camera handling, behavior and operation, as he works through camera design point-by-point. Read more

Articles: Digital Photography Review (dpreview.com)

 
Comments Off on What’s missing? Ming Thein on the state of mirrorless

Posted in Uncategorized


AfterShot Pro 2.3 offers missing link for Photoshop CS6 users with External Editor function option

05 Nov

The latest version of Corel’s AfterShot image editing and Raw conversion application introduces a ‘Send To External Editor’ button that allows Raw files to be opened and worked on in AfterShot, then exported directly to Photoshop. This creates another way for PhotoShop CS6 customers to continue to add Raw support for new cameras to their workflow, in addition to Adobe’s DNG converter application.  Read more

Articles: Digital Photography Review (dpreview.com)

 
Comments Off on AfterShot Pro 2.3 offers missing link for Photoshop CS6 users with External Editor function option

Posted in Uncategorized