RSS
 

Posts Tagged ‘MIOPS’

MIOPS launches Kickstarter campaign for Flex, its featured-packed smart camera gadget

26 Nov

MIOPS, makers of the Smart Trigger and Mobile Remote, is back on Kickstarter with another new product designed to make it easier than ever to capture unique images. The Flex is a ‘smart camera gadget’ photographers can use to create timelapse videos, capture photos of lightning strikes, breaking glass and more.

Flex attaches to your camera’s hot shoe and communicates wirelessly with an accompanying app for iOS and Android. Flex offers many different features and shooting modes, including:

  • Camera control
  • Lightning sensor
  • Sound sensor
  • Laser sensor
  • HDR bracketing
  • Geotagging
  • Live view framing
  • Holy Grail (day to night) timelapse
  • Basic timelapse
  • Long exposure timelapse
  • HDR timelapse
  • Time warper
  • Stormlapse
  • Cable release
  • Press and hold
  • Press and lock
  • Timed release
  • Self timer
  • Timed release with self-timer

As you can see, timelapse is an important aspect of Flex’s feature set. As MIOPS says, ‘Flex is one of the most powerful devices for making timelapse videos.’ A large part of what makes Flex such a promising tool for timelapse creation is that the application shows you a live preview of your timelapse video during the shooting process. When capturing a timelapse in changing conditions, Flex can automatically change your camera’s settings as well, allowing you to capture a ‘holy-grail timelapse,’ which is a timelapse with smooth day-to-night and night-to-day transitions. It’s a notoriously difficult type of timelapse to create.

Flex includes many timelapse features, including a live preview function on the Flex app. Image credit: MIOPS

For high-speed photography, such as capturing lightning strikes or capturing the perfect moment of action, Flex incorporates numerous helpful features. When photographing lightning, Flex automatically captures photos as soon as its sensor detects lightning. For photographing something such as a popping balloon, breaking glass, or a falling object, Flex includes a sound-activated shooting mode and it has a laser sensor that can be tripped to trigger image capture.

When using Flex, you can remotely control your camera, including adjusting settings and capturing images. Image credit: MIOPS

Flex includes new features for more traditional photography applications as well. From the Flex app, you can remotely adjust your camera’s settings and capture images. MIOPS says, ‘Go ahead – put your camera in hard-to-reach places to get that amazing angle.’ With customizable shutter speed control, Flex can also be used to capture very long exposure images, beyond what your camera can capture on its own. Further, you can see what your camera sees via live view from your smartphone.

Flex attaches to your camera’s hot shoe and is compatible with many cameras from Canon, Nikon, Sony and Fujifilm. Image credit: MIOPS

Flex is compatible with cameras from Canon, Nikon, Sony and Fujifilm, including both DSLR and mirrorless cameras from Canon, Nikon and Sony. For the full list of compatible cameras, click here.

Flex has already eclipsed its $ 50,000 goal with 43 days to go in the Kickstarter campaign. MIOPS expects to ship Flex to backers in June 2021. The Flex is available for $ 199 USD with the ‘Super Early Bird’ backer option, a $ 100 savings compared to the expected MSRP. For full details of the Flex and the various backer options, head to the Flex Kickstarter page. To learn more about MIOPS and its other products, click here.


Disclaimer: Remember to do your research with any crowdfunding project. DPReview does its best to share only the projects that look legitimate and come from reliable creators, but as with any crowdfunded campaign, there’s always the risk of the product or service never coming to fruition.

Articles: Digital Photography Review (dpreview.com)

 
Comments Off on MIOPS launches Kickstarter campaign for Flex, its featured-packed smart camera gadget

Posted in Uncategorized


MIOPS Mobile RemotePlus Review – Taking Control of Your Camera in Ways a Cable Release Never Can

31 Mar

The post MIOPS Mobile RemotePlus Review – Taking Control of Your Camera in Ways a Cable Release Never Can appeared first on Digital Photography School. It was authored by Peter West Carey.

MIOPS Mobile RemotePlus is a handy device and app to help you take control of your camera in ways a simple cable release never can. Sleek and stylish, the unit sits on your camera’s hot shoe and can provide a variety of functions through the easy to configure app for iPhones or Android phones.

What is it?

The MIOPS Mobile RemotePlus has three main components:

  1. The remote trigger that sits on your camera’s hot shoe
  2. A release cable specific for your camera type
  3. The MIOPS Mobile app

The app works with the unit via Bluetooth, sending and receiving information constantly while in use. It is important to note that the unit can continue on its own, after being sent a command, if you close the app or you lose connection. So if you start a 500 image time-lapse, you can effectively let the unit continue working without babysitting it.

The RemotePlus will set your shutter speed for the various modes explained below, but you will still be in charge of ISO, Aperture, White Balance and any other setting you choose. Some RemotePlus modes work better with Manual mode on your camera while others, such as the Long Exposure Timelapse, will need Bulb mode.

Getting Started

After unpacking the RemotePlus, you’ll need to connect it to your camera’s remote port. This process is different for each camera. Hook the other end of the cable into the side port on the RemotePlus, which has both a receptacle to attach to a camera hot shoe and a standard tripod threaded hole.

The app can be downloaded from either Google Play or Apple Store.

The app has a demonstration mode if you want to download it before you buy the unit to see how easy it is to use.

You will need to register your device with MIOPS if you want to upgrade your firmware. After signing on, you will see a screen like this one:

Choosing the MobileRemote and the app will scan for nearby remotes:

Clicking on the only unit available brings up a full menu of options:

Whoa now! There’s a lot there to parse through, so let’s take them bit by bit.

What can it do?

Cable Release Modes – 6 Varieties

Let’s start with the basics.

While connected to your camera and smartphone, the RemotePlus functions as a shutter release for your camera in six modes:

Cable Release

This mode is straightforward and perfect for those who don’t want to stand with their camera while taking a photo. Pressing the large button on the screen (see below) will trigger the shutter in whatever mode you have set on the camera. For instance, this mode is great for sitting at a campfire while your camera is set to take photos nearby.

Press & Hold

Press & Hold take things up a notch and is perfect to use when you are waiting for some action. It’s the same as pressing and holding the shutter release on your camera in Bulb mode. The longer you press, the longer the exposure.

Results will vary with duration and here is one simple example of eight seconds on a freeway overpass.

Press & Lock

Don’t want to bother holding the button on your screen while waiting? Press & Lock is where it’s at. Same as above, but now you have to tap the main button on the screen a second time to stop the exposure. There is a timer shown at the bottom of the screen for your convenience.

Timed Release

Going one step further, if you know you want a 10-minute exposure, Timed Release is the correct mode for you. Just enter in the appropriate shutter release time on the screen, set your camera to Bulb mode while adjusting the ISO and Aperture to your liking. Once you press start, it’s all taken care of for you.

On the display are places for hours, minutes, seconds and decimals of a second. In this example, I chose 12 seconds for another overpass shot.

Self Timer and Timed Release & Self Timer

The Self Timer mode is just like the self-timer on your camera, but you can set the delay, up to 99 hours in the future.

Lastly, the Timed Release & Self Timer combines the last two sections to allow for a delay and then a long exposure.

In each of these modes the command is sent from the app and then stored in the unit, so you don’t need to be present or within range for the unit to take action.

Timelapse – 4 Main Varieties

While the RemotePlus will not create the final video file for you, it will greatly simplify your ability to create fun and unique timelapses in a few different modes. More information on compiling the timelapse can be found here on DPS.

Basic Timelapse

The Basic Timelapse mode will take care of all your simple timelapse needs. It’s there for you to point, focus, and create with ease.

On the first screen you set the interval between photos, and on the second, you set the number of photos you want to take. It’s that easy! Press Start and away your camera goes.

The two screenshots above show the app screen while the camera shoots. The circle around the interval counts down until the next shot, while the current frame and remaining time display on the bottom. Up top are the overall settings.

The app has a nice feature to help reduce accidental stops; you have to press the lock button before you can click on STOP. It’s possible to still stop the app on accident, but the extra step helps.

It’s up to you to set your camera on your preferred mode. Manual Mode with the White Balance set often gives the best results for consistent image quality.

Long Exposure Timelapse

Long Exposure Timelapse is where things become more complex but also more exciting as far as the results. Here you will again set the interval between shots and the number of shots, but you will also set your camera to Bulb mode and set the shutter speed in the app.

After pressing Start the screen will change, as with the Basic Timelapse, but now two countdown circles will appear.

These circles will show you the amount of time left in each interval and exposure.

You can use the Long Exposure Timelapse for a variety of subjects. Below are two examples I shot of the same subject, but with slightly different settings for varied effects.

The first had settings of ISO 100, f/7.1 and 1/100th (Standard Timelapse Mode) while the second had settings of ISO 100, f/22 and 1/5th (Long Exposure Timelapse Mode). The difference is apparent in how blurred motion from the cars can impart more motion.

Here are three more tests at 1/10th second shutter speed, .6 seconds and 1.2 seconds. All timing set from the app in Bulb Mode.

Bulb Ramping Timelapse

Bulb ramping is a manner of shooting while the lighting changes. This is most often performed at sunrise or sunset and can cover an extended period, such as an hour. While the camera is in Bulb Mode, the shutter speed is gradually adjusted to keep the overall exposure consistent, so the timelapse does not change from very dark to very bright.

It’s important here to understand some limits and to plan for them with this mode.

Most cameras are limited to 1/30th of a second in Bulb mode with a cable release. Check with your owner’s manual to see what limits Bulb Mode and using a cable release may put on your photography.

This mode also requires planning ahead to know – or at least make a good guess – which exposure settings to use at the start and end of the ramp. The ramp is linear in its progression, so you will need to choose a time of gradually increasing or decreasing light. If the sun suddenly shines brightly on your scene once above the horizon, but then ducks behind some clouds, the effect might be rather jolting.

To use this mode:

The Bulb Ramping mode has four settings.

The first is the interval between shots. The example below shows 30 seconds.

The second screen sets the shutter speed of the first image. Because I am using a Canon, I set it to 1/30th of a second above (the fastest Bulb will handle, even though the screen shows a decimal of .01, or 1/100th of a second).

The next screen is the final shutter speed. This is where math, planning and scouting help. You will need to calculate how long you want your bulb ramp to run, from start to finish, and know what the lighting will be at the start and finish. In this case, I picked 20 seconds for an end shutter speed (left, below).

The last screen asks for the number of frames to shoot. Here, it will shoot 60 frames, one every 30 seconds.

That will make for a total time of 30 minutes from start to finish. It’s important to plan ahead to make sure these shutter speeds will work for the given lighting. While you can adjust aperture and ISO to help compensate, if the end time of your timelapse is too long, your images will become blown out. Too short and you’ll be left in the dark.

Planning is crucial to this mode.

HDR Timelapse

An HDR Timelapse is the same as a normal timelapse, but the mode does all the shooting for you if your camera doesn’t have this ability built in. It can shoot a sequence of 3, 5 or 7 shots, for each step of the timelapse, but it does have the limitation mentioned in Bulb Ramping above; that you can not shoot faster than 1/30th of a second on most cameras. This does limit its abilities.

The brackets are set around a central time setting, such as one second (in the example below). Below that the exposure shift, in terms of EVs, is set, followed by the number of frames. The unit will keep you in check if you pick settings that won’t work with Bulb mode, such as choosing 1/15th of a second, seven frames and 2-stops of EV shift in each image.

Lastly, set the Interval between shots and the number of frames. If you don’t know the number of frames you want to shoot, simply pick the infinity setting and stop the sequence when you have enough.

More information on using bracketing can be found in this DPS article.

Road Lapse, A Special Kind Of Timelapse

Road Lapse is a fun tool to use, not only while driving but also on a train, boat, hot air balloon or anywhere else you have a GPS signal. The app uses that signal then asks you how often you want to take a photo, be it in feet or meters. You also set the number of photos or just set it to infinity which allows you to stop the Road Lapse when you are finished.

What’s different about this mode as compared to a standard timelapse is there is no perceived slowing and speeding, such as when a car comes to a stop sign. Because the mode is distance-based, a rough calculation can be made with regard to timelapse length when the driving distance is known.

For instance, one mile is 5280ft. If you set the device to shoot every 40ft, that will net you 132 images. At 30 frames-per-second, the timelapse would turn out to be 4.4 seconds long. It won’t matter if it takes you 60 seconds or 15 minutes to travel that distance, the video will be the same length.

It does make things appear sped up. In the examples below, the first shows a regular timelapse in a car at night. The second video shows the Road Lapse. In the second video I stopped at four different stoplights, but you don’t even notice them. I think each mode has its strengths and weaknesses and it matters what you want to create.

For a unique test, I set my camera up on a Washington State Ferry, shooting off the back with the distance set to 40ft.

HDR Bracketing

HDR shooting uses the same functionality as mentioned above with HDR Timelapse. You can take a series of shots, offset by specific stops and then combine them in the computer later for an image with more dynamic range than a single image.

It has the same limitations mentioned above.

Sound

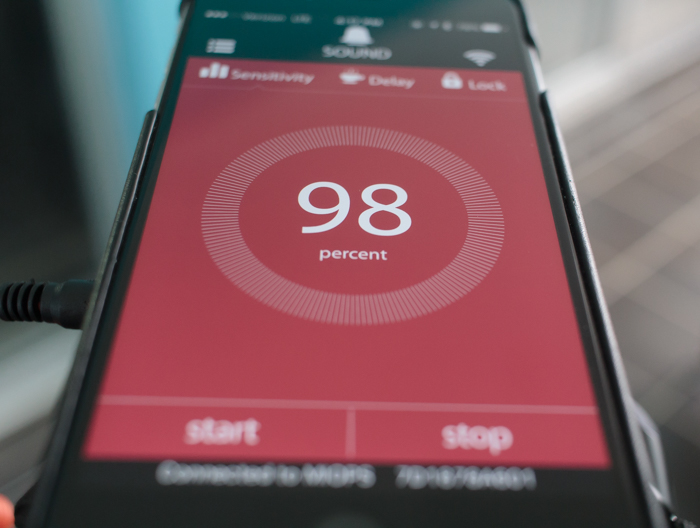
The Sound Mode is triggered by sound and you can choose the threshold via the app.

You will set your camera’s exposure either on Manual or another mode of your choice and leave shutter release up to the MIOPS trigger. I made some attempts at dropping (fake) ice into a glass to catch the splash. You can stop any action that makes a loud enough noise in motion with this mode.

The mode can be set to take just one photo or continuous photos until the sound drops below the threshold. You can also input a delay. Activation of the shutter will happen from 10 milliseconds to 99 hours.

A better example can be seen in Erik Lindegren’s photo, highlighted on Miops’ Instagram feed.

Vibration

Like Sound, Vibration relies on your phone to trigger the unit. And like Sound, you can set the sensitivity so small bumps won’t set off the unit, but large ones will.

Again, a delay can be set and continuous shooting can also be chosen.

Lightning

Most lightning photos in the past were taken by leaving the shutter open for a length of time, maybe 30 seconds. The overall exposure was balanced for this and fingers were crossed, hoping for great bolts.

The problem with this method is shots during the day were difficult with long exposures without the use of a neutral density filter. Even then, a vast multitude of images had to be taken, and the frame had to be clear of other moving objects (trees, for instance) or they could blur.

The Lightning trigger simplifies capturing images and can offer better exposures of daylight and dusk images. Your camera will need to be in Manual Mode where you can set the shutter speed, aperture, and ISO to your liking. Compose the shot with anticipation of where the lightning will strike.

You will set the sensitivity, and that’s it. A higher sensitivity number means any small flash will trigger the unit, while a lower number means much more light (larger bolts) is needed.

Then press the “Go” button and sit back to enjoy the show while your camera does all the work.

As luck would have it, a thunderstorm rolled by in the distance while I had the unit for testing. The lightning was about 10-12 miles away, and I ended up using a 10-22mm lens, with some cropping for the final images. All images shot at ISO 800, f/5, 1.3 second and 22mm.

TIP: If you are curious about where the lightning is striking and which way a storm is moving, check out Blitzortung.org for real-time updates. While watching this storm, I found the delay from the time of strike to it showing up on the map was about 5 seconds. Often the map would update before the thunder made it to me.

Motion

Switching to Motion requires the use of your phone as the ultimate trigger. You can make the settings for your camera manually, or in any mode you desire, while the shutter will trigger when the view from your phone’s camera notices motion.

The advantage here is that the phone can be set up remotely from the camera (within Bluetooth range, however) and made to cover a specific area.

In this example, I set my camera on a tripod with a long lens to capture birds coming to my bird feeder. I prefocused on the feeder and then moved the field of view just off to the side. I then switched to manual focus to lock focus.

I set the camera with a fast shutter speed and the ISO with a shallow aperture so I could capture the fast movement of the birds (ISO 1250, f/7.1, 1/1250th). I then set up my phone with an adjustable, gripping tripod, on top of the feeder, looking down. The field of view of the phone would cover the side of the feeder, where my camera was focused.

That’s the view on the phone screen while setting up the shot. As you can see, much like other modes, you can set a delay after the app notices movement (handy if you put the phone somewhere on the approach to your camera) and the number of frames the camera will snap each time.

Below the screen is the Accuracy Rating. Moving it left means any little movement will set off the unit while moving it right requires a lot of movement before triggering.

The results, as you can see, were easy to capture while I sat inside enjoying the action.

If the rains hadn’t started, I would have captured more. While I could have taken the shots above manually, more birds showed up when I went inside and let the camera do its thing. For skittish subjects, the RemotePlus is a definite benefit.

You can use Motion in this manner for any number of moving subjects where their path is predictable. It will be a drain on your phone’s battery, though, as the camera and screen are on the whole time.

Laser

The Laser trigger mode is handy if you have a laser and expect the beam to be broken at a precise location. You will need a laser source, but just about any constant-on laser can be used, such as a presentation pointer or even a laser level.

Point the laser at the sensor on the front of the RemotePlus, and set your camera’s focus and mode accordingly. It’s similar to the motion feature above, but a bit more specialized for more precision.

Conclusion

This review was harder than I believed it would be because of the number of features packed into the small unit. Also, during the review, I had access to MIOPS staff for questions and found them not only responsive to feedback but updating the app as I wrote. In a company and product, I like to see that nimbleness and desire to improve.

After the testing I put the Miops Mobile RemotePlus through, I would purchase one for my own photography. While it had some room for improvement (the manual sometimes lags behind the quick pace of upgrades, and the Motion feature does have a limit when it comes to Bluetooth connectivity, but that is inherent in the protocol.), I do enjoy updates of the unit, both software and firmware, regularly.

The two big plusses for me are the timelapse features (including the HDR one in specific cases) which add timing capabilities that my current Canon intervalometer lacks, and the lightning shooting, especially for daytime shots.


Disclaimer: MIOPS is a paid partner of dPS

The post MIOPS Mobile RemotePlus Review – Taking Control of Your Camera in Ways a Cable Release Never Can appeared first on Digital Photography School. It was authored by Peter West Carey.


Digital Photography School

 
Comments Off on MIOPS Mobile RemotePlus Review – Taking Control of Your Camera in Ways a Cable Release Never Can

Posted in Photography


App-based camera triggers compared: Alpine Labs Spark & Miops Mobile Dongle

16 Aug

Introduction

From left, the Alpine Labs Spark and the Miops Mobile Dongle.

Finger. Shutter button. Click. Next.

That sequence is so ingrained in our idea of “taking a photo” that it’s pure muscle memory. Many situations call for more than just the press of a finger to capture a shot, though, which is where remote triggers come in.

Plenty of us have a remote release cable buried in our camera bags that activates the shutter from a foot or two away. But what about when you want to trigger a night sky shot in the bitter cold from within the comfortable confines of a sleeping bag? Or hours of time-lapse long exposures? What about automatically tripping the shutter when something moves in front of the camera?

These are exactly the needs that app-based triggers are designed to meet. And while there are traditional accessory triggers that’ll individually accomplish one of the above tasks, none do it all.

Key features of app-based remote releases

  • Remotely trigger a camera’s shutter
  • Automate time-lapse capture sequences
  • HDR capture that’s more flexible than some cameras’ built-in modes
  • Activate the camera shutter using external stimuli such as sound or movement (Miops only)
A photo shot using the Miops Mobile Dongle’s sound trigger function.

Devices to enable remote capture aren’t new, but the popularity of smartphones has shifted attention to app-based solutions. With a small activation device or cable connected to the camera, software on the phone can handle the details—and be easily updated for fixes or new features. I looked at two recent products that connect your camera and smartphone, the Alpine Labs Spark and the Miops Mobile Dongle.


Alpine Labs Spark
$ 74 | AlpineLaboratories.com

The Alpine Labs Spark can sit in the camera’s hot shoe.

The Alpine Labs Spark ($ 74) is a triple-purpose remote trigger. The unit itself sits on top of your camera in the hot-shoe and connects via USB – you need to make sure you have the right cable for your camera model – with a single button on top that can activate the shutter when pressed. Or, for compatible cameras with infrared ports, the Spark on its own can trigger a shot wirelessly.

Things get more interesting with the third connection method, paired with a smartphone running the Spark app via Bluetooth wireless networking. When both devices are within range (up to 100 feet), the app can trigger the shutter remotely, or you can set a timed or manual long exposure capture. The Spark includes a battery that Alpine Labs says is good for more than 2,000 hours.

The trigger options in the Spark app. Setting a long exposure in the Spark app.

You also have control over creating time lapse images, setting an interval and total duration of the shoot, such as one frame every 30 seconds over the course of an hour. Or, you can capture a series of HDR brackets with the option of choosing the number of images and the exposure adjustment between each shot. There’s even a Photo Booth mode that dictates how many photos to capture and the delay between each shot.

Commands are sent and stored in the battery-powered Spark, so for long exposures or time lapse sequences, the app doesn’t need to stay engaged and drain your phone’s battery.

With the Spark connected to my Fujifilm X-T1, I couldn’t get the Time Lapse mode to work at all

Although the Bluetooth connection promises more interesting uses, “interesting” can go in a few different directions, and not always forward. With the Spark connected to my Fujifilm X-T1, I couldn’t get the Time Lapse mode to work at all; even more annoying is a bug that repeatedly pops up a dialog exclaiming that the time lapse is finished. Similarly, the HDR mode was spotty during my time with the unit; sometimes it worked, sometimes it didn’t.

The Spark offers exposure adjustments in full stops, not partial ones, and for whatever reason, when I’m capturing three shots with one-stop difference between them, I end up with three identical one-second exposures. It also assumes you’re only shooting in dark conditions, because the fastest shutter speed it offers is 1/10 (the camera needs to be in bulb mode).

Ultimately, the Spark shows promise, but Alpine Labs needs to work through some software issues.

What we like:

  • Compact and easy to pack
  • Device sits in camera’s hotshoe
  • Camera can be triggered via USB, infrared or Bluetooth (using a smart device and the Spark app)

What we don’t:

  • Overall, unreliable
  • Buggy mobile app
  • Only full stop exposure adjustments offered


Miops Mobile Dongle
$ 37 | Miops.com

Unlike the Spark, the Miops Mobile Dongle ($ 37) is literally just a cable that connects your camera to a smartphone. The cable has two sections: one attaches to your camera’s USB port (you need to specify your camera mode when ordering), and the other attached to the headphone port on your mobile phone. If you own a recent iPhone or Android phone that doesn’t offer a dedicated headphone port, you can use the adapter that came with your phone – yes, that means a dongle for the dongle (see image below).

The Miops Mobile Dongle is a pair of cables (assisted by the Lightning port adapter that came with the iPhone X), which communicates using the Miops app.

With the connection made, the Miops Mobile app presents 15 different ways to trigger the camera’s shutter. There are the usual methods, like Cable Release, Self Timer, and Basic Timelapse, but those are just basics. With the Miops app, the phone plays a much more interactive role.

Some of the options in the Miops app.

For example, you can trip the camera shutter when the phone’s microphone registers a sound above a specific volume level, or when the phone’s built-in camera registers movement. Or take advantage of the phone’s accelerometer and grab a shot when it detects vibration. The Road Lapse feature uses the phone’s GPS to record a shot every X number of meters or feet as you travel, up to a specific number of frames.

Some of the features automate other tasks to make things easy for you, such as HDR Timelapse, which captures brackets at set intervals, or Bulb Ramping Timelapse, which lets you set an initial exposure and a final exposure so the shots remain evenly exposed even as light levels drop or rise (during sunset or sunrise, for instance).

Running a Bulb Ramping Timelapse in the Miops Mobile app. The Miops Mobile app uses the phone’s microphone to trigger the shutter by sound.
Whacking the underside of the table provided the sound needed to trigger the shutter using the Miops dongle. Here’s the setup for capturing a shot based on sound.

A ‘Scenario’ feature enables you to combine modes like a recipe, such as firing an HDR once a sound level is reached. As a bonus, there’s also a Neutral Density Calculator to figure out ideal shutter speeds when using ND filters, and a Solar Calculator that lists sunrise and sunset times.

The downside to the Miops Mobile Dongle is that the phone has to be physically connected
to the camera

The downside to the Miops Mobile Dongle is that the phone has to be connected by the cable to the camera. So, even if the camera is set up on a tripod, you’re still juggling the phone. I solved that by purchasing an inexpensive mini ball head mount that fits into the camera’s hot shoe, and then screwing a Studio Neat Glif onto it to hold the phone in place.

Even without a wireless connection, though, the Miops software offers plenty of remote-triggering options at an affordable price.

A sample time-lapse video shot using the Miops Mobile Dongle and a Fujfilm X-T1.

What we like:

  • Compact and easy to pack
  • The Miops app’s many triggering methods, including sound and motion
  • Reliability
  • Affordability

What we don’t:

  • The dongle’s physical connection requires juggling a phone
  • Some modern phones that lack headphone ports require that you add a dongle to the dongle

Miops also sells the $ 125 Mobile Remote, which is a wireless device akin to the Spark, and the $ 219 Miops Smart, with additional triggering modes like a laser sensor.

Articles: Digital Photography Review (dpreview.com)

 
Comments Off on App-based camera triggers compared: Alpine Labs Spark & Miops Mobile Dongle

Posted in Uncategorized


MIOPS Capture360 is a modular, pocket-sized motion control box

14 Jun

Meet the newest member of the MIOPS family, the Capture360. Deemed the ‘most versatile motion box ever created’ by its creators, the Capture360 is a pocket-sized motion device currently being funded on Kickstarter that works with any camera or smartphone.

What sets Capture360 apart from the rest of MIOPS’ lineup is that it can be be as simple or robust as your filming needs demand.

Out of the box, a single Capture360 only captures one range of motion—panning. But, when paired with MIOPS’ optional L-bracket, that single unit can also be used for tilting. Combine two units and you get a rig that can both pan and tilt, all without the need for wires—the Capture360 devices will automatically determine which one is for panning and which one is for tilting.

MIOPS is also offering a Capsule Slider accessory that will let you add yet another range of motion to your shots.

Like MIOPS’ other systems, the speed and direction of the motion is controlled using MIOPS smartphone app for iOS and Android. The app, which connects via Bluetooth, is used to program the motion path of the device.

In addition to manual configuration, the app can also work to keep track of a subject with both object tracking and face tracking. The app is also capable of controlling the camera settings to account for bulb ramping, interval ramping, long exposures, and high dynamic range (HDR).

If you purchase an optional turntable accessory, you can also program the app to capture 360-degree product photos.

The Capsule360 features a built-in rechargeable battery that can work for eight hours straight of continuous use or up to one week long in time-lapse mode. There’s also an option to attach a USB battery pack to extend the battery life.

As with all of MIOP’s previous devices, the Capture360 is currently being crowdfunded on Kickstarter with an expected ship date of December 2018. As of publishing this article, it’s already surpassed its $ 75,000 goal with 28 days to go. A single standalone Capsule360 starts at $ 200 and depending on the accessories and add-ons you want, prices go up from there.

Articles: Digital Photography Review (dpreview.com)

 
Comments Off on MIOPS Capture360 is a modular, pocket-sized motion control box

Posted in Uncategorized


How to Take Amazing Photos Using the MIOPS Splash Water Drop Kit

22 May

Water droplet photography is a dream for almost every creative photographer. When a water drop collides with another drop, it creates beautiful crowns and other shapes that look fabulous. Capturing those moments is a very satisfying experience for a photographer.

MIOPS Splash water droplet

Taken by Andrea Laybauer using MIOPS Splash Water Drop Kit

Until now it was not easy to create such shots, but thanks to the advancement of technology, now we have some gadgets that could make this process almost effortless for us. One such gadget is the MIOPS Splash Water Drop Kit which is the world’s first water drop photography gear that can be controlled by your smartphone.

It not only controls the size and timing of drops with great precision, but it also controls your camera or flashes so that you can focus on other creative tasks like lighting, background, and different settings to create unique pieces of art.

So, let’s find out how you can create extraordinary splash photographs using this amazing device.

Photo credits: In this article, we are featuring examples done by myself, as well as three photographers and MIOPS Splash Water Drop Kit customers; Andrea Laybauer (a specialist who shoots drops and splashes), Jos Daanen (a primarily wildlife photographer), and Paul Lindqvist (a specialist in food, stop-motion products, and portraits).

MIOPS Splash Water Drop Kit - blue drops

Taken by Ramakant Sharda using MIOPS Splash Water Drop Kit

What you need:

A Quiet Room:

First, you’ll need a room that can be darkened where you can create a lot of mess in that room. It’s better to choose a spare room as you may need to keep your equipment setup for a few days.

Camera and Lens:

You can use any DSLR camera for water droplet photography, or any other camera that has manual controls. Lens choice is important as you need one with a longer focal length and shorter minimum focusing distance so your camera is safe from water splashes but you can still fill the frame with splashes. I found that a 100mm macro lens is the best option for this project.

Flashes/Speedlights:

Next, you need flashes with manual control over power. You are going to use the flashes at the lowest power setting so you need a minimum of two flashes. If you have more, that is even better.

Taken by Andrea Laybauer using MIOPS Splash Water Drop Kit

Taken by Andrea Laybauer using MIOPS Splash Water Drop Kit

Tripod:

A steady tripod is a must for the camera so you can focus on other aspects of the shoot. You also need an extra tripod for attaching the MIOPS Splash Water Drop Kit device.

Water Containers:

You may use a glass bowl, wine glass, or a designer cup. But if you don’t want to show the container in the picture you need around an 8×12″ glass tray with two-inch depth. You can get it from your local aquarium shop (or a similar baking dish).

Taken by Jos Dannen using MIOPS Splash Water Drop Kit

Taken by Jos Daanen using MIOPS Splash Water Drop Kit

Backgrounds:

You also need some colorful background images. Go to Google and search for “blur abstract background” and you’ll get an idea about what type of images you require. You can buy similar images from stock sites or there are some sites that provide images at no cost. You now have two options, you can print these images on paper or transparencies.

MIOPS Splash Water Drop Kit:

Finally, you need a MIOPS Splash Water Drop Kit to control the water drops and your camera. It comes with a holder kit so you can easily fix it on a tripod.

MIOPS splash dark

Other than these items, you need a few more things like a milky white acrylic sheet (Plexiglass) to attach backgrounds. Something to hold the acrylic sheet, a dry cloth, some clamps or clips and a shutter release cable.

Setup:

Now you have everything ready, so let’s start. First, place the acrylic sheet as the background, making sure to leave at least two feet at the back for placing the flashes. Now place a tripod at the front of this and attach the MIOPS Splash Water Drop Kit on it. The distance between the background and the point where your drop will fall should be around 12-15 inches.

Now put your water container below it and ensure that the drop falls in the center of this container. Also, align your background with it.

Next place your flashes. If you are using transparencies for the background, place the flashes behind the glass, at a distance of around 12 inches. If you are using a paper background, place the flashes at a 45-degree angle on both sides. Make sure to cover your flashes with a plastic bag.

Water droplet splash Setup 01

Setup using a transparent background with the flashes behind it.

Water droplet splash Setup 02

Setup using a paper background with the flashes in front of it. Notice the flashes are being protected from any water drops that might splash and land on them, potentially damaging your delicate electronic equipment.

One flash will be the master and it’ll attach with MIOPS Splash Water Drop Kit and the other flashes will be in slave mode so they fire automatically when the master flash fires.

Lastly, fix your camera on a tripod and attach a shutter release cable. It’s better to create this setup on a table because you need to work for a long time and if this setup is on the ground, you’ll get tired quickly.

Settings:

At this point, you may want to take a break and have coffee but if you are like me, you probably dying to see your first image. So, let’s talk about all the settings.

First, set your flashes at 1/32 power. If you are using four flashes, you may need to lower the power to 1/64 or 1/128. The lowest power setting will give you shortest flash duration and your photos won’t have any motion blur.

Next set your camera to Bulb Mode, set ISO to 100, choose an aperture between f/11-f/16 and attach the shutter release cable. Now put a pencil or something else where your drop will fall and focus manually on that spot, and leave the camera.

Taken by Andrea Laybuarer using MIOPS Splash Water Drop Kit

Taken by Andrea Laybuarer using MIOPS Splash Water Drop Kit

You can also control your camera using the MIOPS Splash Water Drop Kit, but it’s always better to set your camera to Bulb Mode and fire flashes instead. It will give you accurate results as there will be no shutter lag.

Lastly, you need to do the MIOPS Splash Water Drop Kit settings. You are going to set the size of the first drop, the delay between two drops, size of the second drop and finally the flash firing time. Open the MIOPS Mobile app on your phone and you’ll find some settings. Set the first drop size to 25 milliseconds, the second drop size to 50 milliseconds and delay to 100 milliseconds. Finally set Trigger to 350 milliseconds and set mode to flash.

These settings are just a starting point and you need to do some fine-tuning. If your nozzle is too high or low, you need to change delay time according to that. For the above settings, the distance between nozzle and water container is around two feet.

Workflow:

Now you need to open the shutter using the shutter release cable and tap on the Start button in the app and close the shutter when flashes are fired. Since your room is dark and you are using a narrow aperture, the ambient light won’t affect the shot.

Taken by Andrea Laybauer using MIOPS Splash Water Drop Kit

Taken by Andrea Laybauer using MIOPS Splash Water Drop Kit

Taken by Jos Daanen using MIOPS Splash Water Drop Kit

Taken by Jos Daanen using MIOPS Splash Water Drop Kit

So, take a shot and check if the lighting is good or not. If your picture is too dark, increase the ISO or move the flashes a little bit closer. Keep in mind that you should not increase the power of your flashes above 1/32 or you’ll start getting motion blur. If your picture is too bright, lower the flash power to 1/64 or 1/128 or move them back.

Once the light is okay, take another shot and see if it’s properly focused. If not, focus again.

When everything is set and you get your first shot, it’s time to do some experiments to create different masterpieces. Change the size of drops to see what difference it makes. Remember that first drop size won’t make any major difference, it’s the size of the second drop what will create different shapes. Now change the delay time, every time you change it, you’ll get different shapes.

Now experiment with both drop size and delay between drops. Each change will give you different results. Just keep in mind that you should make small changes like 5-10 milliseconds.

Taken by Andrea Laybauer using MIOPS Splash Water Drop Kit

Taken by Andrea Laybauer using MIOPS Splash Water Drop Kit

Once you understand the process and take enough shots, experiment with different backgrounds and light positions. You can place the flashes at the back and front or you can use gels on them to get different results.

Taken by Paul Lindqvist using MIOPS Splash Water Drop Kit

Taken by Paul Lindqvist using MIOPS Splash Water Drop Kit

At last, I am going to tell you a little secret to get outstanding photos. If you add a few drops of liquid soap in the water, you’ll start getting some totally unique shapes.

So, let’s get started, please share your masterpieces in the comment area below.

More about the photographers:

Andrea Laybauer started to photograph in 2001. However, since 2009, she has dedicated herself to shooting drops and splashes. View her website here and Instagram to see more of her work.

Jos Daanen is primarily a wildlife photographer. He did his utmost best to get some collisions of droplets… For these featured photos, he ordered the MIOPS Splash Water Drop Kit unit which was released at the beginning of 2018.

Paul Lindqvist is a commercial photographer who specializes in food, stop-motion, product photography, and portraits.  He loves using technology to create his images, and always find new ways to use it to his advantage. View his website and Instagram

Disclaimer: MIOPS is a paid partner of dPS.

The post How to Take Amazing Photos Using the MIOPS Splash Water Drop Kit appeared first on Digital Photography School.


Digital Photography School

 
Comments Off on How to Take Amazing Photos Using the MIOPS Splash Water Drop Kit

Posted in Photography


MIOPS Splash: The world’s first smartphone-controlled water drop photography kit

04 Apr

Camera trigger company MIOPS has launched a new specialized photography kit that aims to help photographers get into water drop photography. Called the MIOPS Splash, this standalone kit doesn’t require an extra trigger, and is said to be the first of its kind that’s controlled with a smartphone.

MIOPS Splash doesn’t just control a flash or camera, it also controls the timing and size of a liquid drop, essentially taking all of the hardest parts of out of water drop photography. Settings are chosen using a companion smartphone app, and users are given two setup options:

In addition to the Splash kit, which is available now for $ 80 USD, MIOPS offers the Splash Holder kit for an extra $ 20. The Holder kit enables users to mount Splash on a tripod with an included tripod mount and box clip.

The MIOPS Splash kit comes with a 2-year warranty and is available now with free global shipping. To learn more about Splash or order your own, head over to the MIOPS website.

Articles: Digital Photography Review (dpreview.com)

 
Comments Off on MIOPS Splash: The world’s first smartphone-controlled water drop photography kit

Posted in Uncategorized


MIOPS displays its MIOPS Mobile smart camera remote

25 Sep

The makers of the MIOPS smart trigger have returned to Kickstarter looking to fund their latest project, the MIOPS Mobile and are showing a prototype at their Photokina booth. The Mobile connects your DSLR and smartphone via a Bluetooth LE connection and uses your mobile device’s built-in sensors to offer a range of creative capture modes. The camera can be triggered by vibration, sound, motion, a predefined travel distance or a combination of all those events. Advanced timelapse modes are included as well and all parameters and modes are controlled via an iOS or Android smartphone app. 

Remote shutter control is on board as well – functions include Cable Release, Press&Hold, Press&Lock, Timed Release, Self Timer and Timed Release with Self Timer. The system is compatible with 350 camera models from most major manufacturers and the battery provides power for approximately 24 hours of use with one charge. Firmware is updated automatically over the air. More information including a video can be found on the MIOPS Mobile Kickstarter page. The funding goal has already been reached but you can still secure a unit with a $ 79 pledge. Shipping is planned for April 2017.

Articles: Digital Photography Review (dpreview.com)

 
Comments Off on MIOPS displays its MIOPS Mobile smart camera remote

Posted in Uncategorized


Review of The MIOPS Smart Trigger

10 Jul

The MIOPS Smart Trigger is many things you’d want in a photography accessory; small, rugged, and multipurpose. It may not be the perfect answer to any solution, but its range of modes and really cool connectivity options, make it a very useful and intriguing tool nonetheless.

At the time of this writing, the MIOPS Smart Trigger is available for $ 199.99 at Amazon (for the standard versions), which makes it a bit pricey for its size, but a great value when you consider the depth of its functionality. The trigger features seven different modes of operation, all available with various sensitivity settings, they include:

  1. Lightning mode
  2. Sound trigger mode
  3. Time lapse mode
  4. Laser mode
  5. HDR mode
  6. DIY mode (experts only)
  7. Scenario or custom mode

MIOPS Camera Trigger

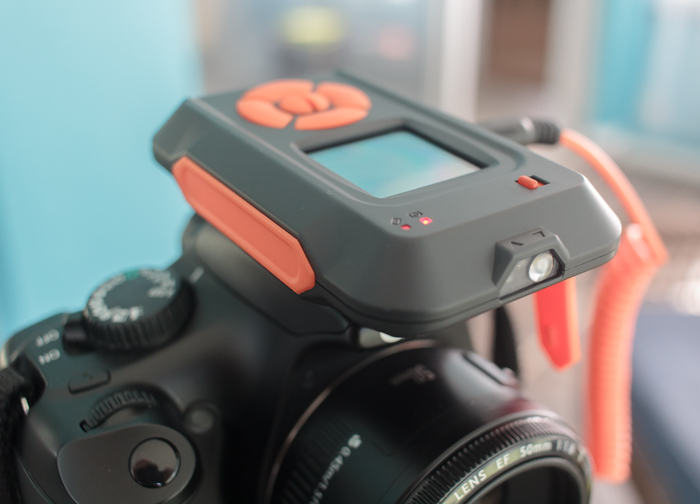
The exterior of the unit is very rugged and appears it would be extremely durable. You definitely get a feeling of solidness when holding it. A 128×128 pixel, full color display, is mounted just above the large buttons, used for operation and selecting menu options on the front of the trigger.

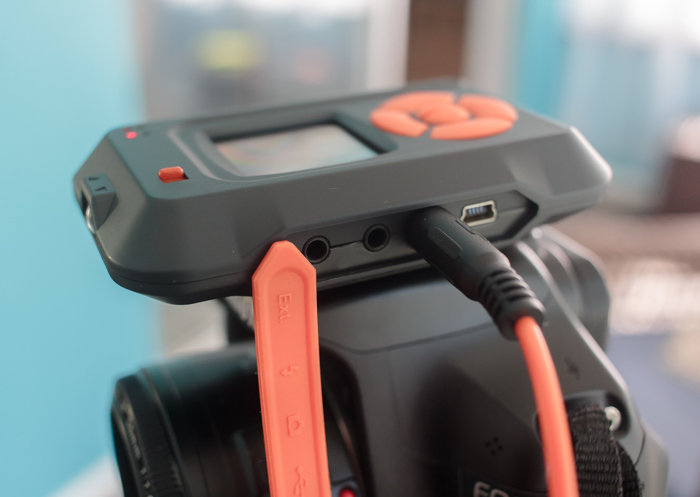
The device is powered by a 3.7 volt/1020 mAh lithium ion battery, which is rechargeable via the provided USB cable. It is also possible to provide power through the USB connection, with no battery in place.

This new trigger kit from MIOPS is an evolution (and apparent replacement) to the Nero Trigger previously available from the company. The newer version was reworked, inside and out, to be a more rugged and competent accessory. Versions of the kit are available for Canon, Nikon, and Sony camera systems, as well as other brands including Olympus, and certain smartphones.

MIOPS7

The various camera connection cables mean that one unit can operate with many different camera makes and models, and extends the usefulness of the accessory.

The trigger unit itself is connected in one of two ways, either to an external flash unit, or to the camera itself. Cables for each are included with each unit. This allows the trigger to sync and fire, either the flash system, or the camera shutter itself. Flash units are connected via the PC sync jack, and cameras are connected through the remote shutter release jack, meaning any camera or flash unit with these common connectors can be potentially be paired with the MIOPS trigger.

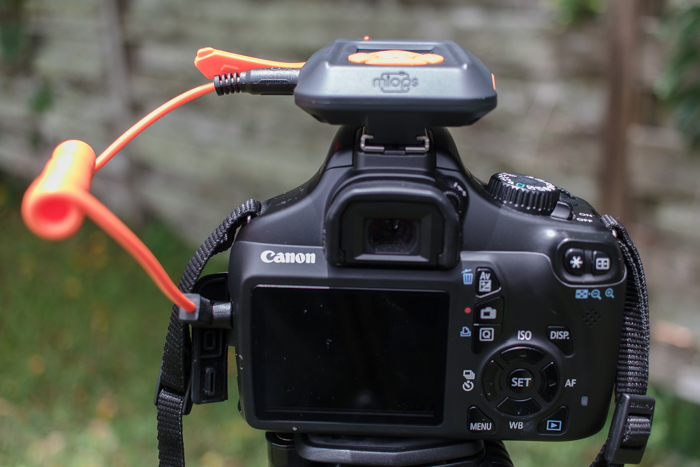
The MIOPS trigger can either mount on your DSLR’s hotshoe connector, or on your tripod via a standard screw-in connection.

The MIOPS trigger can either mount on your DSLR’s hotshoe connector, or on your tripod or light stand, via a standard screw-in connection.

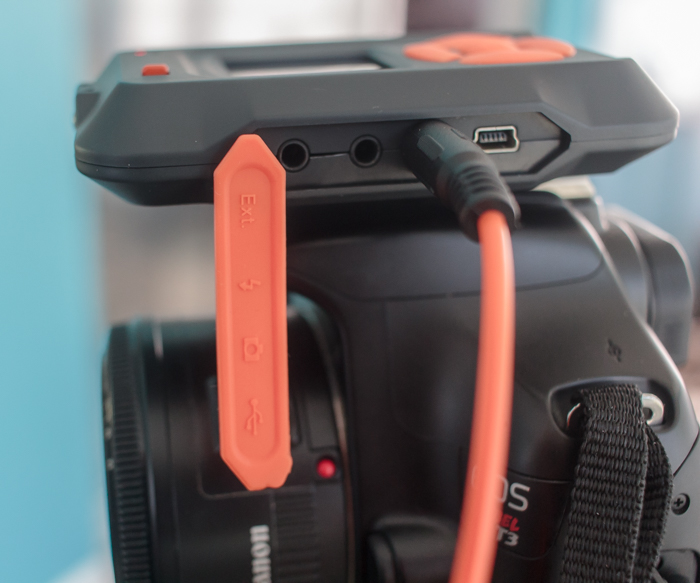
The unit can be connected for charging via a micro-USB cable, which basically means most smartphone charging cables, which are readily available. The trigger housing is rugged plastic, with raised, easy to press controls and features a large color screen for displaying information, a microphone, and a light sensor that is used for the Lightning and Laser modes. Lastly, an additional port is available for connecting various external sensors in DIY Mode.

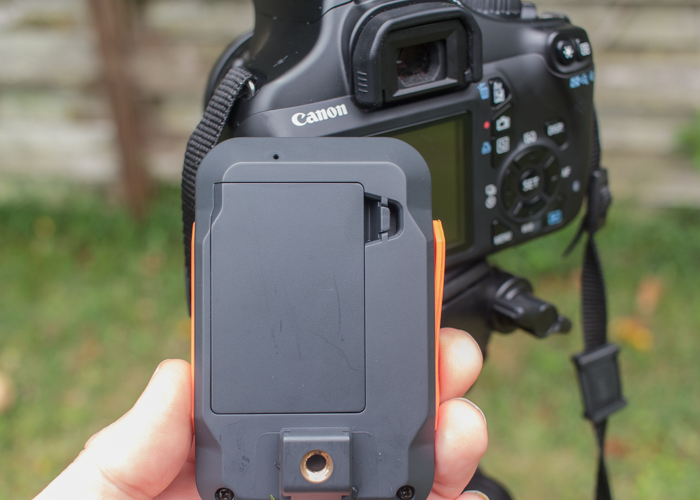
The trigger slides on a standard camera hot shoe, but also has a screw mount for placement on a separate tripod or light stand.

The trigger will accept a standard screw-in type connection for mounting on a tripod.

The trigger will accept a standard screw-in type connection for mounting on a tripod.

To me, one of the best features of the unit is its available remote connectivity via the MIOPS smartphone app. The app is free (available for Apple and Android phones), and allows you to access and control all modes offered by the trigger. After downloading the app, I found it connected to the unit without issue, and I was able to access all modes and modify the settings quickly, without having to even look at the unit mounted on top of my camera.

The accompanying MIOPS smartphone app is a highlight of the system, and allows you to control everything remotely.

The accompanying MIOPS smartphone app is a highlight of the system, and allows you to control everything remotely.

1 – Lightning Mode

Lightning mode is intended to allow you to capture flashes of lightning with your camera, without having to run series of long exposures or using bulb mode. You can set the sensitivity from 1 to 99, and start the sensor to capture the event. This mode is also sensitive to other types of light, such as fireworks, sparks, as well as artificial light, widening the gamut of possibilities. I didn’t get an opportunity to test the unit in a lightning storm, but I did attempt to trigger the MIOPS with a burst from a flashlight, and found that it picked up the light immediately and accurately.

As with several modes on the product, you’ll need to have your camera’s lens in manual focus in order for it to work.

2 – Sound Mode

Although this is the mode you’d expect to be the most useful, (and the biggest draw to the device) I found this one less intriguing due to the way it works. Without using the device, I’d expect it to allow me to trigger the shutter (cables are included to hook the MIOPS unit up to either your camera shutter, or an external flash unit), and capture the image, such as a balloon being popped, for example. This isn’t possible however, due to a slight lag, and the ridiculous shutter speeds necessary.

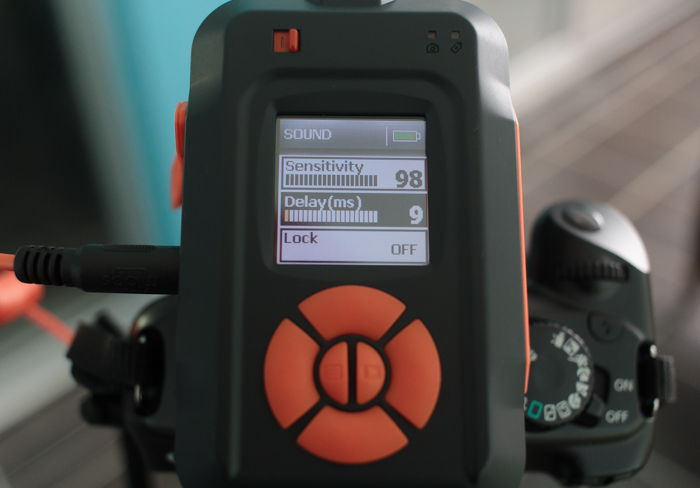
Each mode features several customizable parameters, each adjustable on the unit itself as well as the smartphone app.

Each mode features several customizable parameters, each adjustable on the unit itself as well as the smartphone app.

Instead, you have to perform any captures of this type in total darkness, a pretty big drawback in my book. The idea is to leave your camera shutter open (which is why darkness is needed), and use the MIOPS unit to trigger a separate flash and capture the action.

As a natural light landscape photographer, I don’t have external speedlites available to me. The one I was finally able to get ahold of ended up not being a TTL enabled flash, and didn’t have the connection port I needed to use it.

In the end, I became frustrated and gave up. But of course, this isn’t the trigger’s only feature, and there were plenty of other modes to keep me busy and satisfied.

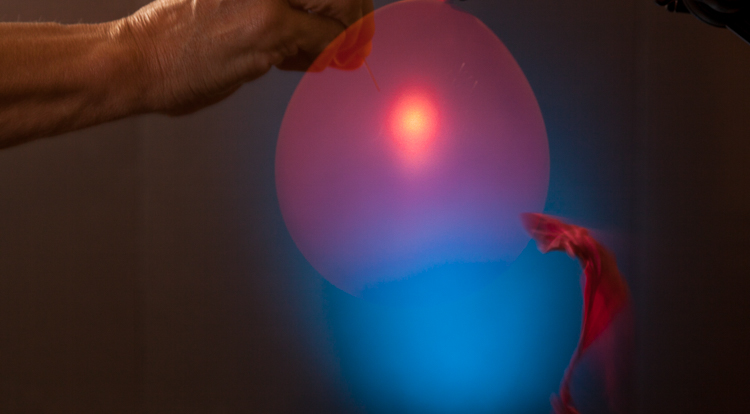
Editor’s note: I actually had a chance to try out the Miops trigger as well and was playing with sound mode. My friend and I had the same issues – we realized we had to fire the flash with it, in total darkness and somehow pop the balloon. We tried it on a balloon and smashing a light bulb. This is all we managed to get:

miops-sound-750px-01

Not exactly frozen or what we were hoping for. We learned later that by turning down the power on the flash the duration is shorter and more freezing occurs. Would have been good for more helpful instructions to come with the unit. We struggled to make this work.

miops-sound-750px-02

The best bulb smash we got after many attempts. Be careful if you try this at home! – Darlene

3 – Time Lapse Mode

Another extremely useful mode is the time lapse feature. With this mode you’re able to set a few parameters, to produce a set of images showing changes to a scene over a period of time. With this feature, you must set your camera to bulb mode so that the trigger can override your camera’s settings.

MIOPS5

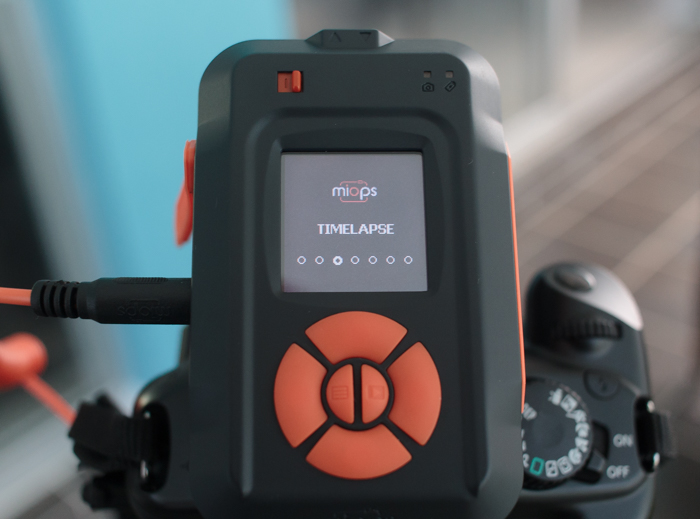
After switching to time lapse mode on the unit, you can set the interval (how often the camera takes a shot), the exposure (this is why your camera must be in bulb mode), as well as the total number of images that will be shot before the process completes.

In my testing, I found it very easy to set these parameters, and after a couple of trials, was pleased to find all of the functionality of this mode worked perfectly, without any issues.

4 – Laser Mode

This is another mode that I was unable to try out, but based on the accuracy of the sensor, I believe it would perform well. This mode requires a constant laser beam to be fed into the front sensor, and will trigger the camera when this beam is broken.

The laser doesn’t have to be a particular type or color, meaning a $ 10 pen laser pointer from an electronics store will do just fine. The hardest part of the operation will probably be mounting the laser on a stable surface and preventing the beam from being broken prematurely. After you’ve setup the laser, you can adjust the delay on the unit up to 999 milliseconds. A final setting allows you to designate a set number of frames to capture in this mode before the trigger stops.

This mode could be used to capture animals moving into the frame (could be tricky to setup) or something falling or moving like pouring shots or freezing water droplets.

10

Image by dPS author Ivo Guimaraes

5 – HDR Mode

HDR is a familiar term for most photographers; it is a technique where two or more images of varying levels of exposure are combined in post-production to capture a higher dynamic range, more equivalent to what the human eye sees. The MIOPS trigger allows you to set these parameters on the unit itself, including the center value (the middle value in the range of exposure levels to be captured), the difference in exposure value from one frame to the next (such as 1 stop between, or 1 1/2 stops between), and the total number of frames to expose, up to 7.

A 3 shot HDR composite from the MIOPS trigger.

A 3 shot HDR composite from the MIOPS trigger.

While this feature definitely extends the functionality and usefulness of the device, it must be said that it doesn’t really offer anything that most DSLR’s can’t do already, and I would almost always prefer to just set this up in-camera.

6 – DIY Mode

DIY mode is one of the modes that really makes the MIOPS unit shine, as it adds functionality not standard on most cameras. The trigger has a 3.5mm stereo jack on the side of the housing, and this allows you to connect a multitude of external sensors, adjust the threshold (percentage of change from the sensor), the delay of the trigger event in milliseconds, and mode, which lets you set what type of event detected from the external (add-on) sensor will trigger the unit, such as change, increase, or decrease.

This mode is advanced, and requires multiple connections in most cases, but the possibilities are almost endless. Sensors that measure changes in temperature, pressure, humidity, or motion can all be used to trigger the camera’s shutter.

7 – Scenario Mode

Scenario mode basically allows the user to program the unit by stringing together a series of functions, and having them execute based on a unique situation. Up to 5 steps can be saved for each custom scenario, and a total of 3 scenarios can be stored on the trigger. This entire function can then be executed via the Miops unit itself, or remotely via the smartphone app.

For example, let’s say a thunderstorm is approaching and you want to capture different types of shots during the event. You could program Lightning Mode as the first step, capturing a set number of stills of the lightning, and then immediately activating Time Lapse Mode in the second step, capturing photos at 5 second intervals to assemble later.

For each step, all of the usual parameters for each mode are available.

I didn’t get the chance to try this scenario out during an actual thunderstorm, but I did attempt to string together a couple of functions and execute them, and the results were excellent. Once the first step was completed (a 5 shot HDR photo), the trigger immediately went into Sound Mode, and stopped after it detected a loud sound (the clap of my hands from a few feet away).

I’d definitely chalk this mode up as one of the most useful features of this unit.

Remote Release

To me, this is one of the most useful features of the MIOPS trigger. I can connect the unit via bluetooth, fire up the accompanying app, and control my shutter from several feet away, wirelessly.

I tried this in a normal scenario I often find myself in, which is my tripod lowered to a short height, legs planted into the surf of a local beach, taking low angle, long exposure shots.

MIOPS_LowAngleBeach

I was able to snap off many perfectly-timed images, without ever having to worry about holding on to my usual corded cable release, keep the camera as still as possible, while avoiding the high winds blowing the cord around and smacking my camera.

I will use this, all the time!

Conclusion

The MIOPS Camera Trigger is a sturdy, rugged little unit that was easy to set up and use (note: this device is more aimed at intermediate to advanced photographers and could easily be confusing for beginners). It has a couple of features that almost make it worth the price of admission in my book, but a few issues linger that keep it from being the perfect tool, including a highly-touted Sound Mode. It promises high-speed photography but requires total darkness and a flash setup to accomplish, as well as a couple of modes that feel a bit tacked on, and not anything you couldn’t do already with existing camera settings (HDR and time lapse).

MIOPS6

Still, the MIOPS is a fun tool to use, the Remote Release mode, DIY mode, and smartphone connectivity are extremely useful, and if you’ve got $ 200 bucks burning a hole in your pocket for a new gadget, this might be one to pick up.

Have you had any experience with the MIOPS Camera Trigger, or triggers in general? Sound off below and let us know what you think, and show us some of the work you’ve accomplished!

googletag.cmd.push(function() {
tablet_slots.push( googletag.defineSlot( “/1005424/_dPSv4_tab-all-article-bottom_(300×250)”, [300, 250], “pb-ad-78623” ).addService( googletag.pubads() ) ); } );

googletag.cmd.push(function() {
mobile_slots.push( googletag.defineSlot( “/1005424/_dPSv4_mob-all-article-bottom_(300×250)”, [300, 250], “pb-ad-78158” ).addService( googletag.pubads() ) ); } );

The post Review of The MIOPS Smart Trigger by Tim Gilbreath appeared first on Digital Photography School.


Digital Photography School

 
Comments Off on Review of The MIOPS Smart Trigger

Posted in Photography