RSS
 

Posts Tagged ‘Managing’

Tips for Managing Digital Noise in Lightroom and Photoshop

26 Aug

The post Tips for Managing Digital Noise in Lightroom and Photoshop appeared first on Digital Photography School. It was authored by Kevin Landwer-Johan.

If you’ve ever set your ISO toward the higher end of your camera’s range, you will find that your photos don’t always turn out so great. Digital noise is generally noticeable in photos that have been taken with a high ISO setting. Managing digital noise is important when you move toward the limits of your camera’s ISO range.

In this article, we’ll take a look at various techniques, both in-camera and during post-processing, for managing digital noise.

Person launching a sky lantern at the Loi Krathong festivlal in Thailand.
© Kevin Landwer-Johan. Nikon D700 | 70mm | 1/100 sec | f/2.8 | ISO 6400.

What does digital noise look like?

Digital noise appears like colored sand scattered through your photos. It’s particularly noticeable in darker and lighter areas of your compositions when you’ve used a high ISO setting.

Noise varies from camera to camera depending on the quality of the sensor. You’ll have noticed it in photos made with your smartphone at night. When the light is low and the ISO is high, a phone or camera with a very small sensor is prone to producing a lot of digital noise. On higher-end full-frame cameras there’s not so much of an issue with digital noise until your ISO reaches the highest settings it’s capable of.

At first glance, digital noise may not be so noticeable. But when you enlarge an image made using a high ISO, it is easy to see noise speckles. These speckles are discolored pixels and pixels with an incorrect luminance value. They contrast with the surroundings in an unnatural way.

Digital noise in photos is not the same as grain. Grain is associated with film and has a different appearance than digital noise. Different types of film have different grain structures. Grain can be used to creatively enhance photos, whereas digital noise degrades an image.

Managing digital noise detail
Detail showing digital noise. Nikon D700 | 70mm | 1/100 sec | f/2.8 | ISO 6400.

Two types of digital noise

There are two types of digital noise that affect your photos when you use a high ISO setting. These are color noise and luminance noise

Color noise, or chromatic noise, appears as discolored pixels that contrast with how the colors in a photo should look. It’s most apparent in the very light or very dark areas of photos taken at high ISO settings. Sometimes this type of noise is difficult to eradicate. The best approach can be to simply convert your photo to black and white.

Luminance noise shows up as pixels that are brighter than they should be. When you raise the ISO setting on your camera, the pixels on the sensor become amplified and distort. Think of it as like turning the volume on your stereo up too high to the point that the sound distorts.

How can you avoid digital noise in photos?

The most surefire way to avoid digital noise is to keep your ISO setting low. This is not always possible, especially when photographing in low light conditions.

Raising your ISO increases the risk of adding unsightly noise, but it also allows you to choose a narrower aperture and faster shutter speed. 

Getting sharp photos of action at night requires a fast shutter speed. And an easy way to achieve this is by raising your ISO setting. So it’s not always possible to avoid noise. Managing digital noise when you post-process your photos then becomes necessary. There are various tricks and tools you can use to do this.

launching a sky lantern during Loi Krathong festival in Thailand
© Kevin Landwer-Johan. Nikon D700 | 35mm | 1/100 sec | f/2.8 | ISO 6400.

Try this exercise to discover the highest ISO setting you are comfortable using on your camera:

Find a reasonably dark place to take photos of a static subject, such as a room with the drapes drawn or outside at night. Set your camera on a tripod, or on a firm surface where it won’t move.

You can set your camera to any exposure mode you’re comfortable with, but you must set your ISO to manual. And if you use your camera’s manual exposure setting, balance your aperture or shutter speed before each shot (so your meter is always reading zero).

Start with the lowest ISO setting. This is usually ISO 100. Take a photo of your subject. Then change your ISO setting to 200. Take another photo.

Repeat this process, doubling the ISO, until you have taken a series of images throughout the ISO range.

Study the photos on your computer. Zoom in to 100% and look at the digital noise. At what ISO setting does the digital noise appear to degrade image quality? The ISO setting below that point should be the maximum you use.

How can you reduce digital noise in photos?

sky lanterns being released during the Loi Krathong festival in Thailand
Unprocessed photo. © Kevin Landwer-Johan. Nikon D700 | 24mm | 1/100 sec | f/3.2 | ISO 6400.

Post-processing programs and apps have functions that can reduce digital noise in photos. 

The less noise apparent in a photo, the more successfully you can remove it. If you’re too aggressive with managing digital noise, your photos will appear soft and blurry.

managing digital noise illustration from Lightroom
Detail showing digital noise.

Reducing digital noise using Lightroom

In the Develop module in Lightroom, click on the Details Panel on the right side of the screen. Here you’ll see a number of sliders. The ones you want to use are the Luminance and Color sliders.

Start with Luminance slider and drag it to the right. Then slide the Color slider if you still see some noise. Watch what’s happening to your image as you do this. You don’t want to slide it further than you need to. The further to the right you move these controls, the softer your image becomes.

The amount you need to adjust the sliders will vary from image to image.

Managing Digital Noise detail showing reduced noise.
Detail with noise reduced. Note the position of the Color and Luminance sliders.

Reducing digital noise using Photoshop

If you prefer using Photoshop, you’ll still find good controls for managing digital noise. 

In the top menu select Filter>Camera Raw Filter. In the new window that opens, select the Details icon (it’s the two triangles). Here you have the same two sliders as in Lightroom: Luminance and Color. Slide them to the right only enough to get a satisfactory result.

Managing Digital noise in Photoshop
Detail of unprocessed image showing noise reduction tools in Photoshop.

You can further reduce noise by selecting Filter>Noise>Reduce Noise from the top menu. 

Managing digital noise in Photoshop
Applying the noise reduction filter in Photoshop.

Photoshop allows you more flexibility in reducing noise. You can isolate the problem areas with masks or multiple layers. This can help retain detail in important areas of your compositions.

Try this noise reduction technique

When you are photographing a static subject and have your camera on a tripod, take two or more photos. 

Open two of the photos in separate layers of the same file in Photoshop. Once you’ve done this, the easiest way to reduce the noise and retain clarity is by changing the blend mode of the top layer. The Multiply blend mode usually works well. You can also experiment with Overlay and Soft Light blend modes.

Conclusion

Whenever I’m taking photos, I try to maintain the lowest ISO setting possible to avoid digital noise. In many low light situations, using a higher ISO setting is necessary to take photos without extra lights.

Each camera model manages digital noise differently. Use the experiment I outlined in this article to ascertain the highest ISO setting at which you are comfortable shooting. 

Managing digital noise is now easier than ever. Cameras have more advanced sensors than early digital cameras had. And imaging software has also evolved to be better at managing digital noise.

The post Tips for Managing Digital Noise in Lightroom and Photoshop appeared first on Digital Photography School. It was authored by Kevin Landwer-Johan.


Digital Photography School

 
Comments Off on Tips for Managing Digital Noise in Lightroom and Photoshop

Posted in Photography


World Press Photo Managing Director, Lars Boering, steps down suddenly as the foundation pivots due to COVID-19

03 Jul

The head of the World Press Photo Foundation has stepped down after five years in the role. Dutchman Lars Boering joined the foundation in 2015 but left without much explanation from either him or the WPP. In an official statement, Boering said ‘It was a tough decision to leave this beautiful organization, especially given the timing’ but doesn’t go on to give his reasons other than to say ‘it is time for me to pursue other opportunities’.

The organization only says ‘Today, the World Press Photo Foundation announces that Managing Director Lars Boering will be leaving the organization’ and goes on to say it is ‘appreciative of Lars’ leadership over the past five years. In this time, major talent programs and grants were developed, digital reach saw substantial growth, and a new format was established to announce contest nominees and winners, to further spotlight the stories that matter.’

Since the announcement, DPReview has spoken with Boering, independently, who said he left the foundation because so much of what he had planned for the future has changed since the coronavirus pandemic:

‘Some of the programs and some of the activities are on hold or will never come back in the same way. I believe we will not see many festivals or events return in the near future, and its doubtful whether many of our ideas will get funding to make them happen. COVID has changed everything and so I have brought my departure forward. My strength is in growth and re-imagining things. It is very clear to me and the Supervisory board that World Press Photo foundation will be better off with a Director that can steer it through, in a calm and steady way, the challenging landscape that Covid19 has unveiled.’

The organization says it is heading towards a ‘new phase’ that will help it to ‘future-proof the business model and ways of working’ as it explores ‘new digital avenues and establishing a new International Advisory Board’.

Boering adds a slightly clearer dimension to the part of the statement that mentions future-proofing the foundation, saying:

‘Over the next two years World Press Photo will be working carefully and steady to keep going, and we now know 2020 and 2021 will be okay for the foundation. I never intended to stay much longer than 7 or so years, and with the changing times now is the right moment to hand it over. WPP now reaches an audience of 300 million when we announce the winners and our reach on social media is growing ever faster. The challenge now is to monetize this value in the right way, in a way that is fits with the values of WPP and visual journalism. That has a great future and will be a wonderful challenge for my successor.’

Boerings departure leaves the foundation looking for a new head while an interim business director, Arnoud van Dommele, steps in for the time being. The organization will also establish an international advisory board by the end of this year, which will ‘provide strategic advice to the Supervisory Board and Executive Board of WPPF.’

Boering tells DPReview that he’s enjoyed his time at WPP and is proud of what he has achieved in his five and a half years:

‘I have steered the foundation toward becoming an organization devoted to progressive values and ethics, and one with a set of advocacy agendas. Programs like the African Photojournalism Database, the 6×6 talent program and various global workshops, are initiatives by WPP to provide more opportunities to photographers of different backgrounds. I’m taking some time off for a small sabbatical and will choose my new path carefully. Many offers and initiatives are already coming my way, and to continue my work in the creative industries will be a pleasure.’

‘The future of visual storytelling is very bright and more money is available than ever before,’ he promises.

You can read more about Lars Boering in an article on Australia’s Inside Imaging, and the statement on the matter on the World Press Photo website.

Press release:

The World Press Photo Foundation enters new phase

The World Press Photo Foundation enters new phase for connecting the world to the stories that matter

Managing Director Lars Boering leaves the organization after 5 years; establishment of an International Advisory Board announced

Today, the World Press Photo Foundation announces that Managing Director Lars Boering will be leaving the organization. As a result, the Supervisory Board will start the search for a new Executive Director. This coincides with the preparations of a broader approach for “connecting the world to the stories that matter” required for the changed world that has presented itself in recent months.

Guido van Nispen, Chairman of the Supervisory Board: “We see the pandemic having an immense impact on everyone and everything. The collateral damage is huge, and the World Press Photo Foundation has also been impacted, which depends partially on a model that organizes physical exhibitions all over the world.

The organization is appreciative of Lars’ leadership over the past five years. In this time, major talent programs and grants were developed, digital reach saw substantial growth, and a new format was established to announce contest nominees and winners, to further spotlight the stories that matter.

A new phase for World Press Photo begins. A phase that builds on a strong foundation, and also leads to opportunities to future-proof the business model and ways of working. This includes exploring new digital avenues and establishing a new International Advisory Board. Press freedom, freedom of expression and the support of visual journalism are more important than ever, and as a leading organization that plays a crucial role for visual storytellers, the World Press Photo Foundation, with the great support of its people and partners, will keep on innovating to deliver on that promise.”

Lars Boering, Managing Director: “It was a tough decision to leave this beautiful organization, especially given the timing. It has been an amazing time and I am incredibly proud of the organization and the impact it has achieved. In these interesting and challenging times the World Press Photo Foundation, and the work it does, is more relevant now than ever before. The admiration I have for visual storytellers has grown and I hope my efforts have contributed to improving their work and position. Personally, it is time for me to pursue other opportunities, but I am confident about the future path for the organization, and am sure a successor can be identified soon.”

Lars Boering will hand over his work to Arnoud van Dommele, who has served as interim business director since March, while the Supervisory Board starts the search for a new Executive Director.

The International Advisory Board will consist of approximately 12 global experts and will be established before the end of 2020. The International Advisory Board will provide strategic advice to the Supervisory Board and Executive Board of WPPF.

About the World Press Photo Foundation

Connecting the world to the stories that matter.

We are a global platform connecting professionals and audiences through trustworthy visual journalism and storytelling, founded in 1955 when a group of Dutch photographers organized a contest (“World Press Photo”) to expose their work to an international audience. Since then, the contest has grown into the world’s most prestigious photography competition, and through our successful worldwide exhibition program, we present to millions of people the stories that matter.

World Press Photo Foundation is a creative, independent, nonprofit organization, based in Amsterdam, the Netherlands. We appreciate the support of our global partner, the Dutch Postcode Lottery, and our partners, PwC and Aegon.

Articles: Digital Photography Review (dpreview.com)

 
Comments Off on World Press Photo Managing Director, Lars Boering, steps down suddenly as the foundation pivots due to COVID-19

Posted in Uncategorized


ON1 announces 360° cross-device sync service for editing and managing images remotely

29 Apr

Software developer ON1 has released details of a new service it claims will allow photographers to synchronize the editing and organizing of images across computers and mobile devices no matter where they are stored. The ON1 360° application will connect up to five computers and five mobile devices so that images stored on any one of them, or on attached external hard drives and NAS systems, can be accessed and edited from any of them – with changes synced across them all.

The software relies on a cloud storage service and a newly developed compressed RAW file format. Photographers select which files, folders or albums they would like to have access to and compressed versions are sent to the cloud. Connected devices, including smartphones, can then access those compressed files so they can be edited locally and the changes saved to all synchronized versions of that picture. A new free mobile app will be available for Android and iOS devices that will have the same RAW processing engine as its ON1 Photo RAW 2020 application so adjustments can match those made in the full desktop version of the software.

ON1 says the compressed RAW files that will pass between the devices will be 75% smaller than the original files, but we are told they will retain the same tonal and color range as the originals. Users also have the choice to store their full-sized originals in the cloud so they can be shared between devices as well.

ON1 claims its new program will offer ten times the amount of storage as competitors, but its application will cost 20% less. The high compression of the new RAW file format all also mean that more pictures will be able to be stored in the same space.

The company says it will retain its perpetual license options alongside subscription services with monthly or annual payment plans. The ON1 Photo RAW 2020.1 desktop application costs a one-off $ 49.99 at the moment, while the ON1 360° starts at $ 59.99 per year with 200GB of storage, or $ 109.99 per year with 1TB if you already own Photo RAW. If you want to buy Photo RAW and the 360° service together it will cost $ 89.99 for 200GB and $ 179.99 1TB per year. The monthly prices will be $ 5.99 and $ 9.99 for those who own Photo RAW, and $ 7.99 and $ 15.99 for those who don’t. Pre-ordering the 360° plan will also get you a training course and a pack of extra pre-sets.

For more information on ON1 360° go to the ON1 website.

Press release:

ON1, creators of ON1 Photo RAW, announces ON1 360° will be available in late June.

ON1 360° is a new end-to-end photography workflow solution for capturing, editing, and accessing photos seamlessly between multiple computers and mobile devices. ON1 360° connects ON1 Photo RAW 2020 on macOS and Windows computers with the new free ON1 Photo Mobile on iOS and Android devices. ON1 360° is the complete photography ecosystem that photographers have been waiting for; giving them more choice and more control. Multiple options for syncing files, control in file storage methods, and new capabilities for managing and editing across devices no matter where files are stored are available in ON1 360°.

At the core of ON1 360° is ON1’s new cloud storage service and sync technology, which allows photographers to sync photos, metadata, and edits, as well as albums, cataloged folders, and more between all their computers and devices, external hard drives, or even network drives. Unlike other cloud service offerings, ON1 360° will allow customers to choose which files or folders to sync, where the files live, as well as their preferred storage format.

“Our focus is on giving photographers control. Control of where they store their photos, what they want to sync and how they want to edit. There isn’t another solution out there providing this flexibility or functionality. We are still going to offer customers perpetual license options where they keep the software, even if they choose not to continue with this service. Of course, the subscription plan will be a good option as well and is ultra-competitive when it comes to price and features. The ON1 360° subscription plan includes 10x the storage at 20% less cost compared to other plans. Plus, the optional ON1 compressed-raw file format requires significantly less storage to have access to all your photos from all devices,” says Dan Harlacher, VP of Product.

With ON1 360°, customers can choose between syncing their original raw files or syncing their photos using ON1’s compressed-raw file format, which is 75% smaller than the original RAW file while maintaining the same tonal and color range. They are perfect for remote editing, sharing, and even printing common sizes, without noticeable loss in quality, saving the customer additional storage costs.

“Some people like using external drives, and some people like storing photos in the cloud. And some like both. The great part about ON1 360° is that you get to choose where photos get stored while still having access to them on all of your devices so you can share from anywhere,” add Matt Kloskowski, ON1 Educator and Guru.

“These all-new technologies that are the foundation of ON1 360° have been under development for some time and we are very excited to deliver them in June. This complete photography solution allows our customers to incorporate ON1 in every stage of their photography. With the technical foundation in place, we will start integrating new AI tools and features into all our products. There has never been a more exciting time at ON1.,” President and CEO, Craig Keudell adds.

Key Features
One Workflow — A complete end-to-end workflow between desktop and mobile with just one desktop application in ON1 Photo RAW 2020. No bouncing between organizers, raw processors, and layered pixel-editors. ON1 Photo RAW 2020 is a modern photo organizer, raw processor, layered editor, and effects app, all-in-one well thought out and affordable application.

Value — ON1 360° plan options start out at 10x the storage amount for 20% less cost compared to competitive plans available today.

Complete Control of Photos — Photographers can organize how they choose, where they store photos, and how they back up their photos. Whether photos are on local drives, upload some or all of them to the ON1 360° cloud storage, it’s their choice. All metadata and edits will back up automatically with ON1 360°.

High Quality with Less Space — ON1’s unique compressed-raw file format will also allow photographers to store more photos in the same amount of space without noticeable loss in image quality when processing. The new file format will also let photographers view, edit, and share their photos without having to store the original photo in the cloud.

ON1 Photo Mobile — The new free ON1 Photo Mobile will be a single app for capturing, editing, and syncing photos back to desktop computers, where each photo will also be re-editable. More than a basic raw processor, ON1 Photo Mobile uses the same RAW processing engine developed for ON1 Photo RAW. Adjustments will include Exposure, Contrast, Shadows, Mid-tones, Highlights, Whites, Blacks, White Balance, Noise, and Sharpening. Built-in filters will start with, black and white, adding film grain, darkening the edges with a vignette, and enhancing local contrast. ON1 Photo Mobile will be available for both iOS and Android devices and is free for anyone.

Capture and Create Anywhere — The new free ON1 Photo Mobile’s camera mode works like your device’s camera app but with many more advanced features. Capture raw photos on your smartphone with all the tonal range and details you expect from an interchangeable lens camera. The pro-level manual controls include the ability to adjust exposure, shutter speed, depth, and white balance.

Photos Stay in Sync — Automatically or selectively sync photos and edits from ON1 Photo RAW 2020 on desktop or laptop computers back to the free ON1 Photo Mobile using ON1 360°, providing a complete, photo editing and organizing system. ON1 360° will allow photographers to wirelessly send photos between desktop and mobile devices. Photos can be viewed, edited or downloaded directly to ON1 Photo RAW 2020 on both desktop or laptop computers with the non-destructive editing settings intact. You can also push edits from ON1 Photo RAW 2020 on desktop or laptop computers and automatically or selectively sync them back to ON1 Photo Mobile.

Privacy — Privacy is most important, and with ON1 360°, all photos will be kept private. ON1 will never analyze any photos using ON1 360° to build ways to market to photographers.

Availability and Pricing
ON1 360° subscription plans will be rolled out gradually starting today and continuing to the full release in late June 2020 when the ON1 360° service officially begins and all purchasing options become available. Today, owners of Photo RAW 2020 can take advantage of special introductory pricing on a 1-year prepaid subscription for ON1 360° (service only edition) with reduced pricing and pre-order bonuses including a new ON1 Pro pack with 360 custom presets ($ 100 value) delivered today, and a new ON1 360° Training Course delivered in June when the ON1 360° service begins. New customers can purchase a perpetual license for ON1 Photo RAW 2020 at a reduced price and the ON1 360° Service Add-on or the ON1 360° Software & Service subscription which includes everything. For a limited time, ON1 is cutting the price of ON1 Photo RAW 2020 by 50% during the lead up to ON1 360° availability in late June.

In June 2020, ON1 will roll out all ON1 360° plans including monthly subscription plans which include ON1 Photo RAW 2020, the ON1 Photo Mobile connectivity, and the 360° syncing service. As always, ON1 will continue offering Photo RAW as a perpetual-license product separate from ON1 360°, for those who prefer to own their software. This allows customers to upgrade to future versions at a time of their choosing, and it allows them to add or cancel any ON1 360° subscription without losing access to ON1 Photo RAW or their photos.

Articles: Digital Photography Review (dpreview.com)

 
Comments Off on ON1 announces 360° cross-device sync service for editing and managing images remotely

Posted in Uncategorized


Canon launches ‘image.canon,’ a new cloud platform for managing and sharing images

14 Feb

Canon has launched a new cloud-based image platform designed for use by select Canon device owners. With the new image.canon service, photographers can have images automatically forwarded from their camera to their computer, mobile device and supported third-party services like Google Drive. The service is free to use and stores images on Canon’s own server.

Put simply, image.canon allows some Canon camera and SELPHY printer owners to register a Canon ID and then use the service to wirelessly transfer images from their supported device to Canon’s cloud platform. From there, the images can then be forwarded to third-party services, a computer and mobile devices.

The platform supports all of the image formats offered by compatible Canon cameras; users can connect an unlimited number of cameras to the service. Likewise, Canon doesn’t have any restrictions on image size or the number of images that can be transferred, though the company says there may be instances where uploads are restricted for ‘operational reasons.’

Image.canon stores the uploaded original images for 30 days, after which they will be deleted from the server. Thumbnails of the images will remain and only be deleted if the user doesn’t use the service for an entire year. The company also offers users 10GB for long-term image storage beyond 30 days. Support for forwarding images to Adobe Creative Cloud and Google Photos won’t arrive until later this summer.

Canon’s new cloud service will officially launch in April 2020.

Articles: Digital Photography Review (dpreview.com)

 
Comments Off on Canon launches ‘image.canon,’ a new cloud platform for managing and sharing images

Posted in Uncategorized


Managing Your Photography Process From Shooting to Editing

17 Jun

The post Managing Your Photography Process From Shooting to Editing appeared first on Digital Photography School. It was authored by Nisha Ramroop.

You spend a lot of time learning about your gear and how to use it to produce great images.  You also invest time and money into learning to improve your technique for capturing and processing your work. It is therefore fair to say that developing a consistent workflow in handling your images after (and sometimes before) they are captured is also of importance. Here are a few steps you should be taking to help you manage your photography work.

Before you shoot

1. Make a plan

What are you going to shoot today? Is it an event in a dimly lit place or is it in the middle of a sunny day and outdoors? What will be your source(s) of light? What gear will you need?

Prepare by planning for your subject and thinking through your shoot. That way you can think of possible outcomes and pack accordingly (and in some cases avoid overpacking). Weather conditions, time on your feet, length of your trek/journey and environmental constraints will also help you determine if you need to scale down your gear to the essentials or rethink how/what you pack.

2. Set up your camera

If you are used to shooting the same genre of images, you may have your settings already dialed in. This takes into consideration the creation of presets to handle different scenarios that you face. Keep a reminder to adjust your white balance for the type of light you will be shooting in. Will you need a flash or supplemental lighting and what settings will you need when you add those?

Do you want to shoot your images in RAW or JPEG? Both have their advantages and disadvantages and you need to choose what works well for your planned shoot and expected outcome.

After you shoot

1. Moving images from your card as soon as possible

A good practice is moving the images from your memory card to your computer as soon as possible. A card reader transfers images faster than using a direct connection from your camera to your computer. While recent computer card slots are comparable to card readers in speed, there is still a preference to the latter.  One school of thought is that a good quality card reader is built to minimize the chance of corrupting your memory cards.

While the objective is to move the images, it is advisable to copy the images across (as opposed to move). After you copy, compare the number of files on the memory card (and size) to what was copied. This is especially important if there was an interruption during the copy process.

Note: If you choose to move instead of copy, this comparison will not be possible. More importantly, there is a higher probability of loss or corrupted files, if there is an interruption during the move process.

2. Making a backup

Prepare for the failure of your devices. Having more than one copy of your image gives you some peace of mind that it is safe somewhere. There are many backup combinations you can use, but the most basic is to have two copies of your images. You can have a copy on your laptop/computer and one on an external drive. You can save on more than one external drive or even go with an external drive/cloud combination. An ideal backup strategy involves two copies where you have one offsite (off premises/cloud).

An essential part of having a backup is testing it from time to time to ensure that it works and can restore your images when needed.

Backup processes can be revised as your workflow progresses. For example, after a shoot, you can copy all of your images to a secondary place. After you have culled your final selection, you can replace those images with your selection. When you edit and find your best images, you can add this to your library later. Whatever system you choose to work with, they all require a level of organization.

3. Clearing your memory cards

A good rule to adopt is to clear your memory cards after you have backed up your files to two locations. In each instance, copy from the memory cards directly. After your copy, compare what was copied to the number of files (and size) of those on the memory card. This is especially important if there was an interruption during the copy process.

4. Using management software to browse your images/cull your images

A digital asset management software system is a great way to browse, preview, locate and rate your images and mark them for processing. Two of the most used asset management systems are Adobe Lightroom and Adobe Bridge. There are a few others that work similar to these, with a primary focus on browsing and rating images.

Most people do not take advantage of the rating ability of asset management software, but it is quite a useful tool to cull your work. When you browse your images, you give the highest ratings to your best images – those to keep, review or edit. The next rating is for those with potential and worth a second look. You award the lowest rating or no rating to images that do not make the cut. These would include blurry images, those that are not salvageable or ones you will never review/edit. These can be marked for discarding at a later time (when space becomes an issue) or immediately (if that is how you streamline your work).

5. Post-processing images

Many times post-processing immediately follows shooting and nothing is wrong with that. Once you develop a workflow that suits you, then there are no rules as to when to do what. Whenever you post-process, remember that your edited images need to be saved in several locations (especially if they are for a client). Saving your final images with a descriptive name/date in a sub-folder will help you easily find them later on.

Note: Post-processing also can be broken down into its own workflow, which includes processing multiple images at a time (batch processing).

Conclusion

Your images are worth protecting, thus developing a habitual photography workflow is important. Find a way that works for you, keeping in mind that you will be thankful for spending the time on a proper backup strategy.

Finally, create with the assurance that your work is organized and managed from capture to delivery.

Do you have any other tips to add here? Please share in the comments below.


The post Managing Your Photography Process From Shooting to Editing appeared first on Digital Photography School. It was authored by Nisha Ramroop.


Digital Photography School

 
Comments Off on Managing Your Photography Process From Shooting to Editing

Posted in Photography


How to Make Well Exposed Photos Every Time. Part Two: Managing Your Exposure

11 Apr

The post How to Make Well Exposed Photos Every Time. Part Two: Managing Your Exposure appeared first on Digital Photography School. It was authored by Kevin Landwer-Johan.

Part Two – Managing Your Exposure

This is the second article in a series of three discussing how to make well-exposed photographs. The first article covers subject choice, some common misconceptions about exposure and the photographer’s intention.

How to Make Well Exposed Photos Every Time Thai Dancer

© Kevin Landwer-Johan

Having identified your subject, managing your exposure then matters most. These things will influence how your photograph is exposed:

  • Point of view
  • Lens choice
  • Timing
  • Reading the light
  • Exposure settings

You’ll notice that I’ve placed ‘Exposure settings’ at the bottom of this list. This is because it’s the most obvious aspect of managing your exposure. I want you to consider how the other items on the list affect your exposure setting choices.

Point of view

Where you choose to take your photo from can significantly affect your exposure. Is the light behind you? Behind your subject? To one side?

By changing your position you can manage what you see in the background and how it impacts the amount of light entering your lens.

How to Make Well Exposed Photos Every Time Giant Soap Bubbles

© Kevin Landwer-Johan

In this photo, the reflection off the water makes up a large portion of the background. Had I not been careful with my exposure my subject may have been underexposed. In this photo, I compensated for the bright background by adding some fill flash.

How to Make Well Exposed Photos Every Time Giant Soap Bubbles

© Kevin Landwer-Johan

Changing my point of view so I no longer included the lake in the background meant I could expose my subject well. The reflected light off the water surface no longer affected my exposure. In this photo, I did not need to use my flash as there was no strong backlight to compensate for.

Lens choice

Composition is partly governed by your choice of lens. Using a telephoto lens will include less background. In doing this, you can restrict light sources and bright areas of your composition more easily. With a wider lens, you are more likely to include more sky or other bright areas which can have some effect on your exposure.

How to Make Well Exposed Photos Every Time Rice Fields

© Kevin Landwer-Johan

Had I used a wider lens for my photo of these rice fields I would have included the setting sun in my composition. This would definitely have a strong impact on my exposure and the whole look and feel of my photo.

I could have eliminated the effect of the sun altogether by using a lens focal length that was slightly longer. I could have also tilted my camera down slightly, but the foreground was unattractive, and I like the sunburst.

Timing

The time you choose to make your photograph can also influence your exposure. It may mean waiting until the sun is in a different place in the sky for a landscape photo. Or you may have to calculate when to press your shutter release to avoid bright headlights of a passing car. This was the case when I photographed the image below.

How to Make Well Exposed Photos Every Time On the Iron Bridge

© Kevin Landwer-Johan

The timing for blue hour photos is particularly important. You must wait for the ambient light to balance with any other light source you have in your frame. This amount of time will vary depending on your proximity to the equator.

In Chiang Mai, Thailand, we have about ten minutes each evening to capture a rich blue sky with the electric lights included in the composition.

How to Make Well Exposed Photos Every Time Chiang Mai Iron Bridge

© Kevin Landwer-Johan

Reading the light

To be able to set your exposure you must use an exposure meter or let your camera make the calculations and settings for you.

Leaving this choice completely up to your camera is rarely best as your camera does not know what you are photographing. Your photos will potentially lack creativity.

Your camera has amazing artificial intelligence built into it, but it cannot see the way you see and discern what your main subject is. By leaving your camera settings so the meter is set to take an averaged reading and is on any auto or semi-auto mode, your camera is in control. You can use exposure compensation or set your camera manually to take control of your exposure.

One of the easiest ways to read the light is by using live view and looking at your monitor. Some cameras do not have this capability, so you need to consult your manual and do some testing to discover if you can use this method.

Checking your exposure with live view works when you have your camera set to manual mode. It’s easy to watch the light values on your monitor changes as you alter your aperture, shutter speed, and ISO. Using this method in conjunction with your histogram is recommended so you can check if there’s any clipping happening.

Using your exposure meter set so it takes a reading from the entire frame and then calculates an average exposure is okay when the light and tone is even.

When there’s any amount of contrast in the scene it’s good to take a spot meter reading directly from your subject. This will provide you with the specific information about the light reflecting off the most important part of your composition.

How to Make Well Exposed Photos Every Time Opening the Windows

© Kevin Landwer-Johan

For this photograph, I took a spot meter reading from the Buddhist nun, as I wanted her exposed well. Had I left my meter on the averaging mode it would have included the bright light outside and the dark interior into its calculations. This would most likely indicate a setting which would have rendered my main subject underexposed.

Exposure settings

Once you have made your exposure reading and ascertained how the light is affecting your composition, you need to set your exposure.

You may decide your subject will be well exposed by setting your aperture, shutter speed, and ISO so the meter reads zero. You may prefer to have it read overexposed or underexposed, depending on the tone value of your subject and your creative expression.

When your subject is very dark or very light, you may want to alter your exposure settings to compensate. When you take a spot meter reading the camera is calibrated to see the thing as being middle gray. This means a black or a white subject will both appear gray in your photo if your meter is reading zero.

You must decide the tone you want your main subject to be. Do you want a clearly exposed subject? Will it look better if it appears brighter than it really is? Do you want a silhouette?

For this photo of pink orchid flowers, I chose to overexpose from the reading my spot meter was giving me. I did this to produce a softer feeling in the image.

How to Make Well Exposed Photos Every Time Pink Flowers

© Kevin Landwer-Johan

Had I been making the photograph to document the flower and its color accurately, I would not have overexposed it. My intent was not to make a technically accurate representation of the flower.

If technical accuracy is what I wanted I would have changed my point of view to avoid the backlighting. I would have set my exposure so the color and tone rendered correctly to how the flower looked to my eyes.

Try it out and see for yourself

Find a white or black subject to photograph. Make a spot meter reading and set your exposure so that the meter is at zero. Take a photo.

Now, for a black subject, change your setting so the spot metering indicates it is two stops underexposed. For a white subject make your settings so it’s two stops overexposed.

Which photograph is most appealing? The ‘correctly’ exposed photo, or the under or overexposed photo?

How to Make Well Exposed Photos Every Time Laughing Lady

© Kevin Landwer-Johan

Conclusion

Experimentation is always good when lighting and subject material are challenging. If you’re not 100% certain you have a perfect exposure, (I never am,) make a series of photos whenever you can.

Tweak your aperture and/or shutter speed settings between each exposure. Don’t make huge shifts in these settings, but just enough so you have a few options to look at when it comes to post-process them.

I’d love you to leave your comments below letting me know if this article has helped you understand exposure better.

The next article in this series will cover post-processing techniques which will enhance your exposure choices.

The post How to Make Well Exposed Photos Every Time. Part Two: Managing Your Exposure appeared first on Digital Photography School. It was authored by Kevin Landwer-Johan.


Digital Photography School

 
Comments Off on How to Make Well Exposed Photos Every Time. Part Two: Managing Your Exposure

Posted in Photography


Introducing New dPS Managing Editor – Caz Nowaczyk

14 Nov
new dPS managing editor - Caz Nowaczyk

Caz Nowaczyk dPS Managing Editor

Some of our regular readers may have noticed a new byline on our Weekly Challenge posts recently, and the absence of Darlene Hildebrand. We announced a while back that after 5 years Darlene was moving on from dPS to focus on her own business – an exciting move for her.

From Darlene:

I’m honored to have been the Managing Editor at dPS for the last 5 years but now it’s time for me to move on to new ventures. It’s been a pleasure curating and publishing all the articles on dPS for you to enjoy and I hope you’ve learned a lot. You’ll be in good hands with the new editor and team of talented writers and photography educators.

Continue on your own photography journey, keep learning and shooting and you may even see my from time to time with a guest article right here on dPS.

Cheers, Darlene

Quietly and confidently slipping into her new role over the past few weeks is Caz (Carolyn) Nowaczyk (much to our General Manager Laney’s relief who got a crash course in editing whilst bridging the gap!).

About Caz Nowaczyk

Caz is a creative sponge and an excellent new asset to our team. As a practicing photographer, filmmaker, designer, songwriter, she follows the philosophy of practicing and sharing creativity to add to a balanced life.
Caz’s love of creativity led her to co-own and operate a community art gallery and performance space for 4 years. It included a photography club, many different creative workshops and hundreds of artists exhibitions. As an exhibiting artist herself (photography, painting, video and sound installation), supporting other artists is a right fit.
She currently has her own photography and digital media business, Exposure Arts and Media, working on projects for Government and commercial clients. One of her favorite things to do is photograph the community she is a part of; theatre, cabaret, circus and other areas of performance. She also loves nothing more than to get out into nature with her camera.
On the side, Caz writes and produces music under the pseudonym Dreamgirl and the Motorist, and plays with Sydney band Feick’s Device. She generally keeps this on the down-low though.
Caz is incredibly excited about being the new Managing Editor with Digital Photography School. She loves photography and the dPS business philosophy to help others learn, grow and make an income from doing something they love, is precisely what she believes in. It seems the stars aligned to bring the two of them together, and Caz can’t wait to share with and learn from the dPS community.

Moving Forward

As a fellow Aussie, we’re looking forward to being able to catch up with Caz in person again later this month, and planning exciting changes for dPS.

We hope you join us in welcoming Caz to the team.

The post Introducing New dPS Managing Editor – Caz Nowaczyk appeared first on Digital Photography School.


Digital Photography School

 
Comments Off on Introducing New dPS Managing Editor – Caz Nowaczyk

Posted in Photography


Introducing our New Managing Editor – Darlene Hildebrandt

19 Nov

Today I’d like to introduce you to the new editor of dPS. But first… a little backstory.

The Evolution of dPS

Back in 2006 when I started Digital Photography School I did so because I was ‘that guy’ in my friendship circle who friends came to for advice on how to use their digital cameras (and to bring my camera along to every party, wedding and other gathering).

Our first day on dps back in 2006.

Our first day on dps back in 2006. Yes, our first design was ‘Maroon’!

While I’d done a few weddings and other paid photography gigs I didn’t consider myself a pro – but wanted to create a place online to share what I did know to help those at the beginning of their photography journey.

In 2008 we went through a bit of a 'blue' stage with our design.

In 2008 we went through a bit of a ‘blue’ stage with our design.

The content in the early days was unashamedly for beginners but in time we began to explore more intermediate level teaching. Early on I did all the writing myself but as the site grew I began to approach more experienced and professional photographers to write more and more of the content.

In 2009 we did a major redesign and expanded the site with new sections on 'camera reviews' and 'post production'.

In 2009 we did a major redesign and expanded the site with new sections on ‘camera reviews’ and ‘post production’.

Today at dPS

Fast forward to 2013 and we now have a team of 15 regular writers in our core team and a group of almost 20 other semi-regular writers submitting guest posts.

While in the early days I published 2-3 posts per week we now post two tutorials per day.

While I was happy in the early days of the site to get 100 visitors in a day, today we regularly see over 100,000 in a day!

As of today we’ve had over 158,934,066 visitors to the dPS blog and forum area since we started! I can hardly believe where dPS has grown to and feel like the luckiest man in the world to have been a part of it.

You will have noticed some changes here on the site in the last couple of months. The blog area had a complete redesign (and the forum will be redesigned shortly to match), we’ve been hard at work on delivering you a much requested mobile friendly theme too – but behind the scenes there have been many changes of late.

6 weeks ago we launched our brand new design.

6 weeks ago we launched our brand new design.

A lot of the backend of the site has been reengineered but in the last couple of years I’ve been developing our team also and have recruited a number of people to help take dPS to the next level. These include:

  • Jasmin who produces our eBooks and other products
  • Simon who works on customer support and moderating the forum
  • Jade who helps with our social media accounts – she’s the one curating our popular Pinterest Account
  • Shayne who works on marketing but also heads up our dev team. He also helps with our SnapnDeals and SnapnGuides sister sites
  • Luke and his team who works with site advertisers/sponsors to help us keep the site free
  • Mario and 3 other developers to work on the back end of the site (they did the redesign but are also working on numerous other behind the scenes technologies to streamline what we do but also help our servers to work faster and more reliably).
  • Lastly we’ve engaged the services quite a few great professionals who have helped us with authoring, editing, design and production of our eBooks.

Most of the above team have come on in the last 2 years (our end of year Christmas party suddenly is becoming a little more fun…) so we’ve seen some significant changes around here – however I’ve also been on the look out for some help with the editorial aspects of the site.

While our writers have consistently had great feedback I know that there is always room for improvement and am very aware of my own limitations as a photography educator. I’ve been blogging for 10 years and so have experience in that – but lately I’ve been on the look out for a Pro Photographer to help us develop our editorial strategy.

Introducing Darlene Hildebrandt

Today I’m pleased to announce the appointment of Darlene Hildebrandt as our new editor. I feel a little strange ‘introducing’ her to you as regular readers will know her work already as she’s been one of our regular authors for 18 months.

Darlene headshot May13 162 web 2Darlene has been a professional photographer for over 26 years having worked in many different genres in the industry including: commercial, food photography, portraits, weddings, fine art, and travel photography. She still does portraits by referral, and special events for charities on a volunteer basis.
Her fine art work is shown and sold in a local gallery in her city, Edmonton, Alberta, Canada and she’s participated in many group and solo art shows and exhibitions over the last eight years. Since 2011 she has turned her focus towards teaching photography, and sharing her passion for the craft with others. She teaches weekend classes locally, as well as photography weekend workshops in Alberta and Washington state (USA).

New for 2014 she will also be leading photography travel tours with a fully booked trip to Cuba scheduled for January, and Nicaragua in February/March that is quickly filling up as well. Her tours will have emphasis on interacting with and helping out the locals in that country, and a schedule that is flexible and adaptable as the participants see fit. Photography at optimal times of day will be one of the goals on the tours and photography coaching in the field will allow Darlene to assist tour members in getting their very best images.

In April of 2012 Darlene started writing for Digital Photography School. Her articles quickly became popular, consistently among the top articles each quarter, and she became a regular author on the site. You can view Darlene’s author page here.

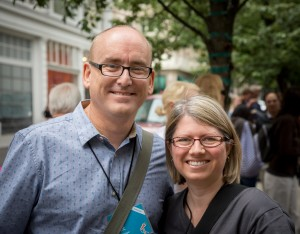
NewImageIn July last year I spent a little time with Darlene in Portland Oregon at a conference (that’s us on the right) and in the last couple of weeks Darlene flew out to spend time with the rest of the dPS team here in Melbourne Australia.

Today, Darlene comes on board as the Managing Editor to help us take DPS to the next level.

A Few Words From Darlene

You’ll no doubt continue to hear from Darlene regularly here on dPS but I asked her to say a few words today!

From Darlene:

“I am really happy to be joining the dPS team as Managing Editor! Working with Darren and the team has endless possibilities for the future, one that it is exciting and inspiring to me.

Being a photography teacher and writer allows me to share my passion for photography with liked minded people like you. I thrive on comments from students and readers who have break through moments and create images they never dreamed possible. These moments drive my energy and enthusiasm for teaching photography. Through you, the valued readers of DPS, I will be able to connect with more people and spread creativity through photography, a subject which is so close to my heart.

There are some great new things coming soon for dPS and I’m really excited to be a part of the team bringing them to you. I look forward to connecting with you soon and seeing your images for the weekly challenges and articles!”

The Future of dPS

I’m really excited about the future of dPS. Darlene coming into the team will continue to lift the quality of our tutorials but will also enable us to do some new things.

I can’t say too much about what’s coming yet but you can expect some new types of teaching and content to start appearing on dPS in the coming months! We’re also hard at work getting our popular 12 Deals of Christmas together for next month!

Darlene coming onto the team will also free me up to work on improving other aspects of the site too. I’ll still be very hands on with all areas of dPS but am also very excited to have a little extra time to work on some new related projects that I’ve been wanting to get my teeth into that I think will make dPS even more useful to our community.

That’s enough from me for today – please welcome Darlene!

Post originally from: Digital Photography Tips.

Check out our more Photography Tips at Photography Tips for Beginners, Portrait Photography Tips and Wedding Photography Tips.

Introducing our New Managing Editor – Darlene Hildebrandt

The post Introducing our New Managing Editor – Darlene Hildebrandt by Darren Rowse appeared first on Digital Photography School.


Digital Photography School

 
Comments Off on Introducing our New Managing Editor – Darlene Hildebrandt

Posted in Photography


Football Photography – Managing Multiple Bodies

14 Nov

Tips on how to manage multiple camera bodies while shooting football. By Scott Sewell www.scottsewell.com
Video Rating: 4 / 5

 
Comments Off on Football Photography – Managing Multiple Bodies

Posted in Photography Videos