RSS
 

Posts Tagged ‘LowKey’

Low-Key Photography – Highlighting Darkness

09 May

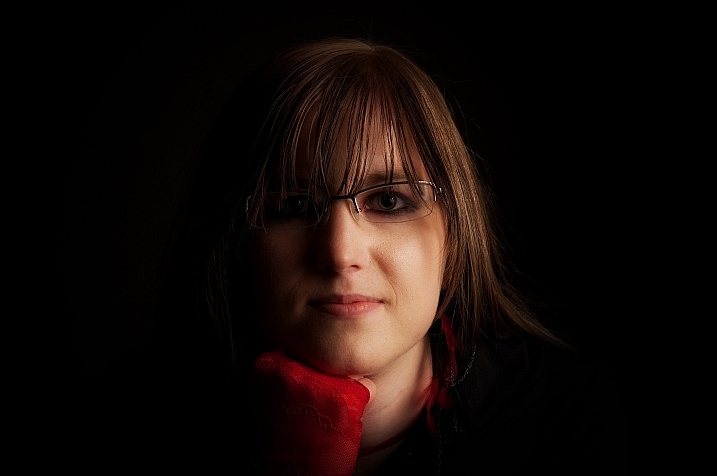
Black is the new black. Low-key photography is a style where the main elements are darkness and negative space. It’s an excellent way to create a certain mood or to use contrast to highlight a subject, such as an item, gaze, or outline. These dark images might suggest a dark mood – loneliness or danger – but they don’t have to! Darkness can also be used to create a sense of safety or adventure, for instance.

You can create a low-key photograph in a variety of ways. It can be an underexposed or high-contrast photo; it can be made in the studio, at home, or outdoors; the subject matter can be anything from a landscape to a tiny detail. The main thing is to create something overwhelmingly dark. As darkness is the absence of light and light is the main ingredient of photography, this is a pretty simple recipe.

lo- key photography

Still, low-key photography might be a bit of a challenge for a complete beginner, as you need to know how to manually control the exposure of your pictures. But don’t let that discourage you from trying.

Technically speaking, you should make sure you don’t have a lot of light reaching the sensor, by using shutter speed, aperture, and ISO – the histogram should be heavily left-biased. Most of the time these kinds of photos can be made using a very low ISO, so always start with that if you can – that way, you can make sure your photos are as high-quality as possible.

low-key photography

Let’s use some examples to get an idea of how low-key photographs can be created. When you browse through the pictures, try to pinpoint the mood of each photograph and what role the darkness plays in it. Is it playing a supporting role – for instance, creating an opportunity for something else to be the focus? Or is the darkness the main point of the photograph?

Let’s begin!

Using flash or shooting in the studio

Using a flash might seem like a surprising suggestion for a style which is defined by a lack of light. Yet, it’s perhaps the easiest way to accomplish exactly what you want, since it gives you precise control over the amount of light that’s used (and where it falls). A black background helps, but isn’t required. The important thing is that there’s a large enough difference in light levels between the highlights and the rest of the image.

low-key photography

ISO 100, 1/125th, f/10.

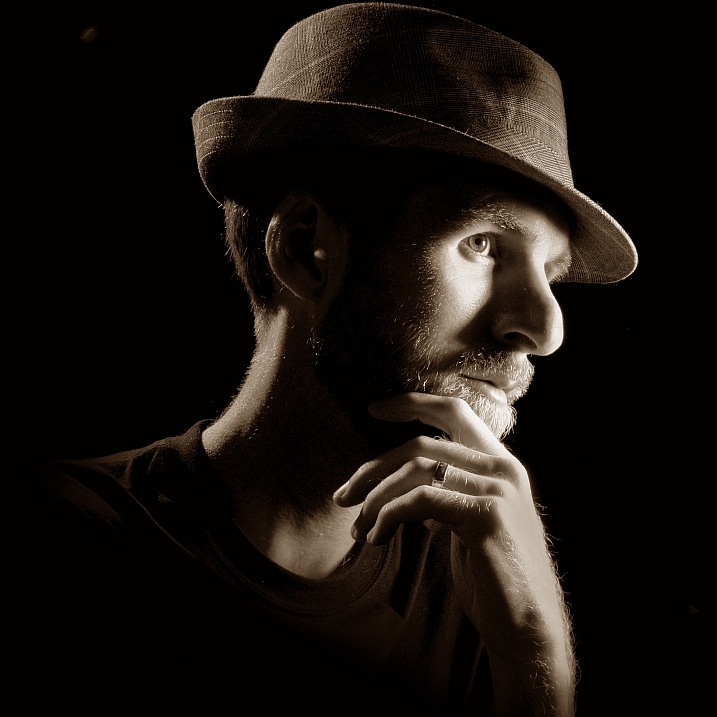
This photo was made in a studio, with a black background, two flashes, and a good friend. Leather or another textured, dark material works really well for this kind of photography.

low-key photography

ISO 100, 1/125th, f/8.

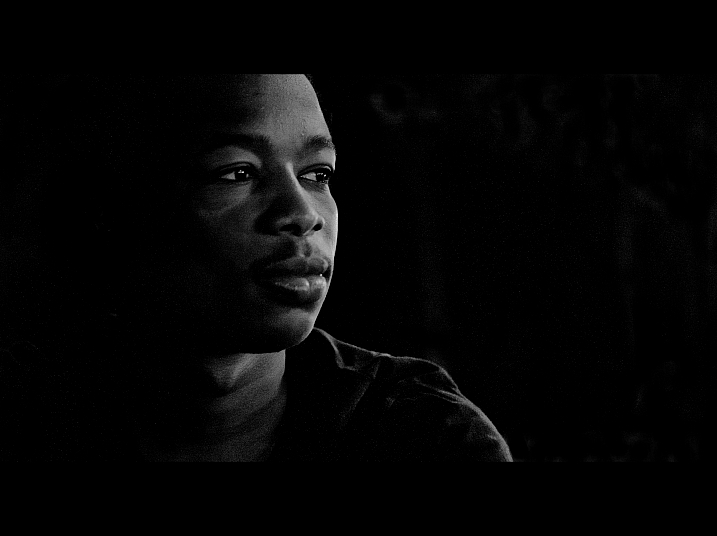
To get this profile image, I used two flashes behind and slightly to the right of the model, one higher up and one lower down. This photo could have worked with most backgrounds, as long as the flashes are strong enough.

low-key photography

ISO 100, 1/125th, f/8.

To light a very specific area of this scene, I used a snoot over my flash.

Using natural light for low-key portraits

To get a low-key portrait in natural light, the most important thing you need to watch out for is that the light source is confined by something, such as a window or a door. You also want the spot where the subject is located to be much darker. The examples below show this in two different ways.

low-key photography

ISO 400, 15 seconds, f/7.1,

Calling this ”natural light” is perhaps a stretch, since it’s coming from inside a house at night. Still, the same applies; it’s a restricted light source shining into a relatively dark space. This time, the space is outdoors and the light source is indoors.

low-key photography

ISO 640, 1/200th, f/2.8.

Here, the subject is sitting in a room with daylight shining through a window with curtains. The background was actually a white wall, but since the light from outside wasn’t shining directly onto it, it was dark enough to turn black in this picture.

Using natural light – textures

Low-key photography is a great way to bring out the feature of a subject that is hard to notice when it’s well lit.

low-key photography

ISO 400, 1/60th, f/2.8.

I found a lot of subtlety in the whites of this wilting flower once I underexposed the shot. The background was very busy, but it became almost completely black once I exposed the shot the way I wanted. I added a slight vignette to darken some lighter spots in the corners of the shot. Another nice thing about this style is that it’s easy to extend a black background if you want more space or to make slightly lighter parts black in post-processing.

low-key photography

ISO 3200, 1/200th, f/5.6.

Sometimes there are also nuances to be found in the blacks. This crow, and its beak, were on a table next to a window (the joys of knowing biologists!) which only got indirect light from outside, so the light levels were very low. Still, it was enough to capture the shades and shapes of the beak.

low-key photography

ISO 4000,1/125th, f/4.

The lighting of these crow feathers was the same as for the above photo. The focus on an all-black scene let all the textures and tones be expressed.

Low-key landscapes

Do you prefer landscape photography? No worries, the low-key photography style works wonderfully for that, too! A night scene usually works very well, but clouds are also very useful. They might make the sky less bright, but they also create interesting light patterns on the ground.

low-key photography

ISO 500, 1/250th, f/8.

An overcast day and an industrial, urban scene provided a great opportunity to capture something dark.

low-key photography

ISO 100, 1/320th, f/8.

The clouds added some nice texture to the sky. But what I was most grateful to them for in this picture was the spotlight effect they created on the landscape.

Conclusion

Experimenting with low-key photography is a great way to get creative – there are so many ways to do it! I hope this basic introduction has whet your appetite to try it out. I’d love to hear from you and see some of your creations in the comments section below!

The post Low-Key Photography – Highlighting Darkness by Hannele Luhtasela-el Showk appeared first on Digital Photography School.
Digital Photography School

 
Comments Off on Low-Key Photography – Highlighting Darkness

Posted in Photography


How to Take Low-Key Head Shots

20 Apr

When talking about head shots, there are so many different types of lighting and styles, that there almost seem to be no hard and fast rules on how to take good ones. There are the basic lighting patterns for portraits that are applicable to head shots. The most commonly used lighting for head-shots is often the clean, classic corporate look; generally speaking a bright background and even lighting. The type of head shot also depends on what it’s for, or if there are prescribed guidelines which must be adhered to.

moody-headshots-tutorial_0012

Typical head shots: two light basic setup

This article will show you how you can take more low-key head shots. By tweaking a few things in your setup and settings, starting from the commonly used lighting setup, you can achieve darker lighting and a moody look, while still looking very professional.

moody-headshots-tutorial-photography

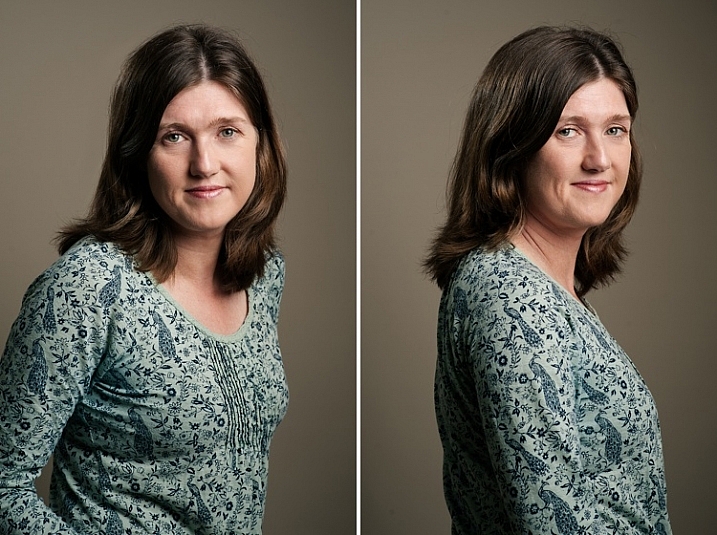
The setup for this one is a light beige background, with a strobe attached on a gridded octabox as the main light, positioned 45 degrees to the subject. Opposite the the main light is a speedlight with a snoot, set up on a stand. The speedlight reduces any shadows on the background which may be cast by the main light, and also provides a hair light and a little backlight. A typical camera setting would be ISO 100, between f/2.8 – f/5.6 and a shutter speed of 1/125 – 1/200 (make sure you don’t go faster that your camera’s sync speed). Of course you adjust the power of the strobe, but the typical look is plenty of light, and pretty brightly illuminated faces (not much or deep shadows).

moody-headshots-tutorial-photography

Normal head-shots have the face more brightly and fully lit, with less shadows. If you want a more dramatic low-key head-shot you can play around with using more shadows and contrast on the face and a darker background. Try split lighting or Rembrandt style which both have more shadow.

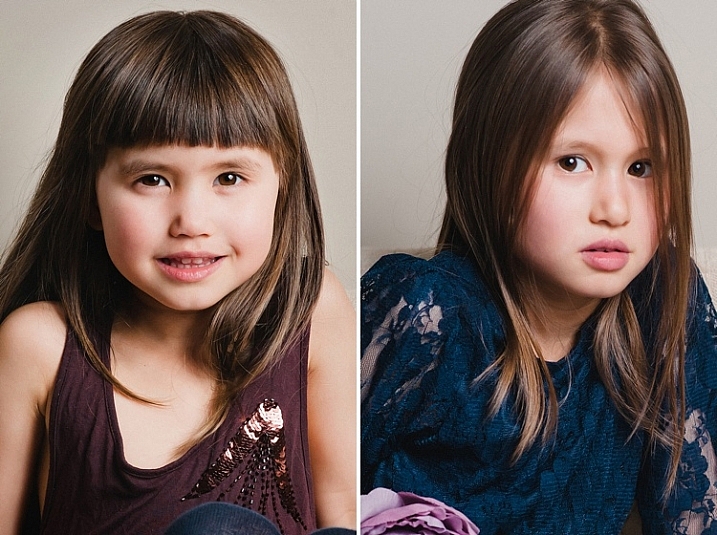
By stopping down to f/10, which is what I did on the photos above, still using exactly the same setup, you can cut out a huge amount of the main light, the background will be darker (less light will get to it), and there will be more shadows on the faces. You will have a more low-key look and feel to the image too, softer but with some light and shadow. However, this is still not low-key enough!

moody-headshots-tutorial-photography

Low-key head shots: one light

Tweak the lighting setup further by removing the hair light, replacing it with a silver reflector (on the face), and stopping down to f/11 you will be cutting out more light. Now there is only one light, and any light that hits the reflector will bounce light back on the subject’s face. Remember, that the main light is gridded so there is not much spill at all. The background is so much darker, the catchlights are still visible on the eyes, but there are no more hotspots on the face. There is a lot more shadow on the unlit side, and no hair light. The result is almost painterly, as you can see below.

moody-headshots-tutorial-photography

More shadows in this Rembrandt lighting pattern produce a more low-key result.

Low-key head shots: natural light and speedlight

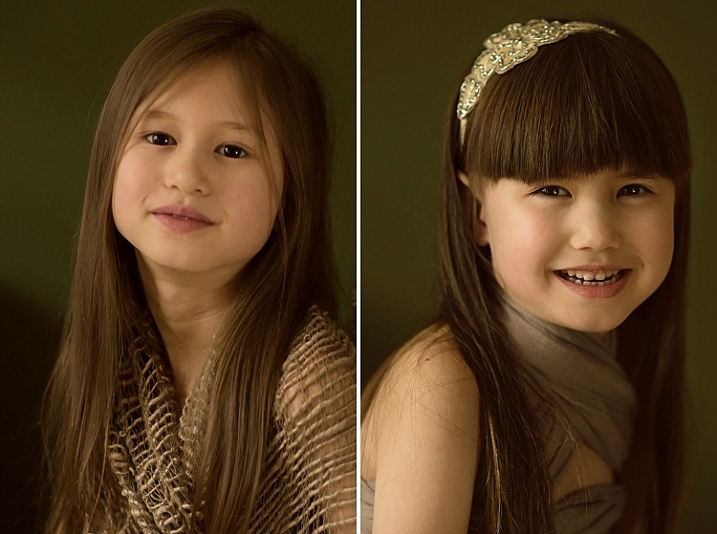
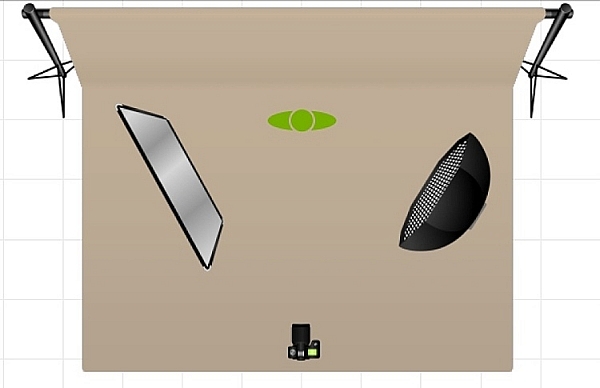
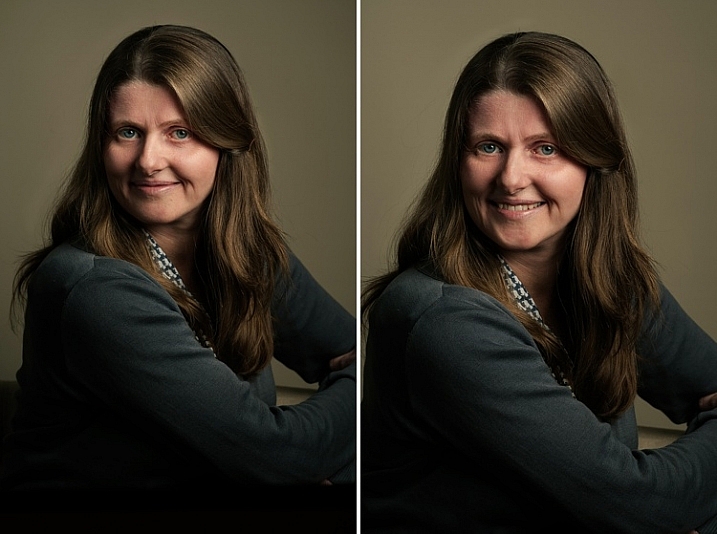
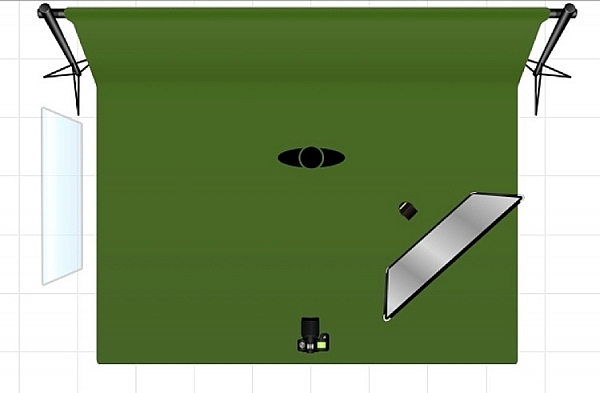
I wanted to see if I could achieve this painterly look for head-shots by removing the strobe as the main light, and replacing it with a window light. The setup below shows the window light on camera left, and a speedlight, bounced into a silver reflector, as a secondary light on camera right. I also changed the background to dark green.

moody-headshots-tutorial-photography

The results below show two catchlights on the eyes from the window and reflector; the lighting is flatter (less contrast or ratio) but the mood is soft and painterly. If you want deeper shadows use a white reflector instead of silver, or take it away entirely.

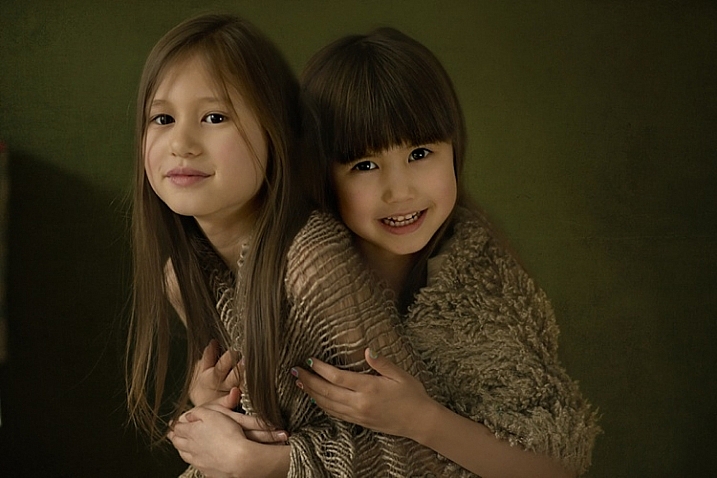
The portrait at the top of this article was taken using this setup. The lesson here is that by making small tweaks to your lighting setup you are able to achieve different looks for your images. Don’t be afraid to experiment.

moody-headshots-tutorial-photography

Here are a few examples of really moody low-key head shots I found on Flickr to give you some ideas to make your own:

Scott Butner

By Scott Butner

Al Ibrahim

By Al Ibrahim

Stephen Poff

By Stephen Poff

Stefano Corso

By Stefano Corso

Jason Tan

By Jason Tan

Do you have any tips in getting moody low-key head shots and portraits? Please share them here.

People photography week

This week on dPS we’re featuring articles all about different kinds of people photography including portrait, event and travel photography. This is the first of the bunch, watch for more people photography articles over the next few days.

googletag.cmd.push(function() {
tablet_slots.push( googletag.defineSlot( “/1005424/_dPSv4_tab-all-article-bottom_(300×250)”, [300, 250], “pb-ad-78623” ).addService( googletag.pubads() ) ); } );

googletag.cmd.push(function() {
mobile_slots.push( googletag.defineSlot( “/1005424/_dPSv4_mob-all-article-bottom_(300×250)”, [300, 250], “pb-ad-78158” ).addService( googletag.pubads() ) ); } );

The post How to Take Low-Key Head Shots by Lily Sawyer appeared first on Digital Photography School.

Digital Photography School

 
Comments Off on How to Take Low-Key Head Shots

Posted in Photography


Low-Key Lighting for Dramatic Portraits

19 Nov
Becky-in-witch-outfit

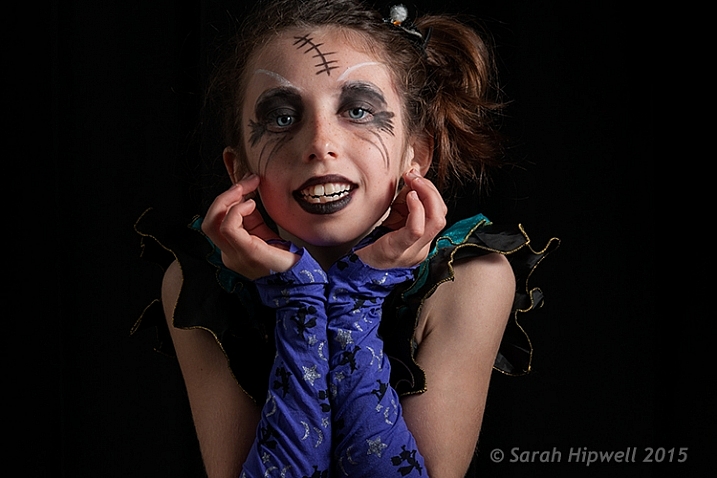
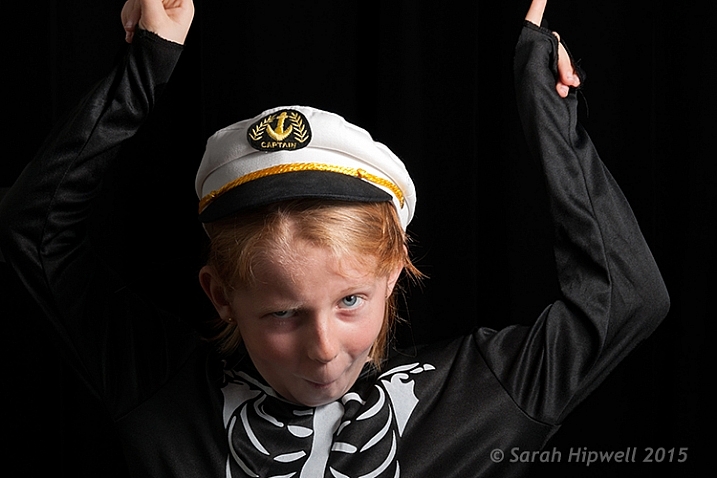
Young girl dressed up for Halloween. Low-key portrait using one speedlight, against a typical black background.

I dare say that nothing is quite like the effect of low-key lighting to show drama in an image. So what does low-key lighting mean in terms of photography? A good definition is found here.

Low-key lighting often uses only one key light, optionally controlled with a fill light or a simple reflector.

The term “low-key” is used in cinematography to refer to any scene with a high lighting ratio, especially if there is a predominance of shadowy areas. It tends to heighten the sense of alienation felt by the viewer, hence is commonly used in film noir and horror genres.

To simplify the term further, low-key lighting focuses on the shadows by using usually one light source. Therefore, shadows are now the primary element of the composition.

What you should know about low-key lighting

The nice thing about low-key lighting is that it’s quite experimental. There are no hard and fast rules that you need to adhere to. You can vary the position, and the distance, of the one light source more to the front or side of the subject, depending on how much contrast you want your model to have. Or ask the subject to turn more into light source or away from it. Here are a few more guidelines:

  • A black seamless background is the classic low-key look.
  • As this type of lighting is quite strong and contrasty, it’s probably suited for the very young, who in general have flawless skin and subjects (seniors 65+) where the emphasis is on the character of the person. For people who don’t have great skin, this type of lighting won’t be the most flattering.
  • You can move the light more to the front and use a reflector to control the light and act as a fill.
  • Creates drama and mystery to your portraits.
  • This type of lighting is probably not best to do wedding portraits!
  • Keep ISO low to 100/200 so that ambient light doesn’t reach the sensor. This will keep the quality of images high by reducing noise.
  • Set your flash to manual and start on a low setting of 1/8th power.
  • Use a small aperture setting of f/8 and upwards (f/11 and smaller).
  • Keep the shutter speed at 1/125 second or higher (not to exceed the native sync-speed of your camera).
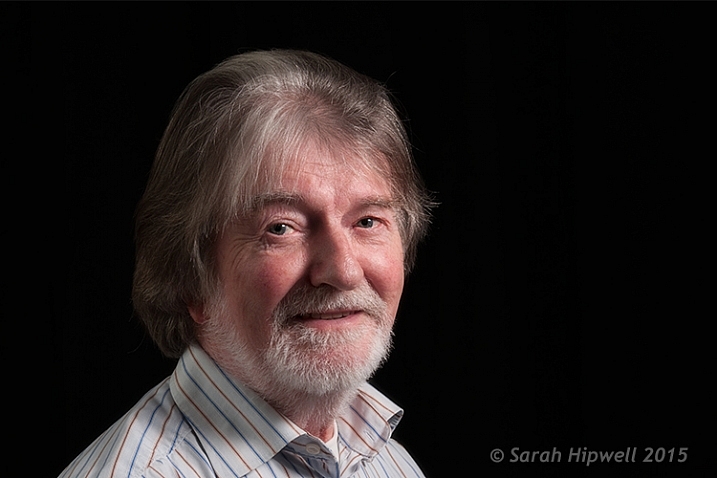
senior model low key lighting

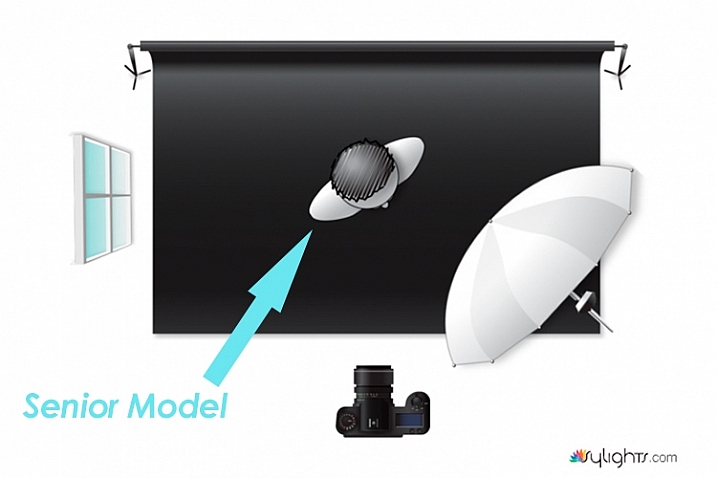
A senior model poses with his body turned more towards the light source to provide less extreme shadows while emphasizing the model’s facial character.

Senior-model

Lighting diagram to show the position of the model in relation to the light source.

Young girl low key photography in Halloween costume

In this particular shot, I wanted more shadow on the model’s right side to give more drama to the shot.

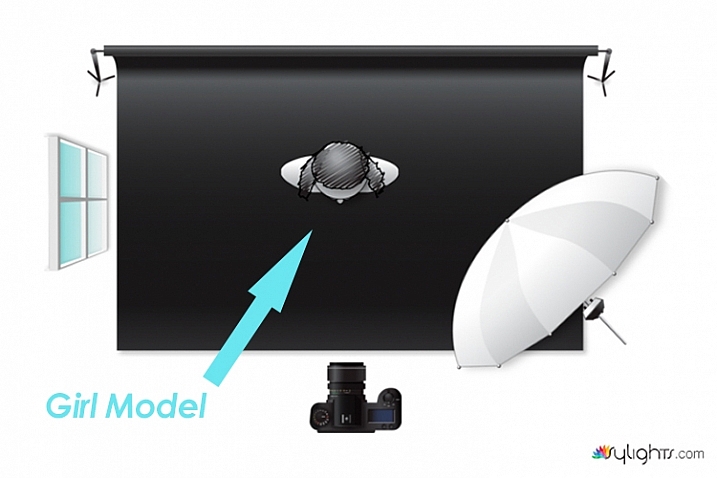
Lighting diagram low key photography

Keeping the light source in the same position, I got the model to look directly at the camera.

What’s involved in a low-key setup?

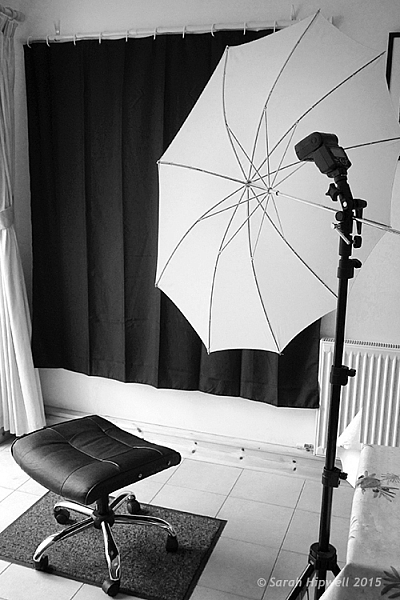
You may be surprised, but this type of setup doesn’t require a proper studio. You can do a low-key portrait in a relatively small area, or anywhere in fact. This setup requires the minimal of gear:

  • A camera and lens (whatever lens is your choice for portraits)
  • One speedlight
  • One lightstand
  • One light modifier (a shoot through umbrella is a great and inexpensive modifier that acts like a softbox)
  • A subject or model, or willing participant
  • Preferably a black background. See my DIY solution below.

Low-key low cost

I am a great believer in practicing what I preach. So I came up with a DIY solution for shooting a low-key setup, using a black shower curtain, in your own home. It is inexpensive, and doesn’t require a lot of time to implement.

First item was the black background

  • I sourced a black shower curtain for less than $ 10USD. Size L180, W180cm. It also comes with plastic rings. Don’t worry that the curtain doesn’t reach the floor. Remember, this is for portraits only. I already had a telescopic white shower rail.
  • 1 ½inch in diameter x 10ft. length of white PVC tubing will do equally well. It works out at $ 2.10 from Home Depot. I would cut this down to 8ft.
  • One pair of White Command Cord Clips that cost from $ 3 to $ 5. These clips have a self-adhesive backing and can stick to most surfaces. So they are easy to put up, and are also removable. They can hold up to 900g or 2 lbs.

So that is your background sorted. The shower curtain, when taken out of the packaging, has obvious pleats. Don’t worry about these. This is easily sorted in post-production.

As I really enjoyed using this DIY method. I have left the Cord Clips up on the wall in my kitchen. They are relatively discreet. I intend to use this setup again. It is so simple and a perfect solution if you can’t get to your studio, or if you don’t have one!

Black-shower-curtain-setup

A DIY low-key solution that you can set up at home.

Post-production to get rid of pleats or wrinkles

You don’t want any light to hit the black background, this is called contamination. Plus you want the black background to be texture, and wrinkle free. In some of my shots, the pleats were a little obvious in the background.

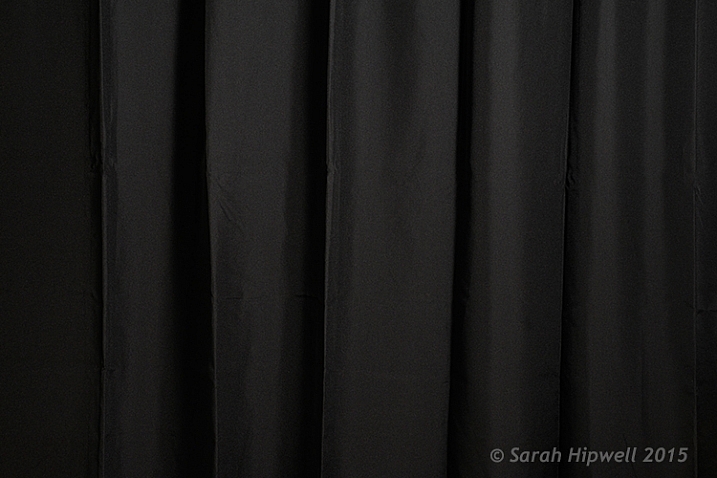
black-shower-curtain

Black shower curtain with pleats visible.

Getting rid of them was relatively easy. In Adobe Camera Raw (ACR), I adjusted the Shadows and Blacks sliders,
until I had a wrinkle free black background. However, as this is a global adjustment, you may need to an Add Adjustment Brush to areas on the subject to bring back some detail.

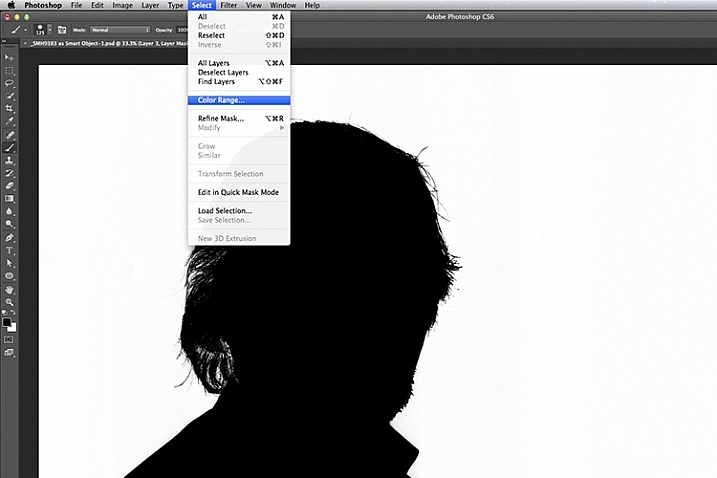
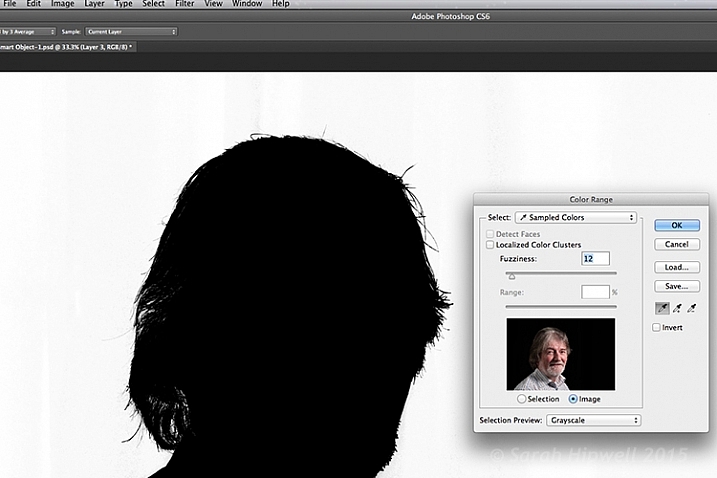
Another alternative in Photoshop, is to apply a mask to isolate the subject. For the image of the senior man, I used Select>Color Range rather than using the Quick Selection tool or the Refine Mask tool. The Color Range is a color-based selection tool which was ideal in this case, as my subject was much lighter than the background making selection relatively easy. A few clicks on the background and I had a near perfect mask, except where the two eyes were. I applied the mask and filled in areas that were needed in black with the brush tool.

color-range

Choosing the Color Range under Select in Photoshop to create a mask.

I then applied a Levels Adjustment layer, and moved the black slider ever so slightly to the right, until the background was completely black.

color-range-dialog-box

The Color Range dialog box.

Of course shooting lo-key isn’t restricted to indoors, nor do you need a black background. You can achieve similar effects outside. Check out this great video on the topic of creating an invisible black background to portraits using the same techniques.

Caution: You may possibly experience lots of fun shooting low-key! So let’s see your examples in the comments below.

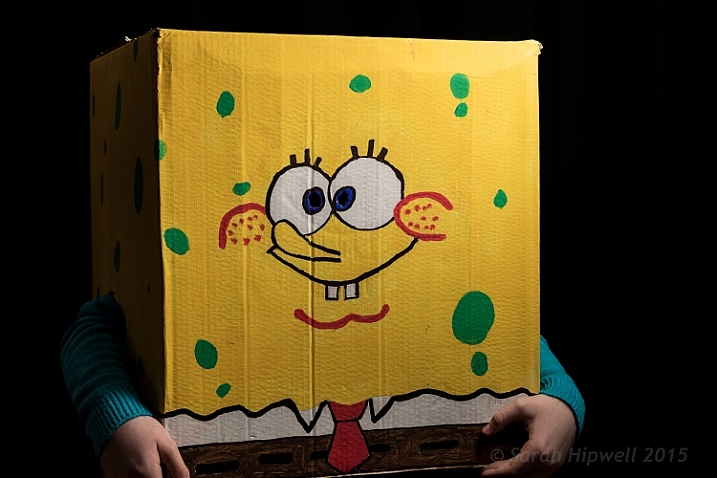
Sponge-Bob-costume

My daughter’s friend dressed for Halloween as Sponge Bob.

googletag.cmd.push(function() {
tablet_slots.push( googletag.defineSlot( “/1005424/_dPSv4_tab-all-article-bottom_(300×250)”, [300, 250], “pb-ad-78623” ).addService( googletag.pubads() ) ); } );

googletag.cmd.push(function() {
mobile_slots.push( googletag.defineSlot( “/1005424/_dPSv4_mob-all-article-bottom_(300×250)”, [300, 250], “pb-ad-78158” ).addService( googletag.pubads() ) ); } );

The post Low-Key Lighting for Dramatic Portraits by Sarah Hipwell appeared first on Digital Photography School.

Digital Photography School

 
Comments Off on Low-Key Lighting for Dramatic Portraits

Posted in Photography


How to Create Dark Moody Low-Key Portraits with Minimal Gear

14 Jan

To paraphrase Samuel L. Jackson in Jackie Brown, “Grids: when you absolutely, positively got to kill every lumen in the room, accept no substitutes.” Do you have a room or environment that you want to appear black? You don’t even need a black backdrop or the dark cover of night to create a dark, dramatic scene. All you need is a flash, a grid and enough space to allow your subject to be at least 5-10 feet away from any walls. As long as you can keep your strobe light from falling on the ground, background or other objects in the scene, only the subject will be illuminated.

1

The scene: If you want to black out your environment to create dark moody low-key images, look for shaded areas with enough space to allow at least 5-10 feet between your subject and the background. The darker the background wall is, the better.

2

The raw file: If you look closely, you will see that there is a bit of background detail, which can be easily eliminated in Lightroom.

It was a particularly windy day that I photographed ballerina Kristie Latham. Since I didn’t have an assistant, and sandbags were too heavy to lug around by myself (I was already pulling my case and carrying two light stands), I would have to shoot without light modifiers. Note, if I had added an umbrella to the light stand without it being sandbagged or held by an assistant, it would have blown over onto a nearby car within five seconds. Though an un-modified flash on a light stand can still be blown over by the wind, it’s much less likely to happen. That said, I still made sure that it wasn’t too close to any nearby cars.

I wanted to highlight her form and the details of her outfit – specifically the tutu – so even though the light was going to be hard without modifiers, it would actually work out to my advantage. I began by setting up the main light. I placed it high – about 8 feet – in order to create dramatic, directional light. After taking a test shot, I saw that the light fell off below her tutu, since it came out about a foot from her body, causing her legs to go into shadow. To remedy this, I added a second light, placing it on the ground, aimed slightly up, to avoid lighting the ground. The second light worked at illuminating the lower half of her body (image above). By zooming the flashes in to a medium setting of 70mm, it allowed just enough light spread to cover her, while not spilling on too much of the environment around her. While a bit of background detail can be seen in the raw file, it can easily be removed in Lightroom in post-production.

3

The final shot: Kristie is now completely isolated in the void. Poetic.

In a slightly different environment, I was doing a shoot with model Dani Dikeman, in a basement. She was in black body paint, wearing all black above the waist. I wanted the whole scene to appear black, save for the highlights on Dani and the textures of her outfit. It was a conceptual portrait shoot, this portion being the Hell portion of a Heaven/Hell-themed shoot. (The as-yet-to-be-shot Heaven scenario will, fittingly, be all white.)

4
The setup: This scenario took place in a basement.

I met Dani at the makeup artist’s house, about an hour after they got started on the makeup, in order to give them a head start on the lengthy application. I knew that the basement was going to be an optimal shooting space because it was not only windowless, but wide open and barren. I quickly set up the sole flash, see above, and then waited while they put the finishing touches on the makeup and hair.

5
The raw file: Though a bit of Dani’s unpainted abdomen and sweatpants are visible in the shot, a quick Lightroom adjustment would have the image ready to go.

The shoot actually went rather quickly (15 minutes), which is ironic since the makeup application took two hours. Though the basement wasn’t especially large, by using a grid on my light to contain light from spilling on the nearby walls, the environment read pretty close to black in the raw files, as seen above. Although Dani’s unpainted abdomen and sweatpants visible in the shot, this wasn’t too big of an issue. Because the light falloff was so dramatic from her bust to her torso, a quick adjustment in Lightroom, lowering the exposure and it went easily to black.

6
The final shot. All black everything.

Have you done all dark or low key images before? Have any other tips or comments to share?

googletag.cmd.push(function() {
tablet_slots.push( googletag.defineSlot( “/1005424/_dPSv4_tab-all-article-bottom_(300×250)”, [300, 250], “pb-ad-78623” ).addService( googletag.pubads() ) ); } );

googletag.cmd.push(function() {
mobile_slots.push( googletag.defineSlot( “/1005424/_dPSv4_mob-all-article-bottom_(300×250)”, [300, 250], “pb-ad-78158” ).addService( googletag.pubads() ) ); } );

The post How to Create Dark Moody Low-Key Portraits with Minimal Gear by Nick Fancher appeared first on Digital Photography School.

Digital Photography School

 
Comments Off on How to Create Dark Moody Low-Key Portraits with Minimal Gear

Posted in Photography


Portrait Photography Lighting Techniques : Portrait Photography Lighting: High-Key & Low-Key Lighting

10 Jan

High-key lighting in portrait photography produces light colors, while low-key lighting produces darker colors. Learn about high-key lighting and low-key lighting in this free video on photography basics from a professional photographer.