RSS
 

Posts Tagged ‘lightning’

How to Use Photoshop to Add Lightning to Your Stormy Photographs

18 Nov

The post How to Use Photoshop to Add Lightning to Your Stormy Photographs appeared first on Digital Photography School. It was authored by Ana Mireles.

Did you know you can use Photoshop to add lightning bolts to your images?

use photoshop to add lightning before and after

Thunderstorms are a great photographic subject, and bolts of lightning can add drama to your photos. Unfortunately, they don’t necessarily occur when you want them.

And you can’t always base your photoshoots around natural events. That’s when post-processing comes to your aid.

How to use Photoshop to add lightning

Have you ever seen a thunderstorm and wished it had happened the day before when you were out doing an urbex photoshoot? Or have you ever you looked at one of your photos and thought that a thunderstorm would have added the perfect ambiance?

how to use photoshop to add lightning tutorial

Unless you’re a professional that specializes in this kind of photography and purposely chases storms, you’ll rarely have a thunderstorm when you’re in the right location with the proper equipment.

And even if you are in the right place at the right time, it’s not always easy to photograph lightning.

Not to worry.

Because there are several different ways to use Photoshop to add lightning – and create the perfect thunderstorm in your photos.

how to use photoshop to add lightning Intro

In this tutorial, I’ll show you two ways of adding lightning to your images. The first way is by making a composite. The second way is to create a lightning bolt inside Photoshop.

So choose the one that’s better for you, and let’s get started.

Use Photoshop to add lightning via compositing

This technique is very easy to do, but you must already have a lightning photograph on hand.

Step 1: Choose and open your images

Use Photoshop to composite a thunderstorm

First, you need to choose the two images that you’re going to use. One of them will be the background where the lightning bolt is going to be added.

This method will work best if the image has a moody sky. You can always place a bolt of lightning into a clear blue sky, but an already-moody sky will look more realistic and have more drama. So pick an image with lots of clouds and contrast.

The second image is the one with the lightning bolt in it. If you’ve photographed thunderstorms in the past, then you can use one of those images. If not, you can always get a lightning bolt from a free stock photography website.

Open both images in Photoshop. Then drag the lightning photo onto the new background; this will automatically paste it into a new layer.

Alternatively, you can use the commands Edit>Copy and Edit>Paste.

Step 2: Use Photoshop’s blending modes to add lightning

Photoshop simple composite technique

Your new layer should be covering the background, so you need to blend both layers together and integrate the lightning bolt.

I prefer to keep the original color, but you can also make your lightning image black and white and then make it darker to make the blending easier.

Whether you decide to leave the lightning in color or change it to black and white, you need to change the blend mode. You can do this by opening the drop-down menu in the Layers panel and selecting your desired mode.

For my example, Overlay is the most appropriate. And it can be a good starting point for you, too, but feel free to experiment with other options.

Step 3: Fine-tune your composite

use Photoshop blending modes to add lightning

Move and adjust the lightning bolt until it’s positioned the way you want it in the background image. Once everything is in place, you need to do some advanced blending in the Layer Style dialog box.

To open the Layer Style box, just double-click on the layer next to its name. Don’t click on the thumbnail or the name itself, because those are different tools. A pop-up window will appear; that’s the Layer Style box. At the bottom, you’ll find the Blend If option.

Here, you need to move the sliders to the right. Start with the top slider (which controls the current layer). Hold Alt while you drag to split the slider and create a more gradual effect. Then, if necessary, do the same with the slider on the underlying layer. Once the lightning looks integrated into the photo, you can click OK to close the dialog box.

You can now add a layer mask to further fine-tune the effect. The source of the lightning is always lighter than the rest of the sky, so you might need to add a gradient to create that effect.

You can also color black any residual elements that didn’t disappear via the Blend If settings.

That’s it! Your composite is now ready. You can add other filters or do some more editing to finalize your picture.

How to use Photoshop to add (and create) lightning bolts

For this method, you only need to have a background image. Again, the choice is yours, but a cloudy day or dramatic scenery will help create more impact.

Step 1: Create a lightning bolt

add lightning using Photoshop - before

Open the background image in Photoshop and create an empty new layer at the top of the layer stack.

To fill it, grab the Gradient tool, set it to Linear Gradient, and drag the tool across the canvas. Make sure that your gradient goes from black to white. These choices can be found in the Options bar at the top of the screen.

With the same layer selected, go to Filter>Render>Difference Clouds. There are no settings (or previews) for this kind of filter; it just generates a pattern using random values.

Use Difference Cloud filter

Now invert it by going to Image>Adjustments>Invert. You can also use the shortcut Ctrl/Cmd + I.

Then go to Image>Adjustments>Levels. In the pop-up window, you’ll find a histogram with a slider (this is the Levels adjustment). Drag it to the right until the background is all black and only white lines are visible. You’ll notice that some of these white lines resemble lightning bolts.

Create fake lightning bolts

Pick a “lightning bolt” and start painting with black to cover the other lines using the Brush tool. Keep going until you leave only a line that looks like lightning. The size and shape are up to you; there’s no specific formula.

If you only want to add that lightning bolt, then just adjust the blend mode of the layer and position it where you want it (see the composite technique explained in the first part of this article).

If you’d like to add several lightning bolts or one lightning bolt with a more complex shape and multiple branches, then I recommend you make a brush.

Step 2: Make a custom brush

Create a custom brush

To create a brush, you have to select the lightning bolt you just made. To do that, you can use any selection tool that is comfortable for you. In this case, I’d recommend using Color Range.

Once you’ve selected your lightning bolt, click on Edit>Define Brush Preset and give it a name. To make the lightning more dynamic, you can adjust the settings and make it change size and direction.

Now you have a lightning bolt brush that you can use in any photograph without having to create one again and again. At this point, you can hide or delete the lightning layer.

Step 3: Add lightning bolts in Photoshop

create a thunderstorm in Photoshop

Create a new empty layer on top of the background. That way, you can have the lightning bolts in a separate layer to edit and modify them as required.

Start painting one or more lightning bolts until you’re satisfied with the thunderstorm effect.

Step 4: Fine-tune the effect

add lightning using Photoshop - after

You can add a layer mask to integrate the lightning using a gradient to make it look more natural.

You can also add a Solid Color layer above the lightning layer. You can then use the Blend If tool to color only the lightning bolts.

Your thunderstorm is ready now! However, you can continue to post-process the final image if you want to give it a specific look. Black and white usually works very well for these type of images, so give that a try.

How to use Photoshop to add lightning: conclusion

I hope this article helped you see how easy it is to use Photoshop to add lightning.

Feel free to share tips and your own amazing images in the comments section below!

The post How to Use Photoshop to Add Lightning to Your Stormy Photographs appeared first on Digital Photography School. It was authored by Ana Mireles.


Digital Photography School

 
Comments Off on How to Use Photoshop to Add Lightning to Your Stormy Photographs

Posted in Photography


Behind the Shot: Fireworks and Lightning

06 Jul

The post Behind the Shot: Fireworks and Lightning appeared first on Digital Photography School. It was authored by Caz Nowaczyk.

Fireworks-and-Lightning-31-days-student-Lyn Wernsmann

31 Days Student photo: Lynn Wernsmann

31 Days to Becoming a Better Photographer student, Lynn Wernsmann, captured this amazing fireworks and lightning photograph. To capture this spectacular photo, Lyn used the following camera settings:

I used my Fujifilm XT2 and the 50-230mm lens.

The settings for this shot were f/10, 5sec, ISO 100, 135mm.

I had my camera set on Interval Timer, and I was shooting 20 shots at a time which works well for things like the fireworks.

I was watching the Erie, Colorado fireworks show. It was a last-minute decision to watch this one which is near my home, instead of driving for 30-minutes to watch the fireworks that were happening in Denver.

I started playing with cameras about 15 years ago – the camera I used then was basically a point and shoot. Over the years, I have upgraded slowly to the camera I use now. I have taken classes online and watched a lot of YouTube videos.

My favorite type of pictures are landscapes, sunrises & sunsets, flowers, and macros.

I need to work more on people pictures.

What prompted her to join the class

I wanted to take a class that isn’t a beginning class, but that would refresh some of what I already know, but to also give me some fresh perspective.

One major thing that I want to learn is how to use Flash and some beginning info for Photoshop. This class touched on both of those.

I took Jim’s Nighttime class and found a lot of good information in that one.


31 Days to Becoming a Better Photographer is opening its doors again this month. Check it out here and make sure you get the alert when registrations open.

The post Behind the Shot: Fireworks and Lightning appeared first on Digital Photography School. It was authored by Caz Nowaczyk.


Digital Photography School

 
Comments Off on Behind the Shot: Fireworks and Lightning

Posted in Photography


Video Tips: How to Photograph Lightning

08 Jun

Storms and bad weather doesn’t mean you have to stop shooting and go indoors. In fact, sometimes you can get more dramatic images in bad weather. So in this article, we’ve found two video tips to help you learn how to photograph lightning.

Adorama TV – Shooting Lightning

In this video, Mark Wallace gives you the 8 steps he uses to photograph lightning.

?

Here are the 8 steps Mark recommends:

  1. Set your camera to Manual Mode.
  2. Set your shutter speed to 30 seconds.
  3. Select an aperture of f/10.
  4. Set the ISO to 100.
  5. Shoot in RAW format.
  6. Set your focus on manual mode, and focus just shy of infinity.
  7. Use a wide-angle lens.
  8. Put your camera on a tripod.
  9. BONUS: Use a remote shutter release to trigger the camera.

Lightning Photography Tutorial

Next, photographer Pecos Hank has a great tutorial on photographing lightning.

?

He covers some of the same tips as the first video, and a few others as well such as the opportunity to also make a time-lapse of your lightning photos.

For other storm photography or chasing tips read:

  •  7 Things I’ve Learned from Photographing Storms
  • 5 Incredible Storm Photographers and Their Best Images

So get out there and photograph some lightning, but stay safe!

The post Video Tips: How to Photograph Lightning appeared first on Digital Photography School.


Digital Photography School

 
Comments Off on Video Tips: How to Photograph Lightning

Posted in Photography


Video: Incredible 1,000fps slow-motion 4K lightning footage

05 Dec

If you need something to get your week off to an ‘epic’ start, look no further than DP Dustin Farrell’s incredible storm chasing video he just released yesterday. Captured mostly with a Phantom Flex4K slow-motion camera at 1,000fps, it’s a slow-motion masterpiece with lightning footage that left this writer’s jaw slack.

The video, titled Transient, is a compilation of Farrell’s best storm chasing shots from the 2017 season. Over the course of 30 days he says he drove over 20,000 miles—developing a deeper “respect and admiration for storm chasers” all the while. He also shared some technical details in the video’s description:

Most of the lightning footage was captured in uncompressed raw at 1000 frames per second with our Phantom Flex4K.

[…]

The Phantom Flex4K is a camera that must be post triggered while shooting high speed. This works out well for capturing lightning because the camera is always recording and rewriting to internal ram. As soon as a bolt appears in my view finder I trigger the camera to save what has been stored in the ram. Shooting at high frame rates requires a lot of light. Therefore, I mostly used my Zeiss Otus 28, 55, and 85mm lenses wide open at f1.4. In all, I captured 10TB of data during this production.

But don’t let the plethora of awesome footage fool you, this was an incredibly challenging project:

This is one of the most difficult projects I have ever attempted in my career […] Chasing storms with a Phantom Flex4K is stressful even when things are going well. There were at least 10 days where I returned home with my tail between my legs and nothing to show after a ten hour chase and 500 miles. There were also a couple of days that I drove home with an ear to ear smile that lasted for hours.

Check out the results for yourself above, but don’t forget to do it right: shades drawn, headphones on, volume up, and resolution set to 4K. It is 100% worth it. And if you like what you see, definitely head over to Farrell’s website or give him a follow on Facebook and Instagram.

Articles: Digital Photography Review (dpreview.com)

 
Comments Off on Video: Incredible 1,000fps slow-motion 4K lightning footage

Posted in Uncategorized


Striking: Photos from a lightning hotspot in Venezuela

21 May

$ (document).ready(function() { SampleGalleryV2({“containerId”:”embeddedSampleGallery_2035541136″,”galleryId”:”2035541136″,”isEmbeddedWidget”:true,”standalone”:false,”selectedImageIndex”:0,”startInCommentsView”:false,”isMobile”:false}) });

For landscape photographer and storm chaser Jonas Piontek, Lake Maracaibo in Venezuela is practically paradise. The lake’s proximity to the Andes and the Caribbean Sea set the conditions for a so-called ‘never ending storm,’ with lightning storms occurring almost 300 days of the year. You’d even notice it from space apparently, as NASA has named it the ‘Lightning Capital of the World.’

You can see a few of his photos here, and over at Resource Travel Piontek describes what it’s like photographing Maracaibo’s daily light show.

Articles: Digital Photography Review (dpreview.com)

 
Comments Off on Striking: Photos from a lightning hotspot in Venezuela

Posted in Uncategorized


Lexar offers microSD dongle with an Apple Lightning connector

19 Apr

Lexar has launched a microSD-to-Apple Lightning reader for transferring files from a media card directly to an iPhone or iPad. The dongle works in conjunction with an iOS file management app, and is designed to make file transfers possible from other devices, whether a camera, drone, or another phone at fast speeds via a wired connection.

“Users no longer need to wait until they’re back in front of their main computer at home or in the office to upload content captured on-the-go,’ said Lexar product marketing manager Steffi Ho. According to the company, the card reader’s Lightning connector can fit in ‘most iOS cases.’

The microSD reader is priced at $ 41.99; though it officially launched for purchase today, Lexar’s website still lists it as ‘coming soon.’


Press release:

New Lexar microSD Reader with Lightening Connector Allows for Rapid Transfer and Easy Offload of Content for On-the-Go Users   

Reader Designed for Management of Video and Photo Content from Sports and Aerial Cameras to the Latest iOS Devices

MILPITAS, Calif., April 14, 2016 (GLOBE NEWSWIRE) — Lexar, a leading global brand of flash memory products, today announced the Lexar® microSD™ Reader, allowing users to easily offload content from their sports camcorder or aerial camera to an iPhone® or iPad®. The small, portable reader features a Lightning® connector for quick transfer of files on the go, allowing users to view and playback photos and videos on their Apple device*. It also works with an easy-to-use and free file management app on the App Store®.**

“Users who are looking to capture more content in real time while on the move can find it challenging to manage that content, especially in an iOS device,” said Steffi Ho, product marketing manager, Lexar. “Shooters can now take advantage of the large screens and connectivity of their iOS devices by editing and uploading content captured on their action sports and aerial cameras wirelessly. Users no longer need to wait until they’re back in front of their main computer at home or in the office to upload content captured on-the-go.”

The new microSD Reader also allows users to offload files and store more on the card, creating more device space to capture content on the go. It also provides an easy way to move files from Android™ or other microSD-based device to an iPhone or iPad, and swap content between iOS devices. It has a small, portable design that makes it easy to take on the go, and its Lightning connector fits with most iOS cases, providing simple plug-and-play functionality. Furthermore, the microSD reader works with a free file management app on the App Store, allowing users to back up files when connected.

All Lexar product designs undergo extensive testing in the Lexar Quality Labs, facilities with more than 1,100 digital devices, to ensure performance, quality, compatibility, and reliability. The new microSD Reader is available for purchase in April 18, 2016 with an MSRP of $ 41.99, and includes a one-year limited warranty. For more information about Lexar products, visit www.lexar.com.

*Files supported: Music—MP3/CAF/ACC/AIF/WAV/AIFF/M4A. Video—AVI/FLV/MP4/MOV/M4V/MKV/MPG/RM/RMVB/WMV.

** App required for product use.

Articles: Digital Photography Review (dpreview.com)

 
Comments Off on Lexar offers microSD dongle with an Apple Lightning connector

Posted in Uncategorized


Tesla Thunderstorms: Miniature Bolts of Man-Made Lightning

23 Jun

[ By Steph in Art & Photography & Video. ]

mini thunderstorms 1

Tiny bolts of lightning are captured on camera as they shoot off an antique electrotherapy medical device, turning the discharge of electricity into a form of art. Germany-based photographer Marc Simon Frei purchased the 1920 violet ray, invented by Nikola Tesla, on eBay and began to experiment with visual effects.

mini thunderstorms 6 mini thunderstorms 3

The device is basically a portable tesla coil, an electrical resonant transformer circuit used to produce alternating-current electricity. Frei used various methods to create sparks and caught them at just the right split-second with his Nikon Df, 50mm f/1.8 lens and a macro extension tube.

mini thunderstorms 5 mini thunderstorms 4

He has also played around with wiring, and creating miniature storms within tufts of wool stuffing taken from a teddy bear. Frei notes that if you want to try it yourself, you’d better be prepared for possible equipment damage from the high frequency voltage; the LCD screen on his camera flickered whenever it came too close to the coil.

mini thunderstorms 7 mini thunderstorms 2

Nikola Tesla would likely be disappointed that his ingenious creations are mostly relegated to exhibits and experiments these days, rather than becoming a viable wide scale source of energy, but it seems likely he’d approve of this project.

Share on Facebook


[ By Steph in Art & Photography & Video. ]

[ WebUrbanist | Archives | Galleries | Privacy | TOS ]


WebUrbanist

 
Comments Off on Tesla Thunderstorms: Miniature Bolts of Man-Made Lightning

Posted in Creativity


With Spring Showers Comes Lightning Photos

14 Apr

Storm season is upon us which means it’s the perfect time to try for some shocking shots.

Lightning photos are hard to perfect but super fun to attempt. Here’s a few tips for getting started.

First and most importantly: Stay safe. Distance is your best friend – use a telephoto lens when possible. Keep your gear dry by setting up under a covered patio or deck.

Second: Long exposures mean you need a tripod, or duct tape and a rock, whatever it takes to get that stability!

Third of all: Every storm is different, so your settings will vary slightly each time. Try these to start with and play around from there –

  • ISO 100
  • f/7 aperture
  • 30 second exposure

For a more in depth tutorial, check out Richard Gottardo’s excellent write-up here covering everything from storm searching to stacking images in post.

And you thought puddle jumping was the best part of a storm…
 

Photo by Richard Gottardo


© Erin for Photojojo, 2015. |
Permalink |
No comment |
Add to
del.icio.us

Post tags:


Photojojo

 
Comments Off on With Spring Showers Comes Lightning Photos

Posted in Equipment


How to Photograph Lightning – the Ultimate Guide

07 Oct

If someone told me I could only take pictures of one thing for the rest of my life – I’d think about it for awhile, and then choose lightning. Luckily I live in reality and no one will ever say that to me, but it does speak to how passionate I am about photographing this stuff.

I’m a storm chaser at heart, so I love everything about weather. It would be difficult if I couldn’t also capture awesome dust storms, supercells, flash floods and whatever else might happen out there. But lightning – I love lightning.
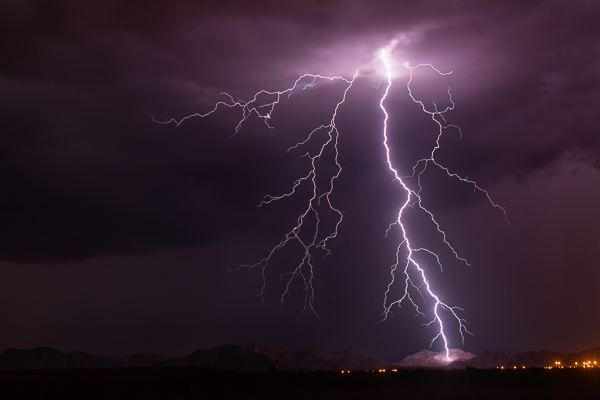
MountainSide

“MountainSide” – Buckeye, Arizona – 50mm, ISO 100, f/8.0, 20 sec

The Adrenaline Rush

What is it about lightning? I’ve lived in Arizona my entire life and I grew up loving our summer monsoon season. One of my early memories as a kid was sitting on our back porch with my dad and being blinded by a strike hitting the field behind our house. I still remember being blinded for a few seconds. It was that close and that intense.

Arizona is a fantastic venue to capture lightning. We get a lot of high-based storms, which means you tend to see more of the strike. Our landscape is beautiful, from deserts and cacti, to rolling grasslands and the Grand Canyon. I once met a guy in Tucson who was spending two whole weeks in Arizona solely to photograph lightning, and he was from Germany!

Trying to capture lightning is an adrenaline rush. It’s addicting. You can look at the back of your camera and know you just caught an epic bolt, but still not be satisfied, or maybe that’s just me. It’s never enough. I want more. More and more.
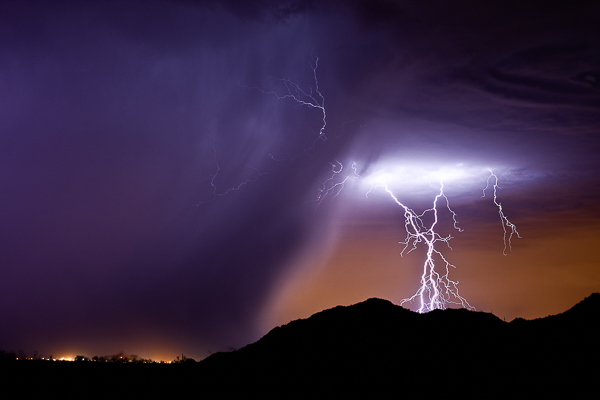
PurpleRain

“Purple Rain” – Highway 347, AZ 50mm, ISO 200, f/6.3, 25 sec

Lightning is freaky. You want to get close, but not too close. The closer the better – sometimes. Suddenly it gets quiet and you realize a storm just built up right over your head and a strike from nowhere makes you double-check your shorts. I am usually out in the middle of nowhere, late at night, and there is something crazy spooky about seeing an entire landscape get lit up in the blink of an eye.

What makes lightning fun to photograph is the uniqueness of it all. No two bolts are the same. You never know what you’ll end up with. Plus, if you are all alone out there, no one else can have the same image as you do.

Finding the Storms

This is in reality the hardest part of photographing lightning. You may worry about your settings and lenses and all that, but if you do this for a while, that all becomes second nature. Finding the storms is the difficult task. You may live in a part of the United States, or even the world, where lightning just doesn’t happen much, if at all. But if it does, then you have to learn the patterns and watch the forecasts to be prepared.

The best way to do that here in the U.S. is to bookmark the webpage of your local National Weather Service, which you can find on NOAA.gov. Their pages have links to radars where you can track the storms. If you want to really get intense, grab a copy of RadarScope (iOS or Android) to have it on your Smartphone anytime you want.

If you don’t have lightning in your area, you may want to invest in a storm chasing tour, or vacation somewhere like Arizona during the summer.
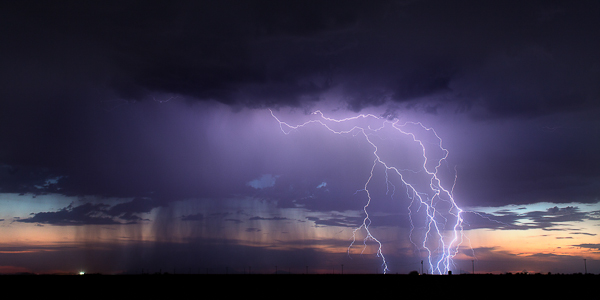
BUckeye

“Buckeye” – Buckeye, AZ – 50mm, ISO 160, f/10, 8 sec

Tools You Need

Okay, these next few sections are what you really care about anyways, so let’s get to it. Tools, meaning things you need to capture lightning.

The fact is, I started out with a little point and shoot that took three shots per second. I actually caught a crazy strike with it on my third or fourth time out, and that’s what really got me hooked. So you can literally capture lighting with basic cameras if you want to depend on luck. There are even apps for your Smartphone.

But if you want to eliminate as much luck as you can AND capture mind-blowing, jaw dropping images – you’ll likely want to upgrade your tools. You don’t have to go crazy though. Here’s the basic list of what you need:

  • A DSLR, SLR or any camera that lets you control the length of your exposure.
  • Lenses of course. Varying focal ranges are a must, although I’m a fan of primes.
  • A tripod – the sturdier the better.
  • A wireless shutter release or intervalometer.

That’s really the essentials. You don’t need the most expensive equipment either. Basic DSLRs are a good starting point. My first upgrade from the point and shoot was a Canon Rebel XSi. It did the job for about a year, but I knew I wanted to go full frame eventually.
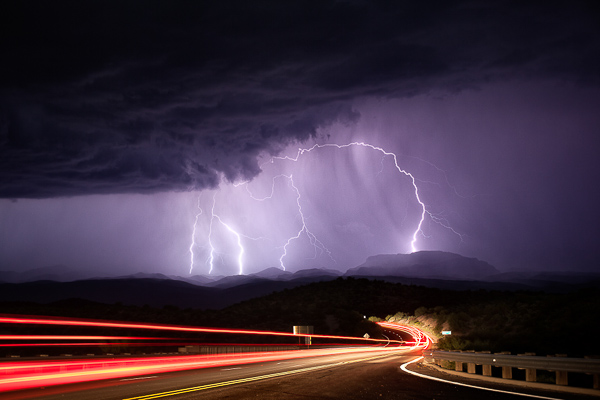
Mammoth

Mammoth, AZ – 50mm, ISO 200, f/6.3, 25 sec

I use Canon products, specifically a couple of 5D Mark III’s and a Mark II as a backup. The lenses I carry on a storm chase:

  • Rokinon 14mm f/2.8 (mostly for time-lapse photograph, but also for big landscape shots)
  • Canon 16-35mm f/2.8
  • Canon 17-40mm f/4.0
  • Canon 35mm f/1.4
  • Canon 50mm f/1.2
  • Canon 135mm f/2.0

Your tripod just needs to sturdy and heavy duty. When you are shooting during a thunderstorm there will usually be wind issues. I’ve had tripods get blown right over by a strong gust of wind. I haven’t spent as much on tripods as I do on camera gear and time-lapse tools, but I use Manfrotto legs and heads. If you can afford it, upgrade to a tripod that has independent legs and a steadier base, that will allow you to shoot with a wider stance.

Finally, you will need some kind of external shutter release. It can be anywhere from your basic wired cable release, all the way up to a wireless intervalometer. I personally like the wireless intervalometers because you can control your camera from inside the car where you are safer than standing outside during a lightning storm. I also love the wireless ones because the cabled ones can get tangled in your tripod legs if you are packing up in a hurry. They are are just easier to use.

A Little About Lightning Triggers

Another external control for lightning photography is a lightning trigger. The brilliance of one of these triggers is that it senses the flash of lightning and automatically fires the shutter on your camera. You can comfortably put it on your camera, day or night, and sit back in your car and let the trigger do all the work.
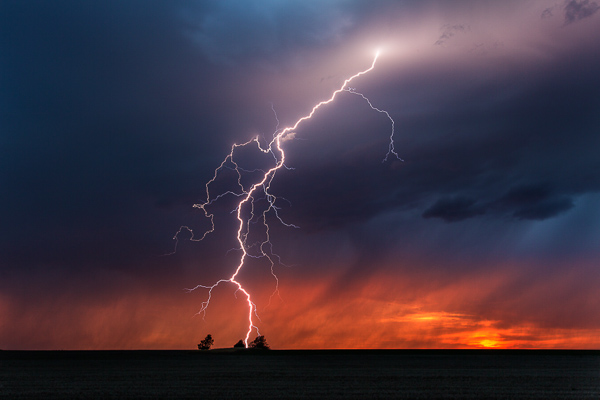
Kansas

Scott City, KS – 33mm, ISO 100, f/16, 2 sec, lightning trigger

The tough part about lightning triggers is finding one that is reliable. I’ve had three different ones and it took until I bought one of the most expensive (The Lightning Trigger IV) for me to feel like I found one that works. I’ve had a few of the $ 100-200 variety and they don’t always trigger from a flash of lightning. That’s kind of the point right? So to me, if you can save up for a good one, it’s worth the price instead of spending $ 100 two or three times trying to find one that works.

My opinion on lightning triggers is that they are good during the day, but become less useful the darker it gets. Most photographers like to use a trigger because it helps for shooting daytime lightning, and it also saves your shutter. During the day, you could either take a ton of photos in a row and hope to get lucky, or you could use a trigger. The triggers works then. Great invention.
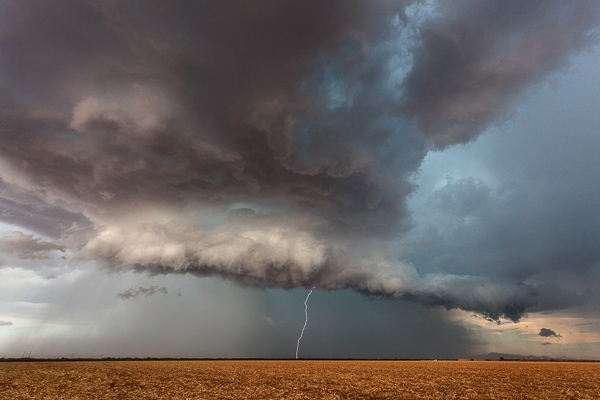
RedRock

Red Rock, AZ – 17mm, ISO 400, f/8.0, 1/160th, lightning trigger

There is also an argument that it can save your shutter at night too. But whenever I’m out shooting lightning, there is enough flashing going on that my trigger is going to keep firing over and over anyways. The anatomy of a lightning bolt is that there are parts of it that could be missed if you wait for a trigger to fire your shutter. I’d much rather increase my odds of a capturing the entire lightning bolt by doing 15-25 one second exposures over and over. Once the sun goes down and I can start getting two or three second exposures, I take off the trigger and use the intervalometer. But that’s just me!
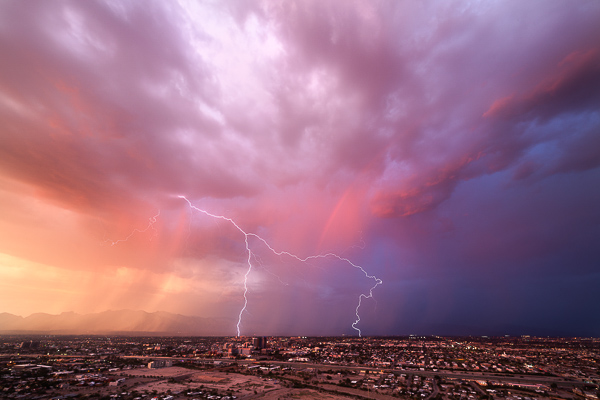
TucsonSunset

Tucson, AZ – 14mm, ISO 50, f/16, 2 sec, time-lapse capture

During the day, since I love to do time-lapse, I’ll actually get lucky enough to capture bolts just from that, without a trigger. Taking shots every one or two seconds allows you to record a sweet time-lapse and also hopefully snag a few lightning strikes. This has happened to me countless times. I’ve even captured a few with an even longer interval on the time-lapse. You might give it a try if you are interested in time-lapse at all.

Camera Settings

People ask me all the time “What are good settings for taking lightning photos?” and the answer is that it varies just like anything else in photography. But there are some good guidelines to get you started.

For daytime lightning, you want to do your best to to have as slow of an exposure as you can, which might mean f/16-f/22 and maybe a neutral density filter. I personally don’t like ND filters for this kind of photography because when I’ve used them in the past, they tend to wash out the lightning a little, but it’s something to at least try. You might slap an ND filter on, increase the ISO to 200, and hope that helps the bolt show up a bit more intensely. Daytime lightning is tough regardless. The best results are usually when it’s really dark with heavy clouds, without much sunlight. The strikes are going to show up a lot better against a dark background.
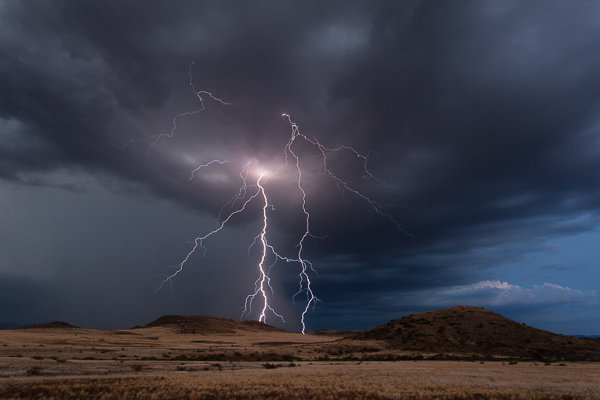
CampVerde

Camp Verde, AZ – 23mm, ISO 100, f/18, 6 sec

Nighttime is a whole different ballgame. There are lots of things that can alter your settings. Are you in the city? Complete and utter darkness? Is there a full moon? Are the bolts coming in fast and furious, or spaced minutes apart? Is the lightning a only a few miles, or 25 or more mile away?

Here are some situations and common settings to use as the sky darkens on a night out chasing storms:

  • Dusk/sunset: f/10-16, 2-10 seconds, ISO 200. You might raise your ISO even more because the sky still has some light in it and you want the lightning to really stand out.
  • Blue hour – as it gets darker, you will open up your aperture and maybe increase your shutter speed.
  • Once it gets dark, your ISO becomes more important. The lightning flash against a dark sky means you don’t need as high of an ISO or you risk blowing out your bolt.
  • After dark in the city – narrower aperture yields better results with city lights, so you might be shooting at f/10-16 even after dark. The shutter speed would depend on how bright the lights are; same with the ISO. Usually in the city I like 10-15 second exposures.
  • After dark, away from light – wider apertures – typically f/5.6-f/8. You’ll want to drop your ISO to 100 to make sure you don’t have blown out shots. If it’s really dark, you may want longer exposures, 20-30 seconds.
  • After dark, but lots of ambient light, for example, a full moon – shorter exposures to reduce motion in the clouds if you don’t want that.
  • Close lightning – narrower aperture, low ISO.
  • Far away – varied aperture, maybe higher ISO so the bolts show up better.

The bottom line is none of this is set in stone. You have to get out there and practice to learn the best settings for you and what you like.
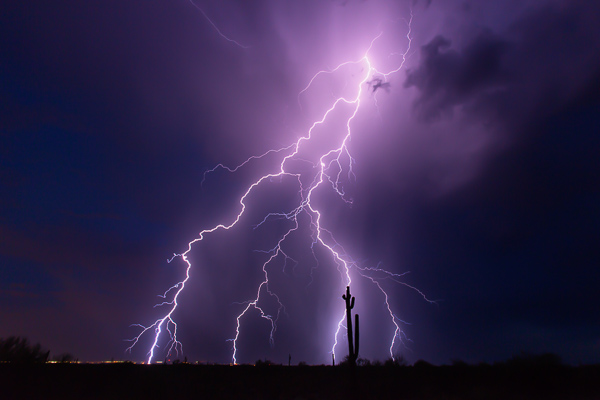
SaguaroBolt

“Saguaro Bolt” – Wickenburg, AZ – 16mm, ISO 200, f/11, 10 sec

The Biggest Things to Watch for:

•Don’t blow out your lightning. Sometimes bolts are so bright that there is nothing you can do about it. But when you realize the strikes are so intense that you are blowing stuff out, narrow your aperture or drop the ISO.
•Don’t let your lightning be too dark. Ah the other side of the coin. If your aperture is too narrow and your ISO too low, that distant lightning may not be so bright and vivid. It will require a lot of post-production, and might result in excess noise if you have to increase your exposure to make it look good. You are also probably not going to get a lot of the surrounding clouds and landscapes unless the bolt is very bright. You want to make sure you still have a good exposure so you get details in the clouds and landscape if you can.
•Cloud ghosting. If you are taking really long exposures for lightning (25 seconds or longer), you will risk seeing ghosting in your clouds as they get illuminated by different strikes over the course of your shot.

Focusing

I could have included focusing in the above section, but I find it so important that I wanted to put extra emphasis on it. The biggest, most common mistake I see in lightning photography is out of focus images (close second is blown-out lightning). This seems to be the toughest thing to learn how to do correctly.

I include myself in that! Even this past summer I was excited about some lightning images only to get home and realize they were out of focus. We all mess this up.
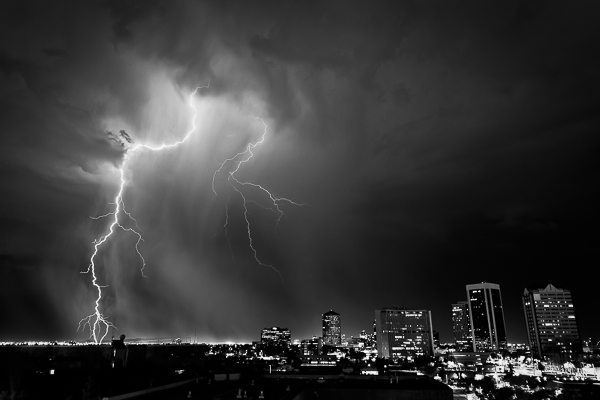
DowntownPhoenix

Phoenix, AZ, ISO 200, 26mm, f/8.0, 15 sec

I think the biggest reason for this is that ofter we rely on the “infinity” setting on our lenses. While some lenses have a hard stop for infinity (I am definitely not well versed in many lenses other than Canon), most of them don’t. Even if it does have a hard stop, is that actually perfect?

The best way to focus at night:

  • Autofocus on distant city lights if you can. I find this to be the most reliable way at night. Sometimes the moon is out which is another good way.
  • If there aren’t enough lights to focus on, then Live View is your next best method. Use Live View, zoom in (on the screen only not with your lens) to anything you can – even if it’s a single light on the horizon, and manually focus on it.
  • If all else fails, use infinity. But once you get a lighting strike on camera, check to see if it’s in focus. If not, adjust.

Remember, the wider your aperture (like f/5.6), the tougher the focusing. For example, you could focus on lights that are only a mile away, but the bolt lands five miles away and it might be slightly soft. A narrower aperture really does help with this issue. Once for me, it was so completely dark, I chose to focus on an incoming truck’s lights about a half mile down the road. Turns out, the lightning 10 miles away was out of focus. I cried – a little.
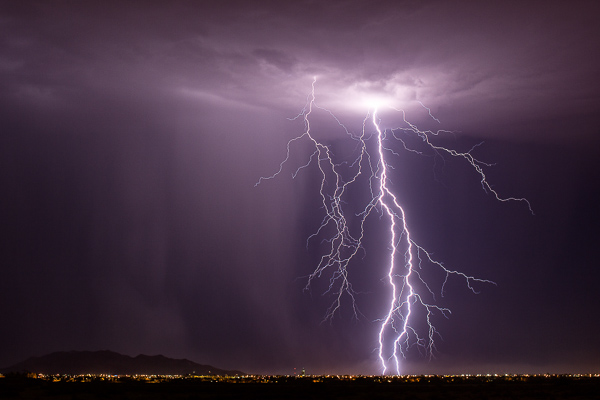
CasaGrande

Casa Grande, AZ – 50mm, ISO 125, f/9.0, 25 sec

Another tip, which I’ve never done myself, is that when you find that perfect infinity spot at say f/8-f/10, put a little scratch on your lens with an X-Acto knife, or a thin line with a paint pen, and just line it up whenever you need it.

Last but definitely not least – if you don’t have back button focus set up on your camera, then you will need to set your lens to manual focus. You don’t want to go through all the work of focusing on distant lights with Live View, only to take your first shot and have your camera try and focus in the dark! Your absolute best solution here to is look up back button focus on dPS. From landscape to wedding and portrait photographers, this is a must.

Practice, Stay Safe and Have Fun!

All my advice is based on my experience. You may find different opinions or thoughts elsewhere, or you might even have your own methods. That’s okay. Figuring out what works best for you is how photography works in general.

The best advice I can give you though, is to practice. You may not have much lightning where you are, so perhaps plan a trip somewhere (like Arizona) where you can spend a few weeks just shooting lightning every chance you get.
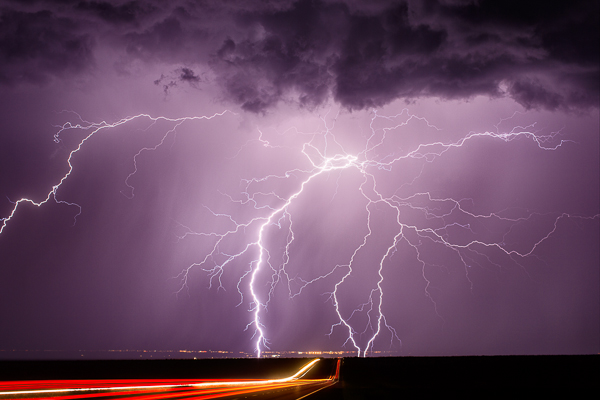
Whetstone - (Highway 90 near Whetstone, AZ 50mm, ISO 100, f/5.6, 25 sec)

Whetstone – (Highway 90 near Whetstone, AZ 50mm, ISO 100, f/5.6, 25 sec)

Like anything in life, practice makes you better. You can read this article and totally have a good idea of what to do, but actually being out there, in the moment, is a different story. I’ve done this enough that I can pull up to a spot and pretty much know my settings before I pull the camera out of the bag. But there are still times when I’m not quite sure and need to take a few practice shots. Not all situations are the same, so you will slowly learn the right settings for each scene.

Please stay safe! In the last three months, I’ve had lightning strikes hit within 75 feet of me. Yikes. It’s scary for sure. Do this knowing the closer you get, the more risk you run of getting hit. Two storm chasers have been struck by lightning this year. It’s a real danger.

But have fun. There is nothing like capturing an amazing strike on camera. I wish you the best of luck.

The post How to Photograph Lightning – the Ultimate Guide by Mike Olbinski appeared first on Digital Photography School.


Digital Photography School

 
Comments Off on How to Photograph Lightning – the Ultimate Guide

Posted in Photography


Lightning Fixture: Domesticated Cloud to Hang in Your Home

16 Jul

[ By WebUrbanist in Design & Fixtures & Interiors. ]

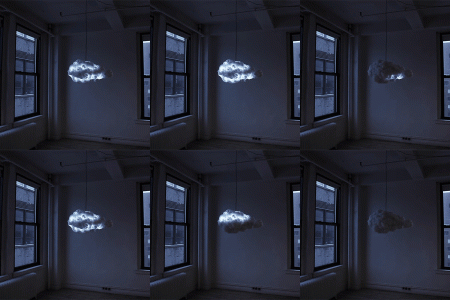
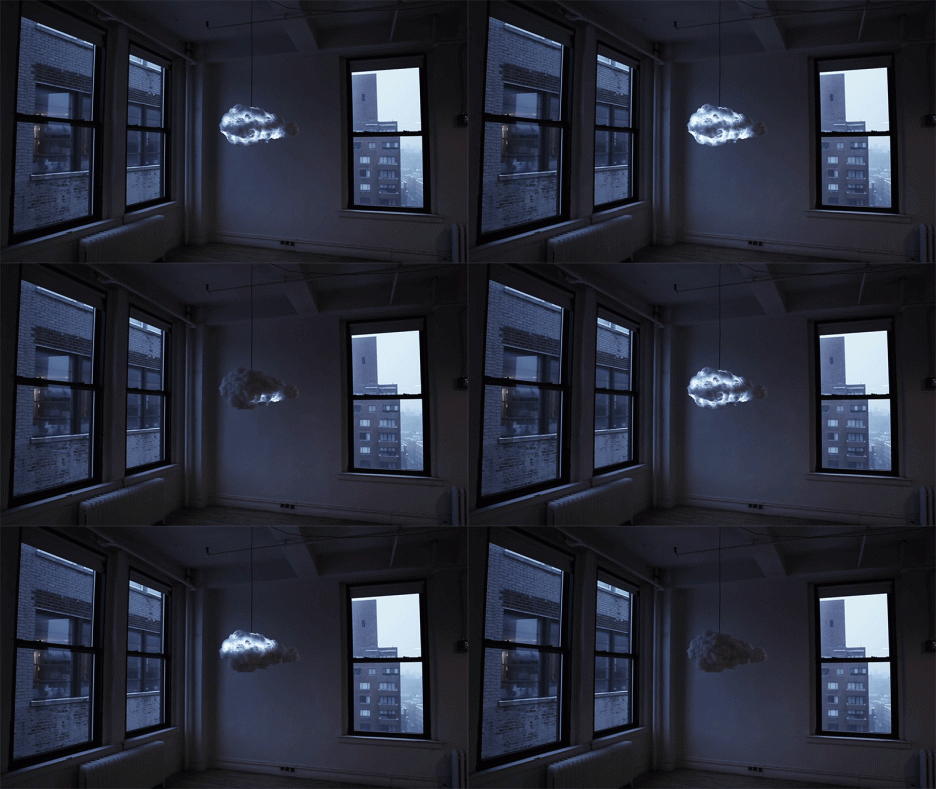
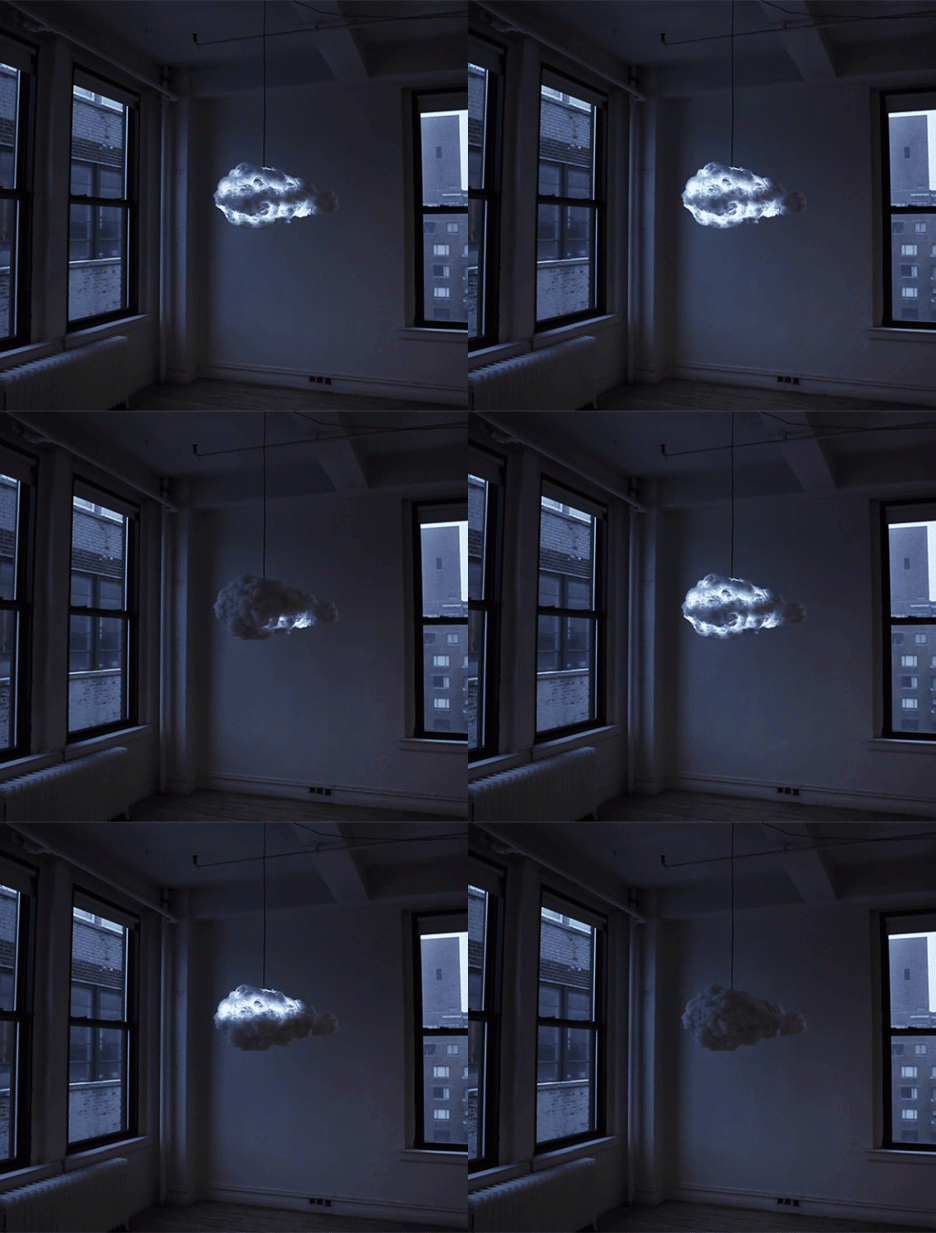
hanging cloude animated

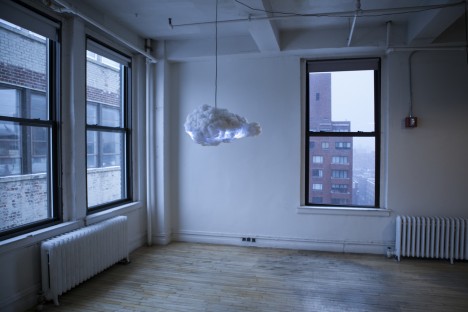
A simple but provocative piece of dynamic home decor, this thundering cloud can be set to react to its environment, picking up cues from the weather or turning stormy on demand.

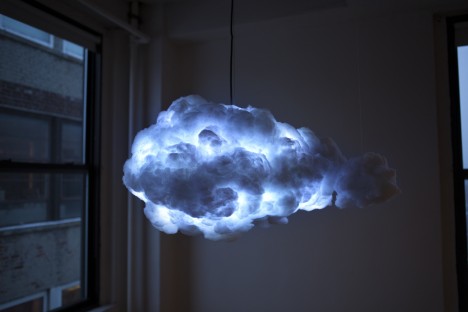
Designed and sold by Richard Clarkson, The Cloud is interactive light(n)ing piece made not just to look a thundercloud but also to create multicolored lights and generate customizable sounds. It can be set to automatic modes or manually operated by remote control to simulate different natural and synthetic effects.

home lightning cloud closeup

hanging thundercloud home lighting

From its creator:  “The Cloud is an interactive lamp and speaker system, designed to mimic a thundercloud in both appearance and entertainment. Using motion sensors the cloud detects a user’s presence and creates a unique lightning and thunder show dictated by their movement.”

thunder-cloud-detail

smart cloud design

“The system features a powerful speaker system from which the user can stream music via any Bluetooth compatible device. Using color-changing lights the cloud is able to adapt to the desired lighting color and brightness. The cloud also has alternative modes such as a nightlight and music reactive mode.”

Share on Facebook


[ By WebUrbanist in Design & Fixtures & Interiors. ]

[ WebUrbanist | Archives | Galleries | Privacy | TOS ]


WebUrbanist

 
Comments Off on Lightning Fixture: Domesticated Cloud to Hang in Your Home

Posted in Creativity