RSS
 

Posts Tagged ‘Lifestyle’

Lockdown forces stars to photograph themselves for lifestyle magazine covers and interviews

13 May

Model Naomi Campbell became a cover star, make-up artist and photographer for the latest issue of Essence magazine as lockdown measures prevented the team from traveling that was booked to work on the special issue cover. Just days before the shoot was due to take place, as part of the magazine’s 50th anniversary issue celebrations, the USA went into lockdown so the magazine asked Naomi if she would shoot the pictures herself.

Also celebrating a 50th anniversary, Campbell rose to the challenge and, with direction from the magazine’s creative team, set up and shot the pictures with her iPhone. Planning discussions went on from the team’s homes via video chat, and the actual shoot was styled and directed remotely on the day—and the pictures have turned out pretty well.

‘Naomi shot herself with an iPhone,’ says MoAna Luu, the Chief Content & Creative Officer of the magazine. ‘We couldn’t send a team so, she had to do her hair, her makeup and her styling herself. We were on late night calls trying to figure out how she was going to do the shoot with her phone in her hand. Then, we had to do a re-shoot because the photos didn’t come out how we imagined. So, there were technical challenges, there were human challenges; but Naomi did it all without asking any questions, she never quit. What’s amazed me the most about working with Naomi to do this cover shoot during the pandemic is the way that she embraces the fact that she truly controls her own narrative. She’s never waited for people to do for her; she’s created her own opportunities. She’s been a pioneer in so many ways and now she’s a pioneer in ESSENCE history because she’s completely and literally controlling her own narrative in this issue from the cover to the in-book story.’

Campbell isn’t the only one doing her own shoots during the global pandemic, as Batman actor Robert Pattinson had to take the pictures for an interview with him for GQ magazine. Pattinson had the good fortune to have a Nikon DSLR to shoot himself with rather than his phone, but perhaps a little less direction from the magazine. The pictures are pretty cool, and one shot in a mirror is used on the cover of this month’s magazine while another is being used as the header on the magazine’s social media channels.

Articles: Digital Photography Review (dpreview.com)

 
Comments Off on Lockdown forces stars to photograph themselves for lifestyle magazine covers and interviews

Posted in Uncategorized


Tips & Tricks: A Survey of Iconic Family Lifestyle Photography

06 Oct

Family lifestyle photography is a unique and incredibly exciting subsection of the photographic field. This is a method that is widely practiced, though to be done right, one needs to properly understand its history, its limitations, its necessities, and how it can be executed to get the most incredible and poignant photos possible. First, defining lifestyle photography is imperative: here, Continue Reading

The post Tips & Tricks: A Survey of Iconic Family Lifestyle Photography appeared first on Photodoto.


Photodoto

 
Comments Off on Tips & Tricks: A Survey of Iconic Family Lifestyle Photography

Posted in Photography


How to Mix Lifestyle and Posed Photography Styles to Add Variety

28 May

The post How to Mix Lifestyle and Posed Photography Styles to Add Variety appeared first on Digital Photography School. It was authored by Jackie Lamas.

As photographers, we take time to hone in our craft and practice many hours getting it right. When it comes to photographing people, there are two main approaches in directing clients to get the photos you want. I’ll explain the difference between both, and how to apply the two during the same session to get the most variety in the final gallery that your clients will absolutely love!

Mixing posed and lifestyle can add variety to your photos.

What is lifestyle photography?

Lifestyle photography is when you capture your clients a little more naturally than you would if you were posing them. It’s all about letting the session unfold naturally all while you photograph your couple, family, or individual being themselves.

Lifestyle can mean going for a walk through a botanical garden with your clients.

It’s also about showcasing the person in their daily life or routines too. For example, joining a family as they casually hang out at their home and bake together. Or joining a couple for coffee and a stroll through the park.

Going for coffee while you photograph your clients can also be considered lifestyle.

Lifestyle photography can be both natural or styled. Styled simply means curating the look so that even though the person is hanging out drinking coffee on their sofa, they are dressed and using items that make the photos have a cohesiveness.

Using a styled home can also offer a great location for lifestyle photos of a couple hanging out in the living room.

Much of what you see on Instagram can be considered lifestyle photography.

What is posed photography?

Posed photography is when you are directing your clients to sit, stand, and well, pose exactly how you would like them to. This gives you a more controlled and directive role in addition to being the photographer.

Directing people to pose a certain way is posed photography.

Posed photography can be really beautiful and usually lies in the editorial, fashion, or fine art styles of photography. However, posed photography can be used in every session where you want to control the final pose in your photo.

How to mix both styles to get variety

In a portrait session, it doesn’t matter if it’s family or just one person, mixing the two styles can really help add variety in the final images that you deliver to your client.

Mixing styles

When you’re starting the session, begin with posed photography because most clients are nervous at the beginning of a session. Getting them comfortable posing, and being more direct in how you want them to stand can help them to feel more comfortable in front of the camera.

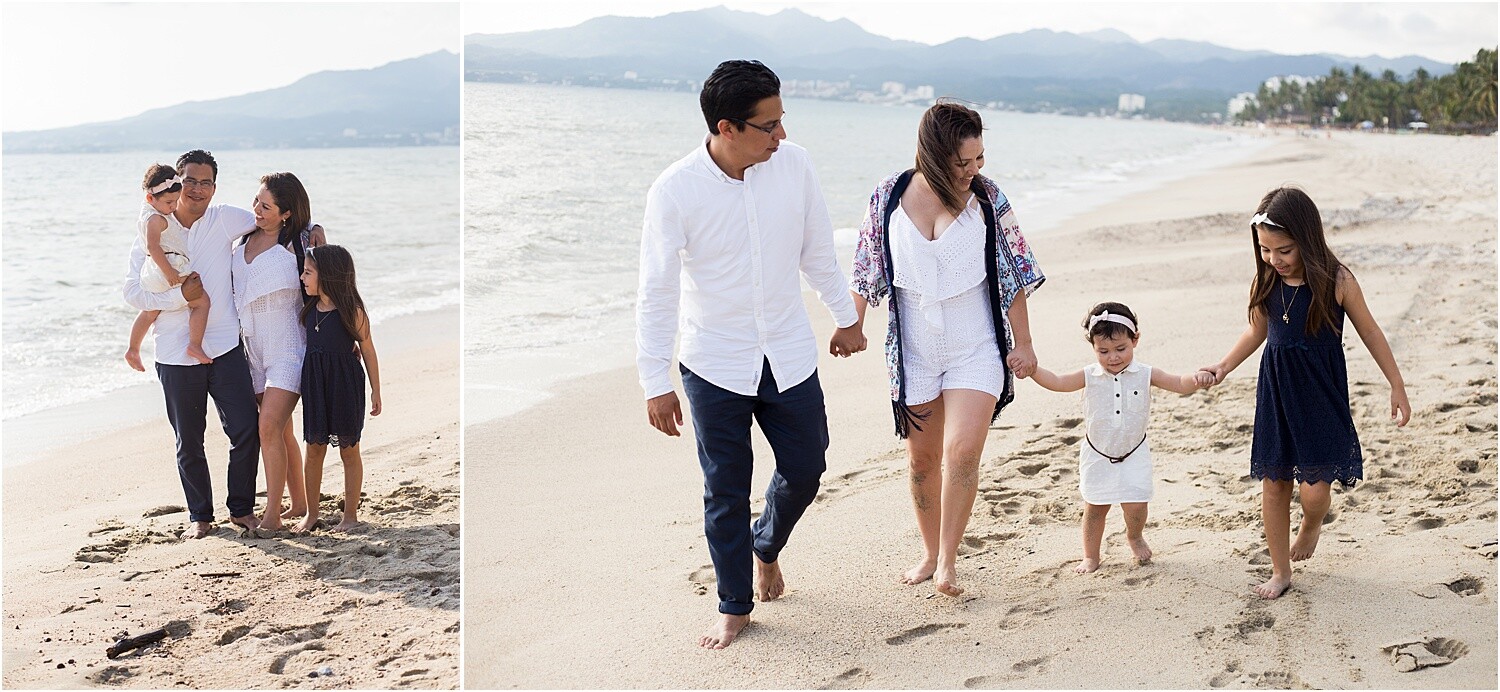
The photo on the left was lifestyle, and the right is posed. Same family, same session, two different styles that add variety to the final images.

While you’re posing, show your client exactly how you want them to pose rather than merely instructing, which can get confusing.

For example, instead of saying “put your left hand on your right elbow,” you would instead go over to where they are standing and show them how you want them to put the left hand on their right elbow.

This is a quicker way to help your client visually see what you want them to do.

After you’ve posed your client enough, and they seem a little more comfortable in front of the camera, go for the lifestyle approach.

Tell your client to relax and walk around the area. If it’s a family, for example, ask them to walk and talk to each other while telling a funny joke. Make sure to keep your camera at the ready during these times. That way you can achieve photojournalistic style photos that make lifestyle so meaningful.

With children, you can capture them playing with their toys and also get posed photos during the same session.

As you go through the session, keep alternating between posed and lifestyle. You can also pose your clients, a couple, for example, so that they’re facing each other, take a few photos and then ask the couple to say one nice thing about the other.

This is a great way to transition from posed to lifestyle. You will get authentic expressions from the couple because you are putting them in a particular pose then giving them something to do that will seem natural. It’s a perfect mix of the two styles at the same time.

If you’re more comfortable with lifestyle and candid photography styles, don’t be afraid to stop your clients in mid-walk, hug, or whatever they are doing naturally to hold the pose. This is a transition from lifestyle to posed.

Mixing the two styles offers your clients more variety as well as an overall great experience. They will feel more comfortable being in front of the camera because they were allowed to be themselves while you also stopped to make sure to get posed photos as well.

Using both styles will give the session a more fluid flow and also allows your clients to have a good time during the session. This is especially important when photographing children. Letting them play and have a good time while mixing in posed photos will give them a fun experience.

In conclusion

lifestyle-and-posed-photography

Mixing the two styles, lifestyle and posed photography, will add variety to your client’s photos and will also ensure that they have a great experience without feeling stiff or uncomfortable in front of the camera.


The post How to Mix Lifestyle and Posed Photography Styles to Add Variety appeared first on Digital Photography School. It was authored by Jackie Lamas.


Digital Photography School

 
Comments Off on How to Mix Lifestyle and Posed Photography Styles to Add Variety

Posted in Photography


5 Tips for Doing Lifestyle Photo Sessions with Families

17 Jul

Even though I focus on weddings, I still do family sessions. Most of these are clients from when I started as a family photographer and I have built a relationship with over the years as well friends that they send my way. I find it a great privilege to see their children grow up and capture moments with them year after year.

family's legs - 5 Tips for Doing Lifestyle Photo Sessions

But let’s face it, this doesn’t happen every month or every six months even. I am not there often enough to capture milestones or fleeting moments. Most of these are annual sessions where the family wants to document a point in their lives once a year. For this reason, I love and encourage lifestyle photo sessions so it feels like a series of snapshots of their daily lives are captured in a relaxed vibe.

What is a lifestyle photo session?

When I first mentioned this to my husband, he said he didn’t have a clue about what that even meant. A lifestyle photo session is one that is relaxed and focused on capturing moments and expressions, day-to-day activities and normal life scenarios, and nothing is too posed. Relaxed, candid shots, fun shots. Think less looking (at the camera) and more doing (action).

5 Tips for Doing Lifestyle Photo Sessions - parents and kids

However, it is done with a lot of planning and intentionality for it to look as such. In this article, I will share with you five tips in my process of photographing family lifestyle photo sessions.

I am very much a planner and I like lists. I generally visualize things in my head first, go through it stage by stage, put this plan and an equipment list on paper and then I feel I’m nearly done. Then it’s just the shoot to get through but half the battle is already won.

#1 Plan in advance

toys and dinosaurs - 5 Tips for Doing Lifestyle Photo Sessions

Communicate your plan with the parents and instruct them on specific preparations in advance of the shoot. Agree on the most suitable time for them especially if the kids are really young. Advise them of outfits. Give them an indication of timings. For example, “We’ll spend an hour in your home and afterward go to a park or a nearby outdoor area for some fun action shots for half an hour”.

Ask them to prepare props that might be needed, snacks, and an activity. For example, if you are coming around at breakfast time, for them to get breakfast organized. This could also work for lunchtime (pizza-making, baking), bath times, play time (kite-flying in the park), etc.

#2 Have a formula

kids hands and snacks in a bowl - 5 Tips for Doing Lifestyle Photo Sessions

When you arrive, you should already have an idea of what to expect. Set up your equipment, line up your lenses where they are safe and have a mental (or physical) list of the following:

  • Wide location shots
  • Close-up detail shots of special things in the house
  • Candid images
  • Action shots
  • Creative/artistic photos
  • Portraits

kids toes - 5 Tips for Doing Lifestyle Photo Sessions

#3 Get to know the family

Spend the first few minutes getting to know the entire family just as they are, not just the children. Join in whatever they’re doing upon your arrival and don’t change the setup straight away.

The children will feel comfortable and safe if they see you interacting with their parents and that they trust you. The kids will warm up to you faster that way than if you would just go straight up to them.

photos of kids - 5 Tips for Doing Lifestyle Photo Sessions

family reading in their home - 5 Tips for Doing Lifestyle Photo Sessions

If you feel the kids need a break from you so that it stays all laid back and relaxed, ask to shoot the details in the house first.

You may need to move things around to style items or the parents may already have prepared these beforehand. Or if there are views outside the house, then take wide photos of them as well as a view into the house. These are part of their day-to-day story.

house details - 5 Tips for Doing Lifestyle Photo Sessions

#4 Focus on natural moments

This is easier said than done because when there is a stranger in the house, it’s very difficult to be completely natural like nobody else is there.

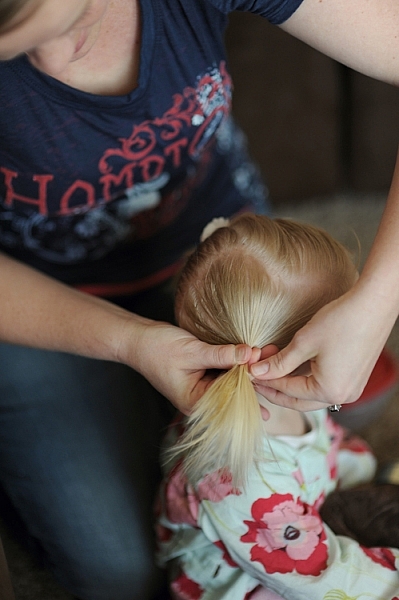
My best tip is to do this using an activity. When the family is focused on what they are doing, try to be invisible and hide behind posts, kitchen cabinets, doors, etc., and capture the moment like you are not there.

b/w candid of a child pointing - 5 Tips for Doing Lifestyle Photo Sessions

kids fingers on a ledge - 5 Tips for Doing Lifestyle Photo Sessions

You need to instruct the parents to initiate the activity, for example, reading books to the kids, playing with their favorite toys, watching their favorite program, etc. If you don’t get the shot you want the first time, you can always ask the parents to repeat the activity and have another go. Tell them not to look at the camera at all unless you ask them to!

This is also a great time to be intentionally creative with your compositions. You can put silhouettes, negative space and layering to great use and enhance your images.

kids and parents - 5 Tips for Doing Lifestyle Photo Sessions

playing peek a boo - 5 Tips for Doing Lifestyle Photo Sessions

hide and seek - 5 Tips for Doing Lifestyle Photo Sessions

#5 Don’t forget to capture portraits looking at the camera as well

This is really important not to overlook because grandparents always like shots of the kids looking at the camera! Try not to spend much time doing this, though.

Often I have to stage this, but try to do it really quickly. You can vary your angles too like asking the little kids to look up at you as shown below.

face portraits - 5 Tips for Doing Lifestyle Photo Sessions

more face photos of kids - 5 Tips for Doing Lifestyle Photo Sessions

Lastly, always remember to take a photo of just the parents without the kids! They always consider it a treat and will treasure their portrait together.

parents and kids photos - 5 Tips for Doing Lifestyle Photo Sessions

Conclusion

Within that five-step plan, I can usually capture a great variety of shots from one or two planned activities. Although they are planned, they look natural and have a fleeting-moment-feel to them. This laid-back process works really well with really young children.

The older the kids get, the more amenable to instructions they become. Older kids may also have their own ideas of how they want you to capture them, and which props or toys they want to be incorporated into their images. So be open to their ideas too.

kids props - 5 Tips for Doing Lifestyle Photo Sessions

I hope you find these tips helpful. Do you have tips to add? Do share them in the comments area below.

The post 5 Tips for Doing Lifestyle Photo Sessions with Families appeared first on Digital Photography School.


Digital Photography School

 
Comments Off on 5 Tips for Doing Lifestyle Photo Sessions with Families

Posted in Photography


DIY Camera Bag Modifications for DSLR Storage and an Active Lifestyle

03 Jun

In today’s world, digital camera technology continues to improve and get lighter. A plethora of systems offer lighter camera bodies with more technology bundled into them. There are many photographers transitioning to these systems to lighten their gear and are selling off their old equipment. However, I cannot help but be attached to the reliability and familiarity of my full frame DSLR bodies.

I do not like to compromise on image quality and feel most confident making quality images in spur-of-the-moment wildlife activity or in difficult lighting with my full-frame camera. Are you the same as me? If so, does that make us a little crazy?

Pelican case - DIY Camera Bag Modifications for DSLR Storage and an Active Lifestyle

The Pelican case gives me space for a couple of bodies, a 200-500 mm telephoto lens, and two shorter ones. Lots of space to pack a full kit!

Well, in truth, it is a bit crazier than that, I am most comfortable when I have two camera bodies with me at all times. I also carry a telephoto lens, 50mm, and wide-angle lens with me along with cleaning equipment and filters, and I like to do so at all times. In other words, I carry a full kit. I do my best to carry a full kit when hiking 10 miles into the backcountry, floating a 5-mile river trip, or walking to a local beach to watch a sunset.

If you are like me you are constantly looking for ways to safely haul your gear from Point A to Point B while also protecting your investment during your adventures. Through experimenting and modifying a Pelican 1510 case I have found a solution that works for me. In this article, I will demonstrate that system for you. I hope my DIY camera bag for DSLR storage and transportation works for you and inspires you to get more creative in hauling your gear!

DIY Camera Bag Modifications for DSLR Storage and an Active Lifestyle

I customized this Pelican 1510 case to provide waterproof and shockproof protection for my DSLR bodies and kit. Thanks to the modifications I have made, I now transport this kit everywhere.

What you’ll need

  1. A hard case – I use a Pelican 1510. The case is TSA approved as a carry-on size, meaning you’ll never have to check your camera gear to baggage claim. I pack non-critical, lower-cost items in the modular pack (see below in #4) and check those in my bag. Then I carry on the rest of my kit.
  2. A drill, 3/32 drill bit, and 3/8 drill bit – You’ll need a high-speed drill and a sharp bit to do some customization of the Pelican case. Make sure the 3/32 bit is wide enough diameter to put the eyebolt through.
  3. Eyebolts (2x) with nylon locking nuts (2x) – These will be used to secure the luggage straps to the Pelican case in the front.
  4. A secondary “modular” case for the outside – You can choose any case that is the same size or smaller than the Pelican case. Think about the gear you are using and tailor it to fit your needs. I make sure my modular case can hold my filter set, cleaning equipment, batteries, and other photography knick-knacks.
  5. Velcro – This will be used to secure the secondary modular case to the outside of the Pelican case. Get Velcro strapping that has sticky sides.
  6. Adjustable luggage straps (2x) – make sure the straps have good clips. I prefer a 1” wide webbing for the strap.
  7. Carabiner clips (2x) – These will be used to secure the luggage straps to the Pelican case in the back.
  8. Backpack straps – I use the Pelican 1510 backpack conversion straps offered by RUCPAC. I have been using their system for about two years now and find it durable and comfortable. If you are a true DIY-er you could modify the straps of an old backpack.

Modifying the Pelican 1510 Case

Pelican 1510, DSLR Storage, Camera, Modification

Step #1 – Drill holes near the latches

Close the lid and use the 3/32 bit to drill through the plastic to the inside of each latch. You’ll need to go through both layers so the extra length of eyebolt has a hole to pass into. Once you have drilled the hole, open the case and use the 3/8 bit to bore into the plastic so that the nylon nut recesses into the case and allows it to close. Repeat on both sides of the case.

drill holes - DIY Camera Bag Modifications for DSLR Storage and an Active Lifestyle

You can see here that I bored through both sides of the Pelican case with the 3/32 bit to allow the eyebolt to pass through. I bored with the 3/8 bit into the top layer to allow the nut to recess so that the top can close

Step #2 – Drill holes through the fins (back hinge)

Use the 3/32 bit to drill through the “fin” on the backside and pass a carabiner through the hole. The fins are the rigid plastic ribs that stick out to hinge the lid and bottom of the Pelican case together.

Repeat on the other side.

DIY Camera Bag Modifications for DSLR Storage and an Active Lifestyle

I drilled through the “fin” of the back with the 3/32 bit and threaded the carabiner through. I did the same thing to the other side of the pack.

Pelican 1510, DSLR Storage, Camera, Modification

Step #3 – Apply the Velcro

Apply the Velcro to the back of the modular case and then line it up accordingly on the front of the Pelican case.

Tip: Stick the hook side and the fuzzy side of the Velcro together on your modular case, peel the paper off to expose the sticky surface and then press the modular case onto the Pelican case to get a perfect alignment of your Velcro.

Pelican 1510, DSLR Storage, Camera, Modification

DIY Camera Bag Modifications for DSLR Storage and an Active Lifestyle

Attach Velcro to the top of the Pelican case and make sure that it aligns with the modular case. It is easies to make sure that the Velcro is aligned by sticking it together, applying it to the Pelican case, and then pressing the secondary modular case onto it.

DIY Camera Bag Modifications for DSLR Storage and an Active Lifestyle

Attach the Velcro.

Pelican 1510, DSLR Storage, Camera, Modification

With the Velcro attached to the Pelican case and the modular case, you’ll be able to open and access the case without it falling off the larger Pelican case. That’s a huge perk!

Step #4 – Thread the luggage straps onto the system

Thread the luggage straps through the eyebolt and the carabiner. Adjust it to a length that fits around the modular case, and then tie a good knot – I prefer two half-hitches.

DIY Camera Bag Modifications for DSLR Storage and an Active Lifestyle

Make sure the luggage straps are long enough to wrap around the modular case. Tie the ends securely to the carabiner and eyebolts.

Step #5 – Install the backpack straps to the Pelican case

Next, install the RUCPAC straps to the Pelican case. This is very simple – you’ll attach it to the top handle and thread the straps through the bottom wheels. Instructions to install the RUCPAC come with the product.

DIY Camera Bag Modifications for DSLR Storage and an Active Lifestyle

RUCPAC straps attached to the Pelican 1510 case.

There you have it!

This DIY camera bag solution has grown with me and my kit and worked for me the last two years. I find this pack very comfortable to use and wear. I am 6’3” and would be interested to hear if it fits shorter torsos as well.

The luggage straps give you the flexibility to attach a tripod or any other gear on to the outside. You can choose the size of modular case you that use to accommodate the gear you have.

This pack also provides a portable chair for those long days or nights shooting photography and can act as a tripod in a pinch. In fact, having the pack available has saved my shoot on several occasions when I needed stabilization but did not have a tripod.

DIY Camera Bag Modifications for DSLR Storage and an Active Lifestyle

The DIY camera bag case can function as a spur-of-the-moment tripod. I’ve used it for shooting the Northern Lights and time-lapses.

DIY Camera Bag Modifications for DSLR Storage and an Active Lifestyle - northern lights

I took this image of the Aurora Borealis with my camera stabilized on my Pelican case. It saved the night since I did not have a tripod along with me!

Conclusion

What I’ve shown you here could be just a jumping off point for you. Use this concept to expand and create your own DIY storage solution that works for the gear and kit you have, and your needs.

Once you are done get out there and shoot lots of images. As I like to say, “pixels are cheap”, so go make a lot of them!

The post DIY Camera Bag Modifications for DSLR Storage and an Active Lifestyle appeared first on Digital Photography School.


Digital Photography School

 
Comments Off on DIY Camera Bag Modifications for DSLR Storage and an Active Lifestyle

Posted in Photography


How to Introduce Lifestyle Photography to Families

23 Feb

Firstly, what exactly is lifestyle photography? Most people are familiar with a family photo shoot, where they go to a studio and get a nice group shot of the family, all smiling in front of the camera. While this is perfectly nice, it feels rather static. Enter lifestyle photography.

googletag.cmd.push(function() {
mobile_slots.push( googletag.defineSlot( “/1005424/_dPSv5topic-rhs(300×250)”, [300, 250], “pb-ad-124309” ).addService( googletag.pubads() ) ); } );

Here, the photo shoot is mostly done at their home and the idea is to capture candid moments in their lives, without getting them to pose specifically for the camera. This helps in getting natural expressions and renders the photos a lot more memorable. Of course, there will still be a few certain posed shots, but the look will be more natural and easy-going. The problem is that most families have not been exposed to the idea of “Lifestyle Photography”, so it is important to understand a few things before you go ahead.

lifestyle photography

Whether you’re an amateur with a point-and-shoot or a professional photographer, getting families to pose during a photography session can be a real challenge!

Let’s consider a typical situation. You are off for a family photo shoot, well equipped with your camera, a nice set of portrait lenses, a couple of off-camera lights, and a few props (hats, jackets, plastic balls, Frisbees, etc.). The shoot is scheduled at their home. You have informed the family to be ready with the right colored clothes. It’s a regular family with the husband and wife, their parents, two kids, and a dog. You have decided to shoot early in the morning to get the magical golden light, having allocated three hours for the photo shoot, allowing for three clothing changes and three locations.

Once you enter, you realize that the living room and the backyard are in a mess, the color coordination of their clothes is off, and the kids are groggy. There is hardly any safe space to set up your lights with the kids and a dog around. What do you do?

lifestyle photography

Well, there are a few things that can be taken care of initially, so that such a situation can be easily handled. Here is what you can do to make it easier for you and the family you are photographing.

1. PLANNING

It’s very important to sit with all the members of the family and discuss what you intend to do, well before the shooting day. Tell them why you intend to start so early in the morning, or maybe reschedule the shoot for late afternoon. This is also a great way to get to know all the family members and for them to get to know, and be comfortable, with you. This is especially helpful in the case of kids and pets.

2. SCOUTING

This is something that is almost always overlooked, but the importance can never be overemphasized. Go to their place and have a look at all the spaces available. This will help you identify the best locations to shoot, considering the best light available and the best settings. You will also be able to find secure places to set up your equipment and make sure it is out of reach of the kids and pets. Plus, it will also help you plan your equipment in a more efficient way.

lifestyle photography

3. CLOTHES

You need the right colored clothes to create the mood you wish to show in the photos. This needs to be communicated to the client in specific terms. If the client is comfortable, you may even have a look at their wardrobe and select clothes for each member of the family. Allow enough time for at least three changes. You can even think of going for coordinated colors for the family, but don’t select matching ones, as it may not look natural.

4. PROPS

Not a requirement, but you can carry a few non-imposing props like toys or clothing accessories, especially for the kids and any pets.

lifestyle photography

Almost all kids love their pets and making them pose with their pet will get you better expressions most of the time. The car bonnet is a way better location to get natural expressions than a living room sofa!

5. LENSES

Considering it’s a family portrait shoot, you will need fast lenses for a shallow depth of field, and depending on the space available, you will have to make your choice between a 35mm, 50mm, 85mm or at the most a 100mm. Aperture needs to be wider than f/2.8 for a couple reasons – better indoor photos and shallower depth of field.

Note: make sure, however, that you have enough depth of field to cover everyone in the photo especially when doing groups.

6. LIGHT

Natural light works best, especially if the house has large windows and big reflecting walls. But not every situation is ideal, and you might be stuck in a place without decent light. In this case, you can consider using off-camera flash, or bouncing it off the ceiling to get nice diffused light, spread evenly across the room. It’s better not carry a lot of equipment as it can feel imposing for the family members.

lifestyle photography

Backlighting can work wonders! This was shot in the late afternoon, and we had nice golden light behind the subjects.

7. POSING

Not everybody is going to be comfortable posing for the camera. Consider that as a given. You will have to work at making the family comfortable to capture more candid moments. You will get the best candid moments before and after the posed shots.

If you still want to try formal poses, go ahead and give it a shot. But you will get some lovely shots when no one is posing, while they’re having a conversation, sharing a joke, or sipping coffee. So be sure you are ready with your camera every single moment.

lifestyle photography

A children’s play area can be an out-of-the-box location for a family pose, but it sure makes for a nice candid moment, and most importantly, makes the children comfortable.

8. KIDS

The kids, especially younger than five, will almost never be comfortable posing. If there is more than one kid, it will be easier to photograph them while they are playing with each other. If it is just one, you can use toys as props, or make the parents, or better still the grandparents, play with them. Chocolates, ice cream, and candies could be used as props (ask the parents first), and you are sure to get some nice expressions of joy and delight on their faces. You can even have the kids play some games, like a running race or even hide-and-seek, to capture natural expressions.

lifestyle photography

A great way to capture candid photos of children is to let them play. If the location has a garden or a backyard, that’s the place to be.

IMG 0357 IMG 0431

9. POST-PROCESSING

A tricky thing, but I believe that every photo needs cleaning-up and a little bit of enhancement. Photo manipulation is debatable, but removing that distracting cable, a piece of paper or some lens spots is perfectly fine. Use warmer tones in White Balance and go slightly soft on clarity.

Conclusion

So if you want to do something a bit different for your family portrait sessions, consider trying lifestyle photography. Please share your images and comments below.

googletag.cmd.push(function() {
tablet_slots.push( googletag.defineSlot( “/1005424/_dPSv4_tab-all-article-bottom_(300×250)”, [300, 250], “pb-ad-78623” ).addService( googletag.pubads() ) ); } );

googletag.cmd.push(function() {
mobile_slots.push( googletag.defineSlot( “/1005424/_dPSv4_mob-all-article-bottom_(300×250)”, [300, 250], “pb-ad-78158” ).addService( googletag.pubads() ) ); } );

The post How to Introduce Lifestyle Photography to Families by Dhananjay Kulkarni appeared first on Digital Photography School.


Digital Photography School

 
Comments Off on How to Introduce Lifestyle Photography to Families

Posted in Photography


How to do Lifestyle Newborn Photography

07 Dec

Very little is as precious to photograph as a newborn baby. Those tiny toes, the fluttering eyelashes, the way they grasp their parents’ fingers. These are the moments that parents want to record and keep forever. There are two schools of newborn photography – I think it is fair to say that they exist on one spectrum.

Lifestyle Newborn Photography

On one far end of the spectrum is what we’ll call traditional newborn photography. This is an incredibly popular style with so many beautiful applications. It is usually posed photographs on a natural background, oftentimes with props or staging, i.e., baby in a basket photography. It’s gorgeous and gives a client’s baby a chance to be a model for the day.

On the other end of the spectrum is newborn lifestyle photography. This is more like photojournalism in that it is designed to tell a story, to document the baby and his or her interactions with the family, pets, environment, etc. These tend to be shots that are more real and less staged, designed to capture the essence of having a newborn.

Lifestyle Newborn Photography

Since these exist on one spectrum, you can do a combination of elements from each. But in this article I’m going to focus on newborn lifestyle photography and its advantages.

What setup is required for lifestyle newborn photography?

In order to set up a home studio for traditional newborn photography, you will likely need quite a bit of gear. At the bare minimum, you will need a beanbag or posing device, some backgrounds, lighting, and dedicated space. Most traditional newborn photographers also have an array of props, also – wraps, hats, tiaras, etc. This can cost thousands in setup costs alone, in addition to your other obvious expenses, like camera, lenses, gallery delivery system, etc.

With newborn lifestyle photography, the entire setup is much simpler. If you are entirely on the lifestyle end of the spectrum (which would take place entirely in a client’s house or destination), you would really just need your camera and maybe a flash. Natural light is highly recommended, however, as flash startles a baby and can look harsh in a home. A better solution for reflecting natural light where you want it to go would be to use a reflector.
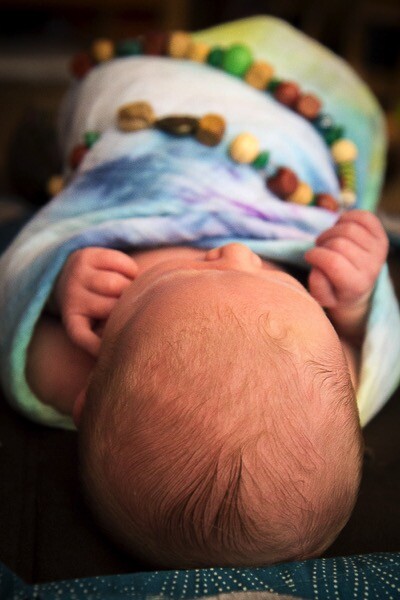
Lifestyle Newborn Photography 9

Before the session

You’ve got a client! So, what’s next? Here are a few things to do prior to the appointment.

Communicate with the client

Call or email and find out what type of shoot they envision, how they want the end product to look. First of all, this will tell you if you have the appropriate gear or props, and if it is practical for you to procure them if you don’t. It will also tell you on what end of the traditional versus lifestyle spectrum they reside so that you can plan the shoot and what you might want to bring. You can research poses and photo ideas based off of this information for inspiration, too – Google Images can be your friend.
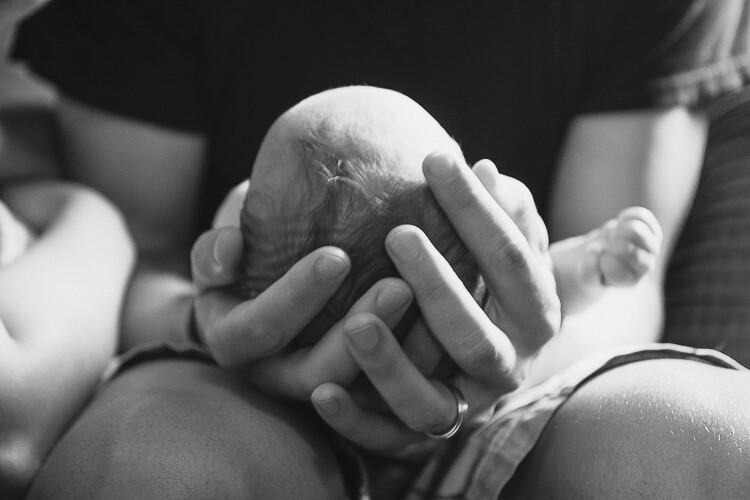
Lifestyle Newborn Photography

Setting the stage

I find it’s helpful to give the clients some recommendations for setting the atmosphere of their home for newborn photos. Babies like it warm (especially if you’re going to have them stripped down to minimal or no clothing), so I recommend either an overall temp of 78 to 82 degrees F (25.5 – 27.5C), or a space heater nearby. White noise is helpful if there are older siblings or other ambient noises around.

If they want lots of sleepy shots, keeping the baby up for two hours or so prior to the shoot will help ensure that you can get some shots of the little one napping. Sleepy shots and traditional newborn photographs tend to work best when the baby is 10 days old or younger, also, just because they’re still in that cuddly newborn stage. However, if they are okay with true lifestyle photos or if the baby is awake, you can fudge that 10-days rule and the amount of awake time some.
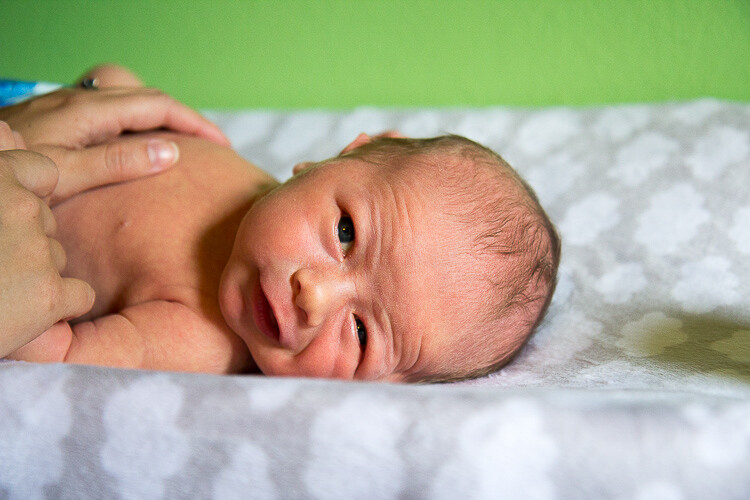
Awake Lifestyle Newborn Photography

Do your best boy scout impression

Be prepared! Some good things to take (or ask if they have ahead of time) are a step-stool or ladder for shots from above, a reflector or (less ideally) a flash, and a spare charged battery for your camera. You may also want to take a change of clothes for yourself, just because babies are prone to all kinds of emissions!

There are also extra optional things you can make that may fall more on the traditional end of the spectrum. A newborn beanbag can be great for getting those up-close posed shots. Here is a great article on how to create your own backdrop stand. You can also take blankets and other backdrops, wraps, props, etc., as much as you can fit in your vehicle.

At the session

Every photographer conducts their photo shoots differently, so you will have your own system and style that works. Here are just a few basic recommendations.

Go where they go

Lifestyle Newborn Photography

Newborn lifestyle photography is all about their life at the time the baby is a newborn (not to belabor the obvious). If the family is home from the hospital, take photos there. Get shots in the crib or bassinet (if they use one), in the master bed cuddled with mom, curled up on the couch, by the front door, etc. Outdoor shots (if seasonally appropriate) can also be fun keepsakes.

However, different babies’ realities might look different. For example, sometimes complications happen and a baby has to be in the NICU for an extended period of time. Those babies still deserve to be captured in their beauty and innocence during the newborn period, so move the shoot there. Capture the reality of what the NICU life is like for the family, as those will be memories that they will have for a lifetime.
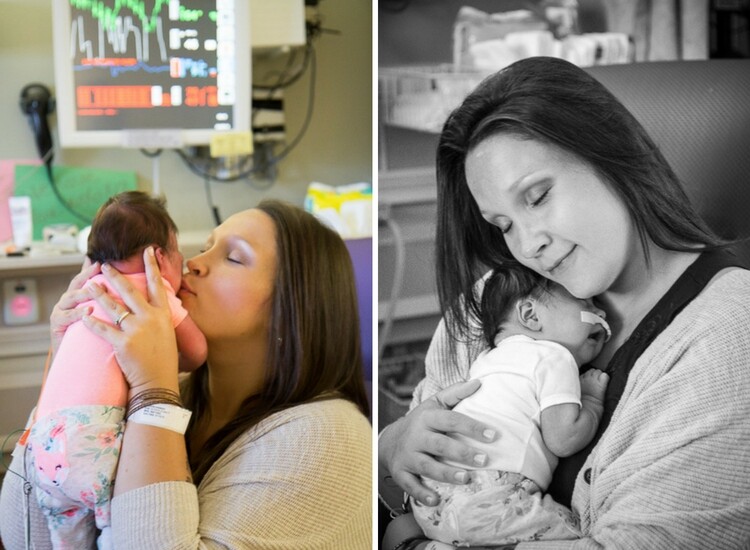
Lifestyle Newborn Photography 4 5

Find the light

With on-location photography, you obviously want to capture picturesque and beautiful places of the home or place you are photographing. However, just as important as the composition of the photo is the lighting. Try to find areas that are particularly well-lit if you are using natural light. Have a parent hold the baby near a large window, especially if it’s indirect lighting. The time of day may greatly affect what works best in a given environment, too. If there is limited natural light and you don’t want to, or can’t use artificial lighting, you may need to shoot at a higher ISO, too. Just keep in mind that this can result in additional graininess in your photo.

Lifestyle Newborn Photography

The tiny details

One of the great thing about newborn lifestyle is that it’s like being a photojournalist, so you catch everything. The curl of a newborn’s eyelashes, the shedding skin on baby’s feet, the umbilical stump. These are things that are precious and fleeting, so you can capture them to remember. You also aren’t confined to just sleeping photos when you do newborn lifestyle photography, so you can get shots of the baby crying, or yawning. Use your imagination.

Capturing the intimacy of the moment through angles

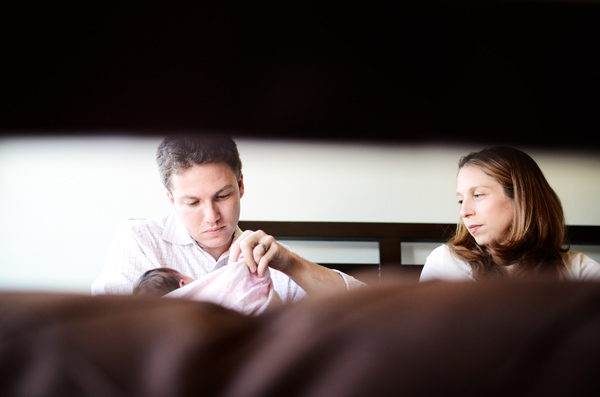
Newborn lifestyle photography is very personal and intimate to the clients’ lives (unlike a studio, which is obviously a separate space). You then, in turn, can capture them having private moments. Cuddling on a bed, holding baby’s hand, feeding the baby – these are all special moments ripe for photo making. You can also use unique angles to preserve that privacy, but to give the appearance of peeking in on the moment. Catch some shots with their reflection in a mirror, through a cracked door, through the bars of a crib, etc. (see below left)
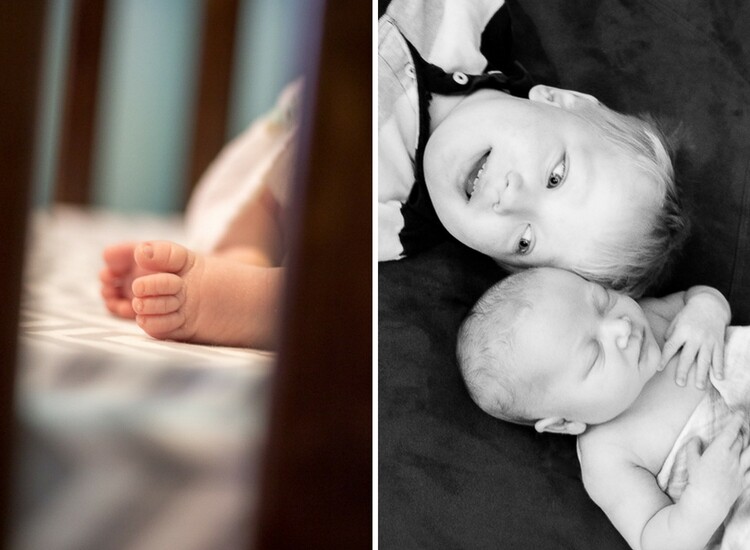
Lifestyle Newborn Photography 10

The human element

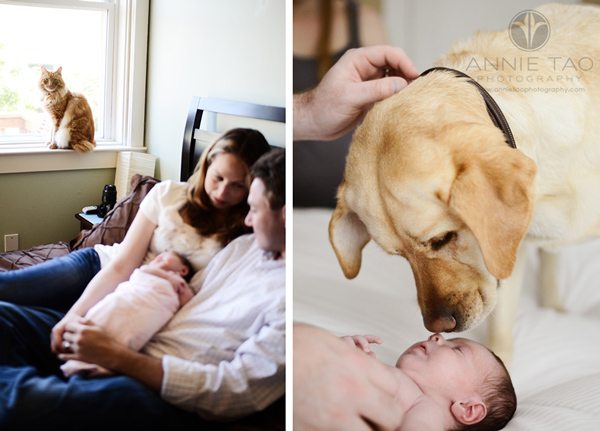
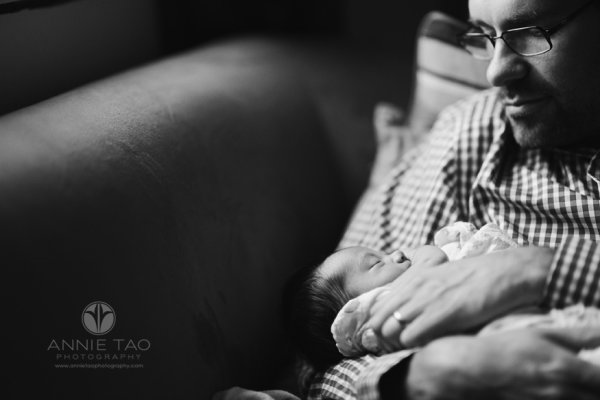
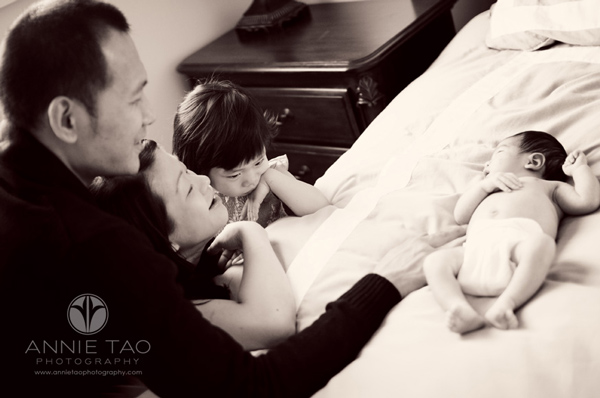
Babies need relationships. They thrive on interpersonal connections, so catch some shots of each parent (if relevant) individually with the baby, and together with the child. Incorporate siblings (if applicable) into group shots, or alone with the baby. Don’t bother posing them. Let them love on their new sibling, and just have your camera ready. Even involve pets if it is safe to do so and desired. (see above right)

Edit Patiently and Carefully

You likely took many photos, so take the time to be choosy about what images to edit. Slightly overexpose shots to get a creamier, softer look. Black and white conversions lend themselves very well to newborn lifestyle photography. I usually offer both a color and black and white version of every photo I present to the clients so that they can choose their own favorites. Make sure to keep your white balance consistent, but one of the wonderful things about a newborn is that you don’t really need to do much to make them look gorgeous.

Conclusion

Do you do lifestyle newborn photography? Please share any addition tips and tricks you have and also your images in the comments section below.

googletag.cmd.push(function() {
tablet_slots.push( googletag.defineSlot( “/1005424/_dPSv4_tab-all-article-bottom_(300×250)”, [300, 250], “pb-ad-78623” ).addService( googletag.pubads() ) ); } );

googletag.cmd.push(function() {
mobile_slots.push( googletag.defineSlot( “/1005424/_dPSv4_mob-all-article-bottom_(300×250)”, [300, 250], “pb-ad-78158” ).addService( googletag.pubads() ) ); } );

The post How to do Lifestyle Newborn Photography by Angie DeWaard appeared first on Digital Photography School.


Digital Photography School

 
Comments Off on How to do Lifestyle Newborn Photography

Posted in Photography


4 Tips to Help You Get Started Doing Lifestyle Photography

27 Apr

135

People are my favorite subject to photograph, and one of my favorite ways to capture them is through lifestyle photography. I love documenting a day in the life of a family, student, or child. I love making beautiful photos out of real life happenings; the everyday stuff that we forget to treasure. Some moments are perfect and gorgeous, and other moments are more ordinary, and sometimes even unattractive; but I love every one of those moments, and I find joy in looking for the beauty in everything.

If you would like to get started with lifestyle portraiture, maybe these tips and photos will inspire you to jump right in. These photos are from a day in the life session with a sweet family. I wanted to document what a normal, ordinary day is like for them, and give them photos that they would treasure forever. We had a lot of fun together, and not only do they love the photos, but I ended up being inspired by them as I spent a little time getting to know who they are.

1 – Set yourself up for success

160

If you decide to do a lifestyle session and just show up without a plan, you may get exactly what you planned for – nothing. I asked the B family to tell me some of the things they enjoy doing together as a group, and we chose some that would photograph well, and represent their life right now.

We took photographs of snack time, with kids helping prepare and eat the peanut butter and apples. We took a few photographs of them jumping on the trampoline, and then we came inside while they played games together. We ended the session with something that they do every single day, and is a huge part of the fabric of their family. They read scriptures together, and prayed as a family. It was important to me to capture the essence of their family, so we planned, ahead of time, the things that would best show who they are.

There are so many scenarios that could be planned and prepared. Families are fun, because there is a lot of interaction. You could have them bake cookies together, or go for a picnic in the park. A family hike might be the perfect thing to photograph if they love the outdoors. It’s so much fun to do sessions on the lake with the family’s boat, or at home with their pets.

168

Although families are fun, they’re definitely not the only group of people who lifestyle photography lends itself to. A group of tweens painting fingernails together, or some kids playing a game of basketball could make great lifestyle sessions. A day in the life of a college student, or a documentary style session with an elementary school teacher could also be amazing. People are involved in so many great things, whether it be their hobbies, work, or recreation. It’s a wonderful experience to capture them in action, doing the things that they love.

As long as you don’t get too attached to it, it can be helpful to create a shot list. This could be a list of all the photos that you are hoping to capture during your session together. If all the things on your list don’t happen, don’t fret about it, but it can give you some ideas to get going.

2 – Be ready for the unexpected

180Now that you’ve planned and prepared, and set yourself up for success, loosen up and go with the flow. If you try to manage every moment, or even direct too much, you lose the realness of a lifestyle session. Things just happen during your time together, and sometimes those things are what make your most memorable photos.

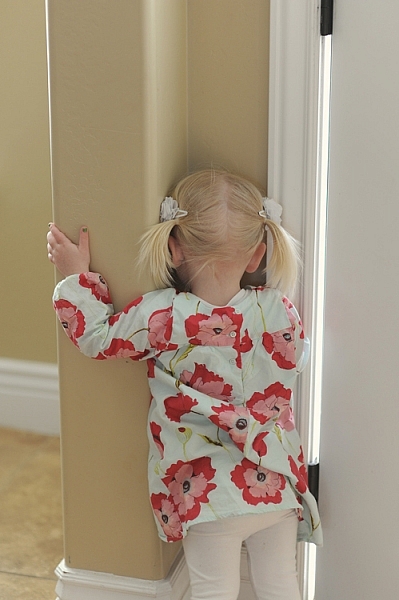
In the photo to the right, the little one got quite upset over something that happened in the game, and she knew right where she had to go, and exactly what she had to do; standing with her nose in the corner was the standard procedure in her family. Although it wasn’t her finest moment, and she probably wasn’t enjoying it very much, I’m pretty sure this photo will be one that she will love when she grows up, and her parents will cherish forever.

These moments are the ones that aren’t on your shot list, because you can’t foresee them happening, but you need to be ready to capture them and include them as part of the story you are telling. You may even have days where you don’t capture one thing that you had planned, and nothing on your shot list is even available to shoot. If that happens, just go with it, and know that you may create something even better than you could have planned. If you have a calm mindset, knowing that you are prepared, but you are ready to roll with the punches, you’ll be just fine.

3 – Capture the story details

181

Some of your photos may not even have your human subjects in them. A lot of your photos might not show any faces or expressions. These detail shots can create interest in the group of photos chosen to represent their story, and tell the story even more deeply than if all the photos were of their faces.

For each scene you are photographing, you might consider taking the “big picture” with lots of the surroundings, and all of the participants visible in the photo. This will provide context, and help your viewer understand the setting, and exactly what is going on. Then you might want to break it down a little further, showing a close up of one or two of the people, or a close up of their hands, or the activity. You could then break it down even further, and take detail shots of what is going on, and the objects that are part of your subject’s story.

100

As you break down these little details, you’ll enrich your story by showing emotions, interactions, and the things that are most important to your subject. Be careful not to get too sidetracked. If you start photographing anything and everything that is in the room, your story becomes muddied, and it won’t be clear what you are trying to portray. Have a clear vision of the story you are telling, and keep that focus as you shoot.

4 – Consider different perspectives

200

Be creative as you figure out how to best tell the story you are trying to portray. Perspective is a great way to add interest to your photos, and show a unique point of view. There are two different types of perspective to consider.

Your perspective

Where are you located when you are taking the photograph? Try shooting from above, or below. Try shooting from behind curtains, or stair railings. Sometimes having something in the foreground makes the viewer feel like they are really seeing into the heart of someone’s life, and seeing something they wouldn’t normally see. Move closer, move back, move around. Be creative.

Their perspective

How does your subject view this activity? What might the little girl be feeling? How could you portray that in a photograph? What does the mother see when she looks at her family? Can you capture her feelings and perspective? When you are creating lifestyle portraits, your vision will definitely be part of the process, but trying to capture your subject’s perspective can add a whole new dimension to your photographs.

196

One of the best things about lifestyle portraiture is that there really are no rules. This opens up so much more room for fun and creativity, and takes a lot of stress off of you as a photographer. Have fun with it, and get you and your camera out there to tell a really great story. I’d love to see your lifestyle photographs in the comments below!

People photography week

This week on dPS we’re featuring articles all about different kinds of people photography including portrait, event and travel photography. See all the previous ones below, and watch for more people photography articles over the next few days.

  • How to Take Low Key Head-shots
  • How to Do a One Light Portrait Setup and Use it as Your Back-up Plan
  • Travel People Photography – Tips and Pitfalls
  • 8 Tips for Photographing Men
  • 24 Diverse Images That Showcase People Photography
  • Weekly Photography Challenge – People Photography
  • Tips for Getting Yourself to Relax as a Photographer and Have More Successful Portrait Sessions
  • 5 Good Reasons to Add People into Your Landscape Photography
  • 6 Must-Have People Shots to Capture When Photographing Corporate Events

googletag.cmd.push(function() {
tablet_slots.push( googletag.defineSlot( “/1005424/_dPSv4_tab-all-article-bottom_(300×250)”, [300, 250], “pb-ad-78623” ).addService( googletag.pubads() ) ); } );

googletag.cmd.push(function() {
mobile_slots.push( googletag.defineSlot( “/1005424/_dPSv4_mob-all-article-bottom_(300×250)”, [300, 250], “pb-ad-78158” ).addService( googletag.pubads() ) ); } );

The post 4 Tips to Help You Get Started Doing Lifestyle Photography by Melinda Smith appeared first on Digital Photography School.


Digital Photography School

 
Comments Off on 4 Tips to Help You Get Started Doing Lifestyle Photography

Posted in Photography


Two NEW Items for your Grab ‘n Go Lifestyle!

24 Aug

Your life is go-go-go. Sometimes it’s go-go-Netflix, but mostly it’s going. You need super portable video and photo gear at your disposal.

Meet the Mighty Mic Wireless and Pythagorean Lens Pouch!

The Mic gives you clear sound without being tied down and the Lens Pouch helps you keep track of all those small knick-knacks you can never find.

Make killer vids and keep track of your phone lenses. On the go!

(…)
Read the rest of Two NEW Items for your
Grab ‘n Go Lifestyle! (0 words)


© Erin for Photojojo, 2015. |
Permalink |
No comment |
Add to
Grab ‘n Go Lifestyle!”>del.icio.us

Post tags:


Photojojo

 
Comments Off on Two NEW Items for your Grab ‘n Go Lifestyle!

Posted in Equipment


6 Tips for Lifestyle Newborn Photography

04 Mar

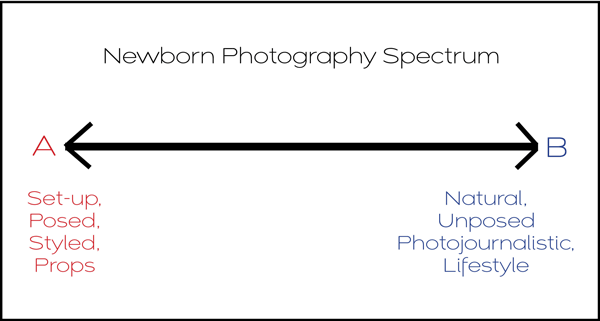
Newborn Photographers fall somewhere on a spectrum between producing posed, styled imagery and natural, lifestyle imagery.

Annie-Tao-Photography-newborn-photography-spectrum2b

While I enjoy looking at styled images of sleeping newborns in costume or appearing as though they are holding their own head up with the use of proficient Photoshop work, the emotions and stories captured in Lifestyle Photography images are what make my heart sing! So I stand comfortably and proudly on “side B” of the spectrum.

After following the rules outlined in The Sensitive Side of Newborn Photography, I follow these six tips for Newborn Photography:

1. Capture every detail

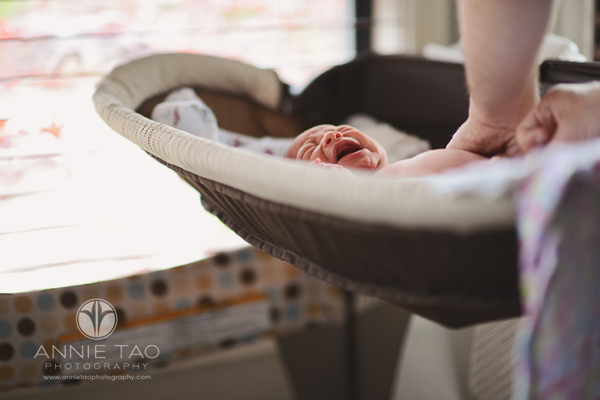
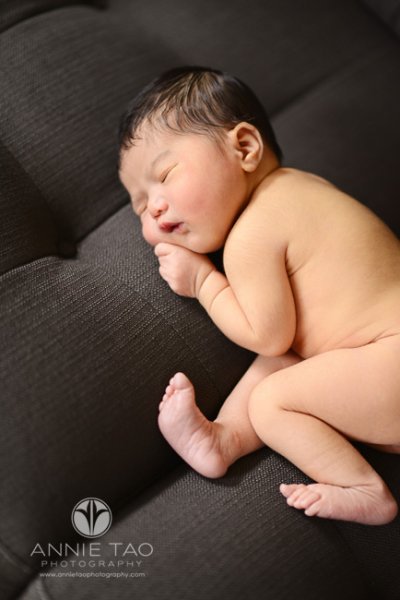
Whether the baby is crying heartily, yawning, or sleeping peacefully, they are all important and precious because the newborn stage is so brief. A yawn of a 4-day new infant, for example, looks different than a yawn of a 4-year old child, so photograph it all!

Annie-Tao-Photography-Lifestyle-Newborn-Photography-article-5b

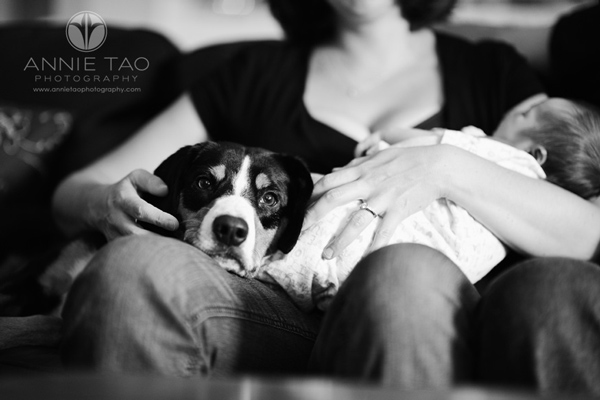
Memorialize the details, including items in the nursery. Talk to the parents and find out what baby items are meaningful to them. Maybe the grandparent knit the blanket or the dog is considered the first-born!

Annie-Tao-Photography-Lifestyle-Newborn-Photography-article-12b

2.  Photograph them at home

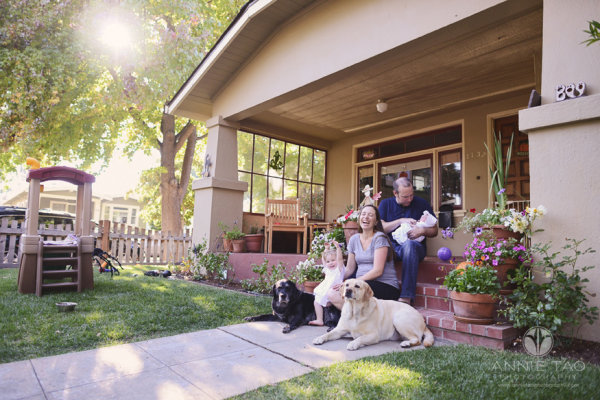
Capturing images of the baby in his or her very first home means every backdrop and furniture will be meaningful in the photos. It also means every session will be unique since every home looks different than the other.

Annie-Tao-Photography-Lifestyle-Newborn-Photography-article-6bg

Annie-Tao-Photography-Lifestyle-Newborn-Photography-article-13

3.  Do the newborn photography session within the first 10 days

Annie-Tao-Photography-Lifestyle-Newborn-Photography-article-8Technically, babies are considered “newborns” the first 3 months of birth. However, in the first 10 days, babies sleep most of the day and can more easily handle noises and movement. Though in Lifestyle Photography, newborns do not need to sleep the entire time, the session will run smoother if the baby is calm.

They also have a better chance of not having skin issues, like newborn acne, which will save you time in post-processing after the session.

4. Be well-equipped

Most of the time, I confidently tell other photographers that their equipment is NOT as important as the person behind the camera when it comes to good imagery. This is still true with photographing newborns, however, you do need to have equipment that performs well in various indoor conditions, such as tight spaces and low light, A wide angle prime lens and a reflector are key. You should also have a macro lens to capture detail shots of the baby.

When I arrive at a client’s home, it usually looks like I’m staying overnight because I have a roller bag and carrying case!

Annie-Tao-Photography-Lifestyle-Newborn-Photography-article-1bg

5. Use natural light

Flash can startle newborns.

Also, when you are photographing new parents with their baby, using flash or other lighting equipment can take away from the spontaneity and natural tone of the shoot.

Annie-Tao-Photography-Lifestyle-Newborn-Photography-article-3b

6. Be flexible

A lot can happen when you’re photographing a newborn, like having unexpected baby visitors looking over your shoulder or being spit on, pooped on, vomited on! (that has all happened to me.) Just remember, you can’t always prepare for what happens at a newborn shoot, so stay calm and take everything in stride.

The first few days of a newborn’s life can be a hazy memory for new parents who are often sleep-deprived and running on adrenalin. Know that you are capturing a magical time for the family, and your photos of their life in that narrow slice of time will be treasured.

Annie-Tao-Photography-Lifestyle-Newborn-Photography-article-10b

Have you photographed any newborns or small babies? Do you have any additional tips or comments to add?

For more information on photographing babies and kids read these:

  • A Guide to Birth Photography
  • Maternity Photography – 7 Tips for Taking Great Shots
  • 7 Tips for Photographing Newborns without Becoming Clichéd, Derivative or Boring
  • Baby Sessions on a Shoe String

The post 6 Tips for Lifestyle Newborn Photography by Annie Tao appeared first on Digital Photography School.


Digital Photography School

 
Comments Off on 6 Tips for Lifestyle Newborn Photography

Posted in Photography