RSS
 

Posts Tagged ‘Less’

The Fujifilm Instax Square SQ10 is less fun than it should be

16 Jul

Fujifilm Instax Square SQ10
$ 280/£249 | www.fujifilm.com | Buy Now

The Instax Square SQ10 represents two firsts for Fujifilm’s Instax line. It’s the first to use the brand’s new square format film, which looks more like a classic Polaroid than the credit card-sized Instax Mini film used by all of the company’s other instant cameras. It’s also the first ‘hybrid’ instant camera offered by Fujifilm, meaning it’s actually a digital camera with the ability to print photos on instant film. You can do this as soon as you snap the shutter for a just-like-instant experience, or manually once you’ve had the chance to review it.

That’s right, this is a digital camera imitating a mobile app that imitates the effects of film cameras. What a time to be alive.

Since it is a digital camera, the SQ10 offers some modern conveniences that its instant-only peers don’t. For one, there’s a real LCD for image composition and menu navigation. There are also a few straightforward image setting adjustments available, like exposure compensation (+/-3 EV).

Key specifications

  • 3.6MP 1/4-in CMOS sensor
  • 3″ 460k-dot LCD
  • microSD card slot / built-in memory for 50 photos
  • Fixed 28.5mm equiv. F2.4 lens
  • Auto ISO only (100-1600)
  • Shooting modes: Standard, double exposure, bulb mode
  • Self timer: 10 or 2sec
  • Built-in NP-50 battery rated to 160 prints
  • Micro USB charging
  • 119mm x 47mm x 127mm / 4.7 x 1.9 x 5″

You can also save photos to internal memory and microSD. The camera automatically stores the last 50 images it printed to internal memory, so you can re-print photos. The SQ10 includes a selection of Instagram-style filters that can be used while shooting or added to images later, as well as a vignette effect. That’s right, this is a digital camera imitating a mobile app that imitates the effects of film cameras. What a time to be alive.

In use

In my first few outings with the camera I was determined to treat it like a true instant camera and left it in Auto print mode. But when not everybody in the photo was looking the right direction, or it turned out that I’d left the flash turned off when it was needed, it felt like I’d really screwed up and wasted a print. Just knowing that it could have been different made the experience less enjoyable than the carefree “Oh well, that’s film!” attitude I can take with my Instax mini 90.

If you dial in exposure compensation or turn the flash off, the SQ10 will continue to honor those settings even if you turn the camera off and back on. But it’s easy to forget they’re enabled as there’s no information displayed on the shooting screen. Before switching to manual printing I lost a few precious prints that way.

I also found that in printed images, shadow tones tend to come out significantly darker than they appear on the screen when viewed straight on. Features that were visible when I previewed images ended up being crushed in shadows when printed. Tilting the camera and viewing the LCD at an angle actually gives a more accurate print preview in some cases than viewing the image straight on.

The good news is that any modern digital camera will take nice photos in the right light

The good news is that any modern digital camera will take nice photos in the right light, and in ample sunshine the SQ10 produces very nice images. I got the best results leaving exposure compensation alone and embracing the punchy contrast. Flash portraits with subjects at a reasonable distance also look pleasant. Images taken in shade or under cloudy conditions have a noticeably cooler tint, and there’s no way to adjust white balance.

$ (document).ready(function() { SampleGalleryV2({“containerId”:”embeddedSampleGallery_7023332162″,”galleryId”:”7023332162″,”isEmbeddedWidget”:true,”standalone”:false,”selectedImageIndex”:0,”startInCommentsView”:false,”isMobile”:false}) });

When you do end up with a nice exposure, print quality is the Square’s strong point. It’s expensive, but I prefer Fujilm’s Instant film’s deep blacks and rich colors over the zero-ink Polaroid-branded competitor any day. And the square format is a selling point for my money – it’s the format associated with instant photography and if it’s good enough for OutKast, it’s good enough for me.

Fujifilm claims you can print photos from other cameras using the SQ10 if you load them onto a microSD card. I followed the instructions in the manual to the letter and never got anything but a read error when trying to view it on the camera. Your mileage may vary. Even if you can get it to work, it’s a pretty clumsy process. There’s no Wi-Fi included for printing from a phone or Fujifilm camera, which is a shame.

The SQ10 is also significantly heavier than the Instax mini 90 – at least it felt significant to my shoulders. The SQ10 weighs about a pound (450g) fully loaded; the 90 is half that Not back-breaking, but noticeable when you carry it around all day. The built-in battery is rated to 160 prints, and indeed it never needed a recharge during the course of this review.

Summing up

The Instax Square SQ10 offers a convincing imitation of instant photography, plus some of the modern comforts of digital. And there are plenty of benefits from this mashup of digital and instant technology. Having the ability to save the printing step for a convenient time is very nice if you’re say, on a hike, and don’t want to carry around a developing photo. Being able to make multiple prints is another bonus, and if you run out of film, great news – you can still take pictures.

But the truth is, if you opt to print manually rather than as you go, you’re basically just carrying around a mediocre digital camera that’s glued to an instant printer. The camera in the SQ10 is just not as good as a modern smartphone camera, plain and simple.

To be sure, smartphone cameras are awfully sophisticated these days, and if you count the phone they’re attached to, cost well more than the SQ10. And the great thing about the year 2017 is that even a bad digital camera will take nice photos in many conditions. If bright-light snapshots and flash portraits are your aim, then the SQ10’s digital camera component will serve you just fine. But if you plan to take photos without flash in lighting that’s less than ideal, you’d be better off using your phone.

The camera in the SQ10 is just not as good as a modern smartphone camera

If instant photography appeals to you but you want more control over the output than an all-film camera, the Instax Square SQ10 is worth a look. But it’s hard to recommend over Fuji’s standalone Instax SP-2 printer used with a smartphone. The camera that’s already in your pocket or purse likely offers a better automatic exposure mode, a polished user interface, infinite film-simulation filters and better control over exposure settings.

Shortcomings like poor image quality in low light are much easier to forgive in an all-film instant camera, but somehow feel more egregious in the SQ10 simply because it seems like the camera should be able to do better. To me at least, it feels less fun than all-instant photography, with not enough of the convenience of digital to make up for it.

What we like:

  • Digital conveniences like saving images and printing later
  • Lovely square format film
  • Good battery life

What we don’t like:

  • Small sensor struggles in low light
  • Prints are expensive at around $ 1.50 each
  • Tendency to crush shadows can make it difficult to judge exposure

Articles: Digital Photography Review (dpreview.com)

 
Comments Off on The Fujifilm Instax Square SQ10 is less fun than it should be

Posted in Uncategorized


It Happened to Me: I Made a Photo Book in Less Than 15 Minutes

22 Mar

Scrolling through your camera roll is cool and all, but leafing through the pages of a photo book is just more magical.

We’d make a photo book for every occasion, but who has the time?

Turns out, if you’ve got 15 minutes, you do!

Photojojo-er and all around great gal, Laurel, just got back from a trip to Thailand, and put together a photo book of her adventures in less than 15 minutes.

And, she’s here to tell you just how she did it.
(…)
Read the rest of It Happened to Me: I Made a Photo Book in Less Than 15 Minutes (339 words)


© laurel for Photojojo, 2017. |
Permalink |
No comment |
Add to
del.icio.us

Post tags:


Photojojo

 
Comments Off on It Happened to Me: I Made a Photo Book in Less Than 15 Minutes

Posted in Equipment


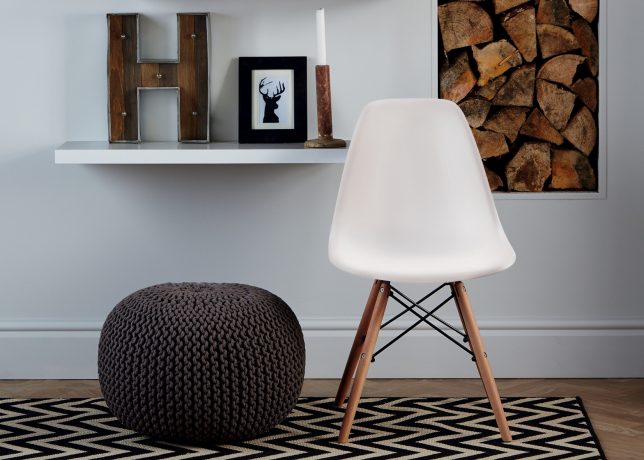
Design Copyright Debate: Cheap Replica Eames Chairs Sold for 90% Less

09 Jun

[ By WebUrbanist in Design & Furniture & Decor. ]

discount famous chair design

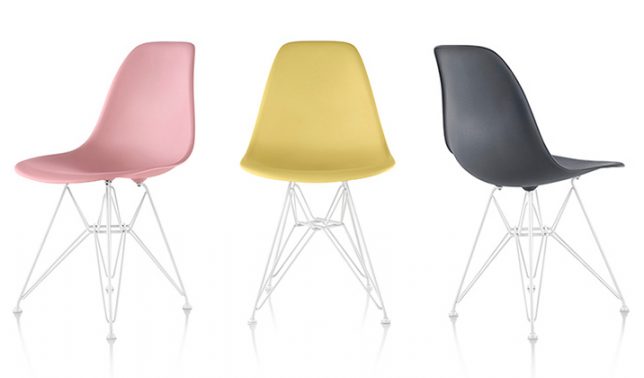
Seated at the center of a new design-related copyright conversation, a series of Eiffel chairs sold by discount superstore Aldi has designers arguing on both sides.

The chairs in question look significantly like the DSW Eames Plastic Chair (designed by Charles and Ray Eames in 1950), currently made by copyright holders Vitra in Switzerland.

eiffel eames chair copy

Critics point out that Aldi has been caught doing this before, selling things like Mies van der Rohe’s Barcelona Chair on countries where it can avoid copyright entanglements, either because the copyrights have expired or replicas are permitted by law.

Defenders of the discount retailer argue that the entire point of these plastic chairs was to create something cheap, comfortable and easy to mass produce. In other words: the fact that replicas sell for 40 GBP and licensed remakes sell for ten times that goes against the intent of the designers.

Either way, Aldi seems to way to stay out of the fray, perhaps planning to hide behind slight design differences when it comes to the structure, materials and details of the seats.

eamges moled chair original

In some places, like the United Kingdom, changes to laws have been proposed or are in the works, which may provide additional protections for rights holders now and into the future.

There is a larger question at work here though too: how close do designs have to be for them to risk creating intellectual property controversies? There are, after all, only so many ways to plan, design and construct a chair for a human occupant. These days, so many 3D models of seats have been uploaded to programs like SketchUp and it is easier than ever to simply cut, paste and print a copy of one’s own on a 3D printer.

Share on Facebook


[ By WebUrbanist in Design & Furniture & Decor. ]

[ WebUrbanist | Archives | Galleries | Privacy | TOS ]


WebUrbanist

 
Comments Off on Design Copyright Debate: Cheap Replica Eames Chairs Sold for 90% Less

Posted in Creativity


World’s Biggest Indoor Vertical Farm Near NYC to Use 95% Less Water

06 Jun

[ By WebUrbanist in Architecture & Offices & Commercial. ]

aerfarms rows

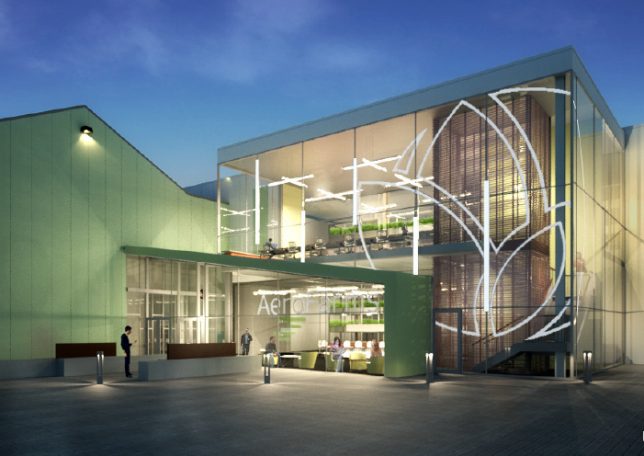
AeroFarms is on track to produce 2 million pounds of food per year in its 70,000-square-foot facility in Newark, under construction about an hour outside Manhattan. Their efficient operation, based on previous experience at similar but smaller facilities, can accomplish this astonishing output “while using 95% less water than field farmed-food and with yields 75 times higher per square foot annually.”

aerofarms facade

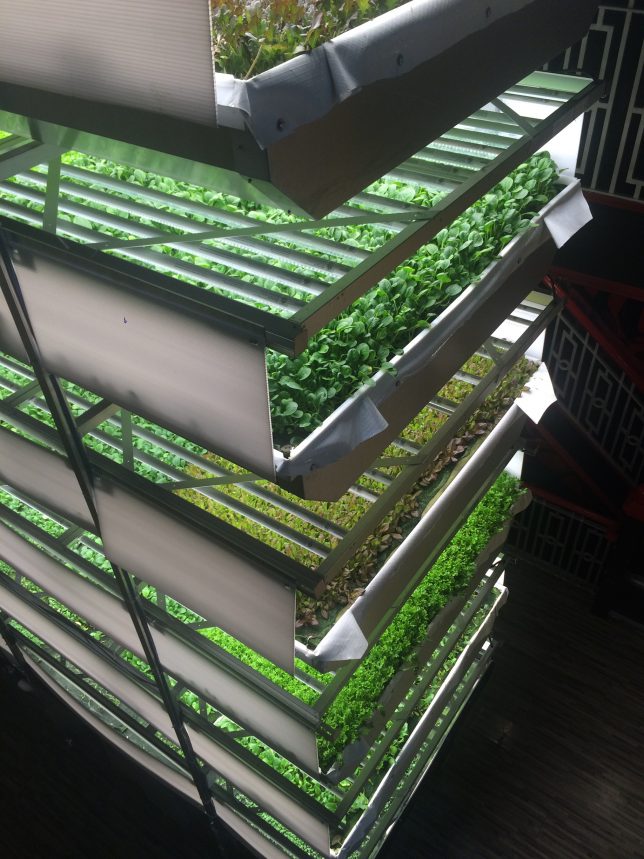
This new facility is comparable in efficiency to what is currently the world’s largest vertical farm in Japan, but nearly three times the size. Staggering its crops is part of the success behind AeroFarm’s strategy at their new and existing locations – at a given facility they are able to switch between 22 crops per year. Their all-season growth works with specialized LED lights and climate controls all without the need for sunlight or soil.

aerofarms diagram

“We use aeroponics to mist the roots of our greens with nutrients, water, and oxygen.,” explains AeroFarms. “Our aeroponic system is a closed loop system, using 95% less water than field farming, 40% less than hydroponics, and zero pesticides.” Smart pest management and highly-detailed data feedback loops help keep the system operating at peak efficiency and provide opportunities for iterative improvement, respectively.

aerofarms shelves

“Our passion is great tasting food and sharing our harvest with the world. In Newark, New Jersey, we are growing and selling into the New York Metro area. There has been tremendous demand for our locally grown, delicious, produce, and we have farms in development in multiple US states and on four continents. There has never been a greater need for safe, dependable, nutritious food, and we are scaling quickly to transform agriculture around the world.”

aerofarms students

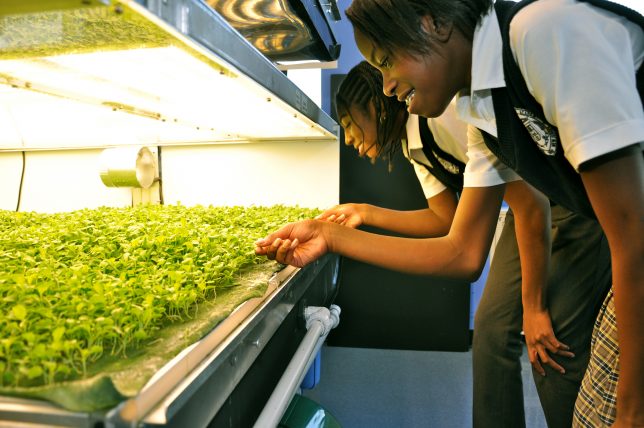
First Lady Michelle Obama recently visited the Garden State and toured a nearby school, planting seeds in a rooftop garden and sharing healthy snacks with students involved in a youth program as young AeroFarmers.

Share on Facebook


[ By WebUrbanist in Architecture & Offices & Commercial. ]

[ WebUrbanist | Archives | Galleries | Privacy | TOS ]


WebUrbanist

 
Comments Off on World’s Biggest Indoor Vertical Farm Near NYC to Use 95% Less Water

Posted in Creativity


5 Holiday Photography Ideas to Shoot More and Get Less Stress

19 Nov

Ahhh, the Holidays, that time of year when everyone is happy and feeling great. Tensions are low, everyone is totally relaxed, and since there’s so much copious free time, everyone wants to get their family pictures taken. Well, that statement might be a little bit off, but I have to say, I love shooting holiday pictures. Just in case the Continue Reading

The post 5 Holiday Photography Ideas to Shoot More and Get Less Stress appeared first on Photodoto.


Photodoto

 
Comments Off on 5 Holiday Photography Ideas to Shoot More and Get Less Stress

Posted in Photography


Less is more? Fujifilm X-T10 review

05 Aug

The Fujifilm X-T10 puts many of the X-T1’s capabilities into a smaller, less expensive body. It uses the same 16MP X-Trans CMOS sensor and EXR Processor II and, despite a more compact body, offers an additional custom function button and even squeezes in a pop-up flash. Is the X-T10 capable of holding its own against APS-C competitors? Read our full analysis. Read more

Articles: Digital Photography Review (dpreview.com)
 
Comments Off on Less is more? Fujifilm X-T10 review

Posted in Uncategorized


5 Tips to Take Less Photos of Everything and Take More Photos That Mean Something

22 Jun

How many photos do you have from a recent holiday, that you just haven’t had time to organize? Or, have you come back from a dream vacation and your photos just don’t seem to match up with your memories? You are not alone, as this is an all too common issue, and both of these questions have their roots in a simple and easy to fix problem.

Take fewer photos, not more!

001A resized2

I mean this literally, but also figuratively. Yes, overall take fewer photos. But, in reality this is a lesson in becoming more conscious of your photography. What is the point of the photo? Why are you clicking the shutter at that moment?

You may have heard many times, that in the era of digital cameras, you can shoot your heart’s desire (a.k.a. until your SD or CF card is full), unlike with film which needed to be developed and only had a limited number of photos on each roll. While that is true, it is not true that more photos equals better photos. Well, you may have also heard that professional photographers shoot hundreds, or thousands, of photos just to get one or several good ones. That is also true, but they are first and foremost shooting with a purpose. Literally shooting less will allow you to discover your point of view, and thus figuratively you will shoot less of everything, and more of something.

Here are five tips on how to take less quantity of photos but more compelling ones

Tell more stories

The story could be your personal story or could be of something else, but most important is that you communicate with your photos. If you are always shooting, you cannot create; you simply react. Creating a balance between creating and reacting will give you storytelling abilities. Be proactive by finding a place with good leading lines and waiting, not by rushing and hoping that one of your clicks is a keeper. Think about a beginning, middle, and an end. This can be easily depicted with shots at different focal lengths like a wide-angle (image above), a close-up (below), and finally a full-frame scene. The process of storytelling is something we have all grown up with – get back to it. Remember, the more simple the story, the more universal it can be.

001B resized2

Close-up gives direction.

001C resized2

Full-frame concludes the events.

Give yourself some time to write (in a travelogue or in a diary)
This gives you an opportunity to reflect, which gives meaning and helps you find purpose. Looking at your own writing helps you realize your patterns day by day, or travel experience by travel experience. Identifying structure will help you select moments and behaviours that lend themselves to your style of photography. You may see yourself getting up late despite your desire to have better golden hour photos, or that you feel more creative in the afternoon so you can set aside time to create your photographic stories when others are resting. You will also love reading what you write in 10 years!

Curb your fleeting feeling

Time is limited and you might just miss the moment. For a photographer, this manifests itself in too many photos, and too little purpose. The reality is you are always going to miss something, you can’t be in two places at the same time, and you definitely can’t turn back the clock. But that doesn’t mean that you must give in to the fleeting feeling. Let the event occur, or the scene develop, and visualize what you want from it. Be selective about your vision and then get it, not all of it. Three meaningful photos outweigh thirty so-so snapshots. You have worked hard for your days off and money saved for leisure; enjoy it and enjoy being productive with your photography.

Create a concept and stick to it. Resist pulling out your camera immediately.

This can be an exercise in patience and restraint. Buildings are not going anywhere, rivers will stay their course, and the coffee shop will always have another interesting customer. Find your concept in a developing scene, whether it is the arches of a building, reflections of the water, or a pair of hearty hands sipping a hot beverage. Know that your vision is attainable. Your concept can be simple or complicated, modern or traditional, but only needs to be defined and pursued by you. Just do it with conviction and don’t measure your concept against others. Go for it!

002A resized2

Creating a concept.

002B resized2

Slight variation of shooting through a window and making it B&W.

002C resized2

Going back to the concept and color to provide continuity.

Philosophically you will never find what you are looking for…

There is an old Chinese proverb that says, “If it will happen, it will no matter your actions; if it will not happen, it will not no matter what you do.”. There are many circumstances which seem to be too peculiar to be a coincidence, and as a photographer these are the moments of pure brilliance. Be present for them; don’t chase after them. There is a whole world of events that are unfolding in front of us at each moment. Your awareness of them is subject to your willingness to be aware of them, not the existence of them.

Photography and traveling have always gone hand in hand. Both have ways of opening up new horizons and being in touch with new possibilities. Both are essential. Spend some time with an ethos of travel, a perspective of photography, and a philosophy of life – and watch your photos tell a story that speaks to the hearts and minds of more than just a few close friends. Instead of having photos sitting unedited, unorganized, and undiscovered; take less photos of everything and take more photos of something. Create a convergence between your photos and your ideas. Less really is more, especially when a photo is worth a thousand words.

googletag.cmd.push(function() {
tablet_slots.push( googletag.defineSlot( “/1005424/_dPSv4_tab-all-article-bottom_(300×250)”, [300, 250], “pb-ad-78623” ).addService( googletag.pubads() ) ); } );

googletag.cmd.push(function() {
mobile_slots.push( googletag.defineSlot( “/1005424/_dPSv4_mob-all-article-bottom_(300×250)”, [300, 250], “pb-ad-78158” ).addService( googletag.pubads() ) ); } );

The post 5 Tips to Take Less Photos of Everything and Take More Photos That Mean Something by Branson Quenzer appeared first on Digital Photography School.


Digital Photography School

 
Comments Off on 5 Tips to Take Less Photos of Everything and Take More Photos That Mean Something

Posted in Photography


Carry Less – Photograph More: Elevate Your Travel Photography

22 Sep

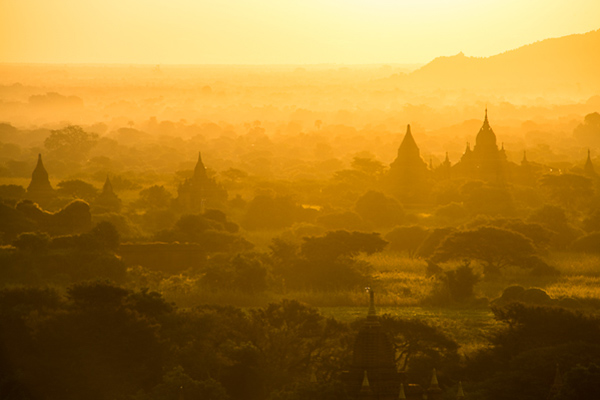
20131206_Bagan_563b

As a travel photographer, either on assignment or shooting a personal project, capturing great quality images that represent the spirit of a place and its people is key.

Looking to achieve that was a priority for me, so I always traveled with a bag full of gear, including at least two DSRL bodies, three or four lenses, flash, tripod, batteries, etc. It was a heavy load, and it slowed me down. I am a Nikon shooter, so my first approach to unload weight was to carry an all-purpose lens. I got the Nikon 28-300mm, and along with this, I’d carry the 14-24mm for wide-angle shots. Now I needed a backup camera or second body. I debated whether to keep carrying another Nikon body or to try something more compact. Finally I decided to get myself a mirrorless camera; enter the Fuji X system. My first mirrorless camera was the Fuji X-E1 with the kit lens, the wonderful Fuji 28-55mm. That camera was a turning point for me, and after my first trip I was sold on the system. Yes, I still shoot Nikon, but I just don’t travel with those big guns anymore.

The mirrorless technology is now really advanced – gone are the days when the image quality was not up to par with DSRLs and the availability of lenses was scarce. There are similar options from different manufacturers: Sony, Olympus, and Panasonic all have systems that eliminated the reflex portion and bulkiness of the typical DSRL. Please understand that I am mentioning Fuji because that’s the camera I use, but this is not an article to discuss a specific camera or brand. What you should consider is that for the most of us, the image quality of these cameras nowadays is amazing.

20131212_Inle_Lake_535b

I’d say I’ve switched, at least for travel. Fuji is now my go-to system for everything on the move, including photo walks. If you are planning to invest in a camera system, you should at least give mirrorless consideration, and here is why:

1) Travel Light

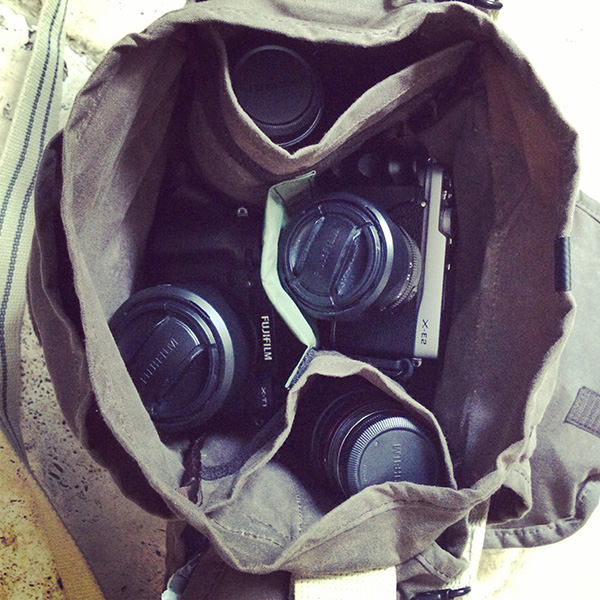
When using a mirrorless system, traveling light doesn’t mean that you’ll be out of options in the field. In just a small camera bag, you can fit a lot. This Domke F-3X Super Compact bag contains two bodies, five lenses, a flash, four extra batteries, radio triggers, a GPS for geotagging and SD cards. What I have here in terms of camera are the Fuji X-T1, Fuji X-E2, Fuji18-55mm zoom, Fuji 55-200 zoom, the 23mm and 35mm primes and an 8mm fish-eye from Rokinon. Believe me, I can carry this all day long without putting strain on my back, which brings me to the second point.

CAMERA BAG

2) Shoot all day

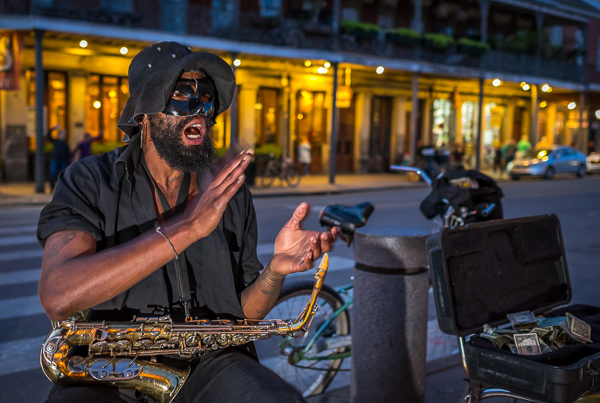
Wandering light means you can wander more. A small and light kit won’t wear you out and you can pretty much shoot all day long. With these cameras you can always have one on you, even if you are not carrying a camera bag. There are plenty of options where you can take them on your belt and even inside the pocket of a jacket. Having a camera with you all the time brings more opportunities to capture the people and places where you are traveling. The photo below was taken my first day in New Orleans; after a long flight I just went out for a walk with the Fuji X-E2, the 23mm prime and a flash in my pockets, and when the opportunity presented itself I was able to shoot it.

Street performer at night in New Orleans

3) Be invisible, blend in

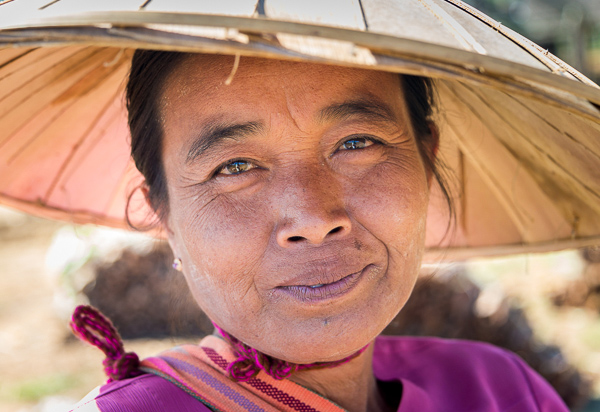
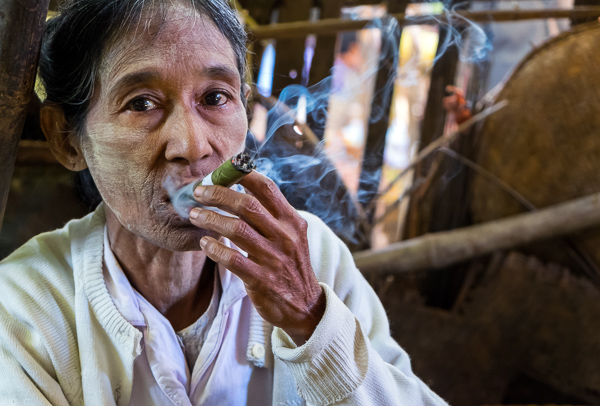
There is nothing more annoying than people being scared of you. Trying to stick a big lens or camera in front of people in public spaces, or even worse, in remote locations where you don’t speak the local language, is a formula for disaster. There is also a difference if they see you as a pro photographer or just another tourist. When you carry a small camera, you’ll most likely go unnoticed or they won’t feel as intimidated as they would when they think you are pro shooting for a magazine. I personally love to shoot markets: these places, away from big cities, are one the best ways to explore local cultures. I’ve noticed a big difference since I started to shoot with the Fujis on my trips. I can blend in more, I can aim the camera, smile, and get a photo with no problems, whereas before many times I’d have people turning their faces down or away from me. Just consider this fact alone and the difference it can make in your photography.

Old Burmese woman smoking a cigar

Another great feature besides what is mentioned above is how easy it is to work with an electronic viewfinder. Imagine being able to see exactly what are you getting in your viewfinder before making the shot. You can quickly adjust camera settings and see the changes on the fly. Seeing where your whites are clipping or how the shooting mode will affect the result of the image without having to move your eyes out of the viewfinder is phenomenal. I could go on an on about the benefits, but I am not a technical person.

If you like to travel and go places, in my opinion this is the way to go. The future is even brighter, as manufacturers continue to develop their lineups. Mirrorless is versatile and delivers excellent results. Touring light will make your travel photography better and you’ll be able to enjoy your trip more.

Any other mirrorless fans here? Show us your photos and tell us about it.

The post Carry Less – Photograph More: Elevate Your Travel Photography by Daniel Korzeniewski appeared first on Digital Photography School.


Digital Photography School

 
Comments Off on Carry Less – Photograph More: Elevate Your Travel Photography

Posted in Photography


6 Ways to Take WOW Photos in Less Than an Hour

08 Sep

If you’re like most photographers, nothing gets you more excited than a new tip or trick that can help you make your photographs more awe inspiring. The problem is that a lot of these processes can take some time to learn and execute correctly. Pretty quickly you realize that it may take you more than a few tries to master the new technique to become a better photographer.

IMG_6179

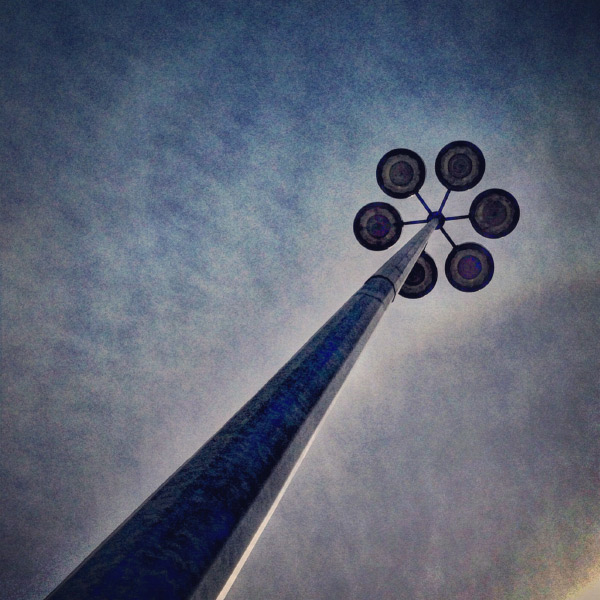
A mundane parking lot light stand can become something wondrous.

You’re also busy with more than just photography to take care of, and with instant gratification pervading all aspects of our lives, who wouldn’t appreciate a few SIMPLE photo strategies that provide immediate results?

Forget about aperture and shutter speed, focal length, ISO, and all the technical stuff for now. If you use the techniques in this article, alone, or mix and match, I guarantee you’ll learn how to take WOW photos in less than an hour. I use my “Snapshots to WOW Shots” process with many of my photography classes, from grade one kids who’ve never seen a camera before, to seasoned professionals who need to inject a quick fix into their  photographic repertoire. It works for everyone, guaranteed. Give it a try!

Method One: Bird’s Eye View

In our day to day lives we see the world from a height of about five to six feet. To create a WOW shot you need to alter that perspective. Show your viewers a point of view they don’t normally see. Just about any subject can be transformed into a WOW if you shoot it with your camera pointing straight down. This is what is called the bird’s eye view.

IMG_3957.Wjpg

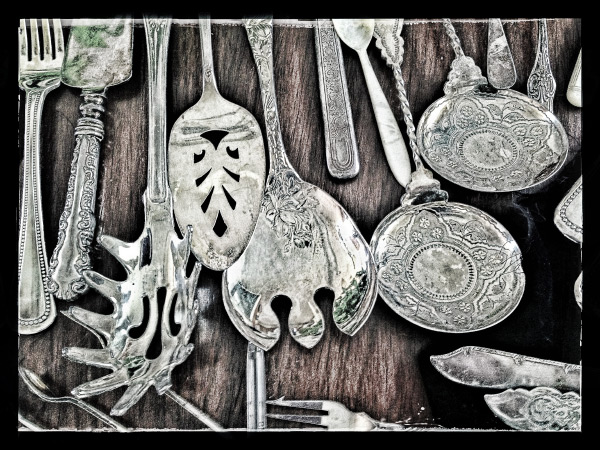
Looking straight down on antique silverware – a different point of view.

IMG_4813W

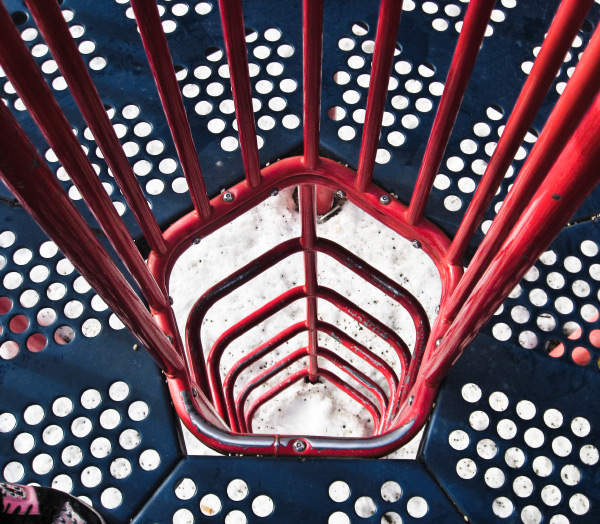
Shot by one of my grade 4 students – atop the play structure, pointing the camera straight down. 

Picture-197W

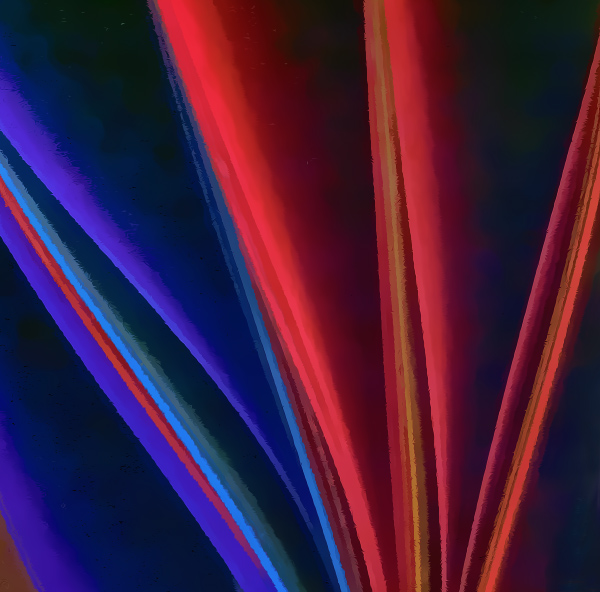
A crazy abstract shot looking down at colored pages in a binder.

Picture-366

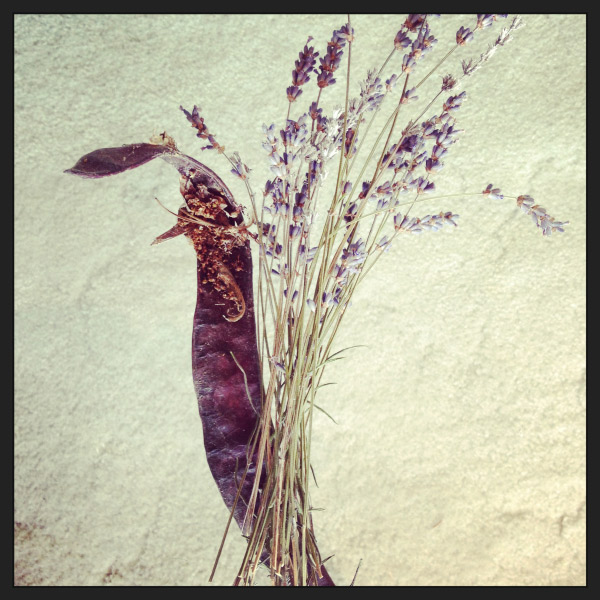
An herbal still life shot through a glass coffee table, straight down.

Method Two: Worms Eye View

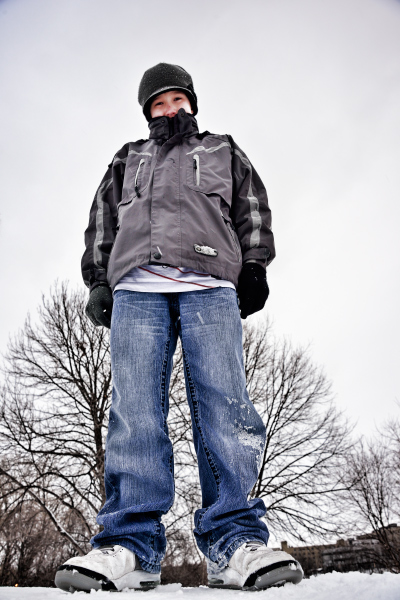
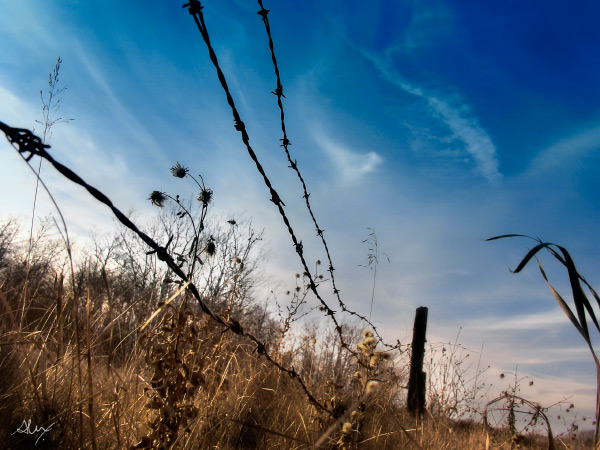
Similarly, not too many of us spend our days down on the ground. So shoot from a very low angle, and point your camera up, or just explore the world from the point of view of a worm (down on your belly!) and mundane things look a whole lot more interesting. Instant WOW shots, from the worm’s eye view.

These shots usually have the added benefit of helping to eliminate distracting backgrounds such as buildings, tree,s or other objects that you don’t want in your image. Bonus!

_DSC7921W

Feeling so small…the worm’s eye view.

DSC04831-eyes

One of my school students shot this one – taking the worm’s eye view literally, but it’s a very freaky WOW Shot.

nat_fieldW

nat_hamlton-bank-copy5W

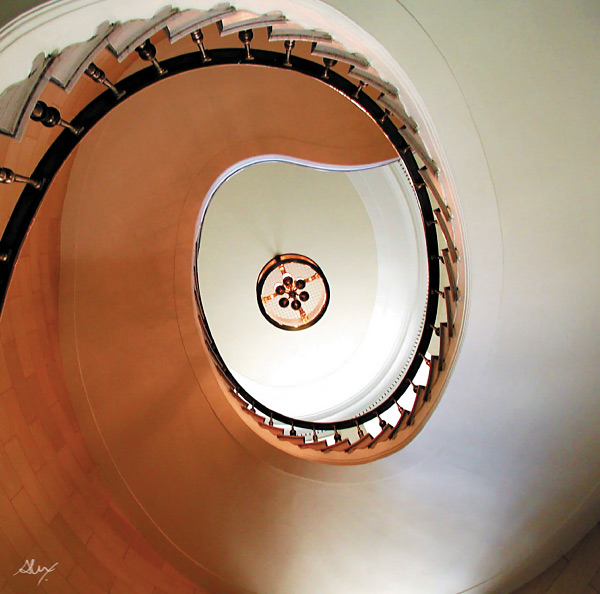
Taken lying on the floor of the lobby looking up at the top of the staircase. 

Method Three: Shoot at an Angle

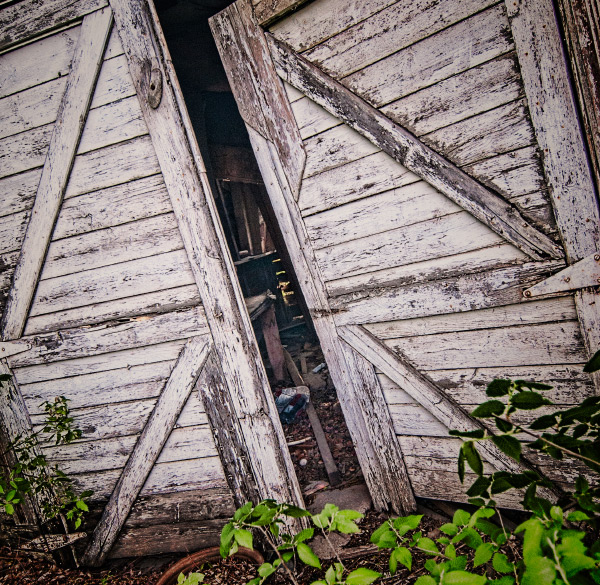
Just as our five foot world gives us a consistently average perspective, it also provides us with horizontal lines and vertical angles. We see the world this way 90% of the time, and there’s nothing particularly WOW in that. But give your camera a twist; a 45 degree angle can add dynamism and drama, instantly!  Just make sure that it’s a big enough angle that it’s clear you did it on purpose, and not by mistake.

Buildings, trees, large objects, and even people look great with a bit of angular rotation when you want to make a point or add impact.

A bit of an angle - on purpose, give the image a more dynamic feel.

A bit of an angle – on purpose, gives the image a more dynamic feel.

A little "off kilter" makes us pay more attention.

A little “off kilter” makes us pay more attention.

Method Four: Get the Sun Behind Your Subject

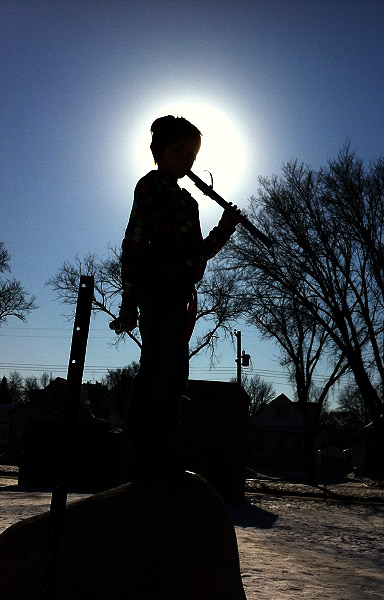
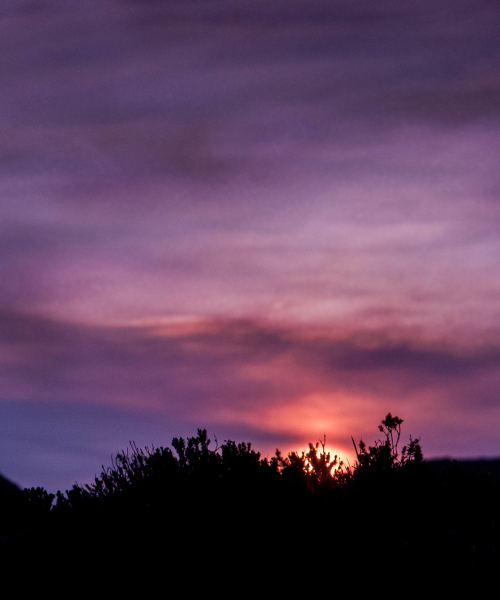
There are all sorts of fabulously detailed techniques for shooting silhouettes, rim lighting, and other back-lighting effects. But really all you need to get an instant WOW Shot is to either place your subject so that the sun or light source is directly behind them, with their head or body blocking the main point of light. Shoot in manual mode and be sure your flash is off.  Point and expose for the sun, then recompose with the sun directly behind your subject.  Whether it’s an animal or a person or an object, use that subject to block the sun, and you’ll have a winner.

Picture-053W

Drama abounds in this simple shot – just a quick iPhone grab during a school photo class.

Picture-388W

Method Five: Use Shadows

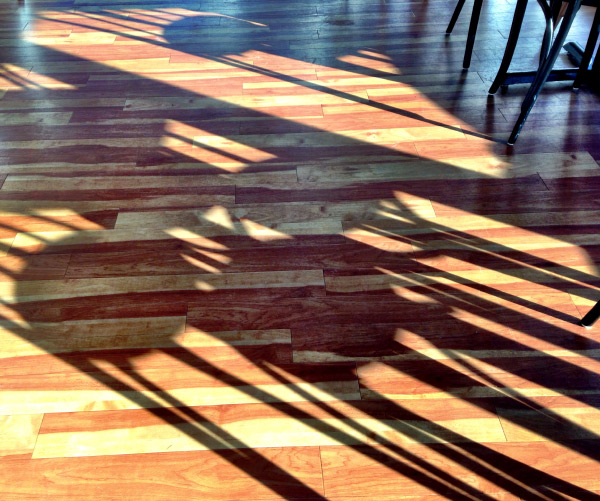
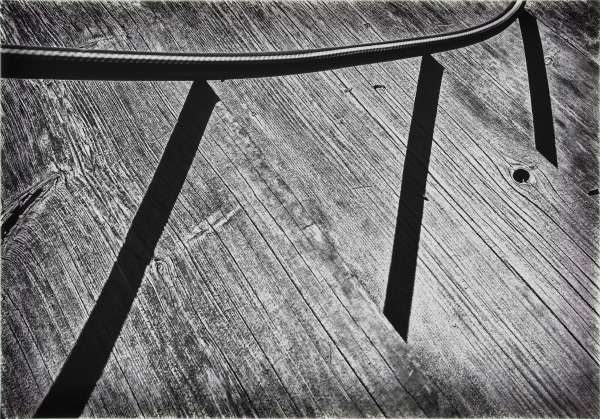
Nothing tells a story more than shadows – they are ethereal, transient, and mystical. Incorporate shadows into your image, or shoot only the shadows. They always tell an intriguing story, and create a captivating image.

Picture-955

Abstract or editorial, the shadow knows.

IMG_6203W

Do you know what’s happening here – the shadows are a riddle and the answer.

photo-1

The Ultimate WOW Shots

The ultimate WOW shots are created when you use one of more of these techniques by combining elements, angles, and points of view.

_2DS2507W

Combining the worm’s eye view AND the sun behind the subject.

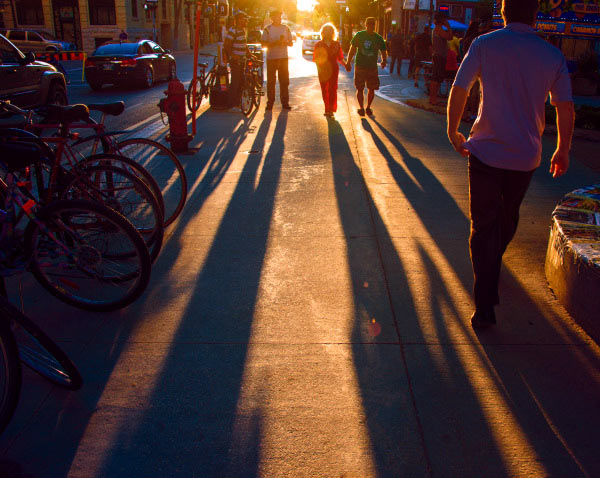
A simple street scene is so much more dynamic with long shadows.

Combine shadows with the sun behind the subject. A simple street scene is so much more dynamic with long shadows.

Combine a bird's eye view with shadows. It adds interest and drama.

Combine a bird’s eye view with shadows. It adds interest and drama.

A worm's eye view and the sun behind the subject. Simple. Wow!

A worm’s eye view and the sun behind the subject. Simple. Wow!

Apply what you have learned

To wrap it all up, these five easy methods will give you dramatic results, and if you’re already proficient with a camera and have a bit of knowledge about composition, color theory, and light, you’ll be shooting like a rock-star photographer in less than an hour –  including the time it took to read this article.  If you’re already a skilled shooter, give these a try and it will help simplify your photographic life while adding more finesse to your portfolio.

Show me your WOW shots, I’d love to see how you put this into action! Share in the comments below.

The post 6 Ways to Take WOW Photos in Less Than an Hour by Alex Morrison appeared first on Digital Photography School.


Digital Photography School

 
Comments Off on 6 Ways to Take WOW Photos in Less Than an Hour

Posted in Photography


Tips for Taking Great Portraits in 10 Minutes or Less

20 Aug

Portraits 10 minutes or less 01

Yes, you read that right. 10 minutes tops (not counting editing time), and you could have a set of photos worthy to hang on the wall. Don’t get me wrong, I’m not telling you that every session should be that speedy, but sometimes that’s all the time you have.

Portraits 10 minutes or less 02

Maybe you’re dealing with some kids that aren’t too happy about being there, and 10 minutes is all they’re going to give you before the meltdown. Maybe you’ve got awful weather, and you’ve got 10 minutes before the tornado hits. Maybe you decide 10 minutes before the sun goes down that it’s the perfect day for some photos, and you must do them right then (or your model shows up an hour late and you’re losing light fast). Maybe you want photos of your favorite pet, and you know that you’ll be lucky to get 10 minutes of attention.

Maybe, like me, you like to do little mini-sessions sometimes, and you stack them in 10 minute increments. Maybe, just maybe, you like a challenge. So, here’s your challenge: see if you can follow these tips and get great portraits you’ll love in 10 minutes or less. Ready, set, go!

Portraits 10 minutes or less 03

Pick one location

For a portrait session in a time crunch, you must choose ONE location. Just one. Find a spot that has good light, a nice background, and stick with it. Moving around is great if you have lots of time, but our goal right now is speed and quality. Use a tried and tested spot, or scout out a good spot ahead of time. This would also be a good time to use a great indoor studio spot, but stick with just one backdrop.

Portraits 10 minutes or less 04

Make a plan

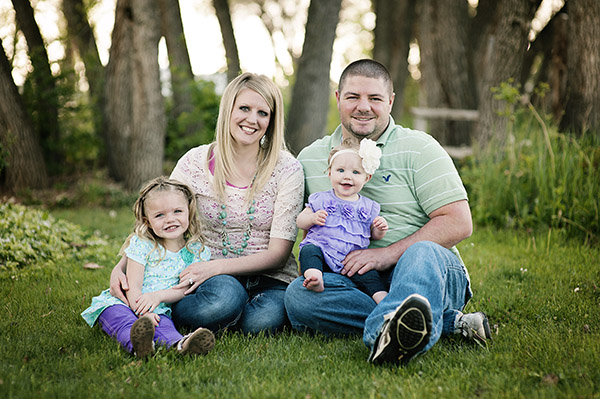
Go into your 10 minute session with a plan. For example: Let’s say you have a family who wants to hang a family photo collage on their wall. You know you’ll need a family photo, one of each kid, one of the kids together, and one of the parents together. You might want to give an option of portrait orientation (vertical), or landscape orientation (horizontal), especially for the family photo. So, take one of each of those. You may want to do one of family photo standing, and one seated. Maybe plan for one close-up and one full-body portrait of each kid. Whatever your scenario is, plan out ahead of time what you’re going to need, then stick to the plan. This isn’t the time to experiment.

Portraits 10 minutes or less 05

Put your subjects at ease quickly

Normally, you’d get to know your subjects a little bit, and put them at ease. You still need them to feel comfortable, so don’t skip this, just put it on fast-forward. The second you greet them, be happy, be enthusiastic, be fun! Every minute counts, so let them know right away that for this 10 minutes, your only focus is them. Let them feel your confidence in them, and in yourself. You don’t have time for awkward photos, so they have to be on board and comfortable right from the start. You could say something like, “Are you ready for the most painless photo session you’ve ever had? Let’s do this!”. It might get a laugh, and put them at ease right away. Who doesn’t want a painless photo session?

Portraits 10 minutes or less 06

Know your camera well

Finally, know your camera. When you’re in a time crunch, you don’t want to be fiddling with the settings, and panicking if things aren’t going how you expect. The more time you practice with your camera when you’re not under pressure, the better you’ll perform when it really counts. Know what settings you like, and when to use different apertures, shutter speeds, and ISO settings. If you are comfortable with these, you’ll be able to change them on the spot, in between photos, without wasting time.

If you aren’t comfortable with your camera yet, this would be a good time to use aperture priority, or even the auto setting. This isn’t the time to learn; this is the time to apply what you have already learned.

Portraits 10 minutes or less 07

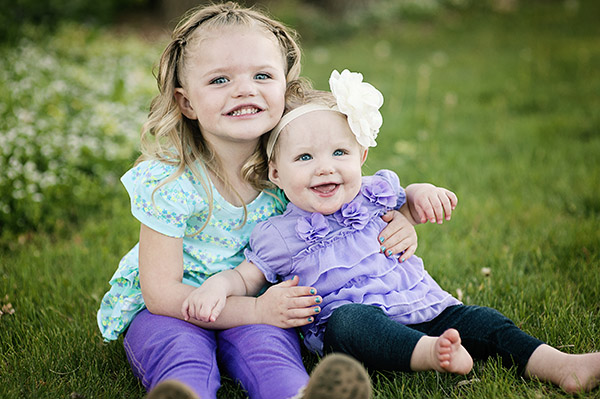
So, are you ready? I’m sure we’ve all got 10 minutes to spare. Give it a try, see if you can shoot at least eight portraits you love in 10 minutes or less using these tips. Let me know how it goes. The photos I shared here are an example of a real life less-than-10-minute session.

Portraits 10 minutes or less 08

The post Tips for Taking Great Portraits in 10 Minutes or Less by Melinda Smith appeared first on Digital Photography School.


Digital Photography School

 
Comments Off on Tips for Taking Great Portraits in 10 Minutes or Less

Posted in Photography