RSS
 

Posts Tagged ‘Language’

Instagram terms and conditions rewritten in simple language for teens

10 Jan

Law firm Schillings was recently tapped by the UK’s Children’s Commission to rewrite Instagram’s Terms and Conditions in simplified, child-friendly language. The simplified terms of service were included in the Commission’s newly published ‘Growing Up Digital’ report detailing, among other things, ways in which the Internet can help young users become better informed about the websites and apps they use.

At the heart of the report is a concern that children (and many adults) are unable to make informed decisions about the digital services they use due to the difficulty of understanding a service’s terms and conditions. The report cites Instagram’s Terms and Conditions as one example, finding that it contains 5,000 words across 17 pages ‘with language and sentence structure only a postgraduate could be expected to understand.’

Teenagers tasked with reading original Instagram Terms and Conditions report trouble understanding the information and frustration at its length. When given the rewritten TAC, however, which are condensed down to only a couple pages, the teenagers are able to explain the rules, what rights they have, and what rights Instagram reserves.

The full rewritten Instagram Terms and Conditions can be found on page 10 of the Commission’s report.

Via: PetaPixel

Articles: Digital Photography Review (dpreview.com)

 
Comments Off on Instagram terms and conditions rewritten in simple language for teens

Posted in Uncategorized


3 Body Language Hacks to Improve Your Portrait Photography

01 Nov

DPSarticle 1main

I’m going to ask you to put your camera down for now. I know it’s a lot to ask, but the secret I’ve discovered to better portrait photography has, in fact, very little to do with your camera.

One of the most common mistakes budding portrait photographers make is to be so focused on getting the technical aspects right, they completely forget about the most important feature of a portrait – the person standing in front of their lens.

I’m not saying that your camera and technique aren’t important, they absolutely are. But even when you have the best technique in the world, you will not have a good portrait if your subject feels, and looks, uncomfortable.

The secret to helping your subject be relaxed and look good in pictures is body language – both yours and their’s.

Body Language
DPSarticle 2bodylanguage

Body language is how our bodies communicate our feelings and intentions, and it makes up for a majority of how we communicate. Some studies found that as much as 92% of our communication is nonverbal, and experts all agree that, as humans, we rely first on what we see and feel, before believing any spoken word.

Why is this important in portrait photography? Because body language is the language spoken in our portraits.

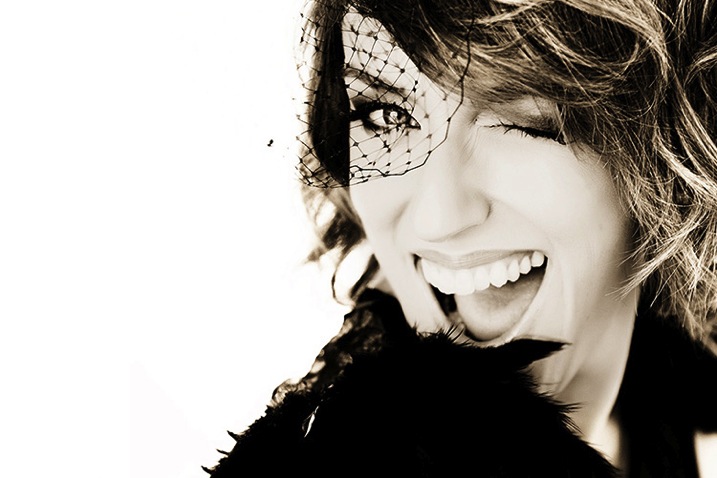
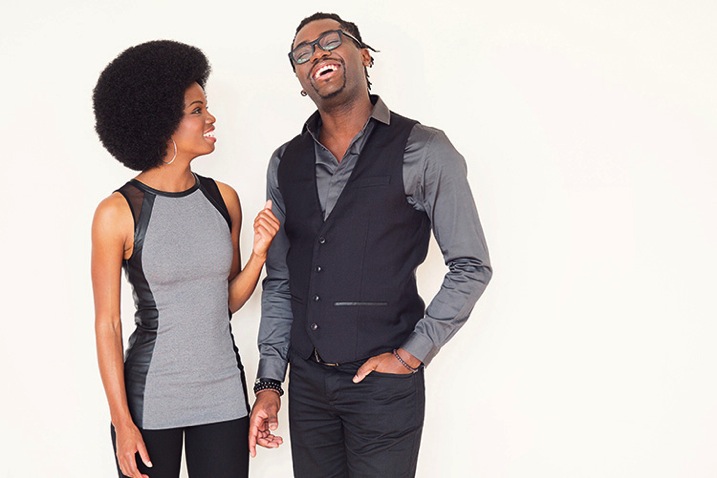
Within one second of seeing a photograph, we make a snap judgment about the person – or people – in the image, and what our brain relies on to make this judgment is their body language. Big cues like slouched shoulders or crossed arms are obvious, but it’s also the small cues like a fake smile, tense hands, slightly pursed lips, or squinting eyes, that tell our brains on an instinctive level, how that person is feeling. Furthermore, if the feelings are negative, it can ruin your portrait.

So, what can you do? Let’s look at three things you can start doing right now to help your subject settle into relaxed and positive body language.

1. Identify discomfort
DPSarticle 3discomfort

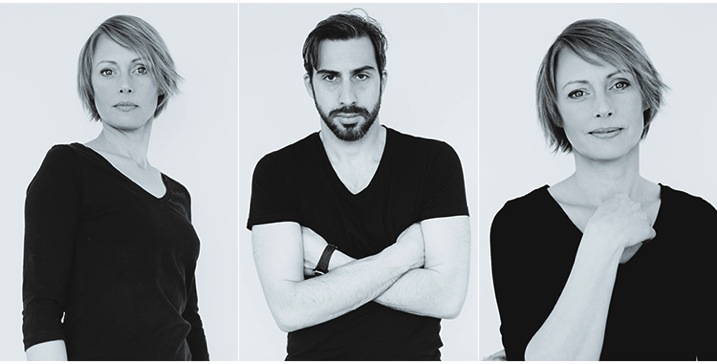
It’s pretty uncomfortable for most people to have their portrait taken, even if they are really looking forward to it. This tension appears mainly through blocking and pacifying cues.

Blocking gestures occur when we put something between ourselves and an uncomfortable situation. Crossed or closed arms are the most obvious signs, but the person may also be holding something like a bag or a laptop in front of them, turning their bodies away from you, and even crossing their legs tightly when standing.

Rubbing or pressure movements are called pacifying gestures. You will observe this when she’s playing with her necklace, rubbing her arms or legs, or he’s playing with his clothes, or squeezing his fingers together. Another place to look for pacifying gestures is the mouth. Lip pressing and licking, and tongue movements pressing inside the cheeks or lips show high levels of stress.

When you see this happening before or during the shoot, your subject is feeling uncomfortable and it’s going to show up in your portraits. Let’s look at how you can help them relax.

2. Show, don’t tell
DPSarticle 4showdonttell

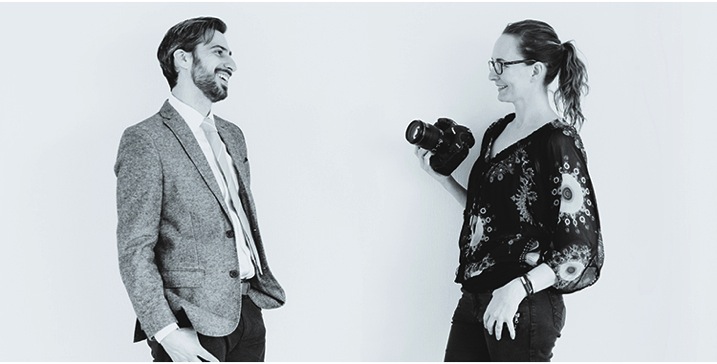
People feel uncomfortable during a photo shoot mostly because they don’t know what to do. It’s really stressful to be in front of a lens and be told to pose or act natural. They have no idea what you want from them, and telling them doesn’t help.

A client of mine shared this story with me;

At my last photo shoot, the photographer asked me to smile. So I smiled. “No! Not like that!” he said “you know, relax and smile!” All I could think is “Damn, I’m not relaxed, how do I relax?” which made me stress even more, and the more he was telling me to relax, the less I was! It was horrible! I look like I’m growling in all the photos. I hate them!

So if telling them what to do doesn’t help, what can you do? Show them! People can easily mirror what you want them to do. Ask them to mirror you, and show them exactly the pose you want them to take. Not only this will help them relax, it also allows you to get them into the right body language for the picture. When working with children, you can turn this into an imitation game, and they will be playing along with you in seconds.

Mirroring is a key bonding behavior in human body language. This interaction creates an immediate connection between you and your subject, and allows them to shift their attention away from the lens and focus on you instead.

3. Be in control -even when you’re not
DPSarticle 5incontrol

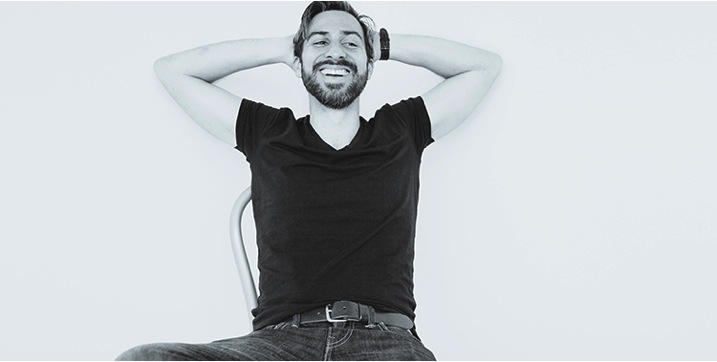
From the minute you meet your subject, until they walk away from the session, it’s vital that you appear in control by using confident body language, keeping your energy up, using positive words, and never showing any signs of stress – even when you’re freaking out because the settings you’re trying aren’t working.

I know this one is tough when you’re starting out, and you have to think of a million things – camera settings, composition, lighting, backgrounds, etc., and now I’m asking you to also think about what your client’s body is saying! But let’s think about this for a minute. How do you think your subject feels when they are working with a silent, stressed out, and fidgety photographer who is focusing all their attention on the camera or the lights? Not so great right? Guess where that’s going to show up? In your pictures.

They need to know that you’re in control, even when you’re not! This is a, “fake it until you become it” moment in your life. Talk to them. Explain what you’re doing. You might be concerned that they won’t take you seriously, but really, they are just curious about what’s going on. If they feel that you’re in control, that you know what you’re doing, you will keep the connection with them and help them to relax.

The best part is that you’re also going to feel more in control. Recent studies on body language have found that by changing our posture and behavior, we actually change our feelings too. Not only will you appear more confident, you’re actually going to feel more confident.

What’s next
DPSarticle 6next

This is really just the very beginning of how body language can help you with your portrait photography. The choice of body language cues you’re going to use in your portraits will also have a huge impact on the feeling and quality of your images, and your relationships with your subjects.

Understanding body language is not just an option if you want to be a portrait photographer, it’s a vital skill; as vital as breathing is to a singer, or taste is to a chef. You will not be able to consistently create beautiful portraits of people, or create a fun experience for them if you ignore it.

The good news is that this is a skill you are born with, and have unconsciously practiced since your youngest age. However, most of us simply don’t pay attention to it because nonverbal communication is not part of our training curriculum, at school or later. Just like a musician will be more alert to sounds through practice, and a chef to taste through experience, I’m confident that you will soon become attuned to your subjects body language if you put in a little work.

Soon you will have mastered an amazing skill that will not only be useful in your work as a photographer, but also in everyday life.

Do you have another other tips about body language? Please share in the comments below along with any images demonstrating body language in your portraits.

googletag.cmd.push(function() {
tablet_slots.push( googletag.defineSlot( “/1005424/_dPSv4_tab-all-article-bottom_(300×250)”, [300, 250], “pb-ad-78623” ).addService( googletag.pubads() ) ); } );

googletag.cmd.push(function() {
mobile_slots.push( googletag.defineSlot( “/1005424/_dPSv4_mob-all-article-bottom_(300×250)”, [300, 250], “pb-ad-78158” ).addService( googletag.pubads() ) ); } );

The post 3 Body Language Hacks to Improve Your Portrait Photography by Dee Libine appeared first on Digital Photography School.


Digital Photography School

 
Comments Off on 3 Body Language Hacks to Improve Your Portrait Photography

Posted in Photography


The Language of Death: 15 Gravestone Symbols Explained

29 Oct

[ By Steph in Culture & History & Travel. ]

grave symbolism main

The symbols carved into stones commemorating the dead can reveal a lot about the deceased’s beliefs and philosophies, or at least those attributed to them by their families when they were buried. Grave symbolism ranges from well-known symbols of major religions to the arcane and complex, each one often containing layer after layer of hidden meaning known only to those initiated into certain organizations. These 15 common symbols seen in cemeteries around the world are often meant to relay messages to those who are still living.

Winged Skull

grave symbols winged skull 1

grave symbolism winged skull 2

(images via: jenn g, xlibber)

The winged skull most often means a dead person’s journey is not over; after they’ve shed their physical form, they are flying away to another realm. In the United States, the ‘death’s head’ was initially a non-religious symbol simply used to denote a buried corpse, as the Puritans didn’t believe in using religious symbols on graves. The particular style of the death’s head motif on older graves acted as a calling card for the carver.

Serpent

grave symbolism snake 1

grave symbolism snakes 2

(images via: henning muhlinghaus, chynna67)

The serpent represents everlasting life, especially when seen in ‘ouroboros’ form, when it creates the shape of a circle with its own tail in its mouth. The snake cheats death by shedding its skin. The Orphic Egg (a snake wrapped around an egg) is an occult symbol representing the personification of light, the hermaphroditic Greek deity Phanes/Protogonus, who created the other gods. Two snakes wrapped around a winged staff (aka the caduceus) similarly represents the hermaphroditic god Hermes and has been incorrectly used by the healthcare industry as a symbol for medicine – mistaken for the rod of asclepius, which has only one snake and isn’t winged. The latter is often seen on graves of doctors. A snake wrapped around a cross can symbolize the Masonic brazen serpent, a symbol of the 25th Degree Masons, or foreshadowing of Christ’s crucifixion.

Clasping Hands

grave symbolism clasped hands

(image via: RPM)

A loved one may be gone, but those they left behind often have hopes of seeing them again someday, as represented by clasping hands on a grave. Symbolizing unity even after death, it’s often depicted on the shared graves of spouses.

Flying Hourglass

grave symbolism winged hourglass

grave symbolism winged hourglass 2

(image via: sean, todd mecklem)

‘Time flies’ and death comes too soon for many, as symbolized by an hourglass with wings. In the early 18th century, it wasn’t unusual for the dead to be buried with an actual hourglass to represent the sands of time having run out. In Masonic symbolism, it’s often paired with the scythe, another emblem of how easy it is to sever the boundary between life and death.

Inverted Torch

grave symbolism: inverted torch

grave symbolism inverted torch 2

(images via: jpmatth, godutchbaby)

Inverting a torch would typically extinguish the flame, so when it’s seen on graves with the flames still burning, it represents eternal life.

Next Page – Click Below to Read More:
The Language Of Death 15 Gravestone Symbols Explained

Share on Facebook


[ By Steph in Culture & History & Travel. ]

[ WebUrbanist | Archives | Galleries | Privacy | TOS ]


WebUrbanist

 
Comments Off on The Language of Death: 15 Gravestone Symbols Explained

Posted in Creativity


“The Language of Light with Joe McNally” – a Review

26 Mar

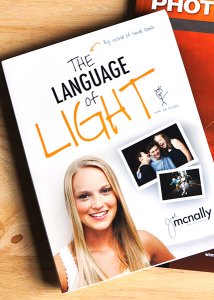
language-of-light-digital-photography-schoolOn the one hand, I could make this article one of the shortest I’ve ever written– a rousing recommendation of only three words: “It’s Joe McNally!”

Thank you. Good night. Drive safely.

Okay…I get it. Some of you may not be convinced. I respect that. That’s why we’re going to take a closer look.

For those who may not know, Joe McNally is one of the very best in the business. In a career spanning 30 years and 50 countries, his work has appeared in National Geographic, LIFE Magazine, Sports Illustrated, TIME, Newsweek, Entertainment Weekly, and a host of other magazines you’ve probably read. Even if you’ve never heard his name (where have you been hiding?), I’m pretty sure you’ve seen his work. If you are ever able to attend one of his workshops, I highly recommend it.

Joe is a master (a word I don’t use lightly) of at least two things–lighting and teaching. As a photographer, light defines or plays a part of everything you do. Regardless of whether you are talking about speedlights, studio lights, street lights, or sunlight, it’s a given that every light source has three attributes–color, quality, and direction. Since every photograph requires light, it stands to reason that having a firm understanding of how to control, manipulate, and manage light would be an important step towards raising the bar on your photography. As he puts it himself in the intro,

“Light is how we speak as photographers.” – Joe McNally

A typical Joe McNally seminar or workshop tends to be filled with sentences that begin with things like, “The photo editor at National Geographic once told me…” or “My editor at LIFE Magazine used to say…”  These are your cues to start feverishly writing down every word that follows.  The Language of Light lets you put the pen down and take it all in–a three-hour guided tour through the how and why of Joe’s “big world of small flash.”

There are a few things that really stand out, separating this DVD lighting class apart from the rest. For starters, it’s conversational. To the extent that this language of ours has words and concepts that need explaining, who better to do it than the man who’s written some of the best books on the subject? The other huge advantage to The Language of Light is the ability to watch as Joe starts each shoot with a basic premise, then explains and demonstrates each step in the process–walking you through from concept to finished image.

Remember that old line? “Those who can, do. Those who cant’ teach?” Well, here’s a guy who does both and doesn’t hold anything back. If he knows it, he wants you to know it. It’s not just about the “how.”  It’s also about the “why.” And that, my friends, is worth the price of admission.

Here is a basic breakdown of the set.

Disc 1 – the Language of Light

They say the best place to start is at the beginning, and The Language of Light takes that to heart. Disc 1 gets you going, explaining light and why it does what it does in simple terms. Prepare to be blown away by what he can do with a single speedlight. Topics include:

  • Turning one small flash into one big light
  • Controlling harsh natural light
  • Dramatic one light portraiture
  • Tour of small flash light modifiers
  • Light placement

Check out the Disc 1 preview in the video below:

Disc 2 – the Language of Light

Disc 2 moves out of the studio and goes on several location shoots, with lighting setups ranging from the basic to the complex. Topics include:

  • Location assessment
  • Basic strategies for one and two lights, as well as three or more
  • Getting the most out of a location
  • Environmental portraits
  • Conquering the sun with high speed sync
  • Mixing color temperatures
  • Athletic portraits
  • Lighting in small places
  • Group portraits
  • Engaging your subject

Take a look at the Disc 2 preview:

The three hours of photographic education contained in this set is some of the best I’ve ever seen. Knowledge, talent, energy, and passion come together in what I can only describe as a moment of enlightenment (no pun intended), where all the pieces seamlessly come together– and it all makes sense. It’s perfect for beginners just learning how to get the flash off the camera, as well as seasoned veterans looking for a refresher.

The Language of Light is available on Amazon.  Still hungry for more? Check out our very own e-book, “Portraits- Lighting the Shot” in the Digital Photography School Bookstore.

The post “The Language of Light with Joe McNally” – a Review by Jeff Guyer appeared first on Digital Photography School.


Digital Photography School

 
Comments Off on “The Language of Light with Joe McNally” – a Review

Posted in Photography


“The Language of Light with Joe McNally” – a Review

24 Mar

language-of-light-digital-photography-schoolOn the one hand, I could make this article one of the shortest I’ve ever written– a rousing recommendation of only three words: “It’s Joe McNally!”

Thank you. Good night. Drive safely.

Okay…I get it. Some of you may not be convinced. I respect that. That’s why we’re going to take a closer look.

For those who may not know, Joe McNally is one of the very best in the business. In a career spanning 30 years and 50 countries, his work has appeared in National Geographic, LIFE Magazine, Sports Illustrated, TIME, Newsweek, Entertainment Weekly, and a host of other magazines you’ve probably read. Even if you’ve never heard his name (where have you been hiding?), I’m pretty sure you’ve seen his work. If you are ever able to attend one of his workshops, I highly recommend it.

Joe is a master (a word I don’t use lightly) of at least two things–lighting and teaching. As a photographer, light defines or plays a part of everything you do. Regardless of whether you are talking about speedlights, studio lights, street lights, or sunlight, it’s a given that every light source has three attributes–color, quality, and direction. Since every photograph requires light, it stands to reason that having a firm understanding of how to control, manipulate, and manage light would be an important step towards raising the bar on your photography. As he puts it himself in the intro,

“Light is how we speak as photographers.” – Joe McNally

A typical Joe McNally seminar or workshop tends to be filled with sentences that begin with things like, “The photo editor at National Geographic once told me…” or “My editor at LIFE Magazine used to say…”  These are your cues to start feverishly writing down every word that follows.  The Language of Light lets you put the pen down and take it all in–a three-hour guided tour through the how and why of Joe’s “big world of small flash.”

There are a few things that really stand out, separating this DVD lighting class apart from the rest. For starters, it’s conversational. To the extent that this language of ours has words and concepts that need explaining, who better to do it than the man who’s written some of the best books on the subject? The other huge advantage to The Language of Light is the ability to watch as Joe starts each shoot with a basic premise, then explains and demonstrates each step in the process–walking you through from concept to finished image.

Remember that old line? “Those who can, do. Those who cant’ teach?” Well, here’s a guy who does both and doesn’t hold anything back. If he knows it, he wants you to know it. It’s not just about the “how.”  It’s also about the “why.” And that, my friends, is worth the price of admission.

Here is a basic breakdown of the set.

Disc 1 – the Language of Light

They say the best place to start is at the beginning, and The Language of Light takes that to heart. Disc 1 gets you going, explaining light and why it does what it does in simple terms. Prepare to be blown away by what he can do with a single speedlight. Topics include:

  • Turning one small flash into one big light
  • Controlling harsh natural light
  • Dramatic one light portraiture
  • Tour of small flash light modifiers
  • Light placement

Check out the Disc 1 preview in the video below:

Disc 2 – the Language of Light

Disc 2 moves out of the studio and goes on several location shoots, with lighting setups ranging from the basic to the complex. Topics include:

  • Location assessment
  • Basic strategies for one and two lights, as well as three or more
  • Getting the most out of a location
  • Environmental portraits
  • Conquering the sun with high speed sync
  • Mixing color temperatures
  • Athletic portraits
  • Lighting in small places
  • Group portraits
  • Engaging your subject

Take a look at the Disc 2 preview:

The three hours of photographic education contained in this set is some of the best I’ve ever seen. Knowledge, talent, energy, and passion come together in what I can only describe as a moment of enlightenment (no pun intended), where all the pieces seamlessly come together– and it all makes sense. It’s perfect for beginners just learning how to get the flash off the camera, as well as seasoned veterans looking for a refresher.

The Language of Light is available on Amazon.  Still hungry for more? Check out our very own e-book, “Portraits- Lighting the Shot” in the Digital Photography School Bookstore.

The post “The Language of Light with Joe McNally” – a Review by Jeff Guyer appeared first on Digital Photography School.


Digital Photography School

 
Comments Off on “The Language of Light with Joe McNally” – a Review

Posted in Photography


elsewhere – Flight Facilities ‘Foreign Language’ Tour

11 Jan

elsewhere – Flight Facilities ‘Foreign Language’ Tour Flight Facilities at elsewhere on November 11, 2011. Track – Flight Facilities – “Foreign Language” Filmed and edited by Tori Jackson
Video Rating: 4 / 5


The Language of Light with Joe McNally- Disc One Preview

06 Nov

A sneak peak into disc one of Joe McNally’s first ever instructional DVD set, The Language of Light with Joe McNally. For more info, or to order the DVD, please visit: www.thelanguageoflightdvd.com
Video Rating: 4 / 5

 
Comments Off on The Language of Light with Joe McNally- Disc One Preview

Posted in Nikon Videos


Text Editors – Notepad Replacements – Editor with Powerful Macro Language and Syntax Highlighting

02 Jan

Boxer Text Editor supports a wide array of customizations, pop-up features such as a HTML color chart, spell check, and more.

Boxer Text Editor is a shareware text editor for Windows with a wide array of customizable options and features for developers. The software includes pop-up calendar and calculator tools, a collection of pop-up lists such as Internet country codes and metric to English conversions, a HTML color chart, ANSI character codes, and more. Syntax highlighting is supported for C#, HTML, PHP, and Ruby, as well as Ada, Fortran, LaTeX, TCL/TK, and more.

Configurable template sets allow quick inserting of C, HTML, and Pascal code, as well as smileys. A macro language is supported, with included example macros such as applying HTML markup to a file, extracting email addresses from a file, and searching for the highlighted text in Google. The software includes a spell checker supporting multiple languages and exception rules such as ignoring all uppercase text….

Read more at MalekTips.
New Computer and Technology Help and Tips – MalekTips.Com

 
Comments Off on Text Editors – Notepad Replacements – Editor with Powerful Macro Language and Syntax Highlighting

Posted in Technology


iGoogle – Test Your English Language Knowledge with Synonym Game

15 Dec

Have fun testing your knowledge of synonyms with the “Match Up” gadget for iGoogle.

Are you a master of the English language? Assess your proficiency with The Free Dictionary’s “Match Up” gadget for iGoogle. Every day five new words are presented to the left, with five unsorted words to the right. Your job is to match up the synonym pairs.

When done, click the “Answer” button to see how well (or, umm, otherwise) you performed. You’ll also be able to read definitions for the daily words, so you might learn something after you play….

Read more at MalekTips.
New Computer and Technology Help and Tips – MalekTips.Com

 
Comments Off on iGoogle – Test Your English Language Knowledge with Synonym Game

Posted in Technology