All professional, and many hobbyist photographers, post-process their photos. There are various reasons why you want to edit your photos, besides the fact RAW files need some level of processing, including:
- To fix minor errors made when you took the image.
- To make the image look more like you envisioned when you took it.
- To add your artistic touch to the image.
- Because image editing is fun, and is an important part of photography.
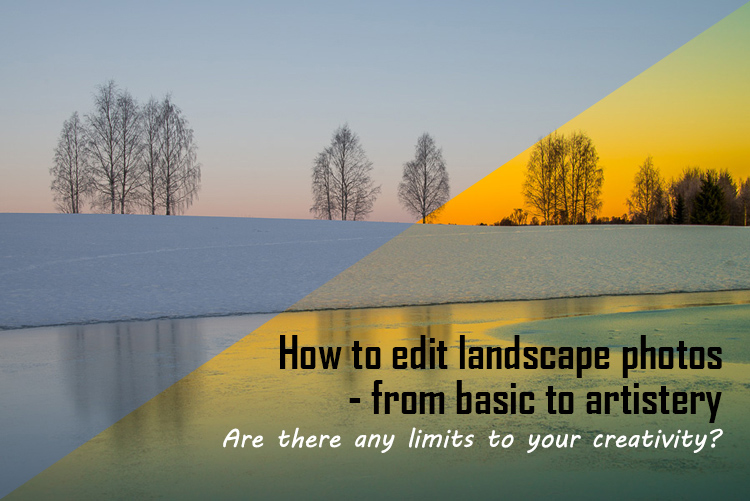
Landscape photography is often about being in the right spot at the right time. This is not always possible, so a little post-processing might help. “Why make it when you can fake it” seems to have become more and more common.
One question often raised, is how much editing you can do before you have over-processed your photo. Too much and your photo no longer represents the reality of the landscape.
It’s subjective how much editing is acceptable. Some argue the editing has gone way too far and is destroying photography. Others put their heart and soul into image editing. They try to get the most out of every detail in the photo, and to make their personal interpretation.
Landscape photographers are not photojournalists documenting reality. As such there should be plenty of room for an artistic interpretation of landscape photos. In the rest of this article, I’m going to discuss different levels of editing, using one of my own landscape photos as an example.
1. The leave as is approach – no editing
The easiest method is to save your files as JPG and do no editing at all. If you don’t want to buy an image editing software, or you simply don’t care to spend time on post-processing, that’s fine. It’s your decision. You can still enjoy the time you spend out in nature taking photos.
Obviously, with this approach, nobody can accuse your photos of not being real. But unless you learn some basic editing skills and post-process your images, you’re likely not to be regarded as a serious photographer.
Hardly any of the images with most likes on social media and photo sharing sites are unedited. In digital photography capturing the photo is just half the work, the rest is about post-processing techniques.
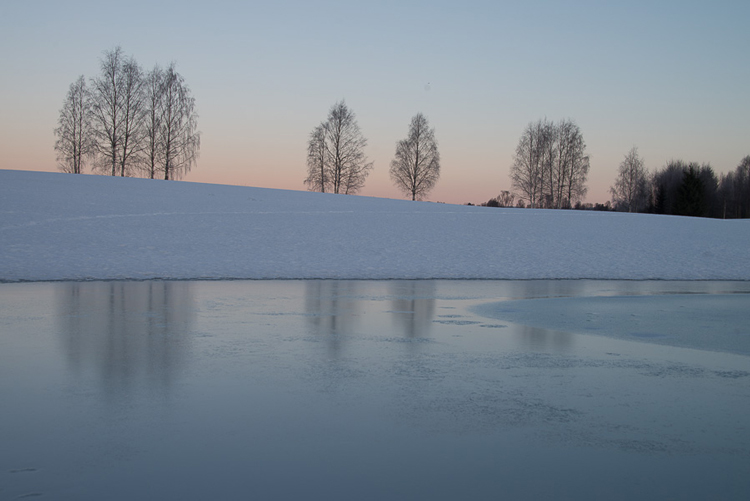
2. Basic editing
In my image (above), I realized I was sloppy with the composition when I took it. I had to fix this. Often one adjustment leads to another. Let’s go through the different steps I applied to this image.
The image above is the untouched RAW file straight out of the camera. Some photographers are happy with this result, and leave it there. After a closer look, I found there were several other things with the image I could improve. Because it’s a RAW file, I knew there was a lot of image data to work with.
Basic editing is supposed to enhance what’s already in the photo, not fix what is wrong. Ideally, you should get the shot as technically correct as possible in the camera. One nice thing about digital photography is how easy it is to make small adjustments after the shot. If you fail on the exposure or the horizon is not perfectly straight, no problem, you can fix it
Levelling a tilted horizon and verticals, cropping, and dust spot removal
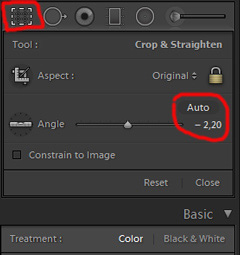 While you edit, you can make simple adjustments to your composition, like levelling the horizon and cropping. By cropping, you can tighten the composition, and to some extent “move” elements, so they align according to the rule of thirds or golden mean.
In the photo below I have levelled the trees, as they were leaning slightly to the right. I did not notice that when I took the photo. Most photographers will not question if levelling the horizon, cropping, and removing dust spots are acceptable image editing. It’s part of the workflow.
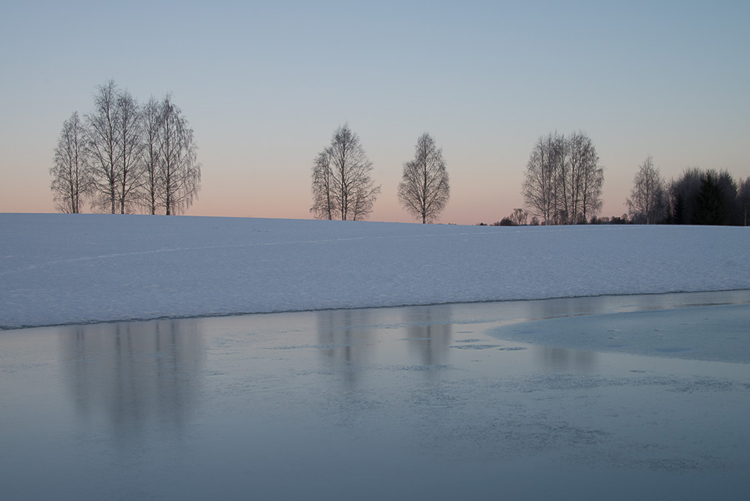
Adjusting the White Balance (WB)
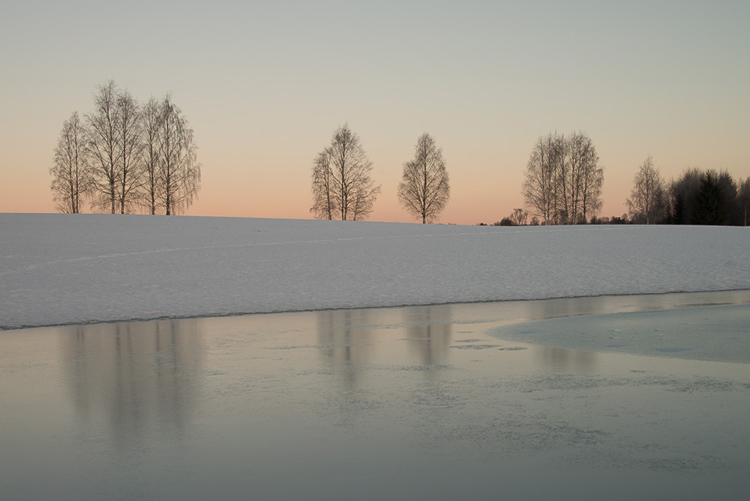
I took this image an early morning, at sunrise. The reflections from the clear blue sky gave the scene an overall blue color cast. At the computer, I remembered the scene as being warmer. Warmer is perceived as more pleasing. I could be wrong, because who remembers exactly what colors a scene had at the time they took the image?
Photographers often claim they edit their photos to represent how they saw the scene. It is probably more correct to say they edit their photos the way they wish they saw the scene.
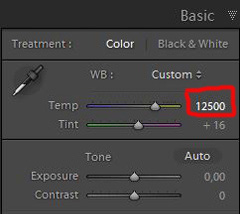 So I decided I wanted my image to have a warmer color tone. I adjusted the White Balance by adding more yellow.
I could have achieved something similar by setting the camera White Balance to the Cloudy preset, at the time I took the image. Changing the White Balance after the shot is another advantage when you shoot your files as RAW. Either way, the result is altered, and to some extent, the reality is changed.
Although the significant impact changing the White Balance can have on an image, it is usually accepted as part of the post-processing workflow.
Increasing Exposure and Contrast
Because no adjustments are made to the RAW files in camera, the images look unfinished when you open them up on your computer. The preview on the LCD is an embedded JPG version of the photo, which often looks much better.
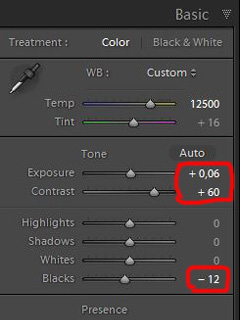 Even with modern digital cameras you don’t always hit spot on with the exposure. If you don’t get it right in-camera, with RAW files you can easily correct the exposure one two stops when post-processing.
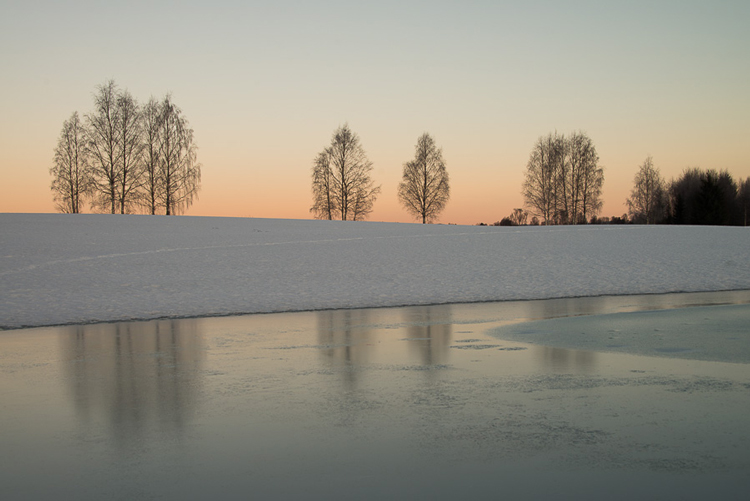
My image is no exception, it looks flat, and needs a few more adjustments. So I increased the contrast slightly. When you increase contrast, the image tends to get a little darker. To compensate for this, I had to increase the exposure a tiny bit. You can see the result so far below.
Decreasing Highlights and increasing Shadows
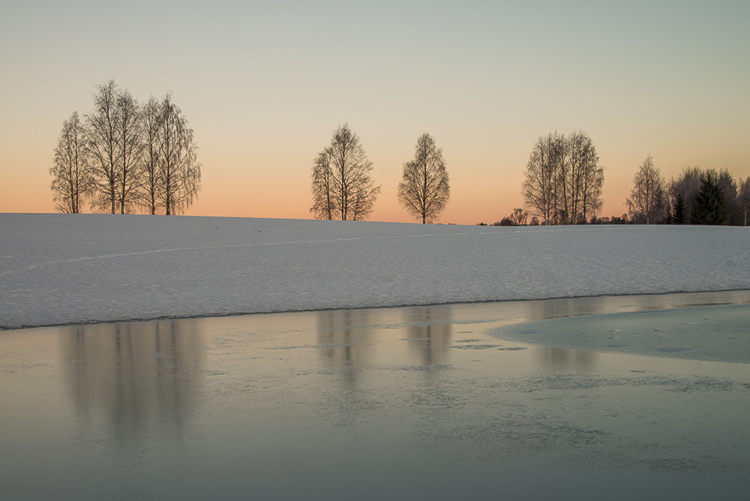
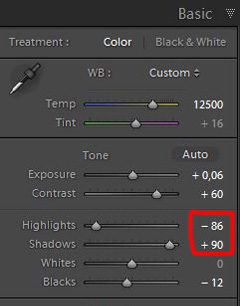 One more thing that bothered me was the black chunk of trees to the far right. The trees have now become too dark with no details in the shadows. I fixed this by increasing the shadows slightly. I also lowered the highlights a little to bring out more of the texture in the ice. In the version below the trees to the right are no longer completely black.
With these last adjustments, the image starts to look pretty decent. So far so good. All of the edits I have done until now are within what most photographers will find acceptable.
3. Beyond basic editing
Oversaturated colors
Photos with saturated and vibrant colors are eye catching. If you want attention when you post your images on social media sites, it’s a good idea to boost the colors first.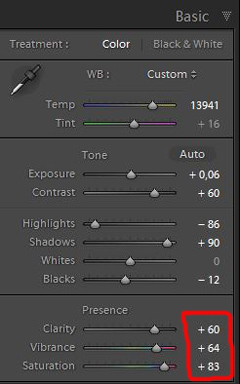
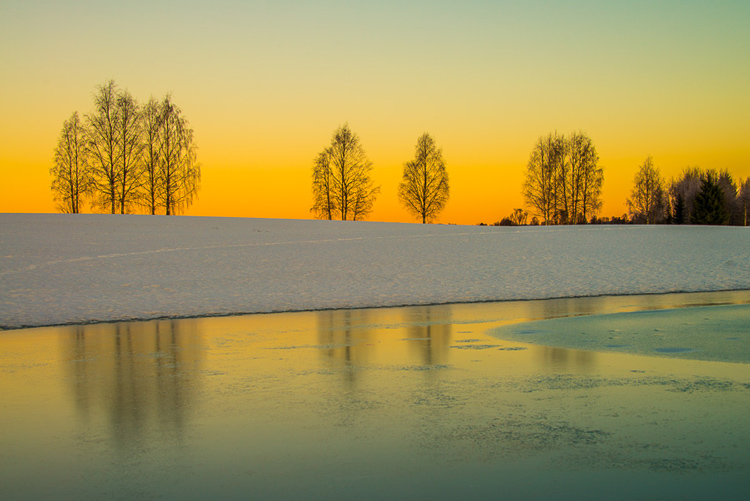
At this stage, it was attempting to make the sunrise more beautiful. To me, it was already an awesome winter morning sunrise. But I felt I could make it even better – with some over-processing.
I did this simply by increasing vibrance and saturation significantly. The image now has an entirely different feel. To me, it looks fake. But I bet this version would have received more attention on my social media sites if I posted both versions there. I have seen this happen with some of my other images before.
With this level of editing, the discussions start as to whether or not the image represents a realistic landscape. It can be your artistic interpretation of the scene, but to me it’s not authentic anymore.
4. Photo editing artistically
Adding texture for a complete different look
In the next image I have used my artistic freedom as a photographer and artist. I blended in a couple of texture layers and photo filters with the original image. By using textures properly, you can create some interesting effects on your images.
If this is a realistic landscape photo or not, is no longer a relevant question. It’s not, nor is it supposed to be. But you can discuss whether or not you like this style. While all the previous edits were made in Lightroom, the last two versions were made in Photoshop, as Lightroom doesn’t have the layers function which is needed.
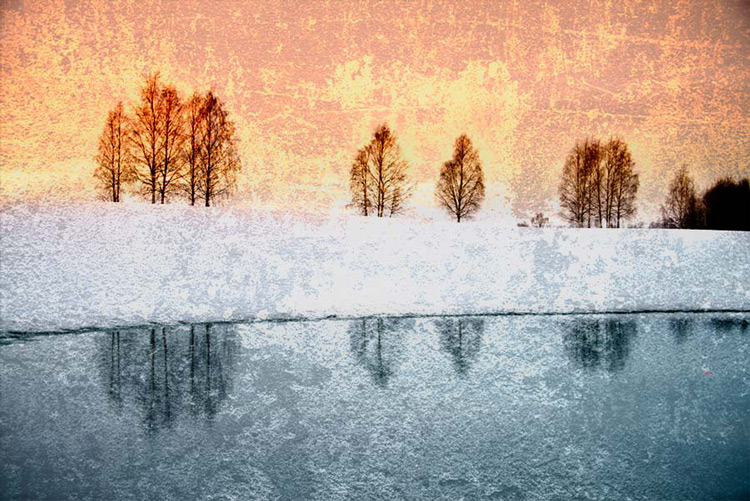
Composite of several images makes this surreal piece
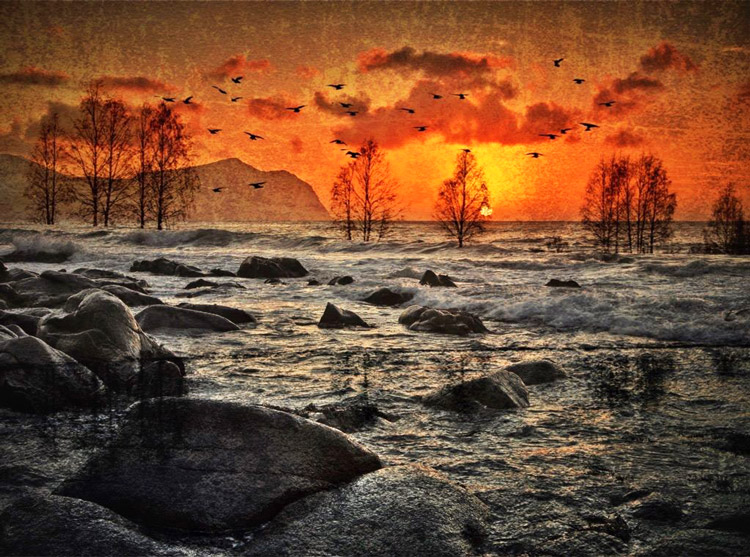
The last version of my image is a composite. Only a few elements are left from the original, but you can tell it’s still there. The result is so extreme that nobody can blame you for faking a realistic landscape image. Everybody know this is a creative piece of art. Again it’s very subjective whether like the style or not. Compositing is a whole new level of photo editing, it’s not for everyone.
When you create composites, you need many of the same skills as when you photograph. For a balanced composite, you must know about composition techniques and how to deal with light and shadows, as well as colors.
Conclusion
With digital photography it’s possible to create the image you want. Your imagination and skills are your only limitations. The general trend is bold and vivid colors get a lot of attention, at least among some photographers. Whether you want to follow this trend or not, is your decision. The fact is that more of the images you see online look similar, due to the same post-processing techniques. It’s getting harder to be recognized online unless you make something different.
As a landscape photographers you have a few challenge to tackle because the elements of nature are limiting. Light and weather conditions might not be as you wish when you’re at your dream scene. Maybe you never come back to the same spot again. In such a situation it’s tempting to fix the light (slightly) in post-production. In other words, to fake reality like I did with the oversaturated image.
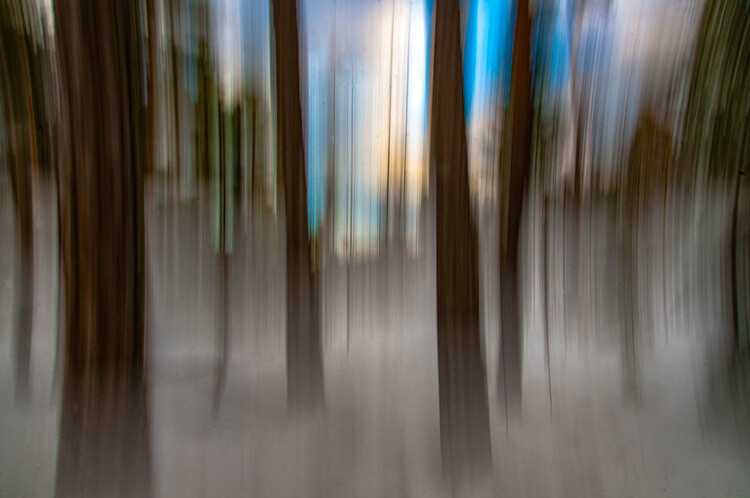
Original edit
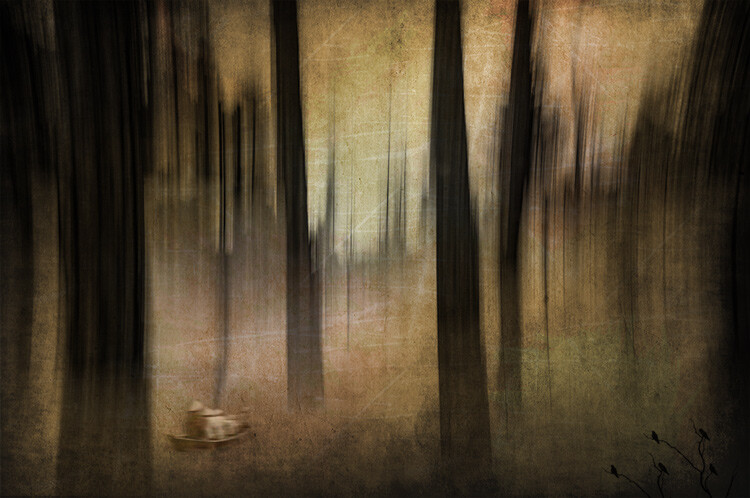
Creative edit
Photography is art, so it’s not wrong if you choose to do so, but be open with what you have done. Don’t pretend you experienced the sunrise of your life if you didn’t. In the end, it’s up to you what you’re comfortable with. Nobody can take away your creative vision.
You can do more advanced editing in Lightroom than I have shown in this tutorial. In Photoshop however the possibilities are endless. You can manipulate, remove, and add content to your images. With such drastic steps, you’re not only altering the reality, but you’re cheating. That’s if you claim your photo is real.
Now it’s your turn. What’s your opinion about how much you can edit landscape photos? Please share your thoughts in the comments below.
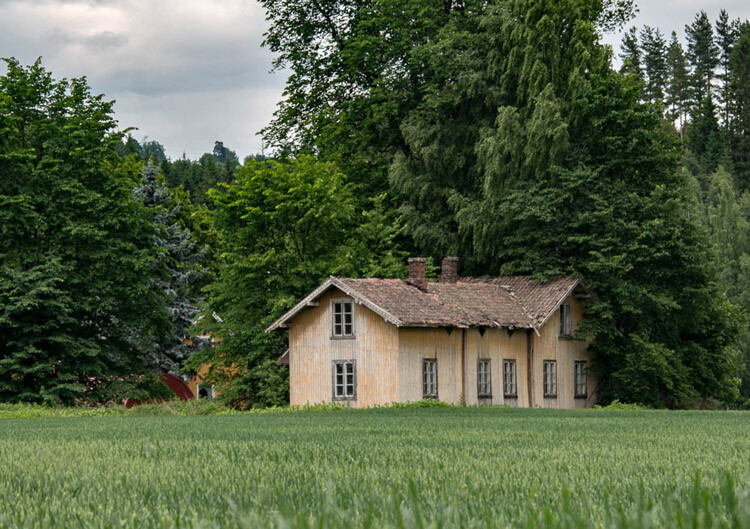
Original edit
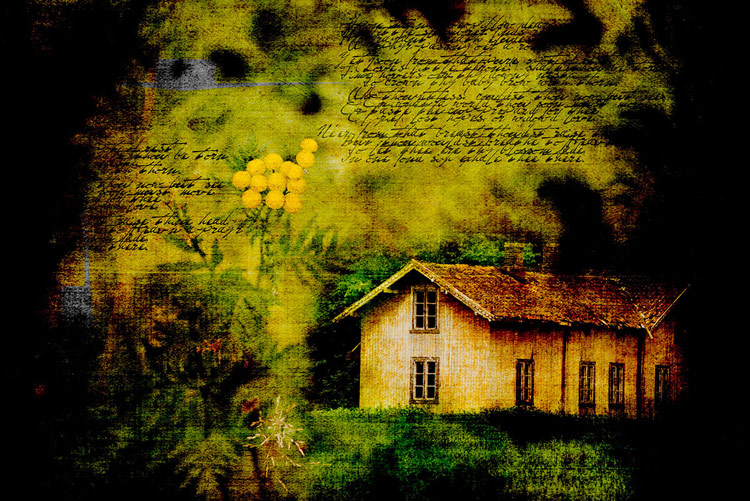
Creative edit
This week we are doing a series of articles to help you do better nature photography. See previous articles here:
- 3 Habits Every Outdoor Photographer Should Develop to Avoid Missing Shots
- 5 Tips for Better Nature Photography
- 27 Serene Images of the Natural World
- Weekly Photography Challenge – Nature
- 10 Ideas for Photographing Nature in your Backyard
- 6 Tips for Capturing Character and Personality in Wildlife Photography
- 5 Tips for Setting the Focus in Your Landscape Photography
- 7 Tips for Better Marine Wildlife Photography
googletag.cmd.push(function() {
tablet_slots.push( googletag.defineSlot( “/1005424/_dPSv4_tab-all-article-bottom_(300×250)”, [300, 250], “pb-ad-78623” ).addService( googletag.pubads() ) ); } );
googletag.cmd.push(function() {
mobile_slots.push( googletag.defineSlot( “/1005424/_dPSv4_mob-all-article-bottom_(300×250)”, [300, 250], “pb-ad-78158” ).addService( googletag.pubads() ) ); } );
The post Tips for Processing Landscape Photos – from Basic Edits to Artistic Interpretation by Kim Rormark appeared first on Digital Photography School.


You must be logged in to post a comment.