RSS
 

Posts Tagged ‘inexpensive’

News: Inexpensive Canon RF Lenses are in the Works, Including a 50mm f/1.8

24 Jan

The post News: Inexpensive Canon RF Lenses are in the Works, Including a 50mm f/1.8 appeared first on Digital Photography School. It was authored by Jaymes Dempsey.


news-Inexpensive-Canon-RF-Lenses

Earlier this month, Canon announced its intention to produce RF lenses over EF lenses. A Canon Europe spokesperson indicated that the imaging giant would continue to support the EF mount, but that we can expect to see only new RF lenses for the foreseeable future.

For longtime Canon users who haven’t jumped on the mirrorless bandwagon, this is a blow. But for Canon’s mirrorless users, this is excellent news. One of the main reasons to switch to a company like Sony over Canon is the mirrorless lens lineup; Sony’s mirrorless lens development has had a big head start over Canon’s, and Sony now offers dozens of full-frame and APS-C mirrorless lenses.

But with Canon focusing on its RF lenses, we might get to see it close the mirrorless gap.

In fact, it looks as if Canon is already making good on its commitment to the RF mount, especially in the budget lens category. Up until now, Canon has offered very few cheap RF lens options.

Over the twelve months, we might see that change.

According to Canon Rumors, we can expect to see several new low-priced RF lenses announced in the near future, including “at least one…this year.”

This should include some type of pancake lens with an f/2.8 maximum aperture, as well as the possibility of an RF 50mm f/1.8.

While it’s unlikely that Canon’s 50mm f/1.8 could rival the price of the current EF 50mm f/1.8 STM, its good to know that we might have some strong options for consumers.

Thus far, anyone looking for a 50mm lens option (which is great for shooting portraits, street images, and more) would have to settle for the Canon RF 50mm f/1.2L, which currently costs over $ 2000 USD.

But with a cheaper 50mm option, the Canon RF lens lineup should feel much more accessible, even for beginners.

And with some luck, we should see both these new RF lenses before the year is out.

The post News: Inexpensive Canon RF Lenses are in the Works, Including a 50mm f/1.8 appeared first on Digital Photography School. It was authored by Jaymes Dempsey.


Digital Photography School

 
Comments Off on News: Inexpensive Canon RF Lenses are in the Works, Including a 50mm f/1.8

Posted in Photography


Open-source Intervalometerator helps DIYers create inexpensive remote time-lapse DSLRs

20 Aug

Sydney-based coder Greig Sheridan and his photographer partner Rocky have introduced Intervalometerator, an open-source intervalometer designed for deploying inexpensive remote time-lapse systems involving Canon DSLRs, Arduino and Raspberry Pi hardware. The system is ideal for DIYers seeking an inexpensive alternative to existing remote time-lapse systems.

According to the Sheridan’s ‘Intvlm8r’ website, the open-source intervalometer system can be used with a battery and solar panel remotely, in addition to ‘on-grid’ for less remote setups. The intervalometer was designed for the Canon 6D, 60D, and 600D models, Sheridan told PetaPixel, but the duo hopes ‘that over time other models and brands will be tested and found compatible too — it relies on gPhoto to talk to the camera.’

The Intervalometerator can be set up with Web access for remote control and is fully configurable, enabling users to choose the full camera settings, select the time/day when images are captured and interval. The software’s interface, a demonstration of which is available here, includes information on battery level, captured images, remaining storage, the time and date of the last image, as well as when the next shot will be captured and the camera hardware in use.

In addition to having a low power requirement of less than 1mA, the Intervalometerator can also automatically recover in the case of a temporary power loss. Sheridan estimates the Intervalometerator’s cost, excluding the protective housing, mount, and camera, at around $ 242. That is substantially cheaper than competing commercially available systems; the Titan2 Remote time-lapse box with solar power for DSLRs, for example, costs $ 4,700 USD.

Sheridan details the project on his blog and has shared the code on Github.

Articles: Digital Photography Review (dpreview.com)

 
Comments Off on Open-source Intervalometerator helps DIYers create inexpensive remote time-lapse DSLRs

Posted in Uncategorized


Video: How to create an ‘anamorfake’ from old, inexpensive lenses

02 May

Shutterstock Tutorials, the YouTube channel of stock image company Shutterstock, has published a new video featuring Todd Blankenship with instructions on how to create ‘anamorfake’ lenses. The DIY anamorphic tutorial features inexpensive lenses sourced from eBay that are taken apart, fully modified, and reassembled.

The 13-minute tutorial is designed to equip budget filmmakers with the cinematic look of anamorphic lenses at a lower price. According to Blankenship, Shutterstock’s new tutorial was inspired by content found on Tito Ferradans’ YouTube channel, and it primarily revolves around adding the iconic flat line lens flare and oval-shaped aperture to an inexpensive lens.

The tutorial requires easily acquired components, including sandpaper, metal polish, fishing line, acetone, spray paint, gloves, and cotton pads. As well, DIYers will need oval aperture disks and a lens wrench. In addition to the video, which provides all the steps, Blankenship details a few notable points and a list of the required tools in a related blog post.

Articles: Digital Photography Review (dpreview.com)

 
Comments Off on Video: How to create an ‘anamorfake’ from old, inexpensive lenses

Posted in Uncategorized


Video: COOPH shares 5 inexpensive ideas for macro photography

23 Apr

Cooperative of Photography (COOPH) has published a video on its YouTube channel that offers viewers five macro photography ideas. The video aims to demonstrate ways to capture striking images without investing in expensive equipment; one idea, for example, includes instructions on transforming an empty chips canister into a flash diffuser.

The video focuses on ordinary items and elements easily found in the home or office. COOPH demonstrates ways to capture unique textures using things like soap bubbles and sponges, as well as color patterns using prisms and macro still life using ordinary tiny objects like a pen spring. Below is a timestamped list of the specific ideas if you want to skip around.

0:06 – DIY Macro Diffuser
1:23 – Textures
1:52 – Depth of Field
2:44 – Macro Still Life
3:09 – Color Macro

Articles: Digital Photography Review (dpreview.com)

 
Comments Off on Video: COOPH shares 5 inexpensive ideas for macro photography

Posted in Uncategorized


Review: Inexpensive Time Lapse with the YI 4K Action Camera

12 Sep

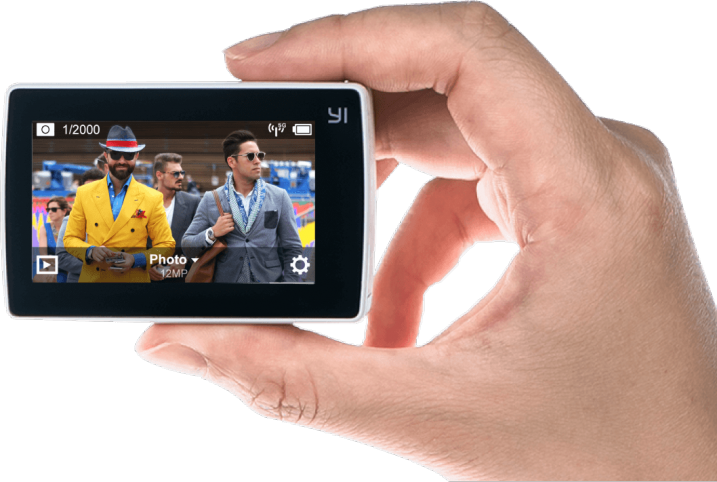
While this is essentially a review of a small action camera, that produces both stills and video, I’m going to focus on using the little YI 4K Action Camera, to kickstart your love of time lapse photography.

YI Technology – YI 4K Action Camera

Time lapse photography can produce stunning results that can inspire you to travel, to capture behind the scenes of your photographic projects, even as a great way to capture your holidays. Your week at the beach might only last a few minutes as a time lapse (as opposed to a couple of hours of video to make your friends sit through!) However you use it, there’s no denying it’s fun to use, and fun to try.

p15

Gear for time lapse photography

So, time lapse with amazing results requires a bit of gear, right? A camera that allows you to adjust your shutter and aperture. A trigger that allows you to set your camera to capture the time lapse, either indefinitely or for a certain period of time. If you want to take it further, you might look at something that allows you to have movement in your time lapse, rather than a static shot, just to add interest. (more on that, next article)

That being said, can you create a good enough looking time lapse, to start your journey into this fun and creative style of photography with an action camera? That’s the question I set out to find an answer to, with this latest hardware review.

I have a GoPro, it’s great! It’s the Hero4 Black, and it does time lapse, but it’s actually pretty expensive! Expensive enough, with some accessories and a spare battery, that you might actually consider just getting an entry level dSLR!

I also have a very brilliant Sony Action Cam 4K. Again, a spare battery and you’re up over half a grand. So, looking at options, I once again find myself wading into the “not really brand name” manufacturers of the lesser known! Enter YI Technology YI 4K Action Cam. There are a handful of reviews popping up online for this little camera, and most I’ve read or watched are positive. I’m not going to talk about the whole video side of the unit much, though it produces decent quality 4K footage for the price tag. This review is all about the camera’s time lapse ability.

p13

The specs in brief are as follows:

  • Main Processor – Ambarella A9SE chipset, includes a 800 MHz dual-core. Cortex-A9 ARM CPU and a high-performance digital signal processing (DSP) subsystem with a 32-Mpixel image sensor pipeline (ISP), and an advanced H.264 encoder capable of 4K resolution.
  • Image Sensor – SONY IMX377, 1/2.3″, 12 megapixels CMOS image sensor with Exmor R ability.
  • LCD Screen – 2.19″, 640×360 resolution touch screen, 330PPI, 250cd/m2 brightness, 30FPS, 160° FOV, 16:9.
  • Lens – Lens f/2.8 aperture / 155° wide-angle lens, 7G, f=2.68mm.
  • Wi-Fi – Broadcom BCM43340 Dual-band 5GHz /2.4GHz, built-in (802.11 abgn), offers 30Mbps download speed.
  • Weight – 3.4 ounces camera + battery (96.4 grams).
  • Size – 65 x 42 x 30 mm.

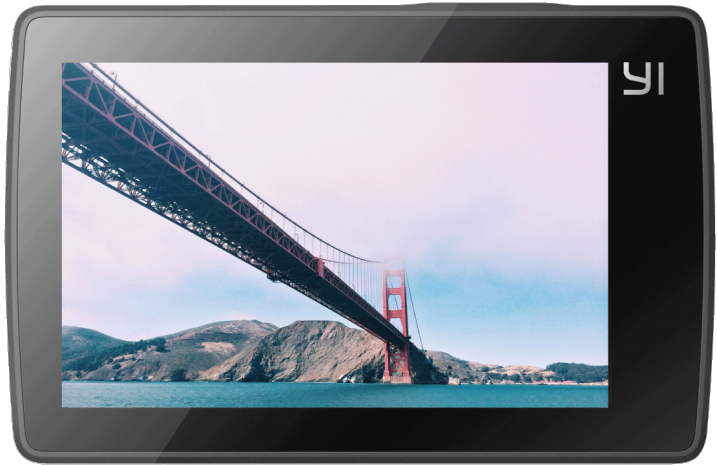
Said to have a Gorilla Glass rear touch screen, and I’ve got to say, that it’s actually useable! Responsive and clear, and also quite good at playing back your Time Lapse sequence on the camera.

Yi-4K-ActionCam-Review-Time-Lapse-Simon-Pollock-Gtvone

What’s it like to work on your time lapse creation with the YI 4K?

It’s actually very simple, there’s a touch screen rear display (as per above) and you simply tap it, select time lapse (either photo or video version of time lapse), dial in some adjustment, and press the go button! Now, the unit saves the time lapse in one of two formats, you may have noticed I said “Photo or Video time lapse” above, which is basically the output you get when you select either. In video time lapse mode, you get a single file at the end of your sequence, with photo time lapse you get the time lapse movie as the individual images.

There are benefits to both. With the video version of the sequence, you get a simple video at the end, that you can directly upload and share with your friends. The downside of this is that if you get a dodgy image (bird flies across, a drastic light change, etc.) in the middle of your time lapse, with the photo version you can simply delete the offending frame and you’re good to go. In video mode, you would need to edit that frame out with a video editor of sorts. Keeping in mind you may lose a little continuity in your time lapse if you delete more than a couple of frames, and you’ll see jumps.

I’ve made a quick example. At 1:03 in this video mode time lapse, someone over my back fence switched on their outside light and the white balance (auto, in video time lapse mode) jumped a gate and ran off into the hills! Take a look, you’ll see what I mean. It’s only 4 frames and I could edit it out, but left it in to show you what I mean. In photo time lapse mode, you can preselect the white balance and this wouldn’t have happened. My sweet darkening purples changed to blue.

Does the YI 4K work as an entry level time lapse camera? Absolutely it does, and with better specs than the current GoPro Hero 4 Black, it’s a decent little all-round package if you want something less expensive to document your photoshoots with too.

Conclusion?

I really enjoyed using the YI 4K as I call it. It’s easy to use, produces a good result, and is very well priced for what you get. One other thing I really like is the inclusion of a 1/4 20″ metal tripod mount in the bottom of the camera. So, you can stick a tripod plate on it, or screw it straight onto a light stand for use on set, or just to get your YI4K up high for a time lapse.

I’m not about to bin my GoPro or Sony Action Cam, but there is rumoured to be a GoPro 5 dropping sometime very soon – we shall see how they stack up.

p6

What I like about the YI 4K Action Camera:

  • Simple iOS app to change all settings on the YI 4K.
  • Good quality images from an Action Cam.
  • Multiple options for time lapse (Video / Stills).
  • Fantastic touchscreen included in device by default.
  • Good battery life.
  • Tripod mount on the camera.

What I’d like to see improved:

  • More standard accessories

I’m not really thinking I should give this a star rating as I’ve really only used it for time lapse, but if I were to give it a rating, it’d have to be a 4.5 out of 5 I think! Good job, YI Technology.

googletag.cmd.push(function() {
tablet_slots.push( googletag.defineSlot( “/1005424/_dPSv4_tab-all-article-bottom_(300×250)”, [300, 250], “pb-ad-78623” ).addService( googletag.pubads() ) ); } );

googletag.cmd.push(function() {
mobile_slots.push( googletag.defineSlot( “/1005424/_dPSv4_mob-all-article-bottom_(300×250)”, [300, 250], “pb-ad-78158” ).addService( googletag.pubads() ) ); } );

The post Review: Inexpensive Time Lapse with the YI 4K Action Camera by Sime appeared first on Digital Photography School.


Digital Photography School

 
Comments Off on Review: Inexpensive Time Lapse with the YI 4K Action Camera

Posted in Photography


How to do a Simple Inexpensive Setup for Newborn Photography

28 Apr

When I first started taking on clients, as a new photographer I thought newborns would be my favorite. They seemed so easy, lying around, ready to be molded into any pose I desired, nothing to it. Fast forward five years and hundreds of dollars later, they are still my favorite, but I’ve wasted a lot of money, sweat, and tears trying to figure out how to do it correctly. If you are just starting out, either with new clients, or your own baby, this article is for you, before you throw away a lot of money.

How to get started doing newborn photography

Newborn

Keep it simple with props

I figured to get the cutest newborn portraits I needed lots of hats, bows, blankets, and baskets. Then I needed colors that worked for boys, and ones that worked for girls. I bought tiny cribs, and big wooden letters to match the baby’s first initial of his or her first name. My house was so cluttered with photography gear we weren’t able to house our guests in our guest room, and I’m not even done.

I had a fake wood floor that was made of paper so I also had a pull out shelf from our armoire that was big enough to support the fake floor on the carpet. I had heaters, and backdrop stands, and so many blankets and backdrops they over took me. Every time I read an article about a photographer and what gear she used to get ONE specific photo, I would hunt down those items for myself. They mentioned she used rolled up receiving blankets under the baby’s head? Fire up Amazon, I need to get myself some of those. When would I be satisfied? I wanted to spend money on lenses, and photography classes, but I was so sure one more prop would produce the most amazing baby portrait, so that’s where all my money went.

Last year I read a photography article called, Less is More. It opened my eyes. It struck me that the baby is the art, not the props. The props will probably date your photograph (have you seen the photos that are black and white except for a red rose in color?). But a baby, on a simple background, with only the simplest of accessories, will be stunning, because of the baby. That is why I’m here to tell you, save your money, especially if you’re just starting out. You can achieve phenomenal photographs of babies with only the very basics, and it’s so much easier than trying to fit her into that basket while trying to keep her asleep!

Scarf

Setup

First of all, you need something to put the baby on. If you are working on posing the baby (versus lifestyle photography which requires no posing), you need something that is slightly malleable. Many professional photographers buy expensive beanbags, but you don’t need that. I actually use a leather ottoman we have here in our house, and when I do sessions at client homes I bring it with me.

Of course, last week I forgot to load it in my car for a newborn session. I got to the house and realized it was missing. They didn’t have any ottomans of their own, so instead I pulled the two large bottom cushions off their couch and stacked them on top of each other. For both the cushions and the ottoman I layer multiple blankets on top of each other. In between the blankets I have a few layers of waterproof sheets that are leftover from my own children, and a heating pad. The multiple layers of blankets make it soft and pliable, and the top few layers are the various backdrops I use to photograph the babies on, so I just keep removing layers for the different backgrounds (see below).
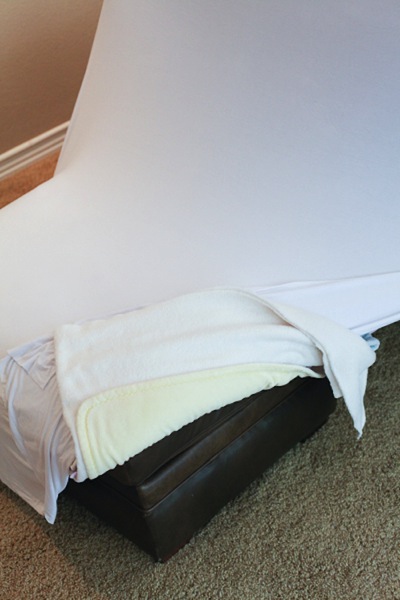
Ottoman

I only shoot on black, white, and cream. I have gotten away from colored blankets, but that’s my choice. I used to have colored blankets as well, and you may still want that, but don’t buy the expensive options off of etsy, use blankets you already own. I do recommend neutral colors though because bright reds, pinks, and greens can cause colorcasts on baby’s skin.

Positioning the baby

The stack of blankets help the baby to sink down a little bit if you want her to, and I also bought a stack of white washcloths from Costco, that I bring with me to roll up and stick in between the blankets and the baby to get her propped and curled exactly how I want her. A boppy (feeding pillow) under a blanket may be a good way to get some of the poses you want, and I’ve found that if you can’t use a boppy, another good option is a neck pillow like you’d use on the plane. I actually prefer that to the boppy because it’s small, and perfectly sized for a baby’s body, so it helps keep the baby propped in place if you lay her on her belly with her arms and head resting on the pillow.

Gear

Background

I like a continuous look for my backdrop, so I use the same material under the baby and stretch it up to create the background behind the baby. I own a stand that I bought for the purpose of holding up backdrops (or you can make your own), but you don’t need one of those. Invest in some heavy-duty clips, and you can pin up the material or blanket to anything above the baby. I’ve used bed frames, chair backs, stepladders, tables, etc., it’s just a matter of looking around you to see what will work. When I’m at a client’s house I pull stuff from all over the house to use during the session. I always put it all back the way I found it, and no one has ever had any issues.

Setup

Lifestyle or unposed photography

So I mentioned lifestyle photography. It’s something that is becoming ever more popular. Essentially, it’s about capturing photos without posing the family too much. Of course you will set the scene. You might move some furniture around, lay a blanket on the ground, and tell the family members where to sit or stand. But beyond that, you let them sort of do their thing. The photos are natural, realistic, and lovely. But I think lifestyle alone is not enough when we’re talking about newborn photos. Of course they are easier, and require almost no additional props at all, but most people want at least two or three posed photos of the baby alone.

Details

Accessories

Now for the accessories. Again, you don’t have to spend a ton of money on this stuff, and believe me, it’s easy to rack up a pretty big bill once you start purchasing. My favorite backdrop is a stretchy knit fabric that when smoothed over my blankets, has no wrinkles. I bought it at a craft store. I also bought an extra, smaller piece of the same fabric to wrap the babies in. I love the continuous look. But if you don’t want to buy anything at all, look around – you probably have some scarves, shawls, or small baby swaddling blankets you can use. I’m not a huge fan of big bows, but I do like small tiebacks. You can purchase one of two of them, or make your own with some twine and pretty beads.

Tieback

Once you start looking around at what you already own, I bet you can find many different options for positioning, backdrops, and wraps. To add some variety you can purchase some scarves, head ties, or small pieces of material at the fabric store that won’t set you back a lot of money, but will bring the needed variety in your photos.

Good luck, and remember it’s the baby you’re trying to capture, not the props. Don’t forget those long eyelashes, those tiny toes, and those perfect pouty lips.
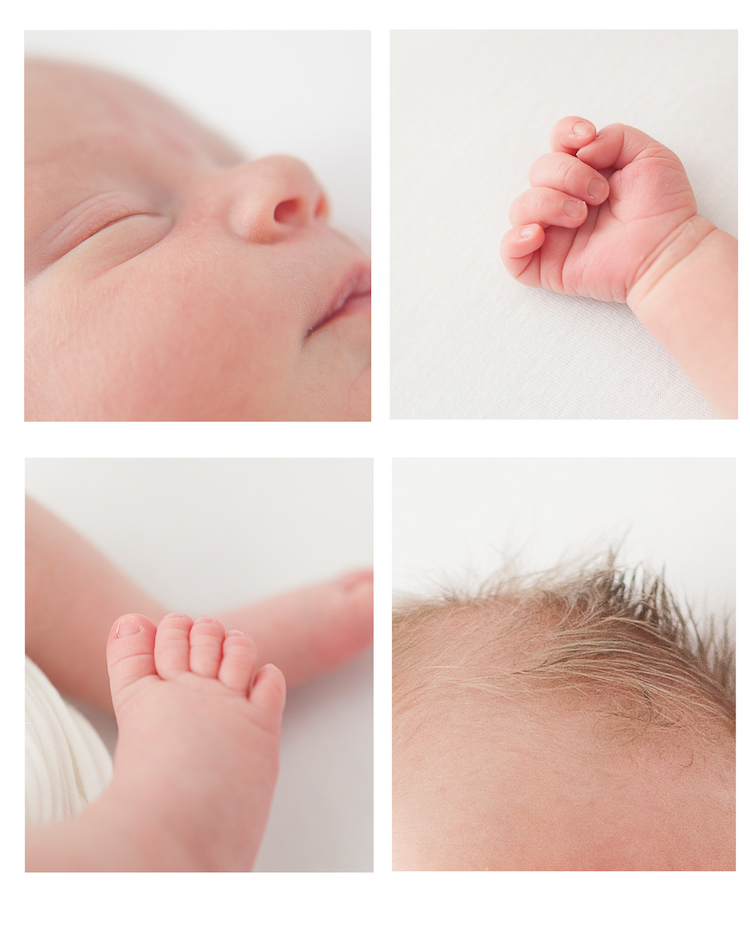
Small details

People photography week

This week on dPS we’re featuring articles all about different kinds of people photography including portrait, event and travel photography. See all the previous ones below, this article is the last one in the series.

  • How to Take Low Key Head-shots
  • How to Do a One Light Portrait Setup and Use it as Your Back-up Plan
  • Travel People Photography – Tips and Pitfalls
  • 8 Tips for Photographing Men
  • 24 Diverse Images That Showcase People Photography
  • Weekly Photography Challenge – People Photography
  • Tips for Getting Yourself to Relax as a Photographer and Have More Successful Portrait Sessions
  • 5 Good Reasons to Add People into Your Landscape Photography
  • 6 Must-Have People Shots to Capture When Photographing Corporate Events
  • 4 Tips to Help You Get Started Doing Lifestyle Photography
  • 3 Tips for Photographing Children Without Losing Your Mind

googletag.cmd.push(function() {
tablet_slots.push( googletag.defineSlot( “/1005424/_dPSv4_tab-all-article-bottom_(300×250)”, [300, 250], “pb-ad-78623” ).addService( googletag.pubads() ) ); } );

googletag.cmd.push(function() {
mobile_slots.push( googletag.defineSlot( “/1005424/_dPSv4_mob-all-article-bottom_(300×250)”, [300, 250], “pb-ad-78158” ).addService( googletag.pubads() ) ); } );

The post How to do a Simple Inexpensive Setup for Newborn Photography by Kim Kelley appeared first on Digital Photography School.


Digital Photography School

 
Comments Off on How to do a Simple Inexpensive Setup for Newborn Photography

Posted in Photography


Ricoh releases inexpensive all-weather AF201FG external flash

12 Feb

Ricoh has announced the AF201FG external flash for Pentax interchangeable lens cameras. The AF201FG is weather-resistant, can tilt down ten degrees and up ninety, and has a  guide number of 20 meters at ISO 100. It also weighs just 141g (5oz). The AF201FG will be available in March for $ 149/£129. Read more 

Articles: Digital Photography Review (dpreview.com)

 
Comments Off on Ricoh releases inexpensive all-weather AF201FG external flash

Posted in Uncategorized


Canon introduces inexpensive PowerShot SX400 IS and SX520 HS superzooms

29 Jul

Canon has introduced a pair of budget-friendly superzooms: the PowerShot SX400 IS and SX520 HS. These cameras have 24-720mm and 24-1008mm equivalent lenses, respectively. The SX400 sports a 16MP CCD and 720p video, while the SX520 uses a CMOS sensor (likely BSI) that can produce Full HD movies. You’ll be able to pick up the SX400 IS in August for $ 249.99, with the SX520 HS following in September for $ 399.99. 

Articles: Digital Photography Review (dpreview.com)

 
Comments Off on Canon introduces inexpensive PowerShot SX400 IS and SX520 HS superzooms

Posted in Uncategorized


Rumors of inexpensive Fujifilm X-series camera hit the web

07 Sep

Fuji-X-A1-mirrorless-camera.png

Leaked details of a possible inexpensive Fujifilm X-series cameras have hit the web today. The camera pictured in the leaked images is apparently named the X-A1, and appears to be built around a 16MP APS-C CMOS sensor instead of X-Trans, but otherwise it looks pretty similar to the recently released X-M1. Other leaked details mention a 3-inch tilting LCD, Wi-Fi, and 5.6 fps burst mode. Click through to see what it (might) look like.

News: Digital Photography Review (dpreview.com)

 
Comments Off on Rumors of inexpensive Fujifilm X-series camera hit the web

Posted in Uncategorized


Coming Soon: Inexpensive Cactus Laser Triggers?

18 Feb

Well this is interesting. Georgia-based photographer Brian Hursey has been testing an advance set of laser “trip-triggers” to be released by Cactus.

These are the types of triggers designed not for syncing but for motion-stopping photography. I.e., when something passes through the laser it trips the flash. They have a variable delay mechanism, and being from Cactus should be reasonably cheap.

For more info, see Brian’s tests, or the Strobist Flickr Group discussion.

-30-


Strobist

 
Comments Off on Coming Soon: Inexpensive Cactus Laser Triggers?

Posted in Photography