Contribution by Shiv Verma
Balancing Exposure
Why is an incident meter important for flash photography?
How often have you struggled trying to capture a well-exposed portrait in a dimly lit room or hall. All you have is the ambient light and your speedlight. With an understanding of exposure and flash techniques you can learn to successfully balance ambient and flash exposures to create exceptional photographs. Ones that look natural, without the harsh appearance of flash, and without detracting from the ambient light.
For the most part, your camera’s meter and exposure evaluation will be just fine when you are capturing images in even light situations. However, the onboard system will usually fail when you are trying to properly expose a subject in a dimly lit room. In these situations, you must be in a position to balance the ambient light that is in the room ,and the light from the flash that will light your subject. The same concept applies to photographing subjects in low light situations outdoors.
The camera’s metering system is not capable of evaluating the two light sources and establish the correct exposure for the scene, or in other words, balancing flash and ambient light. The camera’s meter when set to evaluative (Canon) , matrix (Nikon), centre-weighted, or spot metering works great for a balanced scene, but not when the exposure of the environment is vastly different than the exposure of the flash lit subject.
Two examples of how in-camera metering systems fail
Choose a camera capable of using a hot shoe or off-camera flash to follow along. The pop-up flash is not suitable for this exercise. Keep the aperture value at f/4 and the ISO at 400 for each scenario.
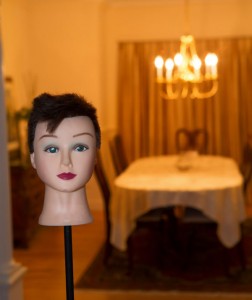
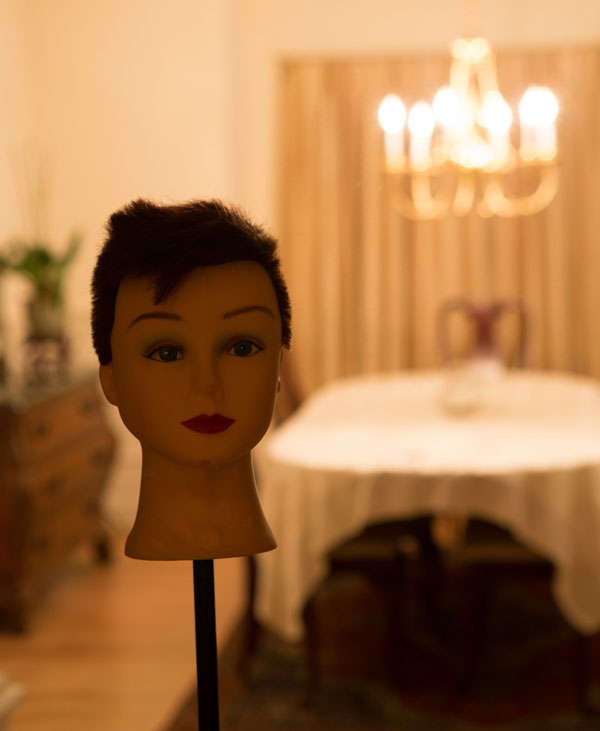
In the first image, below, the flash is set to ETTL (electronic through the lens meter system). The camera is set on aperture priority and evaluative metering mode.
Notice that the subject is reasonably well lit but the background is under exposed
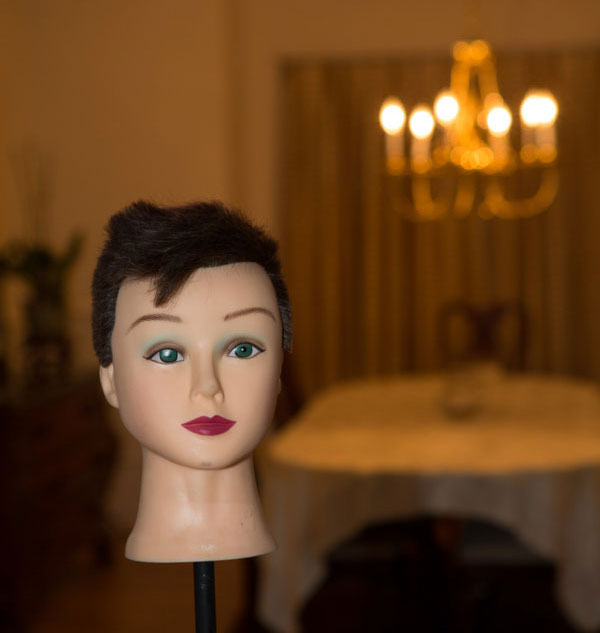
For this next example, set the meter to the spot metering mode and take the reading for the background. All other settings remain the same and the flash is still on ETTL. Notice the overall image is now underexposed. The metering system is unable to properly evaluate the scene and the primary subject. (image below)
For the third image in the sequence turned off your flash, and set your camera evaluative/matrix metering. The idea is to try and get the best exposure for the background. Make note of your shutter speed and exposure settings.
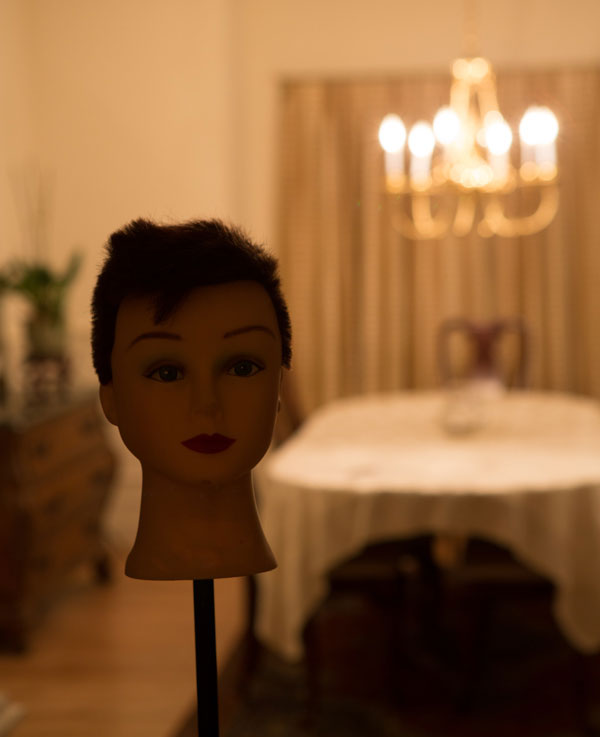
Shutter speed 1/13th second and the background is reasonably well exposed, though not perfect
Using a hand-held incident light meter to solve the problem
Good hand-held meters have multiple modes: a spot metering mode which is a reflective reading (usually 2 degrees or less), an incident mode using the meter’s light dome, and one or more flash modes. It is imperative you learn the proper use of these modes in order to be successful at flash photography.
You want all your images to be good, not the occasional 1%. You need to stop struggling and juggling settings to produce the image you want. Experiments are good only if you know what you are doing and what your tools are. Realize that there are infinite ways to light your subject with strobes, as there are infinite scenarios that your subject can be in. So learn how to expose correctly, learn how to balance ambient light and flash, but most of all, learn how to read light.
Set up the ambient exposure first
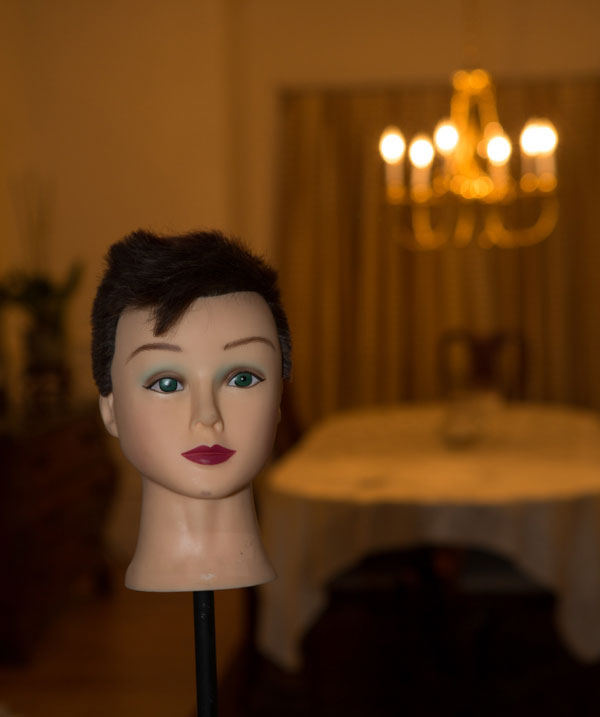
Let’s go back to the scene as we had above. Set your camera to manual exposure mode. As before, keep your aperture at f/4. Next, to properly expose the room you measure the ambient light using the spot meter function of the hand held meter pointed at an area that is mid tone (approximately the same as medium grey) in the scene. In this test case the meter indicated 1/10 sec at f/4. Set your camera to these settings. Take a test shot to ensure your exposure is correct for the ambient light. See below:
Test exposure using ambient light only
Next set the flash exposure for the primary subject
You can experiment with off-camera flash if you do not have remote triggering capability, using an off-camera remote flash cord (for Canon, or Nikon). On-camera hot shoe flash use is not recommended as it produces harsh, flat lighting. But in order to simplify this exercise, you can use the hot shoe flash mounted on you camera. It will be just slightly off center when you have your camera oriented in portrait mode.
To read the flash exposure, set the hand held meter to “incident” mode, and the exposure on the “flash non-cord” setting (do not use the corded or triggered setting). This will read the light falling on the subject when the flash is fired. If you are using a remote trigger, then the next step is easy. If not, then have someone assist you for the next reading. Position the meter such that the dome points to the camera and fire the flash. At full power, in this test case, the reading was f/19. See the image below:
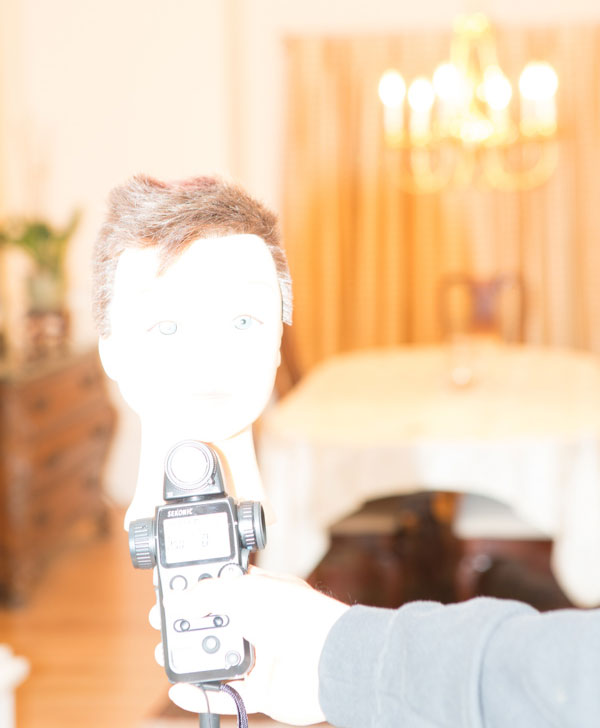
How to point your meter and measure the flash, this is obviously too much power
An f/19 reading indicates overexposure, as your camera is set at f/4 for the depth of field you want. To resolve this, you need to dial down the output of the flash by five stops (f4 > f5.6 > f8 > f11 > f16 > f19>. Set the flash to 1/32 power which is five stops below full power. It is always good to take another test reading and adjust the distance of the flash to subject to compensate for a half stop variance (to f/19). Now you should get a reading of f/4 and you are ready to shoot.
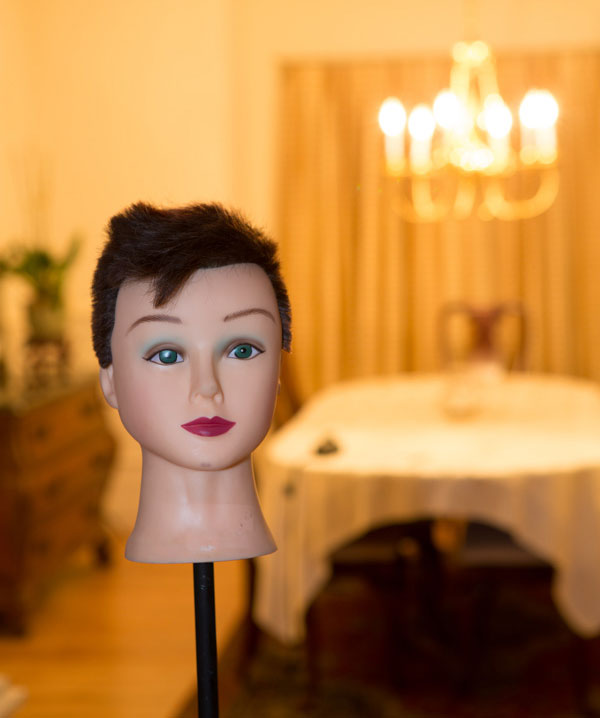
Flash and ambient balanced successfully. The exposure on the subject is perfect and the room is properly exposed too.
Adjust shutter speed to feature the subject more
Basically, the settings on camera indicate equal exposure and you can see that both the subject and the room are exposed correctly at an aperture of f/4. This is good. But, if you want to emphasize the subject more, you want to underexpose the room. With the way you have your exposure already set up, this is really easy. All you need to do is increase the shutter speed by a stop, two stops, or more. This under exposes all the areas lit by the ambient light but the exposure on the subject remains the same and is always correctly exposed.
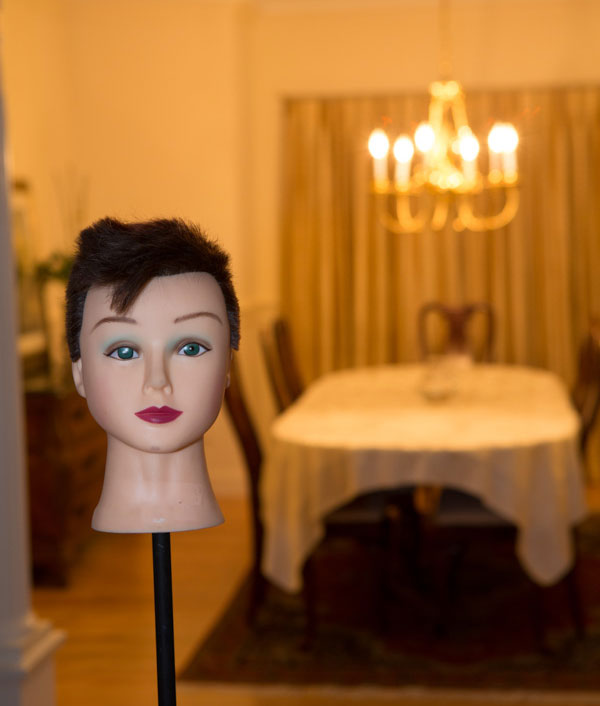
Ambient underexposed by one stop by changing the shutter speed to 1/20th of a second

Ambient underexposed by two stops by changing the shutter speed to 1/40th of a second
The reason for this is that the meter reading for the background is based on the ambient light. The subject however, is lit using the flash, an instantaneous light source. Your flash exposure is controlled by its power output, increasing or decreasing the flash’s distance from the subject and by the aperture setting on your camera. Typically, flash exposure is not affected by shutter speeds as long as your camera’s shutter speed is set to the flash sync speed or slower. As a result, changing the shutter speed affects the ambient light exposure (the exposure of the room) without affecting the flash exposure (the exposure of the subject).
Summary and action plan
In conclusion, relying on your camera’s metering system, be it evaluative, spot or centre-weighted, never gives you the kind of exposure control that you can achieve when using a good hand-held incident light meter.
If you have additional tips or tricks please share them in the comments below, and if you haven’t tried your flash off the camera yet why not give it a go!? Grab yourself a light meter and try it!
 Shiv Verma, is a photographer, educator and technologist and lives in Wrentham Massachusetts. He is an avid wildlife and commercial photographer and conducts photo workshops and tours worldwide. You can check out more of his work on his website at: www.shivverma.com. Follow him on: Google+, Facebook and Twitter
Post originally from: Digital Photography Tips.
Check out our more Photography Tips at Photography Tips for Beginners, Portrait Photography Tips and Wedding Photography Tips.
Balancing Flash and Ambient Light Using an Incident Light Meter
The post Balancing Flash and Ambient Light Using an Incident Light Meter by Guest Contributor appeared first on Digital Photography School.

Digital Photography School


You must be logged in to post a comment.