RSS
 

Posts Tagged ‘InCamera’

How to do Multiple Exposures In-Camera

10 Feb

Combining two or more exposures into a single image is a technique that almost certainly began as an accident (much like photography itself). When using early film cameras, it was all too easy to press the shutter button while forgetting to change the plate – a faux pas that was generally rewarded with an overexposed jumbled mess. When roll films became popular, camera manufacturers thought it prudent to build a mechanical interlock into the film advance mechanism to prevent accidental multiple exposures (unless you used a special override button).
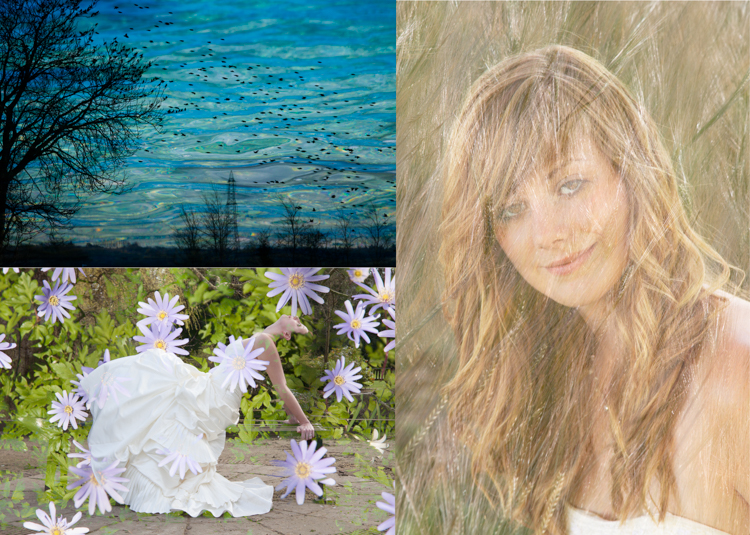
Most digital cameras carried on the tradition of discouraging such mischief by simply not providing the facility at all. As a consequence, a distinctive style of this sometimes serendipitous art began a steady decline – until recently. Today, the thirst for retro styles is gaining popularity and many photographers are once again experimenting with this old technique.

Traditional multiple exposure methods

If you cannot do the electronic equivalent of resetting the shutter without winding the film, how can you achieve this effect? Unless your camera offers you special multiple exposure options, you’re limited to doing everything during one long exposure so that your image can accumulate on the sensor.

One method is to build up your image by firing a flash several times during a long exposure, under low ambient light. This technique is often used by cave photographers as it allows them to create what appears to be a floodlit underground chamber by popping off a number of flashes in different parts of the scene. The disadvantage is that you need a dark environment, but the technique can be effective – particularly when using a flashgun set to produce a rapid burst of flashes in strobe mode to capture fast-moving action.
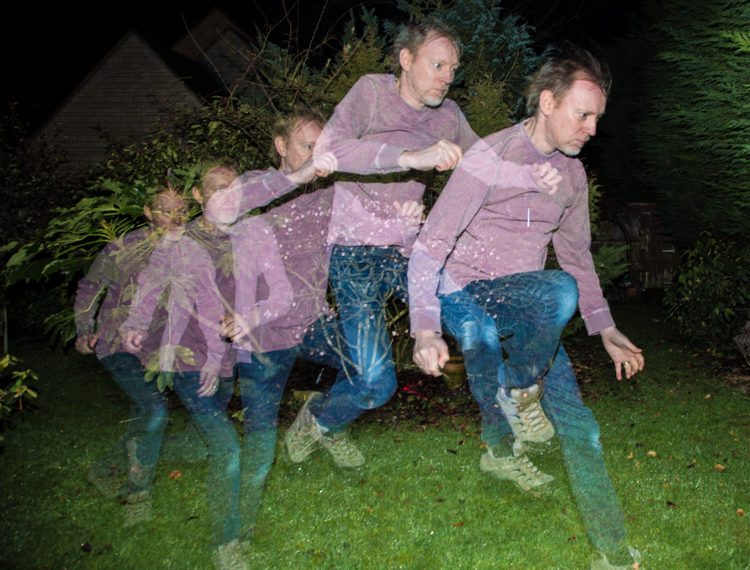
In normal daylight conditions, the only way to achieve a long exposure is to employ a neutral density filter, which will allow you to achieve an exposure time of ten seconds or more. During this time, you can cover and uncover the lens as needed to superimpose a series of still images.

Since both of these methods rely on accumulating more and more light on the sensor from different subjects during a long exposure, it’s easy to produce a result that’s overexposed unless you carefully compensate by underexposing each shot in the sequence. It’s also somewhat tricky to see how your composite image is turning out until the exposure is complete.

New possibilities

Some digital cameras now offer a multiple exposure function, that not only provides a simple means to recreate the traditional effect but also extends the creative possibilities by using more sophisticated blend modes. In addition, the technology is not limited to just high-end DSLRs. Now even smartphone users can enjoy making multiple exposure images using apps such as Multiple Exposures for the iPhone or Photo Blender for Androids.
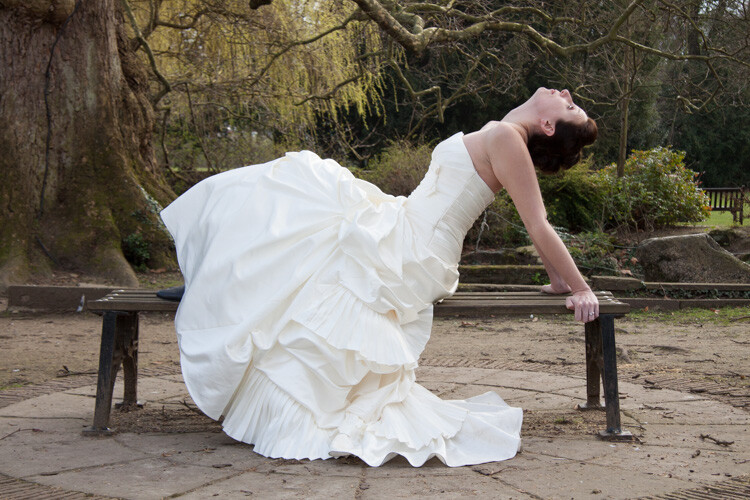
Photo #1
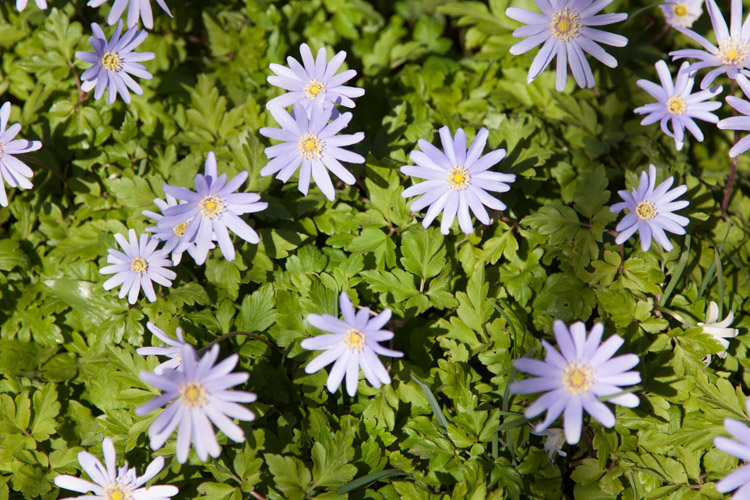
Photo #2

Combined using the Photo Bender app.

If you have a recent camera model, it’s increasingly likely that it will sport some form of multiple exposure feature. Check your camera user manual for details. The specific facilities on offer will vary from one camera model to another, but all those that have this feature will be able to simulate the original technique. So let’s start with a simple double-exposure example using a Canon 5D Mark III.

Double-take

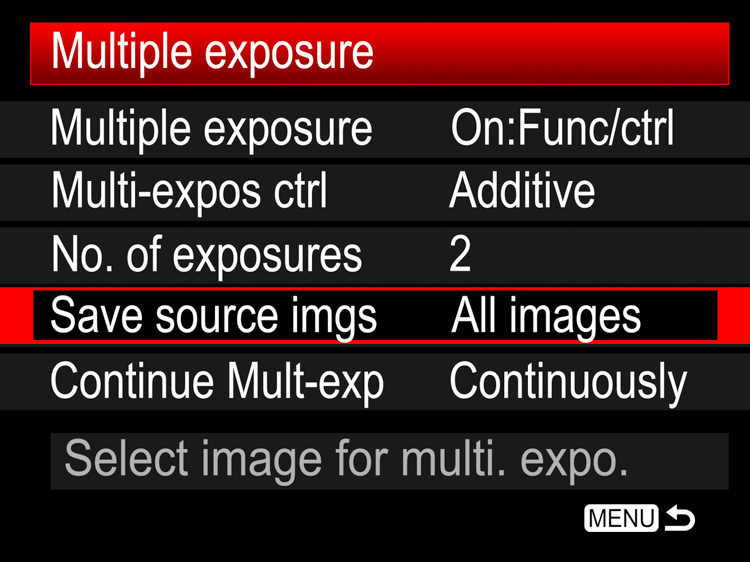
In this technique, both images are exposed normally and then added together. This means that the brightest parts of the final image will be made from the brightest parts of either of the two component images, a fact which can effectively be used to make each image cut out the other. Set the camera’s multiple-exposure setting to take two photos and blend them in the Additive mode, as shown here for the 5D Mk III:
In camera multiple exposures 01

Shooting the images

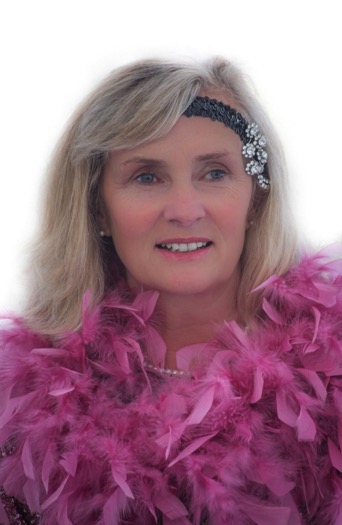
For the best results, you will need two images with light backgrounds. In this example, my subject was photographed indoors against a fairly light background (below left). If your subject is outdoors, it’s often useful to position yourself low down so that your subject is against the sky.
In camera multiple exposures 02 In camera multiple exposures 03

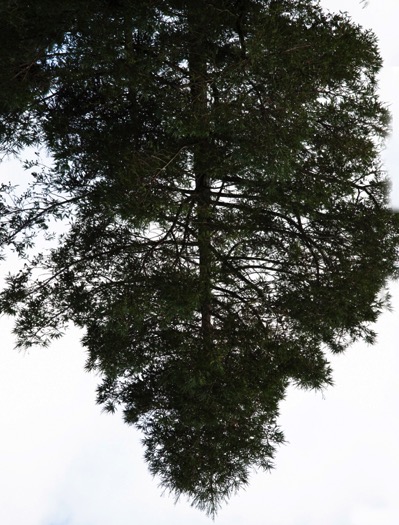
For the second image, look for a high contrast subject that has white areas where you want the first image to be cut-out. In this case, I chose to photograph a tree against the sky (above right), remembering to use the camera in portrait mode but rotating it such that the tree was inverted.

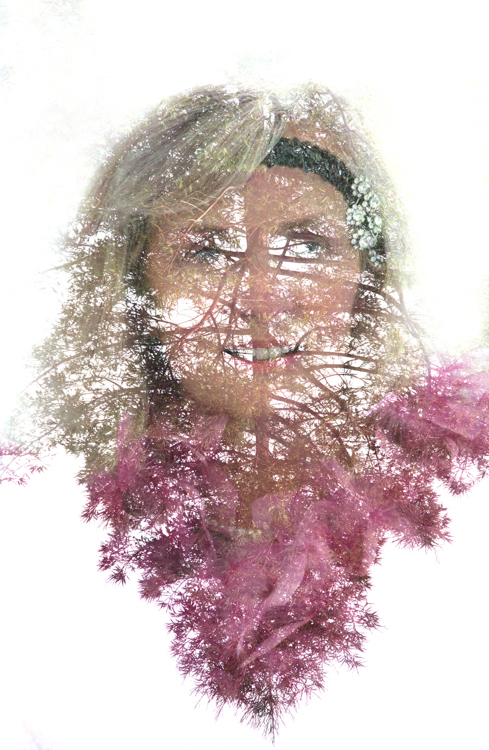
When the images are added in the camera, the light pixels around the subject’s head overwrite the dark pixels from the tree. In the same way, the light pixels from the lower left and right corners of the tree image overwrite the pink feather boa in the first image. Depending on how light the background is in each image, this pixel addition will produce something between a faint high-key effect to a full blown-out white wherever the two subjects don’t overlap.
In camera multiple exposures 04

Camera settings

By default, the multiple exposure setting is disabled. When it is activated on the 5D Mk III, it can be set to either allow you to review and change some settings between exposures or just fire away continuously without slowing down to review images. For this example, I chose the “On:Func/ctrl:” option to allow me time to compose the next shot. One big advantage of selecting that option with Canon cameras is that it enables you to switch to “LiveView where you can see an overlay of your previous shot to help you line up the next one.

Using a previous image

Canon cameras allow you to combine a photo taken the conventional way, with an exposure taken in the multiple exposure mode. To try this, choose the “Select image for multi.expo” option. If you’ve set the total number of exposures to two, you now only have to shoot one extra exposure in multiple exposure mode to complete your composite.

Nikon cameras take this a step further by allowing you to select any two images from the camera’s media card and combine them using a feature Nikon called “Image Overlay”. This is particularly flexible because you can simply keep combining pairs of images and applying exposure adjustments as needed to make your composite raw image.

Auto exposure compensation

If you shoot in this Additive mode and don’t want to exploit the cut-out effect, then you need to reduce the exposure of the individual images according to the number of shots you include in your composite. For example, you should underexpose each shot by one stop if you’re combining two images, or by two stops if you’re combining four images. Alternatively, you can leave the adjustment to the camera. Since you’ve already told the camera how many exposures you wish to combine, it can work out how much exposure compensation to apply in order to create a composite that still retains details in the highlights.

To apply this compensation automatically, simply select “Average” instead of the “Additive” option and set your camera to either aperture or shutter priority mode. If you want to experiment with overlaying textures and making abstract patterns, Average is a good initial blend mode.

Bright and dark

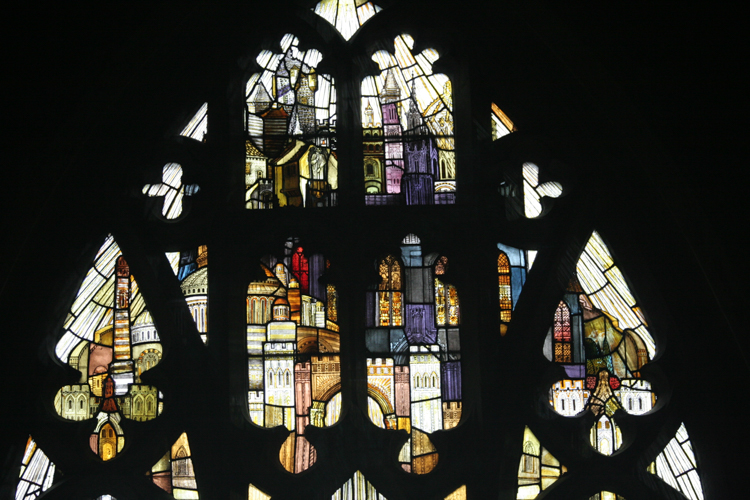
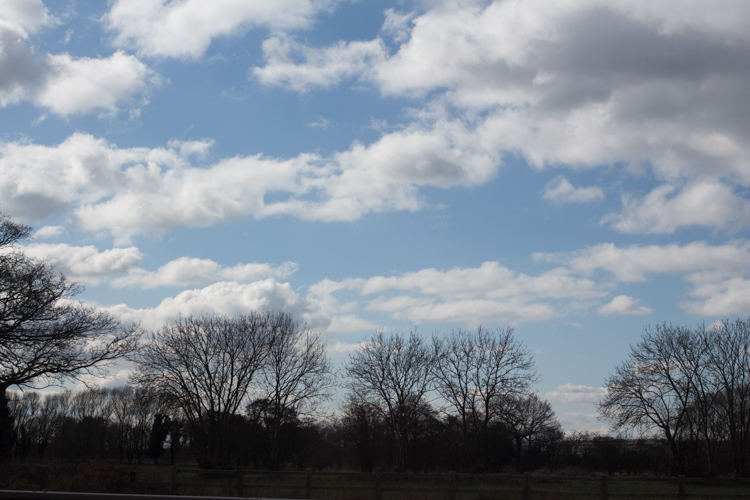
Both the Additive and Average options effectively just accumulate one image on top of another with optional exposure adjustment, so these modes are not that different to conventional film multiple exposures. However, thanks to the increased computing power on some DSLRs, you’re no longer limited to just overlaying images by simply adding their brightness values. Images can also be combined by taking pixels from either one source image or the other, based on which one is brightest (or darkest). To show how this works, consider this combination of window and clouds.
In camera multiple exposures 05

In camera multiple exposures 06

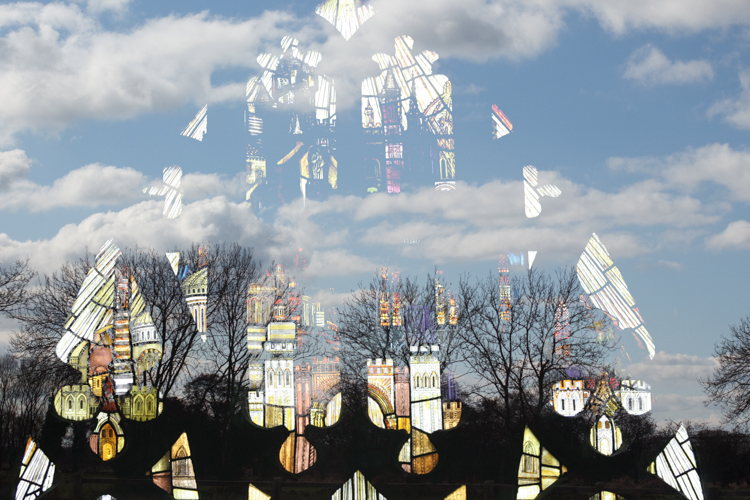
Selecting the Bright mode gives priority to the clouds, which will appear in front of the window at the top of the composite. The dark trees will be excluded in favour of the brighter parts of the window at the bottom of the composite.
In camera multiple exposures 07

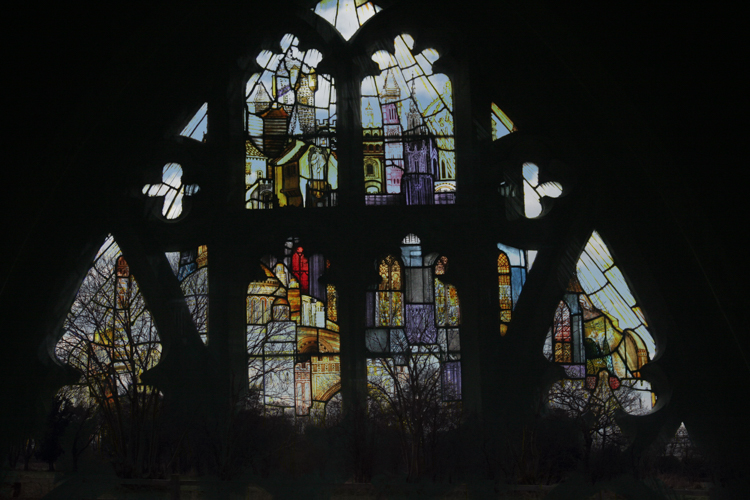
If you select Dark, then the darkest pixels win and the clouds appear behind the window in this rather more subtle version.
In camera multiple exposures 08

Other creative techniques

Having tried out the various blend modes your camera has to offer, it’s worth considering what changes you might want to introduce between shots. As long as you don’t turn the camera off, you could swap lenses, filters or even countries between shots so that you could combine, for example, a macro image with a landscape. Since cameras invariably allow you to combine a live image with one previously stored on the card, there’s a great deal of scope for creatively combining images. Here are two simple examples you might want to try.

Layering a landscape

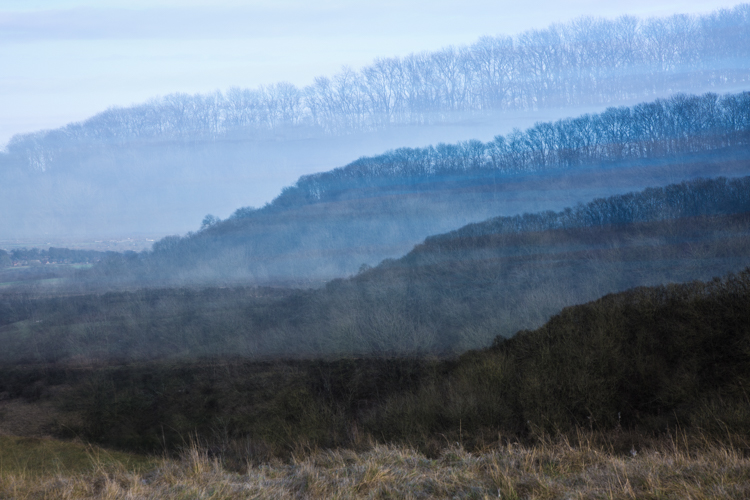
Zoom lenses provide a very convenient way to create a layered effect from a simple skyline. In this example, I combined four shots of different parts of the horizon and also adjusted the camera’s white balance for each exposure to simulate a distance haze.
In camera multiple exposures 09

To produce this effect, follow these steps:

1. Set up your camera to take four exposures in Average multiple exposure mode using either aperture or shutter priority.

2. Set the white balance to 2500ºK to produce a strong blue tint and zoom out for a wide-angle shot. Position the horizon in the top quarter of the viewfinder and take the first photo in the sequence.

3. Turn on LiveView and zoom in slightly so that you can see the magnified overlay which will become your next nearest line of hills. Pan the camera to a different part of the horizon to create some topographic variety and tilt the camera up to position the next horizon just below the previous one. Set the white balance to 4000ºK to create a less intense blue bias and take the second photo.

4. Reposition the horizon lower still on the LiveView screen. Zoom in a little more and with the white balance set to 5500ºK, take the third photo.

5. Finally, zoom in fully, pan the camera again for some foreground interest and position the horizon near the bottom of the screen. Increase the white balance to 7000ºK and take the final photo.

Focus effects

Most of the time, we strive to achieve a sharp focus in our pictures, perhaps with some creative background blur. Shooting multiple exposures enables you to combine a pin-sharp image with a soft out-of-focus one of the same subject to smooth out highlight details or make it glow with an unusual soft-focus effect. Here are the steps used to make a highlight-smoothed image:

1. Set the camera on a tripod and set the multiple-exposure blend mode to Dark.

2. Take a sharply focused photograph of the subject. In this case, some roses were set against a dark background to give them more definition in the final image.
In camera multiple exposures 10

3. Defocus the image (set the lens focus to manual to stop it refocusing on the next shot). In this example, I’ve defocused rather drastically to illustrate the effect.

In camera multiple exposures 11

4. Take the second photo.

Since the highlights are blurred, they become darker. In the Dark blend mode, these darker tones make it to the final image instead of the original highlights. The dark background from the sharper image also takes priority over the fuzzy edges in the defocused image, resulting in a composite image that’s well defined against the dark background but with highlight details smoothed out.
In camera multiple exposures 12

For a more traditional soft-focus effect, it’s necessary to preserve the highlight detail and add the highlight blur around it. You can achieve this effect by simply selecting the Bright blending mode to produce a soft glow, as shown here.
In camera multiple exposures 13

Action shots

In the techniques considered so far, the camera has been set up to review the image after each shot in the sequence and if your camera allows, to store each component image to the media card. This is useful to help line up each new image with the previous one.

But for fast-action shots, this takes too much time to process in-camera. If you want to take a composite photo of someone jumping over a fence, (then apart from arranging for a bull to be located in the same field as the subject) these are the basic steps to follow:

1. Set the multiple exposure mode such that it doesn’t display the image after each shot or write to the card. On the 5D Mk III, this is achieved by setting the Multiple Exposure menu item to “On:ContShtng” for continuous shooting.

2. Set the number of exposures according to the speed of the action you’re anticipating (more exposures for faster action) and set the shutter speed and aperture to values that will be able to capture a sequence of sharp images.

3. Set the camera on a tripod and pre-focus at the distance where the action is to take place. Set the lens focus to manual to ensure the focus doesn’t change during the shoot.

4. Set the drive mode to continuous high speed burst.

5. When the action takes place, press and hold the shutter button to ensure that all the individual exposures are taken.

Blend modes

If you leave the blend mode set to Average, you’ll get a solid background with a number of ghostly overlays corresponding to the various exposures. This is because the exposure of each image in the sequence is automatically reduced to prevent the accumulating image from becoming too bright, but the results can be rather thin and disappointing, like this shot of a Canon camera swinging against a light background.
In camera multiple exposures 14

If you set the blend mode to Dark when using a light background, the results will be much more defined like this:
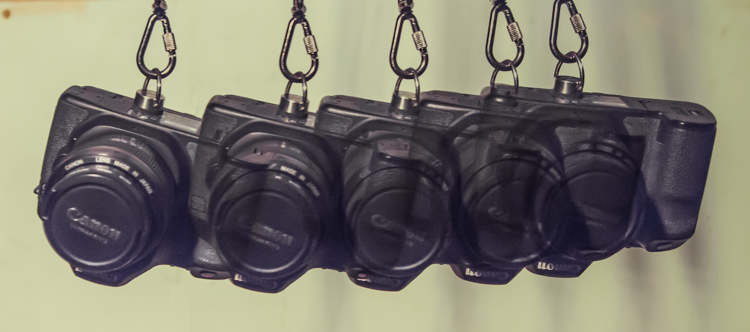
In camera multiple exposures 15

It follows that the converse is also true. When you are shooting a lighter colored object moving against a darker background, the best results are obtained by selecting the Light blend mode:
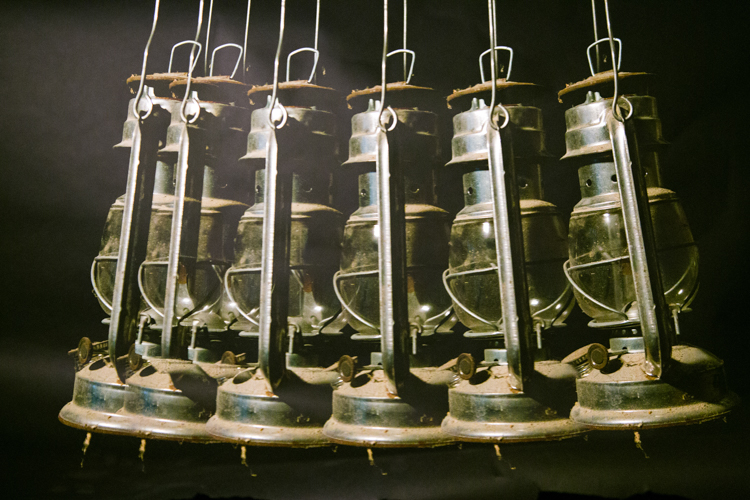
In camera multiple exposures 16

Slowing down

Not all multiple exposure action shots need to be frantic. This image was made using an EOS 6D in multiple exposure mode set to take nine exposures in the Bright blend mode. One image was taken every two minutes.

In camera multiple exposures 17

Look for future image material

Much more sophisticated multiple exposure techniques can be achieved by using dedicated editing software such as Adobe Photoshop. At the moment, you may only be interested in combining some images in-camera, but bear in mind that you might want to experiment on your computer in the future. Even if you’re not familiar with powerful desktop editing software just yet, it’s always worth getting together the raw material you can process on a rainy day.

The next time you’re out and about with your camera, think about photographing interesting textures, silhouettes, and fast-action sequences, instead of just taking single photos. You’ll soon be on your way to creating some eye-catching multiple exposure photos.

googletag.cmd.push(function() {
tablet_slots.push( googletag.defineSlot( “/1005424/_dPSv4_tab-all-article-bottom_(300×250)”, [300, 250], “pb-ad-78623” ).addService( googletag.pubads() ) ); } );

googletag.cmd.push(function() {
mobile_slots.push( googletag.defineSlot( “/1005424/_dPSv4_mob-all-article-bottom_(300×250)”, [300, 250], “pb-ad-78158” ).addService( googletag.pubads() ) ); } );

The post How to do Multiple Exposures In-Camera by Dave Baxter appeared first on Digital Photography School.


Digital Photography School

 
Comments Off on How to do Multiple Exposures In-Camera

Posted in Photography


How to do Multiple Exposures In-Camera

08 Feb

Combining two or more exposures into a single image is a technique that almost certainly began as an accident (much like photography itself). When using early film cameras, it was all too easy to press the shutter button while forgetting to change the plate – a faux pas that was generally rewarded with an overexposed jumbled mess. When roll films became popular, camera manufacturers thought it prudent to build a mechanical interlock into the film advance mechanism to prevent accidental multiple exposures (unless you used a special override button).

Most digital cameras carried on the tradition of discouraging such mischief by simply not providing the facility at all. As a consequence, a distinctive style of this sometimes serendipitous art began a steady decline – until recently. Today, the thirst for retro styles is gaining popularity and many photographers are once again experimenting with this old technique.

Traditional multiple exposure methods

If you cannot do the electronic equivalent of resetting the shutter without winding the film, how can you achieve this effect? Unless your camera offers you special multiple exposure options, you’re limited to doing everything during one long exposure so that your image can accumulate on the sensor.

One method is to build up your image by firing a flash several times during a long exposure, under low ambient light. This technique is often used by cave photographers as it allows them to create what appears to be a floodlit underground chamber by popping off a number of flashes in different parts of the scene. The disadvantage is that you need a dark environment, but the technique can be effective – particularly when using a flashgun set to produce a rapid burst of flashes in strobe mode to capture fast-moving action.

In normal daylight conditions, the only way to achieve a long exposure is to employ a neutral density filter, which will allow you to achieve an exposure time of ten seconds or more. During this time, you can cover and uncover the lens as needed to superimpose a series of still images.

Since both of these methods rely on accumulating more and more light on the sensor from different subjects during a long exposure, it’s easy to produce a result that’s overexposed unless you carefully compensate by underexposing each shot in the sequence. It’s also somewhat tricky to see how your composite image is turning out until the exposure is complete.

New possibilities

Some digital cameras now offer a multiple exposure function, that not only provides a simple means to recreate the traditional effect but also extends the creative possibilities by using more sophisticated blend modes. In addition, the technology is not limited to just high-end DSLRs. Now even smartphone users can enjoy making multiple exposure images using apps such as Multiple Exposures for the iPhone or Photo Blender for Androids.

Photo #1

Photo #2

Combined using the Photo Bender app.

If you have a recent camera model, it’s increasingly likely that it will sport some form of multiple exposure feature. Check your camera user manual for details. The specific facilities on offer will vary from one camera model to another, but all those that have this feature will be able to simulate the original technique. So let’s start with a simple double-exposure example using a Canon 5D Mark III.

Double-take

In this technique, both images are exposed normally and then added together. This means that the brightest parts of the final image will be made from the brightest parts of either of the two component images, a fact which can effectively be used to make each image cut out the other. Set the camera’s multiple-exposure setting to take two photos and blend them in the Additive mode, as shown here for the 5D Mk III:

In camera multiple exposures 01

Shooting the images

For the best results, you will need two images with light backgrounds. In this example, my subject was photographed indoors against a fairly light background (below left). If your subject is outdoors, it’s often useful to position yourself low down so that your subject is against the sky.

In camera multiple exposures 02 In camera multiple exposures 03

For the second image, look for a high contrast subject that has white areas where you want the first image to be cut-out. In this case, I chose to photograph a tree against the sky (above right), remembering to use the camera in portrait mode but rotating it such that the tree was inverted.

When the images are added in the camera, the light pixels around the subject’s head overwrite the dark pixels from the tree. In the same way, the light pixels from the lower left and right corners of the tree image overwrite the pink feather boa in the first image. Depending on how light the background is in each image, this pixel addition will produce something between a faint high-key effect to a full blown-out white wherever the two subjects don’t overlap.

In camera multiple exposures 04

Camera settings

By default, the multiple exposure setting is disabled. When it is activated on the 5D Mk III, it can be set to either allow you to review and change some settings between exposures or just fire away continuously without slowing down to review images. For this example, I chose the “On:Func/ctrl:” option to allow me time to compose the next shot. One big advantage of selecting that option with Canon cameras is that it enables you to switch to “LiveView where you can see an overlay of your previous shot to help you line up the next one.

Using a previous image

Canon cameras allow you to combine a photo taken the conventional way, with an exposure taken in the multiple exposure mode. To try this, choose the “Select image for multi.expo” option. If you’ve set the total number of exposures to two, you now only have to shoot one extra exposure in multiple exposure mode to complete your composite.

Nikon cameras take this a step further by allowing you to select any two images from the camera’s media card and combine them using a feature Nikon called “Image Overlay”. This is particularly flexible because you can simply keep combining pairs of images and applying exposure adjustments as needed to make your composite raw image.

Auto exposure compensation

If you shoot in this Additive mode and don’t want to exploit the cut-out effect, then you need to reduce the exposure of the individual images according to the number of shots you include in your composite. For example, you should underexpose each shot by one stop if you’re combining two images, or by two stops if you’re combining four images. Alternatively, you can leave the adjustment to the camera. Since you’ve already told the camera how many exposures you wish to combine, it can work out how much exposure compensation to apply in order to create a composite that still retains details in the highlights.

To apply this compensation automatically, simply select “Average” instead of the “Additive” option and set your camera to either aperture or shutter priority mode. If you want to experiment with overlaying textures and making abstract patterns, Average is a good initial blend mode.

Bright and dark

Both the Additive and Average options effectively just accumulate one image on top of another with optional exposure adjustment, so these modes are not that different to conventional film multiple exposures. However, thanks to the increased computing power on some DSLRs, you’re no longer limited to just overlaying images by simply adding their brightness values. Images can also be combined by taking pixels from either one source image or the other, based on which one is brightest (or darkest). To show how this works, consider this combination of window and clouds.

In camera multiple exposures 05

In camera multiple exposures 06

Selecting the Bright mode gives priority to the clouds, which will appear in front of the window at the top of the composite. The dark trees will be excluded in favour of the brighter parts of the window at the bottom of the composite.

In camera multiple exposures 07

If you select Dark, then the darkest pixels win and the clouds appear behind the window in this rather more subtle version.

In camera multiple exposures 08

Other creative techniques

Having tried out the various blend modes your camera has to offer, it’s worth considering what changes you might want to introduce between shots. As long as you don’t turn the camera off, you could swap lenses, filters or even countries between shots so that you could combine, for example, a macro image with a landscape. Since cameras invariably allow you to combine a live image with one previously stored on the card, there’s a great deal of scope for creatively combining images. Here are two simple examples you might want to try.

Layering a landscape

Zoom lenses provide a very convenient way to create a layered effect from a simple skyline. In this example, I combined four shots of different parts of the horizon and also adjusted the camera’s white balance for each exposure to simulate a distance haze.

In camera multiple exposures 09

To produce this effect, follow these steps:

1. Set up your camera to take four exposures in Average multiple exposure mode using either aperture or shutter priority.

2. Set the white balance to 2500ºK to produce a strong blue tint and zoom out for a wide-angle shot. Position the horizon in the top quarter of the viewfinder and take the first photo in the sequence.

3. Turn on LiveView and zoom in slightly so that you can see the magnified overlay which will become your next nearest line of hills. Pan the camera to a different part of the horizon to create some topographic variety and tilt the camera up to position the next horizon just below the previous one. Set the white balance to 4000ºK to create a less intense blue bias and take the second photo.

4. Reposition the horizon lower still on the LiveView screen. Zoom in a little more and with the white balance set to 5500ºK, take the third photo.

5. Finally, zoom in fully, pan the camera again for some foreground interest and position the horizon near the bottom of the screen. Increase the white balance to 7000ºK and take the final photo.

Focus effects

Most of the time, we strive to achieve a sharp focus in our pictures, perhaps with some creative background blur. Shooting multiple exposures enables you to combine a pin-sharp image with a soft out-of-focus one of the same subject to smooth out highlight details or make it glow with an unusual soft-focus effect. Here are the steps used to make a highlight-smoothed image:

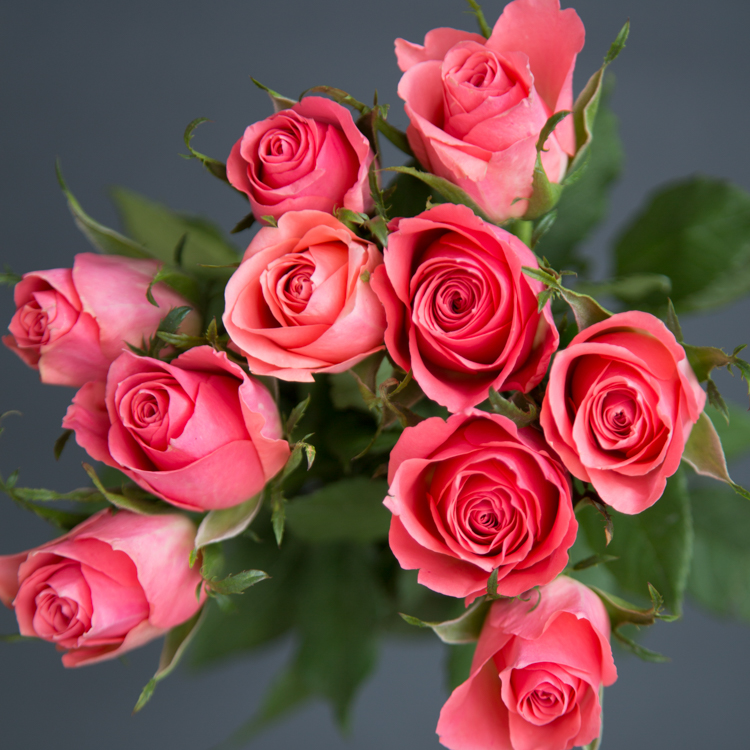
1. Set the camera on a tripod and set the multiple-exposure blend mode to Dark.

2. Take a sharply focused photograph of the subject. In this case, some roses were set against a dark background to give them more definition in the final image.

In camera multiple exposures 10

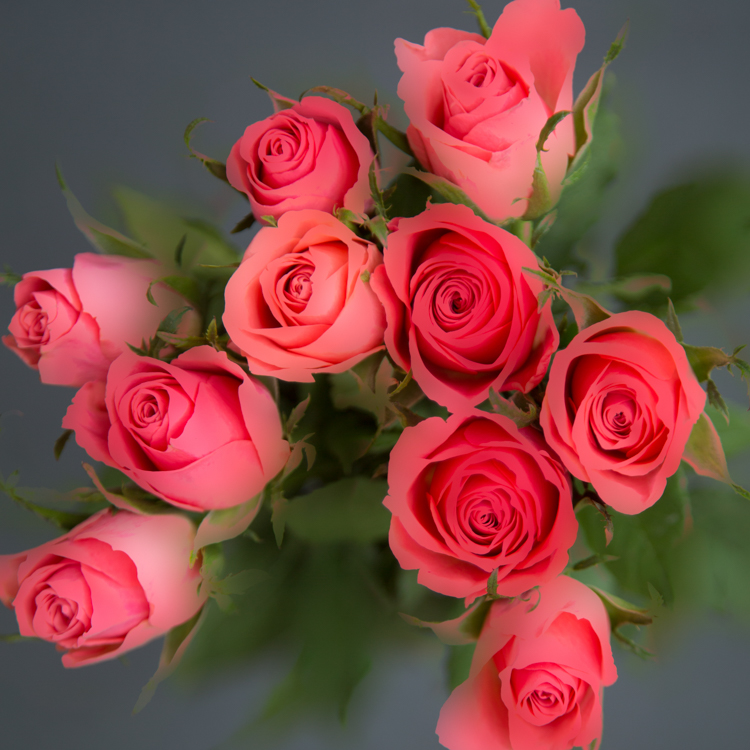
3. Defocus the image (set the lens focus to manual to stop it refocusing on the next shot). In this example, I’ve defocused rather drastically to illustrate the effect.

In camera multiple exposures 11

4. Take the second photo.

Since the highlights are blurred, they become darker. In the Dark blend mode, these darker tones make it to the final image instead of the original highlights. The dark background from the sharper image also takes priority over the fuzzy edges in the defocused image, resulting in a composite image that’s well defined against the dark background but with highlight details smoothed out.

In camera multiple exposures 12

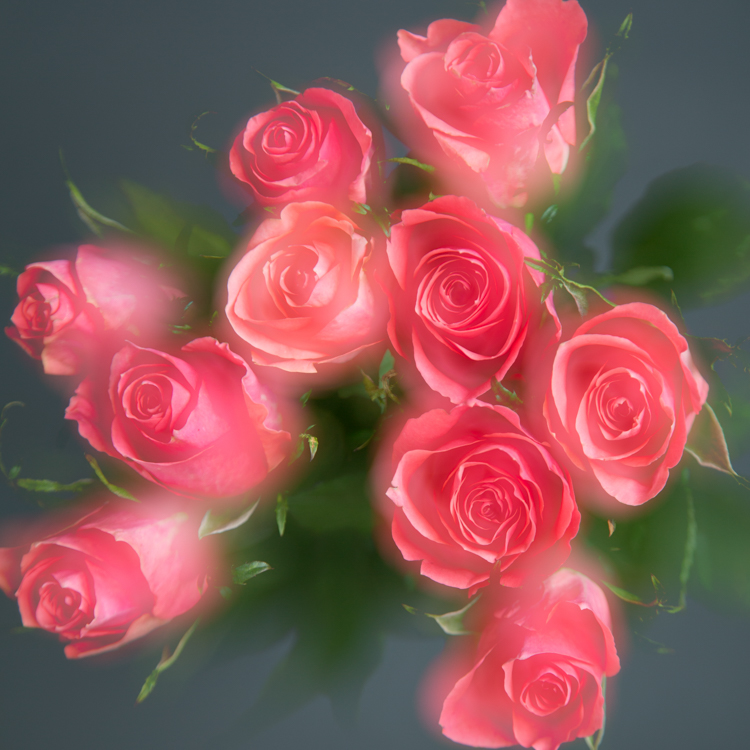
For a more traditional soft-focus effect, it’s necessary to preserve the highlight detail and add the highlight blur around it. You can achieve this effect by simply selecting the Bright blending mode to produce a soft glow, as shown here.

In camera multiple exposures 13

Action shots

In the techniques considered so far, the camera has been set up to review the image after each shot in the sequence and if your camera allows, to store each component image to the media card. This is useful to help line up each new image with the previous one.

But for fast-action shots, this takes too much time to process in-camera. If you want to take a composite photo of someone jumping over a fence, (then apart from arranging for a bull to be located in the same field as the subject) these are the basic steps to follow:

1. Set the multiple exposure mode such that it doesn’t display the image after each shot or write to the card. On the 5D Mk III, this is achieved by setting the Multiple Exposure menu item to “On:ContShtng” for continuous shooting.

2. Set the number of exposures according to the speed of the action you’re anticipating (more exposures for faster action) and set the shutter speed and aperture to values that will be able to capture a sequence of sharp images.

3. Set the camera on a tripod and pre-focus at the distance where the action is to take place. Set the lens focus to manual to ensure the focus doesn’t change during the shoot.

4. Set the drive mode to continuous high speed burst.

5. When the action takes place, press and hold the shutter button to ensure that all the individual exposures are taken.

Blend modes

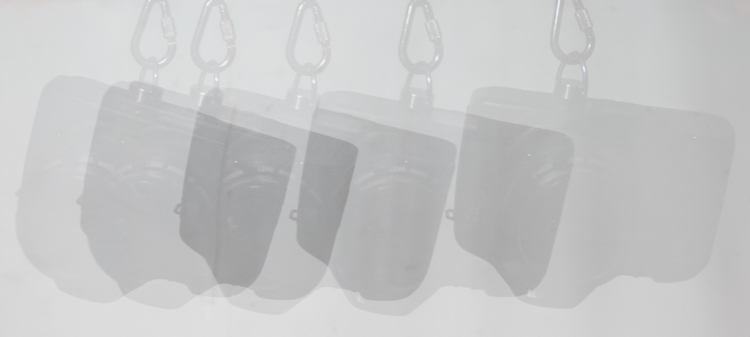
If you leave the blend mode set to Average, you’ll get a solid background with a number of ghostly overlays corresponding to the various exposures. This is because the exposure of each image in the sequence is automatically reduced to prevent the accumulating image from becoming too bright, but the results can be rather thin and disappointing, like this shot of a Canon camera swinging against a light background.

In camera multiple exposures 14

If you set the blend mode to Dark when using a light background, the results will be much more defined like this:

In camera multiple exposures 15

It follows that the converse is also true. When you are shooting a lighter colored object moving against a darker background, the best results are obtained by selecting the Light blend mode:

In camera multiple exposures 16

Slowing down

Not all multiple exposure action shots need to be frantic. This image was made using an EOS 6D in multiple exposure mode set to take nine exposures in the Bright blend mode. One image was taken every two minutes.

In camera multiple exposures 17

Look for future image material

Much more sophisticated multiple exposure techniques can be achieved by using dedicated editing software such as Adobe Photoshop. At the moment, you may only be interested in combining some images in-camera, but bear in mind that you might want to experiment on your computer in the future. Even if you’re not familiar with powerful desktop editing software just yet, it’s always worth getting together the raw material you can process on a rainy day.

The next time you’re out and about with your camera, think about photographing interesting textures, silhouettes, and fast-action sequences, instead of just taking single photos. You’ll soon be on your way to creating some eye-catching multiple exposure photos.

googletag.cmd.push(function() {
tablet_slots.push( googletag.defineSlot( “/1005424/_dPSv4_tab-all-article-bottom_(300×250)”, [300, 250], “pb-ad-78623” ).addService( googletag.pubads() ) ); } );

googletag.cmd.push(function() {
mobile_slots.push( googletag.defineSlot( “/1005424/_dPSv4_mob-all-article-bottom_(300×250)”, [300, 250], “pb-ad-78158” ).addService( googletag.pubads() ) ); } );

The post How to do Multiple Exposures In-Camera by Dave Baxter appeared first on Digital Photography School.


Digital Photography School

 
Comments Off on How to do Multiple Exposures In-Camera

Posted in Photography


Magic Lantern proof-of-concept shows in-camera DNG shooting

04 Jan

Magic Lantern, the free software add-on for some Canon cameras, may one day offer in-camera DNG shooting, at least per a proof-of-concept that has appeared on the company’s forums. The proof-of-concept comes from forum administrator ‘a1ex,’ who details a way in which he got Magic Lantern to produce an in-camera lossless 14-bit DNG file that Adobe’s dng_validate accepts. Although most high-end Canon cameras shoot Raw, files are recorded in Canon’s proprietary .CRW and .CR2 formats.

This proof-of-concept is not a feature currently offered by Magic Lantern, so current users will not be able to access it, and there is no indication at this time whether the software will ever add this feature.

Magic Lantern forum user ‘Danne’ went on to provide sample DNG images taken using this encoder mod; a direct download is available here.

Via: PetaPixel

Articles: Digital Photography Review (dpreview.com)

 
Comments Off on Magic Lantern proof-of-concept shows in-camera DNG shooting

Posted in Uncategorized


3 Tips for Creating Double Exposures In-Camera Using Flash

20 Oct

Have you ever wondered how double exposures are done in digital cameras? I have. Back in film days, we knew that to double expose a frame, all you needed to do is rewind it back to the frame you have just exposed, thereby taking two separate shots using one frame of the film. Nowadays with digital SLRs, there is no film to re-expose and no rewind mechanism to go back to a previous photo so you can re-shoot on top of it. However, double exposure and multiple exposures can be done in post-production quite easily. But this little tutorial will focus on how to take double exposure in-camera using a digital camera.

double-exposures-in-camera-tutorial

Equipment needed for double exposures

What you will need:

  • A tripod.
  • Your camera.
  • Remote trigger, receiver or transceiver.
  • Flash guns (speedlights) or strobes (one or two).
  • Some light modifiers (optional) such as umbrellas, softboxes, or octaboxes.
  • A backdrop or wall.

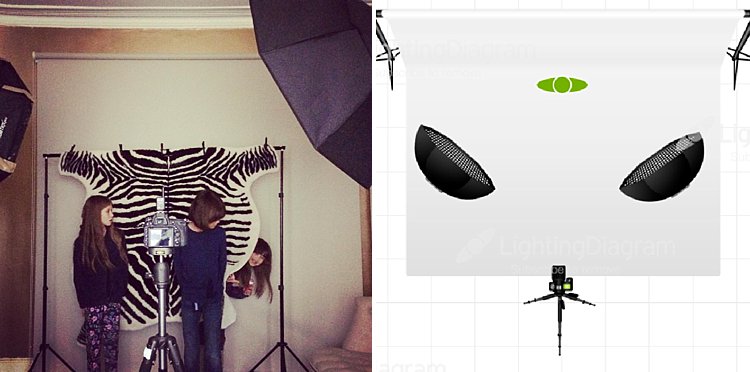
For my experiment below, I used two strobes mounted on stands and modified by gridded octaboxes. I used Paul Buff’s Cybersyncs for the wireless remote transceiver system. I also had three backdrops: one black, one beige and one patterned. See the image below for my studio setup and an iPhone picture of behind the scenes.

double-exposure-tutorial-in-camera

The camera and flash settings

The strobes were kept on a constant setting and I chose the lowest power. My ISO was also on the lowest setting (ISO 100) for most of the shots except for the f/16 ones where I cranked it up a little. The aperture varied between f/8 – f/16, depending on the look I was after and the length of my exposure. Shutter speed also varied between one second to a few seconds, to bulb. In other words, experiment until you get the look right.

How to take the double exposure

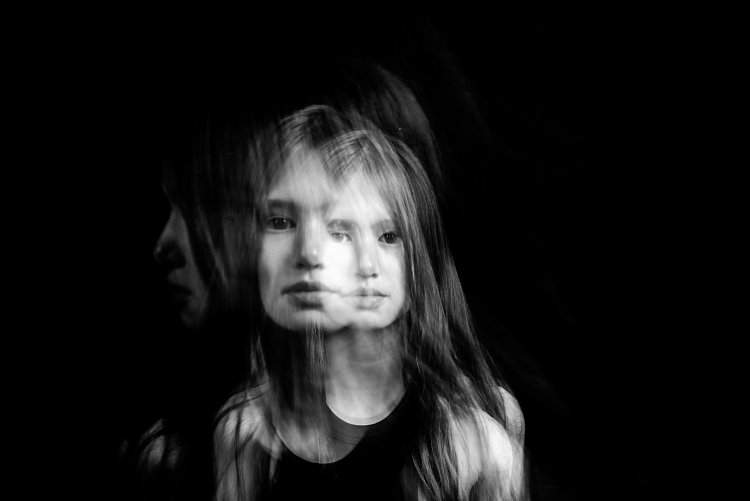
This is the trick. While the camera is exposing the image so that the shutter is open, keep triggering the flash. For these shots, I triggered the flash 2-4 times depending on the length of the exposure and how fast I could press the trigger button. The flash freezes the action so the more time the flash fires the more frozen actions you get on your image.

This leads us nicely to the first tip.

#1 Exaggerated movement is key

double-exposures-in-camera-tutorial

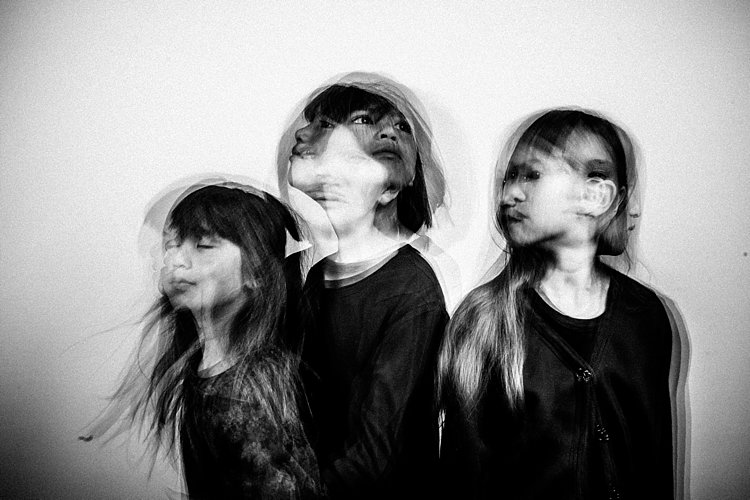
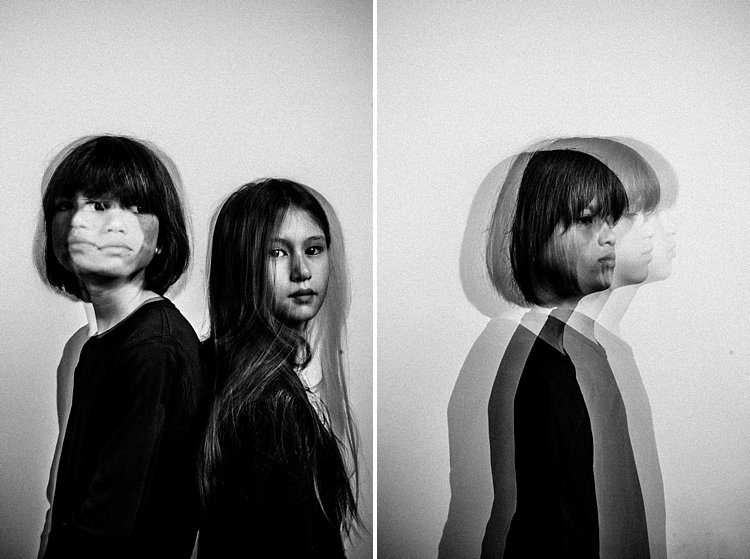
If your subject makes very small and minor movements, the likelihood is the images will sit on top of each other. This may result in one final image that looks like a blurry mess as in the photo above rather than many separate frozen images on a single photo as shown in the photo below. It is better to tell your subject to move distinctly away from the first position so the movements are separate. The camera still captures the trail of movement as a blur. But when you trigger the flash, that particular moment is rendered sharp and still.

double-exposures-in-camera-tutorial

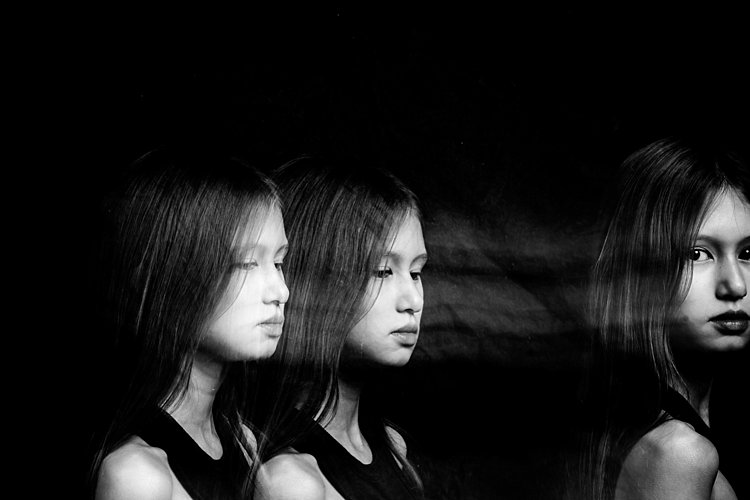
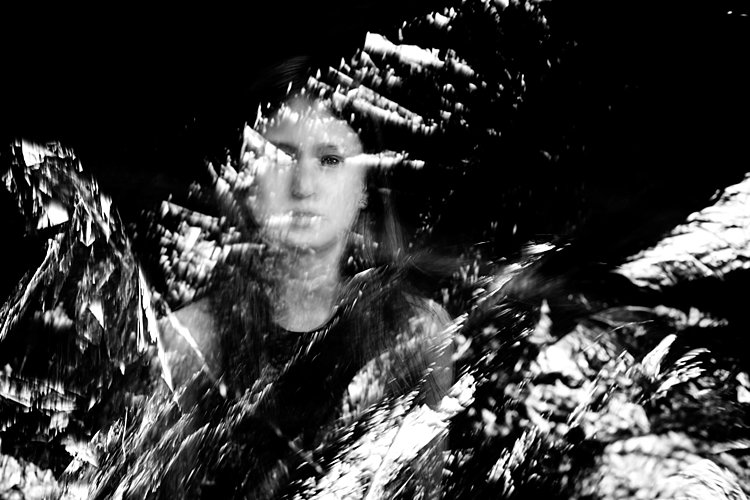
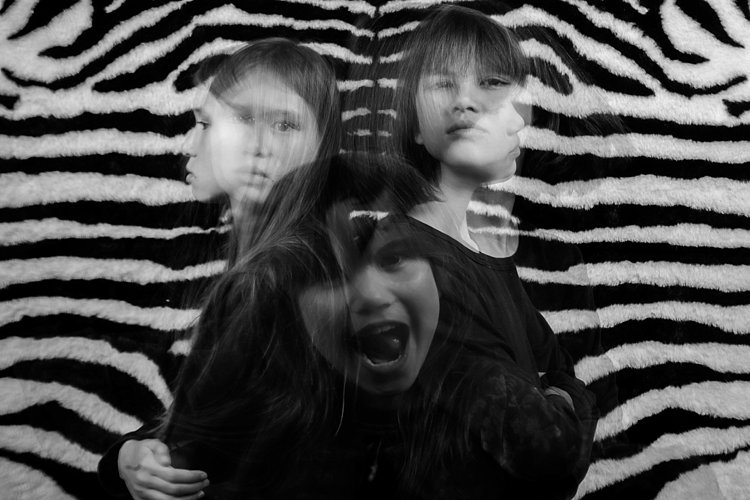
I asked my kids to walk across the frame, counting each step and on a certain count to turn their heads. I would trigger the flash when they moved sideways or turned their heads. At other times I asked one of the children to only join the frame on the third flash so that there is only one of her that registers. I also got them to walk towards me (see photo at top of article). It was at that stage that I changed my aperture to the smallest my lens allowed, in this case, f/16 so that I could still get the head sharp at various depths of field.

double-exposures-in-camera-tutorial

In the photo below, I got my kids to shake their heads as fast and as many times as they could. I wanted the focus here to be the movement rather than their frozen faces. Don’t be afraid to experiment. The beauty of digital is that unlike film, you have an infinite number of frames at your disposal so can afford to make many mistakes until you get what you are looking for.

double-exposures-in-camera-tutorial

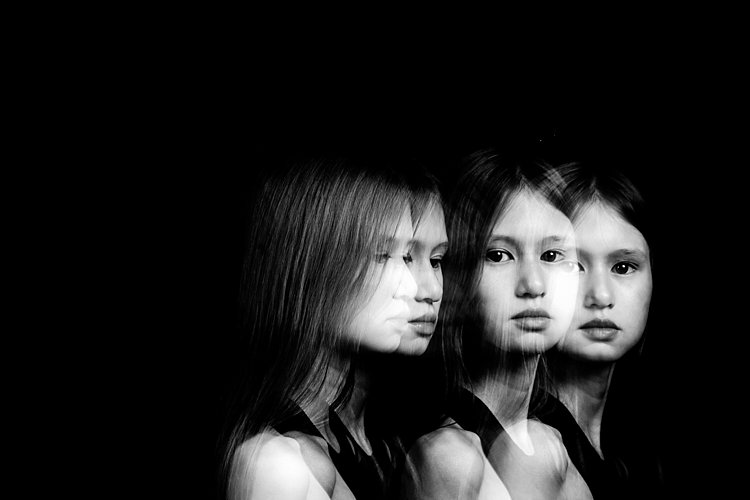
#2 A dark background is better

Compare the image above with the light background to the other images with the black background. The difference in the final image is vast. I prefer the dark background where my intention was to freeze several portraits and the lighter background where my focus was on capturing the trail of movements. Overall I shot and preferred more of the images with a dark background as the delineation between actions and the clarity of subjects are easier to see. Contrast between the skin and other lighter parts of the image was also easier to achieve compared to images shot with the beige background. In the photo below, I edited quite aggressively to get the contrast I wanted. I also added grain to simulate a film look.

double-exposures-in-camera-tutorial

#3 Experiment with materials and textures

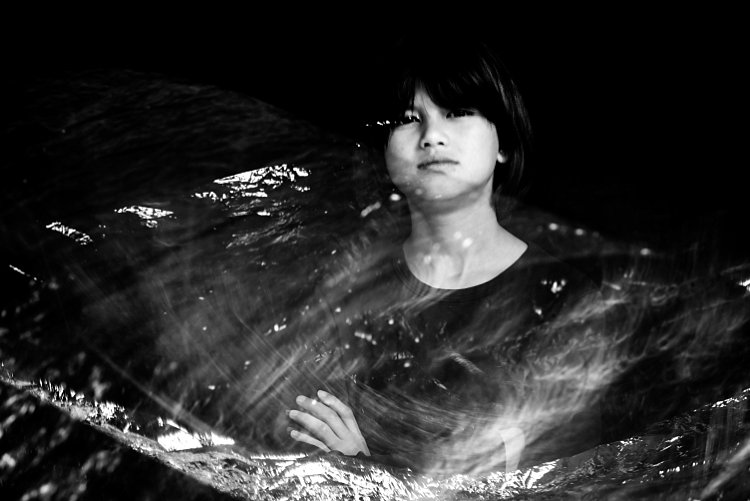
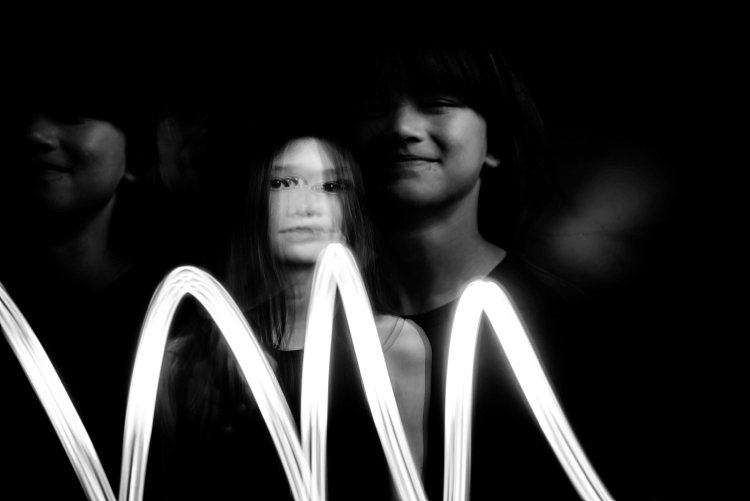
Bring in other materials such as aluminum foil. This one here is an emergency blanket. Two of my kids stood on either side, held and waved the blanket up and down in front of the middle child so the slow shutter captured some of the movement of the foil. The kids also carried  a torch (flash light) and did some light painting. The problem I found with both photos was the blurry look of their faces. Because they did not do big movements with their bodies, hence the frozen photos captured by each flash just got stacked up in roughly the same spot. Other things you can use are glow sticks, flashing lights, moving lights, iPhone and iPad screens – pretty much anything that reflects or emits light.

double-exposures-in-camera-tutorial

double-exposures-in-camera-tutorial

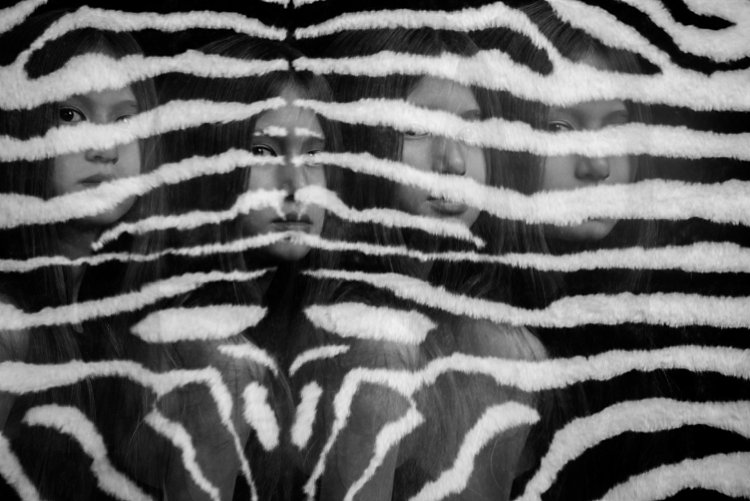
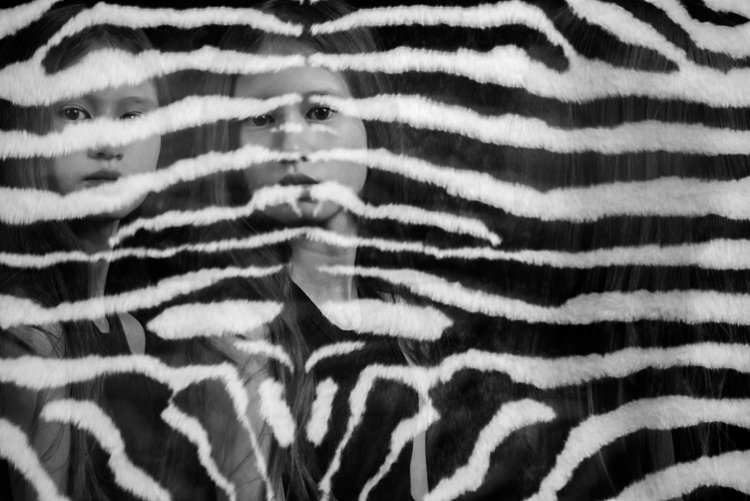
Don’t be afraid to experiment with backgrounds too. In the photos below, I changed the background to a zebra striped black and white rug just because I wanted to see what would happen. I used the same movement techniques as above and the same camera and light settings but the results were very different and unique. The last image below was a happy accident. My third child popped her head up on the third flash, but she came closer to the camera than I had intended so the flash didn’t quite illuminate her face enough. However, I thought this looked really effective as it provided the gray tone of the image as well as a solid form in the middle thereby making the overall image more dynamic and interesting.

double-exposures-in-camera-tutorial

double-exposures-in-camera-tutorial

double-exposures-in-camera-tutorial

I hope you enjoyed this little tutorial on in-camera double exposures using flash. If you have more ideas, do share them here in the comments below!

googletag.cmd.push(function() {
tablet_slots.push( googletag.defineSlot( “/1005424/_dPSv4_tab-all-article-bottom_(300×250)”, [300, 250], “pb-ad-78623” ).addService( googletag.pubads() ) ); } );

googletag.cmd.push(function() {
mobile_slots.push( googletag.defineSlot( “/1005424/_dPSv4_mob-all-article-bottom_(300×250)”, [300, 250], “pb-ad-78158” ).addService( googletag.pubads() ) ); } );

The post 3 Tips for Creating Double Exposures In-Camera Using Flash by Lily Sawyer appeared first on Digital Photography School.


Digital Photography School

 
Comments Off on 3 Tips for Creating Double Exposures In-Camera Using Flash

Posted in Photography


How to Create In-Camera Double Exposures

22 Mar

It was yet another snowy day in New York, so I headed to the Arboretum to work on macro photography. Tripod slung over one shoulder, with my Olympus mirrorless gear in tow, I approached the door only to be stopped in my tracks. “No tripods” she said, pointing to the sign.

I’ve been here plenty of times with a tripod, but on holidays and weekends the rules change. Since it was President’s Day, the ban was in place. I put the tripod back in the car and decided to use the limitation as opportunity. Instead of close up studies, my plan changed to in-camera double exposures.

This is a feature that I loved with my old film camera (Canon Elan 7). While my switch to digital was a revelation, the lack of double exposure capability was a huge let down. It was only recently that camera manufacturers started including it again. Not only has it been added to most current bodies, but the functionality has been further enhanced. Some may consider it cheating, but I look at the updates as an opportunity to be even more creative.

When you take your first shot, you can see an imprint of it in the viewfinder, while looking for shot number two. This makes it possible to line things up carefully, instead of leaving it to chance. It takes a little time to get used to it, sort of the way the depth of field preview button is a bit odd at first. After some practice however, you start to realize the incredible potential of this feature. Scenes that were once ordinary, become a treasure trove of artistic possibility.

In addition to the standard double exposure mode, the Olympus E-M1 has an overlay feature that lets you choose a RAW file from your SD card as shot number one. You then shoot as many frames as you like, to find the perfect image for shot number two. I found this to provide even greater control over the final image. I’m not sure what other manufacturers offer this feature, so be sure to check your manual. With this setting turned on, I set out to create some interesting images.

Ultimately I was looking for texture in shot one, as it would be complementary to the subject in shot number two. The possible outcomes are limitless, with every shot being completely unique. Rather than simply shooting a static flower, it’s possible to create a special piece of art. Today, as more people have cameras than ever before, the ability to make a shot has become even more important. This is not something you can do with a phone camera.

You may be wondering why I wouldn’t just do this in post-production by layering two shots in the computer. First, it wouldn’t be nearly as fun – I enjoy working with my camera more than pushing pixels around in Photoshop.

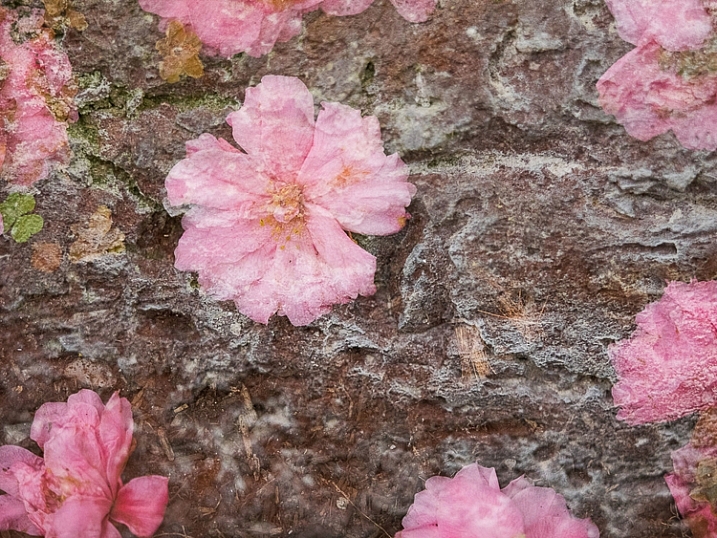
Next, there is something serendipitous about doing it in the field. You work harder, and really tune in to all the possibilities around you. A textured brick becomes more than a wall, but a perfect layer of texture. A crack in the pavement is not merely an imperfection in the floor, but a possible part of an exciting composition. By working deliberately like this, you have no choice but to slow down, and really exercise your vision. You pay attention to the smallest details, focusing on things that most people would walk right past. Isn’t that what creating art is all about?

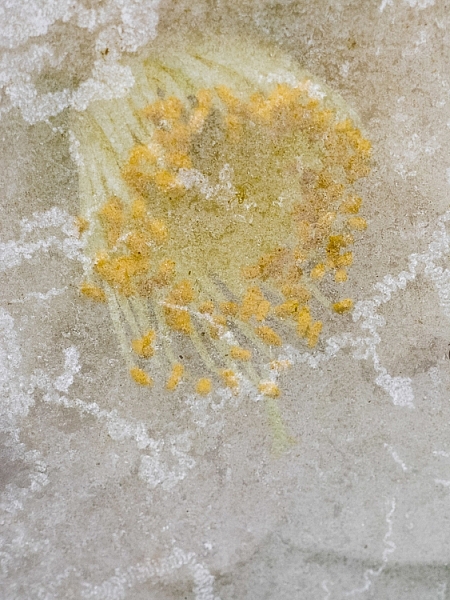
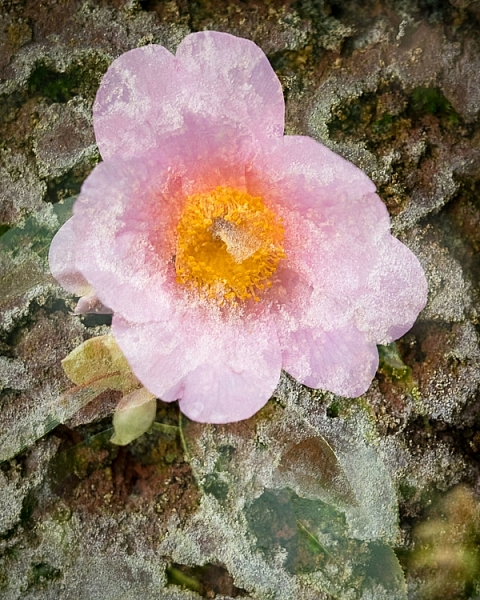
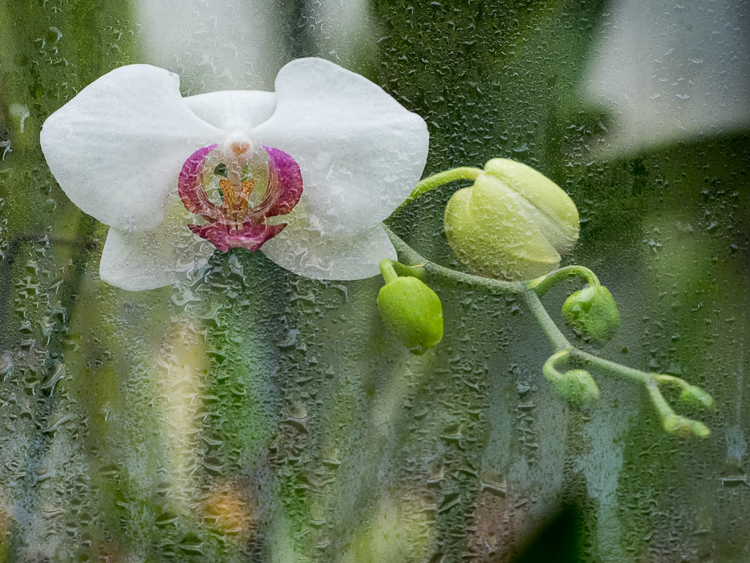
Will there be shots that don’t work? Absolutely! To create these six images I took 200 photos, over two hours. I don’t regret a single moment of this experience however. Each one is a unique work of art that can never be reproduced. Still, you must be patient, and set aside a good amount of time to do this. If you are rushing through, you’ll miss potentially great opportunities.

With winter upon us (spring coming soon in some areas of the Northern Hemisphere), and outdoor expeditions limited, now is the perfect time to explore this form of photography. You just may create something spectacular. The only way to find out is to give it a try.

Have you tried in-camera double exposures before? Please share your results and questions in the comments below. If your camera has a cool double exposure feature – please tell us about it.

This week on dPS we are featuring articles on special effects. Check out the others that have already been published here:

  • How to Photograph the Full Band of the Milky Way
  • Fire Spinning with Steel Wool – A Special Effects Tutorial
  • Special Effect – How to Create Multiple Flash Exposures in a Single Frame
  • Stacking Light Trails for Night Photography Special Effects
  • 26 Unique Special Effects Photos to Spark Your Creativity
  • Weekly Photography Challenge – Special Effects
  • Tips for Shooting Through Objects to Create a Special Effect
  • How to Add Vintage Frame Overlays Using Alien Skin Exposure X
  • 8 Steps to Great Long Exposure Landscape Photography

googletag.cmd.push(function() {
tablet_slots.push( googletag.defineSlot( “/1005424/_dPSv4_tab-all-article-bottom_(300×250)”, [300, 250], “pb-ad-78623” ).addService( googletag.pubads() ) ); } );

googletag.cmd.push(function() {
mobile_slots.push( googletag.defineSlot( “/1005424/_dPSv4_mob-all-article-bottom_(300×250)”, [300, 250], “pb-ad-78158” ).addService( googletag.pubads() ) ); } );

The post How to Create In-Camera Double Exposures by Chris Corradino appeared first on Digital Photography School.


Digital Photography School

 
Comments Off on How to Create In-Camera Double Exposures

Posted in Photography


How to Create Bokeh In-camera and Using Photoshop

26 Jan
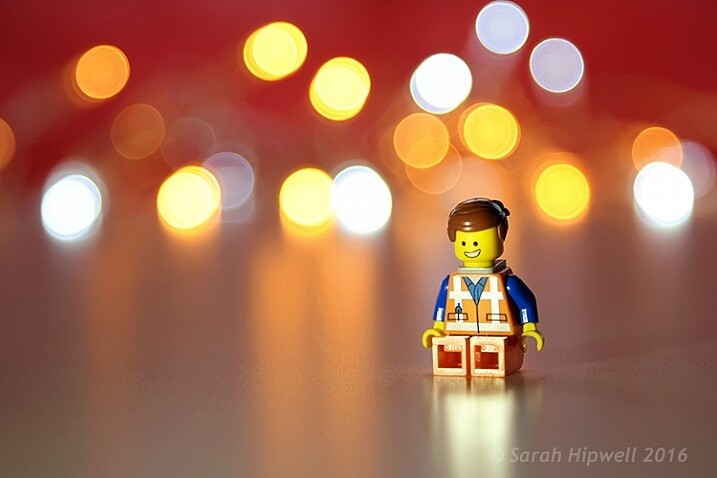
Title-Emmet-with-Bokeh

Emmet with background bokeh from small LED lights.

As the holidays are over, I couldn’t resist taking a classic bokeh shot before putting away the lights and decorations for another year.

In this article I’ll show you how you can create this effect in-camera in your own living room. Plus I’ll show you how easy it is to create a bokeh effect using Photoshop as well.

What is Bokeh?

Bokeh comes from the Japanese word boke, which means blur or haze, or the phrase boke-aji which is the blur quality. It isn’t just that any blur will do. It’s more to do with an aesthetic quality of the blur.

What does Bokeh look like?

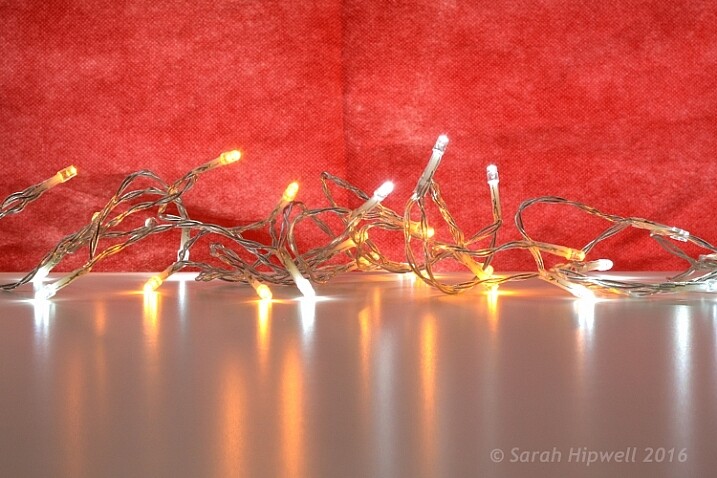
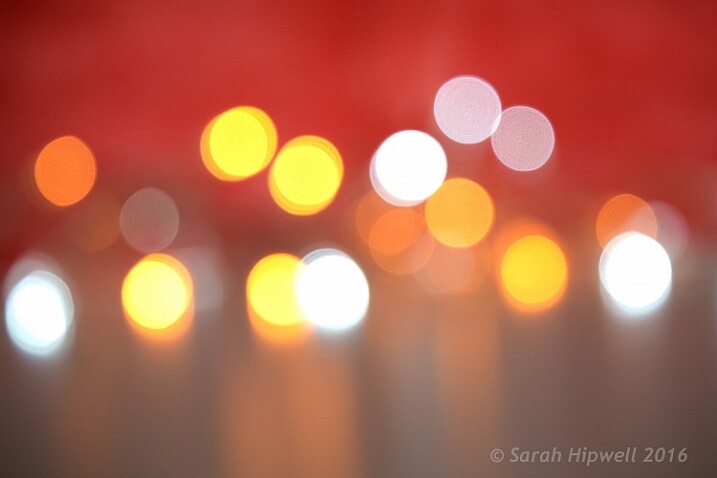
The easiest way to see the shape of the bokeh is by taking a photo with small lights in the background, thrown way out of focus (see second image below).

Small-LED-lights-with-window-in-background

Small LED Lights placed in front of a big window with red see through fabric.

Bokeh-effect-using-aperture-f4

Bokeh effect created in-camera using an aperture of f/4, with a 120mm focal length lens.

Is shallow Depth of Field (DOF) the same as bokeh?

No, but it is important to understand DOF and how it can play an important aspect in creating a bokeh effect. Depth of field (DOF) is the area of your image that is in focus.

Shallow depth of field refers to the object or subject being in focus, but the areas in front, and especially in the background, are blurred. Whereas bokeh is the term that refers to the aspect of light sources that are blurred in the background or foreground.

When discussing DOF, we need to take into consideration three other factors:

  • Aperture size
  • Distance from the lens
  • Focal length of the lens

In practice, photographers who shoot portraits, will in general, use long focal lengths and a wide aperture setting (f/2.8-f/5.6). For example, when you are shooting outdoors with your model, and you don’t want the background in focus. Street lights, or interior building lights, can be used effectively for creating bokeh in the background of your subject.

Aperture

Bokeh is affected by the shape of the diaphragm blades (the aperture) of the lens. A lens with more circular shaped blades will have rounder, softer circles, of out-of-focus highlights. Whereas a lens with an aperture that is more hexagonal in shape, will reflect that shape in the highlights. Generally speaking, the faster the lens, the better the bokeh.

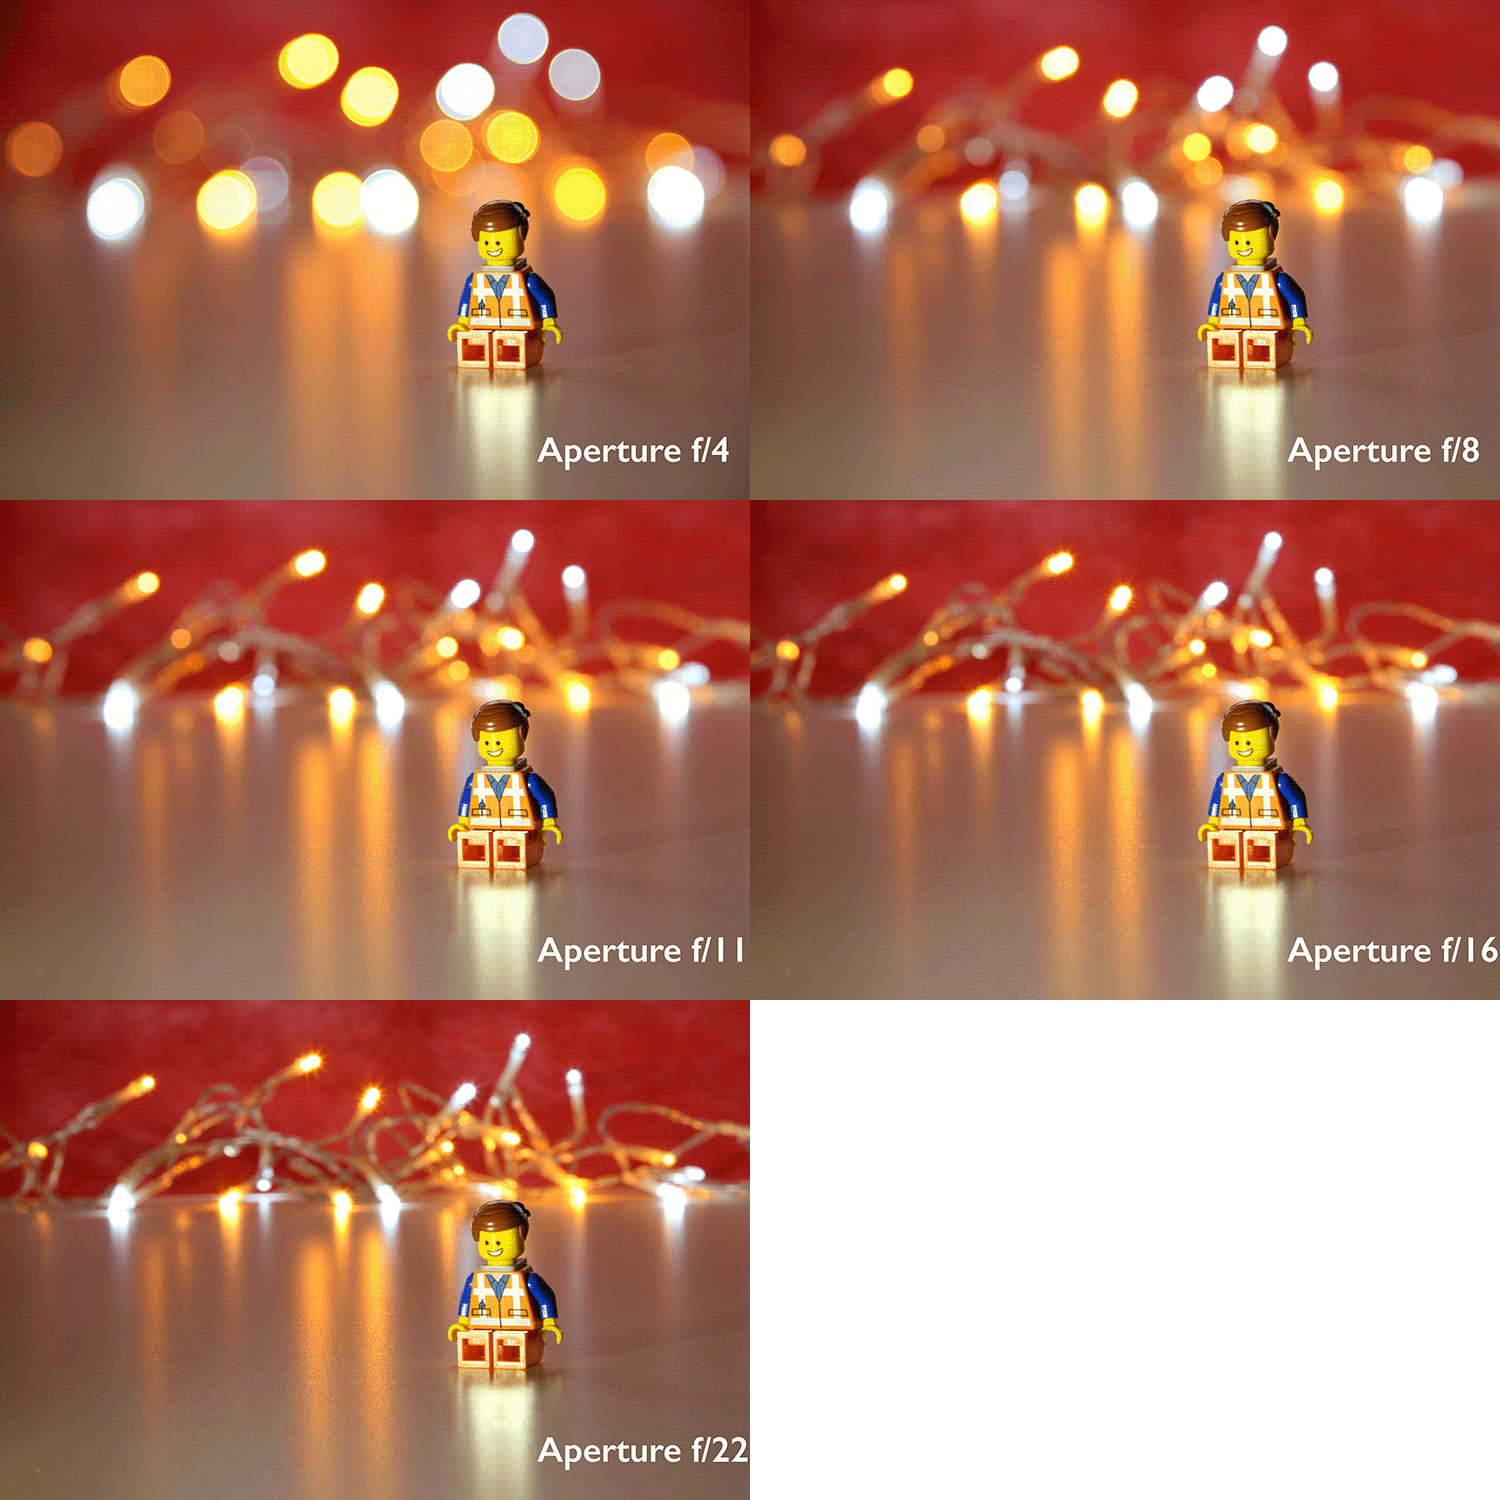
In the following animated gif, you can see that the wider the aperture (the lower the f-number), the shallower your depth of field. The lowest aperture setting on my lens is f/4 but I zoomed out to its maximum focal length of 120mm.

Aperture-animation

Animated gif illustrating the different apertures and how they deal with the lights in the background being thrown out-of-focus.

Create your own bokeh

This setup is really easy to try at home. Use whatever lens you have. Set your DSLR camera to Aperture priority or Manual mode ,and use a tripod. I used small LED christmas lights that were battery operated.

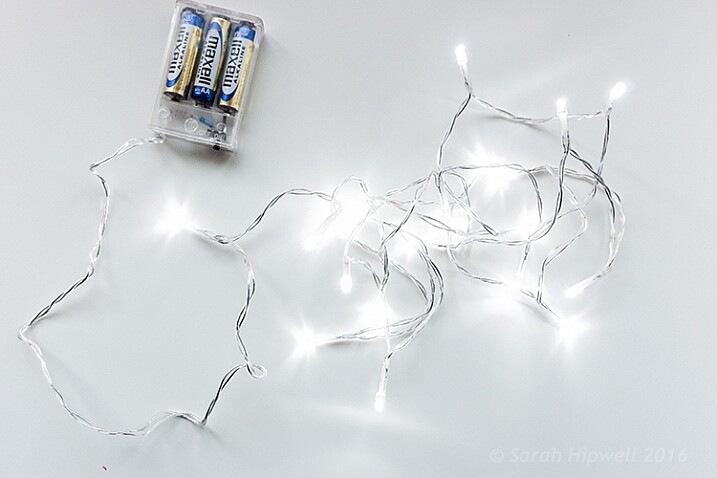
Small-LED-lights

Small battery operated LED lights.

Place your object a good distance away from the camera, and in front of the lights. The distance will vary depending on the lens (focal length) that you are using, so it will be trial and error exercise. Your object must be as near as possible to the camera lens.

Begin with the widest aperture on your lens. The objective is to get the circles of light as round, and as smooth as you can. You may need to experiment by moving the object further away from the lights.
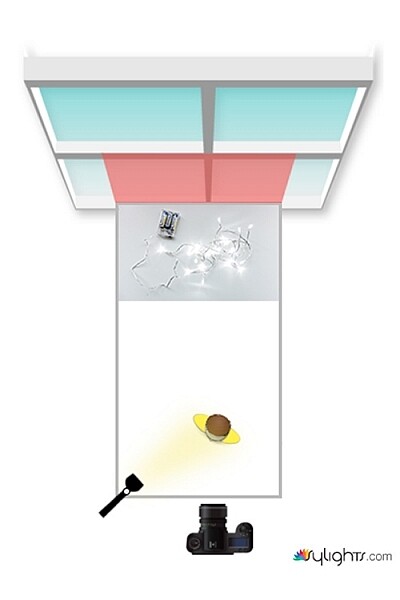
The lighting I used for this setup was a big window light and a small small LED light on Emmet.

Lighting-setup-to-create-Bokeh-in-your-own-home

Lighting diagram to show the setup for doing bokeh shots in your own home.

Creating bokeh in Photoshop

Once I got my shot in-camera, I then decided to see if I could create a great bokeh effect in Photoshop.

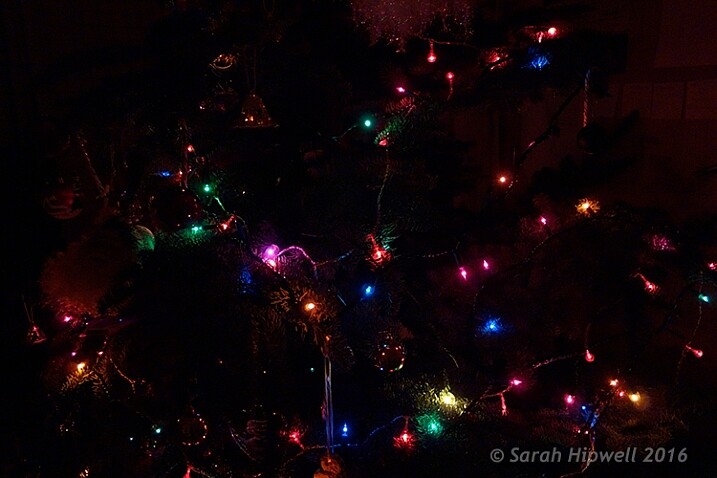
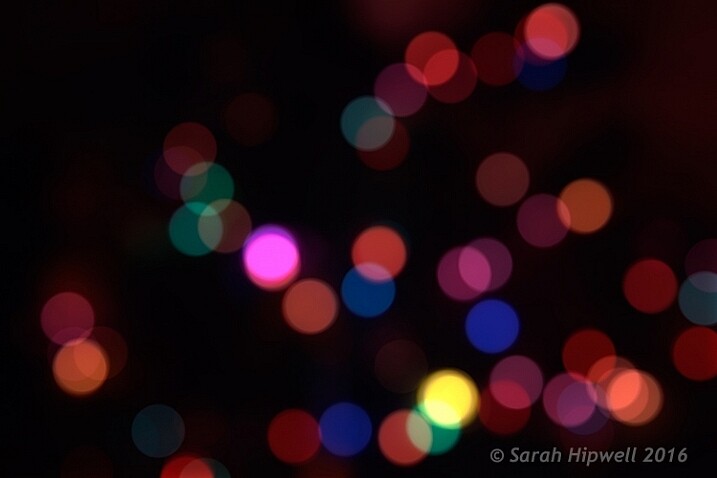
In the Filter Gallery, under Blur is a fantastic option called Field Blur, which has a dedicated Bokeh feature. I took a few random close-up shots of my christmas tree. I focused only on the lights.

Christmas-tree-with-lights

Random shot of a christmas tree with lights.

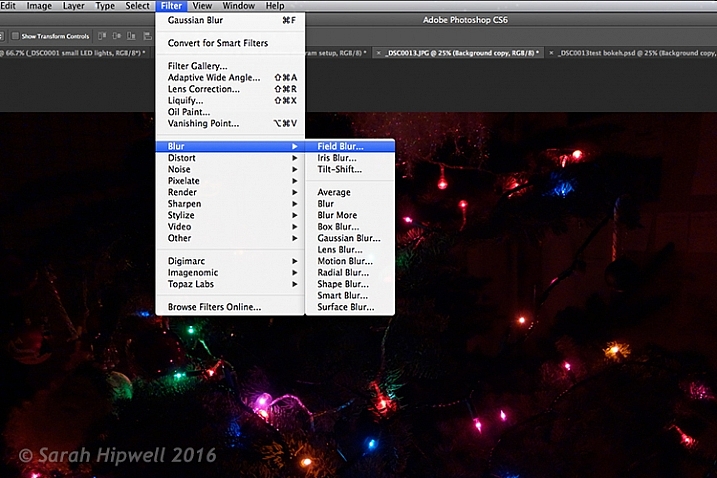
Next, I brought it into Photoshop (CS6). I used the image straight out of camera (SOOC), I didn’t do any other post-processing. Go to Filter > Blur > Field Blur.

Filter-Blur-Field-Blur

The Field Blur in the Filter Gallery in Photoshop has its own bokeh feature.

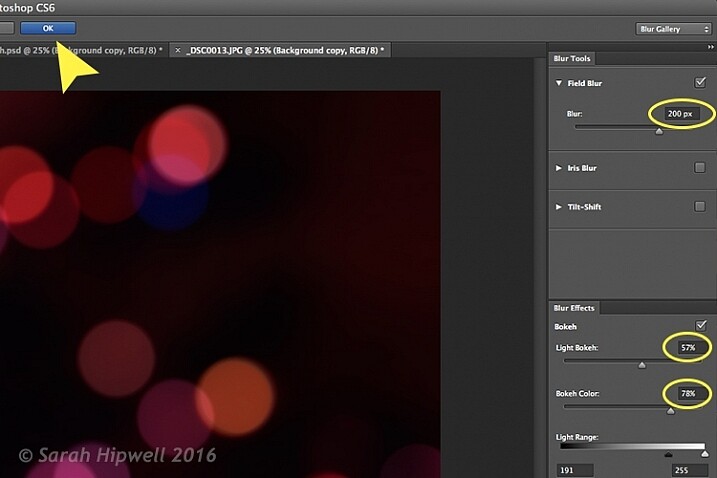
Two panels appear on the right: Blur Tools and Blur Effects. Under Blur Tools, enter 200 px in the Field Blur option. Under Blur Effects, move the Light Bokeh slider to 57%, and the Bokeh Color slider to 78%. Then press the OK button. It takes a few seconds for the blur to take place. Et voilà!

Field-Blur-dialog-options

You can experiment with the input figures for the Blur and Blur Effects to get the desired bokeh. I chose these.

Bokeh-from-christmas-tree-lights

Bokeh effect created in Photoshop using the Field Blur.

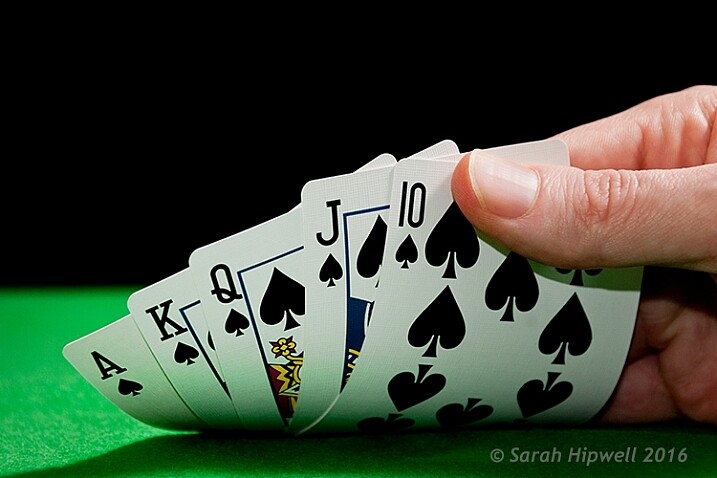
Okay, so now what do you do with the image? Use it as a background. I shot a series of playing cards images against a black background.

Playing-cards

One of a series of images I shot against a plain black background.

This is where the power of Blending Modes and Layer Masks comes into their own.

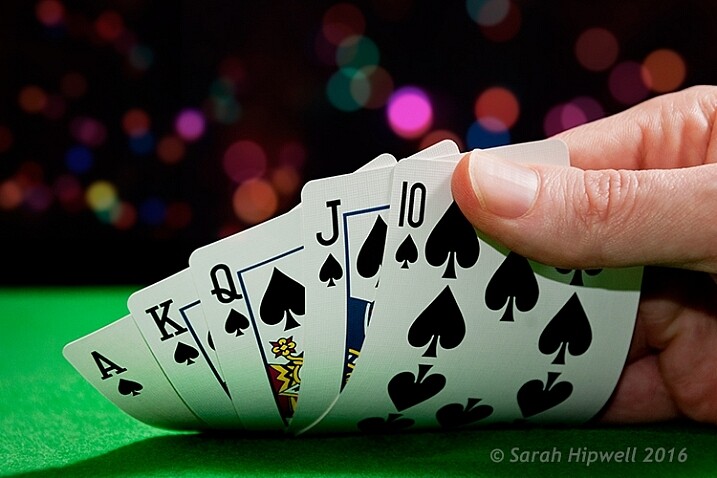
By placing the bokeh image on its own layer. I duplicated it to make another copy. Then I reduced the size of the original and moved this over to the left side of the image. I changed the Blend Mode to Screen and reduced the Opacity. I wanted the lights to appear further away from the playing cards, to give it a better depth of field. The screen blend option eliminates the dark areas and makes the light areas show through, making the bokeh appear.

For the copy layer, I left the size as it was and moved it over to the right. I increased the brightness by using a Levels Adjustment layer to match the light source. I also changed the Blend Mode of this layer to Screen. Lastly, I masked out any hard lines using Layer Masks.

Playing-cards-with-bokeh-background

Bokeh effect created in Photoshop and then applied to a background in this image.

I was well pleased with the result.

Now it’s your turn. Let’s see your images with “Bokeh-licious” images posted below.

googletag.cmd.push(function() {
tablet_slots.push( googletag.defineSlot( “/1005424/_dPSv4_tab-all-article-bottom_(300×250)”, [300, 250], “pb-ad-78623” ).addService( googletag.pubads() ) ); } );

googletag.cmd.push(function() {
mobile_slots.push( googletag.defineSlot( “/1005424/_dPSv4_mob-all-article-bottom_(300×250)”, [300, 250], “pb-ad-78158” ).addService( googletag.pubads() ) ); } );

The post How to Create Bokeh In-camera and Using Photoshop by Sarah Hipwell appeared first on Digital Photography School.


Digital Photography School

 
Comments Off on How to Create Bokeh In-camera and Using Photoshop

Posted in Photography


Create In-Camera White Balance Experiments

18 Jan

Extra photos for bloggers: 1, 2, 3

Did you know that white balance is the quickest way to turn your camera into an InstaLomoCrosstography machine?

This tutorial is a fun, simple way to play with color a la Instagram or Lomography without any apps or chemicals!

All you need to do is take the correct white balance and set it to the “wrong” white balance to get sweet shifts in tones and colors.

We put together a guide on exactly what kind of color shifts you’ll get with each setting. No Android-based technology here. You can do it all with the settings your camera already has!

Create Sweet White Balance Experiments

p.s. We’re giving away an iPhone Lens Dial (our primo iPhoneography gizmo) today! Here’s how to enter.

Why it’s cool:

ingred-smDid you know that your brain has magic color changing abilities? Well, sort of.

Your brain can’t change it’s own color (bummer!), but it does an awesome job at making sure the color white always looks that way. In other words, our brains are stuck in Auto White Balance.

Our cameras are a bit different. To them, white isn’t always white, but is influenced by the source of the light, whether it’s a buzzy fluorescent light in the ceiling or a cozy tungsten bulb under a lampshade.

This technique involves forcing your camera’s white balance to the incorrect setting for the scene so that the colors are purposely skewed. Sometimes it looks a little weird, and sometimes it looks awesome; it’s all about experimenting, with no computer or fancy editing programs required!

For an awesome explanation on how to achieve correct white balance and color temperatures, follow this tutorial by our friends over at SLR Lounge!

Ingredients:

paint-sm

  • A camera that allows access to white balance settings
  • A willingness to experiment!

STEP 1: Locating White Balance Settings

paint-smFirst things first, we need to locate where the White Balance settings are on the camera.

Here’s where ours is located. Look for the letters “WB” or the for “White Balance” if it’s under a set of menus.

Step 2: Crack The Code: Figure Out The Symbols

paint-sm White Balance settings are most often denoted by a set of symbols that represent the light source. They either warm things up, or cool them down!

  • AWB or A: Auto, correct White Balance
  • Sun: Sunshine or Daylight. Neutral.
  • House Casting a Shadow: Shade. The warmest.
  • Cloud: Cloudy. Very warm.
  • Light Bulb: Tungsten Light Bulbs. Very cool, very blue.
  • Glowing Rectangle: Fluorescent Light Bulbs. Cool blue and purple
  • Lightning Bolt: Flash. Warm.
  • Square Floating Over Triangles: Custom
  • K: Specific Kelvin Temperature

Step 3: Time to Play

paint-smNow that you now where the settings are located and what each symbol means, it’s time to start experimenting!

Remember, the AWB or Auto setting will let your camera determine the correct White Balance for the scene; we want to set the “wrong” White Balance to get cool colors!

Featured below are examples of how you can use this technique!

Outside: Cloudy Day Meets Fluorescent and Shade

paint-smIn this example, the natural light was from an overcast day (lame!).
In this instance, Cloudy would be the correct setting. Compare that to the Shade and Fluorescent settings.

The Shade setting is much warmer, which gives a stronger orange and yellow hue. The Fluorescent setting adds some neat purple and blue hues.

Outside: Cloudy Day Meets Fluorescent and Tungsten

paint-sm
This time we paired up another overcast day (round 2!) with Fluorescent and Tungsten.

We have to admit, the Fluorescent setting is one of our favs for getting sweet colors

Inside: Fluorescent meets K10,000 and K2,500

paint-sm This time we’re inside under a mix of Fluorescent and Daylight.

We got even more experimental this time and tried to dial in our own Kelvin temperatures for the white balance! 2,500 Kelvin shifts the photo towards blue, and 10,000 Kelvin shifts the photo towards a warm orange.

Real Life Use

paint-smUsing the “wrong” White Balance goes against the grain for most photography teachings, so we want to share an awesome photographer that uses this technique to achieve great results.

His name is Ryan Waite, and he creates some really sweet portraits! He shared a few tips with us on how to use White Balance to get cool effects. These are a little more advanced and will likely require some editing software to accomplish.

  • Shift the White Balance to “bring out different tones in the skin and create emphasis on certain areas of the face in unique ways.” This can influence the reds and blues in skin tone, or change the highlights and shadows. (seen above!)
  • Push the White Balance so that it’s “excessively warm and then lower the saturation for an aged, vintage feel.” A sepia-esque look without the monotone.
  • In post-production, “you have easy access to the color temperature and the tint. The temperature is great for creating warm and cool effects, but tint can specifically bring out the purples and greens in a photo.” Boost the magenta tint in afternoon sun to get beautiful yellows and purples, or boost greens for trees and plants to make them pop!

Extra Tips

  • Try it for Black and White photos: the colors from the original can make a huge difference before you convert! Try warming up the white balance and shifting the tint all the way green.
  • Go full analog: grab some film balanced for a particular light source and shoot it in another.
  • Use Live View to see the results in real time!

Related posts:

  1. DIY Photo Magic: How to Turn Black and White Photos into Full Color Images! Extra photos for bloggers: 1, 2, 3 We love the…
  2. Black and White Conversion: The Best Ways to Turn Color Digital Photos Into Beautiful B&W ~Have a cool photo product or site? Reach 270,000 photo…
  3. How to Create Coloring Book Pages Using Your Very Own Photos! Extra photos for bloggers: 1, 2 Imagine a world where…


Photojojo

 
Comments Off on Create In-Camera White Balance Experiments

Posted in Equipment


Web Design | In-Camera HDR Detailed Tutorial

06 Jan

Check out this informative tutorial : This video explains into depth how to create a photograph that offers an increase in the dynamic range (or higher dynamic range) that is done by using your camera’s Multiple Exposure alone rather than using Photomatix HDR (High Dynamic Range) photographic image software, which usually result in unusable garbage due to lack of knowledge in tone mapping. Since doing this in-camera offers realistic higher dynamic range than garbage results coming from Photomatix. No, you cannot use Auto Exposure Bracketing while Multiple Exposure because with AEB enabled, the Multiple Exposure will be disabled. Enjoy. Music: Forest Flower by Chico Hamilton Multiple Exposure supported camera models: ? D3-Series ? D2-Series ? D700 ? D300 / D300s ? D200 ? D7000 ? D5100 ? D90 ? D80 Camera models that do not support Multiple Exposure: ? D1-Series ? D100 ? D3000 ? D3100 ? D5000 ? D70 / D70s ? D60 ? D50 ? D40X ? D40 2011 trustseo.com Web Designs in Miami Thanks to the premire uploader of this video was Lilkiwiguy87
Video Rating: 4 / 5


In-Camera HDR Detailed Tutorial

01 Jun

This video explains into depth how to create a photograph that offers an increase in the dynamic range (or higher dynamic range) that is done by using your camera’s Multiple Exposure alone rather than using Photomatix HDR (High Dynamic Range) photographic image software, which usually result in unusable garbage due to lack of knowledge in tone mapping. Since doing this in-camera offers realistic higher dynamic range than garbage results coming from Photomatix. No, you can not use Auto Exposure Bracketing while Multiple Exposure because with AEB enabled, the Multiple Exposure will be disabled. Enjoy. Music: Forest Flower by Chico Hamilton Multiple Exposure supported camera models: • D3X • D3s • D3 • D2X / D2Xs • D2H / D2Hs • D2 • D700 • D300s • D300 • D200 • D90 • D80
Video Rating: 4 / 5