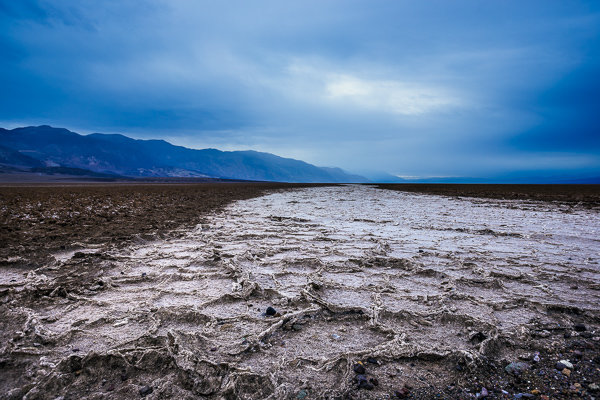
What Lies Beneath | West Side Road, Death Valley National Park
As I start writing this post, I’m sitting by my gate at Las Vegas McCarran International Airport. I loathe Vegas, but that’s beside the point. I managed to avoid the strip this time and will be home soon. I just wrapped up an incredible week leading a workshop in Death Valley National Park with my good buddy Brian Matiash and nine awesome students. This was my fifth trip to the park, and I’m starting to feel like I know the place like the back of my hand (even though there are still a several places I’d like to visit).
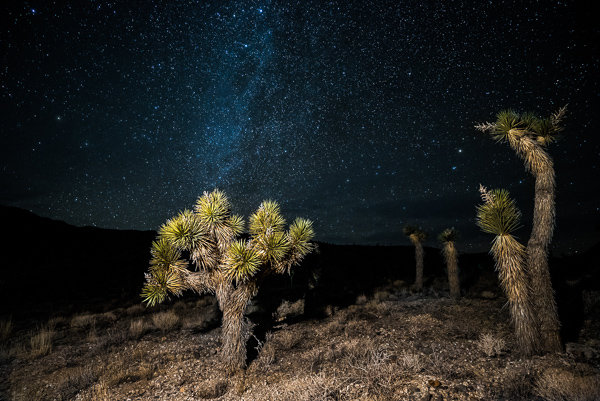
Joshua Trees in Death Valley
Ever since hearing about a lesser known area of the park known as Cottonball Basin (or Cottonball Marsh), I’ve been on the hunt for a certain kind of pattern found there. Cottonball Basin is hiding in plain site of virtually everyone who visits Death Valley. It’s located about five miles north of Furnace Creek off Highway 190, but there are no signs for it, and no areas for parking. You simply have to pull off into the gravel on the side of the road and start hiking out.
The trouble is that Cottonball Basin (and much of Death Valley) is always changing. Badwater Basin (which feeds into Cottonball) is an underground river, so the surface is always morphing and looks different with each visit. If you pick the wrong spot of the highway to pull over and start hiking, you could spend hours hiking around the marsh and find nothing.
During my last visit to the park (before this one), I hiked out to Cottonball twice and while I was able to come out with some decent shots, it wasn’t what I was looking for. I was never able to find the patterns I had seen in a few photos.
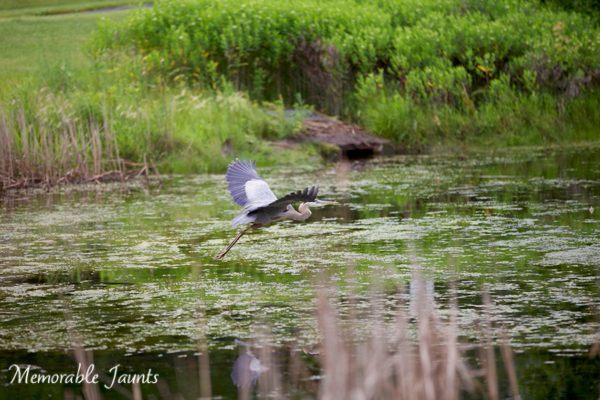
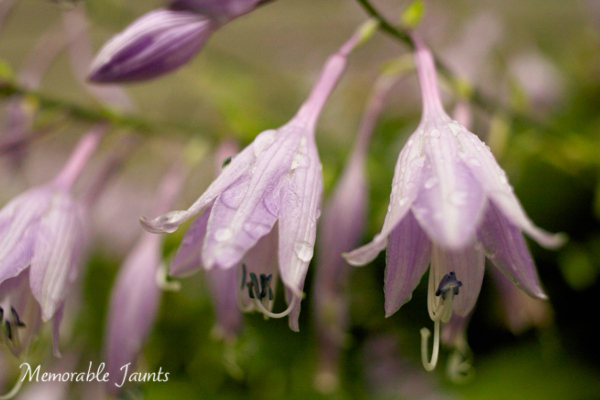
Even though I hadn’t found what I was looking for, there is still plenty of beauty to be found all over Cottonball Basin.
This time around, I was bound and determined not to come up empty handed. Right before heading out, I purchased a Garmin Oregon 600 Handheld GPS. I had a cheaper Garmin before, but it was so unintuitive and difficult to use that I wasn’t willing to risk using it again. The Oregon series is a touch screen model that is responsive, quickly acquires satellites, and is very easy to use and understand.
The day before the workshop began, Brian and I hiked out to Cottonball Basin. We found essentially nothing. I felt pretty defeated. We ended up changing the workshop itinerary and nixed Cottonball Basin altogether. It wasn’t until a chance encounter at Racetrack Playa that my luck would change.
As our group began exploring The Racetrack, Brian and I noticed a group of four photographers at one of the best rocks on the playa. They were taking turns standing on the rock, sitting on it, and taking all sorts of photos with them in it (probably for Instagram or something). This made my blood boil, so before too long, we went over and laid into them pretty good. They apologized for what they were doing and promised to stop (I really don’t understand that behaviour).
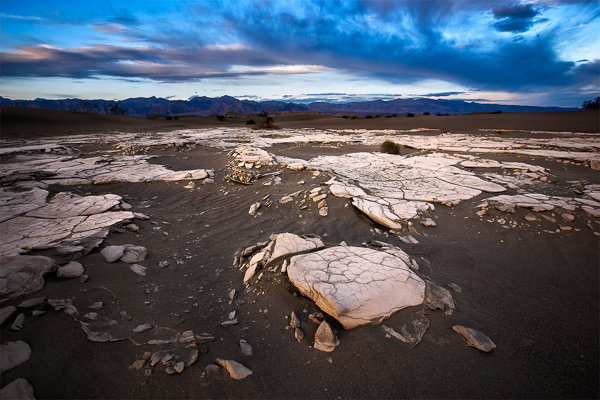
Mesquite Sand Dune Crust | Death Valley National Park
After going back later that evening (they stayed at that same rock the entire evening) we began chatting with the main guy from the group taking pictures. He mentioned that he found some good patterns at Cottonball and showed us the shots he took with his iPhone. These shots were the closest I’ve seen in a long time to the patterns I was looking for and he was nice enough to let us know where to find them. Unfortunately, we only had one last day of the workshop so we’d have to try our luck alone after the students had already left.
On the last day of our trip, after the workshop had concluded, we headed out again to explore and scout the basin. Using my Oregon 600, I dropped a pin at our parking spot off the highway and began hiking out. Around half a mile in, we saw some good patterns starting to forming (this was after walking over some very unwelcoming terrain that would probably cause most tourists and/or photographers to turn back). Things were starting to look good. As we kept hiking out, the patterns began getting tighter and tighter together. Finally, around 1.5 miles into the basin we hit the mother-load. I dropped around 7 pins at different locations out on the basin because I knew these spots were going to be difficult to find again. It’s hard to describe, but Cottonball Basin is a massive expanse of completely flat terrain for the most part. You can pick the same exact parking spot, but if you hike out 20 degrees to the left of where you found the patterns, you’ll miss your mark by enough to not even see something useful.
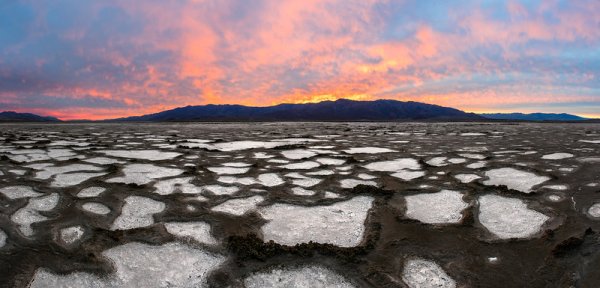
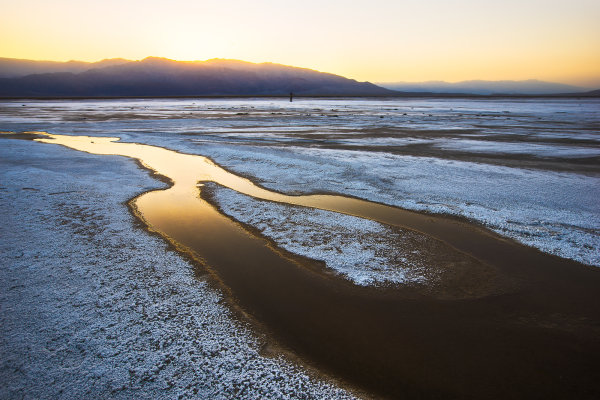
The shot I had been waiting thee years to get was finally mine. I wanted to capture as much as possible so I created this panoramic by taking five vertical images and stitching them together in PTGui Pro.
After lunch and a good nap, we headed out again for sunset. The Oregon 600 led us directly to the exact same spots we stood in earlier that da,y with plenty of time to spare for the light to be right. Oh man, did the light get right. Sunset that evening was one of the top three sunsets I’ve ever seen in my life (and I take ranking my sunsets pretty seriously).
If we hadn’t been relentlessly scouting this location, I’m quite confident I would still be in search of those patterns today.
Start to Finish Video Tutorial
Below is a video I put together from the trip. This is an in-depth video showing the scouting process, the sunset shoot, as well as the post-processing of the image once I got back home. Let me know if you have any questions!
googletag.cmd.push(function() {
tablet_slots.push( googletag.defineSlot( “/1005424/_dPSv4_tab-all-article-bottom_(300×250)”, [300, 250], “pb-ad-78623” ).addService( googletag.pubads() ) ); } );
googletag.cmd.push(function() {
mobile_slots.push( googletag.defineSlot( “/1005424/_dPSv4_mob-all-article-bottom_(300×250)”, [300, 250], “pb-ad-78158” ).addService( googletag.pubads() ) ); } );
The post The Importance of Scouting for Landscape Photographers by James Brandon appeared first on Digital Photography School.

Digital Photography School


You must be logged in to post a comment.