RSS
 

Posts Tagged ‘impact’

How to Practice Low Impact Nature Photography

21 Jun

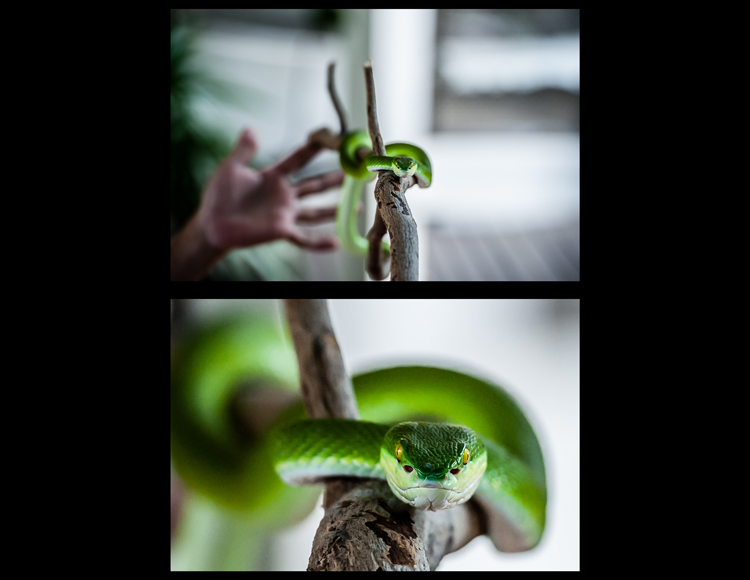
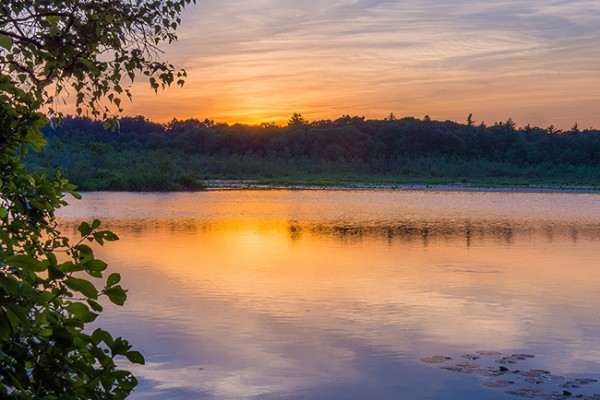
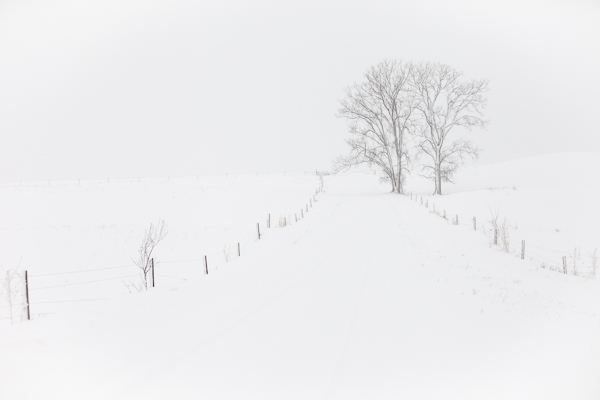
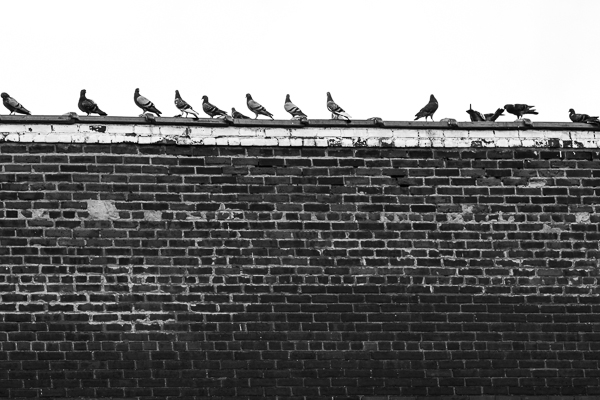
In many parts of the world, spring has blossomed into summer, furry and feathered babies were being born and summer is on its way. Photographers are pulling out their camera gear and finally heading back outside for some nature photography. I am so ready to get out and photograph the bounty that warm weather brings, I bet you are too. Before you head outside though, here are a few tips on having a little lower impact on the nature you’re photographing.

Low Impact Nature Photography - nature in bloom

Spring has sprung so let’s all get outside and shoot. Canon 5DIII, 70-200 @ 121mm, ISO 500, f/4, 1/750th.

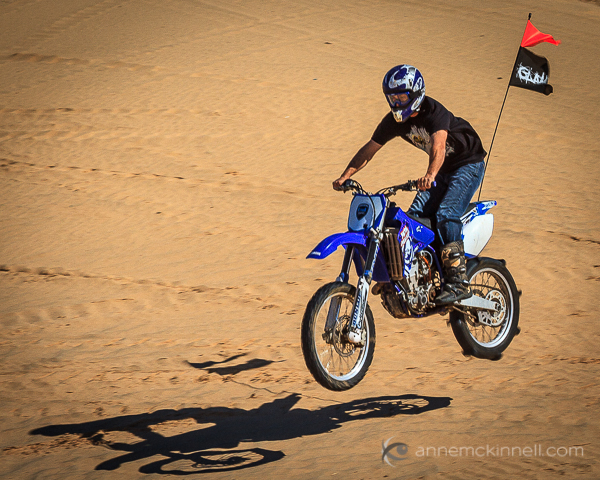
Reduce your carbon footprint

When you do head out to do nature photography, consider your carbon footprint. We lead such comfortable lives these days that’s it’s easy to forget that hopping into the car for a two-hour drive isn’t all that great for our environment. Car-pooling with two or three of your friends is an easy way to reduce emissions. It’s a lot more fun to spend the day shooting with friends, too.

Low Impact Nature Photography - shoot with friends

Planning a day trip or holiday to shoot with your friends is not only more fun, it also helps to reduce your carbon footprint when you carpool and share vehicles.

Doubling up

Another way to reduce your carbon footprint is something I call “doubling up.” Whenever you fly somewhere, research what else you can easily see while you’re there. For example, this fall I’ll be a special guest photography teacher for Big Sky Yoga Retreats “Yogatography,” a combined yoga and photography retreat in Montana.

The ranch I’m staying at is only about a 90-minute drive from Yellowstone National Park so it makes perfect sense to add a few days in the park after the retreat ends. Of course, I also save money by combining my visit to Yellowstone with the Yogatography retreat but more than that, I reduce emissions by flying to Montana once instead of twice.

Low Impact Nature Photography - Mammoth Hot Springs

The last time I was in Yellowstone I was only carrying a little point and shoot while I hiked so I’m pleased to be able to “double up” this fall when I’m in Bozeman teaching and have another crack at shooting Mammoth Hot Springs with some beefier gear.

Heed the signs

Once you arrive at your location, heed the park signs. Often, the signs are meant to protect you from harm. But sometimes they’re meant to protect the wildlife around us.

How to Practice Low Impact Nature Photography

On the left, a sign from Antelope Island in Utah requesting that cars and hikers stay on the road to avoid aggressive wild buffalo encounters. On the right, a funny and scary bathroom sign from a Nevada park. For heaven’s sake, don’t slip. There are rattle snakes!

Several years ago in Utah, I left the trail while I was shooting in Arches National Park. My guide quickly pulled me back and pointed out what I hadn’t seen. Right next to where I’d planted my foot was a type of very slow growing fungal plant life that, when crushed, will not revive for hundreds of years.

How to Practice Low Impact Nature Photography - Arches National Park

It’s hard to see, but tucked in and around the rocks and bushes are delicate fungal plants that are easily crushed when stepped on. Canon 5DIII, 24-105 @ 22mm, ISO 100, f/16, 1.5 seconds.

We all want the best, most unique photographs but if we all leave the trail, our combined impact can destroy the beautiful environments we are trying to capture not to mention causing a lot of potential injury to ourselves.

Share special locations judiciously

While I greatly admire photographers who openly teach and share, consider very carefully whether you should share every amazing location you stumble upon with every photographer you know. Unfortunately, delicate environments can’t handle hordes of photographers. The wear and tear of too many people hiking in and out can destroy the natural beauty of the location itself, even if everyone stays on the trail.

Low Impact Nature Photography - secret location

Canon 7DII, 70-200mm with 1.4xIII extender @ 280mm, ISO 1000, f/5.6, 1/250th.

I love to photograph the tiny Key Deer on Big Pine Key in Florida. When I drive the island, I know just where these little creatures like to hang out. I don’t tell very many people about this location though, because the deer have become too habituated to humans, frequently approaching people and begging for food.

Too many human visitors can also frighten wildlife, disrupt nesting, and impact natural reproductive cycles. While complete secrecy about a magical location seems stingy, consider sharing more environmentally fragile places only with photographers who know and understand the impact they have on where they shoot.

Look, don’t touch!

When I see a lush, velvety plant growing at the Chicago Botanic Garden, all I want to do is run my fingertips across its surface. The rule at the garden, however, is to look and not touch. Sometimes I practically have to put my hands in my pockets to stop myself from touching the amazing specimens on display!

Luckily, they have a wonderful Sensory Garden where visitors are encouraged to physically touch the plant life. The Sensory Garden is mainly a teaching and learning area. But by allowing visitors to touch the plants there, it also helps prevent wear on the rest of the garden, leaving it pristine for the thousands of weekly visitors, many of whom are photographers.

Low Impact Nature Photography - velvet leaf

These broad velvety leaves beg to be touched. Canon 5DIII, 24-105mm lens @ 105mm, ISO 1000, f/4, 1/2000th.

If you’re shooting in a wild and remote place, use the same rule as that applies at the Chicago Botanic Garden, and don’t touch the plant life. Imagine hundreds of people walking through that same wild area and touching the same plant you’re touching. It wouldn’t take much before the plant started to wither around the edges, and ultimately turn brown and die. Next time, before you touch, ask yourself whether you’re truly leaving no impact on the plant. If you are impacting it, perhaps reconsider your actions.

Don’t pick the flowers

It probably goes without saying that when you pick wildflowers you’re impacting the environment in a negative way. Acres and acres of wildflowers are a breath-taking sight. A field left with only one or two flowers standing? Not so much.

Low Impact Nature Photography - field of tulips

Like a field of wildflowers, a picked-over field of tulips wouldn’t be nearly as stunning to photograph as this lush bed was. Canon 5DIII. 70-200mm lens @ 111mm, ISO 250, f/4, 1/1000th.

In some locations, it’s also illegal to pick wildflowers. It’s also illegal to remove shells, bones, pottery shards, and petrified wood from many state and national parks. While we humans seem to have a knee jerk reaction to gather and collect things, leaving plants and artifacts alone preserves them so that all of us can visit, enjoy and photograph them.

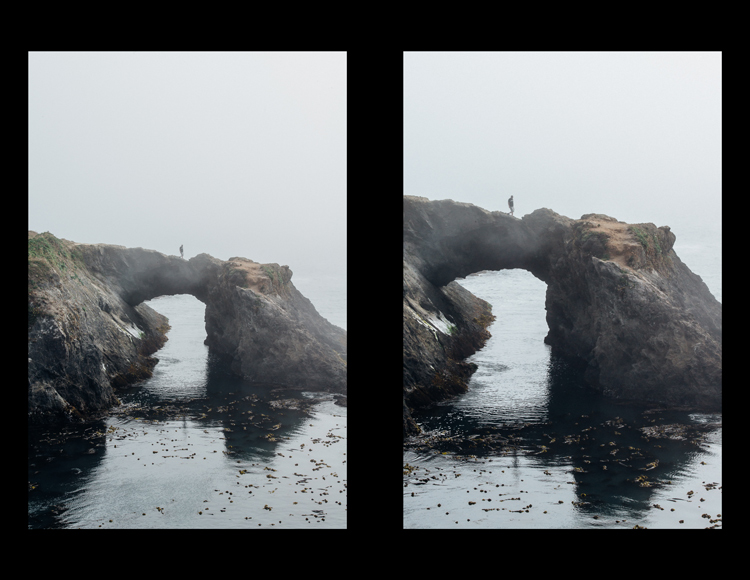
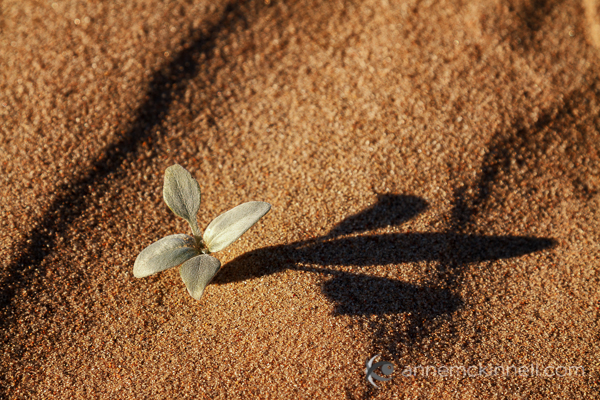
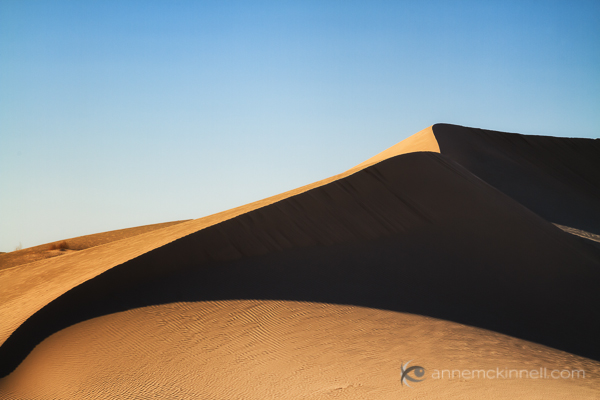
Avoid leaving tracks

Is that mud flat, playa or sand dune you’re photographing absolutely pristine? If it is, take care not to walk on it or leave footprints. Don’t drive on it or leave tire tracks either. Environmental recovery from this sort of carelessness can take decades before there will be enough wind or rainfall to smooth out your tracks. You’re not only wrecking the image-making opportunity for the next photographer that comes along, you’re destroying the beauty of the location for everyone who visits it.

Low Impact Nature Photography - Cumberland island boardwalk over dunes

On Cumberland Island, in Georgia, the National Park Service has constructed boardwalks so that visitors can view the dunes without damaging them. Canon 5DIII, 100-400mm lens @ 100mm, ISO 12800, f/8, 1/6000th.

Keep wild animals wild

Because I mainly photograph wild horses, I’m frequently asked if I touch, pet, or ride them. These questions always strike me as naive but, because most people are used to domesticated horses, perhaps they think that wild horses tolerate or accept humans more readily than other wild animals. They don’t.

Low Impact Nature Photography - cautious wild horse

Does this wild stallion look like he wants to be petted? He doesn’t. His ears are pinned back and he has an eagle eye on me too. Canon 5DIII, 100-400 @ 400mm, ISO 1250, f/6.7, 1/500th.

The same rules apply to wild horses that apply to any other wild animals. No matter how sweet or cuddly a wild animal seems, never approach, feed, touch, hug, or pick it up. Wild animals are often so much bigger than we are and even if they fearfully strike out with mildly aggressive behaviors, you can be seriously injured. Always keep a safe distance between you and the animal you’re photographing and, in some cases, shoot from the car or another protective structure like a blind. If, as a photographer, you’re afraid you’ll be too far away, buy or rent a bigger lens.

If you’re afraid you’ll be too far away to get a good photo, buy or rent a bigger lens.

Low Impact Nature Photography - don't feed wild anmals

Visitors to Big Pine Key often get too close to the Key Deer that live there. This woman fed the deer her lunch leftovers (!!) and then tried to pet them. This is the perfect example of what not to do when you’re photographing wild animals.

These rules may not seem like much “fun” but they are for the animals’ safety as much as for yours. Animals that become too accustomed to humans become less wild, more dependent on humans for their food, and ultimately nuisances when they start to forage for food in suburban areas. When too many wild animals invade populous areas, they are often culled, which is just a more politically correct word for killed. Keep your distance and keep wild animals wild, free, and alive.

Pack it in – pack it out

You’ve probably heard this bit of advice before. Whatever you carry in with you when you head into a refuge, preserve, or wilderness area, you should also plan to carry out with you. Garbage littering the landscape doesn’t make a very pretty picture. Of course, you can just “Photoshop it out in post-processing” but for the environment’s sake, and for the safety of the animals who might ingest any garbage left behind, take everything you brought in with you back out when you leave.

Low Impact Nature Photography - trash in water

The Salt River Wild Horse Management Group volunteers do an amazing job of regularly cleaning up the river but too many people toss their trash into it rather than carrying everything out with them when they leave. Even the day after a massive clean up effort, these wild horses were drinking next to floating trash. Canon 5DIII, 100-400 with 1.4xIII extender @ 560mm, ISO 1250, f/8, 1/500th.

An even nicer thing to do is to leave the area cleaner than you found it. On your way out, pick up the garbage other less savvy hikers and photographers have left behind and dispose of it appropriately once you get back home.

Leave Fido at home

If you’re a weekend warrior type of photographer – and many of us are – it might seem like a natural thing to bring your faithful pup along with you. In a very few situations, bringing your dog (or any domestic animal) may work out just fine, but at best bringing your dog along is a distraction from making images. At worst, your dog can wreck a field of flowers or scare off wildlife (or get injured).

Low Impact Nature Photography - dogs on boat

These two dogs are having a much better time relaxing at sea than they would be out hiking while you photograph wildlife. Canon T3i, 55-250 @ 240mm, ISO 200, f/6.3, 1/320th.

Perhaps if you’re a macro flower photographer, your well-behaved and leashed dog won’t a problem. He can rest on the path while you shoot. A puppy however (at least any that I’ve ever met) probably won’t be content to relax on the trail. Instead, he’ll be crashing through the flowers, possibly damaging them, and rendering them less likely to be image-worthy for the next guy that comes along with a camera.

Domestic animals affect the behavior of wild animals

If you’re photographing butterflies, birds, or wild animals, your dog should really stay at home for his safety, as well as the other animals. I’m sure that some of you are scratching your heads right now and exclaiming how well-behaved your dog is, but seriously… I’ve been out there on the range photographing wild horses when someone shows up with their “amazing dog.” The horses’ behaviors always change as they become aware of the dog.

Low Impact Nature Photography - alert wild stallion

This stallion has just sighted a hiker and her two dogs on the river bank. He’s alert and ready to protect his family. Canon 5DIII, 100-400 @ 241mm, ISO 500, f/4.5, 1/3000th.

Your dog might be cool with wild animals but the wild animals are immediately on alert. Remember, dogs are instinctually predatory animals and other animals recognize that. The behavior dynamic shifts when you bring your dog, no matter how amazing he is. Yell at me all you want, but please, leave Fido at home. Your dog impacts the environment and not in a good way for photography.

Reduce nature’s impact on yourself

I was in North Carolina a few weeks ago hiking on Shackleford Banks and photographing the wild horses. The first thing I did when I got back to my rental house was to shower off the sweat, sand, sunscreen and bug spray. As I toweled my hair dry, I kept itching my ear. That’s when I discovered the tick. Thankfully it wasn’t attached yet and I could just pick it off my skin but, ugh, so gross.

Low Impact Nature Photography - wear protective clothes

Photo Credit: Eden Halbert. Here I am in on Shackleford Banks in 80F+ degree weather, covered head-to-toe in UPF 50 quick dry clothing. Depending on your environment, wear a hat, sun- and bug-protective clothing, sunscreen and bug spray. Don’t forget to bring and drink plenty of water.

To reduce nature’s impact on you, my recommendation is to wear a hat, sun- and bug-protective clothing, sunscreen, and bug spray. Plus, remember to do what I forgot to do. After your photography hike and before you get into your car, check yourself, your clothes and your camera bag for ticks, burs and other clinging critters.

Teach others

Finally, set yourself up as a good example for your fellow photographers. More often than not, when another photographer crashes around like King Kong, it’s not with the intent to be destructive. It’s usually because he/she doesn’t know any better. If you model more appropriate behaviors, and explain why all these strategies are so important to preserving nature, your friends will follow your lead.

What strategies do you use to lower your impact on the nature and wildlife you photograph? Please share your thoughts in the comments. The dPS community would love to hear from you.

The post How to Practice Low Impact Nature Photography by Lara Joy Brynildssen appeared first on Digital Photography School.


Digital Photography School

 
Comments Off on How to Practice Low Impact Nature Photography

Posted in Photography


Industrial Scars: Aerial Photos of Humankind’s Harrowing Impact on Earth

30 May

[ By SA Rogers in Art & Photography & Video. ]

In strikingly well-composed, vividly colored scenes resembling abstract paintings, J. Henry Fair’s aerial photographs of toxic waste and industrial activity on Earth give us an uncomfortable look at the cost of human progress. In fact, the images seem unreal: how could the damage caused by industrial pollution be so strangely beautiful? Tar sands, mountaintop removal mining, fertilizer runoff, coal ash, factory farming and devastating oil spills aren’t exactly the stuff that stunning art is usually made of, but Fair is no ordinary artist, forcing us to face the duality of what we’ve created.

Shooting these scenes from the air gives us a perspective we don’t normally have, as if we’re flying over them in person, reckoning with the damage that comes with our consumption of fossil fuels, large-scale farmed meat, chemicals and other commodities that do significant harm to the environment in their sourcing and manufacturing.

Coal combustion waste may not be pretty, but its splashes of rust and bronze against its black and white surroundings are undeniably striking. Some heavy metals, like ‘red mud’ bauxite waste from aluminum production, are almost floral in their contrast to green.  Oil from the BP Deepwater Horizon spill is mesmerizing in its flowing red ribbons against the cobalt blue of the Gulf of Mexico waters. Phospho-gypsum fertilizer waste is a brilliant blue-green, like a gemstone; it contains both uranium and radium, piled dangerously close to drinking water aquifers.

“What interests me about this series is its essential irony and hope,” he says. “The thinking person participating in the modern world understands that all of us are living unsustainably, the impending consequences on our economy are real and significant. But in fact, with a little effort and luck, these limitations could be overcome, ensuring a secure future. And so we must hope, as we are all invested. My goal is to produce beautiful images that stimulate an aesthetic response, and thus dialog. If the pictures are not beautiful, the viewer will not stop to consider them.”

These images and many more are available in the form of a hardcover book set to be released on July 6th, ‘Industrial Scars: The Hidden Costs of Consumption.’

Share on Facebook


[ By SA Rogers in Art & Photography & Video. ]

[ WebUrbanist | Archives | Galleries | Privacy | TOS ]


WebUrbanist

 
Comments Off on Industrial Scars: Aerial Photos of Humankind’s Harrowing Impact on Earth

Posted in Creativity


How to Improve the Impact of Your Urban Images Using Lines

27 May

If you are struggling with getting your photos of cities and architecture to pop out, chances are that you are underestimating the power of lines in your images. Lines help you structure your images in ways that lead your viewers to look at different parts of the picture, and create interest in both your main objects and the surroundings.

using lines for more impact in your images

The image above shows an example of how you can use lines to create a visual guidance within your city and architecture images, that will help your viewers find multiple points of interest and take a closer look.

using lines for more impact in your images

To help you understand how the lines work in a rather complex image like this, reducing the image to a black and white version with high contrast, can help visualize the structures of the image without getting distracted by the color elements.

Why lines are important especially for urban images

While in many areas of photography, using depth of field and blurred backgrounds is a good way to lead the viewers’ eyes to the most important element, and add a sense of perspective, as city photographers we rarely have this choice. In architecture images, you want most elements to be in focus.

When taking pictures of city scenes, you need to structure your images in different ways to provide perspective and a feel of scale. The conscious use of lines in your images can divide a photo into smaller pieces, separate elements from each other, provide a sense of perspective and lead your viewers’ eyes to where you want them to focus.

using lines for more impact in your images

The image above shows an example of a random shot without considerations for the use of lines. With its grey stones, the National Museum of Ireland in Dublin on a cloudy day, doesn’t offer much to work with when trying to create an interesting image. This is merely a documentation of the place, but probably wouldn’t make it as a header image.

using lines for more impact in your images

However, beyond the documentary aspect, the use of lines to create perspective, orientation and symmetry can increase the impact, even of an otherwise dull looking image.

Which lines can you use to increase impact?

You can separate the lines in three categories which I call:

  • Dividing lines
  • Leading lines
  • Symmetrical lines

A dividing line structures your images into separate areas of interest. It can be horizontal, vertical, or diagonal. You can use it to make a clear difference between bottom and top of an image, but also make sure to use dividing lines to show near and far. In many outdoor images, the horizon line is a natural dividing line.

using lines for more impact in your images

In this image, I am using a major dividing line to clearly separate the floor and the wall. Less noticeable, the additional line in the wall serves as another separation in the photo. Without the addition of this line, the right half of the image would be rather boring. By adding a simple line into the frame, it helps dividing the image into a left and right.

Make sure that your dividing lines are in the right place. With very few exceptions, make sure to place your lines outside of the center of the image (both horizontally or vertically) but also not too close to the borders. The well known Rule of Thirds is good guidance, in many cases dividing images into a two-thirds and a one-third part works best.

Leading lines are an important way to provide your viewers with an idea of perspective. They will lead the eyes into, and around the image. Leading lines often come in pairs, slowly merging into the distant part of the picture. But in fact, you can use multiple leading lines, even one can help the viewer find orientation. Leading lines don’t even have to be straight, you can use curves and angles just as well.

using lines for more impact in your images

The main street in this image serves as a single leading line, it helps the eye find orientation from the interesting space in the foreground, and puts it into the context of the big city.

The third way of using lines to increase impact, is the use of symmetries. When looking for interesting images to capture in a city, try to find symmetrical lines in the architecture around you. Thankfully, architects also know the visual impacts of symmetries, and use them to create the buildings around us.


Bürogebäude des Deutschen Bundestages in Berlin,, Deutschland.

Buildings like this lend themselves to be taken in symmetries. While the content is not perfectly symmetrical due to the individual office decorations on the inside, the structure of the building makes an interesting frame for these individual elements. The symmetry helps to create interest, as you subconsciously start looking for the differences between the halves.

Learn to focus on lines

If you are shooting with a camera capable of RAW images, there is an easy way to train yourself to look out for lines: Use your camera settings, and change your camera to shoot in black and white!

When shooting RAW, the camera will still capture and store all the data from the sensor, including the color information. So when you are back at your computer to edit images, you will find all the options to create color images as well. But while shooting, you can look at your images at the screen in black and white, which will eliminate distractions from the forms in your image.

using lines for more impact in your images

Going a step further, in most cameras you can set up your own image processing profile in camera: Increase the contrast and sharpness of the image as far as possible, and you will end up with a preview image on the camera screen that is mostly reduced to the lines.

Additional ways to use lines

using lines for more impact in your images

Probably one of the most photographed objects in the world, the houses of parliament and the tower with Big Ben in London, UK, it is hard to come up with a unique version. In this image above, I added the light trails created by the passing traffic to add an interesting element. The light trails serve both a dividing lines between the other photographers in the foreground and the architecture in the background, as well as leading lines providing perspective from the left to the right part of the picture.

using lines for more impact in your images

When taking images of tall buildings, like in this case the tower of Westminster, the borders of the building will typically provide leading lines from the bottom (near) to the top (far). To generate an additional element of interest, I used a long exposure image to create another set of lines, through the moving clouds in the sky above the building. This helps add a dynamic element and interest, to an otherwise static and often boring background.

curved leading lines

Do not limit yourself to using only straight lines. While a horizon should always be straight and strictly horizontal, others, especially leading lines, can also be curved. In this image above, the cable car tracks take two turns that lead the viewer’s eyes from the bottom (near) to the center (far) part of the image.

Even complex scenes win from the use of lines

Once you become aware of the lines in your images, you can use them to structure even more complex scenes.

using lines for more impact in your images

While the above example might show the lines all that obvious, you will most likely see the curb of the street easily as a (curved) leading line into the image.

using lines for more impact in your images

However, upon a closer look, you can also note the use of a dividing line separating the photo into a top and bottom part to provide additional perspective and scale. Finally, a use of lines as a frame puts more emphasis on the silhouetted person crossing the scene, adding further scale to the size of the elements contained.

These lines help the viewers structure the image into separate parts and make it easier for the brain to digest all the elements contained.

How do you use lines in your compositions? Please share in the comments below.

googletag.cmd.push(function() {
tablet_slots.push( googletag.defineSlot( “/1005424/_dPSv4_tab-all-article-bottom_(300×250)”, [300, 250], “pb-ad-78623” ).addService( googletag.pubads() ) ); } );

googletag.cmd.push(function() {
mobile_slots.push( googletag.defineSlot( “/1005424/_dPSv4_mob-all-article-bottom_(300×250)”, [300, 250], “pb-ad-78158” ).addService( googletag.pubads() ) ); } );

The post How to Improve the Impact of Your Urban Images Using Lines by Michael Zwahlen appeared first on Digital Photography School.


Digital Photography School

 
Comments Off on How to Improve the Impact of Your Urban Images Using Lines

Posted in Photography


Sigma demos WR Ceramic lens filter strength with impact test

26 Jan

In a newly released video, Sigma tests the strength of its protective ceramic lens filters in an impact test. Putting claims of toughness to the test, the video shows a 49g / 1.7oz metal ball dropped from a height of about 1.3m / 4ft onto the WR Ceramic Protector as well as three competing lens filters. While the ceramic protector survives unscathed, the competition isn’t so lucky.

In addition to its WR Ceramic Protector, the video features a ‘conventional protector,’ ‘Brand A Chemically Strengthened Glass Protector,’ and a ‘Brand B Chemically Strengthened Glass UV Filter.’ According to Sigma, the WR Ceramic Protector is 1000% stronger than a conventional protector and 300% stronger than a chemically strengthened glass filter. The ceramic filters are also scratch-resistant with a water-repellant coating.

Sigma has a half dozen new WR Ceramic Protectors available now:

  • 67mm for $ 93 USD
  • 72mm for $ 108 USD
  • 77mm for $ 118 USD
  • 86mm for $ 202 USD
  • 95mm for $ 247 USD
  • 105mm for $ 315 USD

Via: Sigma Blog

Articles: Digital Photography Review (dpreview.com)

 
Comments Off on Sigma demos WR Ceramic lens filter strength with impact test

Posted in Uncategorized


Composition After the Fact: Cropping for Maximum Impact

10 Aug

It may at first seem simple. You took the shot a little wide, or a sneaky branch that you didn’t notice found its way into the edge of your photo. In Lightroom (LR) it’s just a quick press of the R key to activate the crop tool, hold down the shift key to constrain the crop so you don’t get a weird aspect ratio, and your task is complete.

A cropped portrait

The crop tool – simple, yet powerful.

On the contrary, cropping is one of the more powerful tools that you have at your disposal to dial in the composition of your images. Prime lens users will also find that the limited versatility (compared to zoom lenses) can result in the need for cropping more often.

First, let me make the caveat that many aspects of photography are highly subjective. Some of the information and advice offered in this article is my personal opinion, and is the approach I take to create images that fit my style. Personal preference always prevails. Anything called a rule is only so because a common pattern was identified within compositions that are considered especially attractive.

In many respects cropping echoes the fundamental principles of composition. Luckily, if you didn’t get what you wanted the first time around, when you took the photo, you get a second chance, albeit limited, to recompose your images in post-production for maximum impact.

The Basics

The very first thing I look for, and correct, in any photograph that I edit is straight lines. Horizon lines and any vertical lines that are near the edges of the image, should be straight. It absolutely drives me crazy when I see photos with crooked lines.

That being said, lines can be crooked, but it better be obvious that was the intent, otherwise it just looks like careless composition or lazy editing. In the right context a skewed horizon can add drama, and make an image more dynamic.

Photo cropped with crooked horizon.

Crooked horizons can make viewers cringe unless the intent is obvious.

Make this your first step in cropping, because depending on how radically you have to rotate the image you may be forced to crop the edges of the image.

If you have the time when composing the shot, and your camera has a built-in virtual horizon feature for levelling, by all means do so. I have delegated a customizable button on the front of my camera for activating this feature, and I use it all the time.

With the crop tool activated in LR (keyboard shortcut R) there are a few ways to straighten out an image:

  • Drag the Angle slider left or right
  • Click on the value to the right of the slider and drag left or right (scrubby slider)
  • Click on the numerical value and enter whatever you want
  • Hold the CTRL key while dragging along a straight horizontal or vertical line (will correct on either axis) and LR will fix it automatically
  • Also new in LR6 (LR CC) is the “Auto” feature for the crop tool. Just click it and see how it does – then tweak as necessary.

Elimination

A senior photojournalist at a newspaper I once interned for, gave me a memorable piece of advice while critiquing my photos, he said, “crop until it hurts.” It was his way of telling me that I was leaving too much dead or negative space in my compositions.

To this day his advice always resurfaces in my mind when I’m editing images, especially with portraits or other photos with people in them. Fight the urge to become attached to pixels. Crop out half of the photo if need be. Unimportant areas of a photo are not precious real estate.

Cropping to isolate the subject.

You can’t always get as close to the action as you would like (or it is safe to do so) and heavy-handed cropping can make all the difference.

The fact of the matter is that simple is better. We all suffer from attention deficit disorder, and viewers usually don’t want to spend too much precious time analyzing a photo to get the story. Consider the allure of silhouette images. When cropping look for simple compositions and try to distill the scene down to its essence.

Once the image is rotated and you’ve been forced to chop off some of the edges, look for elements that detract, distract or add little to the image. You may not have a choice but to include them, but it’s good practice to be cognizant of them and it may help guide the rest of your editing process or future compositions.

You see many images where the photographer is too conservative when cropping portraits or photos of people. Again, each photo is different, and there is no magic formula, but for example, I find that tight profile shots of people grab my eye more when they are cropped in really close. I am not afraid to cut off the back of the subject’s head, putting their ear in the upper corner of the image, or even cropping the ear out.

Tight cropped portrait

Cropping in very tight can sometimes create a more powerful image.

Negative space can play an important role, especially if shooting for a publication where they need space for text. But, the nice thing about having post-processing options is that you can always revert back to the original. If you compose your images super tight in camera, you can’t get that negative space back.

Leading Lines

Although thoughtfully composing your shots through the viewfinder is one of the more rudimentary skills in photography, there are often distractions. You may find surprises when you pull up the final image on your computer screen.

In photography, as well as painting and other forms of art, you should always be thinking about the arrangement of elements in the image that are going to draw in the viewer’s eye. A compelling subject is just that, but it is your job as photographer to strive to portray that subject in the most powerful, or striking way possible.

Utilizing leading lines to draw in the viewer's eye.

It’s easy to overlook compositional elements while shooting moving subjects. Post -processing cropping reveals additional possibilities for framing your shots like using leading lines to draw in the viewer’s eye.

When we talk about leading lines it’s not always an obvious straight line. Often it is an invisible thread that takes the viewers’ gaze hostage and leads it through the scene. Think of a series of elements that create a pattern.

Diagonal lines which stretch towards the subject are a common, and effective, way to create interest and tension in an image.

Using Crop Overlays as Guidance

In all of its ingenious glory, LR has included several overlays in the Crop tool to help guide your cropping endeavors. There is a basic grid, the Rule of Thirds, the Golden Ratio, the Golden Triangles, diagonals and the Golden Spiral. With the Crop tool active, the keyboard shortcut O cycles through the various overlays and Shift+O rotates the overlay where applicable.

Personally, I find myself using the Rule of Thirds overlay most often. The Rule of Thirds says that when two horizontal and two vertical lines are drawn across the frame to divide it into equal thirds, the subject or elements of interest, should be placed on, or near the intersection of those lines.

Example of the rule of thirds.

The rule of thirds suggests that the subject be placed at the intersection of lines that separate the image into thirds.

An easy mistake to make is placing the horizon line right in the middle of the frame. This is generally considered a no-no, and is a significant compositional faux pas. The Rule of Thirds overlay gives you those handy horizontal lines for recomposing your photo.

The Golden Ratio and Golden Spiral overlays are closely related. There are a bunch of names for this formula including Phi, the Golden Mean and Fibonacci’s ratio. The Golden Ratio grid employs the same basic concept as the Rule of Thirds. I find that the Golden Spiral really isn’t much different, and is more useful to consider in your original composition, instead of trying to apply it after the fact.

The Golden Triangles overlay shows a diagonal line drawn from one corner to another with two branching lines to the other two corners separating the image into four triangles. This gives you a guide for aligning diagonal leading lines, and a suggested location for the subject at the intersection of the lines.

The diagonal overlay calls for placing elements of interest along 45-degree lines drawn across the image. Although the overlay is meant to fine tune this alignment in post-processing, it has been found that artists tend toward this layout intuitively.

The Moral of the Story

Cropping in post-processing is far more than just a simple tool to tighten up composition. Experimenting with various crops of the same image can help you develop an eye for the hidden compositions in a photo.

After you familiarize yourself with the possibilities, you will likely find yourself looking back through your photo library to revisit old images, in order to give them fresh compositions.

Photography is all about seeing, not just looking, and sometimes instead of taking a step back to see the big picture, you need to take a step forward to discover the small one.

What is your thought process when cropping in post-production?

googletag.cmd.push(function() {
tablet_slots.push( googletag.defineSlot( “/1005424/_dPSv4_tab-all-article-bottom_(300×250)”, [300, 250], “pb-ad-78623” ).addService( googletag.pubads() ) ); } );

googletag.cmd.push(function() {
mobile_slots.push( googletag.defineSlot( “/1005424/_dPSv4_mob-all-article-bottom_(300×250)”, [300, 250], “pb-ad-78158” ).addService( googletag.pubads() ) ); } );

The post Composition After the Fact: Cropping for Maximum Impact by Jeremie Schatz appeared first on Digital Photography School.


Digital Photography School

 
Comments Off on Composition After the Fact: Cropping for Maximum Impact

Posted in Photography


4 Tips for Creating Portraits with Impact

25 Mar

Faceplant

Since the birth of the camera, an overwhelming number of photographers have concentrated on portraiture. Capturing the personality, mood, or expression of a fellow human is sublimely beautiful. Because of this, many of us have thousands of portraits saved on hard drives, and eagerly await the next portrait contest. Honestly, how many of these portraits actually have visual impact? How many of our portraits are powerful enough to hold a viewer’s attention longer than a couple of seconds?

We can continue to produce countless portraits that are stale and void of visual power, or we can step back, evaluate our work, and begin to strategically create portraits that do have impact. Whether you are shooting on location or in a studio, begin adding some punch to your portraiture to captivate your audience. Here are a few ways to start creating portraits with impact immediately.

#1 INCLUDE ENVIRONMENT

When we pick up our cameras to snap a portrait, we almost instinctively move close to our subject. Yet, constantly shooting tight portraits can put us in a close-up rut. Simply moving your camera body closer to someone’s face, or using the telephoto aspect of your lens, doesn’t always lend itself to powerful photographs (the selfie is a perfect example of how easy it is to botch a close-up portrait).

Jun Temple

By physically taking several steps back, or by retracting your zoom, you allow context to enter the frame. Suddenly, what was just a photograph of a person’s face, can become an image rich with balance and environmental information. Additionally, a portrait with contextual information can easily appeal to a much wider audience by relating a story.

Steve wide

Shooting tip: When shooting wide portraits, make smart lens choices. Many wide-angle lenses (such as Canon’s 17-40mm L-Series) come with a great deal of distortion and will exaggerate a subject’s features. So that your subjects are not distorted, use a standard portrait lens (i.e. 85mm) and move your body in relation to your subject.

#2 USE NEGATIVE SPACE

Negative Monks

Stepping back and including environmental information can add impact to many portraits. However, the surrounding environment can also distract from your intended subject. At times, photographs are more powerful if the environment is minimal or void.

To draw the viewer’s eye directly to your subject, strategically add abundant negative space (area around or between a subject) in your frame. The use of negative space can be a key element in artistic composition in that it emphasizes and defines the main subject of a photograph (positive space) and adds impact.

#3 FORGET THE FACE

When we think of portraits, the first thing that usually comes to mind is a frame filled with a face. We can agree that there are many positives to this approach to portraiture. In a headshot we can see facial features, skin tones (unless we wipe them away in Photoshop or Elements) and the catchlights that draw us into the windows of the soul.

Alessa s Leg Grandmother s Hands

Luckily though, all of our photographs do not have to follow a headshot-only, antiquated view of portraiture. It is important to remind ourselves that a portrait is simply a representation of a person. Photographers are given the artistic license to determine how their subjects are portrayed. Instead of snapping a run-of-the-mill headshot, try shooting hands, feet, necks or even the cast shadow of a person. At times, moving away from a person’s face can lead to a frame that carries a tremendous amount of visual impact.

#4 CROP YOUR FRAMES

IMG 5902

Another way to add impact to your portraits is to experiment with cropping. This is one of the simplest ways to add impact to a portrait and to showcase your aesthetic as a photographer. If you are finding it difficult to see fresh or unique frames while you are actually shooting, experiment with the crop tools in post-production.

Focusing on smaller portions of your subject can have much more impact than if you neglect to adjust the original frame. Moreover, a cropped picture can completely alter the photograph’s intention or interpretation. The more you experiment with cropping, the more apt you will be in spotting unique and powerful frames in the field.

Singh

Shooting tip: If you are photographing with particular frame in mind, it is better to take photographs that are a bit wider than your intended crop. You can always crop tighter, but you cannot widen the original frame.

Whether you are an amateur or a seasoned professional, rethinking the way you shoot portraits will inevitable invigorate your craft. The next time your camera is pointed toward another human, try something new. Experiment with a variety of strategies that will add impact to your portraits.

googletag.cmd.push(function() {
tablet_slots.push( googletag.defineSlot( “/1005424/_dPSv4_tab-all-article-bottom_(300×250)”, [300, 250], “pb-ad-78623” ).addService( googletag.pubads() ) ); } );

googletag.cmd.push(function() {
mobile_slots.push( googletag.defineSlot( “/1005424/_dPSv4_mob-all-article-bottom_(300×250)”, [300, 250], “pb-ad-78158” ).addService( googletag.pubads() ) ); } );

The post 4 Tips for Creating Portraits with Impact by Andrew Faulk appeared first on Digital Photography School.


Digital Photography School

 
Comments Off on 4 Tips for Creating Portraits with Impact

Posted in Photography


Add Impact to Your Photos by Including Shadows

17 Aug

In music they say the spaces between the notes are just as important as the notes themselves. Similarly in photography, it can be the spaces that are not in the light that add impact to an image.

Imperial Sand Dunes, California by Anne McKinnell

If it were not for the shadow cast by the dirt bike, it might be difficult to tell it was off the ground.

Shadows help tell a story and enhance the mood and visual power of a photograph. In fact, they can be so interesting, that they “overshadow” the subject itself!

By focussing your attention on the shadows, you can create beautiful compositions full of contrast, form, and minimalist simplicity. An object and its shadow will strengthen each other. Sometimes you might even want to cut the object out entirely, and play with capturing only the interesting shadows that are cast by it.

A small plant and it's shadow by Anne McKinnell

In this image of a small plant, it is really the shadow that is the main subject for the image would have very little interest without it.

Photographing shadows works best with strong, simple shapes that make interesting graphic designs such as flowers, sharp lines, or even human beings. After all, who hasn’t taken a picture of their own shadow as it stretches out across the sidewalk in front of them?

You can use shadows compositionally the same way you would use any other element in the scene: as leading lines, patterns, curves that guide the eye into the scene or to create a balance of negative and positive space.

Sandstone blocks and shadows by Anne McKinnell

Look for patterns created by shadows. Here, an interesting pattern is formed by the sandstone blocks and their shadows.

Exposing for the Shadows

If you put your camera on an automatic mode (even aperture or shutter priority mode) and try to photograph a shadow, it’ll probably come out too light. This is, after all, what cameras are designed to do – expose with enough brightness to see detail. Of course, this isn’t always what we want, and shadows are a prime example of when you need to manually change your exposure to make sure the shadow remains in darkness.

There are a few ways that this can be done:

  • Set your camera to manual mode. This is for advanced photographers. On manual mode, you’re responsible for setting your aperture, shutter speed, and ISO value. If you’re not sure what settings to use, you can copy them from the values on your auto setting and then tweak them as you go.
  • Use EV compensation. If you take a shot and see on the LCD screen that it is too bright, you can simply locate the camera’s EV (exposure value) compensation button. Almost every camera will have one, even point-and-shoots and camera phones; it is denoted by a square with a (+/-) symbol. Using that, you can simply turn the exposure up or down to be brighter or darker, as you see fit, and if you’re using live view it will probably render directly in the display. If the shadows come up too bright, just lower the exposure compensation a little to deepen them.
The El Prado Pedestrian Walkway, Balboa Park, San Diego, California, by Anne McKinnell

Late afternoon sidelight created a pattern, an interesting repetition of lines, in this arcade.

  • Lock down your exposure. If you have a DSLR, it probably has an exposure lock feature, though it may need to be configured in the camera’s menu. Using exposure lock, you can fill your frame with the part of your scene that’s not in shadow – or else some well-lit mid-tone – and let your automatic exposure calculate for that. Then you lock it in by pressing the AE-L (auto-exposure lock) button on your camera. This will freeze the settings as they are, so you can recompose the image to include the shadow and the camera won’t re-calculate and brighten the exposure to account for them. This way, you’ll get perfectly exposed highlights and deep shadows. Alternatively, you can simply note the settings, dial them in to manual mode, and bypass the exposure lock altogether.
  • Bracket your shot. When you bracket your image, you take several shots at different exposures. Mid-range cameras and higher will have this feature built in – it might feature a dedicated BKT button, or the option might be available in the menu. If so, you’ll be able to select how many pictures to take and how many stops of difference between them. This makes it simple to take three exposures, for example, one with the exposure the camera thinks is correct, one underexposed by one stop and one overexposed by one stop. If this feature is not available, it can be achieved through changing the settings in manual mode, or by taking several shots with different EV compensations.
Imperial Sand Dunes, California by Anne McKinnell

In this image of a sand dune, the shadow adds form to the dune and creates a strong and balancing line in the image. I made this image mid-afternoon during a scouting trip. It turned out much better than the image I made of the same location later in the day when the right side of the dune was entirely in shadow.

Next time you’re out shooting, make a point of noticing the shapes of the shadows. Challenge yourself to actively use them to create mood, to add dimension to your subject, or to take center stage in a creatively crafted composition.

Post originally from: Digital Photography Tips.

Check out our more Photography Tips at Photography Tips for Beginners, Portrait Photography Tips and Wedding Photography Tips.

Add Impact to Your Photos by Including Shadows


Digital Photography School

 
Comments Off on Add Impact to Your Photos by Including Shadows

Posted in Photography


Create Photos With IMPACT By Composing With Purpose

09 Jul

After I started my own critique forum I soon started to realize that composition is one of the most commonly critiqued parts of a photograph and in reality composition is the most important element of a photograph next to the subject.

That said, what composition really comes down to, and what I’m talking about today, is the idea of composing with purpose.

Compose With Purpose Not As an After Thought

I’m not here today to tell you about the different “rules” of composition. I’m not going to tell you what is right and what is wrong, because ultimately, the “rules” themselves are both right and wrong in different situations and it’s up to you as the photographer to determine when and how to use them – to do that – you must compose with purpose.

It’s not easy to teach the idea of composing with purpose, but I’m going to attempt to do so by using one of the most commonly photographed landscape subjects out there – sunset – as an example. After all it’s probably safe to say that most of us have experienced at least one or two of these in our lives.

So how many of you return to your computer after photographing a spectacular sunset to see that the entire import is filled with images that basically look exactly the same as one another? Not only do they all look the same, but they’re all missing something. They might look a little like this one right?

Composed With Purpose-2

It’s not that this is a bad photograph of the sunset, there’s detail in the water, the sky and even in the tree line behind the lake, but there’s no planned composition or story being told in the photo. It has nothing to keep the eyes of the viewer interested and ultimately it falls flat.

Just a Small Change Can Have a Big Impact

The photograph below is the exact same sunset at the same location the only difference is that I’ve just chosen a very specific composition for the scene and thus created a more complete photograph.

Composed With Purpose

By taking a little extra time to think about all the elements of the scene in front of me (with my eyes not my camera) and consciously place everything from the setting sun, to the trees in the foreground, to the lily pads on the water within the frame I was able to take what is not only a beautiful sunset and capture it in time, but I was able to add depth to what I captured which allows me to showcase not only what was happening, but where it was happening – this is what adds impact to your photos.

Of course the above is a very simple example of what I’m talking about today, but it’s important to realize that composition isn’t just a set of rules that we must follow – instead composition is an active search for the best elements within the scene in front of you.

Sometimes you’ll need to step back and take the entire scene in to find the composition that make the most sense, other times you might want to put on a super telephoto or grab some binoculars and zoom way in to find some very interesting details not obvious to your normal vision.

So the next time you go out with your camera and something starts to attract your attention, whatever it may be, don’t stress too much about the rules that you’ve learned instead just try to compose with purpose. Hopefully by doing so you’ll get some unique and powerful compositions that will ultimately allow your photographs to stand out from the crowd.

Post originally from: Digital Photography Tips.

Check out our more Photography Tips at Photography Tips for Beginners, Portrait Photography Tips and Wedding Photography Tips.

Create Photos With IMPACT By Composing With Purpose


Digital Photography School

 
Comments Off on Create Photos With IMPACT By Composing With Purpose

Posted in Photography


Minimalist Photography ~ 4 Tips To Keep It Simple With A Maximum Impact

08 Jun

Minimalism is a very subjective concept in the art world. The Webster dictionary defines it as follows: A style or technique that is characterized by extreme spareness and simplicity. Some love it, others hate it, but no one seems to be indifferent. Many artists thrive in the openness of the concept, others have a problem with the lack of definition and direction. Many of us are drawn to ‘less is more’ with simple lines, geometric patterns, strong shadows, contrasting colors, lone subjects, etc. For others, deciding what to leave out of the frame to make a stronger image is a difficult exercise. Here are a few tips and examples to get you started in your quest for minimalist imagery.

©Valerie Jardin ~ Contrasting colors make for great minimalist subjects.

©Valerie Jardin ~ Bright colors make great minimalist subjects.

1. Composition

“Keep it simple” doesn’t mean “keep it boring”. Contrary to what you may think, a minimalist approach requires a lot of creativity. The use of negative space is an integral part of minimalist photography.  A well placed subject doesn’t have to be large to have a big impact.  Deciding what to leave out of the frame and create a stronger image can be challenging and often requires a lot of practice until it becomes the way you see. I recommend training yourself to make those decisions in camera instead of cropping unwanted distractions in post processing. A clever use of depth of field will also isolate your subject from the background by shooting with an aperture as wide (smallest number) as your lens will allow.

2. Textures and colors

A bright color or contrasting colors make great minimalist subjects. The same applies to textures. The viewer should be able to almost feel the texture. Sometimes it’s all about finding a creative angle to make the photograph. Don’t be afraid the experiment. Shoot straight on, shoot high or  low, work your frame until you get the shot that will speak to you.

3. Lines and geometric patterns

Strong lines make strong images. A good place to get started with minimalist photography is by paying attention to modern architecture around you. Leading lines, and other geometric shapes, can make great backdrops for minimalist pictures. Isolating a bird on a power line, if done well, can make a great minimalist shot. There are great opportunities around you all the time, you just have to learn to see them and that requires practice.

4. Telling a story

Push your minimalist photography to the next level by telling a story. Minimalist street photography showcases an interesting urban landscape with a human element. The human element, however small, becomes the focal point of the image. Yet, it’s the interesting background that draws the photographer to make the shot. Symmetry, lines, curves, shadows all play a vital part in making the photograph. Sometimes the story and the environment come together spontaneously and it’s the photographer’s job to see it and respond quickly. Other times it require a bit of patience for the right subject to walk through the frame. A minimalist approach to photography can be applied in nature as well as in an urban environment. You can practice anywhere, so get out there and open yourself to a different way of seeing with your camera!

©Valerie Jardin ~  The use of negative space is an integral part of minimalist photography.

©Valerie Jardin ~ The use of negative space is an integral part of minimalist photography.

©Valerie Jardin

©Valerie Jardin ~ Using a shallow depth of field will allow you to isolate your subject from a distracting background.

©Valerie Jardin ~ You can use a minimalist approach in nature as well as in an urban environment.

©Valerie Jardin ~ You can use a minimalist approach in nature as well as in an urban environment.

©Valerie Jardin

©Valerie Jardin

©Valerie Jardin

©Valerie Jardin

©Valerie Jardin

©Valerie Jardin

©Valerie Jardin ~ Strong lines make strong images.

©Valerie Jardin ~ Strong lines make strong images.

©Valerie Jardin

©Valerie Jardin

©Valerie Jardin

©Valerie Jardin

©Valerie Jardin ~  The viewer should be able to almost feel the texture. Sometimes it’s all about finding a creative angle to make the photograph.

©Valerie Jardin ~ The viewer should be able to almost feel the texture. Sometimes it’s all about finding a creative angle to make the photograph.

©Valerie Jardin ~ In minimalist street photography The human element, however small, becomes the focal point of the image.

©Valerie Jardin ~ Minimalist street photography showcases an interesting urban landscape with a human element.

©Valerie Jardin ~ The human element, however small, becomes the focal point of the image.

©Valerie Jardin ~ The human element, however small, becomes the focal point of the image.

Post originally from: Digital Photography Tips.

Check out our more Photography Tips at Photography Tips for Beginners, Portrait Photography Tips and Wedding Photography Tips.

Minimalist Photography ~ 4 Tips To Keep It Simple With A Maximum Impact


Digital Photography School

 
Comments Off on Minimalist Photography ~ 4 Tips To Keep It Simple With A Maximum Impact

Posted in Photography


Developing Your Photographic Style: Adding Power And Impact To Your Photography

14 Mar

I’ve been working as a photographer for almost 2 years now. And looking back at this time, I can see a number of stages I’ve grown through. Each stage is characterised by what I believed is the most important element of great photography. And in this post I decided to analyse them and come to a conclusion on the benefits Continue Reading

The post Developing Your Photographic Style: Adding Power And Impact To Your Photography appeared first on Photodoto.


Photodoto

 
Comments Off on Developing Your Photographic Style: Adding Power And Impact To Your Photography

Posted in Photography