RSS
 

Posts Tagged ‘household’

Video: Six DIY smartphone camera rigs made from household objects

24 May

The Cooperative of Photography, better known as COOPH, has released its latest YouTube video showing how to make the most of your smartphone footage by creating six different smartphone rigs using materials you likely have sitting around at home.

As you would expect for these rather primitive homemade solutions, the DIY rigs aren’t necessarily aesthetically pleasing but based on the resulting footage, hopefully your video will be. The six-minute video covers how to make a DIY gimbal, a DIY timelapse rig, a DIY stabilizer, a DIY automated slider, a DIY ‘spinning’ rig and a DIY Gorillapod-style tripod.

It’s quite the adventure, but considering there’s a good chance you’re still on some sort of lockdown or stay-at-home order, these DIY projects might be just what you need to keep your creative spirit alive in seclusion. You can find more videos from COOPH on their YouTube channel.

Articles: Digital Photography Review (dpreview.com)

 
Comments Off on Video: Six DIY smartphone camera rigs made from household objects

Posted in Uncategorized


Video: How to make caffenol developer and salt fixer using common household items

31 Mar

Photographer Brendan Barry has published a new video instructing viewers on how to make their own caffenol developer and salt-based fixer using common household items and ingredients. The process is very simple with the most expensive item being the photo paper. The new tutorial follows a video Barry published last week showing how to turn an entire bedroom into a massive camera obscura.

The new video is around 15 minutes long and it guides viewers through the entire process, starting from the ingredients and items needed all the way through the development of a photo captured using Barry’s giant room camera. The recipe is the result of experimentation, according to Barry, who points out that these ingredients may be easier to acquire at the moment compared to more traditional products.

The developer requires washing soda, granulated coffee and vitamin C powder — Barry notes that vitamin C with zinc didn’t appear to have a negative impact compared to vitamin C alone. Ordinary inexpensive table salt is used for the fixer. Mixing the two products requires only a mortar and pestle for grinding the vitamin C tablets, a small container and a measuring cup for mixing the developer and a separate container for mixing the salt fixer. A digital scale is used to weigh some of the ingredients.

Once the developer and fixer are mixed and poured in the trays, the exposed photographic paper is put in the developer for ‘about three minutes,’ according to Barry, who explains that it needs to be left in a bit longer than would be typical with a normal developer. The coffee stain on the paper produces a slight sepia tone in the resulting image, he notes, also explaining that the vitamin C is what produces the contrast in the photo. Leaving out the vitamin C will reduce the contrast.

After the developed paper is rinsed in the tray that contains plain water, it is transferred to the tray with fix, which highlights the one big disadvantage to this process. Barry explains that the photo paper must be left in the fix for ‘quite a long time,’ which equates to around 12 to 24 hours, though the lights can be turned back on after an hour.

Barry demonstrates how to quickly create a positive print from the resulting negative, though he notes that more detailed information on this process is provided in the camera obscura tutorial video from last week.

‘This is obviously just a basic, simple introduction to caffenol and making your own developer and fixer,’ Barry explains. ‘I like to make things as accessible as possible and encourage other people to have a go at these things. Sometimes they can seem a bit intimidating and complicated […] but it’s really, really simple.’

Articles: Digital Photography Review (dpreview.com)

 
Comments Off on Video: How to make caffenol developer and salt fixer using common household items

Posted in Uncategorized


Creative Lighting Tips Using Household Items

30 Apr

The post Creative Lighting Tips Using Household Items appeared first on Digital Photography School. It was authored by Jackie Lamas.

Ever want to create interesting photographs without having to spend so much on equipment? Chances are that you already own ordinary household items that can give your photos that creative lighting twist to make them pop! Read and try these creative light tips using things that are already in your home.

In almost all of the tips, I use my smartphone to light my subject, which is also another item you can use that is already in your home!

1 - Creative Lighting Tips Using Household Items

1. Shadows and patterns

To create shadows and patterns in your photos, try some of the following items that you have in your home already. Create a dot pattern with a colander. Hold it under the light – it can be a flashlight or natural light over your subject and you’ll see how the shadows form.

Experiment with different items with similar holes like a spatula, cheese grater, or laundry basket. Hold the items close and far away from your subject until you get the look that you want! Another easy way to create shadows is with the blinds on your windows. You can place your subject next to the blinds and angle them so that you get the desired pattern on your subject.

2 - Creative Lighting Tips Using Household Items

Using one small light like the flash on my phone and a colander works for making patterns.

You can also cut out patterns on paper, cardboard, or other similar materials to get the patterns you want. Hold them over your subject, and under your light source, and you’ll have shadows and patterns for your photos.

2. Color filters

Using translucent paper like cellophane or even document protectors that are translucent can help you add color casts to your photos. Cut them into squares or circles the diameter of your lens and hold each one up as you take a photo. You can also use tape to keep them on the lens while you’re photographing your subject.

3 - Creative Lighting Tips Using Household Items

I used cut up CD color cases. Document protectors would also work. Anything translucent.

Layer the colors or place them at the edges of the lens to create different color casts in the same photo. Another way is to put the colored paper in front of your light source, like a flashlight or sunlight, in order to achieve the color cast. This way you don’t have to have the paper over your lens and you can mix in different colors in the scene.

4 - Creative Lighting Tips Using Household Items

You can also use a tablet, laptop, or phone to create color casts as well. Try and aim to photograph your subject in a bit of a darker place so that the color cast shows up a little more. Place your device close to the subject and see how the colors show up onto your subject. Make sure your camera is steady as less light will cause more camera shake if you’re using slow shutter speed. Use a fast lens so that you don’t have blurry photos.

5 - Creative Lighting Tips Using Household Items

Use the color filter to the side of the lens.

3. Making rainbows

Using an old CD can create a rainbow light when it’s being reflected. Use this to create interesting rainbows on your subject or background. You can tilt it to get different effects.

6 - Creative Lighting Tips Using Household Items

Another way you can use a CD to create interesting light is to cut it up and glue it to poster board or cardboard and hold it up to the light that way. See what kind of creative light you can get onto your subject!

Try moving it around so that you can angle the rainbow just how you want it in your photo. Get creative with placing the rainbow to highlight different parts of your scene.

4. Fairy or string lights

String lights can give your photos a creative twist all while lighting your subject as well. Place the lights close to the lens to get the blurry orbs of light or place them on your actual subject to get that warm and inviting color on your subject.

7 - Creative Lighting Tips Using Household Items

Tape the lights to the wall so you can have free hands to photograph your subject.

String lights work best in a darker scene but you can experiment with different lighting situations to see what works best. Christmas lights also work for this but they are bulkier.

8 - Creative Lighting Tips Using Household Items

Use the fairy light close up to your lens to get the orb effect.

5. Spray bottle

Water refracts light, this means that when the light hits the water, it bends and can give you a unique way of lighting a photograph! Grab a spray bottle and give the lens a little spray. You might have to point your camera toward the light source, like a backlight or the sun in order to get the light refracting.

9 - Creative Lighting Tips Using Household Items

Using distilled water in a spray bottle gives some really interesting effects too. You could even go another step and use a colored filter over the light or lens to get a mixture of the effects.

In conclusion

10 - Creative Lighting Tips Using Household Items

Create interesting images by combining all of the tips together. This image has the rainbow from the CD, twinkle lights, water droplets all lit by my smartphone flash.

All of these cool lighting effects will give you more creative lighting to your images all using household items that you already have or can create under a budget. Which one will you try?

Share some of the images you take using these techniques with us in the comments below.


The post Creative Lighting Tips Using Household Items appeared first on Digital Photography School. It was authored by Jackie Lamas.


Digital Photography School

 
Comments Off on Creative Lighting Tips Using Household Items

Posted in Photography


How to turn household lights into cheap DIY lighting modifiers

27 Nov

This article was originally published on Jake Hicks blog, and is being republished in full on DPReview with express permission from the author.


There is an almost endless supply of lighting modifiers available on the market right now—some are cheap, and some of the better ones are certainly a lot more expensive. But does cost directly relate to quality?

Well, a lot of the times yes it does, especially if you’re referring to build quality. In general, the more you spend, the better-made and more durable the modifier will be. But does that extra money you spend mean you’re getting a better lighting modifier overall? I would have to say no; in fact, for less than £15/$ 20 you can get some stunningly beautiful light from a homemade lighting modifier.

Read on to see examples of the stupidly cheap DIY lighting modifiers I’m referring too.

I’d like to think that my work is known for its creative approach to lighting. The reason for that is because I strongly believe lighting is the single most important subject in a shot.

I can honestly say that I’ve ‘saved‘ some frankly awful shoots through engaging lighting alone. Terrible locations, inexperienced or even no experience in the model/subject can certainly make a shoot hard, but far from impossible to pull off engaging results. Dynamic lighting can bring a boring room to life and flattering lighting can enhance any subject, lighting really is the one and only tool you need and should have complete control and mastery of.

So what makes good lighting? Well that is probably a topic/article/book/anthology for another day as there are certainly a lot opinions on the subject, but I think no matter how experienced or inexperienced you are as a photographer, we all know what we don’t like and we definitely know what we do like when we see it.

In this article I aim to show you a couple of very cheap alternatives to professional lighting modifiers that I think create some beautiful light that are very functional in a lot of situations.

Regular Household Lights

The lighting modifiers we’ll be taking a look at are the dome-like frosted globes. These can be fantastic at lighting a scene in a shot, as they spread light everywhere very evenly. It also turns out that, not only do they spread light everywhere, but they also create a beautiful portrait light as well. Let’s take a closer look at the lights in question.

I purchased two white frosted dome lights from IKEA. One was small and the other was far larger. The smaller one is intended to be used as ceiling light in a bathroom. The reason it’s intended for this is because it casts light everywhere from a very small source close to the ceiling making it ideal for small rooms and corridors.

Small bathroom ceiling dome light.

The second one I purchased was far larger and is actually originally intended as a table lamp. Again this dome-like design is perfect for casting light over a large area without being overly harsh.

Large table lamp dome.

Where can you get them?

I got mine from IKEA and they are silly-cheap.

The small globe is a ceiling light called VITEMÖLLA and it can be found here for £13. The one in the picture looks slightly different as it has a white base compared to my silver one but the dome (the important part) is the same.

The large dome is a table lamp called FADO and that can be found here for £15. It’s worth pointing out and making sure that you get the white one. There are several of these FADO’s in a variety of tones so just make sure you choose the white one as the others will be fairly useless.

Regular Photographic Modifier

I also wanted to get a bit of a gauge on how the light from these domes looked compared to a regular photographic lighting modifier. For the sake of this test I actually compared them to a few shots taken with a 22″ white beauty dish.

There’s a couple of reasons for this. Firstly, it’s probably my most used lighting modifier so I have a very good idea of how the lighting looks with it. And secondly, the beauty dish is pretty pricey compared to these domes so I thought it would be an interesting comparison.

The image above also gives a nice size comparison and it clearly shows how all three of the modifiers used in the test look when side-by-side.

Getting the Domes ‘Shoot-Ready’

Obviously the domes are designed for an alternative purpose to a photoshoot, so I needed to do make a few adjustments before they were ‘shoot-ready’.

Small Dome

The smaller dome was fairly simple: I just removed the inner wiring and bulb housing and then I simply rested it atop one of my standard dish reflectors. I could have taped it on but there was no fear of it moving or tipping out so I just left it as it was and it was fine.

The small dome was easily made shoot-ready by removing the inner workings and then simply resting it in a current reflector dish.

Large Dome

The larger dome took a little more work, but not much. I simply removed the inner workings once again and then found an old speed-ring to attach it too.

A speed-ring is the metal rotating mount that attaches modifiers like softboxes to your flash head. I’ve acquired a few over the years that I no longer use so I simply taped one of them to the dome. With strong tape like gaffers tape it was surprisingly snug and there was no fear of it coming loose even when mounted on its side.

The large dome was taped snugly onto an old speed-ring which enabled me to attach it to my light horizontally if needed.

The Setup

The actual lighting setup was nothing fancy, but I also wanted to try out some alternative colouring ideas at the same time.

The model was positioned about 5 feet from the white wall behind her. I had the main lights positioned about 2 feet in front of her and above eye level, and then I also had a small softbox on the floor at the models feet with an orange gel* in place for the entirety of the test.

*Obviously you don’t need to the orange gel but I was seeing how much the gel was washed out by the modifiers so that’s why I had it in place.

A very simple setup that involves two lights; a key and orange gelled fill light.

The Results

After I had taken a few shots with the beauty dish, I switched that out for the larger dome. Then, after a few more frames, I changed it too the smaller dome. The resulting images should speak for themselves.

Beauty dish Images

Beauty Dish Shot – Click to Enlarge Beauty Dish Shot – Click to Enlarge

The Small Dome Images

The small dome setup
Small Dome Shot – Click to Enlarge Small Dome Shot – Click to Enlarge

Large Dome Images

The big dome set-up
Large Dome Shot – Click to Enlarge Large Dome Shot – Click to Enlarge

CAUTION: I’m using LED modeling bulbs in my flash heads which produce very little heat. If your flash heads have tungsten modeling bulbs, these globes will get VERY HOT as there is nowhere for the heat to escape when the globes are in position on the heads. Be sure to turn them down or off entirely.

Conclusions

I think you guys can draw your own conclusions from the images above and however you feel about the three looks, I think one thing is very clear that we can all agree on: you don’t necessarily need to spend a lot of money on expensive modifiers to produce beautiful light.

The beauty dish obviously produces a more directional light, and you can see that by how dark the background is compared to the other setups. The other dome shots throw light everywhere so more light is spilling onto the background. Because of this beauty dishes directionality and lack of spill, you should notice that the shadows on the models face are darker too. In contrast, the domes are bouncing light around the room and that spilled light is filling in a lot of the shadows on the models face. This gives the appearance of a far more flattering light as a result.

This dome spill is far from being a bad thing either; in fact, if you’re using the domes in a small space you can use that spill and bounce to really blend the subject into a scene with just a single light. This type of modifier is perfect for location shooting or environmental shots, and it’s certainly something I’ll be using for that type of work.

The small dome actually produced a far better light than I expected. Its small source creates a contrasty light that falls off quite quickly, leaving brighter highlights and darker shadows as a result. I also found that this creates some nice shimmering effects on the skin and makeup as a result of the hard-light properties.

I was really excited to try the big dome, as I thought it was going to be far and away the best looking lighting. Although I wasn’t disappointed, I still feel the resulting light didn’t look like I expected. The light was very clean in that there was a very smooth transition from shadow to highlight, which was nice, but it was still darker overall than I expected.

As a singe beauty light I think the small dome won for me with its look. If I was shooting in a larger area and wanted to illuminate more of the subject in a scene then the big dome placed a little further away would surely be the best choice.

In hindsight, I think I know where I went wrong with this test and what I would like to do differently next time.

You’ll notice that the light stand did not move the entire time, so from the small dome setup to the big dome setup the angling of the flash head caused the light source to get a lot closer to the model, which required me to turn the power of the head down. That’s not a problem normally, but when I turned the power of the head down, I also reduced the amount of light that bounced around the room. This in turn reduced the amount of light falling back into the shadows making the light appear darker than it actually is.

I would like to try this big dome again, but move it further back from the model, thereby allowing that light to bounce around the room and giving a far softer impression to the lighting—perfect for environmental shots.

Closing Comments

So there you have it: a couple of great lighting modifiers and at the cost of just over £25 for the both of them! That’s pretty damn impressive in my book, and you’d be crazy not to grab at least one of them and give them a go. Of course, if you really wanted an excellent dome modifier then you can always grab the Profoto frosted dome one here for a cool $ 177! I’m sure that’s miles better 😉

As always, if you have any questions then let me know. If there was something that didn’t make sense and you wanted clarification on then let me know. Also if you’ve ever tested a DIY modifier that has provided excellent results, I’d love to hear about it. Let me know in the comments!


Jake Hicks is an editorial and fashion photographer specializing in keeping the skill in the camera not just on the screen. To see more of his work or read more tutorials, be sure to visit his website, like his Facebook page, and follow him on Instagram and Twitter.

Articles: Digital Photography Review (dpreview.com)

 
Comments Off on How to turn household lights into cheap DIY lighting modifiers

Posted in Uncategorized


Household Items to Bring to Your Next Food Photography Shoot

03 Jan

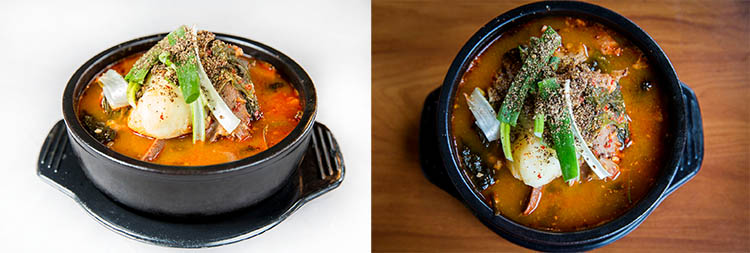
One of the most common assumptions about food photography is that hardcore food styling techniques must be involved to make dishes more visually appealing. In fact, there are professional food stylists who will employ all sorts of techniques to transform a dish into an inedible, yet highly photo-worthy subject. However, food styling techniques can also be very simple and accessible. Below is a list of common household items that can also help you out on your next food photography shoot.

Tweezers Food Styling Tips for Photography

For Keeping Food Clean

Tweezers

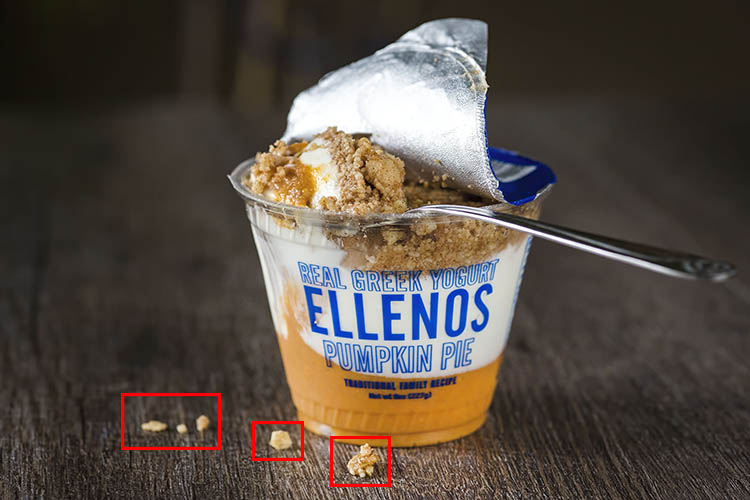
It’s pretty much inevitable that a plate of food will have quite a few moving parts that can easily fall out of place. While the Spot Healing Brush in Photoshop can make crumbs or blemishes disappear in post-production, it’s best to remove those bits and pieces from the dish before your shot is taken. This is where a pair of tweezers comes in. Use them to rearrange food on a plate or reach down into a deep glass or bowl to make adjustments.

Tweezers Food Styling Tips for Photography

These crumbs could have been easily removed with tweezers, or removed in post production.

Cotton balls

Besides being used to soak up pools of excessive liquid that might gather on a dish, cotton balls are also great for propping up food. Stuff one or two behind a piece of food to give it some leverage and height. Since they’re small and absorbent, the cotton balls can easily hide and blend into a dish so it’s not obvious they’re being used.

Q-tips

Serving a similar purpose to tweezers and cotton balls, Q-tips (cotton swabs) are important for small touch ups. Use them dry or dipped into some rubbing alcohol to remove small blemishes from a dish and you’ll save yourself some valuable time in post-production. Which leads me to my next point…

Rubbing alcohol

Throughout a food photography shoot, your props and gear are bound to come into contact with some morsels of food. Bring a small bottle of rubbing alcohol to keep your gear clean, and even consider keeping some hand sanitizer nearby to clean your hands after rearranging plates of food.

Highly absorbent paper towels

If it’s not already obvious, all of the food styling tools listed thus far have to do with cleaning and touching up dishes before they’re photographed. This tool is the last of the cleaning sort and is useful not only for wiping dirty hands after styling, but also for absorbing liquid from juicy meats, iced drinks, or other plates of food that are a touch too wet.

For Keeping Food Fresh

Food Styling Tips for Photography

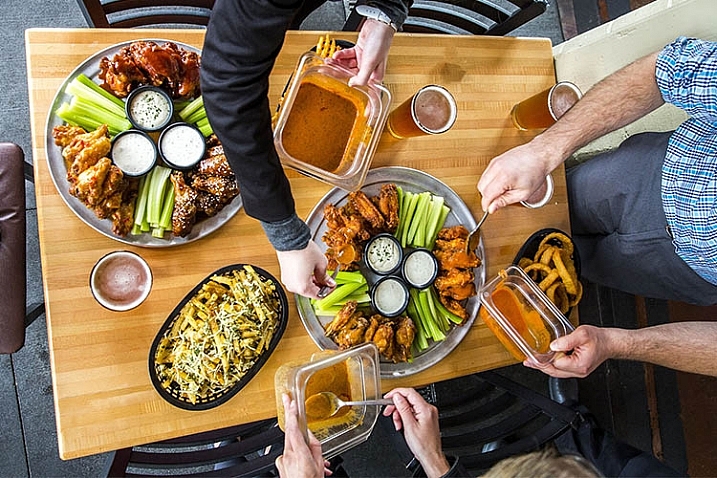
Using a spray bottle filled with water was essential for keeping the shine on these saucy chicken wings.

One of the biggest challenges for food photographers is to shoot dishes while they still look appetizing and edible. These tools will help restore shine and luster to dishes to imply freshness.

Nonstick cooking spray

Restore a bit of shininess to a dish and help it reflect light better by adding a bit of nonstick cooking spray. Be very careful, however, as a spray that is too strong might dishevel parts of your dish.

Spray bottle filled with water

This serves the same purpose as the nonstick cooking spray, but in a slightly more controllable manner as you can often shift the nozzle of a spray bottle to emit a smaller or larger stream of water.

Eye-dropper

When you need ultimate control over liquid application, it’s best to use an eye-dropper instead of a spray bottle or nonstick cooking spray.

For Applying Creative Touches

After using the above tools to perfect the details of your photo subject, it’s time to focus on two other factors that can take your photo to the next level; light control, and selecting a creative background.

Tin foil (or a large metal baking sheet)

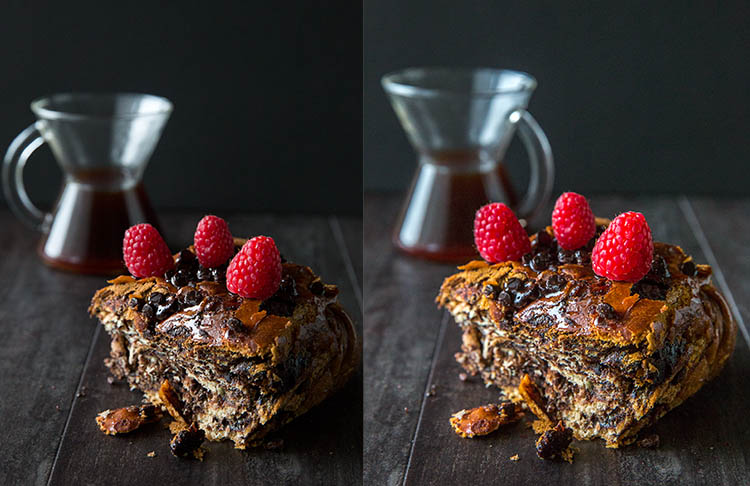
Depending on your preferred camera tools, you may already have a reflector in your food photography kit. If you don’t have a reflector, you can use a sheet of tin foil or a metal baking sheet. If you use tin foil, you have the added bonus of being able to use smaller pieces and mold them.

Food Styling Tips for Photography

On the left: shot without a reflector; on the right: shot with a reflector to the right of the food.

Baking parchment paper

In photography, baking parchment paper can serve a couple of purposes.

First, it can be used as a cheap alternative to a diffuser (light modifier) to soften the light aimed at your subject. Simply tape a sheet of parchment paper to a window where sunlight is shining through. The resulting light will soften considerably, reducing the shadows and glare on your food subject.

Another way to utilize parchment paper is as a photography background or surface. Try plain parchment paper for a white surface, or the brown version for a different color option.

Food Styling Tips for Photography

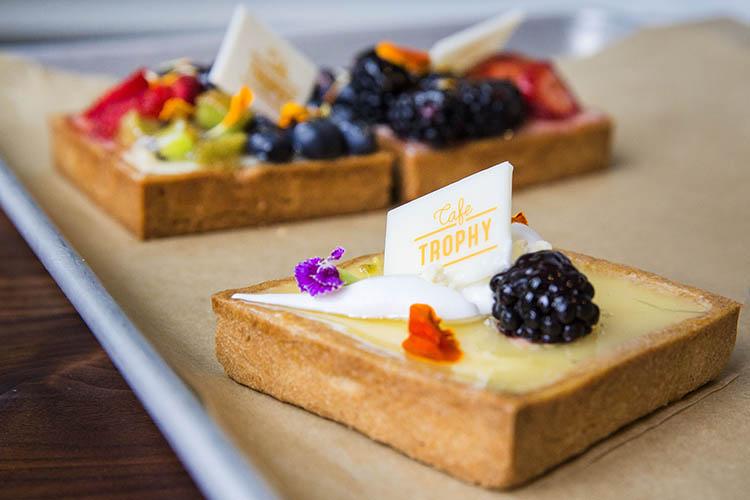
Parchment paper can add a different texture and color to your photo subject.

Gift wrap

Since we’re on the subject of photography surfaces, gift wrap is another affordable option for shooting food against creative backdrops. Cutting boards, tabletops, and placemats are also popular options, but they can be pricey and take up lots of room to store. Gift wrap, on the other hand, is plentiful with a variety of colors and textures to choose from.

Tweezers Food Styling Tips for Photography

The same dish shot with different backgrounds. White gift wrap paper was used on the left and a wooden table surface on the right.

Over to You

Do you have any simple food styling tips or tricks to share? Let me know in the comments below!

googletag.cmd.push(function() {
tablet_slots.push( googletag.defineSlot( “/1005424/_dPSv4_tab-all-article-bottom_(300×250)”, [300, 250], “pb-ad-78623” ).addService( googletag.pubads() ) ); } );

googletag.cmd.push(function() {
mobile_slots.push( googletag.defineSlot( “/1005424/_dPSv4_mob-all-article-bottom_(300×250)”, [300, 250], “pb-ad-78158” ).addService( googletag.pubads() ) ); } );

The post Household Items to Bring to Your Next Food Photography Shoot by Suzi Pratt appeared first on Digital Photography School.


Digital Photography School

 
Comments Off on Household Items to Bring to Your Next Food Photography Shoot

Posted in Photography


Creating Effective DIY Studio Lighting With Household Items

12 May

When I first started to experiment with controlling the light, I couldn’t afford to splash out on studio gear just to experiment, so I improvised with what I could find around the house, or acquire for only a few dollars. Some improvisations were, let’s just say, less successful than others. But some did produce good results. Some DIY studio lighting I still use, even though I now have a studio setup.

Let’s start with an easy and free lighting method, because free is my favourite price!

Use a table lamp

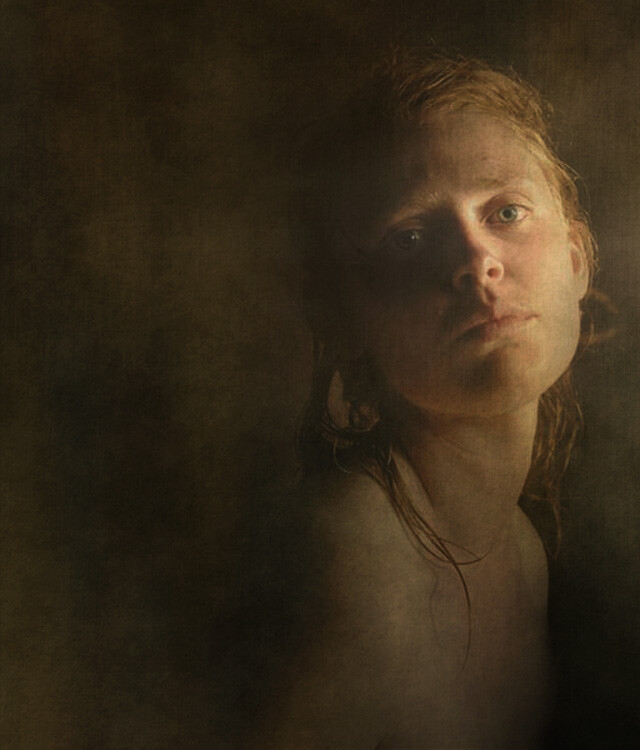
HawkinsDPS1

This shot was taken with a table lamp. Most of us have some sort of lamp around the place. Any kind will do. They come with their own diffuser, the lamp shade, and are easy to move around. You can adjust height with boxes, books, or anything stable you can find. You can experiment with alternative lamp shades as well as different strength, variety, or colour of light bulbs, or the number of lamps you use.

Lamp lighting usually isn’t very bright so you might need a tripod or somewhere solid to put your camera. For the image above I had the model hold the lamp and move it around slowly as I fired away, getting her to go even slower or stop when things were looking good.

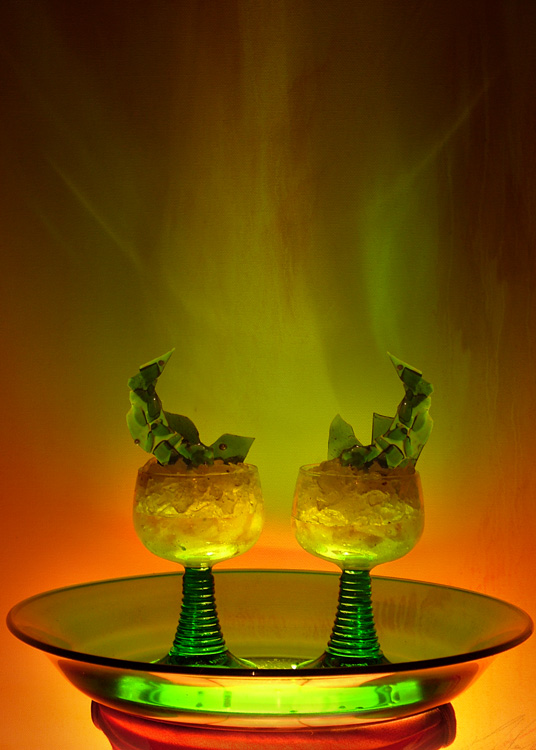
For the shot below I put the green glass dish directly on top of a lampshade, in front of an abstract painting. It’s all about experimenting.

HawkinsDPS2

Make-shift softbox

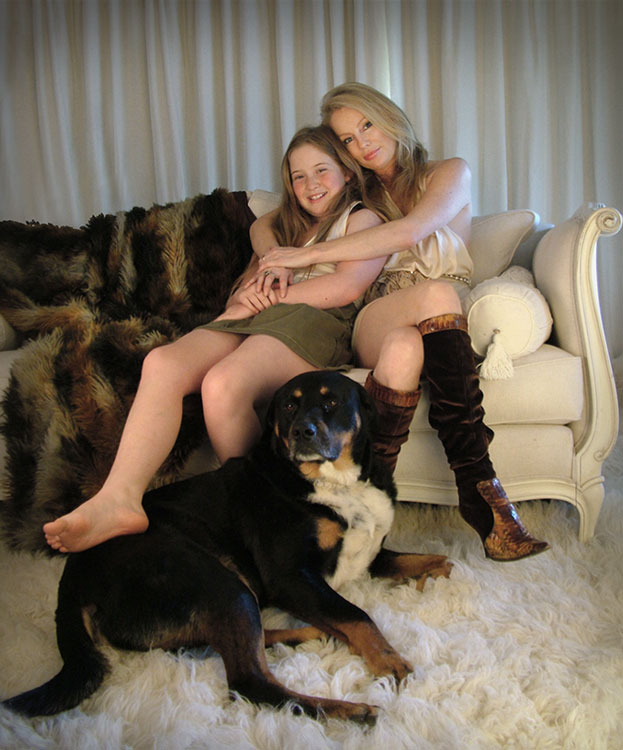
While lamps were great, I really wanted to try soft box style lighting, so I had to get a bit more creative. The portrait below of friends and their dog was lit using a large open cardboard box lined with aluminium foil and placed on its side. I then shone a bright halogen work-light into the box, and softened the resulting light with a white sheet held up in front of the setup. Off to the side was a similar setup using a lamp with the shade removed, a smaller foil lined box, and a white pillow case.

HawkinsDPS3

It’s not a perfectly lit portrait. I was just starting out with portraiture and it was my first attempt with my DIY softboxes, but the results were encouraging enough for me to keep experimenting.

Try different things – experimentation is key

I went on to using regular white umbrellas, of the rain repelling variety, to diffuse the bright bulbs used for household outdoor lighting. I’ve bounced the light from an array of heavy duty flashlights, into a foil lined rain umbrella, all attached to a tripod with about a million miles worth of gaffer tape. I’ve used metallic cardboard sheets from the newsagent, or foil covered boards as reflectors. There were many experiments, some good, some not so much, and some were surprising.

Basically you just need a light, or two, and something to diffuse or reflect/bounce the light, or both. Preferably without setting fire to anything. Work-lights and other really bright bulbs can get surprisingly hot. It’s best not to have flammable things like sheets or cardboard too close and have something protective underneath if the light is placed on surfaces.

If you are not so keen on lining boxes and hanging sheets, you might like to try light painting.

Light painting

HawkinsDPS4

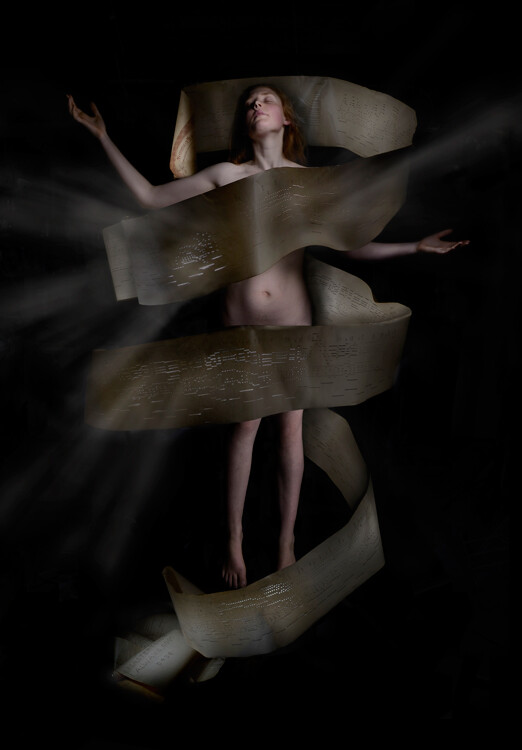
Apart from the emanating beams of light which were added later in Photoshop, the rest of this image, shot in my kitchen, was lit with only a two dollar LED light from the junk store. This was a complicated shoot, which had to be lit and shot several times, then blended in Photoshop. But you don’t have to go to that extreme. With a bit of experimenting and practice you can light a subject this way in one single shot.

There are many interesting and informative articles about light painting here on dPS. I highly recommend having a browse through them if you’ve never tried it before, but I’ll just run you through the basic idea here.

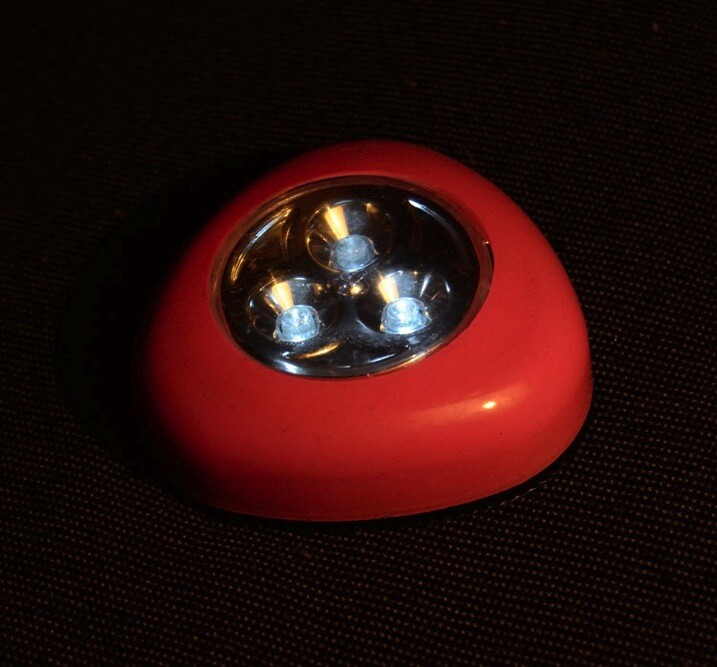
You’ll need a tripod (or somewhere solid to put your camera), a completely or almost completely dark room and a cheap little flashlight, or LED light. This is what I used for the shot above, a two dollar press button, night light.

HawkinsDPS5

A slow shutter speed is necessary to give you time to paint. I usually start off with a shutter speed of about 20 seconds, ISO 400, aperture at roughly f/11. Then adjust from there, depending on the subject and light brightness. Once you are all set up, turn out the lights, shine your flashlight on your subject while looking through viewfinder to get your focus, then click the shutter and start painting your subject with light.

You’ll have to move in close and run your light around only a few inches from the areas you want to light. That means being in front of the lens when the shutter is open, but the camera will only pick up what you shed light on, so as long as you don’t accidentally light yourself up, you won’t show up in the shot.

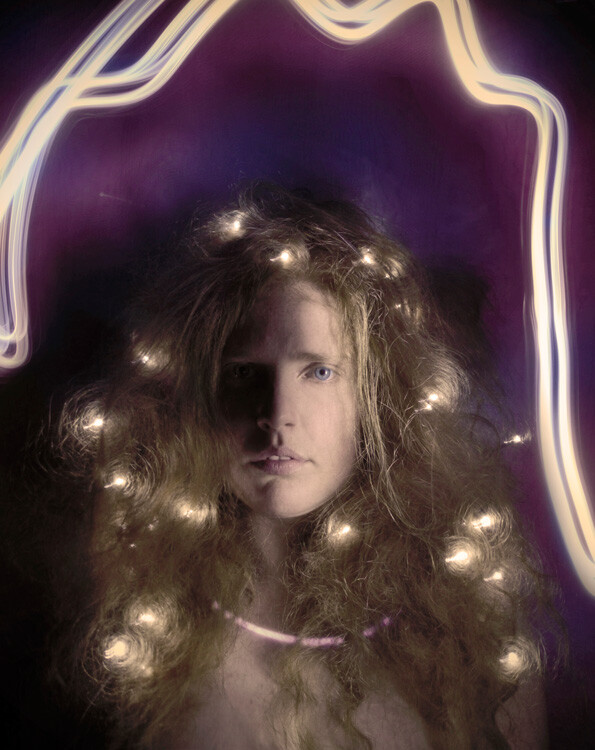
Try a bit of side lighting, play around with different lengths of exposure time, different light sources. If the light shines directly into the lens, you will get what I call ghost lines, which can be used deliberately as I did in this shot below.

HawkinsDPS6

While these methods are obviously not a replacement for studio lighting gear, they are an effective alternative that can produce some surprisingly good results and allow you to take a bit of control over your lighting without forking out more than a few dollars. It’s also very fun and even though I now have a properly equipped studio, I still sometimes love to play around with a simple table lamp or two dollar torch (flashlight).

Feel free to share any photographs you created with DIY lighting setups in the comments, I’d love to see them!

googletag.cmd.push(function() {
tablet_slots.push( googletag.defineSlot( “/1005424/_dPSv4_tab-all-article-bottom_(300×250)”, [300, 250], “pb-ad-78623” ).addService( googletag.pubads() ) ); } );

googletag.cmd.push(function() {
mobile_slots.push( googletag.defineSlot( “/1005424/_dPSv4_mob-all-article-bottom_(300×250)”, [300, 250], “pb-ad-78158” ).addService( googletag.pubads() ) ); } );

The post Creating Effective DIY Studio Lighting With Household Items by Lea Hawkins appeared first on Digital Photography School.


Digital Photography School

 
Comments Off on Creating Effective DIY Studio Lighting With Household Items

Posted in Photography


Seven more DIY photography tips using household objects

12 Jul

The Cooperative of Photography received a lot of attention recently for a video featuring seven easy photographic hacks using household items. Now they’ve released a follow up video with seven more neat tips and tricks. It might just help you kick of a fun weekend photo project. Learn more

Articles: Digital Photography Review (dpreview.com)

 
Comments Off on Seven more DIY photography tips using household objects

Posted in Uncategorized