RSS
 

Posts Tagged ‘Home.’

Mini Living: Breathable Cylindrical Home Slots Into a Tiny Alleyway

07 Apr

[ By SA Rogers in Architecture & Houses & Residential. ]

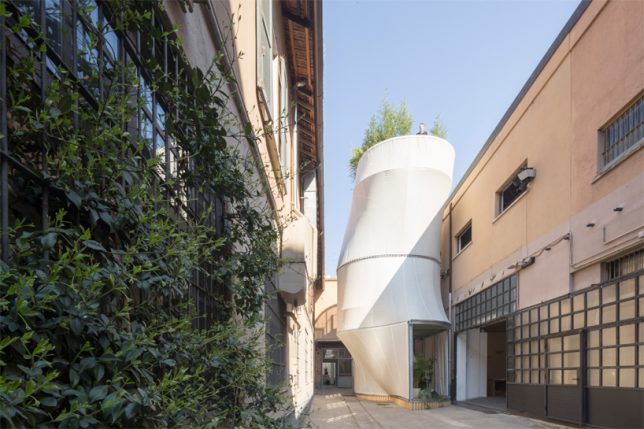
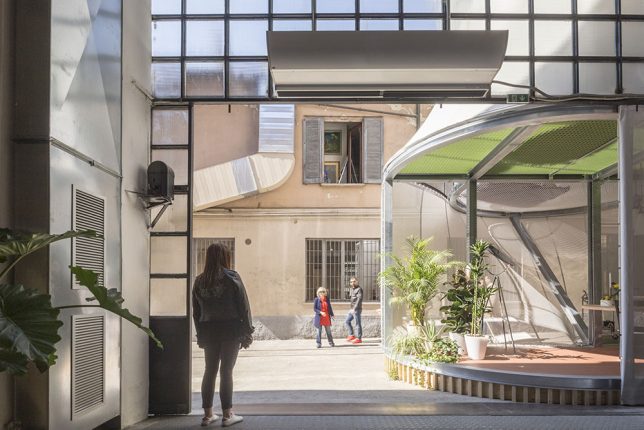
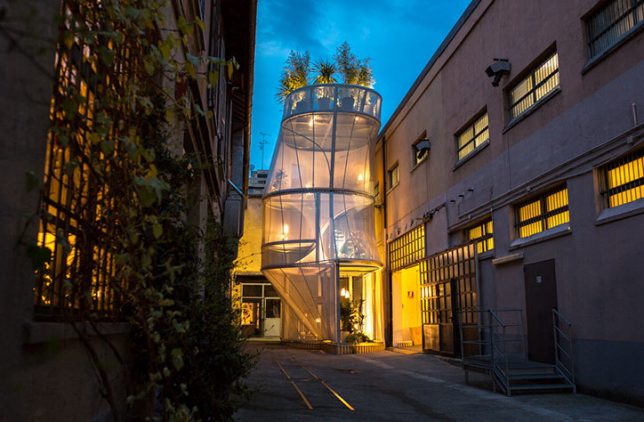
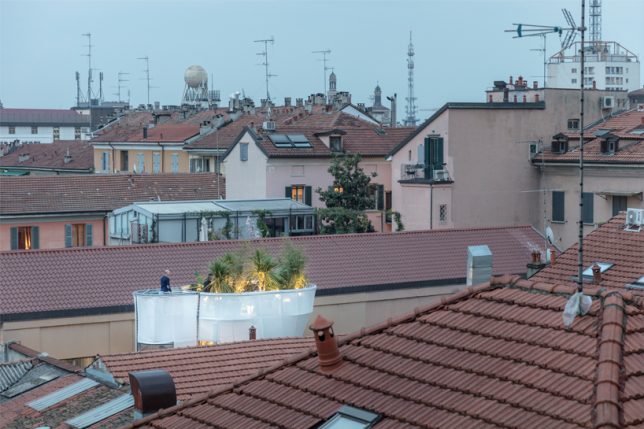
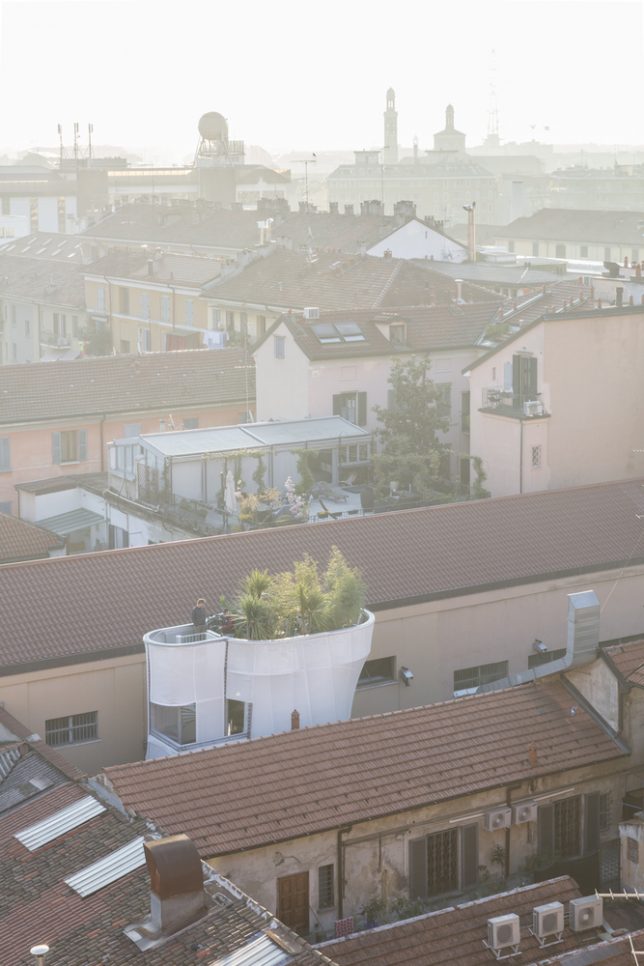
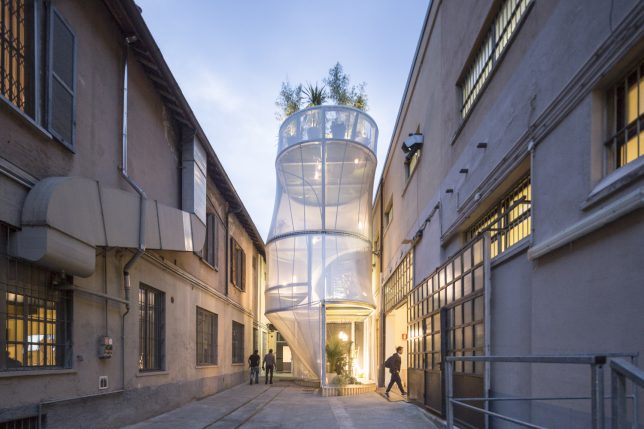
Extending beyond the existing rooftops like a fast-growing plant, this compact cylindrical home slotted into an unused urban plot in Milan features a breathable ‘skin’ connecting the interiors to the outdoors. Designed by New York-based architects SO-IL for Milan Design Week 2017, the MINI LIVING ‘Breathe’ installation is a response to the growing challenge to maximize available space in cities to comfortably accommodate more residences.

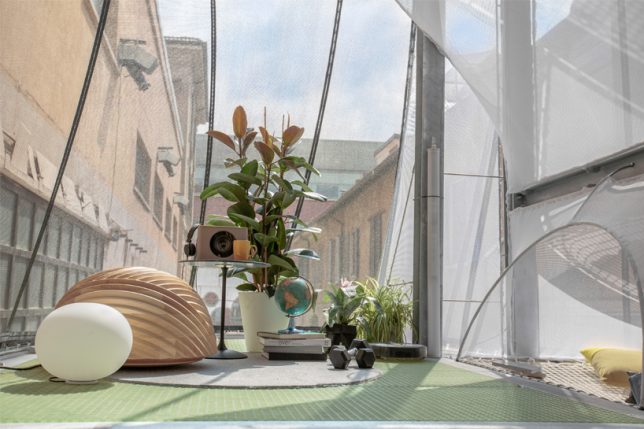
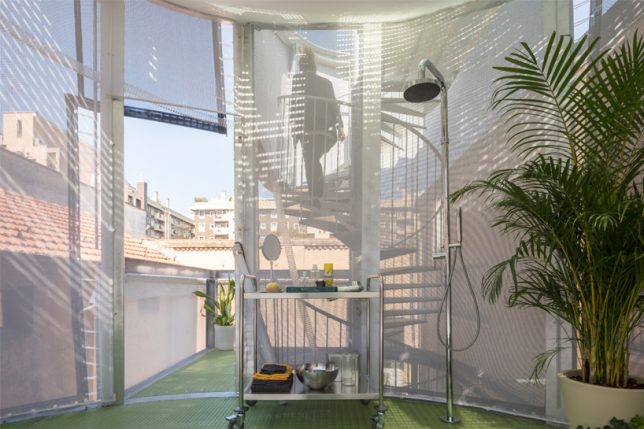
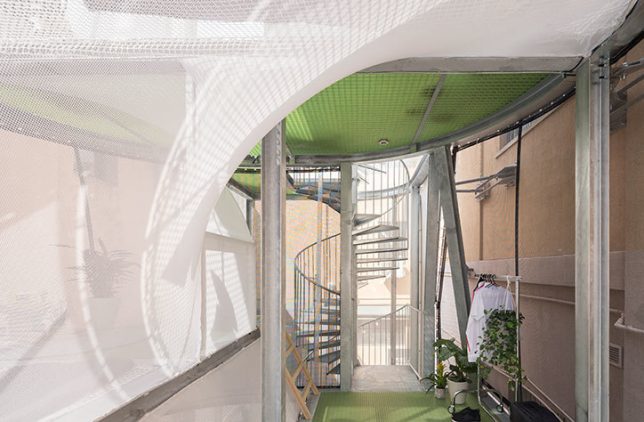
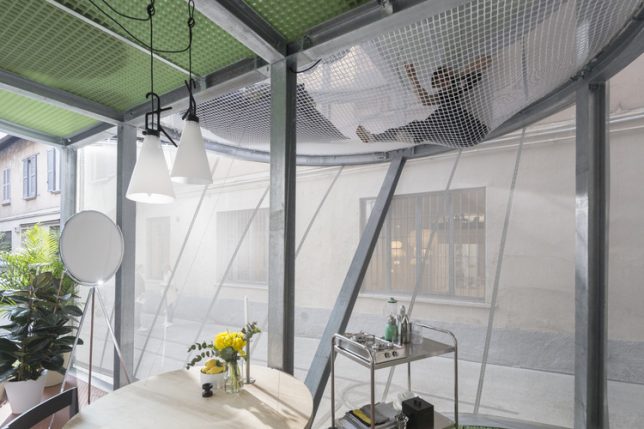
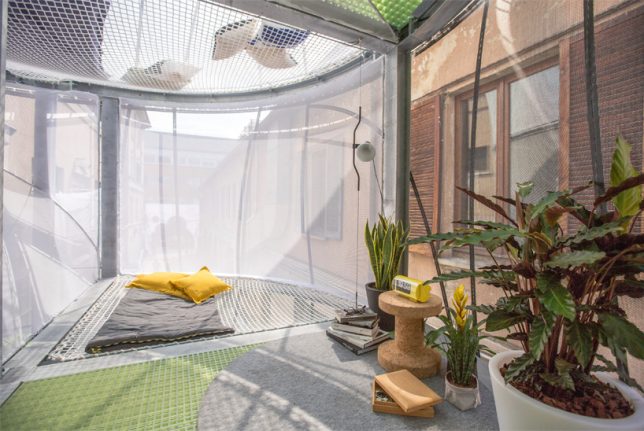
Built on a modular metal frame covered with a flexible, semi-translucent envelope that reacts organically to the environment, the home was designed for a family of three, and features six rooms and a lush rooftop garden. The ground floor is transparent to encourage interaction with the world outside; climb the spiraling staircase and you’ll find a series of private spaces for relaxation, work and sleeping, all separated by fabric canopies.

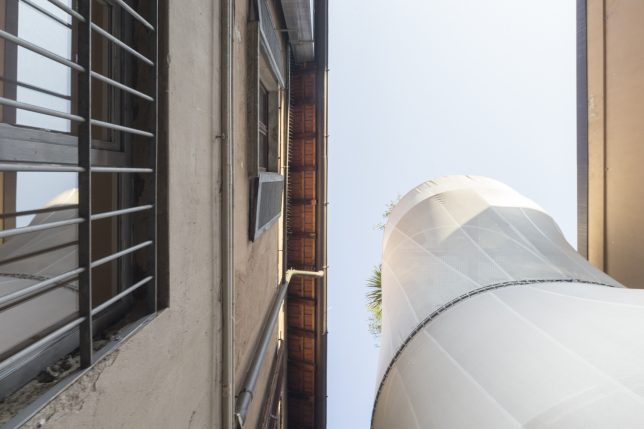
The outer skin lets in filtered sunlight, while the rooftop garden collects rainwater and helps filter the city air. Hammock-like nets suspended from the upper levels look out onto both the city outside and the interiors below. The architects describe the skin as a ‘jacket’ that can be zipped and arranged differently to protect against various external conditions. The more you layer it, the more privacy or water resistance it offers, so inhabitants can customize the needs of different rooms.

The idea, in part, was to ‘tune’ the interiors to the rhythms of the city, the weather and the sun outside, eliminating the closed-off feel that many homes tend to have. While the tent-like design may not be viable for many urban centers where cold weather, rain and theft might be a problem, it’s an intriguing idea for layering with more solid and secure materials like glass.

Share on Facebook


[ By SA Rogers in Architecture & Houses & Residential. ]

[ WebUrbanist | Archives | Galleries | Privacy | TOS ]


WebUrbanist

 
Comments Off on Mini Living: Breathable Cylindrical Home Slots Into a Tiny Alleyway

Posted in Creativity


Inhabited Ruin: Modern Home Hidden Inside Abandoned Masonry Shell

07 Apr

[ By WebUrbanist in Architecture & Houses & Residential. ]

inhabited ruin

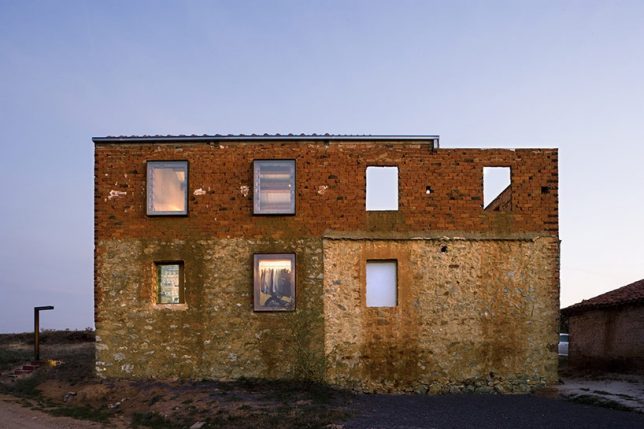
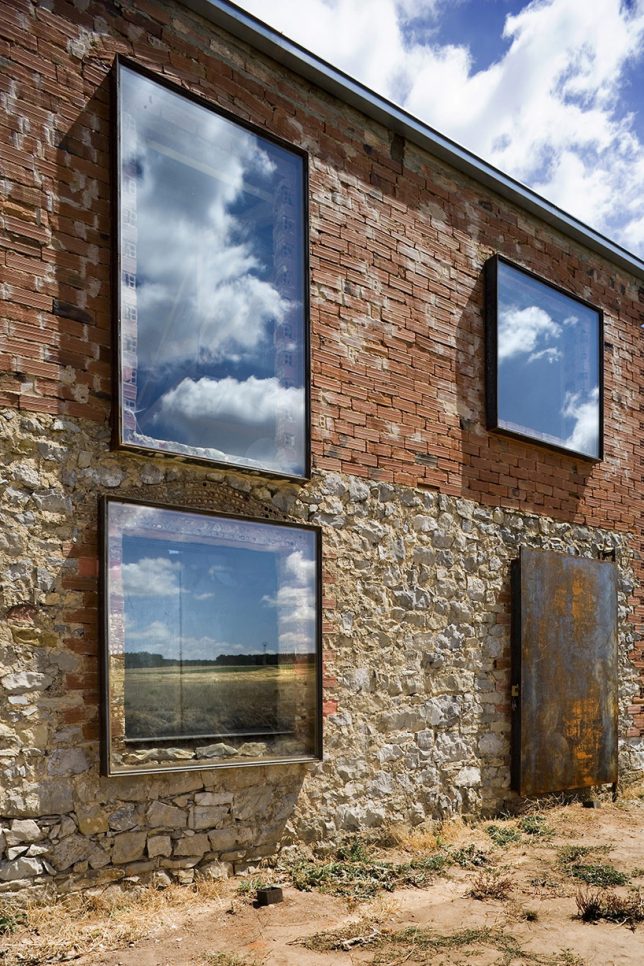
When the architect of this remarkable remodel was hired to create a new home for his clients, a derelict building on the site caught his eye and turned out to be the focal point of a marvelous design project.

ruin exterior

ruin side

Estudio Castillo Oli (images by Angel Baltanas) balances old and new in this hybrid project, inserting a contemporary dwelling into a stone-and-brick shell on the site.

window glazing

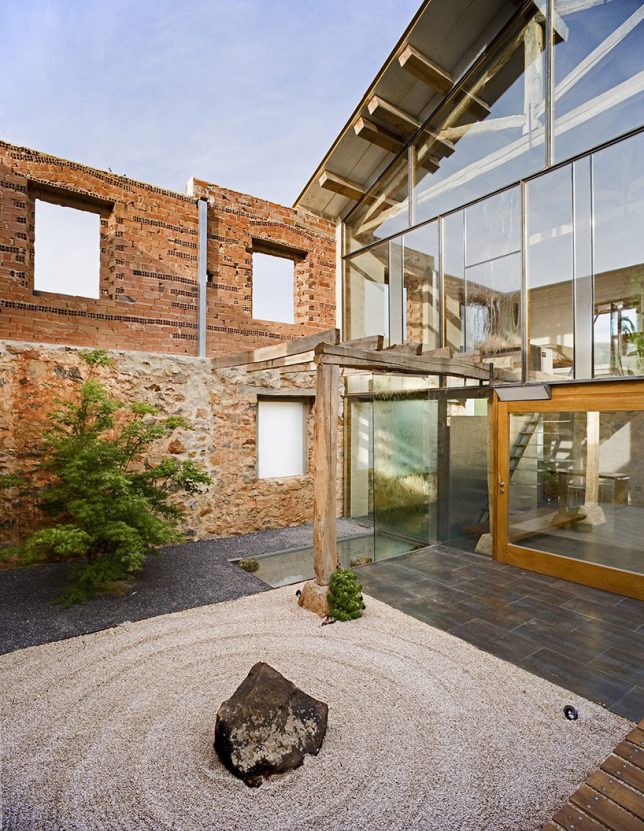
ourtyard inside

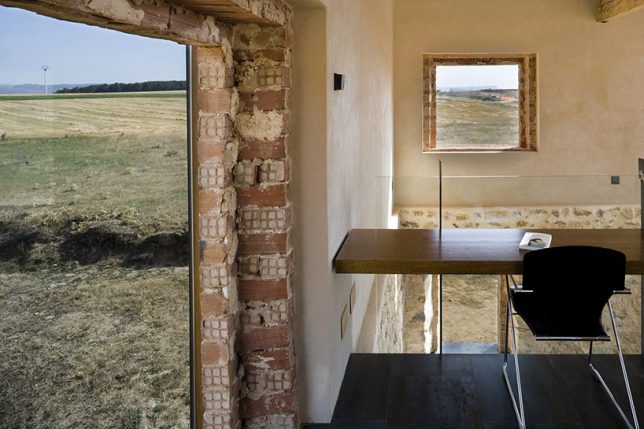
Part of the existing structural remnants were retrofit with modern windows and a roof to create interior spaces for the home while the rest were left up as a kind of fence for a semi-private exterior courtyard.

inner workings

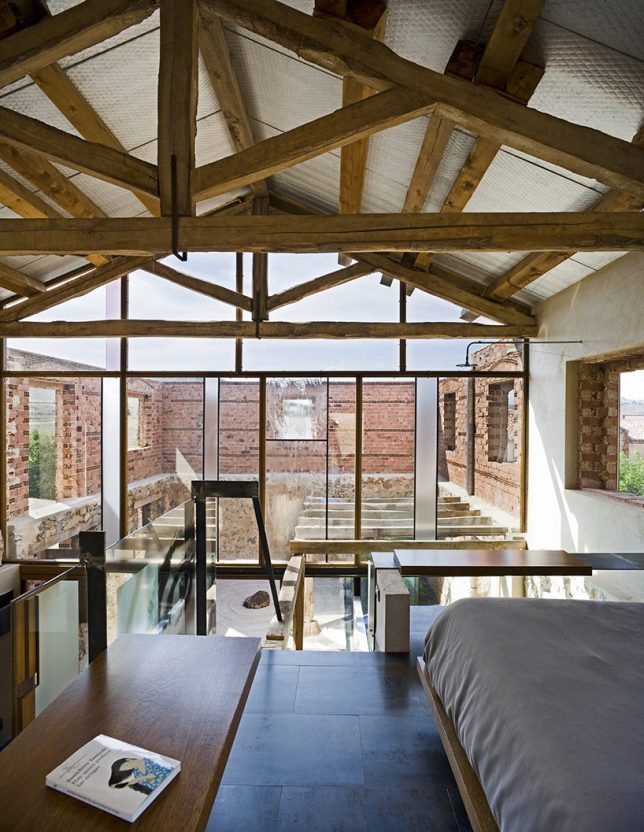
view above

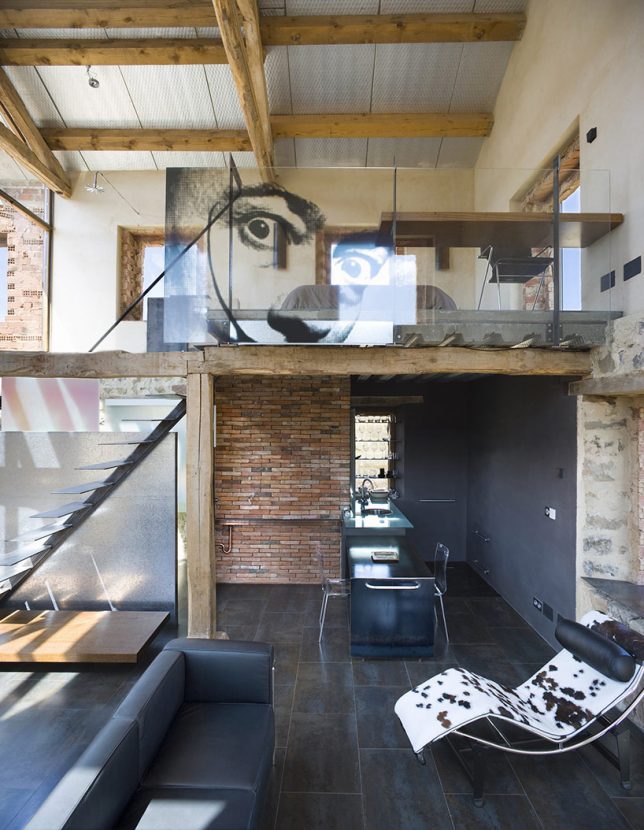
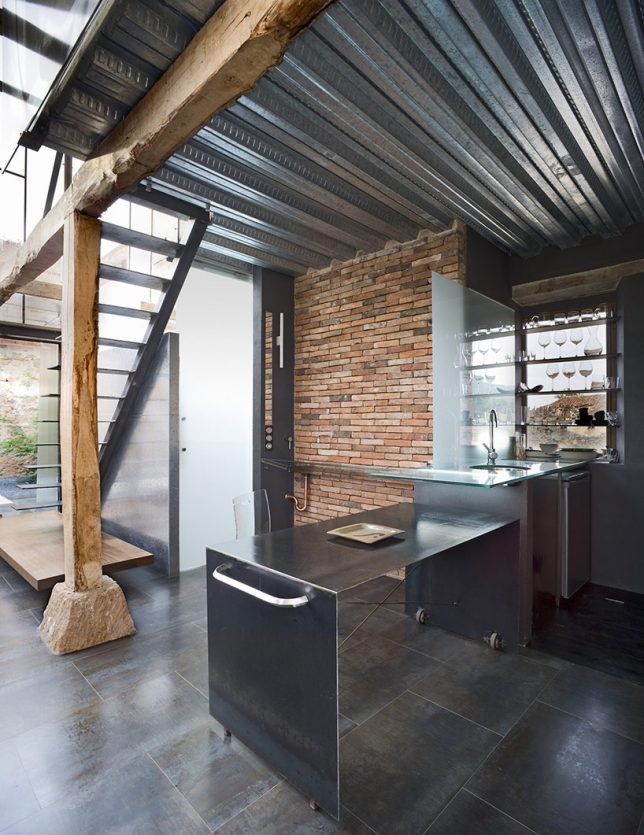
New ceramic tiles and timber framing matches the existing context while steel and glass add a modern touch. A glass wall between inside and outside spaces reduces the sense of separation between them.

window detail

timber modern

Inside, new walls are pulled back from window openings to reveal the old structure. Glass and trim likewise give space to old openings, preserving what was there. The net result is a gorgeous, rich and complex mixture of aged elements and new, creating something with a sense of time but also fit for modern living.

Share on Facebook


[ By WebUrbanist in Architecture & Houses & Residential. ]

[ WebUrbanist | Archives | Galleries | Privacy | TOS ]


WebUrbanist

 
Comments Off on Inhabited Ruin: Modern Home Hidden Inside Abandoned Masonry Shell

Posted in Creativity


Cold Yet Comfortable: 13 Surprisingly Inviting Concrete Home Interiors

06 Apr

[ By SA Rogers in Architecture & Houses & Residential. ]

brisago 4

It may be cold to the touch, but concrete doesn’t have to make a home feel uncomfortable and unwelcoming, even when it makes up most of the surfaces throughout the interiors. In fact, concrete proves to be surprisingly versatile – polished to a mirror finish, molded with wood or given a rocky, irregular texture for visual interest – and setting it off with timber, glass, greenery and natural light strikes just the right balance.

Courtyard House by NOA Architecture

noa concrete house

noa concrete house 2

noa concrete house 3

noa concrete house 4

This stunning intergenerational house by NOA Architecture is programmed “as an inhabited landscape contained within a modernist slab,” with a single glass-wrapped layer between a floor and roof plane, so the concrete floors, walls and other surfaces are offset with views straight out onto the lush green landscape of Aurora, Oregon. The best part is that oculus-style atrium in the center of the living room.

Pitch House by Iñaqui Carnicero

pitch house 2

pitch house 3

pitch house 4

The dramatic ‘Pitch House’ of Madrid by Iñaqui Carnicero uses textured concrete to transition visually into its sloped, rocky surroundings. Using wood as formwork for concrete, and leaving the resulting textural imprint behind, lends a richness that the material usually doesn’t have. Glazed walls reflecting a crystal-clear swimming pool on the terrace don’t hurt, either.

Casa Dem by Wespi de Meuron Romeo Architetti

concrete wespi 1

concrete wespi 2

casa dem

casa dem 3

From street level, this blocky concrete house doesn’t look like much, but its beauty is hidden on the other side of the slope. Casa Dem by Wespi de Meuron Romeo Architects was made with several different types of concrete, including smooth, minimalist textures and rougher, more gravelly textures for an unexpected and beautiful contrast. The house is defined by its many square- and rectangle-shaped cutouts, from the smaller ones on the facade to the openings for windows and doors.

Low-Cost Modernist House by Terra e Tuma Arquitetos

vila matilde

vila matilde 2

vila matilde 4

vila matilde 5

Cement blocks are more commonly associated with prisons than residential architecture, and when you hear that they’ve been used to create a remarkably low-cost home, your expectations might be low. But Terra e Tuma Arquitetos pulled off quite a feat with Vila Matilde, an ultra-affordable modernist home in Brazil. Despite these cheap and typically ‘cold’ materials, the space feels comfortable and homey, with special thanks to plenty of natural light and a clever design incorporating a plant-filled courtyard.

Casa Brutale Cliffside Concept

casa brutale i

casa brutale ii

casa brutale iii

casa brutale iv

On the other side of the spectrum is Casa Brutale, a residence so luxurious and dramatic it seems like it could never be real. But this modern villain’s lair cut directly into a cliffside by OPA is actually under construction, with most of the interior spaces tucked beneath a glass-bottomed swimming pool for lots of watery reflections.

Next Page – Click Below to Read More:
Cold Yet Comfortable 13 Surprisingly Inviting Concrete Home Interiors

Share on Facebook


[ By SA Rogers in Architecture & Houses & Residential. ]

[ WebUrbanist | Archives | Galleries | Privacy | TOS ]


WebUrbanist

 
Comments Off on Cold Yet Comfortable: 13 Surprisingly Inviting Concrete Home Interiors

Posted in Creativity


The home of the L-series: We tour Canon’s Utsunomiya factory

20 Mar

The home of the L-series: Inside Canon’s Utsunomiya lens factory

Recently, following the CP+ 2017 show in Yokohama, we were granted the enormous honor of a guided tour through Canon’s Utsunomiya lens factory. Canon has been making lenses in Utsunomiya since 1977, and we were the first journalists ever to be allowed to see the L-series assembly line.

Utunsomiya (indicated with the dropped pin) is the capital and largest city of Tochigi Prefecture, in the northern Kant? region of Japan – about 80 miles north of Tokyo.

On February 27th, we made our way from Yokohama to Utsunomiya in the company of several representatives from Canon Inc., and our friends Dave Etchells and William Brawley from Imaging Resource. Click through this slideshow to see what we found.

The home of the L-series: Inside Canon’s Utsunomiya lens factory

Plant Manager Kenichi Izuki introduces his team. Of the six ‘Master Craftsmen’ within Canon, two of them work at the Utsunomiya plant. 

The home of the L-series: Inside Canon’s Utsunomiya lens factory

Mr Izuki explains what the Utsunomiya plant does. As you can see, several different families of products are manufactured in Utsunomiya, from high-end broadcast and EF lenses to components for office equipment.

The 2-story plant itself employs around 1,700 people and covers an area of almost 80,000 square meters (roughly 20 acres). 

The home of the L-series: Inside Canon’s Utsunomiya lens factory

Painted yellow lines snake through the corridors of the Utsunomiya factory. These are ‘read’ by robotic carts that carry components to various parts of the plant on pre-programmed routes.

The home of the L-series: Inside Canon’s Utsunomiya lens factory

Why, here’s one of them now!

The home of the L-series: Inside Canon’s Utsunomiya lens factory

One of the two ‘Master Craftsmen’ at the Utsunomiya factory, Mr Saito explains the incredibly fine tolerances involved in the creation of 4/8K broadcast lenses. Canon claims a tolerance of +/-30 nanometers. As such, if one of the finished elements were scaled up to the size of an Olympic stadium, the surface variation would be no thicker than a plastic grocery bag. 

Yes, you read that correctly.

The home of the L-series: Inside Canon’s Utsunomiya lens factory

To make these lenses, first you must make the tools which shape them. In the foreground, on the left you’ll see a steel ‘prototype standard’. Every element in a broadcast lens was born here, from a prototype standard – effectively a ‘master’, rather like a shoemaker’s last, from which the element takes it essential shape. Canon stores thousands of them.

The home of the L-series: Inside Canon’s Utsunomiya lens factory

On the left is the diamond plate, which takes its shape precisely from the prototype standard. This is used to make the lens polishing tool. Each grey disk on the plate is a diamond grindstone. On the right is the polishing tool itself, with its array of polyurethane pads, which is used to polish a single side of each glass element.

Each surface of every element takes roughly 90 minutes to polish, and this is done by hand.

The home of the L-series: Inside Canon’s Utsunomiya lens factory

The grinding and polishing process of broadcast lens elements explained. 

The home of the L-series: Inside Canon’s Utsunomiya lens factory

A replica prototype standard, with a measurement tool on the right. The tool is incredibly accurate, and is used to check for surface inaccuracies. Even a divergence of 0.1 microns (1/10,000th of a millimeter) from design parameters would be considered unacceptable.

The home of the L-series: Inside Canon’s Utsunomiya lens factory

Mr Saito demonstrates how a diamond plate is shaped by hand, using a large (and very heavy) carborundum disk. 

The home of the L-series: Inside Canon’s Utsunomiya lens factory

With decades’ of experience, Master Craftsmen (or ‘Takumi’) can tell when to apply more or less pressure by feel alone. Some processes, like this one, are considered so critical that they must be performed by hand.

It typically takes between 25-30 years before a lens polishing technician attains the status of ‘Meister’, and their experience is essential to the production line. 

The home of the L-series: Inside Canon’s Utsunomiya lens factory

Here, an element is being smoothed. Afterwards it will be centered, and then polished. Every day, the manufacturing process uses 400 tonnes of water, which is purified and re-used continually in a ‘closed loop’ system.

The home of the L-series: Inside Canon’s Utsunomiya lens factory

Not everything is done by hand. When it comes to EF lenses, Canon is expanding its automated manufacturing capabilities. We were extremely privileged to be shown this lens element polishing machine, which processes glass elements from a raw ‘cake’ of glass right through to final polishing, without any human intervention. 

During our tour, this particular machine was processing elements for the new Canon EF 16-35mm F2.8L III USM. From a raw cake of unpolished glass to a finished element the process of grinding, polishing and centering takes about 30 minutes. If this were done in the traditional (non-automated) manner it would take about 3 days per element. 

The home of the L-series: Inside Canon’s Utsunomiya lens factory

Here’s a single element from the Canon EF 16-35mm F2.8L III USM at the beginning of its life, as a cake of raw glass. This is what gets fed into the polishing machine. A finished element emerges from the machine every two minutes, and we’re told that all of the non-aspherical elements in the new Canon EF 16-35mm F2.8L III USM are processed in this way. 

Aspherical elements are produced using a separate high-precision molding process, which happens elsewhere in the facility, behind closed doors. 

The home of the L-series: Inside Canon’s Utsunomiya lens factory

Canon is at pains to point out that machines like this can only be created as a result of the Master Craftsmen’s decades of experience. The machines themselves are made in-house too, by Canon’s Production Engineering Headquarters. 

Although there has been a factory on this site since 1977, Canon opened the current building in 2005. According to Masato Okada, Deputy Chief Executive of Image Communication Products Operations, this move provided an opportunity for Canon to completely revamp its lens production methodology.

The home of the L-series: Inside Canon’s Utsunomiya lens factory

After watching elements being polished, the next stage of the tour is lens assembly. Before we set foot in this area of the facility, we need to don coveralls and take a cool, refreshing ‘air shower’ to make sure we don’t accidentally contaminate the production line. Here’s Barney, trying not to brush against the (sticky) walls of the decontamination room. 

The home of the L-series: Inside Canon’s Utsunomiya lens factory

This area of the factory is where Canon’s high-end L-series lenses are assembled. Like the broadcast lenses, much of the assembly process for fast prime telephotos is still done by hand. 

The home of the L-series: Inside Canon’s Utsunomiya lens factory

Here, a Canon assembly line Meister (her badge tells us she’s been a Meister for 17 years) works on the front assembly of a telephoto prime lens. 

The home of the L-series: Inside Canon’s Utsunomiya lens factory

A finished EF 300mm f/2.8L IS II USM is checked by computer before its final housing is put on.

The home of the L-series: Inside Canon’s Utsunomiya lens factory

‘OK’ – this one passed! You can read up on Zernicke Polynomials here, if you like that sort of thing.

The home of the L-series: Inside Canon’s Utsunomiya lens factory

This finished lens is being checked on a computerized test rig, which measures the lens’s optical characteristics in three positions, across 48 points of a proprietary test chart (which we’re not allowed to show, sorry). The camera is a modified EOS 5D Mark III. We don’t know exactly how it’s been modified, but our guide mentioned some firmware and hardware differences compared to a stock model. 

Interestingly, information about the lens’s optical characteristics is saved to a chip inside the lens itself. This data can be read and updated by Canon if and when the lens comes back for service. This allows information to be gathered about the durability of certain components over time and allows Canon to learn about long-term wear patterns.

The home of the L-series: Inside Canon’s Utsunomiya lens factory

Although rarely-used now, some lenses are still occasionally tested partly by using the traditional ‘projection’ method. Here, in a darkened room off to one side of the assembly line a technician (just visible in the background, under the image of the chart) is inspecting the image projected through a telephoto prime lens.

The home of the L-series: Inside Canon’s Utsunomiya lens factory

Increasingly, Canon uses automated assembly processes for its L-series zooms, which have a comparably higher sales volume than telephoto primes and broadcast lenses.

Again, the new EF 16-35mm F2.8L III USM is at the forefront of developments in automation. Roughly 50% of the assembly process of this lens is automated and Canon tells us that, they’re aiming for 80% automation within a year.

The home of the L-series: Inside Canon’s Utsunomiya lens factory

Because the non-aspherical elements in the EF 16-35mm F2.8L III USM are polished automatically, and 50% of the assembly process is done by machines, the amount of people involved in the manufacture of the new EF 16-35mm F2.8L III USM is relatively small. Roughly 10% of the manpower required if it were manufactured entirely by hand, we’re told.

The home of the L-series: Inside Canon’s Utsunomiya lens factory

Here, the view from a tiny camera inside the assembly machine shows a technician what’s happening. A EF 16-35mm F2.8L III USM’s focus positioning brush switch is being installed – a highly delicate procedure which requires extremely precise positioning.

The home of the L-series: Inside Canon’s Utsunomiya lens factory

Here’s another one of those modified EOS 5D Mark III lens checking cameras, this time hooked up to a finished EF 16-35mm F2.8L III USM.

The home of the L-series: Inside Canon’s Utsunomiya lens factory

It passed! We get the impression that very few lenses don’t. From start to finish, it takes roughly 24 (non-continuous) hours to manufacture each 16-35mm.


Editors’ note:

It’s impossible to come away from Canon’s Utsunomiya plant without an appreciation for the vast amount of expertise employed by Canon in the manufacturing of its high-end lenses. One striking aspect of the assembly process of broadcast lenses is how many steps are deemed so critical that they must be accomplished by hand. In the broadcast lenses assembly line we were told repeatedly that ‘this process is too complex to be performed by a machine’.

One of the reasons that Canon’s broadcast lenses are so costly is that as we saw, each element is hand-polished – often by someone with a minimum of 30 years’ experience. Internally, assembling one of Canon’s high-end broadcast lenses is considered among the most difficult jobs in its entire production line.

Manufacturing high-volume EF lenses in this way would be impractical (the wait-times for new models would likely stretch into decades…) but even so, when it comes to fast telephoto primes, much of the process is still performed by hand.

‘anyone that fetishizes the words ‘made by hand’ should try shooting with the EF 16-35mm F2.8L III sometime.’

Perhaps most impressive though is the automation. Canon has clearly invested a lot of time and energy (not to mention money) in automated lens polishing and assembly. We’ve been lucky enough to visit several factories, run by several manufacturers, and Canon’s Utsunomiya plant is definitely the most advanced that we’ve seen. Automation of critical lens polishing and assembly processes makes perfect sense for mass-produced products, and anyone that still blindly fetishizes the words ‘made by hand’ should try shooting with the EF 16-35mm F2.8L III sometime.

Canon’s self-calibrating lens polishing machines (designed and manufactured in-house) are capable of incredible precision, and the data gathered by automated testing and eventual servicing can be used in any number of different ways, to improve quality control over time.

After watching the entire assembly process from lens element polishing to final QC checks, we’re most excited by the possibilities which emerge from Canon’s inclusion of a chip inside each recent lens, which saves data about its own specific optical characteristics.

‘This could allow for… a bespoke ‘lens profile’ to be applied automatically’

As well as data-gathering and long-term quality control improvement, this also opens up the possibility that at some point a lens’s specific optical characteristics might be made available to the camera to which it is attached. This could allow for automatic AF fine-tuning, or potentially even for a bespoke ‘lens profile’ to be applied automatically to correct for optical characteristics unique to that one lens. This isn’t possible right now, but we’re told that Canon is working on making it a reality.

What did you make of this tour through Canon’s Utsunomiya factory? Let us know in the comments. 

You might also like…

Behind the scenes at Fujifim’s Sendai factory (2016)

A tour of Sigma’s factory in Aizu (2015)

Articles: Digital Photography Review (dpreview.com)
 
Comments Off on The home of the L-series: We tour Canon’s Utsunomiya factory

Posted in Uncategorized


A Fun Project You Can do in Your Own Home – How to Create a Physiogram

09 Mar

Anyone who has ever experimented with shutter speed knows that long exposures can yield some pretty interesting results. Whether it’s light painting at night or capturing the motion blur of a running river, long exposures can truly transform an image. A physiogram is a slightly different take on long exposure projects like light painting. It’s a technique that can easily be done in your living room, with no assistant required. Although the resulting images may look complex, the process to create a physiogram is actually very simple.

How to Create a Physiogram

How to Create a Physiogram

This double-physiogram was created by photographing part of a physiogram, covering the lens mid-exposure, swinging the LED in a different direction and resuming exposure.

How to Create a Physiogram

What is a Physiogram?

Physiography is actually a field of geography that studies the processes and patterns found in the natural environment. The name physiogram is apt because it is a photographic study of the patterns and movement of a suspended object. Imagine an object tethered to a string and suspended from a fixed point. If you push it, the object will swing around in a neat circular motion at first, completing each rotation in roughly the same place each time. However, as the object loses velocity, it will complete an orbit that is increasingly smaller than the last one.

The sequence of rotations that the object takes while it swings around isn’t visible to the naked eye. Fortunately, however, we can use photography to reveal these fascinating patterns. By attaching a light source like a flashlight or LED (don’t use a laser pointer – they can wreck your camera’s sensor!) to a rope or string and allowing the object to swing, we can view the entire path of the object in a single long exposure. The resulting photograph or physiogram reveals fascinating patterns and shapes.

How to Create a Physiogram

What you will need

  • A small flashlight or LED  (key chain lights work great)
  • About a meter (3 feet) or so of string
  • A white sheet of paper
  • Camera with manual exposure capabilities
  • A dark room

Note: the tools in the Light Painting Brushes set can work as your light source for this and add color to your physiogram as well. 

How to create a physiogram

Take the LED and tie the length of string to it. Small LED lights on keychains are great because they won’t smash your lens if they fall. They also have a narrow light for better line definition and come with a key ring and chain for hanging perfectly vertical. You can usually pick one up at discount stores.

How to Create a Physiogram - light source

These novelty keychains are great for creating physiograms because the light source is narrow and bright. They are also easy to suspend from the ceiling. You can depress the ON button with a bit of duct tape.

Take the other end of the string and attach it to the ceiling with a pin or hook. You want to fix the LED so that it will swing easily, about a meter and a half (5 feet) above the camera to start. Your camera will be positioned on the floor directly beneath the LED, so make sure each component is securely fastened. Having a UV filter fixed to the lens is a good idea, just in case something does drop on the camera.

The view looking up – I attached my keychain to a length of string suspended from a removable hook in the ceiling

Camera setup

To photograph nice clean lines of light, we will need to focus the camera on the head of the LED. This can be difficult when the camera is laying on the floor, and the LED is hard to define against the background of the roof. Instead, place your camera directly underneath the LED and place a piece of white paper beneath the camera to mark the spot (you may need to mark an X on the paper as your camera cannot focus on just white, it needs contrast). Then, take your camera and position it beside the hanging LED. Autofocus on the piece of paper and once it locks, turn the autofocus function off.

To start off, set your exposure time to 30 seconds at f/16 with 100 ISO. Position your camera beneath the LED, turn the LED on and turn out the room lights. Give the LED a good push, but be careful not to swing it so hard that it goes out of frame. Wait until the light settles into an even motion and press the shutter button.

How to Create a Physiogram

This exposure was taken directly after I swung the LED. The rippled effects are due to the light source moving out of sync with the rest of the pendulum set-up. As centrifugal force takes over, the lines become smoother.

Once your exposure is complete, have a look at the results!  This project does require some trial and error to perfect, adjustments to your pushing technique, exposure time, and changing the length of the string or the light source are all ways you can refine the final image. A shutter release cable or remote trigger is handy too if you are experiencing camera shake.

How to Create a Physiogram

The physiogram was made with a flashlight. The lines look thicker because the light from it is wider. Using a small LED means that you will see more defined lines.

Tidy it up in Photoshop

Although you need a dark room to properly photograph a physiogram, you may find that part of the background still shows up in your photographs.  This is caused by the light of the LED spilling around the room as it swings. The easiest way to fix this is by adjusting the black point in Photoshop. By adjusting the black point, you can reset what is interpreted as the blackest point in an image, without compromising the white light of the physiogram.

How to Create a Physiogram

The roof and light can still be seen in this image due to the light spilling from the light source. Adjusting the black point in Photoshop is the easiest way to darken the background without affecting the pattern of the physiogram

First, open your image in Photoshop and select Curves (in the adjustment layers panel or via Image > Adjustments > Curves). Click on the eyedropper tool with the black ink and the cursor will change to the eyedropper icon. Now click on an area in the background of the image, preferably a lighter tone that occurs consistently throughout the unwanted backdrop.

How to Create a Physiogram

Click this eyedropper.

How to Create a Physiogram

Then click on an area of the background you want to be pure black.

How to Create a Physiogram

And voila!

How to Create a Physiogram

See how much cleaner the background is now.

As soon as you click an area in the image, any tone up to the selected tone will be reset to read as completely black. It may take you a few tries to get the background uniformly dark (if you don’t like what it did, undo it click a different spot). This will also get rid of light fittings from your image as well as the hook that fixes the LED to the roof.

Spice it up a little

Once you get the hang of creating physiograms, switch it up a little! You can put layers of cellophane, glad wrap or glass over the lens for different textural and color effects. Change the light source, string length or zoom in and out during the exposure to create different pattern results.

This is a great opportunity to have fun and experiment, so enjoy! If you have kids they will love helping you with this project. Please give it a try and post your results in the comments below.

How to Create a Physiogram

I used glad wrap over the lens to soften the lines of this physiogram. The sharp lines indicate the beginning of the exposure with no glad wrap. The softer, more central lines have been taken with the glad wrap over the lens towards the end of the exposure.

How to Create a Physiogram

Some lines in this physiogram aren’t visible. The beak of the Angry Bird keychain blocked light from the LED. I quite like the effect, however.

How to Create a Physiogram

To create the multi-coloured effect in this image I used the gradient tool and blending layers function in Photoshop

How to Create a Physiogram

How to Create a Physiogram

The post A Fun Project You Can do in Your Own Home – How to Create a Physiogram by Megan Kennedy appeared first on Digital Photography School.


Digital Photography School

 
Comments Off on A Fun Project You Can do in Your Own Home – How to Create a Physiogram

Posted in Photography


Sort of Subterranean: 15 Partially Underground Modern Home Designs

14 Feb

[ By SA Rogers in Architecture & Houses & Residential. ]

RD house 2

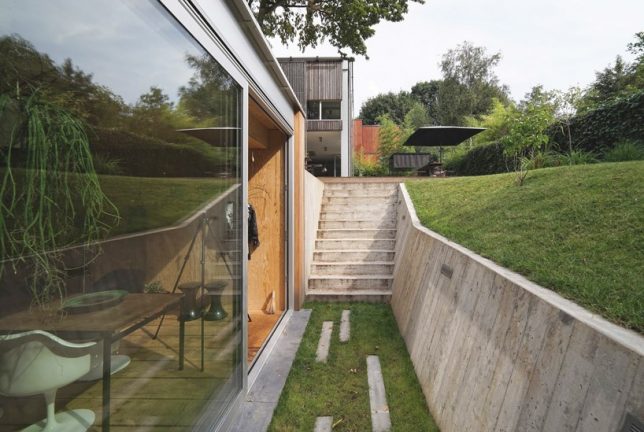
While fully subterranean homes can feel like grim bunkers, homes built partially into hills, cliffs and bluffs peek out from underground through glassy ‘eyes’ to gain daylight access and views of their surroundings. These covert residences are naturally camouflaged from several angles, blending into the landscape while still enjoying sun-dappled swimming pools, terraces and courtyards.

Underground Pavilion by Act Romegialli

underground pavilion

underground pavilion 2

underground pavilion 3

underground pavilion 4

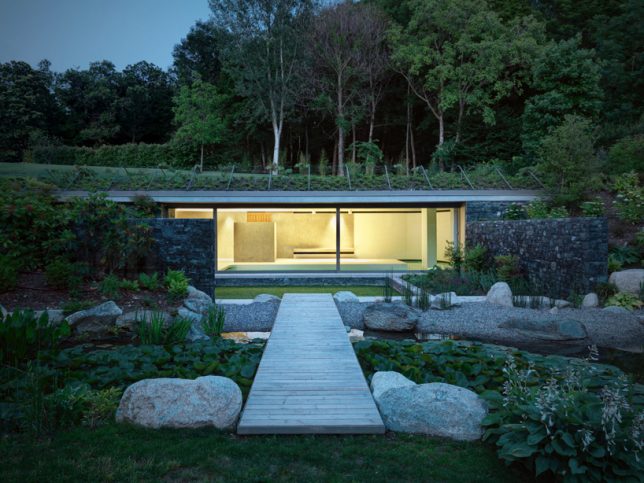
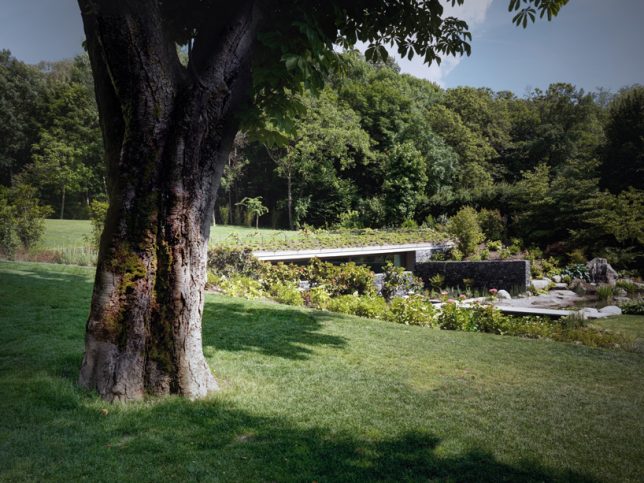
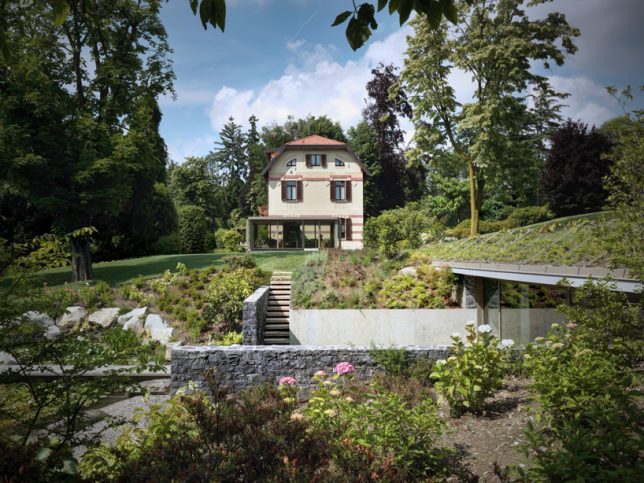
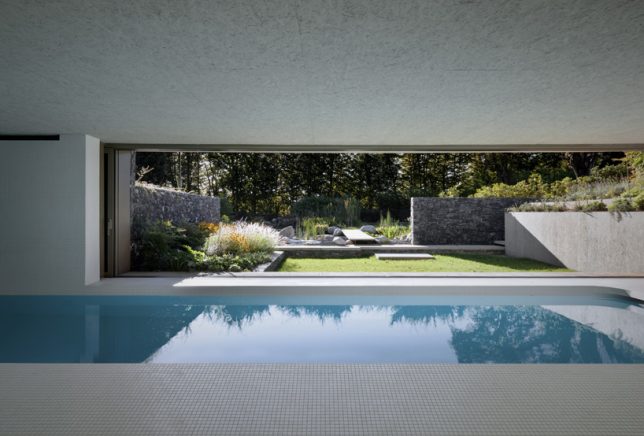
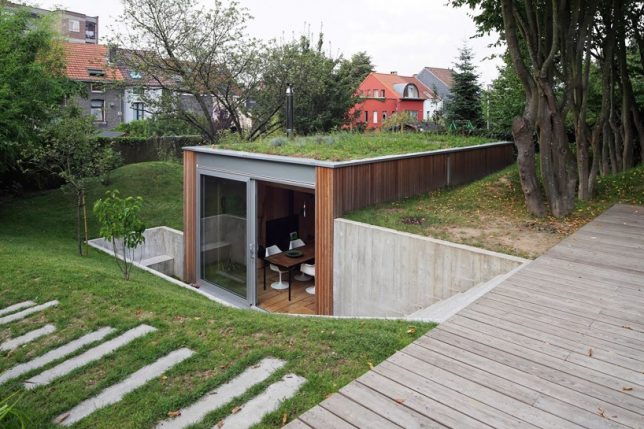
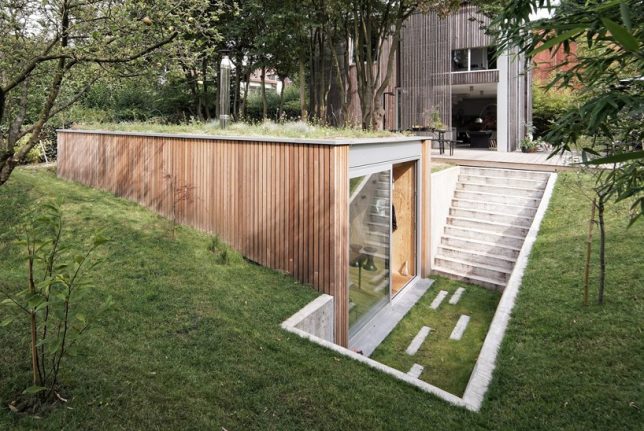
An addition to a traditional home in Northern Italy sits beneath the surface in the backyard, disguised by a green roof, with its ample glazing looking out onto an artificial pond. Local architecture firm Act Romegialli connected the new wing of the home to the original structure with an underground tunnel and placed an indoor swimming pool and gym inside the addition.

Two Single-Family Homes in Paraguay by Bauen

paraguay homes 1

paraguay homes 2

paraguay homes 4

paraguay homes 5

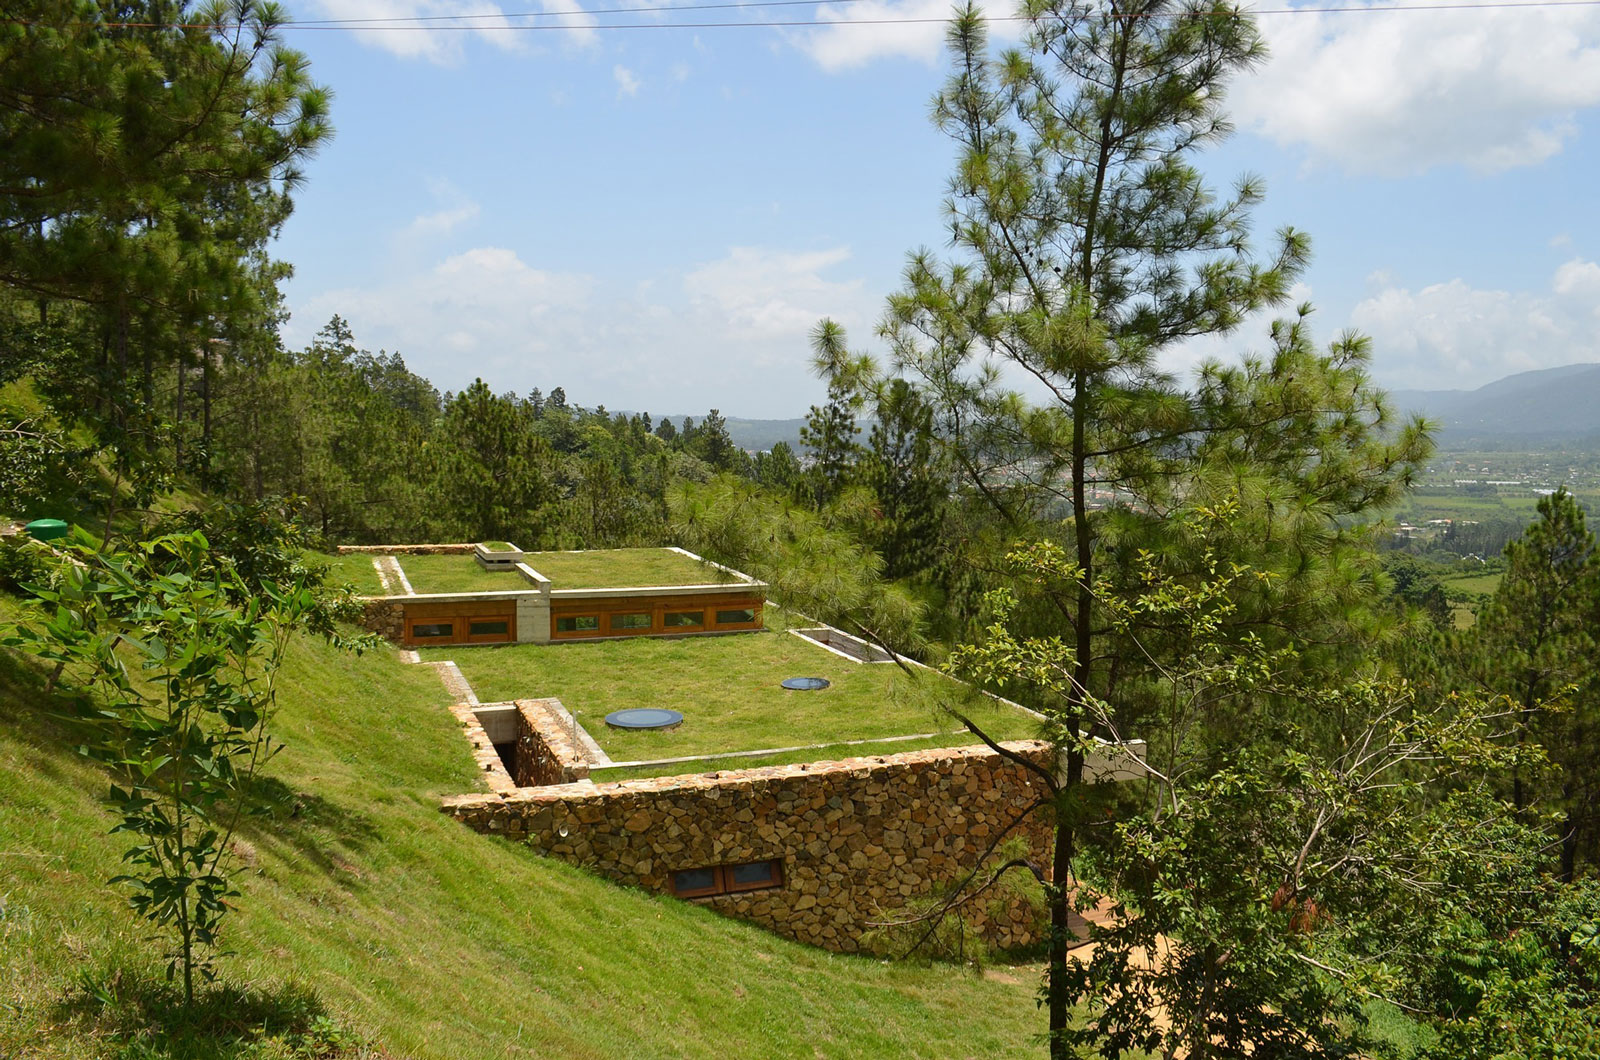
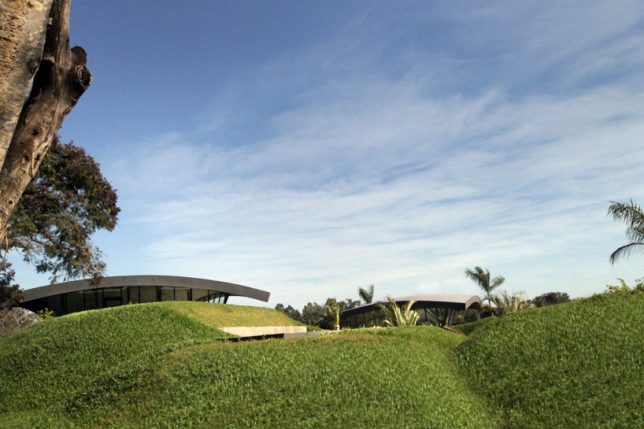
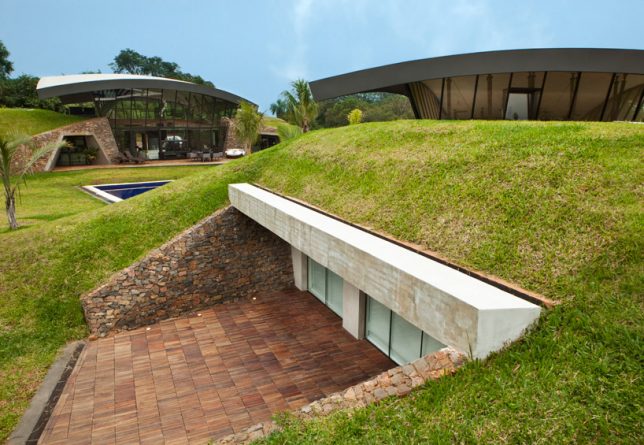
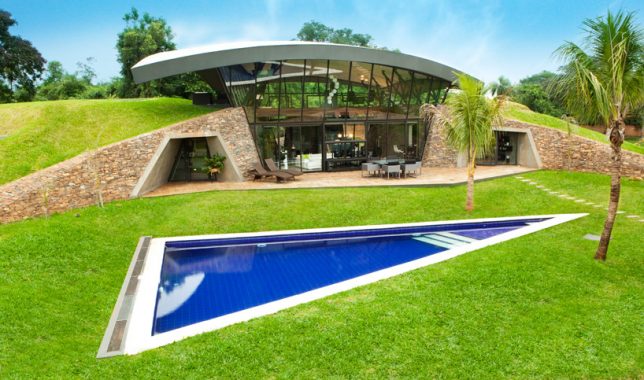
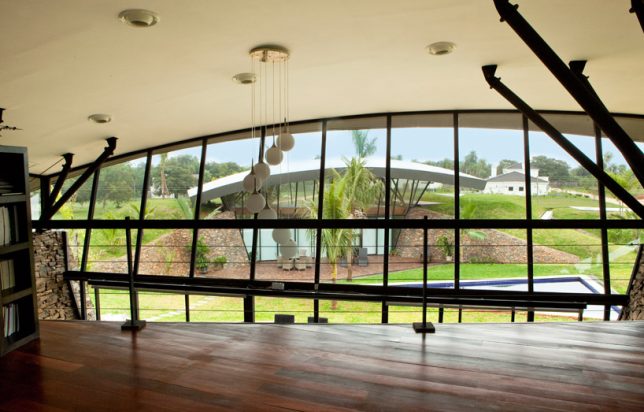
Twin arcs protrude above grassy hills concealing the bulk of ‘two single-family homes’ by Paraguayan firm Bauen. The architects terra-formed the artificial hills and filled in voids between them with triple-height glass enclosures. Both of the luxurious homes look out onto a shared swimming pool. The roofs of the homes mirror the shape of the hills, and from afar, they’re barely visible.

Casa del Acantilado by Gilbartolomé Architects

dragon house 1

dragon house 3

dragon house 2

dragon house 4

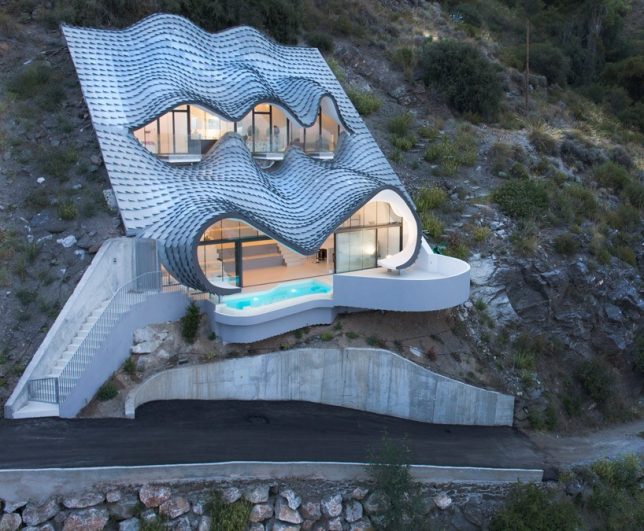
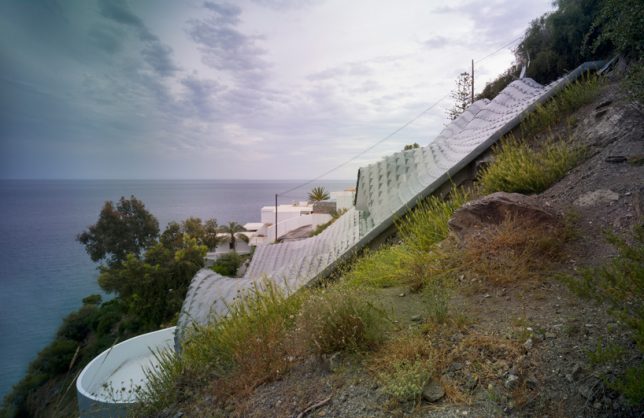
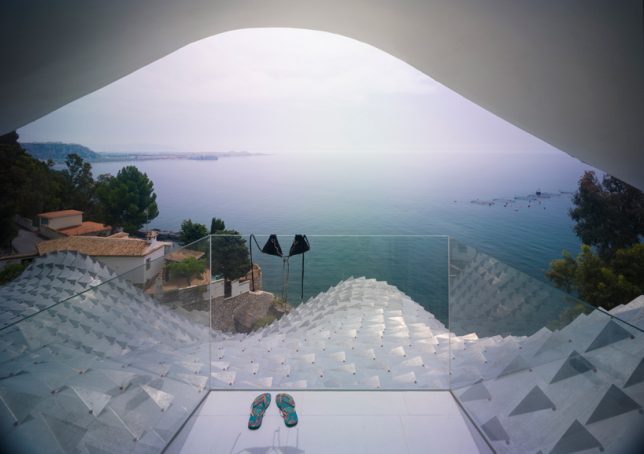
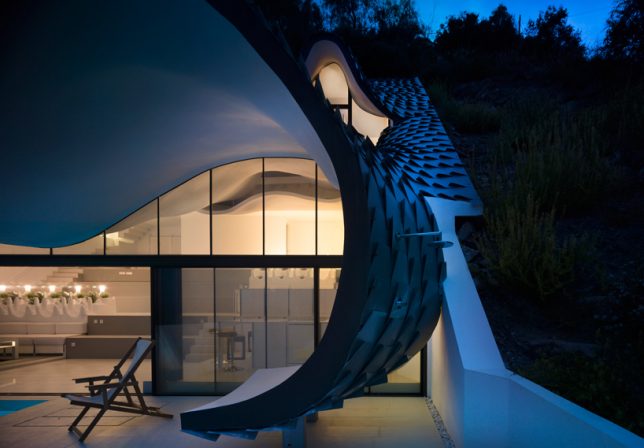
‘Dragon House’ by Gilbartolomé Architects takes a challenging site and transforms it into something truly spectacular, with a curvilinear tiled roof resembling scales on a reptilian hide. The home itself is built into a cliff overlooking the Mediterranean Sea in Granada, Spain, with three ‘eyes’ leading out onto glass-walled balconies to take in the views. The interior is spread across two levels, and the living room segues into a cantilevered terrace with a swimming pool.

Casa Brutale by OPA

casa brutale

casa brutale 2

casa brutale 3

casa brutale 4

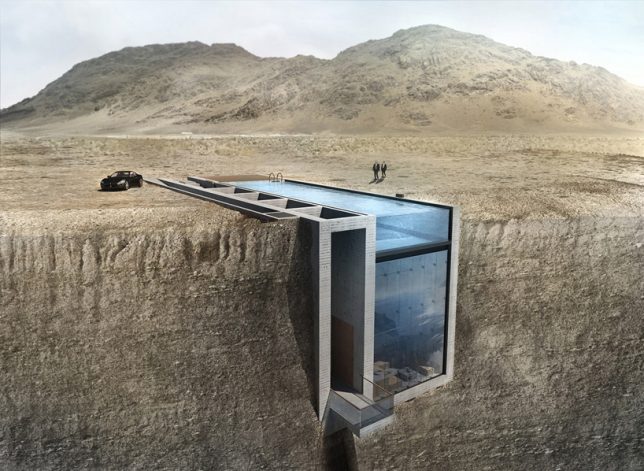
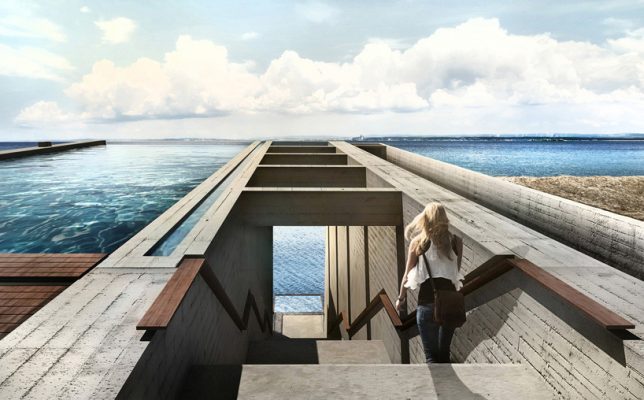
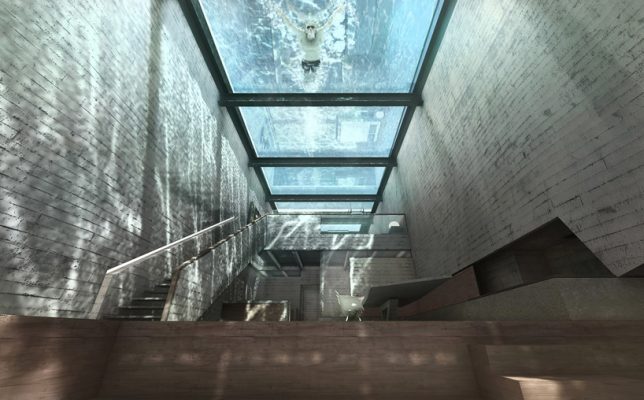
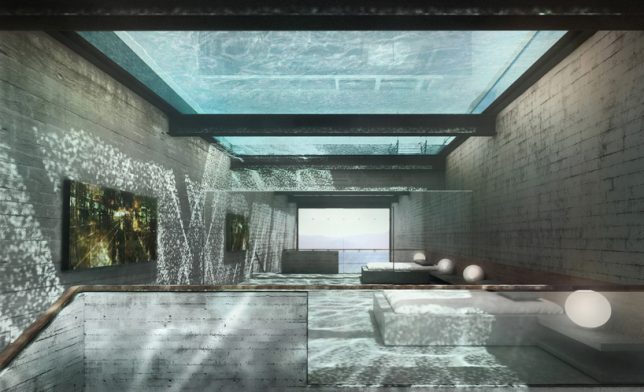
Set to be built into the cliffs of Beirut soon, rather than overlooking a sea as seen in these renderings, Casa Brutale by OPA instantly went viral upon its debut for its dramatic design, with nothing but its swimming pool and stairs visible from surface level. The glass-bottomed pool acts as a giant watery skylight for the entire underground home, which looks out onto the valley from a narrow glazed facade.

Pam and Jenny House by L’escaut

pam and jenny house

pam and jenny house 2

pam and jenny house 3

pam and jenny house 4

Positioned at waterline height within a garden, the ‘Pam and Jenny House’ by L’escaut is mostly subterranean but peeks out full-height glazing into a recessed courtyard to fill the space with light and make it feel larger. Seen from the main house, this addition looks like no more than a series of grassy plains.

Next Page – Click Below to Read More:
Sort Of Subterranean 15 Partially Underground Modern Home Designs

Share on Facebook


[ By SA Rogers in Architecture & Houses & Residential. ]

[ WebUrbanist | Archives | Galleries | Privacy | TOS ]


WebUrbanist

 
Comments Off on Sort of Subterranean: 15 Partially Underground Modern Home Designs

Posted in Creativity


Robot Home Companion: 12 High-Tech Assistants Making Life Easier

02 Feb

[ By SA Rogers in Gadgets & Geekery & Technology. ]

robot-barista

They can’t quite measure up to R2D2, but a new array of consumer robots offer all sorts of practical advantages, including companionship, soothing babies back to sleep, playing with pets, folding laundry and making the perfect latte. All 12 of these robot home companions have passed the concept stage into fully-operational products, and many of them are already up for sale.

Cargo Carrier: Gita Bot

gita-cargo-robot

gita-cargo-robot-2

gita-3

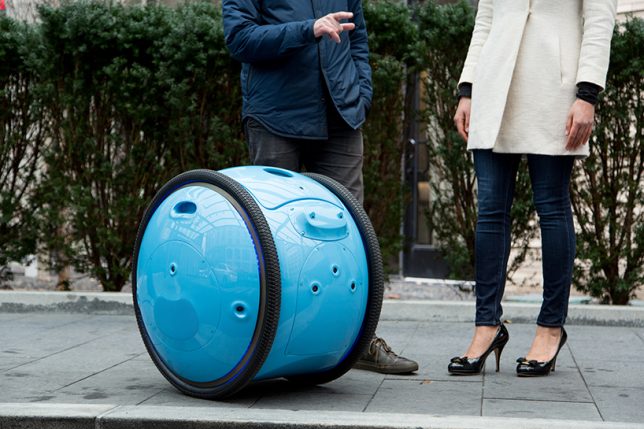
From the same company who gave us the Vespa scooter comes Gita, a cargo bot that’ll carry your stuff for you, follow you ask you walk, stop when you do, slow down when necessary and even keep up if you start running. You could use it to haul groceries home from the neighborhood market, deliver packages or as a travel aide; a display screen lets you know when the battery is getting low. One thing that’s not clear is how it manages stairs.

Scooter Bot: Segway Advanced Personal Robot

segway-robot

segway-robot-2

segway-robot-3

Recently renamed ‘Loomo,’ the Segway ‘Advanced Personal Robot’ is a cross between a robot companion and a functional scooter, capable of recognizing individuals and following them until it’s needed. It’s able to stay in balance while carrying loads, and its microphones listen for voice commands. Sensors keep it from bumping into objects and help it map your home and other surroundings so it can navigate itself. It’s currently still in development.

Cute Companion: Kuri Home Robot

kuri-home-robot-1

kuri-home-robot-2

kuri-home-robot-3

This 20-inch-tall, 14-pound personal companion robot chirps, blinks and ‘smiles’ in response to your attention, and it’s able to recognize specific people, understand context and surroundings, play music, read books, project video, tell you the weather and perform other useful everyday tasks. The Kuri bot responds to verbal commands and can also be controlled and maintained through a smartphone app.

Pet Entertainer: Rolling Bot by LG

lg-rolling-bot

rolling-bot-lg-2

This little bot may not have as much personality as the Kuri, but it’s got some seriously useful functions if you’re the kind of homeowner and/or pet owner who wants to keep a close eye on things while you’re gone. The Rolling Bot by LG is part security system, part pet toy, part smart home gadget with a built-in camera and the capability to roll itself through your home, turning lights on and off, sending you video footage, or entertaining your dogs and cats with dancing and lasers. You can control it through your phone to talk to your pets through it, too.

Next Page – Click Below to Read More:
Robot Home Companion 12 High Tech Assistants Making Life Easier

Share on Facebook


[ By SA Rogers in Gadgets & Geekery & Technology. ]

[ WebUrbanist | Archives | Galleries | Privacy | TOS ]


WebUrbanist

 
Comments Off on Robot Home Companion: 12 High-Tech Assistants Making Life Easier

Posted in Creativity


Mobility Vision: Hyundai Concept Connects Smart Home to Driverless Car

12 Jan

[ By SA Rogers in Technology & Vehicles & Mods. ]

mobility-vision-1

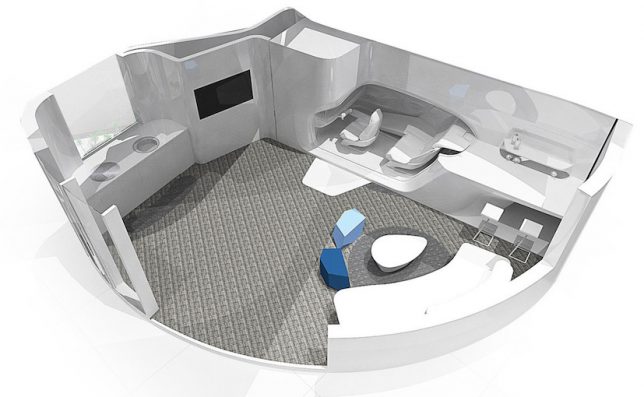
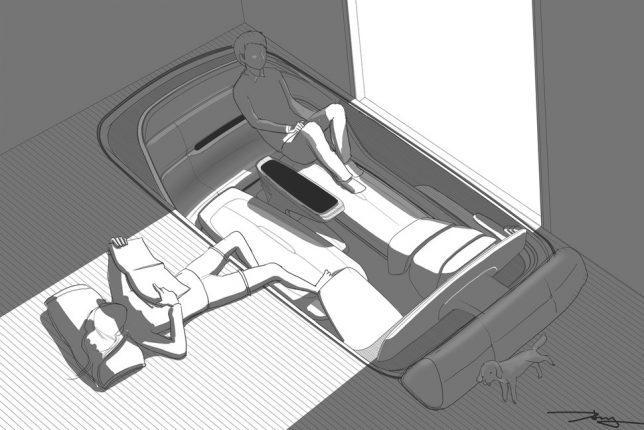
Who needs a garage when your autonomous vehicle could simply pull up into a port inside your home and seamlessly integrate itself with the interior? Hyundai wants to give us all another reason to spend hours inside our cars by effectively turning them into furniture when they’re not in use. Its ‘Mobility Vision’ concept, unveiled at this year’s CES (Consumer Electronics Show) in Las Vegas, blurs the lines between architecture and automobiles more than ever.

mobility-vision-2


The driverless car essentially plugs into the house when you’re done with a trip, and then the driver’s seat, which is mounted on a pivoting arm, can slide right into the living space for use as a chair. The idea is never having to stop what you’re doing and metaphorically shift gears between travel time and home time; stuff you leave in the car is easily accessible, babies can continue sleeping in their carseats, and there’s no fumbling for keys.


mobility-vision-4

A single door, almost the height and width of the entire car, opens upward to delineate the space between the car’s interior and the living room. You can even run the car’s heat or air conditioning to adjust the temperature of your house, and use the car stereo to play music at home. Perhaps the most important detail: the car is powered by a hydrogen fuel cell, so it’s quiet, and there’s no danger of breathing unhealthy fumes.

mobility-vision-7

mobility-vision-6

It’s just a concept, and not likely to become a reality anytime soon – but could it be a glimpse into what mobility will look like in the not-so-distant future? It seems entirely possible, but it’s not clear how many people want to just sit around in their cars for no reason when there’s probably a perfectly good couch just a few feet away.

Share on Facebook


[ By SA Rogers in Technology & Vehicles & Mods. ]

[ WebUrbanist | Archives | Galleries | Privacy | TOS ]


WebUrbanist

 
Comments Off on Mobility Vision: Hyundai Concept Connects Smart Home to Driverless Car

Posted in Creativity


Google Sunroof: Search to Save Money With Home Solar Power

26 Dec

[ By WebUrbanist in Architecture & Houses & Residential. ]

google sunroof

Google has rolled out a search engine with a specific target in mind: your house, more specifically how much area of your roof could be covered in solar panels, what that would save you and where you can look for companies to install a system for you.

Interested homeowners can input their addresses and get realistic illustrations of how many solar panels would fit and what their potential cost savings on energy bills are likely to be.

google solar savings calculation

A complex data comprising everything from your home’s location and orientation to the presence of shade from adjacent trees or buildings – but this set is broken down into simple information for users.

google solar energy savings

Google, of course, is well-positioned to make this Sunroof tool effective, combining its Google Maps and Earth data that can sort out not just the footprint of a building but its 3D space too, and thus shadows. It also has all of the other information at hand, like average temperatures, sun exposure, cloud cover.

new google solar energy

Users of the tool can tinker with variables, but ultimately are given a recommended installation that maximizes the potential output and thus puts more back in homeowner pockets long-term. For now it is limited to the San Francisco Bay Area, Boston and a few other locations, but they have plans to expand around the country.

Share on Facebook


[ By WebUrbanist in Architecture & Houses & Residential. ]

[ WebUrbanist | Archives | Galleries | Privacy | TOS ]


WebUrbanist

 
Comments Off on Google Sunroof: Search to Save Money With Home Solar Power

Posted in Creativity


7 Smart Lighting Setups for Portraits Taken at Home

30 Nov

Let’s get one thing clear – you’re not going to learn how to shoot perfect portraits overnight. There are many things you need to learn first. When it comes to portrait-shooting, no factor is more important than lighting. Even if you’re planning a home portrait session, you can still make the most from various lighting setups to achieve great results. Continue Reading

The post 7 Smart Lighting Setups for Portraits Taken at Home appeared first on Photodoto.


Photodoto

 
Comments Off on 7 Smart Lighting Setups for Portraits Taken at Home

Posted in Photography