There is no doubting the fact that this year is going to be very competitive for photographers. This means that if you are not well-equipped with the proper software, there is a chance that your business may suffer. Many photographers don’t know how to remain competitive. They have yet to understand the fact that rendering top services requires some of Continue Reading
Photodoto
Posts Tagged ‘helpful’
Helpful Tips for Creating Evergreen Content for your Photography Website
The post Helpful Tips for Creating Evergreen Content for your Photography Website appeared first on Digital Photography School. It was authored by Charlie Moss.

It’s always hard to know what to write on a photography blog, isn’t it? You start a blog on your photography website because you’ve been told it’s good for SEO, but then you get stuck on what content to create, and your blog gets neglected. So, I’m going to give you some ideas for creating evergreen content that you can put into practice right now to improve your website, help your readers, and start working on your SEO.

What is evergreen content?
In the same way that evergreen trees stay green all year round, evergreen blog posts stay relevant to readers for a long time. They should stay relevant to readers no matter the season, and, ideally, stay relevant for several years without any serious updating.
By creating evergreen content, you can create a website that pulls in visitors all year round and encourage search engines to rank you highly.
But what kind of evergreen content can photographers create? That really depends on the audience you’re looking to attract to your website! So once you’ve narrowed that down, you can start to come up with some ideas for evergreen content.
Articles to attract photographers
If you’re the kind of photographer who wants to attract other photographers to your website, then content about photography is the place to start. Just look around this site – Digital Photography Photography School is full of evergreen content that appeals to photographers all year round and for many years.

Every photographer knows something that they can teach others, even if they’re a beginner. So start by writing posts teaching other people what you know about taking photos.
You could also write reviews of all the photography equipment that you own. Most photographers love to spend hours researching what they’re buying and read lots of reviews before they spend their money.
By its very nature, evergreen content is often about the topics aimed at beginners to intermediates in the subject matter. It’s content that people will be searching for repeatedly, and that’s what makes beginner content a great place to start when you’re creating your first pieces of evergreen content.
And once you’ve created some engaging content that people are sharing, consider writing a second blog post on the same subject that your visitors might want to read next!
Articles to attract clients
Not everyone wants to attract photographers to their photography website. Some people want to attract more clients if they’re working as a photographer. By creating evergreen content, you can get potential clients to your website and looking at your portfolio.
Many photographers already blog about the shoots they do. It’s really common now for wedding photographers to blog about their client’s big day, or newborn photographers to blog about the cute baby they recently photographed. But those posts are not the ones most likely to get prospective new clients to your site.

When writing a blog the best place to start is almost always with a problem that someone has. So if you are a wedding photographer, think about what your clients might be looking for. They could be asking questions like:
- What are the best clothes to wear for an engagement session and how do you pick a color scheme?
- What do weddings at (your local venue) look like?
- Are veils coming back in fashion for brides, and what unique photo opportunities do they present?
You can answer all of those questions in blogs on your website while filling them with pictures you’ve taken. And the best thing about these kinds of posts is they’ll be shared by more than just your clients, meaning that your images get in front of many new people.
Moreover, you can apply this to all kinds of photography. You can even go beyond photography, which I’ve seen work particularly well in the newborn and maternity niches.
If you photograph newborns and have children yourself, you might use your blog as a way to talk about your own experiences of being a parent, with helpful advice for your readers. And if you’re creating evergreen content that’s useful, you can bet it’ll end up being shared around social media.
What advantages does this bring?
Beyond the pure sharing of posts and getting them in front of new potential clients, evergreen content can bring benefits for the SEO of your website (that’s search engine optimization).
Google, and other search engines, love to see people linking to your content and talking about it. One of the strongest ways that Google determines if you’re a useful and interesting site (and therefore how high you appear in their search listings) is how many backlinks you have to your website.

By creating evergreen content that is interesting and useful, you’re giving people and businesses reasons to share it on their own social media, or include you in posts on their own blog.
A post about the best time to photograph a newborn baby, for example, is relevant content that lots of different people could share on their own page. It could be shared by other newborn photographers, by parenting websites, or even by small maternity clinics.
It doesn’t matter if these businesses aren’t in the same area as you either, because what’s important is the backlinks and the buzz around your content. But Google and other search engines don’t discriminate – if lots of people are sharing your site because it’s good content, then they’ll also show you higher in the search results when people look for your kind of photography locally.
Get started right now!
There’s no better time to start creating evergreen content for your blog than right now. Sit down and make a list of all the questions that people who you’d like to visit your blog might be asking. And then work out from that list the things that will stay relevant all year round, and that won’t go out of fashion.

Don’t forget, after you’ve spent time creating evergreen content for your blog, you should promote it on social media now and then again in the future. If you’ve created some great and long-lasting evergreen content, you’ll be able to promote it many times over. This means that you’ll always have something to say on social media during quieter times without having to constantly be writing new blog posts or shooting new work.
Do you have any other tips for creating evergreen content you’d like to share with our community? Please do so in the comments section!
The post Helpful Tips for Creating Evergreen Content for your Photography Website appeared first on Digital Photography School. It was authored by Charlie Moss.
Adobe’s new video series offers helpful Lightroom CC, Mobile tips in 60 seconds
 |
Adobe has started up a new video series on its Adobe Photoshop Lightroom YouTube channel called In a Lightroom Minute that condenses helpful Lightroom CC and Lightroom Mobile tips into tutorials that are roughly 60 seconds in length.
Similar to its previous Lightroom Coffee Break and Photoshop Magic Minute series, In a Lightroom Minute covers a variety of small tips and tricks, from How to Save Edits as Presets in Lightroom to How to Leverage Interactive Edits in Lightroom.
Currently, there are ten videos in the series, but it’s likely we’ll see more added in the near future. Below are just three you can start with:
How to Create a Preset in Lightroom
How to Get Contextual Help While Using Lightroom
How to Discover Guided Tutorials in Lightroom
You can view the full playlist and subscribe to the Adobe Photoshop Lightroom channel on YouTube.
Articles: Digital Photography Review (dpreview.com)
6 Helpful Tips for Doing Interior Architecture Photography
Shooting interior architecture photography can be challenging to get just right. Here are six tips to help you have more success with this type of photography.

21mm focal length, f/11, ISO 100, 1/200th. One off-camera flash used.
1) Always use a tripod
There are two main reasons why you always want to use a tripod for architecture photography.
First, a tripod will perfectly stabilize your camera/lens setup, which fully mitigates any possibility of motion blur from hand-holding the camera. Additionally, if you’re on a tripod, it’s much easier to make sure your camera is level (I’ll discuss the importance of a level camera later in this article).
Secondly, there’s no good reason NOT to use a tripod (I follow the general rule that, unless there’s a good reason not to have a tripod, I always use one). If you were tracking subjects which required quick movement and recomposition, then a tripod would be a hindrance. But, for architecture photography, your composition will always sit nice and still for you, giving you all the time in the world to set the shot up right. The ideal situation for a tripod.

21mm focal length, f/11, ISO 100, 1/120th. One off-camera flash used.
2) Whenever possible, use a flash
If you shoot a room indoors without a flash, you will typically get shadows scattered around the room. Using a flash for interior architecture will help balance the exposure across the entire frame.
This is how I typically use a flash. Put the flash on a tripod or a stand, and place it a few feet away from the camera (on each side of the camera if you use two flashes for larger rooms), and a foot or so behind the camera. Aim the flashes so they are pointing up at the ceiling, but also slightly away from the room you’re shooting. At this angle, the light from the flashes will illuminate the room indirectly (i.e. bouncing off the ceiling and walls), creating a soft, even, fill-in light for the room you’re shooting. Set the flashes manually at half power (one stop below full power) and fire away!

This was a tricky shot because my flash was reflecting off the windows no matter where I positioned it. So I took two shots (one with flash and one without) and masked them together in Photoshop. The windows you see in this image are from the shot without a flash, while the rest of the room is from the shot with the flash.
3) When shooting whole rooms, don’t get too wide
When I first started taking practice photos of architectural photography, I used the widest angle lens I could get my hands on to shoot entire rooms. My thinking was that with an ultra-wide lens, I could get more of the room in the frame. But more isn’t always better. I quickly noticed the high level of distortion towards the edges of the frame, especially in smaller rooms where the edges of the frame were at wide angles to the camera.
So, I experimented with different focal lengths and came to the conclusion that between 21mm and 28mm gives you the most practical balance between limited distortion and a wide enough frame to capture the character and presence of the scene. Ultra-wide lenses (i.e. 14 or 15mm) will make the sides of the frame look oddly stretched and off the horizontal plane, even when corrected in post-production.
If you’re in a situation where 21mm won’t capture enough of the scene, a panorama is always an option – which segues nicely into the next tip:

This was an extremely dark room, even with all the lights on. So, like the previous image, I stacked two shots: one exposed for the room, and one exposed for the windows, and combined them in Photoshop.
4) Try panoramas for ultra-wide shots
Set up your camera vertically on the tripod (which creates a taller pano). Then, making sure you adequately overlap the scene in each shot, do your best to make the camera rotate on a perfectly level, horizontal plane, with the pivot point being roughly where the lens meets the camera.
If the pivot point is too far forward (i.e. somewhere on the lens), or too far backward (i.e. on the body of the camera), the panorama will appear distorted. For example, in the picture below, the pivot point was on the body of the camera (behind the ideal spot where the lens meets the camera). As a result, the panorama has a weird sort of convex distortion.

This is a seven image panorama. See how artificially “rounded” the walls are? This will happen when shooting a panorama if your camera/lens are not properly situated on the tripod.
5) Whenever possible, try to shoot only one or two walls
Two wall shots typically give the viewer the most geometrically pleasant image to view. When three (or more) walls are introduced, the photograph can have a tendency to appear somewhat awkward-looking if you aren’t careful with the composition.

21mm focal length, f/11, ISO 100, 1/120th. One off-camera flash used.
The above shot is a generic two-wall scene, with the walls meeting at a standard 90 degree angle. The image below is the same room, except I backed up several feet to purposely include the third wall on the left edge of the frame.

The “third wall” on the left side of this shot creates an unnatural and visually-displeasing scene.
I don’t know about you, but to me, the photo above looks compositionally awkward and disorienting because of the third wall on the left. All of that said, just like the Rule of Thirds can occasionally be broken to make a photo work, sometimes getting three walls in the shot is okay – provided everything is geometrically aligned.

A properly-aligned three-wall shot. 21mm focal length, f/11, ISO 100, 1/200th.
6) Make sure your camera is perfectly level
Last, but definitely not least, you will want to make sure your camera isn’t tilted up or down, or tilted to the left or right. Doing so, even slightly, will require post-production cleanup. Here’s an example of what I’m talking about:

In this shot, the camera/lens were not level on the tripod. They were slightly slanted down towards the ground, creating the artificially slanted walls.
See how slanted the windows are? Clearly, this is not an accurate depiction of the room, it’s the result of the camera being tilted ever-so-slightly down. Now, see what a difference makes if we get the camera nice and level.

Camera/lens properly level on the tripod. 21mm focal length, f/8, ISO 100, 1/120th. No flash (this room had plenty of sunlight to illuminate it without artificial help).
Being level makes a HUGE difference. There are several ways to help you get the camera perfectly level when you compose your shot. Most cameras these days have a built-in level, so when you look into the viewfinder, there are lines across the focusing screen that will tilt when the camera tilts. When these lines are level, you know the camera is level.
You can also use a bubble level that slides onto the camera’s hot shoe. When the little bubble is centered, the camera is level. You can buy a hot shoe bubble level at any photography store for just a few bucks. I use a bubble level because they tend to be more accurate than the lines inside the viewfinder.

In this shot, I used Photoshop to remove the camera, lens, and tripod, which were all reflected in the mirror. Sometimes shooting into a mirror is inevitable, and when you do, cloning in Photoshop is a requirement.
Conclusion
As is the case with any type of photography, the most important aspect of getting the shot right is to take your time, and make sure your composition and exposure are exactly what you want. One good thing about architectural photography is that the composition and subject will never move (unless you move it), so there’s no need to rush the photograph.
The post 6 Helpful Tips for Doing Interior Architecture Photography by Jeb Buchman appeared first on Digital Photography School.
How to Get the Correct Exposure at Night with These Helpful Tips
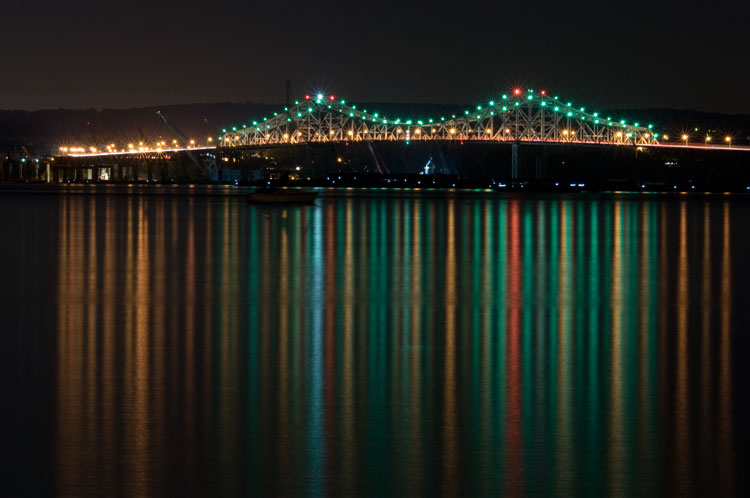
Colorful lights on the Tappan Zee Bridge reflected in the Hudson River at night. Behind the shot: ISO 200, aperture f/8, shutter speed 90 seconds, White Balance tungsten, lens used 80-200mm f/4.5 manual Nikkor zoom.
Exposing your photos correctly at night can be a bit challenging, and will certainly require some trial and error. In this article, you will learn helpful information to minimize the learning curve. Follow the tips outlined below and you will be taking better night photographs in no time.
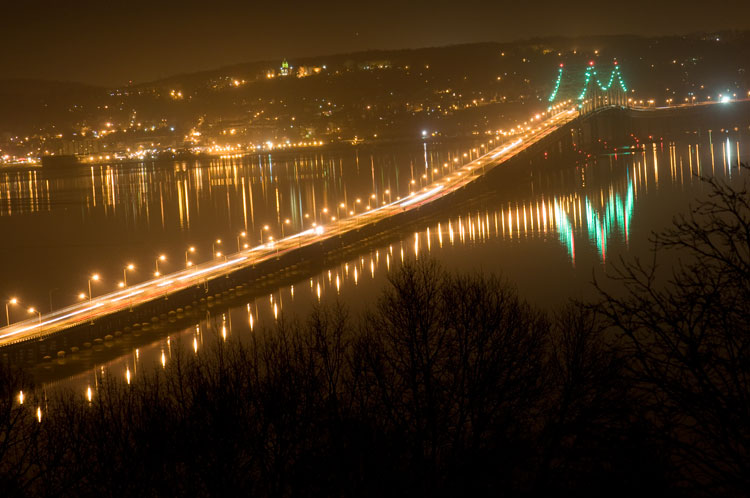
View of the Tappan Zee Bridge and surrounding landscape at night. Behind the shot: ISO 400, aperture f/8, shutter speed 10 seconds, White Balance auto, lens used 105mm f/2.8 Nikkor.
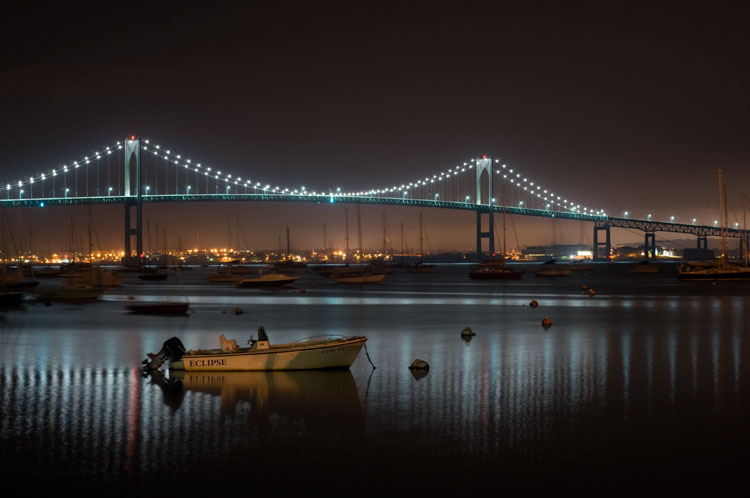
Night-time view of the Claiborne-Pell Newport Bridge and Narragansett Bay, taken in Jamestown, Rhode Island. Behind the shot: ISO 200, aperture f/8, shutter speed 25 seconds, White Balance fluorescent, lens used 50mm f/1.8D Nikkor.
Things You’ll Need
A Tripod
If you’re shooting at night, your exposures are going to be pretty long (anywhere from one to 30 seconds, or more). Since it is impossible to hold your camera perfectly still for that long, you will need a sturdy tripod, so that your camera does not move at all during the exposure. For added stability, you can hang your camera bag (or another somewhat heavy object) from the hook on your tripod’s center column. This is especially handy in windy conditions.
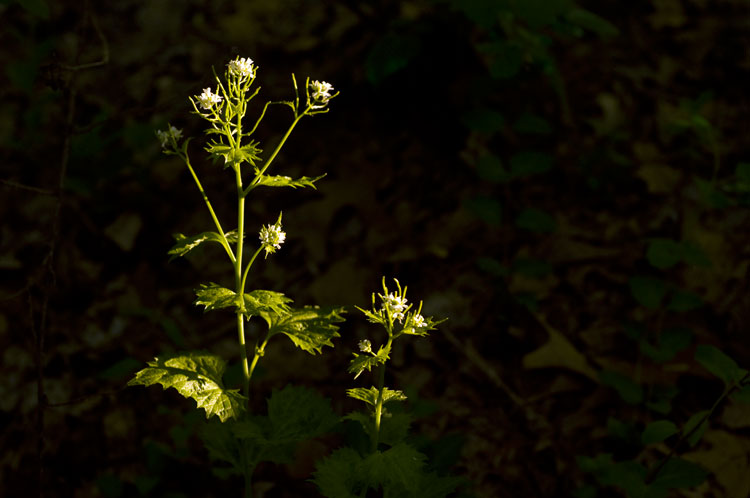
Long exposure of plants illuminated by streetlight at night in Nyack, New York. Behind the shot: ISO 400, aperture f/4, shutter speed 30 seconds, White Balance tungsten, lens used 50mm f/1.8D Nikkor.
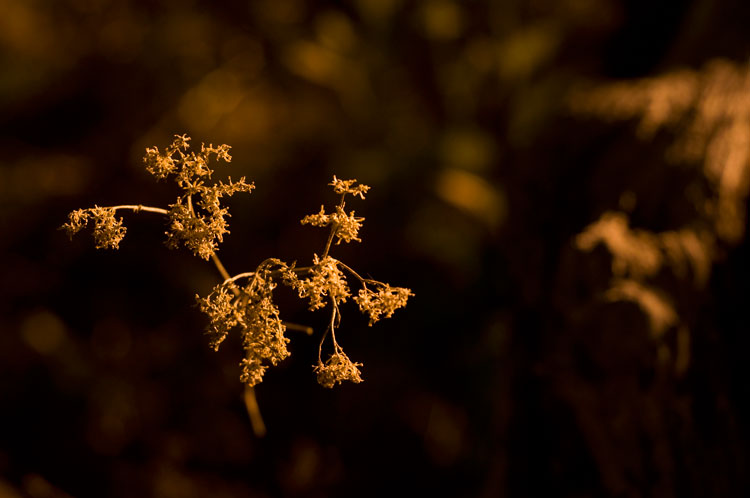
Golden plant illuminated by streetlight at night in Nyack, New York. Behind the shot: ISO 400, aperture f/4, shutter speed 30 seconds, White Balance tungsten, lens used 50mm f/1.8D Nikkor.
Remote Shutter Release
With a long exposure, any camera movement can ruin the shot, making it soft or blurry. To ensure you get a sharp image, use a remote shutter release (remote trigger). The best type of shutter release to use is the kind that functions as a timer remote as well. If you don’t have a remote shutter release, you can use your camera’s self-timer. The only downside to using the self-timer is that you will have to keep your shutter speed at 30 seconds or less. If you don’t have too much light, you can always increase your aperture (decrease the f-stop) or increase your ISO to speed up your shutter speed.
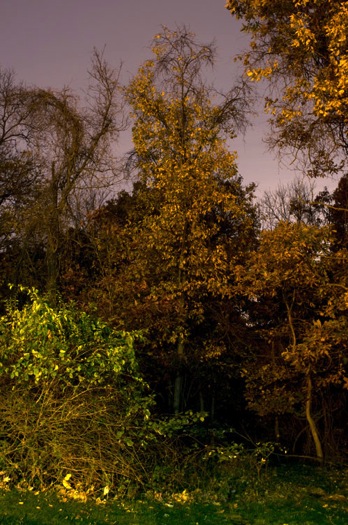
Assorted foliage illuminated by streetlights in Nyack, New York. Behind the shot: ISO 200, aperture f/5.6, shutter speed 30 seconds, White Balance fluorescent, lens used 24mm f/2.8D Nikkor. |
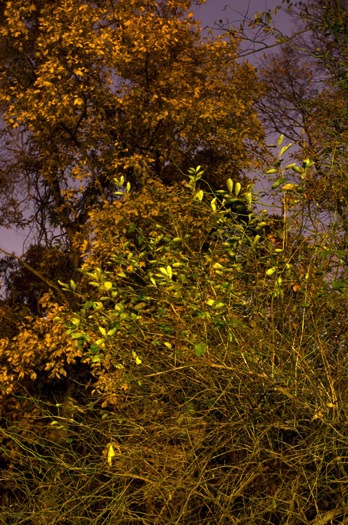
Colorful plants and trees in Nyack, New York. Behind the shot: ISO 200, aperture f/5.6, shutter speed 30 seconds, White Balance fluorescent, lens used 24mm f/2.8D Nikkor. |
Camera Settings
Shoot RAW
Keeping image quality in mind, you should always strive to shoot in RAW format. It records more pixel information, and does not compress your images at all. RAW provides you with more post-processing options, including white balance correction. If you happen to under or over expose an image, you can easily adjust the exposure if your image is in RAW format.
ISO
When taking photographs with little available light, you are better off using a low ISO (400 and below) and longer exposure times. This is important so you don’t get too much noise (or grain) in your images. Also, make sure you have Long Exposure Noise Reduction turned on in your camera’s settings.
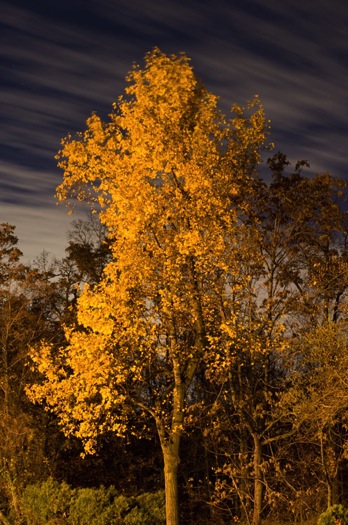
Yellow-leaved tree and moving clouds at night in Nyack, New York. Behind the shot: ISO 200, aperture f/5.6, shutter speed 30 seconds, White Balance tungsten, lens used 50mm f/1.8D Nikkor. |
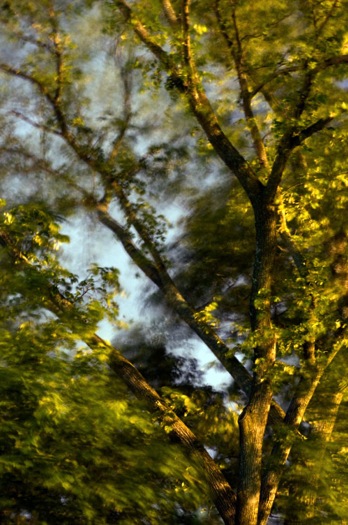
Tree in wind at night in Valley Cottage, New York. Behind the shot: ISO 400, aperture f/2.8, shutter speed 30 seconds, White Balance tungsten, lens used 50mm f/1.8D Nikkor. |
Use Manual Mode
While shooting in very low light, your camera’s light meter may not read the scene too well. Your best bet is to use Manual mode, where you control both the aperture and the shutter speed. To find a baseline for the correct exposure, you can use the following trick (which I learned in this blog post):
- Set your ISO to 6400
- Set the aperture you would like to use
- Set your shutter speed at one second
Take a test shot using these settings to get an idea of what your image will look like. Note, these settings are almost equivalent to a 1-minute exposure at ISO 100, a 30-second exposure at ISO 200 and a 15-second exposure at ISO 400, etc. If your scene is too bright with these settings, you can see what a half second exposure at 6400 looks like. This would equal a 30-second exposure at ISO 100, a 15-second exposure at ISO 200 and a 8-second exposure at ISO 400. This baseline is a great guide, you can easily take test shots to figure out what shutter speed to use.
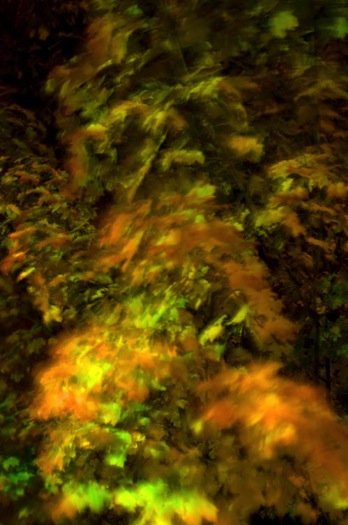
Autumn leaves in motion at night in Valley Cottage, New York. Behind the shot: ISO 400, aperture f13, shutter speed 30 seconds, White Balance fluorescent, lens used 24mm f/2.8D Nikkor. |
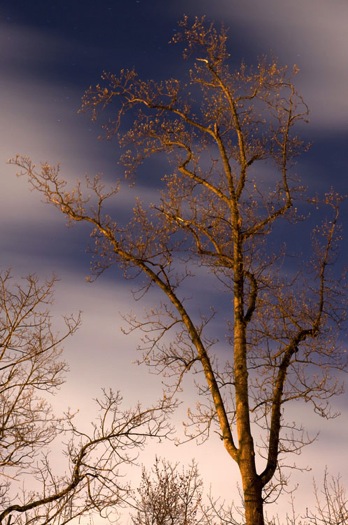
Tree and clouds in motion at night in Nyack, New York. Behind the shot: ISO 400, aperture f/5.6, shutter speed 30 seconds, White Balance tungsten, lens used 50mm f/1.8 manual Nikkor. |
If you use the above trick, you won’t unnecessarily waste time taking a bunch of long test exposures. As it is, long exposure night photography is rather time-consuming. Make sure you switch your ISO back to 400, or below, before you start taking photos that you intend to keep.
In scenes where you have a decent amount of available light (e.g. places with numerous streetlights), you may be able to use Aperture Priority mode instead of Manual mode.
In Conclusion
Night photography can be rather tricky, and requires a good amount of practice. In time, you will have a feel for the amount of light in various night scenes, and be able to figure out accurate camera settings with relative ease. Hopefully, the information contained in this post will help you capture great long exposure night shots, that don’t need much post-processing.
googletag.cmd.push(function() {
tablet_slots.push( googletag.defineSlot( “/1005424/_dPSv4_tab-all-article-bottom_(300×250)”, [300, 250], “pb-ad-78623” ).addService( googletag.pubads() ) ); } );
googletag.cmd.push(function() {
mobile_slots.push( googletag.defineSlot( “/1005424/_dPSv4_mob-all-article-bottom_(300×250)”, [300, 250], “pb-ad-78158” ).addService( googletag.pubads() ) ); } );
The post How to Get the Correct Exposure at Night with These Helpful Tips by Marshall Reyher appeared first on Digital Photography School.
Why Asking What Camera Settings Were Used is Not as Helpful as You Think
When you view an image that you love, do you find yourself asking, “What camera settings did the photographer use?” This is a common question, that overlooks other important aspects which would have helped to create that image, such as the lighting conditions, and any post-processing techniques involved. As you become more experienced, and progress in your journey as a photographer, you may begin to realize that the things you originally obsessed over, may not be as important as you once thought.
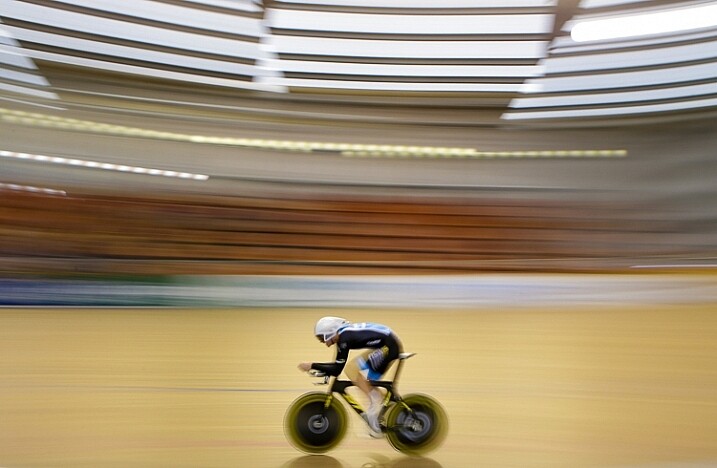
For this image I used a shutter speed of 1/5th, as this would blur out the background quite nicely, as I panned with the rider to make him pop out more. This meant I had to increase my aperture to f/10, and could also decrease my ISO to ISO 320, too. © Daniel Smith / Getty Images.
A topic that many photographers are caught up in, is knowing which camera settings were used; more specifically, aperture, shutter speed and ISO. Any photographer will tell you that these three elements of exposure are very important in creating the desired image. If you use the wrong combination of these in any given environment, you could very well end up with undesired results. Keeping that in mind, it is completely understandable why new photographers obsess over knowing exactly which camera settings were used.
In theory, this should help you to recreate that particular image, right? Unfortunately this may not be the case. Images are created from much more than just the correct combination of aperture, shutter speed and ISO. These three fundamentals do more than just control the exposure; they also give us a creative language to use in our images.
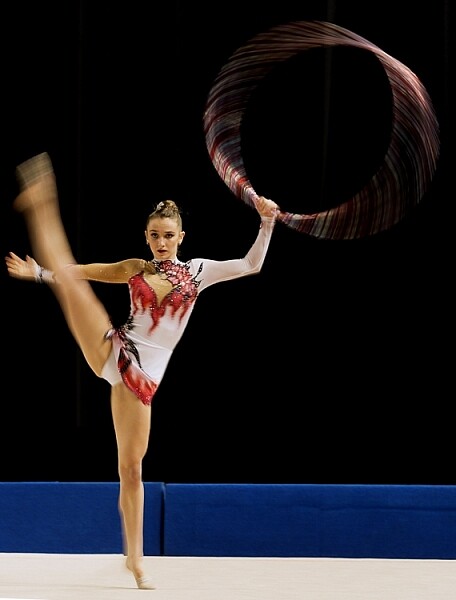
In this image, I wanted to show some motion in the gymnast’s movements, rather than taking another frozen frame. To do this I lowered my shutter speed from 1/1000th to 1/15th. This reduction meant I could also lower my ISO from ISO 3200 to ISO 500 and increase my aperture to f/7.1.
But before diving into this further, let’s explore the two different perspectives of this question; firstly from the point of view of a beginner, who would hope to replicate this imagine. They may assume that by knowing the exact camera settings, and dialling them into the camera, that they will somehow magically achieve the same result. Looking at this from an experienced photographer’s perspective, they may ask this question but with a different scope in mind. It may be when they are perplexed as to the techniques behind a particular image, or in relation to a very specific genre in photography, such as astrophotography, where knowing the settings may help provide a breakthrough.
So why is the question unhelpful?
This question will not always equip you with the knowledge you need, to recreate that image, or with your endeavours of becoming a more successful photographer. There is a lot more to creating an image than just the camera settings. By focussing on camera settings alone, you are missing out on a lot more information as to why those settings were used.
Settings are only a small part of what makes up that image. Lighting conditions, post-processing and the outcome the photographer wants to achieve, are just some of the factors that will dictate what settings the photographer uses. It’s akin to having the correct ingredients for a cake, but not knowing the method behind making it, or the reasons behind that method. Relying on camera settings alone does not tell you anything about the environment the image was taken in, nor does it give you an indication of what the lighting conditions were like.
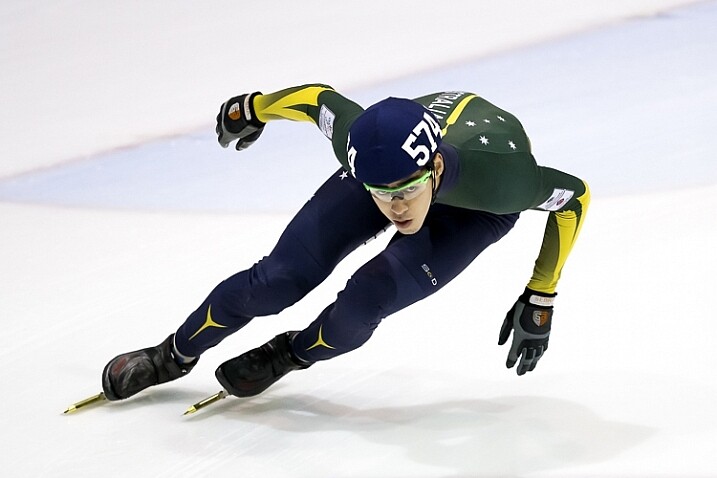
To freeze the action here I used a shutter speed of 1/1000th. To keep my ISO as low as possible, but still have a little more depth of field than what f/2.8 would offer, I used an aperture of f/3.5. I then set my ISO to 3200 to give me the correct exposure. Being indoors, with low light conditions, the ISO is a little higher. © Daniel Smith / Getty Images.
Deciding what camera settings to use is a result of knowing how you want the image to look. For the above image, if I told you that I used a shutter speed of 1/1000, aperture f/3.5 and ISO 3200, and you were to go out and dial in the same settings, it would be highly unlikely that you will get the same result. Why? Because the chances of the lighting in your environment, compared to where this image was taken, being the same is highly unlikely.
The reason I chose these particular settings was simple; I needed a fast shutter speed to freeze the action, so I used 1/1000th of a second. I also wanted to use a wider aperture that would allow me to isolate the subject more. A bi-product of this, is that it allows me to maintain a fast shutter speed, but also helps me use a lower ISO. I then use whatever ISO needed to create the correct exposure – in this case it was ISO 3200. The settings you that you require could be 1/2000th, f/4 and ISO 800. The exposure may come out the same, but the settings used are different, and tailored to the specific lighting conditions.
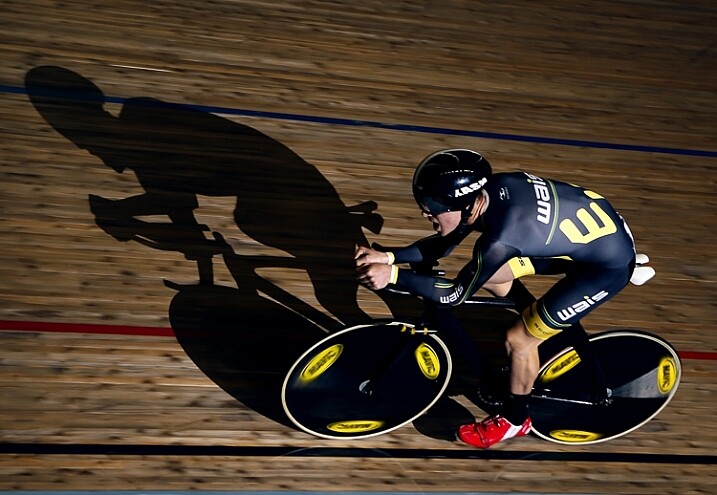
1/160th, f/2.8 ISO 100 © Daniel Smith / Getty Images.
Consider the image above. If you ask me what the camera settings for this image were, I will gladly tell you that this was shot at 1/160th, f/2.8 and ISO 100. But what this doesn’t tell you is that I had a speedlight on the ground, off to camera right, at full power. The majority of the light in this image is coming from the flash, with very little ambient (available light) influencing this image at all. Knowing just the settings will not help you to understand how this image was made. There is more to the image than just the camera settings.
The camera settings here are geared more toward the speedlight, as it is quite a distance from the rider. The slower shutter speed is just below sync-speed, which allows for more power of the flash to affect the image (high-speed sync decreases the flash output range) and it also adds a slight blur to the wheels, which gives a nice sense of speed to the image. I used f/2.8 again to aid in the power of the flash, because my ISO was low to reduce the amount of ambient light. The flash is also freezing the majority of the action here.
Knowing why those settings were used, is far more important than just knowing the settings by themselves. It’s knowing the why, that will help you in your journey as a photographer. As the saying goes, “Give a man a fish and you feed him for a day; teach a man to fish and you feed him for a lifetime.” The same principle is at work in photography. Even if I was with you, and told you the settings to use, what will you do when you are alone? You need to understand why those settings have been used.
Reading an image
When looking at an image, understanding what and why you like it, will be of great benefit to you. This is something that you will develop more and more, as you mature as a photographer. Just a hint, it’s not the camera settings that made an image great. It could be the location, the lighting (time of day is very important), composition, perspective, focal length, any editing techniques used, etc., that all worked together to make the final piece. Each one of these is no more or less important than the next, and they all need to be considered.
For me, moving from obsessing over camera settings, to these other factors that influence a photo, was somewhat of an epiphany for me, and made me realize that photography may not be as simple as I once thought it was!
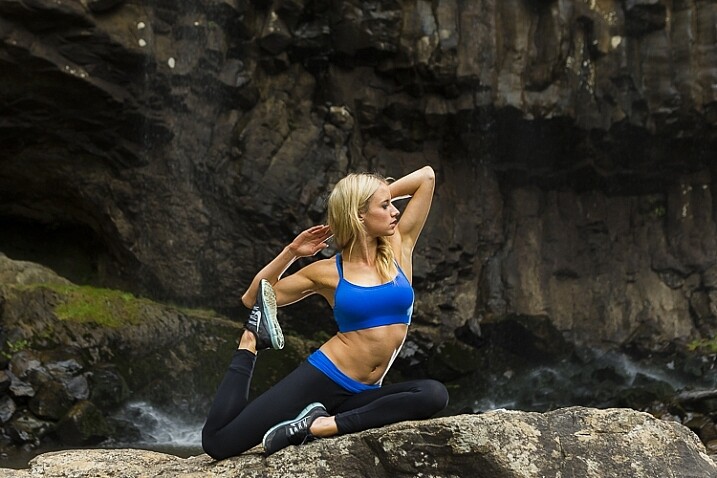
With this image, I used 1/160th, f/4 and ISO 400. I also have two flashes fired remotely; one camera-right just behind the model, creatng the rim light on her front side and arms. I also have my key light placed at camera left and at approximately a 45-degree angle, facing the model. Both lights are un-modified (bare-head, or bare-bulb).
As you advance in photography, you will slowly develop a skill that is often referred to as reading an image. This is were you look at an image, and begin to work out how it was created.
For instance you will be able to have a rough idea of the position of the camera, any lighting setups that were used, etc. This is something that you will build upon as you become more experienced. Unfortunately, this is where the magic of photography seems to end. At first, you are in awe of what you captured, when you didn’t quite know how you got it; it all seemed to work like magic. But as you begin to read images, and dissect how they were crafted, that magic can seemingly disappear.
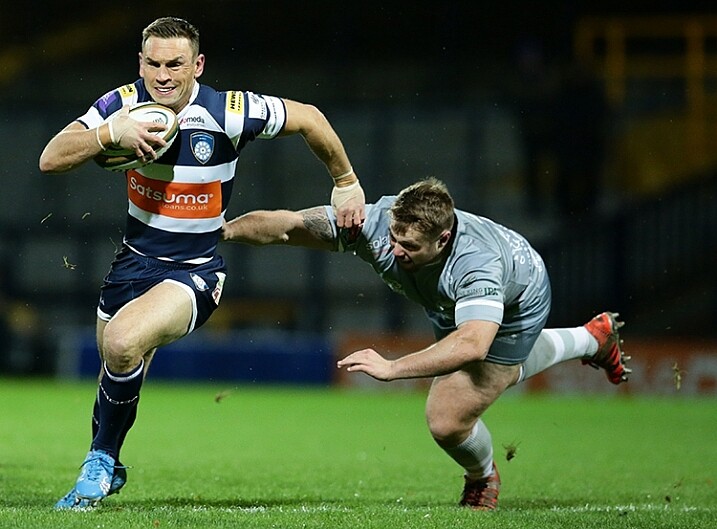
Here I used 1/1000th to freeze the action, f/3.5 to give less depth of field, and ISO 6400 to fill in the exposure gap. The ISO is quite high as this was a night game. © Daniel Smith / Getty Images.
But before you being to to read photos, you must first be very comfortable with not only the three exposure elements (aperture, shutter speed and ISO), but also how they visually affect images. Once you fully understand each element, you will be able to look at an image and say, “They’ve used a fast shutter speed for this” or, “The aperture used was very wide”.
You may not be able to determine the exact camera settings, but you will be able to put yourself in a much better starting point than when you first begun, when you had no idea where to begin! This illustration gives a very quick visual representation of how shutter speed, aperture and ISO affect the look of an image.
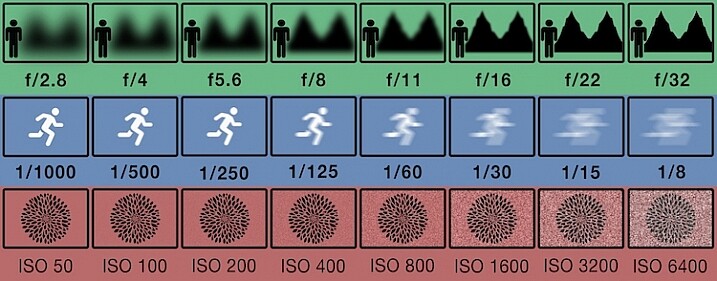
This illustration gives a visual guide to how aperture, shutter speed, and ISO affect an image. *Note: this is just an illustration and does not necessarily give exact representation for each.
Conclusion
So you now know why asking, “What camera setting did you use?” is not the most helpful. But rather than leave you there, let’s look at some alternative questions you can ask, while you develop your image reading skills, and get some education under your belt:
- How did you create this image?
- What post-processing methods did you use?
- How did you achieve (whatever part you are most intrigued about)?
- What camera/lens combination did you use?
- Why did you use that specific camera/lens combination?
- Why did you use those particular settings?
- What was the lighting like?
Now you are armed with some alternative questions to ask that will give you a better insight to how it was made, when you see an image you like.
With this in mind, what questions would you ask about this image? Would you still ask for the camera settings, or how this image was created?
googletag.cmd.push(function() {
tablet_slots.push( googletag.defineSlot( “/1005424/_dPSv4_tab-all-article-bottom_(300×250)”, [300, 250], “pb-ad-78623” ).addService( googletag.pubads() ) ); } );
googletag.cmd.push(function() {
mobile_slots.push( googletag.defineSlot( “/1005424/_dPSv4_mob-all-article-bottom_(300×250)”, [300, 250], “pb-ad-78158” ).addService( googletag.pubads() ) ); } );
The post Why Asking What Camera Settings Were Used is Not as Helpful as You Think by Daniel appeared first on Digital Photography School.
A Helpful Checklist to Use Before Photographing Anything
If you are reading this you probably find photography exciting, maybe even so exciting that from time to time you forget changing your camera settings according to the subject you’re shooting. You have probably already missed at least one amazing shot, just because you forgot to change the ISO or shutter speed.
You are not alone. This happens to both amateurs and professionals, however there are a few simple tricks to avoid ever missing that shot again due to unpreparedness. In this article I’m going to share with you the simple steps I follow before going out to photograph, the steps I have learned the hard way. A helpful checklist to use before photographing anything.
Why do you need a checklist?
Okay, before I start sharing the steps, let’s briefly talk about why you need a checklist. The reason I need a checklist might be different than yours, and it all comes down to your needs. What are you photographing? Are you photographing to make huge prints? Are you capturing a moment that only lasts a brief second?
My main field of photography is landscapes and nature. It is rare that my window of opportunity only lasts for a brief second, meaning that I often have the time to find the best settings. However, if you are more into wildlife photography, travel, or perhaps street photography, your window of opportunity is much shorter, ergo you must be able to quickly take up your camera, and fire off some shots without spending much time fiddling with your settings.
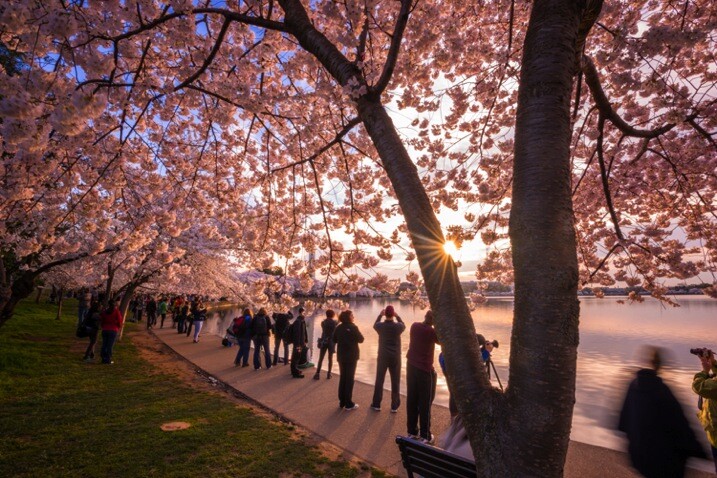
The feeling of coming back home after an amazing evening, importing your photos, and realizing all the shots are ruined as a result of forgetting to change the settings is a feeling I don’t wish upon anyone. No matter what type of photography you do, quality is the most important.
Point one – Before you leave
Step one takes place before even leaving your home. This might very well be the most important step, and I know for a fact it’s one that many often forget.
Part one of the checklist consists of four basic, yet crucial elements to check:
- Are your batteries charged?
- Is your memory card full?
- Did you clean your equipment?
- Is all your gear packed?
Are your batteries charged?
You may laugh and think, “Do’h, obviously I won’t go out with empty batteries”. Well, that’s exactly what I thought too until one time when I drove seven hours to the west of Norwa,y where I would spend the weekend in a tent photographing epic landscapes. After one hour of shooting my first battery died, and I realized that all my spare batteries where empty too. Since I was camping I did not bring a charger.
In deep frustration I ended up driving the seven hours back home, as I did not want to spend the weekend in some of the greatest nature of Norway without my camera (Yes, I should have stayed and enjoyed the nature – but my thoughts where not rational at the time). Luckily I managed to pull off one descent shot from that evening, which I did not realize before writing this article!
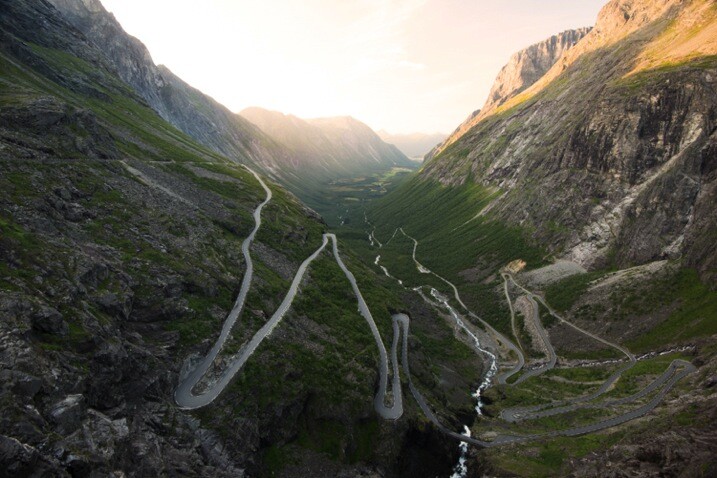
I have made a habit to always set my batteries to charge as soon as I get home from photographing, yet I also double check that all batteries are charged when I leave on trips.
Is your memory card full?
Now, leaving home with a full memory card is not as critical as not having any battery time. However it is rather annoying to get the message “Memory card full” after taking 10 pictures. You then have to waste time deleting images one-by-one. Make sure there is enough free space on the card when you head out on your adventures!
Is your equipment clean?
Most of us are guilty of not cleaning our equipment from time to time. It’s more exciting to process your images when you get back home rather than clean your gear, right?
Regardless of what is fun or not, cleaning your equipment needs to be done, especially after photographing in rough conditions or by the sea. I recommend always bringing a microfiber cloth, air blower, and some cleaning spray when you are out, but the more you clean at home, the more time you have to photograph when you’re out.
Personally, in my earlier days I had a couple shots ruined due to forgetting to clean my filters after being out photographing by the ocean.
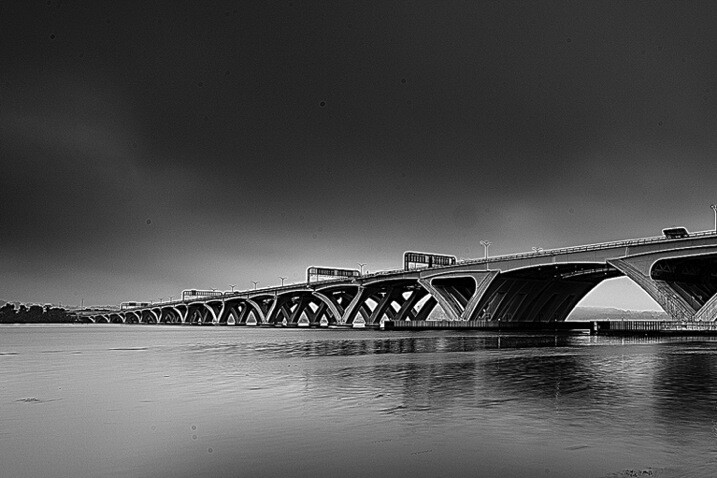
The image below is a typical example of what your files might look like if you forget to clean your lens before shooting. This shot was luckily not ruined, but it took some time removing all dust spots.
Did you pack all your gear?
This is something I have yet to experience myself, probably due to my paranoia of forgetting something. But it’s happened more than once that I have been out with someone who forgot their memory card, remote shutter, or even their camera. So make sure that all of the equipment you need is in your backpack when you exit the door!
Point two – In the field
Now that your batteries are charged, your memory card has available space, your gear is cleaned, and the equipment you need is packed, let’s head out to capture some beautiful images! But don’t get too excited, remember to go through these quick steps first:
Determine the subject you are about to photograph
Before you look into the settings themselves, start by reflecting upon the subject you are going to photograph. Is it a landscape, animal, people, or something else? By spending a few seconds becoming aware of what you are about to photograph, it will be much easier for you to remember to set your settings accordingly. You will then avoid photographing a bird with a narrow aperture when you want to blur the background.
At this stage I would also recommend putting some thought towards what lens you will need most. If you’re photographing birds, you normally need a long zoom, more than the wide angle. Prepare the correct equipment right away, so you avoid having to change lenses while you watch the bird fly away.
Check your ISO
If you are a landscape photographer like myself, you want the ISO to be as low as possible in most situations. However, you are also outside photographing sunrise, daytime, sunset and nighttime. These hours often require different settings.
It sucks to photograph a beautiful sunrise, just to come home and realize you forgot to change the ISO from 1600 after photographing the stars last night.
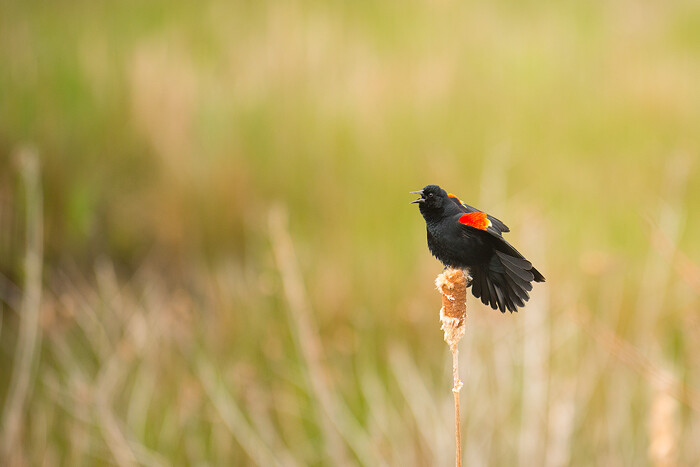
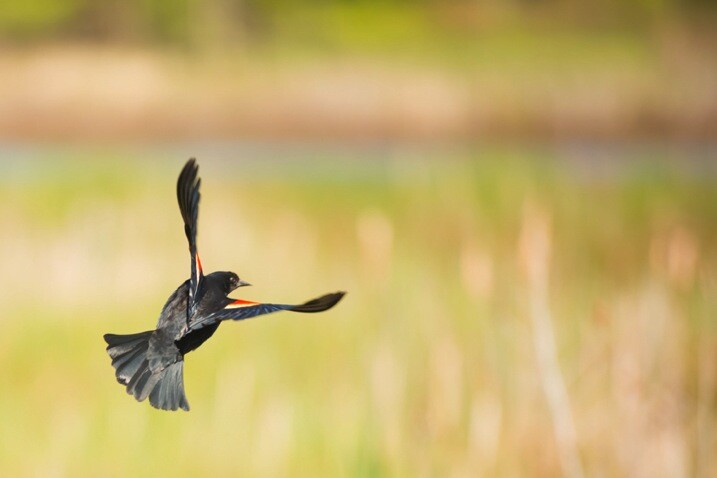
As a default I always check that my ISO is set to 100 when turning my camera on, as this is the setting I use for most of my shots. If you are photographing wildlife you might use 400 as a default to make sure you freeze the moment.The image below is a unfortunate example of one time I forgot to reset my settings from the night before. This resulted in me missing that small moment when the bird spread its wings.
Check your White Balance
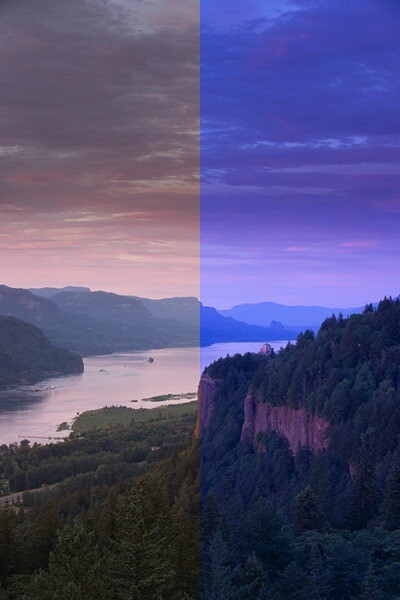
Most of us look at the image preview after firing of a couple shots so we quickly become aware of any visible mistakes we have made, such as not setting the White Balance. Sure, the White Balance is easy to fix in post processing, but I prefer to make the shot as complete as possible in the camera. Quickly check that the White Balance is set to what you normally use (even if it is Auto, Cloudy or any other pre-made setting).
Don’t forget the focus!
Have you ever quickly taken up your camera to photograph the bird that just passed you, and later noticed that the image is out of focus because you forgot to change to Autofocus? It’s an easy mistake to make, so before you start photographing, be aware of how you have set the focus.
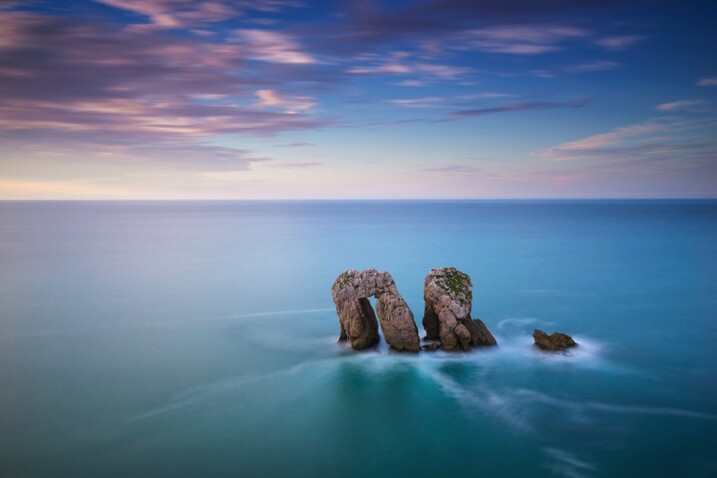
This also applies for the other way around as well. Say you are about to photograph a long exposure, you set the focus perfectly and slide on the filters. Then, just as you are about to start taking the picture, your autofocus starts going. No, it’s not a disaster, just simply annoying.
Point three – Back home
At this point your memory card is hopefully filled with amazing images. This is the last step, and it loops right back to point one. Now it’s time to set your batteries to charge, import your photos, and clean your equipment. If you make a routine of doing this after every session, you will avoid making the mistake of heading out unprepared.
That’s it for this checklist, and I hope it helps the next time you are out photographing. These steps don’t take much time to follow, and you don’t need to spend hours in post-processing trying to save a image anymore.
Do you have any “rituals” you do before going out to photograph? Please share in the comments section below.
googletag.cmd.push(function() {
tablet_slots.push( googletag.defineSlot( “/1005424/_dPSv4_tab-all-article-bottom_(300×250)”, [300, 250], “pb-ad-78623” ).addService( googletag.pubads() ) ); } );
googletag.cmd.push(function() {
mobile_slots.push( googletag.defineSlot( “/1005424/_dPSv4_mob-all-article-bottom_(300×250)”, [300, 250], “pb-ad-78158” ).addService( googletag.pubads() ) ); } );
The post A Helpful Checklist to Use Before Photographing Anything by Christian Hoiberg appeared first on Digital Photography School.
9 Helpful Apps for Photographers
Hopefully I’m not the only photographer in the world that tends to get quite excited when I discover a new app, or software that could definitely be used in my career. Yes I’m a bit geeky, but you know what – geeky is the new cool. Anyway, throughout my four years as a professional I’ve come across some really great Apps that you could use for your photography, even if you’re not a pro. What makes this more interesting, is that these Apps are not commonly talked about, so chances are they are probably new to you.
So, let’s get to it:
Quick Disclaimer: I am in no way affiliated with, paid by, or asked to list any of these apps/programs. I am not rewarded in any way from any of the software creators. This is purely a list of apps that I have found useful, besides the all too famous ones like Photoshop and Lightroom.
1) Instagram (Mac and PC – $ 0.00)
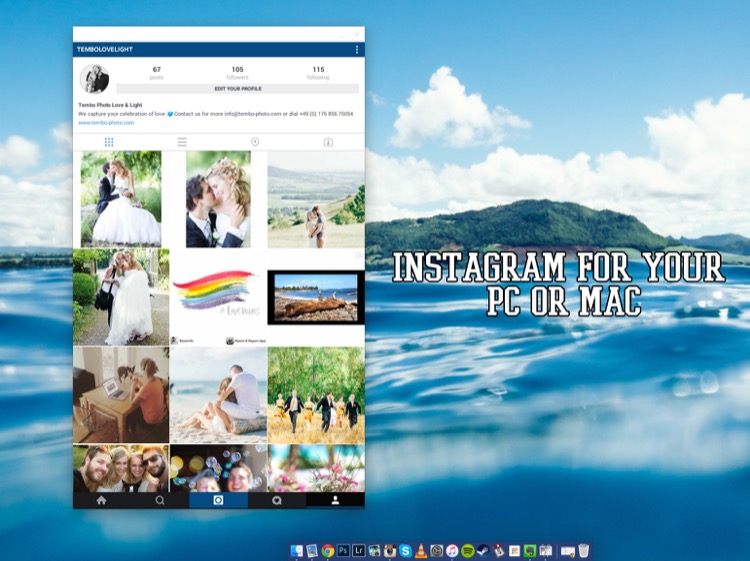
To get this app to work you need to download and install both parts:
- ARC Welder extension for Google Chrome
- Instagram App Direct Download:
Have you ever wanted to share some of your photographic work on Instagram? Well, with this little app, it all becomes possible. Besides the occasional bugs here and there, it does its job just like it would on a phone – and makes sharing your work a real pleasure.
Love:
- Posting images from my computer. It’s easy, accurate, and can be a huge plus to your workflow as a photographer.
- How simple it is to set up and get running
- You can comment, like, post, and update your profile – just like you would on your phone.
Love not so much:
- Occasional bugs where it doesn’t load correctly.
- I use a 27” screen, and it works there perfectly. However, when I’m using the 15” display on my MacBook, I cannot resize the window to show the bottom part (the most important part of the window). I’m sure there’s a solution for that somewhere. It does bug me sometimes, but a simple closing and reopening of the app normally fixes it.
Conclusion: Definitely worth testing as I’m sure they will release updates to fix the issues so, it’s worth having it and following along.
2) Blogo ($ 29.99 Mac Only in the App Store)

If you’re not familiar with WordPress as a place to build and hold your website, I’d definitely recommend you go and check it out. It’s such a great platform to host a website (although, there is a bit of a learning curve). But, you are already familiar with WP, then Blogo is for you, especially if you love to write articles on your blog.
Blogo presents you with a stylishly clean writing panel, with the ability to add images where you like, as well as easily add Alt-tags, descriptions, links, and other SEO necessities you would normally do directly in WordPress. The best part is, you can write away online and offline, travelling or at home. A simple Publish button will send your post directly to your website and voila, it’s done. Now, the cherry on the cake = it is INCREDIBLY easy to set up. It takes less than one minute to get up and running, plus, their support is second to none.
Love:
- The clean, stylish writing panel.
- The features and its offline ability
- Adding images and SEO tweaks to your images has never been easier
- Previewing your post on your website (from within Blogo) without actually publishing it
- Top notch support
- Very fair pricing
Love not so much:
I personally had some issues with WPML (A multilingual plugin for wordpress that allows me to have a German and English website). But, they were right on top of it and are keeping me updated weekly (via personal emails) to let me know how it’s going.
3) JPEG Mini (Free Trial, $ 19.99, Mac and Windows)
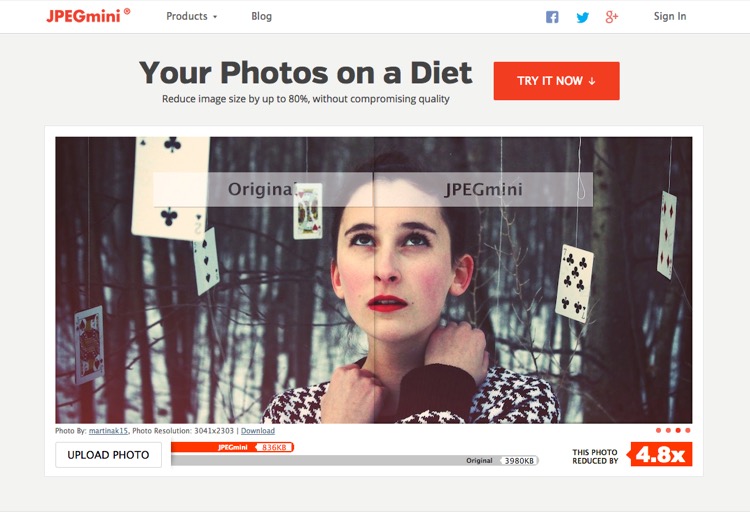
While we’re on the topic of websites, if you take pride in your website and use it as a highly-valuable business tool, chances are you’ve come across the dilemma of choosing between high-quality, sharp images OR website load speed. Putting it in the simplest form, the higher quality the image, the bigger the file size. The bigger the file size, the longer the page takes to load. So, catch 22? Not with JPEGmini.
JPEGmini does an incredible job of reducing the size of your JPEGS, yet retaining a very acceptable image quality. The best thing is, it’s an application so you can optimize your images on your desktop, offline, and get them ready to be uploaded. I use this program religiously for our website.
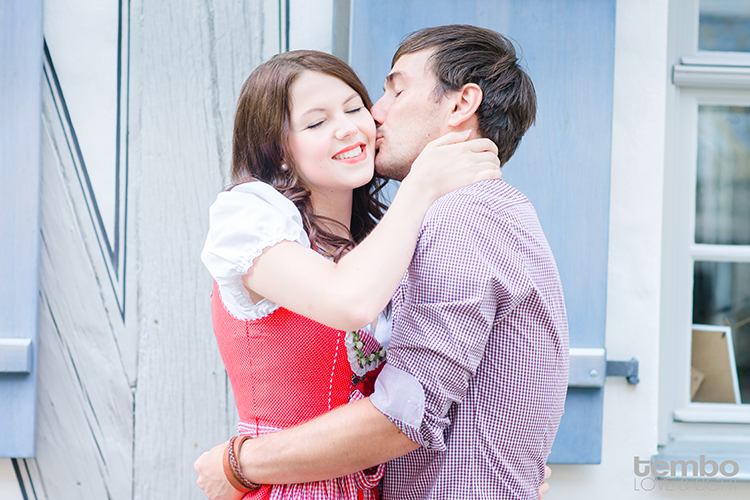
750px size original image – 359kb


JPEGmini version 750px – 144kb
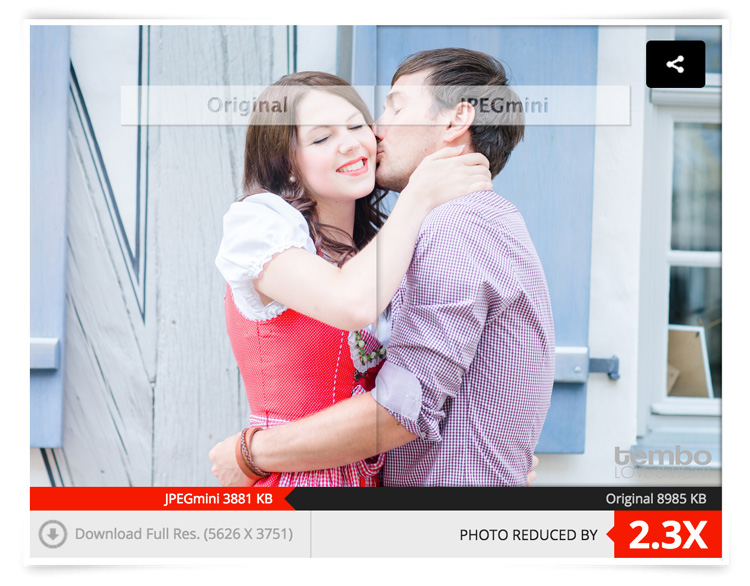
This original image was 359kb (fairly big for an image online). After JPEGmini = 144kb!!! Notice a difference in quality? Here’s what it did with the full sized file:
Love:
- Their lossless compressions and the speed at which it works
- Bulk optimizing. Drag as many images you want into the window and it’ll get right to work, showing you how much you’re saving
- Fair pricing (especially if you’re going to use it a lot)
- Options included to either overwrite the original file or make a copy of it.
- Lightweight program that works offline
- So easy to use
- Mac and PC compatible
- Free Trial
- Lightroom Plugin
Love not so much:
I can’t find anything wrong with it.
Conclusion: 100% worth it if you’re into blogging, and want to optimize images for your website, while keeping a fine ratio between size and quality. Do yourself a favor and at least try it, it’s quite incredible.
4) Pixieset (free options as well as paid subscriptions for more features and storage space)
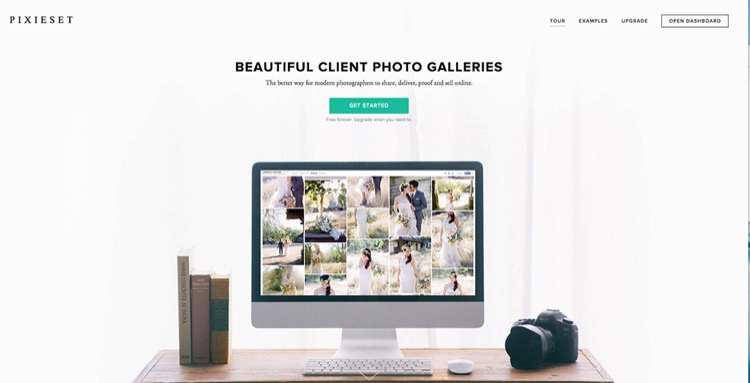
There is a familiar battle between Pixieset versus PASS as there is the Nikon versus Canon debate. Both are great in their own ways, and both do the same thing. However, I personally use Pixieset. I have not really tried PASS, so please do not think I’m being negative towards it. I just found Pixieset to do exactly what I need, when I need it, perfectly every time. Why would I look for something else?
So, what is Pixieset? It’s a stunning, clean, and professional way to create client galleries and send them out. It is so good, that 100% of my clients love it (no lie)! You upload the high-resolution files (pro version only) to the online gallery, design it with a few clicks and some information, and voila, it’s done. It’s responsive, easy to use for anyone (even grandma), and allows your clients to download the high-resolution files (pro version only) or smaller web sized images whenever they want.
Love:
- The responsiveness: Works amazing on computers as it does on mobile devices.
- Allows downloads a range of file sizes (from Web, to high resolution, to Full resolution).
- Let’s face it, the world has shifted to Digital mediums. This is the perfect solution to delivering your work to your clients.
- Has a Lightroom plugin to automatically upload a set to Pixieset.
- Frequent updates and features being added.
- Password protected galleries to make them private.
- Clients can favorite images and send that list to you, as the photographer, very easily. Perfect for when clients choose images for albums, or to make adjustments on files.
- The above favorite list can be easily added into your Lightroom catalog to show only those files. Saves you having to manually go and choose the files.
- Amazing support! These people love their customers.
Love not so much:
You can’t really edit offline, but that’s okay, it’s not to serious. That’s it.
5) Automator (Built into OS X)
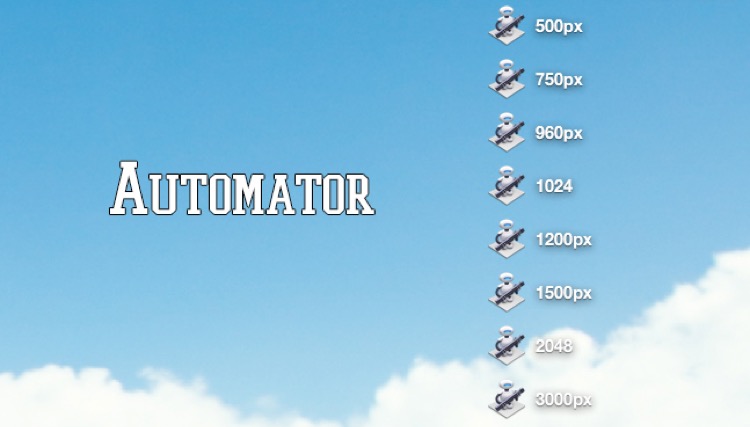
Ever stumbled upon this awesome little robot guy? Well, believe it or not – he’s actually very useful. Remember how I mentioned I always resize my images before compressing them with JPEGmini? Well, Automator is my go-to tool to resize (if I don’t want to do it in LR or PS). Why? Because it’s simple. That’s why. It does its job and it does it fast, and well.
How does it work?
Setting up Automations may seem a bit daunting at first, but it’s really simple once you get the hang of it. Here is the step by step guide:
- Open Automator on your Mac (I use spotlight, so CMD+Space and type in Automator)
- You’re presented with a drop down window giving you a list of documents you can create. For this purpose (resizing), create an Application
- Now, you need to add something to this Application. Above the list of all the options you can choose, there’s a search box. Type in SCALE. The last choice, Scale Images, is the one you want.
- Drag it over to the right into the open space.
- You will be asked if you want to add another function to the application about creating copies of the original file. Add it if you like, or don’t, it’s up to you. I don’t, I normally copy my High Res from their HD place, put them in a folder on the desktop and resize/rewrite over them. Simple. Just make sure you have them all in full resolution saved somewhere else!
- Under the Scale Images options on the right, you can choose between: To Size (pixels) or To Percentage (%). Choose Size, then simply type in how big you want your images to be (on the longest edge). I’ve created eight different sizes and saved them all on my desktop. This way, if I need a 750px image, I have the automation there already. If I need 2048px for Facebook, it’s there.
- Choose your size and finally click on File > Export > Give it a Name > Choose Location > and BAM! There you go.
- To use it, simply drag your image files onto the actual icon of the Automator and away it goes. Resizing all the images you dragged (it supports bulk drag too, awesome huh?).
6) Smart Albums 2 (free to try, $ 299.00, Mac and PC compatible)
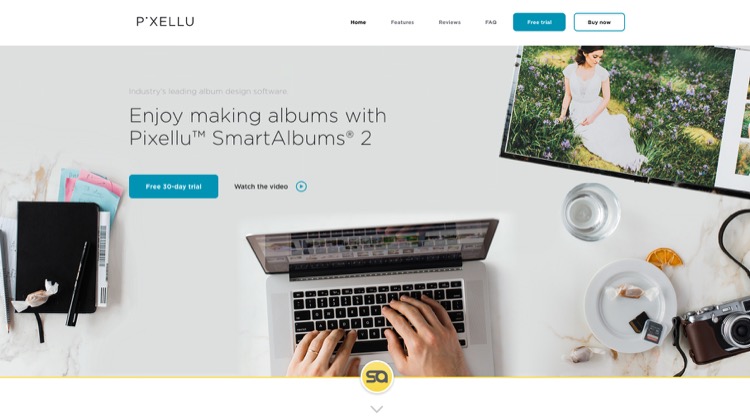
Before you run away after seeing the above price tag, just hear me out. If you’re into designing albums for your clients, be it Wedding Albums that you sell, or session albums, Smart Albums fixes that all-to-common problem of using really bad, boring, slow and unappealing design software that 99% of the printing companies offer. I mean, some of them are appalling.
Smart Albums links up to some of the most popular printing companies around the world and lets you design your album the way you want, according to the sizes, spreads, and specifications of your chosen printing company. It does this in a beautiful, fast, and very easy to understand way. Yes, it’s expensive, but if it’s a business that you are running, you’ll make it back after one sale. Totally worth it, given the amount of time you save and how much more efficient the whole thing becomes. Of course, it’s free to try so give it a go before you decide if it’s really for you or not.
They have over 30+ printing agencies that are compatible with Smart Albums, on an international level. They work in the USA, Europe, Africa and Asia. They’re constantly adding new agencies to their list, so the chances are high that your favorite printers will be listed.
Love:
- The simplicity of the program and how easy it is to use.
- The humungous list of agencies that they can work with.
- The support. Great help from their team.
- Mobile support.
Love not so much:
The price is pretty heavy. But, the good thing is that it’s a one-off payment. No need to pay yearly (unless you want their cloud storage).
7) AstroPad (Mac and iOS only: Free, or $ 20 for Pro Features)
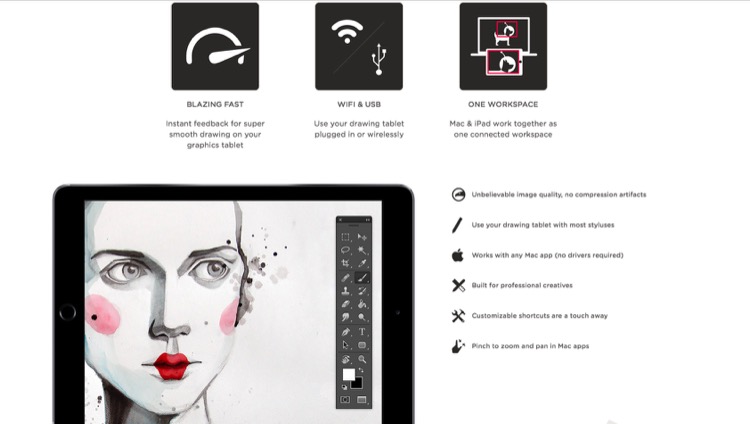
Own an iPad? Want a graphics tablet to edit your photos with, like a Wacom? Want a free solution that works surprisingly well? Then, AstroPad is for you. After downloading the App both on your Mac and your iPad, you can pretty much control your entire computer from your iPad. Using touch gestures and special movements, you can set this app up to work for you, not against you. If you happen to have a stylus for the iPad, then you’re even closer to having a free graphics tablet. Definitely worth trying, as it’s free, and you may even improve your post-processing, especially if you need delicate movements with the brush tool.
Love:
- The idea of using an iPad as a graphics tablet.
- That you can see your image on the iPad and paint/adjust/edit directly on it.
- That it’s free.
- That you can control more than just Photoshop.
- Use it wirelessly (Wi-Fi) or plugged in (when you don’t have Wi-Fi).
Love not so much:
It can have a little delay in terms of what you do on the iPad and what comes out on the computer – only slightly, but enough to notice.
8) Sunseeker ($ 9.99 iOS only)
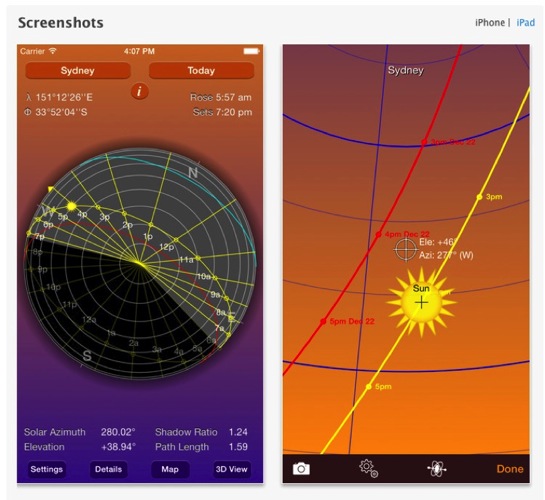
Sunseeker is an app for the iPhone or iPad that augments reality into its software to track the sun. It’s surprisingly accurate, and is a perfect tool for photographers who rely on the sun for their shoots. It’s a great way to plan where the sun will be in the sky at a certain point in time. Can you imagine how easy it would be when location scouting?
Simply point the phone up to the sky and follow the trail until you find where the sun will be. You can move a slider to change the position of the sun at a certain hour of a certain day. What’s great is that it uses your camera and projects its overlay on top of what you’re seeing. So, if there’s a building in front of you, you’ll see at what point the sun will just start to hide behind it; giving you valuable planning information as to when is the best time to do something.
Love:
- That it uses the camera to project the sun’s future and past placement.
- That it’s simple, easy to use, and fits in your pocket (iPhone only).
- A great planning tool that you should have with you. Even if you don’t use it too often, it does come in handy from time to time.
Love not so much:
The sliders to change the time of day, and the position of the sun are quite small, and to pin point an exact day can be quite frustrating as you almost always overshoot it.
9) Tave (Free to try, $ 24 – $ 49 per month subscription)
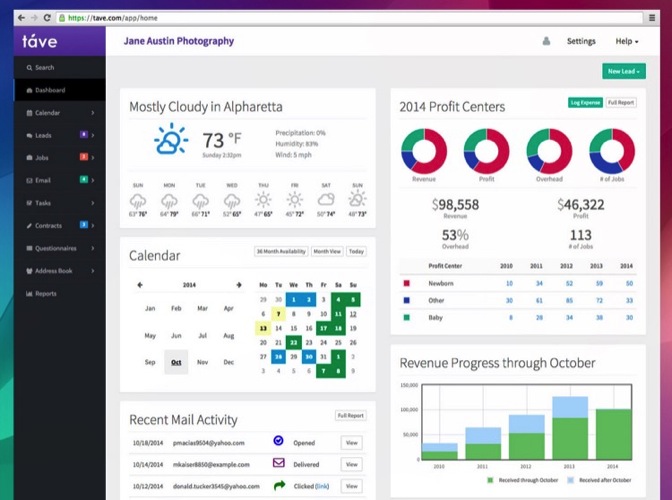
Running a photography business can be quite chaotic if you don’t have a decent system or workflow. Keeping track of your clients, their anniversaries and important dates, logging your expenses and income, tracking weather, and planning the shoots can all add up to the mess. Tave solves that and 99+ things more. I was hooked on it the moment I set everything up.
Love:
- A complete business management tool that sits safely online, and can be accessed by more than one person (if you choose).
- Amazing reports and financial tracking.
- Huge customizations.
- Great support. Offers live Chat right in your dashboard.
- You can create questionnaires to send to your clients that will automatically record their answers, and place them in their respective job areas.
- Verified by accountants.
- Works internationally.
- Works on mobile devices.
- Tons of features!
Love not so much:
- It does require a fair amount of time investment to set it up. But once you do, it’s groovy.
- It doesn’t work offline.
- A little bit of a learning curve, but they have really great support, and are more than willing to help you along the way.
Conclusion
Those are the nine apps that I personally recommend and use. I hope that I’ve introduced you to some great things that you can use for your own photography. Again, I gain no benefit from listing these apps besides the satisfaction of actually sharing some information with you.
What are your favorite apps for photography that aren’t talked about too often? I’m not talking about Editing Apps, as they’re everywhere, but any apps that you know of that are worth checking out? Let me know in the comments below.
googletag.cmd.push(function() {
tablet_slots.push( googletag.defineSlot( “/1005424/_dPSv4_tab-all-article-bottom_(300×250)”, [300, 250], “pb-ad-78623” ).addService( googletag.pubads() ) ); } );
googletag.cmd.push(function() {
mobile_slots.push( googletag.defineSlot( “/1005424/_dPSv4_mob-all-article-bottom_(300×250)”, [300, 250], “pb-ad-78158” ).addService( googletag.pubads() ) ); } );
The post 9 Helpful Apps for Photographers by Shayne Thomas appeared first on Digital Photography School.
25 Helpful & Free Lightroom Tutorials to Post-Process Like a Pro
Adobe Lightroom is one of the most popular options for photo editing and with great reason. Thanks to a number of various Lightroom features, photographers may decrease the time spent processing and increase efficiency. Moreover, one of the greatest time-saving features of Lightroom is the ability to save your actions, which means creating presets. In this article, I’d like to share Continue Reading
The post 25 Helpful & Free Lightroom Tutorials to Post-Process Like a Pro appeared first on Photodoto.
Everything you wanted to know covered in helpful Lightroom tutorial

Adobe’s Lightroom 5 is a powerful program, but that power comes at the expense of a learning curve that some find pretty steep. In this excellent video shot at B&H, Photographer Robert Rodriguez, Jr. walks photographers through the functions and features of Lightroom’s Develop module in an hour-long hands-on tutorial as he covers just about every panel and slider in the Develop module. Learn more
News: Digital Photography Review (dpreview.com)
You must be logged in to post a comment.