RSS
 

Posts Tagged ‘Headshots’

10 Tips for Beautiful Black and White Headshots

01 Apr

The post 10 Tips for Beautiful Black and White Headshots appeared first on Digital Photography School. It was authored by John McIntire.

10 tips for beautiful black and white headshots

Black and white has long been a popular way to capture headshots with impact and visual interest. The lack of color helps to emphasize the subject while discarding information that isn’t relevant. 

And in this article, I’m going to share 10 black and white headshot tips to help you get the best results.

Let’s get started.

Headshots vs. portraits

black and white headshots
A headshot is always a portrait, but a portrait (including a closely cropped portrait) is not always a headshot. Remember, headshots (no matter the type) come with a specific goal.

If you’re new to portrait photography, it might help to clear up what a headshot actually is before you try to create one.

Portraits: In general terms, a portrait photograph is a representation of a person. Portrait photography is a broad genre that encompasses nearly every subgenre that involves photographing people. It doesn’t matter if we’re talking studio portraits, street candids, or fashion photography. If it has a person in the frame, it’s probably a portrait.

Headshots: Headshots are a subgenre of portrait photography. The difference is that headshots serve a very specific purpose. Whether it’s actors’ headshots or corporate headshots, the purpose is to sell something. That something could be an actor’s ability to fit a role’s physical requirements, or it could be your business professionalism.

Headshots are limited to close-up images of the subject’s head. They can also include head and shoulders as well as half-length shots. Before capturing a headshot, it’s important you understand where and how the photo will be used so you can get the right shot for the right purpose.

Tips for black and white headshots

black and white headshot of a man
Canon 5D Mark III | Canon EF 50mm f/2.5 Macro | 50mm | 1/80s | f/5.6 | ISO 100

There are no hard and fast rules for creating headshots. However, following these tips will hopefully help!

And as always with photography, remember: There is no one way to do anything.

In other words, nothing listed here is a rule of any sort. If a tip fails to help you get the results you want or need, then discard or revamp it.  

1. Remember that a headshot is different from a portrait

portrait vs headshot

Yes, we’ve already discussed this – but when you’re in the middle of a session, it’s easy to get caught up and start changing your approach. This may not be a problem in a normal portrait session, but with headshots, you need to make sure you’re focused on the specific end result. If you change tack and the results aren’t showing your subject in the desired manner, you’ll have wasted time and effort on images that are unsuitable for the subject’s uses.

One way to help keep you on track is to ask your subject to share the purpose of their headshot. Allow them to be as specific and detailed as possible. Once you have an answer to that question, you should find it much easier to stay on track. 

If you are photographing an actor with representation, ask them for their agency’s headshot guidelines (or ask the agency yourself). This will give you a strict set of limitations and help to ensure you get the required result. 

2. Getting it right in-camera is just as important as ever

black and white vs color portrait comparison
By shooting with black and white in mind and getting it right in-camera, you can help make the conversion process much easier.
Canon 5D Mark III | Canon EF 50mm f/2.5 Macro | 50mm | 1/125s | f/5.6 | ISO 100

Depending on where your headshots are going to wind up, you might find that you can’t do any edits beyond basic retouching. You should be allowed a black and white conversion and some basic blemish removal, but much more than that might not be acceptable. 

Therefore, do whatever you can to get your images right in the camera. Light your images well with good exposure and good contrast. Learn your lighting patterns and use a meter if you have to. 

Get this step right, and you might find that you have little more editing to do beyond the actual black and white conversion.

3. Start in color

It might be tempting to set your camera to a black and white mode at the point of shooting. You can do this – but if you shoot JPEGs, I would advise against it.

By choosing this route, you will be discarding a huge amount of color information at the very beginning. For the best conversions, you’ll want to later manipulate your color information to get the very best black and white results.

(However, note that RAW shooters can use a black and white mode while still retaining color information.) 

4. Avoid shooting to crop

cropped portrait
By cropping down to a head-and-shoulders composition, you discard most of the information in the frame. Instead, try to get your compositions right at the shooting stage.

This might be controversial, but I’ll stand by it. When you are creating black and white headshots, try to get your composition as close as possible to how you want it to end up.

Doing this will ensure that your images are as big as possible and have as much detail as possible when you pass them on to your client. If you shoot before cropping out significant parts of your image, you will lose out on a large chunk of resolution.

5. Control contrast with light, not post-production

woman in the studio
Using a medium-sized octabox up close allows for extremely soft light, thus controlling the contrast. Also, at camera right, you see a background light that reduces the overall contrast in the image.

This point goes back to getting it right in-camera, but specifically for lighting.

One of the quickest ways to ruin a portrait is to add a lot of unnatural contrast in the post-production phase.

Avoid this by setting up your lights to get the contrast you want from the very start. 

You can do this through modifier selection and lighting ratios. 

6. Use fill to control your contrast

headshot with and without fill light
Left: Without fill. Right: With fill. Here you can see how a fill light might help you lift the shadows and control the contrast in your images.

If you want to decrease contrast, make sure to do it in-camera.

You can do this with fill light. Whether you work with a dedicated second light source or a reflector, introducing fill into your images is a great way to control exactly how your black and white headshots turn out.

7. Think in values rather than color

black and white headshot of a woman
In this image, you can see four distinct areas of value: The highlights of the skin, the midtones of the sweater, and two shadow areas for the hair and the background. Being able to see these at the time of shooting will help you design your black and white headshots better.
Canon 5D Mark III | Canon EF 50mm f/2.5 Macro | 50mm | 1/160 sec | f/4 | ISO 100

Because you are starting in color, it can help to think of things in terms of values.

At its most basic, value simply describes where colors fall on a spectrum between pure white and pure black.

Now, once converted to black and white, almost everything in your images will appear as a shade of gray. If you can visualize how the colors you see with your eyes will be represented in a black and white conversion, you will be better able to design your lighting before your subject even arrives. 

How do you learn to do this?

Practice. A lot of it.

Get out there and photograph anything and everything you can, then convert to black and white so you can build this skill.

Remember, different conversion techniques affect color and value in different ways, so be sure to practice with as many conversion methods as possible. 

8. Minimize details in the frame

Because we are talking about headshots, you’ll need to remember that the entire point of the photograph is the person. Any extra details will only serve to detract from your subject.

So do what you can to minimize the impact of the background, the subject’s clothing, and other elements in the photo.

For backgrounds, you can focus your efforts on finding the cleanest, most non-distracting backdrop. For clothing, ask your subjects to dress without distracting elements that would take the focus off of them. Patterns can be fine, but it might be best if you avoided particularly bold choices like leopard-print and zebra-stripe tops.

9. Focus on form

black and white headshot of a woman
When you are lighting your subject, take the time to ensure that you’re using the light to shape their features in the best way possible.
Canon 5D Mark III | Canon EF 50mm f/2.5 Macro | 50mm | 1/100s | f/9 | ISO 100

This goes back to basic lighting skills.

You need to shape your subject’s face in a flattering way that also helps it stand out in the frame.

You are trying to minimize other details, so it is the subject’s features you must focus on. Make as much use of them as you can. 

10. Eyes and expressions are more important than ever

black and white headshot examples
With headshots, expressions and eye contact are more important than ever. Do what you can to develop a rapport with your subjects.

As the goal of a headshot is to make your subject look as good as possible, and as you have already reduced the impact of distracting elements, your subject’s eyes and expression become more important than ever. 

Lighting for the eyes will keep them bright and prominent in the frame. Doing this also means you won’t have to spend time processing the eyes, which might work well for your client’s requirements. 

Also, to get the best expressions, ensure that your subject is comfortable and that you have a good rapport with them.

Black and white headshots: (not) the end

On their own, headshot photography and black and white photography are broad topics that are truly impossible to distill into a short list of tips. However, I do hope that these ten tips for black and white headshots will help you get started on your journey.

As always, none of these tips are rules, just guidance. If you feel that something I said doesn’t suit you or your photography, that’s perfectly fine.

Now over to you:

Which of these black and white headshot tips did you like the most? Do you have any tips for black and white headshot photography? Share your thoughts (and photos) in the comments below!

Tips for better black and white headshots.
Should I shoot headshots in black and white mode?

If you’re shooting in JPEG, no. But if you’re shooting in RAW, you can decide whether to shoot in black and white or color (you won’t lose any image information in either mode).

Is black and white a good option for headshots?

Yes. Black and white allows you to strip down the information in the photo to its key elements (in this case, the person whose headshot it is).

What kind of light should I use for headshots?

Any soft light that flatters your subject is a good choice.

How should I do black and white conversions for my headshot photography?

Use whatever method suits you and your workflow best. Photoshop and Lightroom both offer great options for black and white conversions.

The post 10 Tips for Beautiful Black and White Headshots appeared first on Digital Photography School. It was authored by John McIntire.


Digital Photography School

 
Comments Off on 10 Tips for Beautiful Black and White Headshots

Posted in Photography


10 Tips for Photographing Great Headshots

14 Nov

The post 10 Tips for Photographing Great Headshots appeared first on Digital Photography School. It was authored by Sean Gannon.

Creating beautiful headshots can seem like a daunting prospect. To have one person in front of your camera, looking to you for direction and positivity, can be tough. Plus, people are generally very critical of themselves when in front of the camera and can feel very nervous.

However, there are some simple things that you can do to make headshots a lot easier for everyone.

Headshot on Black Background

So here are 10 tips to help you photograph headshots:

1. Have a pre-session consultation

Before your session, make sure you know how the images will be used and what style your subject would like. You can have this “pre-session consultation” on the phone or face-to-face. Talking to your subject will help them relax so much more than an email, and a consultation will allow you to help them prepare for the session.

Make sure they know what to expect and are as relaxed as possible.

Headshot on White Background

Find out what profession your subject is involved in; a corporate lawyer may opt for a clean white background look (above), while a more relaxed style of business (e.g., a yoga instructor) may prefer a more colorful, environmental image (below). Find out in the consultation what they want so you are prepared on the day.

Indoor Headshot

2. Help your subject choose the right clothes

Generally speaking, solid, neutral colors work best for headshots, as you want to avoid anything that distracts from people’s faces.

If you’re looking to achieve a formal style, make sure that everyone gets the message and remembers to bring formal work clothes with them. Men often forget their jackets, so for a consistent look, try to have a spare one on hand, even if you need to clip it at the back.

If you know you’ll have lots of time with a person, get them to bring a few items of clothing. Remind them to iron their clothes, as well.

Here are some examples of good clothing choices:

What to wear for headshots

3. Create separation from the background

For great headshots, make sure your subject doesn’t stand too close to the background.

If you are using a studio background (or the wall in an office) and you position someone close to it, you may see shadows on the wall, which makes the images look less professional.

For environmental headshots outdoors, I still recommend separation from the background. The resulting bokeh will create a nice, nondescript background, especially when you shoot at a wide aperture. Typically, I aim for an aperture of f/4 for environmental and natural light sessions, and f/8 for studio-style sessions with lights.

4. Starting the session

Whether you are photographing headshots for a single person or a whole team, make sure you have a general chat with each person first to help them relax.

This can be just a 10-second, confident handshake and a “How are you?” People generally feel very nervous about having their photograph taken, and talking about something within their comfort zone (where they live, if they have children or pets, etc.) will really help them to become (and to appear!) more comfortable.

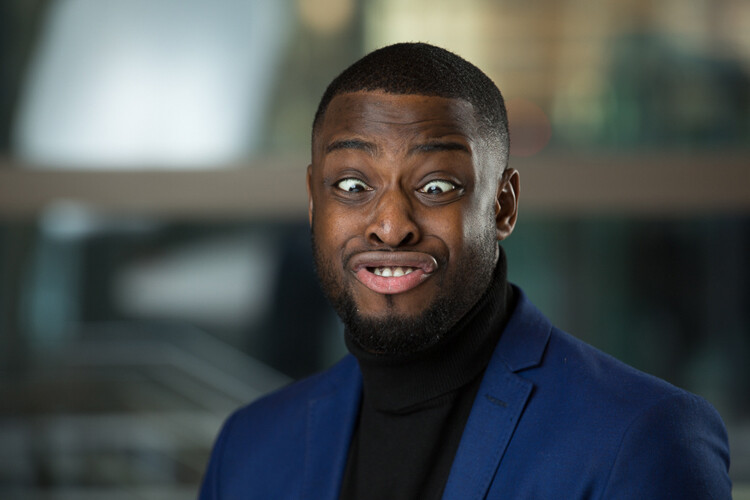
5. Silly faces!

A great way of helping people relax in front of the camera – especially if you don’t have much time with them – is to ask them to pull a funny face for the first frame.

Use this as a lighting test for a new person, as well. It’s a great way to break the ice, and very few people will refuse to do it. Once your subject has pulled a silly face, everything else is easy!

person making a funny face
Headshot Photography example

6. Lighting and positioning

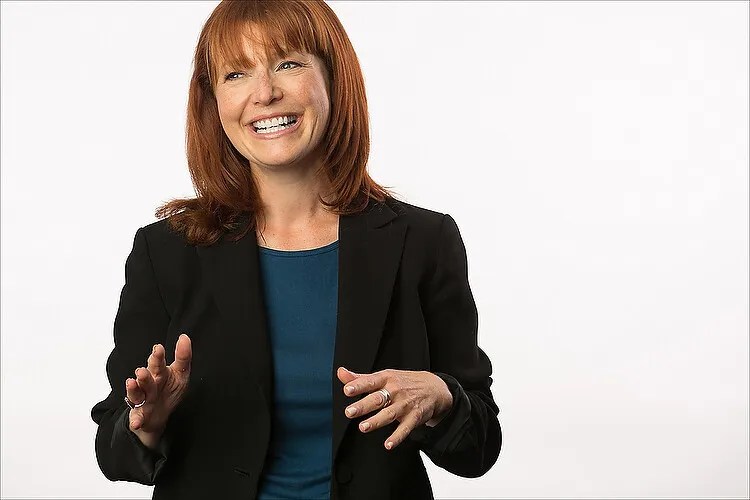
For business and actors’ headshots, I tend to light quite evenly. There are a few circumstances where the images are low-key, but for the most part, they are evenly lit. A classic beauty lighting setup works well, with one light above and a second light, or a reflector, supplying fill light from below.

Ensure the subject is turned with their body 45 degrees away from the camera and toward the main light source (if your lighting allows for this). Their face should be pointed straight toward the camera. You may need to guide people to look straight down the lens. It’s surprising how many people look off-camera, at the flash, or somewhere random.

Headshot setup
Posing example

7. Sit people down

People may be more comfortable sitting down, and by asking them to rest their hands on the tops of their thighs, it gives them something to do with their hands. It also ensures that the subjects all know where they need to be, and that they don’t move around too much.

8. It’s all about the little adjustments

What separates a great headshot from an average one is generally very small changes. These little adjustments can make all the difference. The slight tilt to the head, leaning forward, a gentle but intriguing smile. Don’t be afraid to ask someone to make very specific changes to their expression and position until you get the image you’re looking for.

Headshot Photography

9. Keep talking and be positive

When you’re in the midst of taking photographs, make sure that you keep talking to your subject. Reassure them that they’re doing it right and you’re getting great images.

Even if you’re not satisfied with the images you get when your subject turns their head in a certain direction or when the light falls in a bad way, never express those feelings. Silence will kill the atmosphere, so no matter what is happening, just keep chatting and being positive.

10. Shoot tethered

If you have all the necessary equipment, shooting tethered is a fantastic way to get great headshots. When people see a couple of shots on the screen, they can very quickly get an idea of what needs to be changed. The immediate feedback from the screen will help everyone massively.

Photographing great headshots: conclusion

I hope you find these tips for better headshots helpful.

Do you have any other tips we missed? Please share them – and your favorite headshot photos – in the comments below!

On Pinterest? Here’s an image to pin.

10 Tips for Photographing Great Headshots

The post 10 Tips for Photographing Great Headshots appeared first on Digital Photography School. It was authored by Sean Gannon.


Digital Photography School

 
Comments Off on 10 Tips for Photographing Great Headshots

Posted in Photography


10,000 Headshots initiative saw 200 photographers give free headshots to unemployed workers

28 Jul

Photographers from across the United States joined together on July 22 to participate in the ‘10,000 Headshots’ initiative, a group effort that involved offering free professional headshots to unemployed workers with the goal of helping them secure new jobs. The initiative was coordinated by Headshot Booker, which explains on its website that these sessions were offered to anyone who was unemployed as of July 22 when the sessions took place.

The initiative was a success, according to Headshot Booker. Participants interested in getting headshots were required to pre-register for a 10-minute session and each location was limited to 50 total appointments. More than 200 photographers participated across 50 states and used Brookfield Properties retail locations with pop-ups as their studios.

The agency notes that every location used proper social distancing and safety measures to keep everyone safe, including contactless delivery of images and having photographers wear masks.

Headshots are an important aspect of finding work, the agency points out. Career-centric social platform LinkedIn claims that profiles featuring professional headshots are nine times as likely as other accounts to receive connection requests. Paying for a headshot while unemployed is particularly difficult, however, making it harder for those in need of a job to find one.

Professional photographer and Headshot Booker co-founder Peter Hurley explained:

Unfortunately, many job seekers underestimate the value of a professional headshot, instead opting for a snapshot taken by a friend or even worse a selfie. The headshot has become the cornerstone of one’s digital brand identity and we want to empower people as they go through the process of procuring a new job and getting back into the workforce.

The initiative was launched in partnership with Canon, MySpotPhotos and several other companies. Ultimately, every registered participant left the pop-up studios with a professional headshot for their resumes. Headshot Booker says this was the ‘largest, single-day photo initiative’ of its kind, one that comes amid widespread unemployment caused by the pandemic.

Articles: Digital Photography Review (dpreview.com)

 
Comments Off on 10,000 Headshots initiative saw 200 photographers give free headshots to unemployed workers

Posted in Uncategorized


How To Take Better Headshots: The Complete Guide

24 Aug

Headshot photography is a huge sub genre of portrait photography right now and is becoming bigger and bigger as time passes. So many people need to get headshots done and they should be going to you for this service! I want to talk about how we can all make our headshot photography so much better and thus provide our clients Continue Reading

The post How To Take Better Headshots: The Complete Guide appeared first on Photodoto.


Photodoto

 
Comments Off on How To Take Better Headshots: The Complete Guide

Posted in Photography


Review of the Westcott Eyelighter for Headshots and Portraits

16 Jul

The portrait and headshot industry in photography is likely the craft’s most popular niche. As such, it isn’t a stretch to say that there is a multitude of headshot and portrait photographers in every state and country. So, you need to find a way to stand out from the herd. The Westcott Eyelighter is one such way to differentiate from the masses, a unique reflector unlike any other I’ve seen before.

Review of the Westcott Eyelighter 2 - studio portrait of a model

What is the Westcott Eyelighter?

Much like the name implies, the Westcott Eyelighter is curved to mimic the shape of the human eye and illuminate the bottom part of the iris (something that many photographers tend to add in post-production). The eyes are the windows to the soul, and often the very first thing most viewers notice about an image. This highlight creates an eye-catching image (no pun intended).

As all working photographers understand, the more time you spend in front of a computer screen is less time out there shooting. So taking advantage of a tool that creates a commonly edited effect is grand. This product certainly diminishes the time spent at the computer.

portrait of a model in a black and white dress - Review of the Westcott Eyelighter for Headshots and Portraits

What’s in the box?

The Westcott Eyelighter kit features the reflector itself and a carrying case, with additional accessories sold separately. The physical makeup of the Eyelighter includes a durable aluminum frame and a highly-reflective silver surface. Tension rods are utilized to pull this material taut, maximizing the light cast on the subject.

I was quite impressed by the durability and quality of the Eyelighter’s build, this is not an addition that will snap or break easily.

Review of the Westcott Eyelighter for Headshots and Portraits - b/w of a model in the studio

Assembly

Assembling the Westcott Eyelighter is not much of a task on paper, but can be a bit of a handful in practice. Myself, as a 5’ 5” 98lb female, did struggle to put the Eyelighter together with no help, but it is most certainly possible.

Westcott released a very helpful YouTube instructional video (see below) on how to properly assemble this reflector for those that don’t find the instruction manual helpful. The real difficulty comes from the tension rods as I found it requires quite a bit of strength to put together.

?

Had there been a second pair of hands to help, the assembly would have been more of a breeze (so photographers that have studio assistants, there won’t be much concern there). On average, after practicing the assembly process several times, it finally took me 10-15 minutes to put together.

Review of the Westcott Eyelighter for Headshots and Portraits

What’s included with the Westcott Eyelighter.

Transporting the Eyelighter and portability

The Eyelighter is a rather large piece of studio equipment and really is intended as a permanent addition to your studio. As I did not want to assemble and disassemble the kit every time, I wanted to test to see if I can transport the reflector in its fully assembled state.

From personal experience, I can attest that this product can fit into a car fully-assembled (minus the tripod). I drive an SUV, and I did not need to place the seats down to fit this reflector in horizontally across the backseat. Seats may need to be put down for smaller vehicles, but the height of the kit poses no issue fitting inside of a car.

The Eyelighter does come with a carry case and can be disassembled and assembled, but the assembly does take a bit of time. At least, for me it took a significant amount of time, so I would rather transport the reflector fully-assembled.

Review of the Westcott Eyelighter for Headshots and Portraits - studio setup showing it in use

Using the Westcott Eyelighter

Using the Eyelighter is rather simple and doesn’t require any advanced studio knowledge. Like any reflector, the Eyelighter works by bouncing light off of its reflective panel.

The Eyelighter is already tilted upon attachment to a tripod (which must be purchased separately). As such, all you need to do is take a large softbox (I personally use an octagonal one for this but a square or rectangular softbox is just as valid), place it directly above the Eyelighter, and aim downwards.

It may take a bit of maneuvering and brief trial-and-error test to find the correct placement of the reflector underneath your subject, but the general consensus is that it belongs below the chest area of your model. This piece of equipment will not affect your additional lighting setup, which allows you the freedom to light the rest of the subject in any which way.

Unique catchlights

Review of the Westcott Eyelighter for Headshots and Portraits - dramatic b/w portrait

The Eyelighter reflects light toward your subject, leaving a catchlight that follows the natural curve of the eye. If the silver reflector is too bright or causes too stark of a reflection, Westcott has a white sheet available for purchase that will cover that whole panel and soften the effect.

My favorite aspect of this is how seamless the catch light is, there are no odd or unflattering gaps. As well as this, it really does soften the light on the neck and chin. Paired with your other studio lighting kits, this is a must-have for anyone looking to add something fantastic to their collection.

That being said, it is important to keep in mind that due to the necessary position to create the effect, this reflector really is for portrait and headshot use only – you won’t be able to catch a whole body image with this.

Review of the Westcott Eyelighter for Headshots and Portraits - white panel


Conclusion

In conclusion, the Westcott Eyelighter is a fun, eye-catching, and simple to use reflector that can really help you stand out from the competition.

With a retail price of $ 299, this isn’t the absolute most expensive item in your photographic arsenal but can make a huge difference to your portraits and headshots.

The post Review of the Westcott Eyelighter for Headshots and Portraits appeared first on Digital Photography School.


Digital Photography School

 
Comments Off on Review of the Westcott Eyelighter for Headshots and Portraits

Posted in Photography


Tips for Doing Natural Light Headshots and Portraits

08 May

You may think that headshots are just like portraits or perhaps think that they are only best photographed in a studio space. Thankfully, natural light headshots can help you to achieve the perfect look and portraits for your clients.

Both indoors and outdoors, natural light will give you a more organic and authentic feel to your client’s headshots. Making the photos more personable and versatile when it comes to using them on social media, resumes, or the like.

Natural light headshots - portrait of a man in cactus setting

Using natural light allows you to create headshots with a more authentic feel.

Advantages of Natural Light Headshots

While studio headshots are the more traditional route for this style of photography, natural light will offer more options as far as backgrounds and lighting than you could ever imagine.

Photographing in natural light gives you more mobility to go from indoor to outdoor without fussing with setting up or tearing down a whole set.

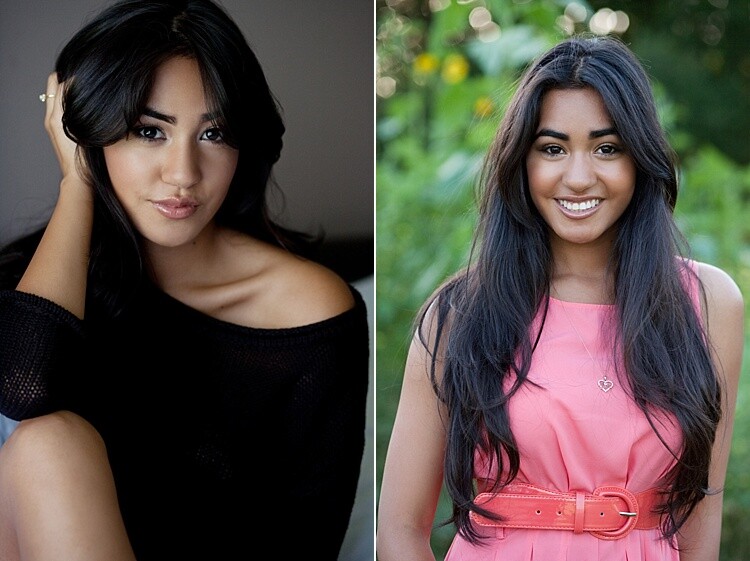
Natural light headshots - two photos of a lady indoors and outdoors

Natural light gives you the opportunity to photograph your client both indoors and at outdoor locations.

You also have the opportunity to photograph your client more organically and more authentically than a traditional headshot in a studio light setup. These types of headshots are growing in popularity since they can be versatile for social media and online profiles.

For example, a wedding decorator actually decorating an event can be a great optional headshot since this way her clients can see her working the event, in addition to the waist cropped headshot.

Natural light headhshots

Photographing your client in natural light helps to create more authentic and real shots that can be used for different purposes.

Natural light also helps you choose backgrounds that perhaps you don’t have available or can’t afford in a studio setup. Brick, repetitive lines like stairs, textured concrete, etc., will give your client more options when choosing her headshots.

Photographing Indoor Natural Light Headshots

Your client may ask you to photograph them in the very place where they work, which will most likely be inside. If this is the case, ask them if you can photograph during midday. This ensures that you will get the best possible light entering their office or building.

Natural light headshots - two portraits of ladies

Using elements already found inside near large windows can offer subtle backgrounds without distracting from your client.

When you are photographing headshots it’s very important to keep your background in mind. Look for evenly dispersed, soft light and a neutral background. Headshots are meant to put the focal point of the photo on the person’s face. Neutral backgrounds help to isolate your client and keep the focus on them. This is one advantage of photographing inside.

Ideal backgrounds where natural light is abundant can include office building lobbies, large windowed offices with lounge seating, plain neutral colored walls, rooms with an interesting pendant or incandescent lighting.

Natural light headshots

Using natural light and combining it with the ambient light in the building can give the portrait a more interesting look.

Photographing Outdoor Headshots

If your client has asked you to photograph them at their workplace, don’t feel pressured to only photograph them indoors. Most often office buildings will have beautifully manicured gardens, atriums, or lawns where you can photograph your client’s headshots.

Choose the background wisely

Try to steer away from too busy a background, though, as this can cause the background to compete with your client. Photographing your client in the shade is most likely to give you the best results as you don’t want to have blotchy lighting on your client’s face or body.

Natural light headshots

Use neutral backgrounds for your client’s headshots in natural light.

Shooting on location can also offer you other options such as textured walls, patterned walls like a brick wall, solid concrete walls, and staircases. All of which creates a neutral background where you will have an overflow of natural light.   

Natural light headshots

Using different types of backgrounds can give your client options.

One of the best backgrounds that you can use is the pavement. Placing your client on a ladder, crate, or having them crouch down will help you get the right angle so that the pavement becomes an even colored background.

If you do use the pavement, place your client close to the edge where the sunlight and shade meet, this will create a natural reflector and bounce light back onto your subject.

Natural light headshots

Using both solid pavement and a manicured garden can offer your client variety.

Add variety

Another advantage to photographing on location is that you can add variety to the session without being limited. Photograph your client with a textured background and then try a solid background.

Even though placing your client in the shade is ideal, you can also use the sunlight as a hair light or to light parts of the background to create more depth in the image.

Natural light headshots

Depending on where you place your client, you can choose how you want to light the headshot. More light or with more drama.

Depending on what your client intends to use the headshots for, you may even try facing your client towards the setting sun.

Natural light headshots

Facing this model towards the sun gives his headshot a different look.

One more advantage of on-location headshots is the option of bringing props for your client’s headshot. For example, if they are a photographer, they can bring cameras. Or if they are a travel writer, they can bring suitcases. Or a fashion blogger with accessories.

All of these, with the various backgrounds work well to create the perfect headshot for your client.

Natural light headshots

Natural light headshots can give you the option of using props to create a more stylized portrait.

In Conclusion

Natural light headshots

Using props can also enhance the effect of your client’s headshots and portraits.

Given that you are using natural light as your main source for your client’s headshots and portraits means that you will be able to offer more variety to your client. This is a great advantage because it can give your client the chance to use the photographs for different purposes.

Furthermore, your client will have more natural and authentic headshots versus more traditional studio headshot, which is becoming more and more popular as well.

The post Tips for Doing Natural Light Headshots and Portraits appeared first on Digital Photography School.


Digital Photography School

 
Comments Off on Tips for Doing Natural Light Headshots and Portraits

Posted in Photography


Weekly Photography Challenge – Headshots

24 Feb

You don’t need a fancy studio or lights to do good headshots, but there are a few things you need to get right like the lighting and posing.

Karthika Gupta Memorable Jaunts DPS Article - Sigma 135mm lens review-11

Images by dPS author Karthika Gupta.

Here are some tips for both to help with this week’s challenge:

  • How to Make Headshots That Glow
  • 3 Reasons to do Headshots with Natural Light
  • How to Pose People for Headshots
  • 3 Steps to Professional-Looking Headshots Using One Flash
  • Video Tutorials – Portrait Posing Tips

Weekly Photography Challenge – Headshots

Simply upload your shot into the comment field (look for the little camera icon in the Disqus comments section) and they’ll get embedded for us all to see or if you’d prefer, upload them to your favorite photo-sharing site and leave the link to them. Show me your best images in this week’s challenge. Sometimes it takes a while for an image to appear so be patient and try not to post the same image twice.

Share in the dPS Facebook Group

You can also share your images in the dPS Facebook group as the challenge is posted there each week as well.

The post Weekly Photography Challenge – Headshots by Darlene Hildebrandt appeared first on Digital Photography School.


Digital Photography School

 
Comments Off on Weekly Photography Challenge – Headshots

Posted in Photography


How to Make Headshots That Glow

11 Jul

I’d like to share a particular technique I use to capture a “glowing subject” effect for headshots. You may be disappointed to hear that, by glow effect, I don’t mean your headshots will literally glow, like in the dark, because they most likely won’t. But that’s okay because this technique is actually better than that and who wants a headshot that literally glows anyway? To the point, when set up correctly, you’ll end up with a subtle, spotlight-like feel on your subject which appears to glow, hence the title of this article.

headshots that glow example

The process

The process consists of a pretty straight forward lighting setup involving the use of different light levels for your key and background light and a fairly long lens. Essentially, you emphasize your subject by allowing light and focus to fall off as it moves toward the background. Here are the details:

To get the effect I use a 70-200mm f/2.8 lens at around 200mm. I recommend a long and fairly fast lens zoomed all the way into the longest focal length. A long (telephoto) lens will compress the scene and keep your subject from appearing distorted and bent, the way a wide lens would. It will also give you a nice, shallow, depth of field.

headshots that glow lens

Background choice

You’ll want to choose your background first before setting up all of your lights. Unless, of course, you enjoy moving them around for the exercise, which I don’t. I often like to add some interest to each headshot by choosing a background that suggests a kind of “on location” environment. I set mine up in the studio, but backgrounds like this can be found almost anywhere.

headshot background

Keep in mind that the background will be soft in the final photo as a result of using the long end of the 200mm lens and a large aperture, so plan accordingly. To find your background you may find it helpful to focus on something close, reframe, and get some shots of your background out of focus just for test purposes.

Also, keep in mind that you’re going to place your subject at least six to seven feet from the background. Make sure you have room to do this while also having the appropriate distance in front of your subject to frame a good headshot at 200mm. To be safe, give yourself 15 feet in front of the subject.

headshots that glow distance to subject

Lighting

After finding a good background, it’s time to set up the lights. First, I’d like to give special thanks to my model, the mannequin, for participating in this demo.

headshots mannequin

Main light

The setup I’m using here is called clamshell lighting, with a rim light or kicker (whichever you prefer to call it, also known as an accent light) added on the side of the face. The main light is above the subject and centered. I most often use an AlienBees B800 light with a beauty dish modifier, softened with a diffusion sock or two. Sometimes I’ll use more than one sock so that I can effectively keep my aperture around f/3.5 or maybe even f/2.8 with no sync-speed issues. If you’d like to sculpt the light further, try using a grid on the beauty dish.

headshots lighting setup

I’ve also used a large octabox in place of the beauty dish. However, I think the beauty dish works well for this particular look. I won’t go into great detail about how to best use a beauty dish, but ideally, you’ll want to line the center reflector up with the subject’s face.

Adjust the light depending on your subject’s bone structure, moving it further up and in for more definition in the cheeks, etc. Typically I have the dish about two feet back from the subject (toward camera) and about a foot overhead, focused down at an angle. Boom the light and beauty dish over the subject with a c-stand or whatever boom arm you may have handy.

Addition lights and reflectors

Next, add a reflector under the subject’s face (right above waist level or just out of frame) to bounce light back up and fill the shadows under the chin. The size of the reflector really comes down to what you’re comfortable using.

headshots reflector

Use a strip softbox with a grid for the rim or kicker light. I’ll place the light a few feet behind the subject and about two feet off to one side or the other, aimed back at the subject. Set this light to an exposure equal to your key light (as low as it goes with an AlienBees B800).

headshots lighting

Lastly, set up a background light. You can use any method of diffusion you have at your disposal for your background light. I try to keep mine fairly soft and even. The trick is to underexpose your background a few stops. By this, I mean a couple of stops under the exposure of your subject.

How many stops is a matter of personal preference. However, you don’t want to go too dark or have an exposure too similar to your subject’s exposure, or you’ll loose the effect. Because the key and rim are already set to the lowest light level, you’re going to want to either use heavy diffusion or put some distance between your light and background. Turning the light away from the background works too. Underexposing the background a couple of stops is a critical part of the process.

headshots background headshots background

Conclusion

That’s it. Don’t forget to thank our model, the mannequin, and you should be ready to go! Or shall I say, ready to glow? Hmmm.

Please post any questions or comments you have in the area below, and remember to share your headshots as well.

The post How to Make Headshots That Glow by Carlisle Kellam appeared first on Digital Photography School.


Digital Photography School

 
Comments Off on How to Make Headshots That Glow

Posted in Photography


Back to basics: A simple three-point lighting setup for headshots

16 May

Music photographer PJ Pantelis points out that three point lighting is nothing new, but it’s not something every self-taught photographer has learned. If that sounds like you and you’re looking to experiment with studio portraiture, his recent demo provides a great starting point. 

Articles: Digital Photography Review (dpreview.com)

 
Comments Off on Back to basics: A simple three-point lighting setup for headshots

Posted in Uncategorized


3 Lighting Setups for Photographing Headshots

28 Apr

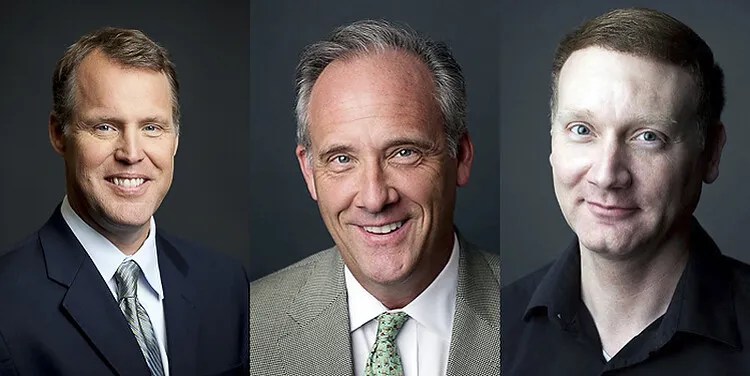
I do a lot of corporate and actors headshots around Washington, DC and I wanted to share some of the simple but effective lighting setups that I use over and over, which you can easily copy and use yourself.

lighting for headshots

The One Light Wonder

My standard setup consists of a large soft light source to the left or right of the subject, a reflector under the face, and another reflector opposite the main light source. I shoot hundreds of headshots per year using this simple setup. I use a Paul C. Buff Einstein unit with a large octabox in my studio, but you could easily put together something similar with a cheap speedlight, an umbrella, and a couple of $ 20 reflectors.

You can see this setup in the photo below, with my poor wife Karen standing in as a subject. She was just coming downstairs to make some tea, and got ambushed!

headshots lighting

Reflectors and adjustments

Once my subject is in place, I do some tweaking. First I will adjust the light source so it is slightly above their eye level. For most people, I think it looks best to have the light coming from above to cast subtle shadows under the chin, accentuating the jaw and helping to hide any double chin.

Then I will adjust the reflector underneath their face and bring it up to about their mid-chest level. This reflector helps fill in shadows on the face and provides a really nice extra catch light in the eyes. Some folks will use another (powered) light source down here, but I find the reflector to be much simpler to set up, and it also has the virtue of being idiot proof.

For example, if you have another light instead of a reflector below the subject, and you accidentally overpower it (so it is more powerful than the main light), you have created some horrible Frankenstein lighting! It is physically impossible to do this with a reflector, which can save from you from costly mistakes.

headshots lightingYou can see the side reflector in my studio in this photo (it’s just to Karen’s left).
Finally we have the reflector opposite the light source. For this one, I will often use a black-sided panel to create a darker shadow on that side of the face. This effect can be very dramatic, and has added benefit of slimming the face. The downside is that if your subject is very wrinkly, you’re not filling those wrinkles with light from that side. So it doesn’t work for everyone.

Here’s an example where of a headshot where I used this effect to create a nice dramatic edge:

headshots lighting

Some additional tweaks

With this simple setup, it’s very easy to make tweaks and see what works best with a particular person’s face. Often I will leave the basic setup in place with the black reflector, but a few examples where I might make changes are:

  1. The subject has a double chin, so I really want to define the jaw. In this case, I may raise the light up extra high to cast more shadow under the chin (make sure you don’t go too high and lose your catchlights), and/or lower or remove the under reflector.

headshots lighting

  1. The subject has long dark hair. In this case, the dark reflector is not necessary because we already have a dark edge there from the hair. So in this case I would go with a white reflector on the side or bring in a hair light from behind (more on that in the next section)

In the photo below, you can see a lot of detail in her hair on the shadow side. That’s because I brought my big white reflector in close.

headshots lighting

  1. Subject has deep set eyes. We want to fire more light into those sockets or our poor subject will end up looking like a serial killer or a cave man! In this case, I might lower the main/soft light so it is right at eye level.

Two Lights

You could run a whole business just using the one light system, but if you’re anything like me you get bored and like to try new things. So let’s bring in a second light.

The second light for me is usually a “kicker” (also called a rim or accent light) coming from behind and opposite the main light. I use this to accentuate the jaw, especially in men, or hair in women. It’s especially nice to create a little highlight on darker hair.

In the photo below, I needed a way to separate this young man from the dark background. My kicker light did the trick!

Headshots lighting

In my studio, I use a strip softbox for this purpose, but you could also use a bare head with a grid or even an old speedlight with a paper towel roll taped to it to make a simple snoot. The important thing is that you want to control the light so it doesn’t spray into your lens and create flare or lack of contrast.

You can see my kicker light in this setup shot with Karen.

headshots

Three and Four Lights

I use lights three and four to create a clean white background. You can either use one light fired at the background from just behind the subject, or two lights off to either side.

The white background is my favorite look these days for a lot of reasons. I think it looks super bright, modern and happy, and really pops on LinkedIn and other online profiles. It is also a great way to go for companies because it is easy to replicate and get a consistent look from shoot to shoot (for example, when photographing a new employee months after the initial shoot, or replicating the same look with shoots done across the country by different photographers).

headshots lighting setups

headshots lighting setups

headshots lighting setups

headshots lighting setups

Whether you use one or two lights for the background depends on your budget and the space where you are working. Two lights can give you a larger more even spread of light, whereas with one light you might have some fall off around the edges that you need to clean up in post-production. So I usually stick to two lights unless I’m on location somewhere and space is tight.

Conclusion

So I hope you all found this article helpful and you can use the lighting setups for your headshot. I look forward to your comments and questions!

The post 3 Lighting Setups for Photographing Headshots by Dennis Drenner appeared first on Digital Photography School.


Digital Photography School

 
Comments Off on 3 Lighting Setups for Photographing Headshots

Posted in Photography