RSS
 

Posts Tagged ‘Guidelines’

8 Simple Guidelines for Capturing Spectacular Sunrise and Sunset Images

24 Jan

The post 8 Simple Guidelines for Capturing Spectacular Sunrise and Sunset Images appeared first on Digital Photography School. It was authored by Tim Gilbreath.

8 simple tips for stunning sunrise photography and sunset photography

When we are asked to think of popular subjects for landscape photography, images of beautiful sunsets and sunrises immediately come to mind.

What outdoor photographer worth their salt doesn’t have at least a couple of images of the sun dipping below the horizon?

In most people’s minds, sunrise and sunset photography is an easy thing to capture; the beauty and scale of the event itself should carry the photo, with minimal interaction from the photographer.

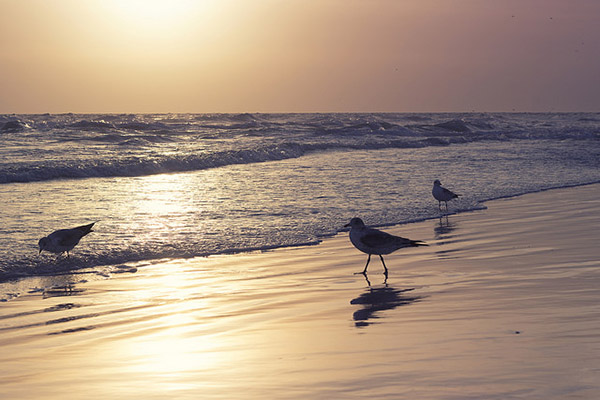
three birds at sunset

But is this really the case?

Unfortunately, it’s not. Unless you’re relying on luck alone, you’ll need to possess a few seeds of knowledge (eight, in this case!) to get you started capturing that epic sunrise or sunset.

None of these guidelines are difficult to comprehend, and they can all vastly improve your chances of properly capturing one of Mother Nature’s most incredible events.

So let’s jump right in!

1. Scout the location

As tempting as it is to just show up at a convenient location and start shooting, you greatly increase your chances of success by planning your sunrise or sunset photoshoot in advance. The first thing you’ll want to determine is the best location from which to shoot.

Pick a location that is out of the way of road and foot traffic, where you’re unlikely to be disturbed. Go to the location in broad daylight before the shoot, and ensure your view of the horizon will be unobstructed and free of any hazards.

The most important factor after the location is the time of day. Obviously, this will vary depending on whether you’re capturing a sunrise or a sunset.

But start by checking the weather. If your shooting time coincides with an approaching or recently-ended storm, the results can be staggering. Rain and storm clouds can add a dramatic layer of dimension to the scene.

You can also pinpoint the perfect time to shoot with an online tool or smartphone app that will display precise sunrise and sunset times for your location. Many low-cost (and sometimes free) solutions are available, including PhotoPills (for Android and iOS), and The Photographer’s Ephemeris (for Android and iOS).

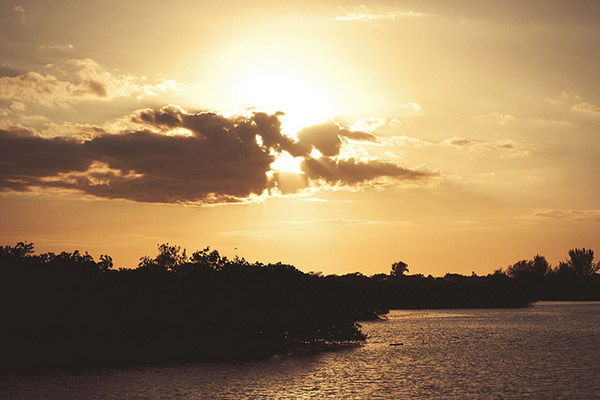
sunset photography over lake

2. Sunrise or sunset?

If you’re familiar with color temperature, you’ll know that there is a slight difference in the appearance of light at sunset versus sunrise. Early morning light tends to be cooler (higher blue) than light in the late evening, which leans toward warmer color casts consisting of orange and red.

Since there are different color temperatures at work here, you might need to adjust your photos, depending on the look you’re after. You can do this through your camera’s white balance settings, through warming or cooling filters, or via adjustments in post-production – where you’ll need to add or remove warmth to achieve the perfect final photograph.

Be aware that physical filters placed over your lens will degrade image quality slightly, because they’re an additional obstacle for light to pass through, so adjusting color temperature with camera settings or in post-production is often the better choice.

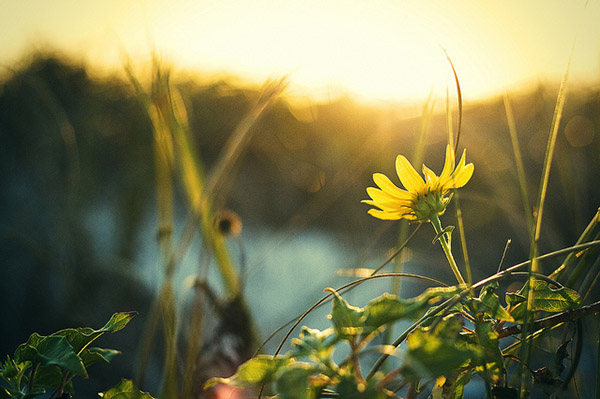
sunflower sunrise photography

3. Plan your shots

Another important step to accomplish before heading out is to plan what you hope to achieve in your sunrise or sunset photo.

Ask yourself:

What look are you going for? Will you capture a definitive subject lit by the sunlight, or will the sunset itself be the star of the show?

Planning beforehand is also a great time to determine any other special considerations, such as whether you’ll be shooting an HDR (high dynamic range) photo.

If you do decide to use an HDR technique, you’ll need to prepare your camera for bracketed exposures to capture the full range of tones in the scene.

But while HDR can be a bit tricky to pull off, it’s a great way to produce some truly dramatic images!

4. Gather the proper gear

You can’t capture the right shot without the right gear, so make sure you have everything ready to go before you head out.

First and foremost, you’ll want to bring your tripod. Sunrises and sunsets are potential low-light situations (depending on the part of the sunset you’re trying to capture), so you’ll need a steady base for your camera.

Second, you’ll want to determine the right lens to use for the shoot. While beautiful landscapes can be captured using a 50mm to 85mm focal length, a wide-angle lens is preferred, including any zoom lenses that can shoot at 40mm or below. If you have a prime lens in the 12mm to 40mm range, you’ll have a better chance of capturing an even sharper image, and using a wide-angle lens will allow you to capture a vast, sweeping portion of the scene.

Do you own and use screw-on filters for your camera?

Although using filters can degrade image quality a bit, some can be useful here. A GND (graduated neutral density) filter, for instance, will darken the upper portion of the sky and keep it well-exposed and dramatic, even without HDR techniques.

A polarizing filter, on the other hand, may actually be a hindrance in these situations, so I recommend you avoid them. 

(Polarizers reduce the amount of light coming in to the sensor, further increasing the required exposure time, which may not be ideal if you’re trying to freeze motion, such as ocean waves.)

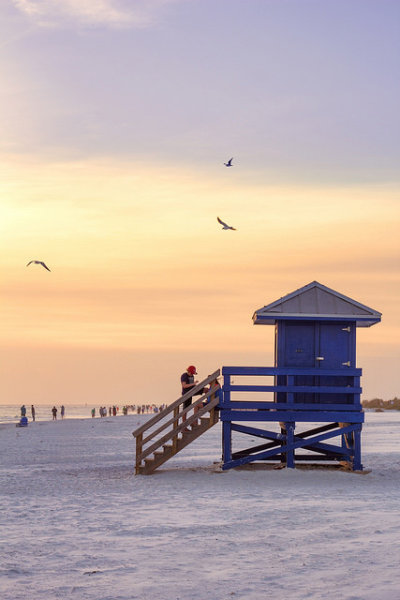
lifeguard at sunset

5. Use the right settings

Before you even arrive at your photoshoot destination, you can choose the settings on your camera.

Since you’re shooting a landscape image, you’ll want to use a smaller aperture, such as f/8, f/11, or even higher, to maximize the depth of field and capture sharp detail throughout. If you’re using a tripod, this shouldn’t be a problem.

Although you can shoot in Manual mode, I personally prefer to shoot almost everything in A/Av (Aperture Priority mode). This way, I can lock in my aperture and let the camera choose a proper shutter speed. Since low-light situations like this can confuse the camera and you run the risk of overexposure, you can always use your camera’s exposure compensation settings to drop the brightness a bit.

If possible, you should use a low ISO, such as 100 or 200, to ensure there isn’t a lot of noise in the final shot. This should be very achievable if you’re working with a tripod. However, if you’re hand-holding your shot, you will need to bump the ISO up to get a shutter speed that’s fast enough to avoid a blurry photo.

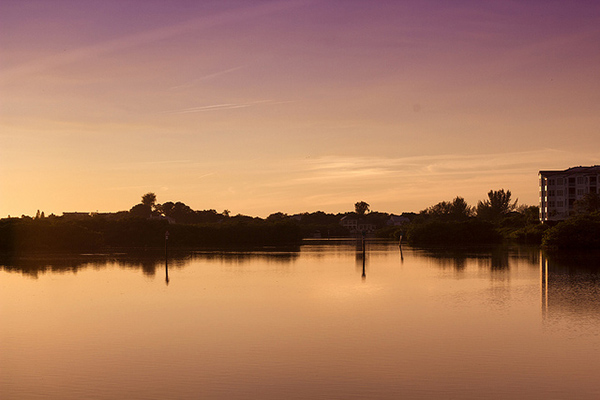
inlet sunset photography

This is also the time to choose your white balance, and as I mentioned above, you can use this setting to boost (or reduce) the warmth of your shot. If you’re after a warm, orangish image, set your white balance to the Shadow, Cloudy, or Daylight option.

And, of course, always shoot in RAW! To a certain extent, shadows and highlights that are lost in a shot can be recovered in post-processing later – but only if you have a RAW file.

6. Compose for interest

Now that the preparation is over, we get to the fun part! Once you’re on location and are ready to take the shot, you’ll need to consider your composition.

The most common error when shooting sunsets or sunrises is positioning the horizon exactly in the middle of the photo. While this can work, it normally causes a bit too much symmetry and can make the picture uninteresting.

Take a moment to look your scene over. Ask yourself: What part of the sunrise or sunset is the most dramatic? Are there any parts that aren’t that interesting?

Once you’ve done this, simply compose the shot to include more of the most dramatic scenery. If you have an angry, cloudy sky that accentuates the sunlight, let that occupy the upper two-thirds of the scene. If you have an interesting foreground or landscape but a less intriguing sky, let that occupy the bottom two-thirds of the image.

You want to draw the viewer into the composition, then let their eyes drift to the most dramatic part of the image.

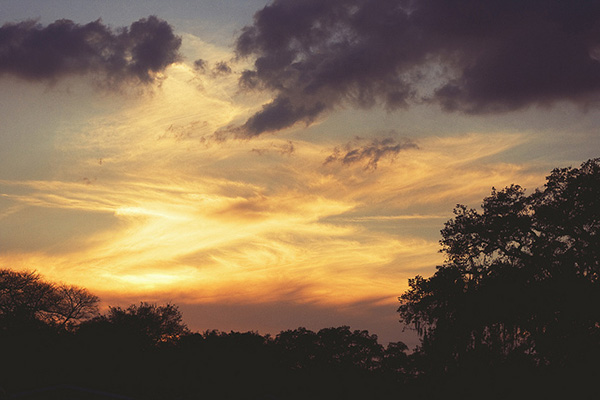
sunset photography over trees

7. Waiting for the right shot

If you already have experience shooting landscapes, you know that sometimes waiting is the name of the game. Because of the dynamics of natural lighting, a scene can completely change from one hour to the next – and sometimes even from one minute to the next.

That’s why a sunrise or sunset shoot is the time to be creative! Try different exposure times and play with your exposure compensation settings for different tones. Let the clouds and sun change positions, then reshoot, or try a slightly different angle.

Maybe even include additional subjects in the frame, and shoot them in the foreground against the sunrise or sunset. The longer you’re at the location shooting, the more variety you’ll end up with!

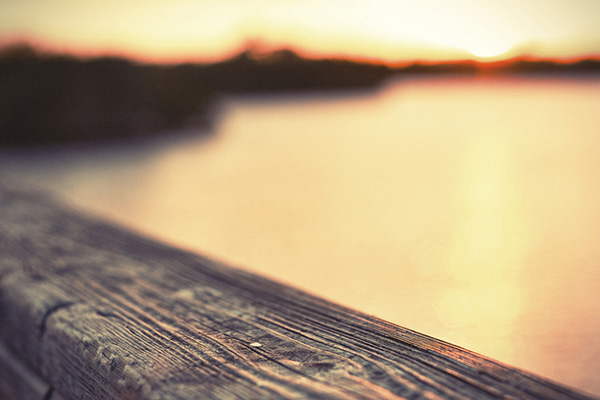
pier close-up at sunset

8. Don’t leave too early

One of the most common tips you’ll hear regarding sunset photography is to stick around after the sun dips below the horizon.

This is certainly good advice, as the entire dynamic of the scene changes after sundown.

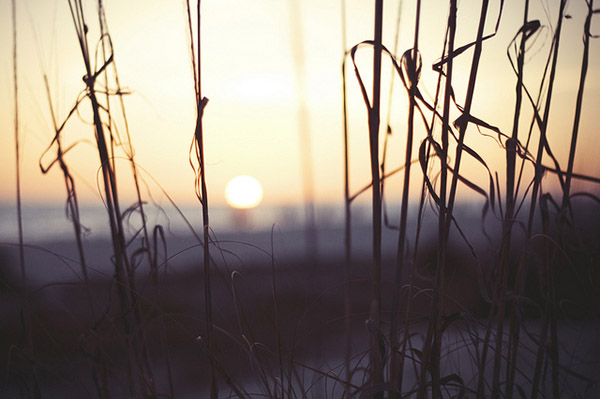
grasses at sunset

Specifically, the tones, colors, and hues in the sky often become more saturated and dramatic. You’ll need to compensate for the loss of your main source of light, probably with a tripod – but it’s hard to deny some of the most beautiful images can be shot right after the sun is out of sight.

8 simple guidelines for sunrise and sunset photography: Conclusion

Now that you’ve finished this article, you should be ready to capture some stunning images at sunrise and sunset!

So get up early, stay out late, and create some gorgeous photos.

Now over to you:

Do you have any beautiful sunset or sunrise photography you’d like to share? Post it in the comments below!

The post 8 Simple Guidelines for Capturing Spectacular Sunrise and Sunset Images appeared first on Digital Photography School. It was authored by Tim Gilbreath.


Digital Photography School

 
Comments Off on 8 Simple Guidelines for Capturing Spectacular Sunrise and Sunset Images

Posted in Photography


14 Guidelines for Photographers to Live By

17 Dec

The post 14 Guidelines for Photographers to Live By appeared first on Digital Photography School. It was authored by John McIntire.

guidelines for photographers to live by

It doesn’t matter if you’re brand new to photography or a seasoned pro with decades of experience; at some point or another, you’re going to develop some habits and behaviors that are counterproductive.

Without getting these habits in check, they can have a negative effect on your photography, whether on your portfolio in general, your love for the medium, or your workflow. Sometimes these behaviors can even be destructive to other people in ways you didn’t realize.

In this article, I’ll share 14 guidelines for photographers – designed to deal with some of these counterproductive behaviors and habits that I’ve come across.

Now, none of these are rules, and I am not presenting them as such. If you feel that a guideline doesn’t apply to you, I am not saying or implying that you are wrong for feeling that way. These are merely my thoughts based on my experiences.

So without further ado, here are 14 guidelines for photographers to live by.

1. Shoot often, show few

guidelines for photographers Lightroom catalog
Whether you shoot 10 photos at a time or 100, try to whittle your portfolio down to the very best and only show those.

One of the best things any photographer can do for their portfolio is reduce the number of images from any given session that they share with the public. By showing only the very best of your work, the quality of your portfolio and its impression on your viewers will increase.

Let’s say that you have a portrait session, and you normally share 10-15 photos from a set. All of the images might be good, but chances are that one or two of those images are much better than the rest. By sharing every photo, you are only diluting the quality of the best ones. Instead, only share the very best shots – this is what will make them shine.

Of course, it also means that you will have fewer images to share. How do you counteract this deficit in content?

Shoot more!

Now, this doesn’t mean you should shoot more images of the same subject. It means you should shoot more in general. For instance, if you’re a portrait shooter, then you should conduct more portrait sessions with more people.

This will give your portfolio more variety, as well as ensuring that you have plenty of images to share.

2. Shoot outside your genre

guidelines for photographers architectural black and white
As a portrait photographer, long exposures of buildings in the middle of the day are way outside my normal range. Shooting outside your niche every once in a while can help to give you realizations that you wouldn’t have come to otherwise.

Canon 5D Mark III | Canon EF 16-35mm f/4L IS USM | 35mm | 326s | f/11 | ISO 100

Even if you don’t specialize in a single particular niche with your photography, you will probably wind up shooting the same genre (or a couple of genres) over and over again.

While you may be perfectly happy photographing the same subjects repeatedly, you also might start developing habits that guide how you photograph things. When you get set in your ways like this, it can become increasingly difficult to shake those systems and try things in new ways.

One way to counteract this is to shoot in a genre outside of what you normally photograph. Photographing subjects that require a completely different skill set than what you are used to will force you to actively think about what you are doing instead of going through the motions. This has helped me to come up with a solution to an unrelated problem more than once, as it helps you think about things from a completely different angle.

Shooting outside of your genre can also act as something of a palette cleanser. As a portrait photographer, when I do a long stretch of shooting nothing but portraits, it can feel a bit monotonous and stale. Getting out and shooting a landscape feels like a breath of fresh air and helps get me excited about portrait photography again.

3. Share your knowledge

guidelines for photographers portrait thumbs up
Sharing your knowledge with other photographers (whether it’s lighting setups, post-processing techniques, or general camera-craft skills) can help to reinforce your own knowledge and strengthen the community.

There’s an old negative cliché about photographers shutting down when asked how something was done (and mentioning the words “trade secret”). Fortunately, I haven’t noticed any of this in recent years, and things have opened up quite a bit. That’s a great thing for everybody.

Don’t be afraid to share what you’ve learned. Not only will you be able to help someone else, but the act of trying to communicate something to somebody else only reinforces your understanding of it.

Everybody wins here. And I genuinely believe that when one of us grows, we all grow.

4. You are not special, so don’t act like it

person with camera
Hey, look at me! I have some fancy equipment. Perhaps I should lord that over others who don’t! No, that is definitely not what you should do.

The barriers to entry for getting started in photography are lower than ever. The only thing that could be considered a real barrier is money, but only if you want to go all-in from the start and buy the fanciest camera and lenses.

Ultimately, this means that there’s pretty much nothing stopping anyone interested in photography from getting into it.

So owning a camera does not make you special. Calling yourself a photographer does not make you special. Having a great portfolio opens doors that other photographers can’t access, but it still does not make you special.

All too often, there are stories about photographers treating other people like dirt, acting entitled in public, and trashing landscapes. Photography forums can be some of the most toxic places on the internet. Yes, I know the vast majority of photographers aren’t like that, but it doesn’t excuse the poor behavior of the minority.

There is no reason to act that way. Be respectful to people. Be polite. Contrary to another old cliché, your photos do not speak for themselves, and acting decent will only help to strengthen people’s impression of your photography.

If you don’t want to be decent and you choose the other route, you may find that it closes a lot of doors – and there are a hundred other photographers right behind you, ready to take your place.

5. Learn constantly

model in studio with flash and continuous lighting
Make it a point to learn new things. Here, I was trying to see what happened if I mixed flash and continuous lighting. The troubleshooting that followed gave me a better understanding of my equipment.

This is one of those things that is preached often in all walks of life and is critical for photographers to remember.

The world of photography is constantly changing. New technologies make it easier than ever to create images and get them out in the world. Therefore, new techniques and methods are popping up all the time.

By ensuring that you put regular effort into learning new skills (or into reinforcing old ones), you will stay ahead of the curve as things continue to change. Not only will this help improve your photography, but it will also help to enhance the skills that you already have. Things will take less time, and you will get more efficient.

By the way, this doesn’t just apply to image-making. It also applies to other important aspects of photography, such as marketing.

6. Do the things you’re sure won’t work

person with busy background
Before I set up this shot, I was certain the background was too busy, but I liked the light. I was right about the background, but what did it cost me? A bit of memory and a few minutes, plus there was always the chance that I could have been wrong.

As you learn new things, you are going to have a lot of ideas.

Many of those ideas are going to be ridiculous. There’s no way they could ever work out.

So do them anyway.

Taking on difficult, unlikely, or even impossible challenges is one of the fastest ways to learn. To get what you want, you must put your problem-solving skills through their paces. Even if the result isn’t up to scratch, you will almost certainly have learned something from the process that you can use in the future.

This is something I wish I had learned much sooner than I did. Take those crazy ideas and run with them. If nothing works out, don’t show anyone!

7. Embrace clichés

guidelines for photographers shoot what you want, even iconic views
This view of Staithes has been photographed by just about every photographer who has ever set foot here. It’s about as clichéd as cliché gets. Does that mean you shouldn’t bother taking your own shot? No, not at all. Shoot whatever you want and enjoy it.

Canon 5D Mark III | Canon EF 16-35mm f/4L IS USM | 28mm | 1/30s | f/6.3 | ISO 400

Okay, I can already hear you groaning, but hear me out.

Every genre in photography has concepts that have been shot over and over again by just about anybody that’s ever picked up a camera.

It doesn’t matter if we’re talking about portraits, landscapes, wildlife, or any other genre. If you need a visual example, search any photosharing site for “Derwent Water.” This is a lake in England’s Lake District National Park. What you should find is the exact same shot of a certain jetty a couple of thousand times over. Want another example? Search for “Skógafoss.”

So what?

Have they been done to death? Yes, definitely. Should you go there and take the same photo if you want to? Yes. Absolutely.

Should you take photos of birds perched on sticks? Should you take pictures of interesting doors? Should you take photos of swaddled newborns? Should you take photos of a ring on a book so the shadow looks like a heart?

Do you want to? Then the answer is “Yes.”

When it comes to clichés in photography, photographers get bored with them because we see them all the time. What you have to ask yourself is why they have become clichés in the first place. What has drawn people to photograph these things again and again? The answer is usually because they resonate with an audience.

In other words:

These things are clichés because people love them.

The audience for your photography should not be photographers (more on this later), so don’t be afraid to shoot something you like, or that might resonate with your viewers, even if another photographer might brand it as clichéd.

8. Shoot for fun

have fun taking photos guidelines for photographers
Going out and taking photos for the sheer pleasure of taking photos is a great way to help ensure that your interest remains fired up.

Once you’ve been doing photography for a while, it is likely that, at some point, it’s going to stop being fun for one reason or another. This happens all the time and it usually happens more than once.

This can result in a lack of motivation that can lead to feelings of contempt for a hobby you used to love.

To help stop this process before it starts, regularly shoot something just because it would be fun to do so. You don’t have to use the images for anything, but doing fun photoshoots will help make sure you are still connecting with the reasons you got into photography in the first place.

If you’re already experiencing a lack of motivation, do whatever you can to make sure that, the next time you pick up a camera, it is to do something solely for the sheer pleasure of photography.

9. Strive for consistency

consistent Lightroom catalog
Being able to provide a consistent output using a range of techniques is a good goal to strive for.

A consistent output might just be one of the most underrated things a photographer can focus on.

To be clear, in this instance, I am talking about consistency in quality. I’m talking about ensuring that every time you pick up a camera for a purpose beyond self-gratification, you are producing the best photos you can with a variety of techniques.

(There is a lot of value in consistency of style and presentation across a portfolio, but that is another point for another time.)

It will not serve you well as a photographer to have a well-curated portfolio that you show to potential clients if you are unable to reproduce the same quality of photos over and over again.

Having a good portfolio is only the first step. If you get something good that you feel is portfolio-worthy, hammer down the techniques and make sure you can get similar results whenever you need to.

10. Learn to love the process, not the output

model lit by softbox
Once you put an image out into the world, you have zero control over how it is received. Instead of worrying about how other people react, focus on and learn to love the process instead of people’s reactions.

Is there a part of the image-making process that you don’t like? Perhaps retouching? Early sunrises? Do you just slog through it to get to the end result? Have you gone through steps you don’t like to get an image that you love, only to upload it somewhere or add it to your portfolio and find that it gets no response, or that people hate it?

I suspect something similar has happened to every photographer at one point or another. But what do you do when an image or a body of work doesn’t get the response you like or the one you expect?

Nothing. There is nothing you can do. You cannot control how other people react to things. If you can learn to accept that the only thing you can control is the process of creating the image, and then learn to love and focus on that process, you will be able to detach from the things you can’t control.

When the inevitable does happen and you don’t get the response you expected or wanted, you can shrug it off and move on to creating the next image.

11. Embrace harsh feedback

dog jumping in a field
This is one of my most favorite images. I wouldn’t change it for the world. Yet if I put my photography cap on, I can nitpick it until the end of time. That’s good. I can still love this image and know to look out for things I could do better (like the awkward crop, the overly contrasty subject/background, and the slightly too-slow shutter speed) in the future.

One of the fastest ways to learn as a photographer is to solicit feedback from other photographers. Often, the best sort of feedback can also be the harshest, and it can be utterly deflating. Have you ever asked for a critique only to receive a huge list of errors? It can feel soul-crushing, especially to a new photographer. Unfortunately, embracing that sort of feedback remains one of the best ways to improve fast.

The trick is to learn how to detach from the emotional attachment you have with the image you created.

How do you do this? I wish I could say. The answer is different for everyone. Once you have managed to do it, you’ll find it much easier to take on even the harshest feedback.

Now, harsh feedback does not always mean good feedback. A critique should never include prescriptive mandates, personal attacks on character or motivation, unsolicited criticism, or abusive comments toward people in the images.

Also, take statements such as “I would have done such and such” with a grain of salt and judge their relevance on a case-by-case basis. If you come across any feedback like that, feel free to ignore it. The sort of person who behaves in that way does not have you or your photography in their best interests. They are only stroking their ego at your expense.

12. Don’t force your ways onto others

model in front of lights
In the studio, I like to bring the lights in as close to the subject as I can. This works for me, and I encourage other photographers to try it. Does that mean it’s the right way to do things? Not a chance. It’s one of a million ways and none of them are the single right way.

As photographers, we learn in different ways from different sources at different speeds. And we take the bits that work for us and apply them in a way that gets the results we want.

Everybody is different. It doesn’t matter if we are talking about lens choice, lighting choices, or retouching techniques. There is no right way, or proper way, to do anything in photography.

The only right way is the way that gets the job done.

I like to do my dodging and burning on separate gray layers. Other photographers like to do dodging and burning with curves layers. There are about a dozen other options that I can think of that all result in the same thing. It doesn’t matter what your preference is. If someone prefers a different method to you, great.

Yes, you can and should advise others on how you go about things; that’s all a part of sharing your knowledge, after all. Just try to leave the prescriptive mandates such as right and proper out of it.

13. Stop marketing to photographers

If you are trying to get attention for your photography and you want to build an audience, then there is one demographic you should stop targeting:

Photographers.

Photographers rarely buy photography. A lot don’t even consume it for any reason other than comparison. Sure, peer recognition and validation feel nice, but when it comes to getting your work out there or starting a photography business, it has very little tangible value.

It’s as simple as that. Instead of posting your images where only photographers see them, look for the places where people are interested in the sort of subjects you cover.

Is this easy? No. If marketing were easy, then we’d all be rich and famous!

14. Your work is neither as good nor as bad as you think it is

portrait of woman with red top
To be honest, my own impression of my photography is not great. It goes with my overly self-critical nature. Whenever my images place in a contest (as this image did), it always comes as a surprise. It is hard to have an objective view of your own images.

Canon 5D Mark III | Canon EF 50mm f/2.5 Macro | 50mm | 1/125s | f/6.3 | ISO 100

Most of us don’t have a good grasp on how other people see our work.

Some photographers think everything they produce is fantastic. Some think everything they produce is utter rubbish. (Before anyone asks, I’m in the “utter rubbish” category.)

The problem is that we, as humans, are rarely objective judges when it comes to ourselves, and both extremes have serious downsides to them.

For the more confident personalities, it can be disheartening or downright depressing to think a photo is great only to have it be rejected by a wider audience. If this happens enough times, it can spell the end of your passion for photography.

For the self-critical camp, that’s only the beginning of the battle. I mean, what’s the point in even trying when you know that whatever you do is going to wind up terrible, anyway?

If you fall into one of these extremes, one answer is to try your best to remove any self-judgment from the process, good or bad. Try to come at your images with an analytical approach, and as mentioned above, focus on the process – because you have no control over how anyone else might react.

14 guidelines for photographers to live by: Conclusion

I hope this article has provided you with some food for thought on how some of the habits and tendencies we can develop as photographers negatively affect our output.

Even if you feel none of this applies to you, I hope you can see how evaluating your habits can lead you to a deeper understanding of how what you do and think affects your photography.

So remember these 14 guidelines for photographers; that way, you can learn and grow as much as possible.

Now over to you:

Are there any guidelines that I missed? And are there any additional negative behaviors that you often witness from photographers? Share your thoughts in the comments!

The post 14 Guidelines for Photographers to Live By appeared first on Digital Photography School. It was authored by John McIntire.


Digital Photography School

 
Comments Off on 14 Guidelines for Photographers to Live By

Posted in Photography


Guidelines for Creating Your Photography Contract

23 Apr

The post Guidelines for Creating Your Photography Contract appeared first on Digital Photography School. It was authored by Darina Kopcok.

Guidelines for Creating Your Photography Contract

If you’re any level of a photographer working with clients, you need to have a contract.

When photo jobs go awry, it’s often due to a lack of communication.

A contract protects not only you but also your client in the event of any unmet expectations.

Here are some inclusions you may want to consider.

Who is the agreement between?

First of all, you need to state clearly who the contract is between and identify each party. You can identify yourself as “the Company”, and your client as “the Client.” The photo shoot itself can be referred to as “the Event.”

Note that the agreement supersedes any prior agreements between the parties, and that the only way to add to the agreement is to do so in writing, and that this amendment must be signed by both parties.

In short, if anything changes between the signing of the agreement and shoot day, you’ll need another contract.

What are the reservations?

You should have a section on your contract about the Reservations.

This means you note the date the shoot is scheduled for, and your policies about rescheduling, postponement and cancellation.

Make sure the client is very clear on the consequences of any of these changes.

For example, many photographers require a 50% non-refundable deposit in case of cancellation, so they don’t miss out on potential work that could have been booked that day.

Photography Contract - Darina Kopcok-DPS

Safety

I recommend having a section that notes that you as the photographer/company have the right to terminate coverage and leave the location if you experience inappropriate, threatening, hostile or offensive behaviour from a person at the event that calls your safety into question. This may be a rare occurrence, but it’s worth putting into your contract so you can assert your rights in case you’re a victim in an unsafe situation.

This could be relevant to a female wedding photographer being harassed by drunken guests, for example.

Shooting time and additions

Note that shooting time commences at the scheduled start time and ends at the scheduled time, regardless of when the client shows up. If a client is very late, then the shoot goes to the agreed upon time and no later.

I also highly recommend that if you’re a commercial photographer, that you state clearly that the client or a representative from their company must attend the shoot to provide creative direction and approve the final images.

You’re not responsible for the final aesthetic if they are not there to provide feedback and approval.

Furthermore, reserve the right to cancel the shoot and retain the deposit if the client or their representative does not attend.

Seriously. This happens.

Photography Contract -Darina Kopcok-DPS

Expenses incurred

This is where you might note that there could be additional expenses incurred that may not be part of the original quote, such as parking, props on a fashion or product shoot, or groceries on a food shoot.

These kinds of expenses are usually TBD (to be determined) and not part of the initial estimate. This should be made clear up-front so you don’t end up taking a cut from your earnings to cover these things.

Responsibilities

You are responsible for a lot on a shoot, but certain things are unforeseen and out of your control. Things such as obtrusive staff, lateness of the client and staff, the weather, schedule complications, incorrect addresses provided by the client, or restrictions of the chosen location.

Venue and Location Limits

Unless you’re shooting at your studio or a rental, the client is usually responsible for providing an appropriate place for the photographic work to take place.

If the venue is found to be limited in space or otherwise hinders you from carrying out your work in a safe manner (or one that doesn’t allow you to produce the desired result), reserve the right to request moving to another location or cancel the shoot without penalty.

Permits

Who is responsible for securing permits?

The second you put a tripod down in a public place, you can very likely get asked to move along by a police officer or other type of city official. This can be disastrous on a commercial shoot where the location has been scouted and is essential to the storyboard or narrative of the final images.

Permits can take some time to secure, so keep this in mind if this job falls on you.

Photography Contract -Darina Kopcok-DPS

Film & copyright

The photography you produce for a client still belongs to you, as the creator of those images. A lot of clients think the images belong to them because they are paying you money to produce them. They need to be educated on copyright.

In the commercial world, clients commission you to produce photos that align with their brand. They then pay you a separate fee to license those images for a specific use and time frame.

You should have a separate Usage Agreement in addition to your contract that outlines usage parameters.

Limit of liability

In the unlikely event that you are not able to perform to the guidelines laid out in the contract due to injury, illness, an “act of God,” or another event outside of your control, you should not be held responsible.

You should, however, make every effort to reschedule the shoot. If this isn’t possible, then ordinarily all payment received for the event should be returned.

If digital files are lost, stolen, or destroyed beyond your control, including but not limited to hard drive or equipment malfunction, your liability is to return all payments.

The limit liability for a partial loss of originals should be a prorated amount of exposures lost based on the percentages of the total number of originals.

Capture and delivery

You are not liable to deliver every image taken at an event or shoot.

The number of final files to be delivered is up to the photographers discretion or is based on an agreement made between the photographer and client before the signing of the contract.

In this section, you can make a note of when you’ll be delivering the files by and how they will be delivered, such as JPG or TIFF files.

Photography Contract -Darina Kopcok-DPS

Post-production and editing

The final post-production and editing styles, effects, and overall aesthetic of the image are at your discretion unless you’re working on a specific type of job where the editing will be done in-house, say by a magazine or ad agency.

Nothing is worse than working hard on editing and then having clients put crazy Instagram filters on your images. Prohibit any alteration to your photographs unless there is an agreement with the client as to what those alterations will be, like putting text on a photo.

Payment schedule

If you’re asking for a deposit (and I hope you are), make sure to put that in your contract.

How you manage payment for the remainder is up to you. Many photographers allow thirty days for receipt, however, any late payment after that is subject to interest – usually 15-18%.

Also, note a policy around any NSF charges and if there are any consequences the client needs to be aware of in terms of not paying on time.

For example, you can state in your contract that non-payment after three months is subject to legal action.

Pricing

At the end of the agreement, I suggest that you lay out the agreed upon pricing.

If you don’t have a separate usage agreement, you can include the usage terms here.

For my commercial work, I typically don’t give my clients a usage agreement until the images have been paid for in full and prohibit the use of my images until then.

I find this works well for me. Clients should not be using your images publicly unless they have paid for them, or it is a violation of your copyright.

I even state this term on my invoices and draw their attention to this in my email communication upon sending it.

Some clients can take a long time to pay you unless you draw specific boundaries around payment and the use of your images.

Photography Contract -Darina Kopcok-DPS

Signature field

There should be an area where both you and the client can sign and date the contract.

It’s best if you use electronic signature software such as Hello Sign so that clients don’t have to spend their time physically downloading and scanning a signed contract back to you. Everyone is busy, right?

If you use a CRM software, it may already offer such a feature. For example, I use Dubsado, which is a CRM system for creatives. I can send clients emails and contracts directly from within the user interface.

I have all the other features of a client management system for around the same price I would have to pay for signature software alone.

In Conclusion

Hopefully, this has given you some idea of what you can put in your contract.

Be sure that your contracts are dated and signed before you consider a job booked.

Go over them with the client and make sure the terms and conditions are understood. A lot of people don’t bother to read stuff before they sign it and you don’t want to deal with any surprises.

Please note that this post is for educational purposes only and doesn’t constitute legal advice, as I am not a lawyer and cannot advise in that capacity.

To make sure that any or your contract or written agreements are legally binding, and will cover you in an event of a discrepancy, please contact an attorney.

The post Guidelines for Creating Your Photography Contract appeared first on Digital Photography School. It was authored by Darina Kopcok.


Digital Photography School

 
Comments Off on Guidelines for Creating Your Photography Contract

Posted in Photography


5 Guidelines of Minimalist Photography to Help Improve Your Work

18 Jul


Minimalism is one of those movements that some people see as a recent fad or newfangled things, like fidget spinners or man buns. In reality, minimalism is a true case of making what was once old new again, and unlike the aforementioned man bun, that’s a good thing.

In photography, minimalism is an obvious visual statement; the story of the photograph is simplified, elements are reduced, and clean space is added. Not only has minimalist photography become its own genre (you can see some excellent examples of minimal imagery here), but photographers specializing in the discipline have come into their own, creating a revitalized, attractive space of art for us all to enjoy.

5 Guidelines of Minimalist Photography to Help Improve Your Work

Minimalism (even in photography) isn’t new. Before the term became ubiquitous and synonymous with “new” and “clean”,  the style existed in various forms under other names. It has had a profound and positive influence on photography as it exists in the modern world.

But do you have to fully embrace specializing as a minimalist photographer to benefit from the advantages of the style? Absolutely not! Each of the tips below can work for almost any kind of photography. Let’s explore some of the guidelines and see how you can apply them to your own work, regardless of genre or type.

#1 – Make the story concise

As with any photo, the story is the most important thing to convey to your viewer. In minimalism, you want to tell that story as efficiently as possible. That means clean backgrounds, negative space where appropriate, and a well-defined subject.

We will discuss background and separation of the subject in more detail below, but generally, you don’t want any distracting elements in ANY photograph. Keeping your background clean, whether through blurring, or using a solid color or simple texture can remove any unwanted distractions.

5 Guidelines of Minimalist Photography to Help Improve Your Work

Negative space is defined as the margin around your subject and other important objects in your composition. Properly used, this space accentuates what you actually want the viewer to deem as most important in the photo.

When looking through the viewfinder at a potential shot, take a moment to get a feeling of the complexity of what you’re seeing. If the composition feels muddy or hard to discern, recompose your image to include some extra negative or white space around your subject.

#2 – Isolate the subject

Wide-open apertures along with proper positioning of the subject to background tend to make smooth, creamy backgrounds, separating it from the subject of the photo. This is right up the minimalist’s alley. Having a solid or smoothly blurred background really isolates what you want to highlight in the photo, and keeps the viewer’s eye from being overrun by more complex patterns to distinguish.

5 Guidelines of Minimalist Photography to Help Improve Your Work

In some photos, you may not want that blurred effect on your background. Many landscape photos, for example, are shot using stopped-down apertures such as f/11 or f/16, because you want most of the scene in focus. This is because, in those situations, the entire scene can be the subject. In those situations, using color or patterns are other ways of separating the subject from your background.

But many other types of photos, especially nature and portraiture, benefit greatly from a wider aperture and using that to create separate layers in the image. Experimenting with the effects that aperture and distance have on that separation can provide many different looks for the same composition.

#3 – Use color to your advantage

One of the most powerful methods of constructing a minimalist image is by using color to create a contrast. While you don’t necessarily have to go to the extremes that you would in a completely minimalist photo, picking two or even three colors that juxtapose well with each other and featuring them prominently in the textures of the image can improve the attractiveness of the shot.

While minimalist photographs tend to use large areas of solid contrasting colors to establish simplicity, other photography can benefit by keeping the color palette small and using colors that work well together or invoke a particular feeling in the viewer. For example, I find one of the most intriguing and pleasing color combinations to the eye to be blue and red, as in this example of the old red rowboat on the shore (bel0w).

5 Guidelines of Minimalist Photography to Help Improve Your Work

Using a color wheel (as shown below), you can identify color harmony, which are complementary color combinations that are pleasing to the eye. Then try to use those color combinations in your images.

Color wheel

Diagram by Wikipedia contributor Jacobolus

#4 – Embrace leading lines

Because minimalist photography tends to feature very simple compositions, lines and textures are often used to improve upon storytelling and point the viewer in the right direction. Finding natural leading lines in your compositions can help guide the eyes of the viewer where you want them to go, which allows you to minimize the number of elements in your photo needed to tell the story.

5 Guidelines of Minimalist Photography to Help Improve Your Work

Lines can be found everywhere; train tracks, roads, sidewalks, and buildings are just a few examples. While they are easy to find, it is just as easy to misuse them and confuse the viewer. If the line is easy to pick out, then it should lead the eyes somewhere relevant. Lines should not lead the viewer randomly away from the subject, or out of the frame with no real destination.

#5 – Find texture and use it

Texture can be a powerful element in a photograph, especially when an entire image is built around it. Obviously most often used when shooting subjects in the natural world around us, textures are a tool that can communicate many things to the viewer, including emotions, mood, light, and darkness.

Because of the limited language of minimalism, texture itself is often used as the subject, usually in the form of repeated patterns. All photography, however, can benefit from its strategic use. What is the effect when the subject features a consistent, repeating texture, as opposed to one that consists of an uneven texture made up of objects of varying size and smoothness?

5 Guidelines of Minimalist Photography to Help Improve Your Work

Texture is a great way to put a large, consistent element in your image without introducing too much distraction.

Can millions of grains of smooth beach sand, saturated with ocean water, serve as a different backdrop than a large area of broken shells and sand mixed together? What type of effect will this have on the viewer’s perception of the image?

Conclusion

As photographers, regardless of skill level, we are destined to be students of an innumerable amount of subjects. We must constantly keep learning, and apply the things we learn to our work, to keep innovating our style, invigorating our images, and keep our viewers interested.

While minimalist photography is very popular today and is an intriguing discipline, it’s not the chosen style for us all. But the ability to take the most important points from that genre and apply it to your own work is what elevates you as a photographer, and keeps you on top of your game.

What are your thoughts on the current state of minimalism, and its influence on art and photography? Is minimalism your favorite photography style? Have some minimalist images of your own to share? Let’s discuss this and more in the comments below.

The post 5 Guidelines of Minimalist Photography to Help Improve Your Work by Tim Gilbreath appeared first on Digital Photography School.


Digital Photography School

 
Comments Off on 5 Guidelines of Minimalist Photography to Help Improve Your Work

Posted in Photography


PIX 2015: Rick Sammon’s guidelines for getting motivated and staying inspired

07 Nov

Staying inspired as a creative, no matter the discipline, isn’t always easy. Some photographers work through creative droughts by starting 365 projects, while others look to photo groups and peers to help them stay accountable and keep shooting. Pro wildlife photographer Rick Sammon argues that all creatives – especially photographers – need some help staying inspired from time to time. Read more

Articles: Digital Photography Review (dpreview.com)

 
Comments Off on PIX 2015: Rick Sammon’s guidelines for getting motivated and staying inspired

Posted in Uncategorized


8 Simple Guidelines for Capturing Spectacular Sunrise and Sunset Images

26 Mar

When we are asked to think of popular subjects for landscape photography, images of beautiful sunsets immediately come to mind. What outdoor photographer worth his or her salt doesn’t have at least a couple of images of the sun dipping below the horizon? In most people’s minds, it is an easy thing to capture; the beauty and scale of the event itself should carry the photo, with minimal interaction from the photographer.

bird_trio

But is this really the case?

Unfortunately, it’s not. Unless you’re relying on luck alone, you’ll need to possess a few seeds of knowledge (eight in this case) to get you started in capturing that epic sunrise or sunset. None of these guidelines are difficult to comprehend, and can vastly improve your chances of properly capturing one of mother nature’s most incredible events.

1. Scout the Location

As tempting as it is to just show up at a convenient location and start shooting, you greatly increase your chances of success by planning the shoot in advance. The first thing you’ll want to determine is the best location from which to shoot.

Pick a location that is out of the way of road and foot traffic, where you’re unlikely to be disturbed. Go to the location in broad daylight before the shoot, and ensure your view of the horizon will be unobstructed and free of any hazards.

The most important factor after the location is time of the day. Obviously, this will vary depending on whether you’re capturing a sunrise or a sunset. Is there a storm coming? If your shooting time coincides with an approaching or recently-ended storm, the results can be staggering. Rain and storm clouds can add a dramatic layer of dimension to the scene.

Lastly, you can pinpoint the perfect time to shoot by using an online tool or smartphone app to determine precise sunrise and sunset times for your exact location. Many low-cost (and sometimes free) solutions are out there, including SunSeeker, Daylight Free, and the excellent Photographers Ephemeris to name a few.

sunset_article3.jpg

2. Sunrise, or Sunset?

If you’re familiar with color temperature, you’ll know that there is a slight difference in the appearance of light at sunset versus what you’ll see at sunrise. Early morning light tends to be cooler (higher blue) than light in the late evening, which leans toward more warm color castings consisting of orange and red.

Since we know there are differing color temperatures at work here, you might need to adjust for this, depending on what feel you’re going for, either through warming or cooling filters, or adjustments in post-production to add or remove warmth into the color profile of the final photograph.

Be aware that physical filters used on your camera will degrade image quality slightly, due to the addition of another obstacle for light to pass through between your subject and your camera’s sensor

daisy

3. Plan your Shots

Another important step to accomplish before heading out is to plan out what you hope to achieve in the photo. What look are you going for?  Is there a definitive subject lit by the sunlight, or will the sunset itself be the star of the show?

This is also a great time to determine any other special considerations, such as the possibility of shooting an HDR (High Dynamic Range) photo. If that’s the case, you’ll need to prepare your camera for bracketed exposures to capture the full range of tones in the scene. Since these type of scenes normally consist of bright spots and shadows, this is a great way to produce some truly dramatic images.

4. Gather the Proper Gear

Obviously you can’t capture the right shot without the right gear; so make sure you have it all ready to go before you head out. First and foremost, you’ll want to bring your tripod. Sunrises and sunsets are potentially low-light situations (depending on what part of the sunset you’re trying to capture), so you want a steady base for your camera.

Secondly, you’ll want to determine what lens to use for the shot.  Even though beautiful landscapes can be captured using a 35mm or 50mm focal length (for sensors with a 1.6 crop factor – 56 to 80mm on a full frame system), a wide angle lens is preferred, including any zoom lenses that can capture a length of 25mm and below (40mm on a full frame system).  If you have a prime lens at these lengths, you will have a better chance of catching an even sharper image.  Using a wide angle lens will allow you to capture a more vast, sweeping portion of the scene.

Do you own and use screw-on filters for your camera?

Although using filters can degrade image quality a bit, due to the addition of another obstacle for light to pass through between your subject and your camera’s sensor, there are some that could be useful here, such as a GND (graduated neutral density) filter, to darken the upper portion of the sky a bit. Filters such as UV (ultraviolet) or polarizing filters may actually be a hinderance in these situations, and should be avoided. These filters reduce the amount of light coming in to the sensor, further increasing the required exposure time, which may not be idea if you’re trying to freeze any motion in the shot.

lifeguard_shack

5. Use the Right Settings

Another item that can be set up before you arrive to your shoot is the settings on the camera itself.

Since you’re shooting landscape, you’ll want to use a smaller aperture such as f/8, f/11 or even higher to maximize the depth of field and capture a sharp image throughout. If you’re using a tripod, this isn’t a problem.

Although shooting in manual mode is the norm here, to allow for minor changes in exposure compensation, I prefer to shoot almost everything in A/Av (aperture priority mode). This way I can lock in my aperture and let the camera choose a proper shutter speed. Since low-light situations like this can confuse the camera and you run the risk of overexposure, you can use your camera’s exposure compensation settings to fine-tune the exposure a bit lower.

A low ISO should also be used such as 100 or 200, to ensure there isn’t a lot of noise in the final shot. Again, with a tripod this isn’t an issue, but if you’re hand-holding for the shot, you will need to bump the ISO up to get a shutter speed that’s fast enough to avoid a disappointingly blurry photo.

inlet_sunset

Another useful trick to increase warmth in your final shot is to set WB (white balance) to the “sunny” or “cloudy” setting instead of “auto”. Although you can certainly add warmth in post-processing, your initial image from the camera will be warmer if you make this adjustment now.

And of course, ALWAYS shoot in RAW! To a certain extent, shadows and highlights that are lost in a shot can be recovered in post-processing later.

6. Compose for Interest

Alright, the preparation is over, now we get to the fun part! Once you’re on location, and are ready to take the shot, you’ll want to make considerations for composition.

The most common error in shooting sunsets or sunrises is composing the horizon exactly in the middle of the photo. While this can work in some cases, it normally causes a bit too much symmetry and can make the picture uninteresting.

Take a moment to look the scene over; what part is the most dramatic? Are there any parts that aren’t as interesting of a focus?

Once you have identified that, simply compose the shot to include more of the most dramatic scenery. If you have an angry, cloudy sky that accentuates the sunlight, let that occupy the upper 2/3 of the scene. If you have an interesting foreground or landscape below the sun, and a less-intriguing sky, let that occupy the bottom 2/3 of the image. You want to draw the viewer into the horizon, and then let their eyes drift to the most dramatic part of the image.

purple_sunset

7. Waiting for the Right Shot

If you already have experience shooting landscapes, you know that sometimes waiting is the name of the game. Because of the dynamics of natural lighting, a scene can completely change from one hour to the next, and sometimes even one minute to the next.

Now is the time to be creative! Try different exposure times, play with your exposure compensation settings for different tones. Let the clouds and sun change positions, and reshoot, or try a slightly different angle.

Maybe even allow different subjects to come in and out of frame, and shoot them in the foreground against the sunrise or sunset. The longer you’re at the location shooting, the more variety of shots you’ll end up with.

pier

Sunset article4

8. Don’t Leave Too Early

Lastly, one of the most common things you’ll hear about capturing sunsets, in particular, is to stick around after the sun dips below the horizon. This is certainly true, as the entire dynamic of a scene changes at this point.

Tones, colors and hues in the sky usually become more saturated and dramatic. You’ll need to allow for the loss of your main source of light, but it’s hard to deny some of the most beautiful images can be shot right after the sun is out of sight.

The post 8 Simple Guidelines for Capturing Spectacular Sunrise and Sunset Images by Tim Gilbreath appeared first on Digital Photography School.


Digital Photography School

 
Comments Off on 8 Simple Guidelines for Capturing Spectacular Sunrise and Sunset Images

Posted in Photography