RSS
 

Posts Tagged ‘Groups’

21 Sample Poses to Get You Started Photographing Groups of People

29 Aug

The post 21 Sample Poses to Get You Started Photographing Groups of People appeared first on Digital Photography School. It was authored by Guest Contributor.

21 sample poses for photographing groups

Are you looking for some group posing inspiration? Need some group poses for your next family or event photoshoot?

We’ve got you covered.

In this article, I’m going to share my favorite 21 poses for groups, ranging from fun and informal to serious and businesslike.

Let’s dive right in, starting with:

1. Everyone standing together, facing forward

When working with a large group of people, you won’t be able to control each individual’s pose or expression. This works out fine – as long as you pay attention to the overall composition.

So direct everyone to stand together, with no significant gaps. Ask them to face forward and cross their arms over their chests. Most importantly, make sure that all people in the group are visible.

group standing together facing forward

2. The standard full-body shot

When photographing large groups, the only composition that will include everyone into the frame is often a full-body shot.

These shots are usually formal and even documentary, so your primary objective is to ensure everyone in the group is clearly visible. Note the varied poses in the example below; feel free to direct heads and arms, but don’t obsess too much about it.

group standing businesslike

3. Businesslike from above

If possible, shoot from an elevated angle. You might use a balcony or climb on a car to get a higher viewpoint (and if you’re really daring, you could get on a roof).

The higher vantage point will definitely be worth the effort, because instead of an ordinary and common group shot, you will get a more interesting and inviting perspective. As with the group poses discussed above, make sure all individuals are visible.

elevated angle group pose

4. Staggered team

There are occasions when standing separately is more appropriate than keeping everyone tightly packed. It’s not the best way to take a friendly group photo, but it can certainly work well for a small team shot: a band, a TV show cast, or a small business staff.

If a group has a known leader, put them in front for an even stronger composition, then stagger everyone else behind and to the sides. Some overlap between bodies is okay, but ensure that everyone is given ample space in the frame.

staggered team group pose

5. The trio

This is pretty much a standard way to photograph a group of friends. Yes, it’s easy, ordinary, and common, but it really works.

Simply ask your subjects (three is ideal, but four or five can work, too) to position themselves around the tallest group member, shoulder to shoulder, arms around each other.

three people posing together

6. Heads leaning in

Here’s another great pose for friends.

Ask everyone to stand very close together. Then make them lean their heads in slightly – both toward one another and toward the camera. If they’re willing, group members might put their arms around one another.

five people leaning in

7. Head circle (on the ground)

This is another friendly one, and it works great for outdoor photo shoots. Ask the group to form a circle while lying in the grass, then shoot from above.

Make sure everyone is spaced out evenly – in other words, the circle should feel balanced – and looking toward the camera. You can try photographing from different angles: directly overhead, from the side, from a high vantage point, etc.

lying on the ground looking up

8. Over the shoulder

This is a fun and rewarding way to pose a small group of people. Choose a group leader and put them in front, then bring in the others one by one, staggered behind.

Note that each new group member should stand behind the previous person and peek toward the camera over the shoulder. Supporting themselves a little by leaning on the person directly in front adds to the informality of the composition.

people posing together informal

9. Peeking out from behind

A variation on the previous shot, this pose has a slightly sillier feel. Put a group leader in front, then ask the others to peek out from behind.

Pro tip: Take shots with different aperture settings, then decide whether you prefer the entire group in focus or only the leader.

posing with heads behind

10. Jumping in the air

This is a fun way to do an informal picture of a group of friends.

Simply ask everyone to hold hands and jump (ideally while raising their arms above their heads). For the best results, ask the group to make the jump after a short run.

holding hands and jumping in the air pose

11. Heads in a row

Here’s a very rewarding and interesting composition: a group of people in a row, slowly fading into the background.

Check that everybody is clearly visible, then shoot from a close distance with a wide aperture and be sure to focus on the first person. Yes, people farther away will be blurred, but the result is a very interesting and unusual-looking group shot.

heads in a row pose

12. Family on a couch

Now let’s look at some family poses.

The most common way to photograph a family is by asking them to sit on a couch in the living room. No, it’s not the most creative way for a family shot, but it can be done well and generally looks good.

The easiest way to improve these standard compositions is to simply crop tight. Don’t include the couch and room furniture in the shot. Instead, fill the frame with all the family members.

family sitting together on the couch

13. Family on the lawn

Another good idea for family photos is to simply get outside. A front lawn, a local park, and a beach are all excellent places to take some family shots.

Just remember that when subjects are sitting, you shouldn’t remain standing; instead, get low and shoot from your subjects’ eye level.

family sitting together on the lawn

14. Family on the ground

For an intimate family pose, ask everyone to lie together on the ground. Make them lift their upper bodies a bit and support themselves on their arms. Shoot from a low angle for the best results.

family lying together on the lawn

15. Family pile

Here’s a beautiful composition for a family shot, and one that’s tons of fun for kids and adults alike. Choose one family member to lie down flat against the ground, and ask the others to (gently) pile on top.

You can do this one outdoors on the ground or indoors in a bed; note that it works absolutely fine with any number of kids.

family piling on top of each other lying down

16. Family cuddle

This one’s a classic, though make sure the family is comfortable with it before continuing.

Ask the family to sit on their favorite couch and cuddle up tight. Keep everyone staggered enough that all facial features are visible.

family cuddling together on the couch

17. Behind the couch

For an unusual and interesting family picture, turn the traditional couch photo setting around. Simply take your shots from the back side of the couch and see what a huge difference it can make.

Ask the group to huddle together, with the “leader” at the bottom and the rest arrayed behind.

family looking over the back of the couch

18. Behind the couch, separated

Here’s a slight variation on the group pose shared above. Head around the back of the couch and ask the family to peer over – but instead of posing in a pile, have them sit more formally.

family looking over the back of the couch more formal

19. Piggyback posing

This one’s an absolutely beautiful way to create shots of a group of family members. Just ask the kids to hang onto the adults’ backs, then position the adults close together:

piggyback family pose

20. Full-body staggered

If you’re looking for a full-body shot, try this option, where you ask the tallest family member to stand in the back, then stagger the shorter individuals forward.

As you can imagine, this works well with any number of people, though the more folks you include, the more variation you’ll need in height.

staggered group pose full body

21. Walking forward

Here’s your final posing idea for groups:

Take shots of the family walking hand in hand. Make sure they’re spaced out relatively evenly (also, as indicated in the example below, younger kids can be carried).

Pro tip: Shoot in continuous mode and select the photos with the best leg movement and positioning. Make sure to control the focus while subjects are approaching from a distance.

group walking forward while holding hands

Group posing ideas: final words

Well, there you have it:

21 posing ideas to get you started with group photography. Of course, feel free to get creative and come up with different variants on your own. Think of ways you can transform these ideas for your particular shooting scenario and subjects.

Now over to you:

Which of these group poses do you like best? And do you have any group posing ideas of your own? Share them in the comments below!

Kaspars Grinvalds is a photographer working and living in Riga, Latvia. He is the author of Posing App where more poses and tips for people photography are available.

Table of contents

Portrait Photography

  • GENERAL
    • 15 Common Portrait Mistakes to Avoid
    • 10 Ways to Direct a Portrait Shoot like a Pro
    • How to Photograph People: 7 Tips for Photographers Who Never Photograph People
    • 10 Crucial Things You Need to Think About for Portrait Photography
    • 5 Portrait Photography Rules You Should Probably Ignore
    • Five Budget Portrait Photography Hacks to Save You Money
    • 8 Lessons Learned from My First Attempt at Portrait Photography
    • How Self-Portraiture Makes You a Better Photographer
    • The Photo Critique: Portrait Edition
    • 10 Shots, 10 Portraits, 1 Focal Length: Take this Photography Challenge
    • How I Got The Shot: Portrait Style
  • PREPARATION
    • Tips for Preparing for a Portrait Session
    • 8 Tips to Help Make People Comfortable for Their Portrait Session
    • Clothing for Portraits – How to Tell your Subjects What to Wear
    • How to Plan a Successful Sunset Portrait Session
    • 5 Secrets for Finding Great Indoor Photoshoot Locations
    • 10 Christmas Portrait Locations (with Bonus Lighting and Composition Tips)
    • How to Build a Bench Prop for Great Portrait Photos
    • A Beginners Guide to Taking Portraits of Elderly Clients: Part 1 – Preparation and Rapport
    • How to Scout for Portrait Shooting Locations
    • The Importance of Location for Outdoor Portraits
    • How to Choose Urban Landscapes for Portrait Photography
  • SETTINGS
    • The Best Camera Settings for Portrait Photography
    • How to Achieve Blurred Backgrounds in Portrait Photography
    • How to Bypass the Portrait Mode on Your Digital Camera and Get Great Portraits
    • Understanding the Focus and Recompose Technique
    • Overcoming Depth of Field Problems in Portraits
    • 9 Ways to Ensure You Get Sharp Images When Photographing People
    • Stunning Portraits: Manipulating White Balance
    • Shooting for HDR Portraiture
    • How [Not] to Take a Self Timer Portrait
    • How Focal Length Changes the Shape of the Face in Portraiture
  • LIGHTING
    • 5 Tips How to Set Up a Home Studio for Dramatic Portraits
    • Simple Portrait Setups You Can Create on a Tight Budget
    • How to Eliminate Reflections in Glasses in Portraits
    • Portrait Photography: How to Photograph People in the Harsh Midday Sun
    • 4 Ways to Shoot Portraits in the Middle of the Day
    • 6 Portrait Lighting Patterns Every Photographer Should Know
    • 3 Lighting Setups for Photographing Headshots
    • 6 Ways of Using Reflector to Take Better Portraits
    • How to Create and Shoot Night Portraits
    • How to Make Beautiful Portraits Using Flash and High-Speed Sync
    • How to Make a Low Key Portrait (Step by Step)
    • Fill Flash Photography: How to Get Beautiful Portraits (Even in Bad Light)
    • A Lighting Ratios Guide: How to Make (or Break) Your Portraits
    • How to Mix Ambient Light and Fill-Flash for Outdoor Portraits
    • How to Photograph Fantastic Portraits with One Flash
    • DIY How to Build and Use a Reflector to Take Better Portraits
    • Understanding Light for Better Portrait Photography
    • Tips for Doing Natural Light Headshots and Portraits
    • 3 Reasons to do Headshots with Natural Light
    • A Beginners Guide to Taking Portraits of Elderly Clients: Part 2 – Lighting and Posing
    • How to Create Stunning Wide-Angle Portraits (Using an Off-Camera Flash)
    • Tips for Making the Most of Morning Light for Portraits
    • 5 Ways to Use a Beauty Dish Light for Portraits
    • Beginners Tips for Sunrise Portraits : Part I
    • Getting to Grips with Fill Light in Portrait Photography
    • How to Use Flash for Night Portraits
    • What Size Beauty Dish is Right For Your Portrait Photography?
    • How to Create Catch Lights in Your Natural Light Portraits
    • Tips for Using Golden Hour Light for Portraits
    • Side-by-side comparison between reflectors and diffusers for portraits
    • 6 Tips for Taking Better Natural Light Classic Portraits
    • How to Use a Small Softbox With Your Flash to Transform Your Portraits
    • Simple Tips for Positioning Your Portrait Subject to Leverage Natural Light
    • The Importance of Shadows in Portrait Photography
    • So You Have No Model? Here are Ways to Practice Your Portrait Lighting With Toys
    • How to use Colored Gels to Create Unique and Creative Portraits
    • 3 Steps to Professional Looking Headshots Using One Flash
    • How to Use Two LED Lights to Achieve Moody Portraits
    • Made in the Shade – Why Taking Portraits in the Shade Can be Ideal
    • What Is Good Light? (And How to Use It for Beautiful Portraits)
    • How to do Accent Lighting for Portraits
    • Tips For Great Indoor Portraits Using Natural Light
    • 5 Reasons for Doing Natural Light Portraits
    • Review of the Westcott Eyelighter for Headshots and Portraits
    • How to Use Angle of Light in People Photography for Added Punch
    • High Speed Sync Versus a Neutral Density Filter to Overcome Bright Sunlight in Portraits
    • 5 Creative Portrait Lighting Tricks Using Only Phone Light
    • How to Use Off-camera Flash to Fix Lighting Problems for Outdoor Portraits
    • How to Create Awesome Portrait Lighting with a Paper Bag an Elastic Band and a Chocolate Donut
    • Tips for Using Speedlights to Create the Right Lighting for Outdoor Portraits
    • How to use a Gobo to add Depth to Your Portraits with Subtractive Lighting
    • How to Use Hard Lighting to Create a Dramatic Portrait
    • Portrait Comparison – Flash Versus Natural Light
    • Stealing Light – Using Street Lights for Portraits
    • Five Places for Perfect Natural Portrait Lighting
    • How to See the Light for Portraits: A Quick Tip for Beginners
    • Shooting with Available Light – Lifestyle Portraiture
    • 5 Ways to Light Your Christmas Tree Portraits This Festive Season
    • A Simple Lighting Technique for Couples Portraits
    • Awash In Light: High Key Portraiture
    • A Portrait Lighting Project for a Rainy Day
    • Simple Portrait Lighting Setup: Gorgeous Result
    • How to Achieve Great Portraits with Window Light
    • A Simple Exercise on Working with Natural Light in Portraits
    • Small Flash Portraits on Location with Adorama TV
    • Portraits on an Overcast Day? Use a Reflector
    • Tips for Using Flash for Beach Portraits
    • How to Find and Use Natural Reflectors for Portraits
    • How to Create Dramatic Portraits with Shadow Photography
    • Tips for Portrait Photography in Overcast Weather
    • How to Photograph People Outdoors Without Using a Reflector
    • How To Use an Outdoor Studio for Natural Portraits
  • POSING
    • Female Poses: 21 Posing Ideas to Get You Started Photographing Women
    • Glamour Posing Guide: 21 Sample Poses to Get You Started
    • Posing Guide: 21 Sample Poses to Get You Started with Photographing Men
    • Good Crop Bad Crop – How to Crop Portraits
    • How to Pose and Angle the Body for Better Portraits
    • Posing Guide: 21 Sample Poses to Get You Started with Photographing Groups of People

    • Posing Guide: 21 Sample Poses to Get You Started with Photographing Couples
    • Your Guide to the Best Poses for Engagement Photos
    • How to do Gentle Posing: A Collection of Prompts to Get You Started
    • Tips for Posing Large Families and Groups
    • How to Pose People for Headshots
    • Tips for Posing People in Outdoor Portraits
    • 20 Tips for Getting People to Smile in Photos
    • How to Avoid Fake Smiles in Your People Photography
    • Tips for Posing Muscular Female Body Types
    • Your Posing Guide for Maternity Sessions
    • Handiwork: How to Pose Hands
    • Your Guide to Posing Bands in Photography
    • Posing Tip for Portraits – Which Way Should Your Subject Lean?
    • Posing Tips – Waistlines, Thighs and Bustlines
    • 3 Posing Tips for Young Siblings
    • What Everybody Ought to Know About Posing for Portraits
    • Poser: Achieve Perfect Portrait Expression
    • Capturing Better Portraits Between Poses
    • A Posing Technique from A Girl With a Pearl Earring
    • Tips for Posing Men
  • COMPOSITION
    • 6 Types of Portrait Backgrounds for Creative Images
    • 6 Tips for Perfect Composition in Portrait Photography
    • How to Find Great Backgrounds for Outdoor Portraits
    • How to Make Colors Pop in Your Portraits – Without Using Photoshop
    • How to Use Foreground Framing to Improve Your Portrait Photography
    • How to Use Negative Space in People Photography
    • 3 Simple Ways to Use Framing and Layering in Portraits
    • Is Portrait Formatting always best for Portraits?
    • Portrait Tip: Don't Fill the Frame
    • How to Use Portrait Angles More Creatively: A Visual Guide
    • How to Use Facial View and Camera Angle to take Flattering Portraits
  • GEAR
    • Comparing a 50mm Versus 85mm Lens for Photographing People
    • Comparing a 24mm Versus 50mm Lens for Photographing People
    • 3 Tips for Taking Portraits with a Kit Lens
    • Best Fujifilm X-Series Kit for Urban Portraits
    • 3 Ways to Get Killer Portraits Using a Tripod
    • Photographing Portraits with Classic Lenses (includes Example Images)
    • Portrait Photographers: Do You Really Need a 70-200mm Lens?
    • Essential Portrait Photography Gear You Need When Starting Out
    • Portable Portrait Studio in a Bag: Now You Can Take Portraits While on the Road
    • How to Choose the Perfect Portrait Lens
    • Which 50mm Lens is Best for Portraits?
  • ADVANCED GUIDES
    • 13 Tips for Improving Outdoor Portraits
    • Create Beautiful Indoor Portraits Without Flash (NSFW)
    • 10 Tips for Photographing Great Headshots
    • 3 Simple Ways to Create Stunning Eyes in Your Portrait Photography
    • 11 Tips for Photographing High School Senior Portraits
    • Tips for Doing Fall Portraits
    • 6 Tips for Photographing Large People
    • 7 Tips for Black and White Portrait Photography
    • How to Create Environmental Portraits (Tips and Examples)
    • Capturing Unenthusiastic Teens: Forget the Perfect Pose and Get Photos You Truly Love
    • Tips for Taking the Torture out of Extended Family Portrait Sessions
    • Self Portrait Photography Tips
    • What the Mona Lisa Can Teach You About Taking Great Portraits
    • 5 Tips for Musician Portraits (So You Can Hit All the Right Notes)
    • 5 Tips to Help You Take More Natural Looking Portraits
    • 15 Tips for More Powerful Portraits
    • How to Create Dramatic Portraits in Your Garage
    • 9 Tips that Make Couples Happy During a Portrait Session
    • 5 Tips for Taking Better Portraits in Nature
    • Snow Portrait: Behind the Scenes
    • Tips for Creating Dance Portraits
    • How to Take Better Beach Portraits at Any Time of Day
    • The Introverts Guide to Photographing People
    • 6 Ways to Take a Candid Portrait of Somebody You Know
    • 3 Body Language Hacks to Improve Your Portrait Photography
    • 5 More Tips for Making Better Black and White Portraits
    • Tips for Planning and Capturing a Creative Portrait
    • 5 Tips for Creating Romantic Portraits of Couples
    • 10 Tips to Create Emotive Portraits
    • 7 Tips for Photographing a Bridal Portrait Session
    • 3 Lessons I Learned by Doing a Self-Portrait Project
    • The Ultimate Guide to Photographing People for the Shy Photographer
    • Tips for Getting Yourself to Relax as a Photographer and Have More Successful Portrait Sessions
    • Tips for Taking More Natural Engagement Portraits
    • 6 Tips for Better Portraits on Location
    • 7 Ways to Take Advantage of Autumn in Your Portrait Photography
    • 7 Tips and Etiquette for Taking Portraits in Public
    • How to Make a Unique Portrait in the City at Night
    • 3 Tips for Creating Outstanding Portraits, Inspired by the work of Dutch Artist Van Gogh
    • 5 Keys to Taking Beautiful Maternity Portraits
    • Photographing People: To do Styled Portraits or Not?
    • 7 Steps to Capturing Truth in Your Portraiture
    • Engagement Portrait Shoots: 7 Professional Tips to take your Engagement Shoots to the Next Level
    • Personalities and Portraits – and Getting Them to Mix
    • 3 Reasons to Have Your Own Portrait Taken
    • 5 Tips for Photographing Portfolio-Worthy Costume Portraits
    • 3 Critical People Skills Portrait Photographers Need
    • The Essence of Masculinity – Portraits of Men
    • 5 Corporate-Style Portrait Techniques
    • 5 Tips for Doing Portrait Photography in Busy Locations
    • Tips for Great Beach Sunset Portraits
  • CREATIVE TECHNIQUES
    • How to Create Portraits with a Black Background
    • How Using Props in Portraits Can Make Your Photos More Interesting
    • How to Take Unique Crystal Ball Portraits
    • How to Create a Hollywood Film Noir Portrait
    • How to Create this “Fight Club” Inspired Portrait using One Light
    • Dragging the Shutter for Creative Portraits
    • 5 Secrets for Creating Perfect Silhouette Portrait Photography
    • How to do Tilt-Shift Portraits
    • Copper, Prisms, and Orbs, Oh My! – 3 Creative Techniques for People Photography
    • Portrait Tip: Add Interest and Movement into Your Shots with Wind
    • Glitter Portrait: How I Took It
    • How to Create a Unique Bokeh Portrait for Under $ 10
    • 5 Ways to Use a Piece of Glass for Unique Portraits
    • Room with a View: How to Create this Window with Blinds Portrait Anywhere
    • 7 Steps to Perfect White Portrait Backgrounds in the Studio
    • How to Make Unique Portraits Using Light Painting
  • POST-PROCESSING
    • 11 Steps for Basic Portrait Editing in Lightroom – A Beginner’s Guide
    • Five Common Portrait Retouching Mistakes to Avoid
    • How to Create a Dramatic Cinematic Style Portrait Using Photoshop Color Grading
    • How to Edit Corporate Headshots in Lightroom
    • How to Create a Dark and Moody Rembrandt-Style Portrait In Lightroom
    • How to Retouch a Portrait with the Adjustment Brush in Lightroom
    • Photoshop: Red Eye Fix for Difficult Cases in People and Pets
    • 3 Steps to Photoshop Retouching for Natural Looking Portraits
    • How to do Frequency Separation Portrait Retouching in Photoshop
    • Basic Portrait Post-Processing Workflow Tips to Help You Save Time and Stay Organized
    • How to Add a Grunge Effect to Your Portraits Using Lightroom
    • How to Create Twinkle Lights for Christmas Tree Portraits in Photoshop
    • How to Enhance Portraits Using Gray Layers to Dodge and Burn in Photoshop
    • How to Blur the Background of a Portrait Using the Magnetic Lasso Tool in Photoshop
    • How to Use Photoshop Blending Modes for Fine Art Portraiture
    • Stylized Techniques for Editing Portraits Using Lightroom
    • How to Make a Bubble Portrait using Photoshop CS3
    • Creating a Black and White High Contrast Portrait Edit in Lightroom
    • How to Create a “Soft Portrait” Preset in Lightroom 4
    • Basic Photoshop Tutorial – How to Add Creative Overlays to Your Portraits
    • 3 Essential Photoshop Tools for New Portrait Photographers
    • How to Make Creative Lightroom Develop Presets for Portraits
    • 5 Reasons to Use Lightroom for Portrait Retouching
    • Advanced Portrait Retouch on a Male Subject in Lightroom 4 – Part 1 of 3
    • 3 Ways to Make Selective Color Portraits Using Lightroom and Silver Efex Pro 2
    • Correcting For Under Exposure and Boosting Dynamic Range with an Environmental Portrait in Lightroom 4
    • How to do Portrait Retouching With Luminar
    • Tips for Portrait Processing with ON1 Photo RAW 2018.5
    • 5 Tips to Cut Your Portrait Editing Time in Half
  • BUSINESS
    • Portrait Consultations: Two Questions That Make A Big Difference
    • How to Shoot a Self Portrait to Support your Brand Identity
  • INSPIRATION
    • 5 Examples of Beautiful Simple Portraits
    • DISCUSS: When you Photograph People in Black and White, you Photograph their Souls
    • 21 Inspirational Natural Light Portraits
    • 24 Photos of Perfectly Posed Portraits
    • 19 More Creative Mirror Self Portraits
    • 18 Stunning Self Portraits
    • Interview with Fine Art Portrait Photographer Bill Gekas
    • 11 Influential Portrait Photographers you Need to Know
    • Black and White Portraits a Set of Images to Admire
    • Nadav Kander on Portrait Photography [VIDEO]
    • 21 Spooky Portraits
    • Inspiring Portraits of Women – a Collection of Images
    • 12.5 Years of Daily Self Portraits [VIDEO]
    • Interview with Self Portrait and 365 Photographer – Anna Gay
    • Triptych Portrait Series
    • 8 Striking Portraits from Photograph Einar Erici [Shot in 1930]
    • An Interview With Underwater Portrait Photographer Sacha Blue
    • Masters of Photography – Yousuf Karsh Portrait Photographer
    • 21 Fun Images of People Laughing
  • RESOURCES
    • Portrait Photography: Secrets of Posing & Lighting [Book Review]
    • The Luminous Portrait: Book Review
    • The Portrait Photography Course by Mark Jenkinson – Book Review
    • The Perfect Portrait Guide – How to Photograph People – Book Review
    • Improve Your Portraits with these Courses from Ed Verosky
    • People Photography and Portraits: Best Resources Toolbox

var dpsTopics = {
id: 35928,
titles: [{“id”:”everyone-standing-together-facing-forward”,”permalink”:”https:\/\/digital-photography-school.com\/posing-guide-21-sample-poses-to-get-you-started-with-photographing-groups-of-people\/”,”title”:”1. Everyone standing together, facing forward”},{“id”:”the-standard-full-body-shot”,”permalink”:”https:\/\/digital-photography-school.com\/posing-guide-21-sample-poses-to-get-you-started-with-photographing-groups-of-people\/”,”title”:”2. The standard full-body shot”},{“id”:”businesslike-from-above”,”permalink”:”https:\/\/digital-photography-school.com\/posing-guide-21-sample-poses-to-get-you-started-with-photographing-groups-of-people\/”,”title”:”3. Businesslike from above”},{“id”:”staggered-team”,”permalink”:”https:\/\/digital-photography-school.com\/posing-guide-21-sample-poses-to-get-you-started-with-photographing-groups-of-people\/”,”title”:”4. Staggered team”},{“id”:”the-trio”,”permalink”:”https:\/\/digital-photography-school.com\/posing-guide-21-sample-poses-to-get-you-started-with-photographing-groups-of-people\/”,”title”:”5. The trio”},{“id”:”heads-leaning-in”,”permalink”:”https:\/\/digital-photography-school.com\/posing-guide-21-sample-poses-to-get-you-started-with-photographing-groups-of-people\/”,”title”:”6. Heads leaning in”},{“id”:”head-circle-on-the-ground”,”permalink”:”https:\/\/digital-photography-school.com\/posing-guide-21-sample-poses-to-get-you-started-with-photographing-groups-of-people\/”,”title”:”7. Head circle (on the ground)”},{“id”:”over-the-shoulder”,”permalink”:”https:\/\/digital-photography-school.com\/posing-guide-21-sample-poses-to-get-you-started-with-photographing-groups-of-people\/”,”title”:”8. Over the shoulder”},{“id”:”peeking-out-from-behind”,”permalink”:”https:\/\/digital-photography-school.com\/posing-guide-21-sample-poses-to-get-you-started-with-photographing-groups-of-people\/”,”title”:”9. Peeking out from behind”},{“id”:”jumping-in-the-air”,”permalink”:”https:\/\/digital-photography-school.com\/posing-guide-21-sample-poses-to-get-you-started-with-photographing-groups-of-people\/”,”title”:”10. Jumping in the air”},{“id”:”heads-in-a-row”,”permalink”:”https:\/\/digital-photography-school.com\/posing-guide-21-sample-poses-to-get-you-started-with-photographing-groups-of-people\/”,”title”:”11. Heads in a row”},{“id”:”family-on-a-couch”,”permalink”:”https:\/\/digital-photography-school.com\/posing-guide-21-sample-poses-to-get-you-started-with-photographing-groups-of-people\/”,”title”:”12. Family on a couch”},{“id”:”family-on-the-lawn”,”permalink”:”https:\/\/digital-photography-school.com\/posing-guide-21-sample-poses-to-get-you-started-with-photographing-groups-of-people\/”,”title”:”13. Family on the lawn”},{“id”:”family-on-the-ground”,”permalink”:”https:\/\/digital-photography-school.com\/posing-guide-21-sample-poses-to-get-you-started-with-photographing-groups-of-people\/”,”title”:”14. Family on the ground”},{“id”:”family-pile”,”permalink”:”https:\/\/digital-photography-school.com\/posing-guide-21-sample-poses-to-get-you-started-with-photographing-groups-of-people\/”,”title”:”15. Family pile”},{“id”:”family-cuddle”,”permalink”:”https:\/\/digital-photography-school.com\/posing-guide-21-sample-poses-to-get-you-started-with-photographing-groups-of-people\/”,”title”:”16. Family cuddle”},{“id”:”behind-the-couch”,”permalink”:”https:\/\/digital-photography-school.com\/posing-guide-21-sample-poses-to-get-you-started-with-photographing-groups-of-people\/”,”title”:”17. Behind the couch”},{“id”:”behind-the-couch-separated”,”permalink”:”https:\/\/digital-photography-school.com\/posing-guide-21-sample-poses-to-get-you-started-with-photographing-groups-of-people\/”,”title”:”18. Behind the couch, separated”},{“id”:”piggyback-posing”,”permalink”:”https:\/\/digital-photography-school.com\/posing-guide-21-sample-poses-to-get-you-started-with-photographing-groups-of-people\/”,”title”:”19. Piggyback posing”},{“id”:”full-body-staggered”,”permalink”:”https:\/\/digital-photography-school.com\/posing-guide-21-sample-poses-to-get-you-started-with-photographing-groups-of-people\/”,”title”:”20. Full-body staggered”},{“id”:”walking-forward”,”permalink”:”https:\/\/digital-photography-school.com\/posing-guide-21-sample-poses-to-get-you-started-with-photographing-groups-of-people\/”,”title”:”21. Walking forward “},{“id”:”group-posing-ideas-final-words”,”permalink”:”https:\/\/digital-photography-school.com\/posing-guide-21-sample-poses-to-get-you-started-with-photographing-groups-of-people\/”,”title”:”Group posing ideas: final words”},{“id”:”everyone-standing-together-facing-forward”,”permalink”:”https:\/\/digital-photography-school.com\/posing-guide-21-sample-poses-to-get-you-started-with-photographing-groups-of-people\/”,”title”:”1. Everyone standing together, facing forward”},{“id”:”the-standard-full-body-shot”,”permalink”:”https:\/\/digital-photography-school.com\/posing-guide-21-sample-poses-to-get-you-started-with-photographing-groups-of-people\/”,”title”:”2. The standard full-body shot”},{“id”:”businesslike-from-above”,”permalink”:”https:\/\/digital-photography-school.com\/posing-guide-21-sample-poses-to-get-you-started-with-photographing-groups-of-people\/”,”title”:”3. Businesslike from above”},{“id”:”staggered-team”,”permalink”:”https:\/\/digital-photography-school.com\/posing-guide-21-sample-poses-to-get-you-started-with-photographing-groups-of-people\/”,”title”:”4. Staggered team”},{“id”:”the-trio”,”permalink”:”https:\/\/digital-photography-school.com\/posing-guide-21-sample-poses-to-get-you-started-with-photographing-groups-of-people\/”,”title”:”5. The trio”},{“id”:”heads-leaning-in”,”permalink”:”https:\/\/digital-photography-school.com\/posing-guide-21-sample-poses-to-get-you-started-with-photographing-groups-of-people\/”,”title”:”6. Heads leaning in”},{“id”:”head-circle-on-the-ground”,”permalink”:”https:\/\/digital-photography-school.com\/posing-guide-21-sample-poses-to-get-you-started-with-photographing-groups-of-people\/”,”title”:”7. Head circle (on the ground)”},{“id”:”over-the-shoulder”,”permalink”:”https:\/\/digital-photography-school.com\/posing-guide-21-sample-poses-to-get-you-started-with-photographing-groups-of-people\/”,”title”:”8. Over the shoulder”},{“id”:”peeking-out-from-behind”,”permalink”:”https:\/\/digital-photography-school.com\/posing-guide-21-sample-poses-to-get-you-started-with-photographing-groups-of-people\/”,”title”:”9. Peeking out from behind”},{“id”:”jumping-in-the-air”,”permalink”:”https:\/\/digital-photography-school.com\/posing-guide-21-sample-poses-to-get-you-started-with-photographing-groups-of-people\/”,”title”:”10. Jumping in the air”},{“id”:”heads-in-a-row”,”permalink”:”https:\/\/digital-photography-school.com\/posing-guide-21-sample-poses-to-get-you-started-with-photographing-groups-of-people\/”,”title”:”11. Heads in a row”},{“id”:”family-on-a-couch”,”permalink”:”https:\/\/digital-photography-school.com\/posing-guide-21-sample-poses-to-get-you-started-with-photographing-groups-of-people\/”,”title”:”12. Family on a couch”},{“id”:”family-on-the-lawn”,”permalink”:”https:\/\/digital-photography-school.com\/posing-guide-21-sample-poses-to-get-you-started-with-photographing-groups-of-people\/”,”title”:”13. Family on the lawn”},{“id”:”family-on-the-ground”,”permalink”:”https:\/\/digital-photography-school.com\/posing-guide-21-sample-poses-to-get-you-started-with-photographing-groups-of-people\/”,”title”:”14. Family on the ground”},{“id”:”family-pile”,”permalink”:”https:\/\/digital-photography-school.com\/posing-guide-21-sample-poses-to-get-you-started-with-photographing-groups-of-people\/”,”title”:”15. Family pile”},{“id”:”family-cuddle”,”permalink”:”https:\/\/digital-photography-school.com\/posing-guide-21-sample-poses-to-get-you-started-with-photographing-groups-of-people\/”,”title”:”16. Family cuddle”},{“id”:”behind-the-couch”,”permalink”:”https:\/\/digital-photography-school.com\/posing-guide-21-sample-poses-to-get-you-started-with-photographing-groups-of-people\/”,”title”:”17. Behind the couch”},{“id”:”behind-the-couch-separated”,”permalink”:”https:\/\/digital-photography-school.com\/posing-guide-21-sample-poses-to-get-you-started-with-photographing-groups-of-people\/”,”title”:”18. Behind the couch, separated”},{“id”:”piggyback-posing”,”permalink”:”https:\/\/digital-photography-school.com\/posing-guide-21-sample-poses-to-get-you-started-with-photographing-groups-of-people\/”,”title”:”19. Piggyback posing”},{“id”:”full-body-staggered”,”permalink”:”https:\/\/digital-photography-school.com\/posing-guide-21-sample-poses-to-get-you-started-with-photographing-groups-of-people\/”,”title”:”20. Full-body staggered”},{“id”:”walking-forward”,”permalink”:”https:\/\/digital-photography-school.com\/posing-guide-21-sample-poses-to-get-you-started-with-photographing-groups-of-people\/”,”title”:”21. Walking forward “},{“id”:”group-posing-ideas-final-words”,”permalink”:”https:\/\/digital-photography-school.com\/posing-guide-21-sample-poses-to-get-you-started-with-photographing-groups-of-people\/”,”title”:”Group posing ideas: final words”}] };

The post 21 Sample Poses to Get You Started Photographing Groups of People appeared first on Digital Photography School. It was authored by Guest Contributor.


Digital Photography School

 
Comments Off on 21 Sample Poses to Get You Started Photographing Groups of People

Posted in Photography


Tips for Posing Large Families and Groups

30 Aug

Portrait sessions can vary in many ways, one being the size of the group you are photographing. Don’t be afraid, these tips for posing large families and groups will help you to create the perfect large group portrait no matter the location or the number of people.

Tips for Posing Large Families and Groups - family posed on the grass

What is considered a large group?

Large group portraits typically begin with six or more people. Large groups can include children or be made up of adults, it all depends on the type of session you are photographing.

It can also reach up to 20 people, especially if you are photographing a bridal party or a family with smaller family units all mixed together.

Tips for Posing Large Families and Groups - large family in front of trees

Posing rule for any type of grouping

The most useful posing rule for large groups is to use the triangle method.
This is where you pose people, either standing or sitting, or a mixture of both, and if you draw imaginary lines connecting their heads, they would create triangles. This method is the best so that you don’t pose people’s heads one on top of another (totem pole-like), creating an awkward photograph.

Tips for Posing Large Families and Groups - use triangles in posing

Use the triangle method to pose large groups.

This method works for any type of grouping with three or more people. However, for large groups of 10 or more, this posing rule is perfect so that everyone in the photo can be seen. It ensures nobody’s head is directly behind another person’s.

Large Families

Large families can range from nuclear families where there are more than five people or extended portraits where more than one nuclear family is going to be in the portrait.

Tips for Posing Large Families and Groups - family of 5 with young kids

The key is to pose the families in different combinations in the same spot so that you can offer your client more poses without having to move them too much.

Always pose the parents in the middle and then pose the rest of the family out from there. The parents are a great focal point in any portrait and from there, you can lead the eyes to the children or other families.

Tips for Posing Large Families and Groups - family in white and jeans

For example, for a portrait of a family of five, begin by placing the parents in the center of your photo first. Then, pose the taller children next to each parent. Smaller children can be put between the taller child and parent, creating the triangle.

Afterward, you can seat the family in the same order as when they were standing. If there are really small children, they can stand and hug another family member from behind. Be mindful of where their heads are positioned so that you create triangles and can see each family member in the portrait.

Tips for Posing Large Families and Groups - family standing and sitting

Pose the family sitting or standing.

In the same spot, you can then have the family stand up and separate a little. This gives them a little more space but still keeps them at arm’s length. Ask them to interact with each other in between posing for the camera.

Don’t forget the triangles in this pose as well! It can look a little off if you pose two family members who are the same height together. Try and move the family members from one side to the other to create more variety.

Tips for Posing Large Families and Groups - extended family standing

Give the family some space while posing them standing.

For larger families, walking is a good way to get more natural photos of everyone. Pose nuclear families together.

For example, if you have a family of 16 with grandparents, pose the grandparents in the center, then group the families on either side keeping the children with their parents.

Tips for Posing Large Families and Groups - extended family on the beach

Keep in mind that if it looks a little awkward, it probably will look that way in the photo as well. Taking more time and moving people around will ensure that you get the right posing even before taking the photograph.

Lastly, try posing some people away from the center to give the photo more depth. Facing everyone toward the center is a good starting point. However, with large groups, it’s best to try different poses so that you can offer your clients an assortment of different options.

Connect People

There is nothing more awkward than people standing together with their arms at their sides. With families, especially large groups, try and have your clients connect with each other.

You can do this by grouping the main people (the parents or grandparents) in the center facing each other hugging, and then group smaller families where each family member is touching another person. This shows connection within small family units in the large family photo and shows warmth.

Tips for Posing Large Families and Groups - family hugging b/w

Resting hands on shoulders, holding hands, hugging and tucking fingers behind, resting a hand on someone’s arm, or having someone lean on another’s shoulders are all good examples of connection.

Connecting people in a photo also gets rid of this most often heard question, “What do I do with my hands?”

Tips for Posing Large Families and Groups - family with 4 kids

For the people that you pose on the edges of the family portrait, be mindful that they look in toward the center so that they don’t seem out of place. If they are male and there are no children present, have them put one hand in their pocket. If they are female, make sure they aren’t standing too short or they will look out of place.

Chairs and Stools

If you are photographing at a venue, say a wedding reception, you may have the chance to use chairs or stools for posing.

In this case, try and place them throughout the photo so that they don’t line up perfectly. You’ll want to space them out according to the number of people in the portrait, always keeping in mind the triangle rule.

Tips for Posing Large Families and Groups - family photo

Chairs tend to work better than stools because the stool height can create really big valleys in your triangle posing if the person is too tall or too short in relation to those around them in the portrait.

Natural Posing

Once you have taken the best-posed portraits of the large group, have them loosen up a bit by asking them to do a group huddle or squeeze. This will get some laughs out of your clients and allow them to let their posed bodies rest for a bit.

Tips for Posing Large Families and Groups - family hugging

Asking the family to take a break can offer some great natural posing. This man had his whole family together after many years and was overcome by joy.

Ask your group to walk around, talk to each other, and just be. Look out for the children in particular, as they’ll usually act the most natural.

This collection of natural posing will often make for the most emotive portraits because they will portray the family just as they are. Even better if they are in a location that is fun or open where they can enjoy a walk or play games.

Photograph Family Units Separately

When you photograph families with grandparents or more than one family unit, make sure to photograph each family separately and together. Pose each family together in the larger portrait first, then, if you have time, mix them up a bit and have some fun.

Tips for Posing Large Families and Groups

Ask them to play, run, walk, do a group hug, or anything that will create authentic smiles and expressions from the oldest to the youngest.

Tips for Posing Large Families and Groups - individual portraits

Take time to get portraits of the adults as well. Either in couples or individually.

This also helps to break up a session with little children because they can get bored quickly.

Tips for Posing Large Families and Groups - individual photos of kids

Photograph children individually.

Try different combinations with the families, for example:

  • Grandparents with the grandchildren
  • Grandchildren together
  • All of the children of the parents together with and without the parents
  • Each couple in the family alone
  • Individuals portraits of each child
  • All the men together
  • All the women together
  • Generational photos
  • Cousins together
  • Brothers and sisters with and without in-laws
  • Each grandparent alone and together

Tips for Posing Large Families and Groups - different group posing options

Not all of those may apply to each large family portrait, but they can help you to add to the collection of poses that you’ll deliver to your clients.

Tips for Posing Large Families and Groups - family and kids photos

Take photos of the whole family together and then take photos of just the children.

Tips for Posing Large Families and Groups - 4 generations photo

Make sure to get generational photographs like this one of the 4 generations of men in the family.

Wrapping up

Before you wrap up the session, ask your clients if there is any portrait or pose that they specifically want. Some large families may bring a prop for everyone to use like shirts. There may also be a combination that you missed or didn’t think of that they would like to get.

Tips for Posing Large Families and Groups

Asking, “Is there anything else you’d like me to photograph before we leave?” can also be a great way to end the session once you feel you have gotten all of the best photos.

Giving your clients the chance to make sure they get all of the portraits they want is key for you to do a complete job with their photographs.

In conclusion

Posing large families can seem like a big challenge, however, using the triangle posing method can help tremendously in getting different combinations and poses. This will give your clients an assortment of poses and keep the whole experience fun and light which will make them want to get more portraits taken in the future!

The post Tips for Posing Large Families and Groups appeared first on Digital Photography School.


Digital Photography School

 
Comments Off on Tips for Posing Large Families and Groups

Posted in Photography


How to Get the Most out of Membership in Facebook Photography Groups

01 Dec

You can’t avoid them. Photography Facebook communities are everywhere now. Most photographers belong to at least one. You don’t even get a choice – people just add you to groups, and before you know it your newsfeed is just one long stream of photography chatter. And, let’s face it, the quality varies!

Becoming an active member of a great Facebook group can be a fantastic source of inspiration, support, motivation and friendship. It can be a wonderful, life-enhancing experience. I have met true, like-minded friends via these groups over the years.

04

I used to be a member of a zillion Facebook groups. I tried to engage with all of them before realizing that I was losing weeks of my life interacting with stuff that didn’t really add any value to my photography, or to my life in general. So, I made the decision to cull the groups that I didn’t get much from, and just removed myself without a second thought.

Out of the groups that remained, I chose just three in which to be active. These were the groups I felt strongly connected to. I had become a core member of each and truly enjoyed the people and the chats.

This left a small number of groups in which I decided to become a silent member. I didn’t feel a bond with the group, but I was still getting value from the content. Yes, in some groups, I am one of the lurkers.

I don’t contribute. I might click Like occasionally if I see something wonderful, but I don’t post, but I am not alone. In larger Facebook groups the majority of members are silent. However, you are looking and reading, this doesn’t make you any less important. In fact, nothing could be further from the truth. I am admin for a fabulous Facebook group of learning photographers, and I often get private messages of thanks from members who have never once contributed to a thread. These lurkers are actually very important to me. I know they are quietly consuming the content in the background.

01

But there is another type of member. They attempt to engage but others don’t respond. They post sporadically in different groups, get dejected, and sometimes even defensive when their posts do not get the engagement that other active members enjoy. No one commented. No one even pressed Like.

Some will grump in silence and decide never to post there again. Some are a little noisier about it…

It is human nature to feel this way. If we go to the effort of putting ourselves out there, then of course we hope for a positive response. When we don’t get one, we feel disappointed, or even rejected. They may think:

  • They are cliquey.
  • They are unfriendly.
  • They have not accepted me.

Sometimes stuff just gets missed. People are busy, posts get buried – that’s life. However, often the reason for the lack of response (or maybe the negative response) is much more to do with you than you might want to believe.

Let’s say you have found a photography Facebook group that you like. It just ‘fits’. You feel an affinity with the other members, the ethos of the group works for you and the content is pitched at your level. Maybe you have just joined or maybe you have been lurking for a while and now you would like to enter the fold.

How do you go about doing that? Especially in a well established group?

06

I have seen many newbies join Facebook groups and become much-loved members within a few weeks. However, I have also seen others try, only to crash and burn. Here is what I have learned from those who manage to succeed.

1. Take your time. Don’t ask for something straight away.

I see this all the time. A newbie’s first ever post is asking for something from the other members. It might be a request for critique, or a question about a challenge they are having.

Asking for something at this point is not ideal. The other members don’t know you. They don’t feel compelled to help you yet. Not because they don’t like you, but because you haven’t given them a reason to want to help you.

So how do you make people want to help you?

2. Introduce yourself (but your life story isn’t necessary).

Tell everyone who you are, that you are glad to be there, and that you’re looking forward to getting involved. Don’t post an image. Don’t ask for anything at all.

Keep it short and sweet. No one wants to read a random stranger’s autobiography on their newsfeed, however interesting you may think it is.

05

3. Give of yourself and watch it come back.

If you don’t take the time to respond to others, why would you expect them to respond to you?

Find images you genuinely like and compliment the photographer, or ask them a question about how they achieved it. Photographers love to be congratulated on their work and they enjoy talking about how it was created.

If there was a question posted that you know the answer to, then take some time to craft a response.

If you can identify with a challenge someone else is having, say so. Empathize. The person on the receiving end of your time will be grateful, and they will remember.

4. Engage selectively.

Don’t misinterpret number three above. I am not saying that you should hop onto every thread gushing about everyone’s images, answer every question, and agree with every statement. People-pleasers never win. Not only would other members see right through this, but you would also have no time left in the day for anything else.

Engage with posts which add value to the group and ignore the nonsense (there will be some). Be present in interesting discussions, and frame your responses with respect and intelligence.

You will be remembered.

02

5. Reach out to like-minded individuals.

We live in a new world. A world where it is actually possible to have good friends you have never met in person. Making friends online can be similar to making friends the traditional way, in that we gravitate towards those we have something in common with.

Look for those people in the group. Maybe they have a similar style to you, or they seem to get your dry sense of humour. Perhaps, like you, they love to geek out on equipment specifications, or they are struggling with the same issues that you are.

Connect with them within the group at first (in a non-stalker way) then later send them a friend request.

6. When posting or commenting, consider motive, wording and tone.

So let’s say you have done everything in numbers 1-6 above. Now your fellow members are much more likely to respond positively to you! They have seen your name pop up for some time now, alongside your considered comments. Maybe they have even been on the receiving end of some of your genuine praise.

They still have to feel inclined to engage with you though. Your motive, wording and tone will all contribute to whether other members interact positively with you.

That, however, is a whole other article…

03

Do you belong to a Facebook photography group? What makes you decide whether to become a part of that group, whether to remain a lurker or whether to leave?

googletag.cmd.push(function() {
tablet_slots.push( googletag.defineSlot( “/1005424/_dPSv4_tab-all-article-bottom_(300×250)”, [300, 250], “pb-ad-78623” ).addService( googletag.pubads() ) ); } );

googletag.cmd.push(function() {
mobile_slots.push( googletag.defineSlot( “/1005424/_dPSv4_mob-all-article-bottom_(300×250)”, [300, 250], “pb-ad-78158” ).addService( googletag.pubads() ) ); } );

The post How to Get the Most out of Membership in Facebook Photography Groups by Julie Christie appeared first on Digital Photography School.


Digital Photography School

 
Comments Off on How to Get the Most out of Membership in Facebook Photography Groups

Posted in Photography


How to Pose Groups for Portrait Photography

16 Jun

Group Main

For many years the gold standard for posing groups looked just like my first grade school photo. Everybody would be lined up and asked to stand as awkwardly as possible, feet together and for the lucky ones in the front, hands clasped together in their laps.

The photographer would shoot two frames (one for safety) and count every one in with a “1..2..3…say cheese” my grade one teacher Mrs. Witchell was way too cool to do cheese. She busted out her own version of Blue Steel instead. Respect.

Sadly this style of posing large groups is still pretty much the norm. But with some careful planning, and a little imagination, portraits of large groups can look far more dynamic than my grade one school photo.

Group 1

The classic school or sports style group photo is rigid and posed awkwardly. Introducing some variation in height, pose and shape of the group with give your portraits more life and energy making them far more interesting and dynamic.

There are four main styles I like use to shoot my groups:

1. The 90210

I learned this style of posing groups by studying the publicity shots of the American teen drama from the 90s, 90210 (I had a huge crush on Dilan). I have now developed, and modified, this technique and it has become my go to pose for many of the cast shoots I do.

I like to create interest in these group shots by staggering the levels of all my models. I will have the back row standing. Middle row seated at various heights including high stools, chairs, lower ottomans or boxes. I then have a third level either on the floor or seated on very low stools or boxes. Lastly I pose each person individually and bring them onto the set one at a time, so I can see how the overall shot is looking.

90210 2 3 90210 2 4
90210 2 90210 2 6

Checklist

  • Shoot at 50mm or longer, as wider lenses will distort the group and make people in the front appear larger than those at the back. I usually shoot at around 100-150mm.
  • Ensure everyone is clearly visible.
  • Try and space everyone out so the image does not feel too constricted.
  • Shoot at least 10-15 frames. This is harder than it sounds because large groups can be intimidating and many people in the group tend to lose interest after two or three frames. The way around this is to warn everyone that you will be shooting at least 10 frames.
  • Keep the dialogue going. Be complimentary. Never single anyone out for doing the wrong thing.
  • If you need to, stop the shoot and give more direction.
  • Don’t be afraid to make people wait. I used to rush through my group shots (particularly with corporate males and athletes) because they intimidated me. I now realize that when I rush I don’t get great shots. Be confident and explain that you want to get this right, and if everyone does their bit it should all be over in five minutes.
  • Keep the dialogue going. Silence is a cue that you are unhappy with the shot or are finished shooting.
  • Lower your tone and speak calmly. This is a great trick I learned from my teacher training. Whenever I’m speaking to a large group I lower my voice rather than raise it. This way everyone becomes silent to hear you. I also find that women’s voices tend to go up and sound shrill when they try and raise it. This doesn’t sound very assertive or authoritative.

90210 3

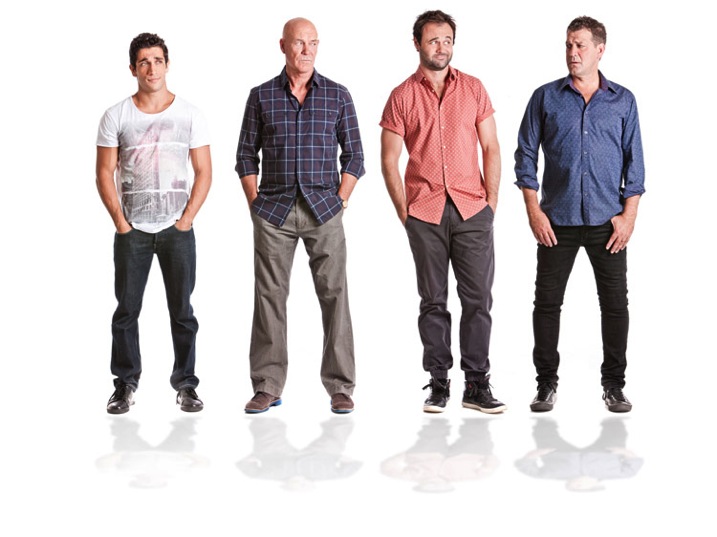
The 90210 style also works for larger groups like this shot of the entire cast of the Australian Soap Opera, Neighbours ( above) or the cast and crew shot of the musical Moonshadow (below). I use the exact same approach and set up my shot in groups of three and five, staggering the head heights to keep the shot from looking too square.

Big Groups

2. The Reservoir Dog

This shot was inspired by the opening sequence of a Quentin Tarantino movie, Reservoir Dogs.

Resdog

This is a great option to photograph groups if you are pressed for time, need something more dynamic, or have a group of people that have trouble posing or taking direction.

I like to shoot very low to the ground (sitting or laying) and ask the group to walk towards me. It works best when I give each person individual direction before we start. Eg., Person 1 put one hand in your pocket;,Person 2 walk and fix your tie as you go, Person 3 button your jacket up as you walk, Person 4 walk with a strut and attitude.

Reservoir Dog 2

If this shot is left to chance you may get lucky, but a little direction will really take it to another level.

When shooting set your camera to autofocus (AI servo for Canon or continuous for Nikon) and shoot with a long lens 150-200mm (to remove background distraction). I recommend aperture of f/5.6, a shutter speed of 1/250th of a second or higher, and focus on the face.

3. The Cartier-Bresson

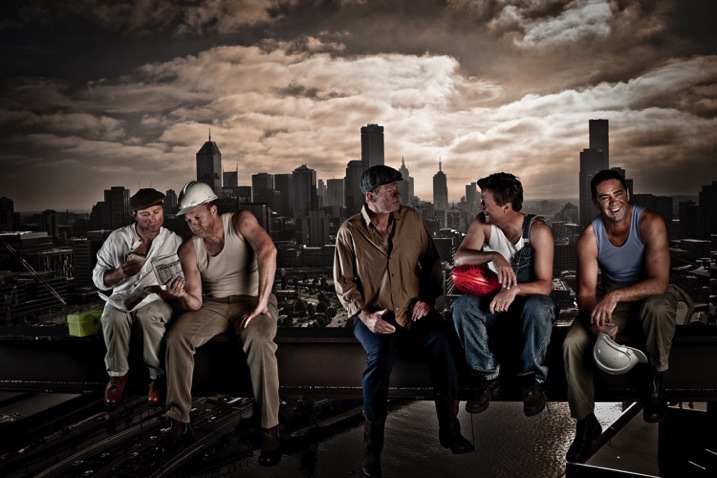
This style is named after Henri Cartier-Bresson, a French photographer who took snapshots of everyday life and made them look extraordinary. He was a true master of candid photography.

I love photographing groups in is this fly on the wall style, which is posed to look like a candid snap-shot of life. I often get my inspiration for these poses from popular culture.

Cartier Bresson

This photo of the cast of The Footy Show is homage to the famous 1932 image Lunch atop a Skyscraper.

When I’m directing a shoot like this I give everyone a role and ask him or her to repeat it over and over again. Poses are varied only minutely. For example: Billy and Shane (far left) were directed to look at the newspaper and eat the sandwich. Sam and JB (center) were asked to have an animated conversation and Garry (far right) was asked to laugh off camera. Expression was varied slightly but the pose was kept the same.

Lastsupper

This image was inspired by DaVinci’s Last Supper, and was photographed using a very similar technique to the Footy Show image.

4. The lineup and “v” posed group shot

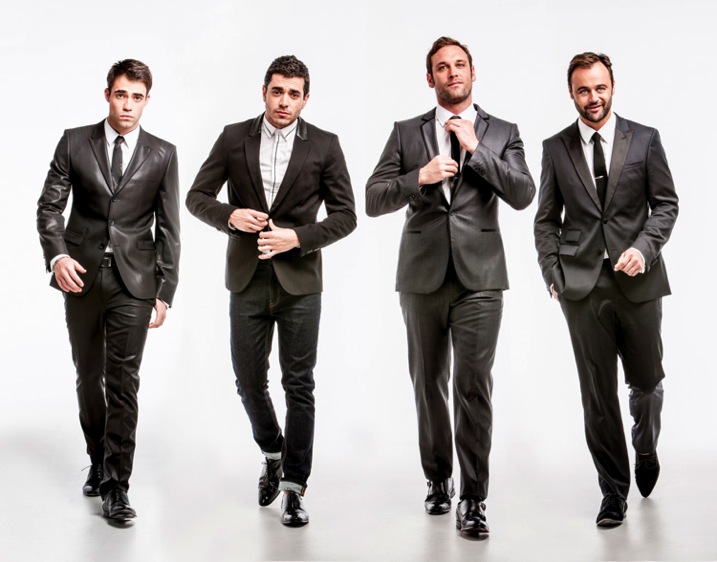
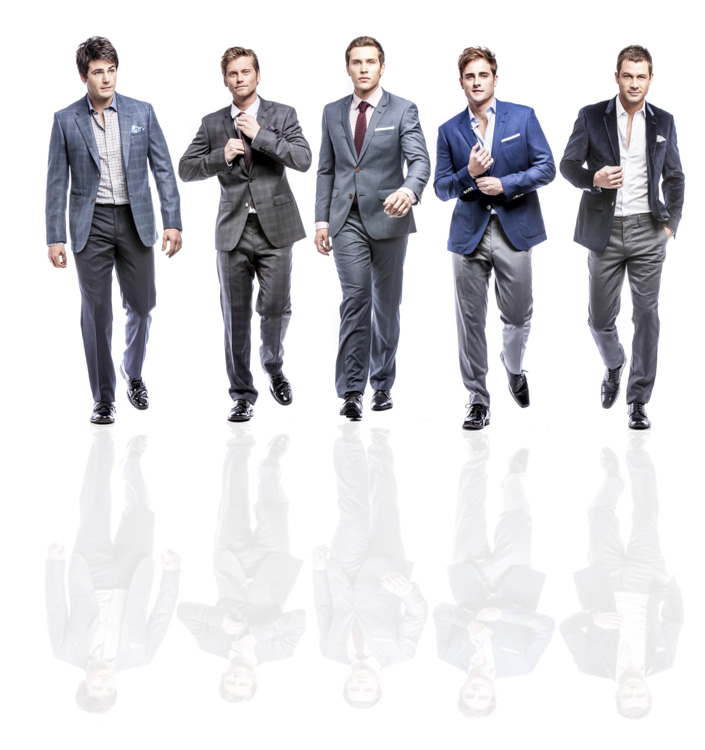
Small Time Gangster

I photographed the cast of Small Time Gangster individually for this movie poster and then the shots were Photoshopped to create a “V” shape that is really popular in advertising and the entertainment industry.

Husbands A

The Cast of House Husbands was shot individually for this group shot, then the best expressions and poses were selected to create this image.

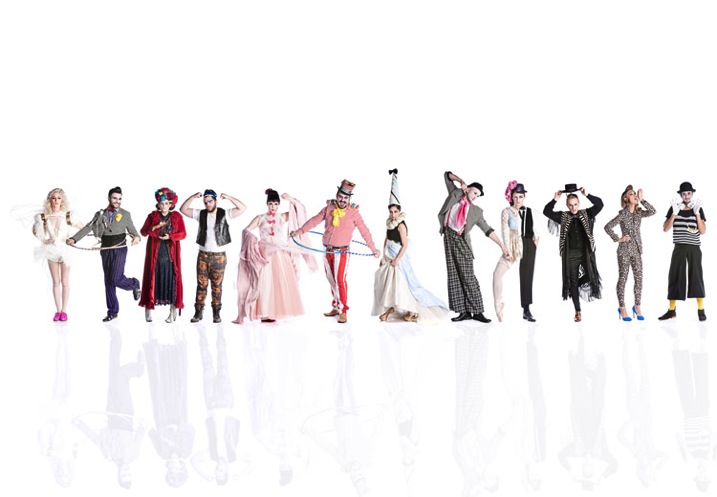
Project Runway S4

This style of photography works really well for large families and corporate groups, and really lets the individual personalities come through. I thought this was the ideal way to capture the cast of Project Runway Season 4.

This style of shooting was born out of necessity. Many of the TV shows I shoot cast shots for can’t schedule all their talent to be on set at once so I shoot them individually, and combine the shots in post-production. This is a great technique to capture everyone’s personality and it always looks dynamic.

Finally, don’t forget to have fun when shooting group portraits and let their personality (and yours) shine!

Lifestyle

These images were all posed to look like they had been taken candidly. The problem with candid photography is that you are relying on too many variables to be just right before you can get your shot. You need good light, location and expression. Miss out on one of these and your shot may turn to caca. If you set up the shot and give everyone great direction, you are guaranteed a great shot.

What are your favourite ways to pose and direct groups? Is there anything I may have missed or do you have a group portrait you are really proud of? I’d love to hear from you.

All images copyright Gina Milicia 2015

googletag.cmd.push(function() {
tablet_slots.push( googletag.defineSlot( “/1005424/_dPSv4_tab-all-article-bottom_(300×250)”, [300, 250], “pb-ad-78623” ).addService( googletag.pubads() ) ); } );

googletag.cmd.push(function() {
mobile_slots.push( googletag.defineSlot( “/1005424/_dPSv4_mob-all-article-bottom_(300×250)”, [300, 250], “pb-ad-78158” ).addService( googletag.pubads() ) ); } );

The post How to Pose Groups for Portrait Photography by Gina Milicia appeared first on Digital Photography School.


Digital Photography School

 
Comments Off on How to Pose Groups for Portrait Photography

Posted in Photography


Posing Guide: How to Pose Groups without Losing Your Mind

09 Mar

The other day I had mom bring her daughter in for fine art dance pictures. “Oh, just snap away while she’s doing her competition routine… she doesn’t like to be interrupted,“ the mom said as the daughter grand jeted halfway off my roll paper half in the storage room, facing completely away from me. Shooting that would be crazy, right? Continue Reading

The post Posing Guide: How to Pose Groups without Losing Your Mind appeared first on Photodoto.


Photodoto

 
Comments Off on Posing Guide: How to Pose Groups without Losing Your Mind

Posted in Photography


7 Tips for Photographing Groups

04 Nov

Whether you’re an amateur or professional photographer, whether you usually photograph people, products, landscapes or insects, the time will come when you will be asked to photograph a large group of people.

Image H smaller family group

Of course large is a relative term. If you are used to photographing couples or taking individual portraits, large could mean a group of five people. In general, I consider large to be a group of seven or more.

The festive season is fast approaching, and this is the time of year when you are most likely to be asked to photograph large groups. During this season, families tend to congregate in one place, some travelling far and wide for the privilege of togetherness. Sports teams, dance clubs and social groups start winding down for the holiday season, and love to have an annual or seasonal record of their group.

Wedding and school photographers are the true experts in group photography. I am neither of those; I’m a family and children’s photographer, and I don’t mind admitting that I’m a one-trick pony.

However, over the past few months and for one reason or another, I have been asked to photograph an increasing number of large groups. Sometimes the lessons we need to learn find us, and it has been said that we best teach what we most need to learn. With that in mind, I’d like to share some of the lessons I’ve learned along the way, both through my own trial and error, and through tips for photographing large groups, passed on to me from other photographers.

#1 – Choosing a location

You won’t always have the luxury of being able to choose your location – sometimes you’ll be stuck with your aunt’s backyard, or some other less-than-ideal spot. If you have the luxury of choice, look to open spaces and uncluttered backgrounds.

There are two reasons why simplicity is even more important with a group shot than with any other kind of portraiture.

  • First, by its very nature, a group shot is cluttered. With so many different faces and competing outfits, your group shot can end up looking very messy if the background is also complicated.
  • The second reason is that, in order to keep your entire group in focus, you will need to shoot at a higher number f-stop than you would for a single portrait, so you won’t benefit from the blurred background that you would when shooting wide open.

When it comes to locations, my personal favourites are parks, gardens and beaches. The colours of nature never seem to clash or compete with your subjects. If you’re in a rural setting, and trees and grass are not your thing, look for hay bales, rustic sheds and timber fences. If you prefer an urban feel, seek out the unadorned walls and steps of old buildings and churches, or the clean lines of modern architecture.

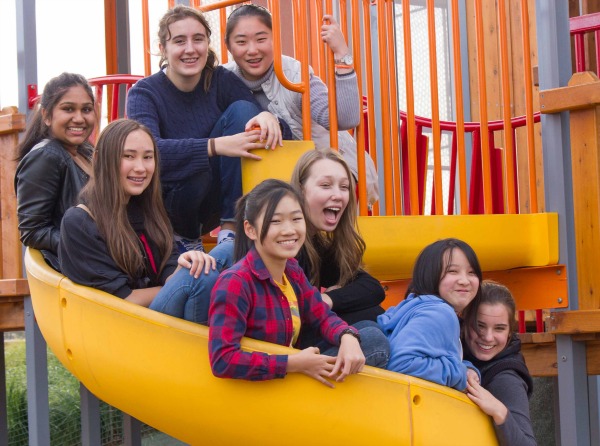
The images below illustrate the different moods that you can create with background. Although the playground shot is a little busy, it conveys colour and fun.

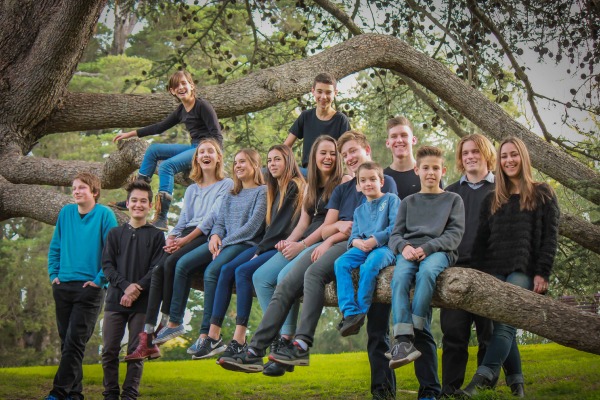
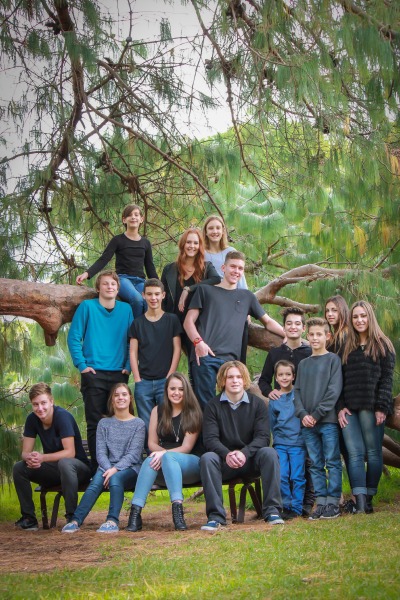
Image A  teen group on branch

Image B teen girls in playground

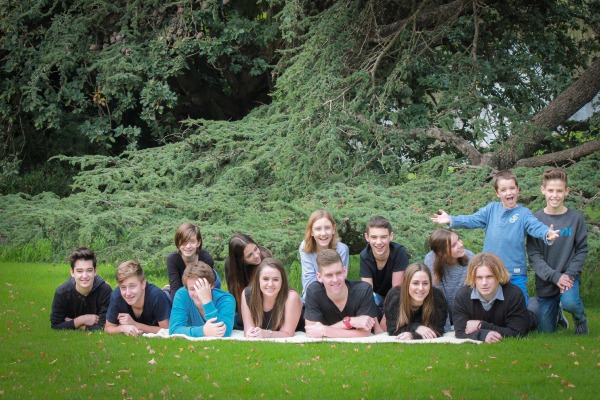
These images show how you can create a different look to the same grouping, simply by changing your shooting position.

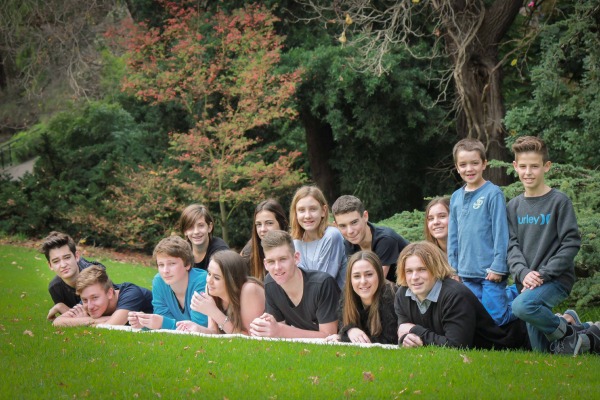
Image C group on lawn front

Image D group on lawn side

#2 – Lighting

Soft, even, light is imperative when photographing a group. If you can choose the time of day to shoot, opt for early morning or late afternoon to early evening, when the light is gentle and warm.

If you’re stuck shooting in the middle of the day, avoid harsh shadows by shooting in open shade such as beneath the canopy of a large tree, or in the shadow of a building. Importantly, make sure the light falls evenly on your group, and that there are no patches of sun on anyone.

#3 – Use a tripod

If you are photographing a small group, and you want to get creative with poses and shooting angles, you probably won’t need a tripod. While they go a long way towards preventing blurry images caused by camera shake, I personally find them restrictive.

However, when photographing a large group, you’ll probably want to keep your subjects in one position while you fire off lots of similar shots. A tripod has the benefit not only of preventing camera shake, but allowing you to take a number of shots at the same angle and focal length. So, when you discover that your perfect image is marred by one person blinking or doing something weird with their mouth, it’s easy to take spare parts from the other images and transpose them in Photoshop (do a head-swap).

#4: Lens and aperture selection

Lens and aperture preference are always controversial. To photograph a large group, I’d recommend playing it safe and using a 50mm lens. Depending on the depth of your group arrangement, stick with an aperture of f/9 or higher to ensure that everyone is sharp, and always do a test shot first.

To avoid distortion when using a lens that is 50mm or below, make sure you leave plenty of space between the people at either side of the group, and the edge of the frame. No one will thank you for making them look wider than they are (which is what a wide-angle will do to the people on the edges)!

While we’re on the subject, it’s a good idea to leave some space around your group to allow for different cropping ratios.

#5 – Vary the head heights

If your subjects are huddled close together on a level surface, chances are the people at the back will only be visible from the eyes up in the final images.

You can easily remedy this by placing them on a graduated surface. A flight of steps is ideal, or a sloping lawn, a playground slide, the branch of a tree – anywhere that you can stagger the height of the heads to make sure everyone can be clearly seen without sitting in a dead-straight row.

If you happen to be stuck with a flat surface, use chairs for a formal arrangement. Place some people standing behind the chairs, some seated on the chairs, and some sitting on the ground in front. The ground is a good spot for younger children, who get fidgety if asked to sit still for too long.

For something a little different, find a vantage point that allows you to look down on the group. This might be a balcony, a ladder, or a chair.

Image F- group tiered on tree

#6 – Last call: Nose check!

I can’t tell you how many hours I’ve spent in Lightroom cleaning up little noses (and big ones), fixing smudged eyeliner and removing lint from clothing.

While you are preparing your set-up, ask the women in the group to reapply their lipstick and check their hair and makeup.
Immediately before you start shooting, ask the adults in your group to check their partners’ and children’s faces and clothing, paying special attention to noses, teeth and eyebrows. Have a packet of tissues and wet wipes handy. If you feel uncomfortable asking this, think of all the hours you’ll save post-processing.

#7 – Ready, steady, shoot!

Once you have your group positioned, work quickly. Fire off a test shot for exposure, focus, and depth of field. When checking the image on your screen, enlarge it to the maximum size and make sure everyone from the front row to the back is in focus. Adjust your aperture if necessary. When photographing smaller groups, you can get creative with depth of field by focussing on some individuals and allowing others to soften, but that’s a whole other story. With a large group, everyone should be in focus.

With your camera’s drive mode set to continuous shooting, ask everyone in the group to close their eyes and open them on the count of three. Fire multiple shots on the count of three, and then repeat the process a few times to ensure you have at least one great image.

As to obtaining an image with everyone’s eyes open, the jury is still out as to the best method. What works for me is to set the camera’s drive mode to continuous shooting, and ask everyone in the group to close their eyes and open them on the count of three. I fire multiple shots on the count of three, and then repeat the process a few times to ensure I have at least one great image.

When you are satisfied with what you’ve captured, you can break the group down into individual families and other groupings, and have some fun with it. Ditch the tripod and get creative with posing and shooting positions. Avoid meltdowns by photographing families with the youngest children first, and use common sense when it comes to mixing children with water, pets, and climbable objects.

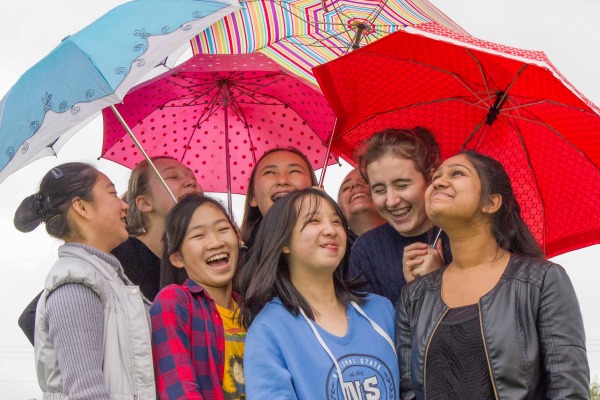
Image G girls under unbrella

Over to you

What kind of groups have you photographed? What are your tips for photographing groups? What did you do right, and where did it go wrong?

The post 7 Tips for Photographing Groups by Karen Quist appeared first on Digital Photography School.


Digital Photography School

 
Comments Off on 7 Tips for Photographing Groups

Posted in Photography


Google+ Launches “Communities” — Will Compete Directly With Flickr Groups for Photographers

07 Dec

This morning Google+ launched communities. It will be rolling out to users over the course of today. I don’t have it yet this morning but my Pal Trey Ratcliff does and has written a blog post about it here.

Over the past year, the photographic community has come together on Google+ probably more than any other site on the internet. Many of the most active of these social photographers early on migrated over from Flickr to Google. While there have been some great conversations that have gone on in many Google+ posts by individuals, what Google has lacked is a town square sort of feature where individuals could congregate around a shared idea. Today’s launch of communities addresses that and it also offers photographers a direct competing platform for Flickr groups for the first time.

I haven’t tried communities yet, so I don’t know how robust it is compared to Flickr groups, but one thing Google seems to do really well is quickly innovate and improve new features on G+ after they launch them. I’ll write a follow up post once I get a chance to try them out. I’m sure I’ll be joining Trey’s new community and probably creating one of my own. Stay tuned. :)


Thomas Hawk Digital Connection

 
Comments Off on Google+ Launches “Communities” — Will Compete Directly With Flickr Groups for Photographers

Posted in Photography


Ways to Redesign Flickr Groups to Make Them More Social, Addictive and Powerful

16 Oct

Flickr is currently in the process of redesigning the Groups section of their site. Initial comments by some beta testers have suggested that more emphasis will be placed on photos and less on discussion threads. I’m not a part of this new beta group, but I thought I’d share a list of ways that Flickr could improve Groups anyways. I believe that Groups represent Flickr and Yahoo’s greatest chance at making progress in social — an area increasingly being dominated by Google+, Facebook, Twitter, Instagram, Pinterest and other Yahoo social competitors.

Although I have not been as active in Groups over the past year, I’ve literally spent thousands of hours in Flickr Groups and feel like I understand how they work and their dynamics very well.

1. It cannot be overstated. The power of Groups are in the discussion threads. The power of Groups are in the discussion threads. The power of Groups are in the discussion threads. Discussion threads, positioned correctly, can be like crack. They can be terribly addictive. Flickr should be doing everything that they possibly can to push people to the discussion threads in Groups. This is how you turn a casual user into a hardcore top 1% Flickr user. If you can suck someone into the discussion threads you can get 100x the use of Flickr out of them. These are the most valuable members on Flickr. These are the biggest Flickr evangelists. These are the ones who will promote the site more than everyone else. Every design decision around groups should be made with the idea of how can we suck more users into the group discussion threads.

2. Toxic people are like cancer. Toxic people will drive people away from Flickr. Toxic people are the single biggest impediment for Flickr Groups to overcome today. The answer to protecting Flickr members from toxic people is simple. Create a more robust blocking mechanism which allows users to block each other. Online harassment that turns into real life harassment will drive even the most hardcore Flickr Group addict away from social. The best way to prevent this harassment is to allow users the ability to block each other. This seems so basic. Google got this super right a long time ago with Google+.

If I choose to block you then you should be made completely and entirely invisible on the site. Poof. Gone. Vanished. It’s not that you still can’t harass, but it makes it harder to harass someone when you are invisible to them in any profile they create that gains momentum on the site. This would encourage people to behave more civilly towards each other if such a tool existed.

Civility will help social for groups.

3. The goal for Flickr should be to create a page of discussion threads that are irresistible to me — an entire page of threads that I simply can’t help myself but click and converse. Any thread that is not of interest is a waste of space. Allowing me to mute or hide threads will ensure that I will be more social because I will see more opportunities to be social. There is no reason for me to see a thread about baseball that keeps popping to the top if I don’t care about baseball.

Muting threads also helps with trolling.

4. Flickr already has a super powerful tool that they are using in their help forum that they are not using in their Groups. If they’ve already coded it for the help forum it seems like a total non-brainer to simply port it to other Group discussions. This is the button that shows me posts that I’ve posted in. Obviously I care more about the threads that I’ve posted in than the threads that I haven’t.

5. Flickr needs to allow me to subscribe to threads that I’m particularly interested in and aggregate these threads on a single page sorted by recent activity. If you want people to be active in multiple groups (and you do, trust me) you want them to be able to easily follow the conversations that they care about in multiple groups. This does not happen today. Instead you have to go to group by group by group by group to hunt around for the conversations that you care about. Alternatively you can bookmark them all and go back and check them manually over and over and over again. You quickly tire of bookmarks because you are only interested in a Group conversation if there is new activity. Having a page to view subscribed threads could become the most powerful page for social on the web.

6. Flickr can’t fight anonymity at this point. It’s too late. Google and Facebook forced this issue early on by requiring users to use names that they are commonly known by. There would be too much of a revolt if Flickr even tried to institute anything like this. However, they can allow verified profiles. By allowing users to opt in to verified profiles they would give these accounts more credibility. Verification could be done similar to how Google used to do it by having users submit a Government ID or simply enter in a credit card number on a credit card. NOTE: I’m suggesting this be made voluntary and OPT IN. If people want to opt in, why not let them? If someone wants to keep their hackerboy6969 anonymous ID this is fine too.

7. Groups need to be promoted more heavily by Yahoo and Flickr across other sections of the site. Yahoo especially and Yahoo search especially, should be driving traffic to Group discussions. Although Yahoo probably has to talk to the boss (Bing/Microsoft) at this point to try to have any input on the search algorithm, if I were Yahoo I’d try to get multiplier algorithm weightings for public group conversations and general group pages. If someone is searching for information on a new Canon 5D Mark III, by all means, Yahoo should try to route them to a Canon Group on Flickr where they can find discussion about this. It’s relevant and invites them to be more social on a Yahoo property.

8. Group invitations should be super easy. New blood is vital to ensuring Group success. Flickr should make it as easy as possible both to invite other Flickr members to your Groups and also equally important to invite people outside of Flickr to your Groups. A Group invitation section should be made which will invite Facebook friends, people in your address book, etc. to your Group. A few years back Flickr made it actually harder to invite people to Groups. They probably did this due to criticism about people spamming Group invitations. Instead of making Group inviting harder, they should simply allow users to mute these notifications by category.

9. Flickr needs to come out with a super easy way to consume and converse in Group discussion threads on both iPhone and Android.

10. Create a +/@ mentioning system for Groups. If someone +/@ mentions me in a Group (or on a photo page discussion as well), I should receive a notification. This is smart and will invite and encourage me to respond.

Flickr Group discussion threads represent the future for social at Yahoo not just for the photo community that is Flickr. Group discussion threads represent the future for social ideally for millions of other topics. To this end, Flickr Photo Groups should be considered as much a social lab as anything for Yahoo. Thoughtful consideration should be made as to how to push this Group format out to the rest of the social web, inviting people to create and manage groups about everything from knitting to hang gliding. Yes, photos are important. Every Group should have a photography function, but the discussion threads really are the power.

By making Groups more about photos and less about discussions Yahoo squanders this important opportunity.

I also believe that Yahoo should consider hiring some people to live in Groups for a while. They should hire some super smart people who understand psychology and just have them live in Groups. Their entire job should just be to participate in Groups all day long and then thoughtfully consider how to make them more and more social.

Although Yahoo staffers are in some Groups today, I can’t think of any who are particularly hyperactive there. It’s hard to be social in Flickr Groups when you’re so busy writing code all day, but Yahoo does need some talent to really get in there and understand what they have — because today I don’t think they really do and I’m not sure there’s ever any HOPE that senior management at Yahoo will ever truly understand what they have with social in the form of the seedling that is Flickr Groups.


Thomas Hawk Digital Connection

 
Comments Off on Ways to Redesign Flickr Groups to Make Them More Social, Addictive and Powerful

Posted in Photography


Flickr Close to Releasing a Redesign of Global Navigation, Explore and Groups

16 Oct

Yesterday I was contacted by a Flickr member asking me if I knew about the redesign that was being done on Flickr. Although I’d assumed that more redesigning was coming to Flickr after earlier releases this year, I wasn’t aware of what specific changes were being implemented or considered. I’ve seen screenshots of some of the new redesign but haven’t had a chance to seriously examine it yet.

Apparently a beta group is currently testing changes to Flickr’s Global Navigation, Explore section and most significantly Groups. Rollouts of the new design have begun and some users are now seeing a different layout on Flickr.

I’ve long believed that Groups represents Flickr/Yahoo’s most significant chance for winning at social. Although it doesn’t sounds like the new Groups layout is set in stone yet, some of the comments made by beta testers would seem to suggest that more emphasis is being placed on Group photos and less emphasis on Group threads. Here are some of the comments in the thread

“That would be a complete disaster and kill off what remains of the active discussion groups on Flickr. Good luck getting new members to ever click over to the threads.

The Groups List page redesign is also, quite frankly, atrocious. Much harder to find groups, not to mention the graphics are messed up.

I will personally lead the revolt if the new group page design sticks. It will KILL any attempts to integrate new users into group discussions.”

AND

“Oh lordy, that’s terrible. The group rules page and intro is completely hidden and while the emphasis on photos is kind of nice, it completely destroys any importance of the description and the discussion.

Not liking that at all. It makes groups look about as social as a set is now. Completely wrong direction and neuters the group other than a photo collection.”

AND

“Let me rephrase that. If you go ahead, and make the groups look like what I just saw, I will mothball every group I have, log out and never log back in. This is not out of some idea that I’d be contributing to an effort to twist Flickr’s arm into doing anything, but because navigation will have broken down so badly, that the site will no longer be worth my time.”

These initial comments regarding Groups are disappointing. It sounds like Groups may be headed in the wrong direction. I’ve long been critical of Yahoo executives who can’t/won’t join Flickr publicly including current Yahoo CEO Marissa Mayer (Mayer posts her photos on competitor Instagram instead of on her own company’s photo sharing site Flickr). Previous CEOs Scott Thompson and Carol Bartz likewise did not have public Flickr accounts.

Part of my criticism of Yahoo execs not using Flickr is that without dogfooding it, without really digging into it, I don’t believe that they can begin to understand the promise that Groups represent for social on Yahoo. Based on early comments on the Group redesign page I’m also beginning to worry that even Flickr staffers don’t truly understand the power of social that Groups represent.

Whether or not this new Group redesign will be rolled out to other users or not remains to be seen. I’m concerned though that time/engineering/design talent wasted making Groups *less* social might just be another blunder after a long line of previous blunders made by Flickr in terms of the guesswork on what users may or may not want.

Last year Flickr rolled out a wonky photo/chat feature, for example, that was quickly killed earlier this year. Time wasted going in the wrong direction hurts Flickr and hurts their chance at social.

Photo sharing is a super competitive space and becoming more and more important. Great care should be taken to make photo sharing as social as it can possibly be. Every single step towards redesign should be asking the question, will this make Flickr more social or less social?

Although I’m not part of this beta or test group, I’m usually not one to keep my opinions to myself, so I’ve also written a companion post to this one entitled “Ways to Redesign Flickr Groups to Make Them More Social, Addictive and Powerful.”


Thomas Hawk Digital Connection

 
Comments Off on Flickr Close to Releasing a Redesign of Global Navigation, Explore and Groups

Posted in Photography