RSS
 

Posts Tagged ‘Great’

How to Take Great Photos with Your iPhone

03 May

The post How to Take Great Photos with Your iPhone appeared first on Digital Photography School. It was authored by Sandra Roussy.

Camera phones have certainly come a long way. A few years ago it was impossible to try to achieve good photos with the camera that came with your smartphone. The quality and resolution were so low that we didn’t even think about post-processing and posting our photos.

The iPhone has had steady updates with new features added over the years including constant improvements to the camera quality. When the iPhone 8Plus came onto the market, photographers were finally ready to take photos that they could be proud of editing and posting. Many professional photographers are now using their smartphone cameras to snap photos during their travels or even on assignments.

Of course, the iPhone is limited and can’t provide all the creative features that a DSLR with interchangeable lenses can. But some days, carrying bulky camera gear is impossible, so the iPhone provides a great alternative.

Learn how to use your iPhone to its full potential, and you too will be taking great photos with your camera phone! We’ll take a look at the iPhone 8plus and newer models in this article because they have some great new photo features like Portrait Mode.

Super helpful tip: Use the slide-left feature from your lock screen to get quick access to your camera.

Learn the settings

Set to highest quality

Your iPhone camera can offer some high-quality photos and videos. If you intend to store hundreds of photos on your phone without downloading or transferring them into a cloud-based platform, then you may want to shoot in low resolution, so your phone doesn’t get full.

When you do want to shoot something important and want to edit the photos afterward, it’s best to shoot in the highest quality possible.

Set your focus point

The iPhone has a feature that you can use to set your exact focus point, and it’s quite important to use it to achieve tack sharp images.

  • Compose your shot
  • Tap your screen where you want the focus to be.
  • Slide the exposure up or down (The little yellow sun icon).
  • Press and hold to lock the focus point and recompose your photo if you wish (AE/AF LOCK).
  • Take your photo.

About HDR

HDR means High Dynamic Range and what it does is help provide evenly exposed images. The camera takes 3 shots when you take a photo and stacks them to provide a perfectly exposed image with all components having details in both the highlights and shadows.

Go to your camera setting and toggle off Auto HDR and Keep Normal Photo toggled on. While shooting you will see the HDR icon at the top. If there is a line through it, simply tap it to activate.

Helpful Tip: Your iPhone gives you the option to preserve your last shoot settings. This is especially useful when you plan to do the same type of photography. If these are not toggled on, the iPhone goes back to its default setting every time.

Use the grid lines

Nothing says amateur like a crooked horizon line. One of our pet peeves as photographers is to see a beautiful landscape where the ocean seems to be sliding down the side of the photograph.

Tilt your head to look at the photo? No.

Better, apply grid lines on your iPhone so that you can align the horizon line to get a perfectly straight horizon.

How-to: Go to settings and toggle the Grid option on.

Composition tips and tricks

Rule of thirds

Rule of Thirds is the main composition rule of photography that allows the viewer’s eye to flow easily over a photo. This is a good guideline to follow but it is not always the best composition for every situation.

Tip: Having the Grid Lines toggled on will help you achieve the rule of thirds better.

Keep it simple

Sometimes less is more. When you cram too much info into a photograph, the viewer doesn’t know where to look and may not capture your intent. Keep white space and focus on a single subject. This will bring attention to the subject and give your photo more creative meaning.

Get down and raise it up

Shooting from the same perspective and position will most probably create some pretty boring and repetitious photos. Try getting down on the ground and see how the perspective changes. This can sometimes add some drama to your subjects. Also, look up! Look at the contrasts with the sky, buildings, trees, and clouds.

Move in close

Sometimes a small detail can take a photograph from good to WOW!

Observe light, colors, and shadows

Learning to observe how light affects objects and changes throughout the day is key to improving your photos. Observe how shadows get created and how the light hits particular objects and capture those unique events.

Look for contrasts of color or a single color pop in a monotone environment.

Photo modes and special features

The iPhone comes with photo modes for you to choose from. The best feature to have come out in the last few years is Portrait Mode.

Portrait Mode

As of the introduction of the iPhone 8 plus, Portrait Mode has been accessible and has provided some broader creative possibilities. The iPhone Xs and iPhone Xr have the option to adjust the depth of field while shooting in Portrait Mode. Portrait Mode makes great portraits, of course, but can also be used for so much more. Try setting to portrait mode when you want a bokeh effect or a blurry background in your photos.


Square

This mode is useful if you want to post on Instagram while keeping your composition intact.


Pano

Shoot some panoramic photos to show a greater angle of a landscape.

Special features

Burst Mode: Burst mode is great when you want to capture some action shots. Press and hold the shutter button, and the camera takes a series of photos.

Live Photo: Live photo is a fun feature that records 3-second videos before and after you have pressed the shutter. When viewing your photo, press and hold the photo to see the effect in action. You can activate or deactivate this feature in your camera mode.

Loop, Bounce, Long Exposure: Swipe up on your Live Photo to gain access to a few more features that let you loop the live photo effect, bounce it, or create a long exposure.

Zoom or no zoom – Attachable lens options

  • The newer versions of the iPhone have two lenses that allow you to zoom into your subject without moving in closer. This is practical when photographing wildlife or even when doing portraits.
  • Click on the 1X at the bottom of the camera screen. The zoom will go to 2X. Click your photo. You can pinch your screen and zoom even further, but this can cause shake in your photo and probably create blur.

Attachable lenses have hit the market and can offer some fun alternatives when shooting. They come in a variety of prices and quality. Macro lenses and fish-eye lenses seem to be the most popular.

Try photo apps and filters

Photo editing apps and software are very popular with amateurs and professional photographers alike. Some apps let you add filters to create moods, while others give you access to features that let you edit and fine-tune your iPhone photos.

Some of these apps even let you get out of the automatic iPhone mode and into manual shooting mode. They let you adjust your shutter speed, ISO, and aperture as you wish.

Here is a list of some of our favorite apps available for your iPhone.

Pro Camera

You can shoot in Manual, Semi-automatic, or Automatic modes with Pro Camera. It contains RAW capture, live histogram, and an anti-shake feature. Pro Camera is the app that allows you to achieve super sharp images with your iPhone.

Snapseed

Snapseed is a popular go-to app for every level photographer. It’s one of the most complete free apps offering a variety of functions to edit your photos.

VSCO

VSCO is one of those apps, that when downloaded, allows you to shoot from your camera phone with the option of controlling the ISO, white balance, shutter speed, and other customizable camera functions.

Like a DSLR, you adjust your exposure components before you shoot to get your desired outcome. You can create long exposure photographs and fine-tune your focus points.

There’s a useful active tilt meter to level your phone to achieve a perfectly straight horizon line.

Have some fun with your iPhone

Even if you own an expensive DSLR and shoot in Manual mode, you can still get some great shots with your iPhone. The latest generation iPhones have stepped up the game regarding the cameras, lenses, and shooting options.

Keep in mind a few helpful tips to achieve beautiful compositions and don’t forget to add some useful photo-editing apps on your iPhone.

Your iPhone photos will look more professional, and you’ll be proud to post and show them off.

Feel free to share some with us in the comments section below.


The post How to Take Great Photos with Your iPhone appeared first on Digital Photography School. It was authored by Sandra Roussy.


Digital Photography School

 
Comments Off on How to Take Great Photos with Your iPhone

Posted in Photography


How to Find Great Photography Opportunities Where You Live

28 Feb

The post How to Find Great Photography Opportunities Where You Live appeared first on Digital Photography School. It was authored by Prasad Np.

Are you one of those folks who wait to travel to an exotic destination to make photographs? Is your camera nicely packed or gathering dust until you are traveling or on an assignment because you don’t have enough inspiration or subjects? If you are one such photographer, then you are actually missing countless photography opportunities right in front of you. No matter what level of skill and experience you have, the more you take your camera out and make photos, the better you get.

This image of the Gurgaon Metro was taken in the night on one of the busiest streets of the city and clicked from 20-floors above © Prasad Np

Gone are the days when you made images on film, and there was a cost involved in acquiring and processing rolls of films. Now, thanks to the digital cameras, you can take as many photos you want and keep on learning and improving every day.

So there’s no reason to wait until you are traveling to an exotic location to make images. Look around you, and you will find countless opportunities to make beautiful images, test your technical skills and take your game to the next level.

Whether you live in a developing city like Gurgaon (where I live), or in a picturesque mountain town, there are photographs to be made and shared. So the question is, how do you find great photo opportunities when you think you live in a boring location?

Sunset In Gurgaon © Prasad Np

The first step is to believe there are beautiful photographs around you that you must capture. It doesn’t matter what your preferred genre of photography is. Whether you enjoy wildlife, landscape, people or street photography, there are photographs to be made right near your home, in your own city.

Advantages of photographing your city and its surroundings

The advantages of photographing your city and its surroundings include:

  • You get to practice photography regularly and dissect your photographs technically and artistically to take better photos next time
  • You don’t have to travel a lot. You can always take pictures close to your home
  • Unlike when traveling to an exotic, faraway location where you may get only a short window to get the shot, closer to home you can always revisit the place and get the shots you may have missed the first time
  • If you are not happy with some of the photos, you can always go again and click, and you can also plan the shots in a better way, especially in cases like the city skyline, or sunsets

So here are a few pointers for you to find great photo opportunities right where you live. In this post, I am sharing some images I made in Gurgaon – a city I now call home.

Go for skyline and redefine it

Every city has its own iconic skyline that people can identify it with. However, that should not restrict you from trying to redefine or interpret it in your way. You can always go for a different shot; especially if the city is still developing. Capturing it as it develops creates an everlasting record of the change the city went through as it grew.

Even the most mundane of skylines can give a dramatic effect when you combine it with beautiful clouds or a sunset. Because you know the best vantage points from your previous experiences in your city, you can be well prepared and reach the spot in time to get the shot you have always wanted to take.

A Housing Society In Gurgaon © Prasad Np

Photograph seasonal natural phenomenon like blooming of trees

Many cities in Japan are known for the Sakura or Cherry Blossom festivals. Think about what the equivalent may be in your city. Every change of season brings a visual spectacle that is a hallmark of that season. In Gurgaon and most of North India, April to June are months of Golden Shower. The hotter the weather, the more beautiful flowers of Indian laburnum trees you find. Make a point to find out when the local trees in your area are in bloom, so you are prepared to take their pictures. An advantage of this is you can go over an extended period and click pictures of the same tree in various stages of bloom, including being barren in autumn. If you have these trees growing close to local landmarks, then your pictures may be easily identified with your city.

Laburnum blooms Gurgaon © Prasad Np

Local festivals and fairs

Local festivals & fairs are a great way to photograph your local community and happenings around you. Festivals and fairs are excellent opportunities to document the vibrancy and bonhomie of your city and how people connect – more so when a festival is a community event. “Lohri” is one such festival celebrated on 13th of January every year. Here, they light large communal bonfires in various housing communities, and people walk around the fire singing songs and celebrating. Find out what festivals your city celebrates. It could be as big as Christmas or something that could be very local, like a fair. Be there and make images to your heart’s desire.

Lohri Festival Bonfire Gurgaon © Prasad Np

Night photography in your city

A big city is no place for star trails as light pollution may be too much. However, there are other night photography opportunities in abundance. All you need is a good vantage point, your DSLR and a sturdy tripod. Any high-rise with a safe observation area or a balcony can become your vantage point to capture the light trails of vehicles down below.

Look for exciting locations like a curve in the local metro train tracks and wait for the train to come along. You can also click interesting images while incorporating the moon against your city skyline. The photo below of Super blood moon was deliberately clicked with part of it hiding behind the building to give an idea of the size of the moon compared to a normal one you see in the picture with the power towers.

Super Blood Moon Gurgaon © Prasad Np

Power Towers Gurgaon © Prasad Np

Go abstract

Night photography is also a great time to go abstract with some images of your city. While there are no creative limits to what you can do when trying to create a work of abstract photography, it is always a good idea to never overdo it, especially when you are beginning. A creative idea you can try is to move to manual focus and deliberately click out of focus images that render the distant lights with a bokeh-like effect. Use a tripod or keep your camera on a sturdy surface. Also, use a time release button or remote to click images to keep your images sharp.

Abstract Night Photograph Gurgaon © Prasad Np

Be observant of your surroundings

One of the keys to photography is being observant of your surroundings. Even when you are on your apartment balcony or in your backyard, there are enough photography opportunities available to you. If you live in a highrise, look down. You may get an interesting frame like the photo below of the two kids carrying similar umbrellas on the sidewalk. Or perhaps, the cars passing below under the trees that look like a beast under the canopy of the rainforest.

Kids Walking with Umbrellas © Prasad Np

Car under tree Gurgaon © Prasad NP

Conclusion

As you can see, any place can be a good location for making photographs. Don’t miss any opportunity to take photos as it helps in honing your skills both technically and artistically. Most of all, photographing your own city helps you learn much faster. You have an opportunity to click images in various seasons, in many light situations and go back as you need.

Now it is your turn, do share where you live and your favorite image that you made in your own city.

The post How to Find Great Photography Opportunities Where You Live appeared first on Digital Photography School. It was authored by Prasad Np.


Digital Photography School

 
Comments Off on How to Find Great Photography Opportunities Where You Live

Posted in Photography


How to Make Great Photo Invitations in Photoshop

22 Feb

The post How to Make Great Photo Invitations in Photoshop appeared first on Digital Photography School. It was authored by Ana Mireles.

Do you have an event coming up? Let’s make it a success!

It doesn’t matter if you’re throwing a birthday party for your kid or organizing a fancy dinner for your clients and coworkers, every event needs an invitation. You want people to know about it, but you also want to get them excited so they want to come. Here are a couple of ideas to do photo invitations to start you off on the right foot.

1 - How to Make Great Photo Invitations in Photoshop

In this day and age, we are used to expressing ourselves with photos and a party is no exception to that. If you make a Facebook event it asks you to add a cover photo; if you want to do printed invitations, a photo works well too. The idea behind a photo invitation is to communicate more than just when and where. It also sets the tone for the party, so choose your image wisely and incorporate the text creatively.

2- How to Make Great Photo Invitations in Photoshop

Text box photo invitations

One idea for your photo invitations is to create a text box within your photo, like the example above. I suggest this idea if you’re going with postcard format, or folding card, where you can put all the practical information on the back or inside. This is because too much text on top of the photo can look messy. However, it can work if you’re using a minimalistic photo.

In any case, you can achieve this effect in just a few steps:

Step 1:

Once you’ve chosen your photo, open it in Photoshop. Then duplicate the layer by going to Menu -> Layer -> Duplicate Layer. You can also do this with the New Layer button at the bottom of the Layers panel if you prefer.

3- How to Make Great Photo Invitations in Photoshop

Step 2:

You want the two layers to have different brightness, so depending on the exposure of your image you can either darken the original layer or lighten the new top one. You can do this by adjusting the levels. Go to Menu -> Image -> Adjustments -> Levels, making sure the right layer is selected.

4- How to Make Great Photo Invitations in Photoshop

Step 3:

Now go to the top layer. Using the Rectangular Marquee Tool, select the area of the Text Box to the size you require. Once you have it, create a layer mask by clicking on the button at the bottom of the Layers panel. You can also delete the excess image by inverting the selection with Menu -> Select -> Invert and click the backspace key, however with this choice, you can’t adjust it later so I don’t recommend it.

5- How to Make Great Photo Invitations in Photoshop

Step 4:

Give the text box a special effect so that it’s clearly separated from the background image. Click on the fx button at the bottom of the Layers panel and choose the one you like, usually an Outer Glow or Drop Shadow should work well.

6- How to Make Great Photo Invitations in Photoshop

Step 5:

Finally, click on the Text tool and add your text. Remember that you can personalize the font, size, color, and much more on the top Options Bar. One trick I like to use is to type it twice in different colors, then move one of them a click or two to give it some depth.

7- How to Make Great Photo Invitations in Photoshop

There you go. Using the same technique, you can do the invitations to any event from a casual rooftop party with friends to a homey, intimate holiday party and much more. What sets the tone is the photo.

8- How to Make Great Photo Invitations in Photoshop

Faded background photo invitations

If you need all the information to be in one place together with the image, you can use a fade effect:

Step 1:

With your image open in Photoshop, create a new layer by clicking the new layer button at the bottom of the Layers panel. Then go to Menu -> Edit -> Fill. Choose the color you want keeping in mind that this becomes the background of the text. However, it also interacts with the image you chose.

9- How to Make Great Photo Invitations in Photoshop

Step 2:

Click on the Gradient Tool (if you don’t see it, check under the Fill Tool) and drag across your image to fade in the color layer into the image layer. This process is trial and error, so do it as many times as you need until you’re satisfied. If you need more information on how the Gradient Tool works I recommend you check out my tutorial “How to Customize and Use the Photoshop Gradient Tool.”

10- How to Make Great Photo Invitations in Photoshop

Step 3:

Now you just have to include all the information using the text tool as shown in the first example and you’re good to go.

Have fun and feel free to share your invitations with us in the comments section below.

11- How to Make Great Photo Invitations in Photoshop


The post How to Make Great Photo Invitations in Photoshop appeared first on Digital Photography School. It was authored by Ana Mireles.


Digital Photography School

 
Comments Off on How to Make Great Photo Invitations in Photoshop

Posted in Photography


5 Great Android Apps for Taking Creative Selfies

17 Feb

The post 5 Great Android Apps for Taking Creative Selfies appeared first on Digital Photography School. It was authored by Erin Fitzgibbon.

Selfies with a Creative Twist

Last year I wrote an article about pushing beyond the selfie. I wrote about trying to make self-portraits that spoke more deeply about who you are as a person; that we should all try to make a portrait that portrays more than just a smiling face. I still believe strongly in that premise. I’m not the type to shoot endless selfies and post them on Instagram. I want to show off the amazing energy and rich personalities of the people I photograph.

Using another app called Photo Lab I created this image in just a few quick minutes. The free version requires the Photo Lab logo.

Peer pressure

But the problem is I have friends who love taking selfies. Everywhere we go they want to make sure we capture the moment. You know the quick shots that commemorate a place and time and how much fun you’re having there. The creative in me wants to do more than just put a hand on my hip and smile. I want to do more. So as a tribute to my friends and salute to those of who you crave creative options I’ve compiled a list of Selfie and Photo Apps that can help you to take great images but also allow you some creative opportunities.

App #1

Sweet Camera – I love this app. If I’m taking a selfie (mostly for my gaming avatar) I use this app. It’s quick and easy to use, and I’ll admit it’s fun. There are a ton of free filters to download and if you want you can add endless combos of ears, sparkly fake earrings, etc. The app works nicely on Android and links quickly through the share option to all my social media accounts. My friends love this one for all the fun little options they can use. One of their favorites is the ability to change their hair color.

I created this image in just a few minutes using a large window for lighting and the Sweet Camera app.

App#2

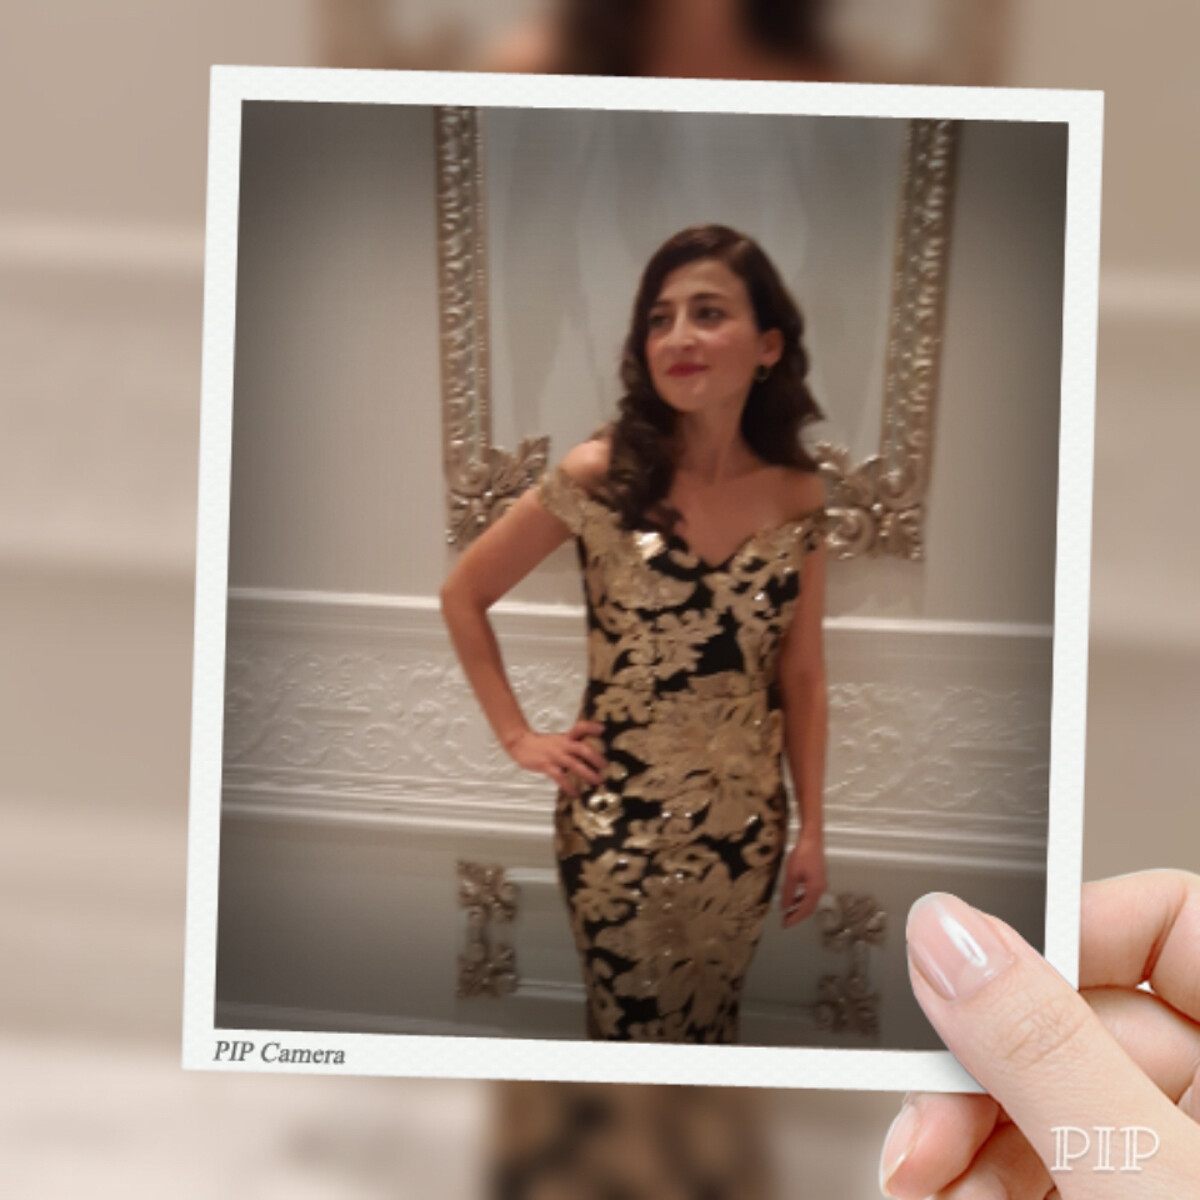
Pip Camera – Photo Editor Pro – this one is really about the different filters you can use. Pip camera allows you to take your photos and insert them into fun frames. Take a full length shot then insert yourself into a glass bottle. The effect is a lot of fun. There are also options to use polaroid frames. You can even take your photo and edit it, so it looks like the front page of a magazine. This app is about easily using options to make creative images. It’s more than just a selfie app that hides skin blemishes.

I used the bottle effect to take this photo of my friend. It’s the typical joyful jumping shot with a little adjustment.

App#3

Retrica – Yes, Instagram has many filters you can use for your selfies, but Retrica is probably one of the most comprehensive apps. Its got hundreds of different filters you can play around with and use for free. The editing power for managing blemishes and smoothing skin isn’t as powerful as other apps, but there’s a lot you can do with Retrica.

The filters on Retrica are a lot of fun to use in experiments.

App#4

Photo Overlays – this has lots of backgrounds that you can use to create interesting overlays. For those of you who use Photoshop, it’s really about blending layers. For those of you who know nothing about Photoshop, it’s plain fun to insert you and your friend’s face into the moon. Give it a try. Just be prepared to deal with advertisements. There are lots of opportunities for creativity with this app.

Photo Overlays lets you play around with layers in a really simplified manner.

App#5

VSCO– VSCO is more of a photo editor than a selfie app with lots of options for creativity. VSCO also works as a social media sharing platform in and of itself. It comes with lots of preset options as well as some pretty comprehensive editing tools. This app is more of an editing program for your mobile device than a quick and simple selfie app. However, it’s fun to use if you’re the type that wants to do more than add some fun stickers. VSCO lets you get creative with your mobile photos.


Processed with VSCO with b1 preset

Be creative!

So basically, the sky is the limit for all of those out there who want to tweak their selfies. You don’t have to stick to the simple little stickers and filters you find in your Instagram toolbox. There are a lot more options out there. Give some of these a try and show us what you create. The world of mobile photography is always expanding. The really cool part about it is that it is accessible to all. Some may turn down their noses at the idea of using these apps and filters but for the average user its a lot of fun to experiment. For me, these apps can never replace Photoshop and Lightroom – I love the creative flexibility of those programs too much to give up on them. I’m still a huge advocate for creating more than the quick and simple selfie, however, if you’re less inclined to take time to shoot something a little more original perhaps these options can fulfill your creative needs.

So now it’s time to see your creative endeavors. I’ll leave you with a few more fun experiments, but I know the rest of you are a lot better at this than me. I’m not the selfie type. So it’s your turn show me what you can do in the comments below.


The post 5 Great Android Apps for Taking Creative Selfies appeared first on Digital Photography School. It was authored by Erin Fitzgibbon.


Digital Photography School

 
Comments Off on 5 Great Android Apps for Taking Creative Selfies

Posted in Photography


Get Low and Aim High – How to Use Low-Angle Photography to Great Effect

17 Feb

The post Get Low and Aim High – How to Use Low-Angle Photography to Great Effect appeared first on Digital Photography School. It was authored by Glenn Harper.

One way you can make photos stand out is to compose them from an unusually low viewpoint. But why is low-angle photography so effective?

Good photography is hard to define, not least because there is always an element of subjectivity in judging it. Even when you have firm ideas about what great photos look like, there is no guarantee you’ll create them frequently. In fact, the more honed your tastes become, the less easily your own photos are likely to satisfy you.

Low angle photography - gate shot from below

Shooting this Prague gate from below gave it more visual impact and a cleaner composition.

Is there any secret to taking eye-catching pictures? If so, I wish I could harness it. There’s one idea I try to bear in mind: show people things in your pictures they don’t see in their day-to-day lives. That means looking closely and seeing details, noticing the unusual, emphasizing the point of interest, keeping things simple, and knowing what to exclude. What is it you have seen and want to convey?

Low angle photography - statue looking downwards

Statues shot from below often work well when the subject looks down at the camera.

Used creatively, low-angle photography meets the criteria of being unusual and will often make viewers look twice. However, it needs a bit more thought than just pointing the camera upwards.

Getting low, aiming high

Of course, low-angle photography isn’t a radical idea in the context of photographing architecture or statues, because they will often rise above you anyway. Unless you photograph these subjects from distance, you’ll always be pointing the lens upwards. But even with these subjects, you need to get the angle of the shot right and consider what qualities you’re aiming to accentuate.

Low angle photography - St Dunstan's Hill in London

In this slightly eerie photo, the street name at the right adds extra interest and gives the picture scale.

If you’re photographing less lofty subjects such as people, animals or plants, you’ll have to get very low to make the perspective unusual. This, of course, could draw attention to you as a photographer, so you might have to shake off any inhibitions. Concentrate on the shot and you’ll soon forget about what other people think.

Architecture & statues

In the case of architecture, more ornate buildings (e.g. Gothic) aren’t always best shot from directly beneath, because all their detail becomes obscured or lost. You could photograph them that way and pick out a detail such as a gargoyle using shallow depth of field. The same can be done with statues on occasion, whereby you focus on an interesting part of the statue from below and isolate it.

Low angle photography - Canary Wharf in London

Three buildings add to the enclosed feeling of this photo, while the carefully positioned clock lends it some scale.

Modern buildings like office skyscrapers often have the benefit of windows and lines, which narrow and converge if you photograph them from immediately below. This is an effective way of directing the eye towards the top of the building. Use of diagonals is an old trick for leading the eye into the picture, but you might need something else to make the shot a great one: perhaps a dramatic sky or cloud above the building.

Low angle photography - statue of Emmeline Pankhurst in London

Using a shallow depth of field, I isolated the eyeglass in the hand of famous suffragette Emmeline Pankhurst, London.

Camera angle

There is no obligation when standing under a building or any other subject to keep it central or horizontal in the frame. By rotating the camera, often you’ll find an angle that increases the slightly giddy impression of towering height. This effect should not be underestimated. It’s a useful trick in low-angle shooting to make the viewer feel slightly disorientated.

Low angle photography - architecture

Left: Silhouette of Rouen Cathedral. Right: One Canada Square – the tallest building in the UK when I shot it. The presence of a second building adds to the giddying effect.

When pointing a camera upwards inside a church or cathedral, I avoid including small sections of detail at the edge of the frame. Instead, I rotate the camera until everything in the picture looks intentional and not something I didn’t notice.

Low angle photography - Rouen Cathedral

This is an obvious shot to take of the Crossing Tower in Rouen Cathedral. The main trick lies in composition and finding an effective angle.

People

Photographing people from a low angle produces some interesting effects. If you look at old “film noir” movie stills, you’ll see a lot of shots where the camera is pointing upwards. This gives portraits a moody feel and empowers the subject because he/she towers above the photographer and, ultimately, the viewer. The downside of shooting from below is that it can be unflattering, often making subjects look broader in the body and fatter in the face.

Low angle photography - casual portrait from a low perspective

A somewhat moody low-angle portrait. You’ll see a lot of low angles as well as low-key lighting in old film noir movies.

You can shoot from low angles in street photography, too, whether from the hip or the ground. Be careful when shooting from the ground that you’re not invading anyone’s privacy by pointing the camera upwards—stay aware of your surroundings and watch who is entering the frame and how they are dressed.

Low angle photography - Venice Carnival

This shot at the Venice Carnival was taken from ground level. Without any prompting, the lady in the middle obligingly leaned over towards the camera.

The mere act of taking street photos from a low level may not, in itself, create a successful photo (if only it were that easy). You still need to have seen something interesting or out of the ordinary and the composition must be right. You might notice a detail at ground level and juxtapose it with the people above it.

Animals & pets

Many people photograph their pets from above, but if you get down to their level you can almost humanize them. That is to say, you’ll often capture their character better than from above. Like human subjects, photographing a pet from floor level gives it more power. An example of this might be if you photograph a cat preparing to pounce—you’ll put yourself in the position of the cat’s prey.

Low angle photography - Birman cat

Cats often take on that regal, aloof look when photographed from below.

Flowers

Sometimes you’ll get good results when shooting flowers from a low angle. One benefit in good weather is that you might get a plain blue sky as a background. Blue goes well with red and yellow – the three together form a triadic color scheme. It also blends well with orange (e.g. California Poppies), since blue and orange are complementary colors.

This low-angle shot from many years ago was completely unsighted. I was aiming to contrast life (flowers and bumblebee) with the WW1 gravestone and tragedy of war. I don’t know that I succeeded, but the idea still resonates.

Of course, it may not be color that inspires you to photograph flowers from below. You might want to emphasize a long stem or capture the translucent qualities of a flower’s petals against a bright sky. You might go for the dramatic effect of many flowers looming over the lens—a bit like a miniaturized forest.

Low angle photography - flowers

These flower shots from below aim to show the sunlit semi-opaque petals as well as color and shape. The fact that they are tall flowers makes this treatment easy even with a bulky SLR.

Trees

Trees are a prime candidate for low-angle shooting, either individually or collectively. Like buildings, you need to stand immediately below them to make the shot even slightly unconventional and maximize the effect. Such photos aren’t always striking unless there is an interesting branch formation or pattern above, so you should take care in picking a subject. Colorful foliage is an obvious thing to look out for, too, especially during fall.

Low angle photography

I shot this mainly for its bark pattern and texture, using the blue sky as a pleasing backdrop. Interesting branch formations or foliage colors might also prompt you to take such pictures.

Equipment

You don’t need any special equipment to shoot from low angles, but obviously a flip-out LCD screen is a useful thing to have. If you don’t have that, at least digital photography costs nothing to experiment with, so you can shoot blind until you get what you want. This was how I first took low-angle photos—with repeated unsighted exposures. A wide-angle lens might help you accentuate height sometimes with its sweeping view of the world, but this is not a necessity.

I hope this article inspires you to shoot some great low-angle photos, whatever the subject. Good luck, and please share with us in the comments below!

The post Get Low and Aim High – How to Use Low-Angle Photography to Great Effect appeared first on Digital Photography School. It was authored by Glenn Harper.


Digital Photography School

 
Comments Off on Get Low and Aim High – How to Use Low-Angle Photography to Great Effect

Posted in Photography


FOB Kitchen, Great New Filipino Hot Spot in Oakland, California

09 Feb

FOB Kitchen, Oakland, California

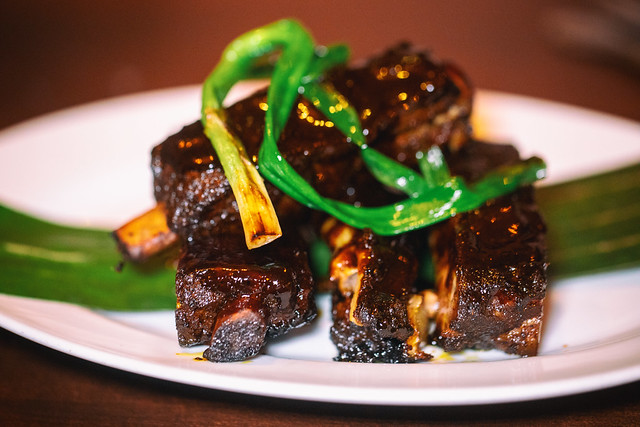
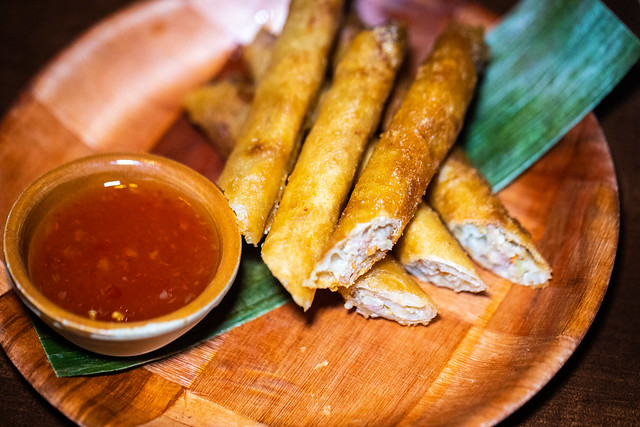
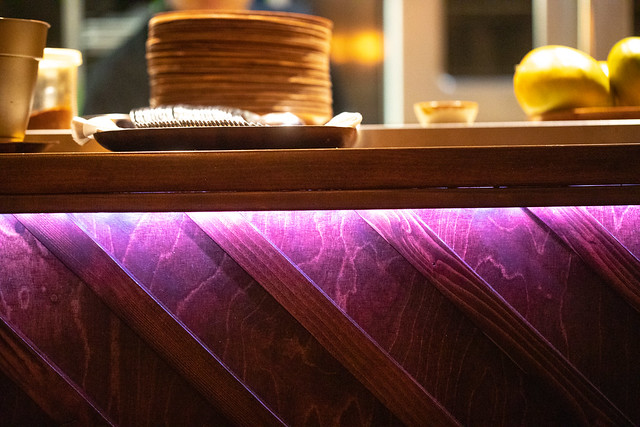
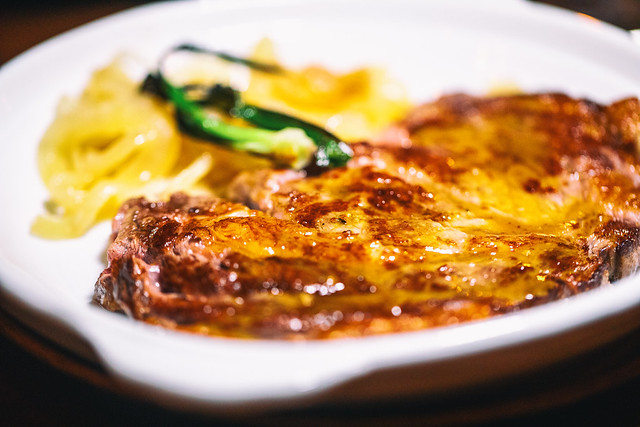
I had the pleasure to try FOB Kitchen last night, a hot new Telegraph Avenue Oakland Filipino menu in Oakland (Thanks cristina_thebaker!). 5179 Telegraph Ave, Oakland, CA 94609. You would not know it from the unassuming Temescal strip mall setting, but once inside you are treated to an amazing and flavorful Filipino menu from this former San Francisco pop up. The decor and setting make you feel like you are being transported to a swanky tropical beach bar in the Philippines and once you dive into the family style offerings you will be hooked. The friendly service is first rate and definitely take their recommendations when ordering for the first time.

Chef Janice Dulce (right), FOB Kitchen, Oakland, California
FOB Kitchen Chef Janice Dulce (right).

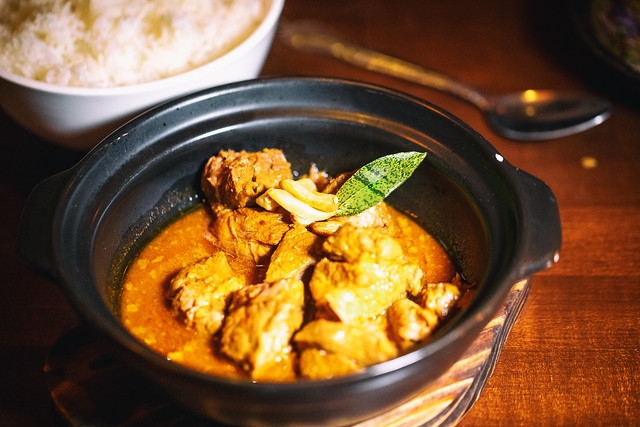
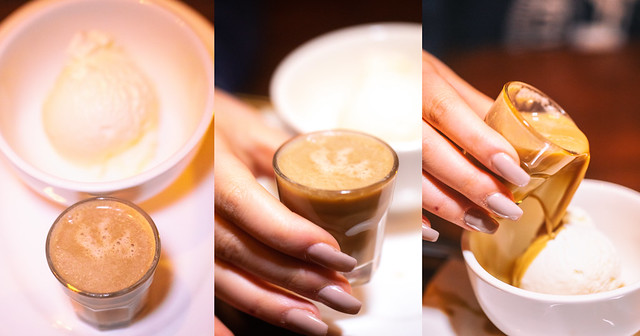
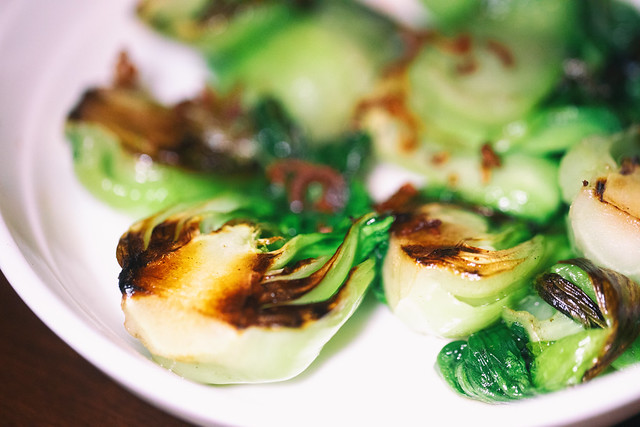
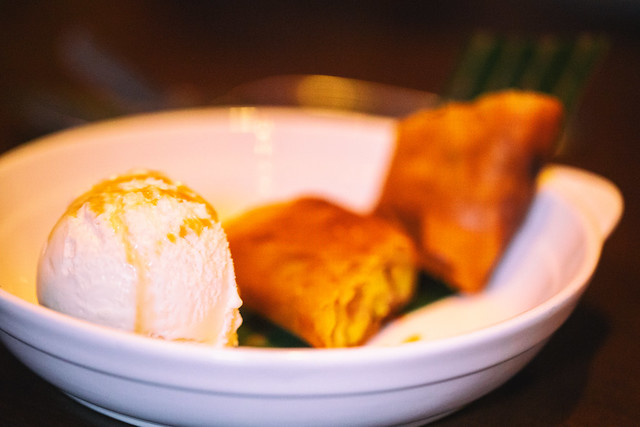
My favorite dish of the evening was their popular and well regarded Pork Adobo (palm vinegar, soy, garlic, annatto). The succulent chunks of pork go perfectly with the savory sauce which is also perfect to pour over the rice served with dinner. I also enjoyed the cornucopia of flavors in another recommended vegetarian dish the Ensalada Talong (eggplant, jicama, tomato, sea bean, cilantro, scallion, coconut vinegar, soy, rice cracker). I’m a huge brussel sprouts fan and FOB Kitchen prepares theirs perfectly — and as a bonus they also have bok choy as a side as well. Of the three desserts I tried I think I liked the turon the most, which are Filipino fried banana rolls served with ice cream. While these dishes were some of my favorite standouts, I loved everything I tried there.

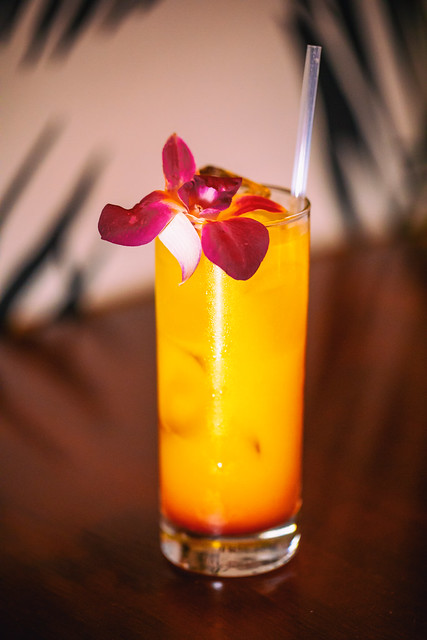
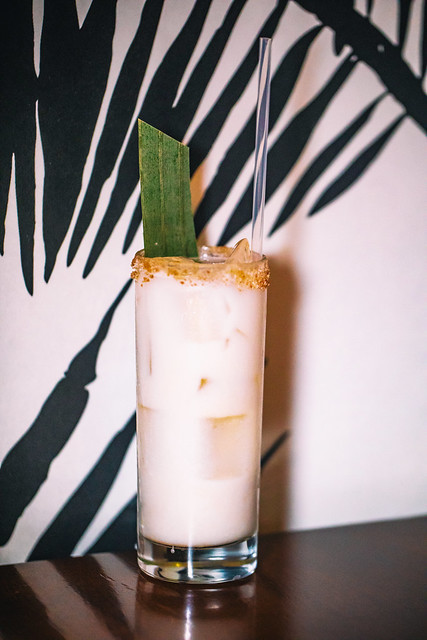
Beautiful well crafted cocktails, savory regional cuisine and a flight of excellent desserts with family celebrating my second oldests 17th birthday made for a memorable evening. I will definitely be back!

FOB Kitchen, Oakland, California

FOB Kitchen, Oakland, California

FOB Kitchen, Oakland, California

FOB Kitchen, Oakland, California

FOB Kitchen, Oakland, California

FOB Kitchen, Oakland, California

FOB Kitchen, Oakland, California

FOB Kitchen, Oakland, California

FOB Kitchen, Oakland, California

FOB Kitchen, Oakland, California

FOB Kitchen, Oakland, California

FOB Kitchen, Oakland, California

FOB Kitchen, Oakland, California

FOB Kitchen, Oakland, California


Thomas Hawk Digital Connection

 
Comments Off on FOB Kitchen, Great New Filipino Hot Spot in Oakland, California

Posted in Photography


8 Great Reasons to Enter a Photo Contest

06 Feb

The post 8 Great Reasons to Enter a Photo Contest appeared first on Digital Photography School. It was authored by Simon Bond.

Do you want to take your photography to the next level? Are you look for a focus to your work? There are many ways to achieve those aims in photography. One of the best ways is to enter a photo contest. That competitive edge is a really good way of driving your photography on by that extra few percent. In this article, you’ll discover some great reasons to enter a contest. Then you’ll find out some great contests to enter, and some of the potential pitfalls that some contests present.

1. A photo contest gives you direction

A decent level of creativity and a well-executed photo are two things needed to win a contest.

There are times as a photographer that you’ll drift a little bit. Whether that means you photograph less, or when you do photograph there’s not too much cohesion to it depends on you as a photographer. Even those with clear ideas about their photography benefit from a clear direction to head in, and a photo contest is one great way to achieve this. Not all, but many photo contests have themes, and it’s this theme you concentrate your mind on as you look to compose the best photo.

2. Pushes you out of your comfort zone

In the same way that a themed contest can give you direction, it can also push you out of your comfort zone. Of course, if the contest is too far out of your comfort zone, you might choose not to enter for a variety of reasons. However, with enough time before the final entry date, contests provide the perfect opportunity to hone your skill in another area of photography. Contests also allow you to adapt the way you take photos to fit the theme of the contest. Do you enjoy landscape photography? A contest theme set to crystal ball photography could be the perfect chance to learn this new photographic technique while applying what you already know about landscape work.

This photo ranked number 1 for the daily interesting contest on flickr.

3. Focuses your mind on being perfect

Do you always photograph all your photos at the correct aperture? Was the ISO left too high, from the last time you photographed indoors? While you’ll almost certainly get those camera settings correct when you’re out photographing when it comes to a contest you definitely will. The smallest advantages you can gain by perfecting your technique can all stack up, and you’ll need every advantage you can get to win a contest.

4. Is a great way to gain exposure

There are several ways you can gain exposure through a photo contest. However, there is no doubt your photo needs to stand out because most contests gain thousands of entries. It’s in the interests of a contest to engage its audience though, so how can that benefit you? Those contests that run for a couple of months may well have a weekly top ten. Photos from this ten may not end up winning the prize, but it can put eyeballs on your photo if you make the ten. In addition to this, typically photo contests have a winner, as well as a raft of commended photos. Once again, this gives you a significant chance of more exposure, should your photo be commended.

This photo won a contest in South Korea a few years ago.

5. There’s the potential to win a great prize!

The bigger the contest, the bigger the prize! Of course, it is incredibly difficult to win the grand prize of any contest, and that’s certainly the case with photography. Those that win often gain a photographic opportunity that is a once in a lifetime chance. The national geographic contests often have prizes that involve traveling to exotic locations, and the chance to learn from established photographers.

6. See other peoples entries, and be inspired

There are plenty of places you can see other photographers work. More or less, any form of social media allows for this. Photo contests are the place people place their very best. Seeing how other people have interpreted a contest theme can lead to inspiration in your own work. Of course, plagiarism isn’t a good idea, but looking at style, technique and execution might lead to an adaption in the way you take photos yourself. Adapting other peoples ideas, and incorporating them into your work is a great way to improve.

Photo contest sites like Pixoto are a great way to see how well your photography level is progressing.

7. Doing well validates you

All that exposure and a potential prize is not the only benefit you get from a photo contest. Having a winning entry, be that the overall winner or a top ten photo gives your photography validation. There is nothing that beats this when it comes to things like growing your photography business. The ability to call yourself a prize-winning photographer can go a long way. Does the size of the contest matter? From the perspective of calling yourself a prize-winning photographer, entering a smaller contest where there is a greater chance to win might be the way to go.

8. Gain feedback

If you’re lucky, you might get direct feedback from the person judging the contest. Those contests that allow comments may also lead to fellow contestants commenting on your work. Getting feedback on what you do is a great way to grow as a photographer. Contests are one platform where you may be able to receive some of this vital information.

The really big contest to win is National Geographic’s. It’s of course incredibly difficult to do so.

Photo contests to be wary of

There are, as you may have read, a great many good reasons to enter a photo contest. That said, there are a few contest types to be wary of.

Large entry fee

The majority of photo contests are free or have a nominal entry fee. Some contests charge large entry fees though. It’s up to you, but sometimes these contests are best avoided. There is no justification for a large entry fee. A good contest has many contestants, so they should only need to charge a nominal entry per person to cover their costs.

Loss of photograph rights

It’s always worth reading the terms and conditions of a photography contest carefully. That’s because some contests claim rights to your photo when you enter it in the contest, even if your photo is not one of the winning entries. Contests like this are essentially looking to use your work for their commercial advertising. Instead of paying for a stock image, they’ll instead run a photo contest to get their advertising material that way. This is why you’ll lose rights to your photo by entering this type of contest.

The Photocrowd website offers two prizes: A Judges Award, and a Peoples Award.

Which photo contest is for you?

The rise in the number of photographers has also led to a rise in photo contests. There are now many choices. You could choose a local contest, contests that run weekly, or perhaps you’ll go for one of the big yearly ones. Those looking to try their luck with a weekly contest should look no further than digital photography school, which runs a great themed weekly challenge to get you out with your camera (though it is not a contest, just a challenge). Sony and National Geographic run two of the biggest yearly photo contests, though search the web and you’ll find more. Finally, there are now websites dedicated to photo contests throughout the year. You can look to Photocrowd or Gurushots for these types of website.

Improve your chance of winning

Of course, improving your photography, and going to the best locations to take photos, are great things that can improve your chances. An excellent tip is to find out who the judges are. Do your research on these people, and visit their websites. See what kind of photos they enjoy taking, and channel your own work through the prism of the judges work. It’s not certain you’ll win, but it’s likely to improve your chances.

Go out and win the prize!

Do you enjoy entering photo contests? Are you new to this, and keen to dip your toe in the water? Have you got prize-winning photos, which you’d like to share with the digital photography community in the comments section? We’d love to hear from you, and having read this article we hope you’ll want to join a photo contest yourself! So pick a contest you like the sound of, and start planning how you’re going to take the winning photo!

The post 8 Great Reasons to Enter a Photo Contest appeared first on Digital Photography School. It was authored by Simon Bond.


Digital Photography School

 
Comments Off on 8 Great Reasons to Enter a Photo Contest

Posted in Photography


How to Take Great Food Photos this Holiday Season

18 Dec

The post How to Take Great Food Photos this Holiday Season appeared first on Digital Photography School. It was authored by Mat Coker.

This holiday season your Instagram feed is going to be filled with photos of people’s food. Many of those photos can look terrible – dark, blurry, and discolored. In this tutorial, I’m going to show you how to take great food photos this holiday season. The principles are simple and apply to the food photos you take all year long.

Window light - How to Take Great Food Photos this Holiday Season

The photo on the left is from a few years ago. I attempted to take a stunning food photo to post online, but the pop-up flash on my camera spoiled things. I knew nothing about light back then! The photo on the right is a combination of soft window light and the warm ambient light of the tree in the background.

1. Presentation

You may have no control over how the food gets presented. Perhaps it gets placed in front of you, and you want to snap a quick picture. However, if you do have control over how the food gets presented, then you should give some thought to it.

Consider things like what color dishes or drink wear do you have available? You could use something neutral in tone, colors that represent the season, or something that accents the food.

2 - How to Take Great Food Photos this Holiday Season

The white plate allows the cookies to stand out from the wood table with similar tones, while the red mug hints at the holiday season.

3 - How to Take Great Food Photos this Holiday Season

This scene is more colorful, mixing the traditional red and green colors of the holiday. This time the table is white to make the colors pop.

2. Light

Light can make or break your food photos. The direction of the light (overhead, front, back, side) and the quality of light (soft or harsh) dramatically changes how your photo looks.

4 - How to Take Great Food Photos this Holiday Season

This photo was taken with nothing but an overhead light. You can see by the crisp shadow that the light is very harsh. It’s good enough and is certainly better than dark and blurry, but I prefer a big soft window light.

5 - How to Take Great Food Photos this Holiday Season

The pop-up flash on my camera was used for this photo. Again, better than nothing. But certainly not as nice as the window light.

For the following photos, I used my daughter’s play food! You can practice with anything you’ve got. I wanted something with even more texture to illustrate the effect of side and backlight.

A large window lights the photos below. The light skims across the cupcake from the side or behind, bringing out texture through highlights and shadows.

6 - How to Take Great Food Photos this Holiday Season

The cookies are placed on the crate, with the window behind or to the side.

7 - How to Take Great Food Photos this Holiday Season

This cupcake is lit by a large window producing soft light. The window is to the right. Notice that the right side of the cupcake is brighter? The light coming from the side helps to bring out some texture and make the two-dimensional photo pop more.


8 - How to Take Great Food Photos this Holiday Season

This cupcake is backlit by the same window. Backlight helps bring out texture too but gives the photo a moodier look.

3. Angle

So you’ve found the perfect colored dishes and you’ve got your light source. Now consider the best angle from which to photograph your food. Generally, I recommend a higher angle, maybe even a bird’s eye view.

9 - How to Take Great Food Photos this Holiday Season

A bird’s eye view is great for food photography, especially if the food is in a deep dish. It allows you to look down from above.

10 - How to Take Great Food Photos this Holiday Season

This is a high angle, though not as high as the bird’s eye view. You are able to see what is on the plate. This photo is less about the food and more about the mood of the scene. I remember being a kid waiting for Thanksgiving or Christmas dinner while the grown-ups bustled around. Everything is so dramatic with plumes of steam rising from the dishes! Steam should be photographed with backlight to help it stand out.


11 - How to Take Great Food Photos this Holiday Season

This face to face angle brings you into direct confrontation with the pile of cookies. They don’t stand a chance!

4. Background

Finally, consider what’s in the background. Your background should be clean and simple or a little bit scenic.

12 - How to Take Great Food Photos this Holiday Season

I snapped a quick photo, only to realize afterward that the background is a mess. I never seem to pay enough attention to the background.


13 - How to Take Great Food Photos this Holiday Season

I grabbed a clipboard off the table and used it as a backdrop to block out the mess. It’s not fancy, but it will do for a quick snapshot.

14 - How to Take Great Food Photos this Holiday Season

This background is intentionally scenic, showing that it’s Christmas time. Bring together color, light, angle, and background to make your food photos look great!

Keep these tips in your pocket all year long!

I learned how to take better photos of my food through trial and error, and learning from professional food photographers.

Whenever I’m inspired by what’s on my plate I set it by the window, pay attention to the background, find its best angle and take a nice looking photo. No more harsh overhead light or pop-up flash!

The post How to Take Great Food Photos this Holiday Season appeared first on Digital Photography School. It was authored by Mat Coker.


Digital Photography School

 
Comments Off on How to Take Great Food Photos this Holiday Season

Posted in Photography


5 Tips to Guarantee Great Road Trip Photos

10 Dec

The post 5 Tips to Guarantee Great Road Trip Photos appeared first on Digital Photography School. It was authored by Simon Ringsmuth.

1 - 5 Tips to Guarantee Great Road Trip Photos

Few things say “Midwest United States” like hay bales and rolling hills. You won’t find scenes like this on most interstates and major highways though.

For some people, the idea of taking a road trip can seem like a dull proposition. One fraught with mundane scenery and near-endless hours of staring out of the window watching the world outside whiz by at 70 miles an hour. However, with a little planning and creativity, you can turn any long car ride into a precious opportunity for amazing pictures.

The countryside you are traveling through may seem uninspiring. You may have already made the drive dozens or even hundreds of times. Still, there are a few things you can do to set yourself up with some fantastic photos, of which to be proud, at the end of your journey.

Take the road less traveled

I live about 400 miles from my parents and siblings, so I end up making the drive back to my old stomping grounds a few times a year. The easiest route to take involves a turnpike, followed by hundreds of miles of interstate. Due to the speed limit being higher, and the drive straighter, I don’t have to slow down every 20 minutes to pass through a small town. However, when it comes to photo opportunities, this type of travel precludes a lot of good chances for picture-taking.

2 - 5 Tips to Guarantee Great Road Trip Photos

I was driving down a highway when I saw this dirt road off to the side, so I pulled over and got a picture while also taking a minute to stretch my legs.

Interstates and other thoroughfares are great for getting to your destination quickly, but not so great for photos. Instead of taking the quick and easy path, as Yoda might say, look for alternate routes to your destination. Alternative routes that may not be as fast but are far more photogenic.

Pull up your preferred mapping software, or unfold a physical map, and look for highways or other types of two-lane roads. When you are driving down these types of roads, you pass by scenery that is more interesting than you find on the interstate.

Moreover, you also have the luxury of being able to pull over and stop without causing a traffic jam.

Plan your photos

When taking a road trip, have an idea in mind of the types of pictures you want to take. Keep a sharp eye out for those opportunities when you are on your drive. Hoping to find something interesting along the way to your destination may work out, however, planning ahead to photograph something specific, is likely to achieve much better results.

3 - 5 Tips to Guarantee Great Road Trip Photos

On this particular drive I wanted to take pictures of windmills and sure enough, once I had that thought in my mind I started noticing windmills all over the place.

The Baader-Meinhof phenomenon is a weird trick your brain plays on you. When you start taking notice of one particular thing, say a specific type of car or style of clothing, you start seeing it everywhere. This concept comes in handy on road trips. While you may not know what you are going to encounter along the way, you can plant the seeds for some great photos with a little mental preparation in advance.

For instance, on a recent drive back home, I pulled out a map and found some slower, but more interesting, highways to take. I told myself to look for windmills along the way. I couldn’t recall ever seeing windmills before.

However, given that I was going across the midwest United States, I felt sure I would end up going past at least a few. I was stunned when, as the hours ticked by on my drive, I kept passing one after the next and ended up with some excellent pictures as a result.

4 - 5 Tips to Guarantee Great Road Trip Photos

Try applying this method next time you’re on a road trip. You might be equally surprised at how well it works. Before you leave, think of a particular subject or type of picture you want to take. Then look at how often you see those opportunities along the way. Things such as dilapidated barns, weathered billboards, old bridges, tall cacti, mountainside vistas, or even dirt roads can all be exciting subjects for road trip photos.

If you plant these seeds in your mind, by the time you reach your destination, they could very well grow into fascinating and beautiful photos.

Time of day is paramount

Sunlight can make or break almost any type of photo. The same holds true when it comes to making images on a road trip. The journey you are taking might be perfect for some sunrise or sunset shots, but those aren’t going happen if you set out at noon! It might seem too simple to mention, but just knowing that your photos are dramatically affected by the sunlight affects your departure time and helps you plan accordingly.

5 - 5 Tips to Guarantee Great Road Trip Photos

There’s about a two-minute window for getting sunrise shots like this. Plan your drive accordingly.

If you aren’t sure what type of pictures you want to capture on your road trip, plan to leave at least 30 minutes before sunrise. You may see something compelling. Alternatively, if you know you are going to pass by a particular photo location, make sure you get a good picture of it by adjusting the timing of your trip. That way you maximize the chances of getting good light in that particular spot.

6 - 5 Tips to Guarantee Great Road Trip Photos

Allow more time than you need

If I take the interstate to get back to my hometown and plan on stopping only once, I can make the trip in about six and a half hours. However, that’s not how I prefer to make the drive. Taking less-traveled roads and stopping half-a-dozen times for possible photo-ops, I usually get there in seven-and-a-half hours. So, when planning for the drive, I always allow at least eight hours for unexpected photo opportunity stops.

One of the worst situations a road-trip photographer encounter is coming across a stunning sight or landmark only to realize they don’t have enough time to stop and take a picture. Give yourself some wiggle room by adding an extra half-hour into your drive schedule. Make sure that time is not a limiting factor.

Having extra time is also an excellent excuse to get out, stretch your legs, and see the scenery even if you’re not sure of the photographic possibilities.

7 - 5 Tips to Guarantee Great Road Trip Photos

On one recent drive to see my folks, I ended up driving past a vast field of beautiful sunflowers by accident. The lighting wasn’t great, but I stopped for some pictures nonetheless. I made a mental note to go back to the same spot on my return drive. Not knowing how long I would need, I made sure to build in plenty of extra time on my drive and achieved the shot you see above. This extra time gave me the ability to pull over a few hours later to capture this shot of an oil pump and wind turbine.

8 - 5 Tips to Guarantee Great Road Trip Photos

Don’t worry about your gear

At this point, you might be thinking about how to apply some of these tips on your next drive. However, you may not think you have the right gear for the job. On the contrary, the nice thing about road trip photos is you probably already have the camera equipment you need to take great photos. Something as simple as a mobile phone camera is enough to capture sweeping landscapes or beautiful countrysides.

9 - 5 Tips to Guarantee Great Road Trip Photos

I shot this with some expensive camera gear but based on the exposure settings (f/4, 78mm, 1/180 second, ISO 220) a nearly identical image could have easily been taken with a basic DSLR with a kit lens.

Don’t let your camera gear, or lack of it, hold you back from taking good photos the next time you are in a car for hours on end. Fantastic shots are achievable with a mobile phone, a DSLR, or anything in between. If you have a tripod, go ahead and bring it because you never know when it might come in handy. However, don’t stress over whether your camera is good enough.

As you develop your skills, you may find yourself gravitating towards a particular lens, or camera depending on the shots you like to take. Things such as lighting, planning, and taking less-popular roads achieve better results than merely buying a new camera.

10 - 5 Tips to Guarantee Great Road Trip Photos

I took this shot on a road trip with a simple point-and-shoot camera, and all it required was some good light and an observant eye.

What about you? Do you have any favorite tips or tricks for getting good pictures while out driving? Share your thoughts in the comments below!

The post 5 Tips to Guarantee Great Road Trip Photos appeared first on Digital Photography School. It was authored by Simon Ringsmuth.


Digital Photography School

 
Comments Off on 5 Tips to Guarantee Great Road Trip Photos

Posted in Photography


Seven Great Ways to Control the Photography Background

29 Oct

Much thought goes into photographing an interesting, compelling main subject. In concentrating too much on the main subject though, it’s possible to neglect an equally important part of the photo – the photography background. The background needs to be controlled to achieve a great photo, and in this article, you’ll learn the various ways to do this. So let’s look at the various strategies you can employ.

1. Look to the light in the photography background

The creative use of light is what makes a good photo. That means you need to be in control of this key element. Control this, and your photo should be better for it. In the majority of cases that light is daylight though, of course, there are artificial light sources as well. Those looking to know where the sun is can use a great website called Suncalc, which is also available as an app. So how does this relate to your background? Well knowing where the sun is rising and setting means you can plan for sunset and sunrise skies in your background. Equally, you’ll know when the sun is in the optimum position to light up your main subject properly. Having a poorly lit subject often impacts the background, which is overexposed to compensate for an under-lit main subject.


Seven Great Ways to Control the Photography Background 1

One option for the background is to underexpose it. This woman is lit by a strobe to the left of the camera.

Low key photography background

A great choice to control your background, especially for street photography, is to underexpose it relative to your main subject. To achieve this, you’ll need to find somewhere that lets a beam of strong sunlight in, like a gap in the roofing at a market. Now the aim is to photograph your subject in that sunlight, and in so doing underexpose the background by -2 to -3 EV.

2. Things can change with the seasons

The position of elements in the sky, such as the sun, the moon and the milky way, all change with the seasons. Knowing when to visit a location so that the background lines up with your photo requirements is another crucial step to make. Once again, Suncalc can help you here, or for astrophotography, Photopils is a great resource. Good landscape photography takes planning. Some photos are only possible for a few days per year, and you’ll need luck with the weather on those days.

Seven Great Ways to Control the Photography Background 2

The Milkyway appearing behind Durdle Door during Spring.

3. Change the angle

Photography is the art of subtraction, and a busy background is an easy way of adding more elements to your frame than you need. A simple change in the angle can avoid such elements as wires or unwanted people in the background of your image. Keep your photo as simple as possible, with your background often needing to be a minimal element of the frame.

Seven Great Ways to Control the Photography Background 3

This photo is effective because the background and angle chosen help to frame the model.

4. Use leading lines

Closely related to changing the angle of your photo is using leading lines to your subject from your background. Those lines are a great way to bring the viewers eye to your main subject, thus, making that background an essential element of your photo. A photographers favorite is the use of tunnels, where lines lead from an infinity point to your main subject. Using this gives you more control over your frame and results in a photo with real impact. A shallow depth of field isn’t always necessary when using leading lines, as the lines hold the background together.

Seven Great Ways to Control the Photography Background 4

Leading lines and tunnels are a favorite of photographers.

5. Line up foreground and background elements

It’s not just about lining up leading lines and avoiding distracting elements in your background. Particular elements in your background can be lined up to compliment whatever you have in the foreground. An example of this is when your background is blurred out with bokeh. In that background, there can be lighter and darker portions. You can also position your main subject in front of a patch of brighter background to highlight this area, and provide a natural frame.

Seven Great Ways to Control the Photography Background 5

The center of the Japanese flag in the background makes and excellent frame.

6. Aperture controls the background

One of the most effective controls you have over the photography background is aperture. What this does is controls the depth of field, allowing you to blur out the background if you wish. Bokeh is the term given to the out of focus portion of an image, often in the background. You can produce bokeh by opening up your aperture, usually on a prime lens. It’s also possible to produce bokeh with a long focal length, as long as the background is some distance from the object you’re focusing on. So controlling the aperture is one of the easiest and most effective ways of controlling your background.

Seven Great Ways to Control the Photography Background 6

Background bokeh can be an attractive element of a frame.

7. Textured backgrounds

Another option available to photographers is to use a textured background. Find a background, like a wall, that has a pattern or texture to it. Photography backgrounds that work well include: brick walls, old decaying facades that have one color, or metal shutters that shops use when they’re closed. Chances are, you’ll be photographing a model in this situation, and a clean background works well for this style of photo.

Seven Great Ways to Control the Photography Background 7

A natural photography background can also work well. In this example, the grass in the background is blurred out.

What do you look for in a background?

There are many ways to create an excellent background in your image. Which of the suggestions in this article do you like to use? Is there a different way of controlling the background that you like to use? This article aims to make you think a little more about the background of your photo, the next time you go out with your camera. So please share your thoughts, and comments with us. Let’s see some of your fantastic photography backgrounds in the comments section!


The post Seven Great Ways to Control the Photography Background appeared first on Digital Photography School.


Digital Photography School

 
Comments Off on Seven Great Ways to Control the Photography Background

Posted in Photography