RSS
 

Posts Tagged ‘graphics’

XP-Pen Artist 24 Pro Review: A Gorgeous Graphics Tablet for Photographers

08 Jan

The post XP-Pen Artist 24 Pro Review: A Gorgeous Graphics Tablet for Photographers appeared first on Digital Photography School. It was authored by Sime.

XP-Pen Artist 24 Pro graphics tablet review

I’ve been using Photoshop for many years – primarily as a photographer that works in Lightroom and sometimes exports images into Photoshop for editing. But using Photoshop with a mouse is something that takes a lot of practice; it’s not really a natural way to post-process, which is why many serious editors turn to graphics tablets.

Now, when the team from XP-Pen reached out and offered us a review unit of the XP-Pen Artist 24 Pro, a 2K, 23.8-inch QHD graphics tablet, I’ll admit I was a little dubious. I’d only ever owned one graphics tablet – a tiny little Wacom that didn’t get a lot of use. I was certainly keen to try a new tablet, but I’ll admit that I was a little worried about not liking it.

Fortunately, as you’ll soon see, I needn’t have worried. As I share in this review, the XP-Pen Artist 24 Pro is a powerful graphics tablet, one that both looks and works great.

So to discover all the nitty-gritty details, including both the benefits and the drawbacks of working with the Artist 24 Pro, read on.

First impressions

The package that arrived was much larger than I expected. I knew the Artist 24 Pro featured a 24-inch display, but I had clearly not managed to comprehend just how large the tablet would be.

I have a desk with two 27-inch displays, which meant that the XP-Pen Artist 24 Pro would need an extra bit of real estate. So after I MacGuyvered something together with a Kupo light stand and my Tether Tools Aero, it was time to get the new tablet set up!

XP-Pen Artist 24 Pro graphics tablet review
The XP-Pen Artist 24 Pro standing on the makeshift work table.

I tried using the tablet in two different configurations:

First, on a stand with my Macbook sitting behind it. This is a great setup for shooting tethered, as you can perform quick edits there and then with the tablet while using it as your main display.

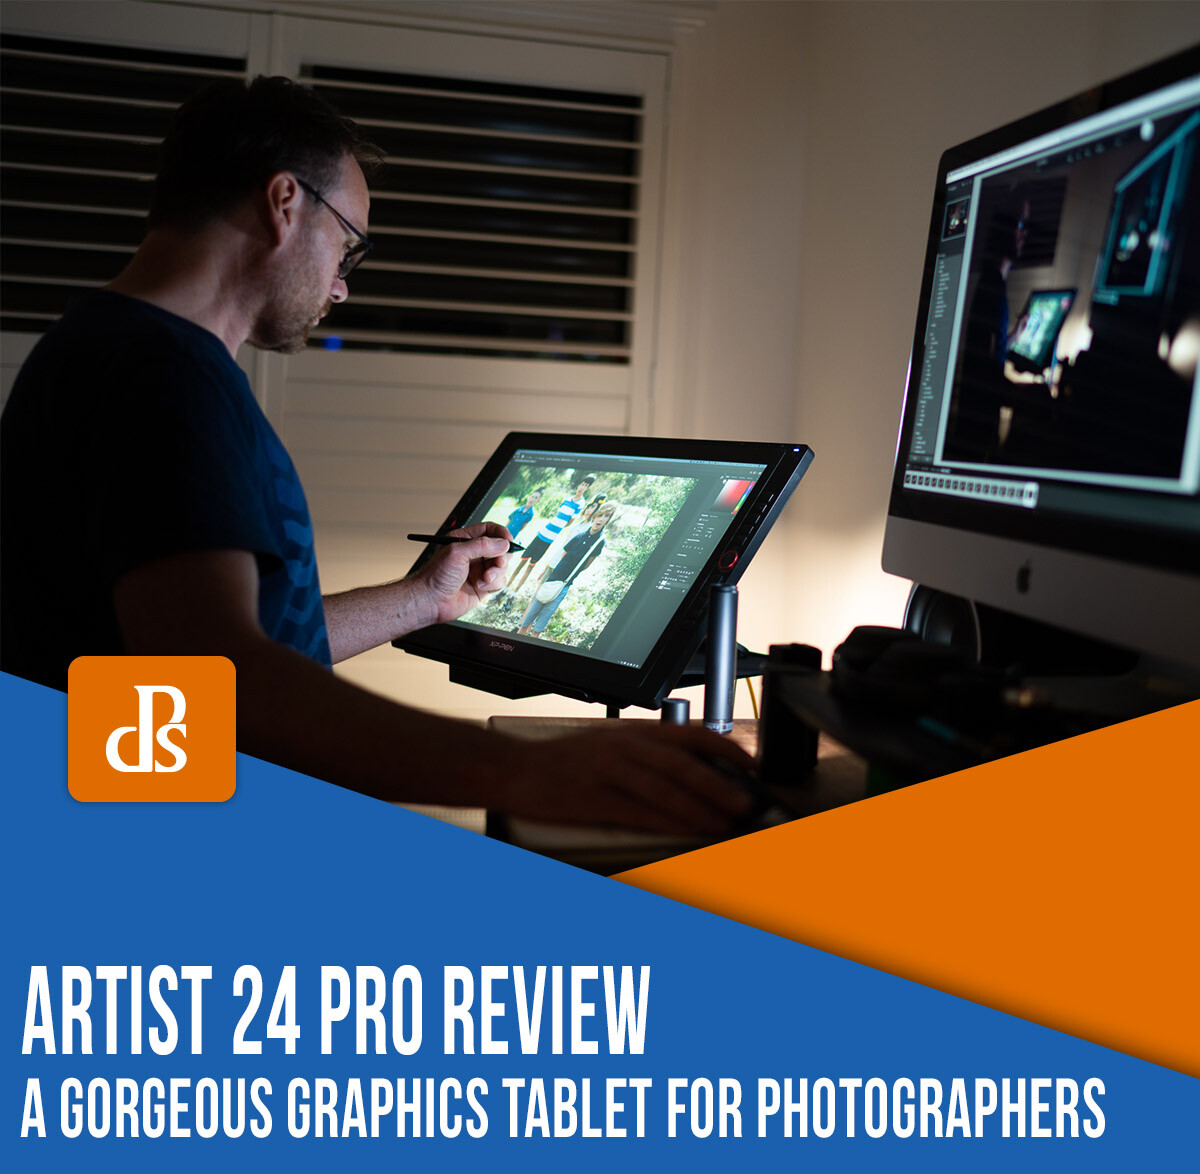
The second configuration, as shown in the photograph above, was with the tablet adjusted to the height of my standing desk, ready to go!

Design

The XP-Pen Artist 24 Pro offers one HDMI and two USB host ports (so you can charge things like phones, etc.), as well as the power input on the back of the unit.

There’s also a USB-C port, which allows me to connect my iMac to the display. This was very quick and convenient; it worked straight out of the box with very little configuration required.

XP-Pen Artist 24 Pro graphics tablet

The rear of the tablet sports a flappy-paddle stand that, when depressed, moves a foot into the desired position. This lets you adjust the unit to stand up or lay almost flat, as though you’re writing in a nice big notepad.

XP-Pen Artist 24 Pro graphics tablet tilting

I love how I can stand up the tablet to use as a regular second monitor for my 13-inch Macbook Pro, before laying it flat and working on photographs.

XP-Pen Artist 24 pro setup
The XP-Pen Artist 24 Pro lying almost flat.

Ease of use

The XP-Pen Artist 24 Pro comes with a piece of software (a download) that adjusts the settings of the tablet, pen controls and functions, monitor configuration, express key setup (more on that in a bit), calibration, and other general features. I’ve found it very easy to use with no what-the-heck-am-I-doing moments to speak of!

XP-Pen Artist 24 Pro settings

However, when you first set up your tablet and open Photoshop, make sure you have the correct monitor mapped. Otherwise, you’ll find yourself deeply frustrated; I speak from personal experience.

XP-Pen Artist 24 pro settings tab

Performance

There are many technical reviews of the XP-Pen Artist 24 Pro on the web, and most of them will tell you, in superbly technical terms, that the tablet is a very capable tool.

In fact, my conclusion is similar – the large screen, the 2560×1440 resolution, the 90% AdobeRGB color gamut, and the tilting stand makes for a very usable tablet.

When you get the XP-Pen Artist 24 Pro custom buttons all configured using the two easy-to-control red dial wheels and the 20 customizable shortcut keys, it’s very easy to open and control many different graphics packages, as well as a lot of other options (depending on which software you like to use on your computer).

In truth, I hadn’t previously used a tablet much. I thought that I’d always just edit with my mouse. I guess that comes from having a less-than-pleasant time with the first tablet I tried (and I hadn’t used another tablet until the Artist 24 Pro).

I’ve now had the XP-Pen Artist 24 Pro for quite a while. And when working in Photoshop, while I would have once happily used my mouse, I now whip out the tablet and do my editing on the screen – a testament to the great performance and ease of use of the tablet.

Granted, the 24-inch tablet isn’t the smallest device, and you do need to have space for it. But the tablet only requires one USB-C (or HDMI) and one power cable, so you can have your laptop tucked behind the tablet, using the tablet as your main display with a wireless keyboard and mouse to give your laptop that “big screen” feeling.

I’ve used the tablet as the main display for my 13-inch MacBook Pro for almost everything from movies to editing since I received it.

The XP-Pen Artist 24 Pro review: Conclusion

The XP-Pen Artist 24 Pro offers solid build quality combined with a simple-to-navigate interface, great on-screen performance, visual clarity, and ergonomics.

There was only one thing I thought could be improved, and that was the rear foot of the big screen. It has a couple of rubber stoppers that hold the device nicely in place, but it’s easy to scratch your desk if you’re not careful.

Overall, I like almost everything about the Artist 24 Pro; it’s packed full of features that make it one great tablet!

You can purchase the XP-Pen Artist 24 Pro right here.

The post XP-Pen Artist 24 Pro Review: A Gorgeous Graphics Tablet for Photographers appeared first on Digital Photography School. It was authored by Sime.


Digital Photography School

 
Comments Off on XP-Pen Artist 24 Pro Review: A Gorgeous Graphics Tablet for Photographers

Posted in Photography


Apple’s new 13-inch MacBook Pro features faster CPU options, latest Intel Iris Graphics configurations and updated keyboard

04 May

Apple has announced its new 13-inch MacBook Pro, bringing modest performances improvements and one physical improvement that should make keyboard warriors around the world much happier.

We’ll get to the specs in a minute, but first the most important update—the keyboard. Apple has eschewed its troubled ‘butterfly’ keyboard for its Magic Keyboard with this new 13-inch MacBook Pro. For nearly five years, Apple’s ‘butterfly mechanism’ keyboard has caused issues for MacBook owners, with individual keys sometimes becoming entirely non-functioning, causing all sorts of issues while typing. This transition means the ‘butterfly’ keyboard is no longer present in any of Apple’s laptops.

The physical ‘esc’ key is a welcomed change also.

In addition to the changes underneath the keys, Apple has also added a physical ‘Escape’ (esc) key to the left of the Touch Bar. On previous models, the ‘esc’ key was digital, located within the Touch Bar, a design decision that could wreak havoc if the Touch Bar glitched out or broke.

The updated 13-inch model is powered by Intel quad-core chips, with optional upgrades to configure the MacBook Pro with Intel’s 10th-gen CPUs that offer up to 2.3GHz per core and TurboBoost speeds up to 4.1GHz. Apple has also added the option to configure the 13-inch MacBook Pro with up to 32GB of 3733MHz LPDDR4X RAM and has doubled the base model storage to 256GB (with optional upgrades to increase it to 4TB).

If you upgrade to the $ 1,799 model, you’ll also get the latest Intel Iris Plus Graphics, which Apple claims will offer an 80% performance increase over the previous-generation dual-core MacBook Pros. In addition to improving overall graphic performance, models with Intel’s Iris Plus graphics will be able to power Apple’s Pro Display XDR at its full 6K resolution.

As for the laptop’s own display, the 13-inch screen supports P3 wide color gamut, offers a maximum 500 nits brightness and includes Apple’s ‘True Tone’ technology that automatically adjusts the screen’s white balance based on the ambient environment.

The base model starts at $ 1,299 and includes a 1.4GHz quad-core 9th-gen Intel Core i5 CPU, 8GB of RAM and 256GB of storage. However, if you’re planning on using this for editing photos or video though, we’d suggest you jump up to the $ 1,799 base model, which offers Intel’s 10-gen CPUs with the newer Intel Iris Plus graphics and 16GB of RAM. Further upgrades can be configured for additional costs, as usual.

You can find out more information about the latest 13-inch MacBook Pro models and browse through the different configurations on Apple’s website.

Articles: Digital Photography Review (dpreview.com)

 
Comments Off on Apple’s new 13-inch MacBook Pro features faster CPU options, latest Intel Iris Graphics configurations and updated keyboard

Posted in Uncategorized


10 Tips for Using a Graphics Tablet for Easier Photo Editing

01 Mar

The post 10 Tips for Using a Graphics Tablet for Easier Photo Editing appeared first on Digital Photography School. It was authored by John McIntire.

using-a-graphics-tablet-for-photo-editing

In terms of post-processing and retouching, there are a lot of basic techniques that you can use with a mouse (a trackpad is even worse) and a keyboard combo. However, once you get into the more complicated stuff, the amount of precision you need to apply becomes tedious and hard to do with that setup. This is where using a graphics tablet for photo editing comes into its own. Graphics tablets, such as those from Wacom, offer you an enormous amount of control and precision in your retouching. They can also speed up your workflow a lot.

If you’ve never used a graphics tablet for photo editing before, you may wonder if you actually need one.

Using a graphics tablet for retouching photos.

The answer depends on how much time you spend and the type of post-processing that you do. But I will say, this is one of those pieces of equipment that, once you’ve been using it for a week, you’ll wonder how you ever got on without it.

Using a graphics tablet for cleaner and more consistent lines.

Left: Not a mouse, but a trackpad. You can still see how the lines are sloppy and less controlled. Right: With a graphics tablet, more consistent lines become much easier to make.

While graphics tablets are (for the most part) intuitive to use and get to grips with, some of the finer aspects of their use can seem a bit tricky. This article will cover a set of tips to help you get the most out of your graphics tablet.

1. Setup

The first thing you should make sure you do with your graphics tablet is to ensure that it is set up properly.

Many devices have plug-and-play functionality and will seem to work by just plugging them in. This isn’t the case.

In most cases, while you may have use of the pen, the full functionality of your tablet won’t be open to you until you install and setup the relevant software.  Ensure any you install any relevant drivers for your tablet and if it has a software suite, go through all of the options and make sure it is set up in a way that works for you.

Image: A lot of tablets will seem to work without any software installed, but it is important to mak...

A lot of tablets will seem to work without any software installed, but it is important to make sure that you do install it, or you will be missing out on a lot of features.

Your preferences may change over time. If you find that something could be working better for you, do look in the software to see if any of the settings there can help you solve any issue you might be having.

2. Shortcut buttons

After you’ve set-up the basics, you can now move on to the shortcut buttons.

Most graphics tablets offer a number of programmable buttons that you can program and set to any function you choose. Some cheaper tablets might have only a few buttons, while some of the more expensive ones can be covered in them.

How you program them is up to you. A good way to approach this is to take a moment and examine your normal workflow in Photoshop. What actions do you make the most? Which of those actions would be easier (and suitable) to use at the click of a button?

Once you’ve done that, all you have to do is set-up the buttons in a way that suits you.

Image: You have full control over how your shortcut buttons are setup. Use these in any way that sui...

You have full control over how your shortcut buttons are setup. Use these in any way that suits the way you work.

Now, I don’t like using the shortcut buttons and they don’t suit me. The only one I use is the one that allows me to rotate the canvas. That may be the case for you too. That’s fine, and you shouldn’t feel obligated to use something that doesn’t suit your needs or approach.

3. Keyboard shortcuts

Keyboard shortcuts while using a graphics tablet make a powerful combo.

Even with a tablet, you will still use the keyboard a lot for Photoshop shortcuts. Be sure to memorize any that are relevant to you.

Whether you are using Lightroom, Photoshop or any of the other software packages, you will still be using the keyboard alongside your graphics tablet for photo editing.

These programs hold so much functionality that there’s no way that everything you can do could be contained to a few buttons. As such, do spend some time learning as many of the keyboard shortcuts as you can (or at least the ones relevant to your workflow).

Using both a stylus and a keyboard at the same time can seem counterintuitive at first, but you will quickly find it’s nothing to worry about.

4. Undo

Speaking of keyboard shortcuts, there is one that you already probably use more than any other. That, of course, is Ctrl+z (cmd+z) to undo your last action. Be prepared to use this a lot.

Using a pen allows you to work with precision strokes, and just like in drawing, not all of those strokes are going to be perfect the first time. There is nothing wrong with undoing something over and over again until you get it right, so do get comfortable with ctrl+z (cmd+z) and ctrl+alt+z (cmd+alt=z).

You could always set this to a shortcut button on your tablet if you think that option would be good for you.

5. Brush settings

When you start using a graphics tablet for photo editing, you unlock a few features in Photoshop that were previously unavailable to you.

The most important of these are the brush settings; specifically, they’re the pen pressure settings. By turning these on, you give yourself control of the brush pressure through how much pressure you apply to the tablet.

For example, if you have the Always Use Pressure for Size option clicked, then the brush size will change depending on how hard you press down with the pen.

If it’s the opacity option you are using, then a light touch will result in a low opacity from your brush. Turn them both on, and the effects combine.

Image: Taking control of the pressure settings is one of the most powerful aspects of using a graphi...

Taking control of the pressure settings is one of the most powerful aspects of using a graphics tablet for photo editing.

These settings are powerful, and on their own, one of the biggest reasons to use a tablet if you’re on the fence about them. Get to know these settings intimately as they will define your use of your graphics tablet for photo editing.

6. Tilting brushes

This is a bit of a wild card, as you might never use one of these brushes for retouching photos. However, because they exist, it’s good to know about them before you stumble onto them by accident and think your tablet is broken.

Using a graphics tablet unlocks features in Photoshop that are otherwise unavailable.

This charcoal pencil brush responds to the way you hold your pen. Here, all of these lines were made by holding the pen in different positions with all of the pressure settings turned off.

These brushes respond to the way you hold your pen and alter the shape and texture of their output. This replicates how a traditional artist would use a brush or pencil (or other tools) to create different strokes and marks.

If nothing else, it is a fun feature to play with, and if you can figure out how to use it with your photography, more power to you.

7. Digital art tutorials

Using a graphics tablet for retouching can be both intuitive and counterintuitive at the same time. If you have any art background at all (I do not), you will find it easier than other photographers without that kind of background, and you can skip this tip.

If, like me, you don’t have any experience with art (either traditional or digital), I highly recommend taking the time to watch and read some digital painting tutorials.

Some of the most useful types of tutorials are:

Drawing lines – These exercises will give you control over your stylus and help you get used to the pressure sensitivity of your tablet. They will also help you make more precise movements, which will overall help to increase the quality of your output.

Follow digital painting tutorials to get better at using a graphics tablet.

Following tutorials that teach you how to practice making lines and other marks will help you to gain confidence and experience with using your tablet.

Rendering – Digital painting tutorials that deal with painting with values can be an invaluable asset when your using techniques like dodging and burning. These techniques will help you blend your values better and teach you to make more controlled adjustments.

8. Brushstrokes and control

Now that you have watched some tutorials on the subject, don’t forget to actually practice them.

Taking the time to set up a blank canvas and practice your brush strokes with the various pressure settings will only help you to become proficient with your tablet faster.

The same goes for blending values for the retouching techniques that use them. Practice as much as you can, both inside and outside of retouching.

Practice using a graphics tablet as often as possible.

Don’t just follow the tutorials once. Practice a lot at first and then make it a point to practice some more at regular intervals.

9. Warm-up

This one is entirely optional, but if you’re feeling stiff and not getting the results you want, you can borrow another technique from traditional artists and do some warm-up exercises.

There’s nothing fancy here, just set up a blank canvas in Photoshop and spend time practicing your lines and rendering (two or three minutes might be plenty), or whatever else you will be using in your retouching session.

10. Practice, practice, practice

Image: The best way to get to grips with your graphics tablet is to use it a lot.

The best way to get to grips with your graphics tablet is to use it a lot.

Just like everything else in life, if you want to get proficient in using a graphics tablet, there is only one solution:

Use it.

Put in as much mileage as you can as quickly as you can. You should find that any challenges you face in the beginning are quickly put to rest.

The end

There you have it, 10 tips to help you get the most out of using a graphics tablet for photo editing. While there is nothing complicated here, I hope that you will have found something that will help you get the most out of your graphics tablet for photo editing in the early days.

If you have any tips that you feel I have left out, please leave them in the comments below.

The post 10 Tips for Using a Graphics Tablet for Easier Photo Editing appeared first on Digital Photography School. It was authored by John McIntire.


Digital Photography School

 
Comments Off on 10 Tips for Using a Graphics Tablet for Easier Photo Editing

Posted in Photography


Wacom announces the Cintiq 16HD, a Full HD graphics tablet that displays 16.7 million colors

09 Jan

Wacom has announced its latest creation, the Cintiq 16HD, a mid-range pen tablet that takes inspiration from Wacom’s much larger (and more expensive) Cintiq Pro lineup and packages it in a more compact and affordable form factor.

The Cintiq 16HD falls right between Wacom’s Cintiq 13HD and Cintiq 22HD graphics tablet. Its display, as it name suggests, is a 15.6 inch 1920 x 1080 pixel touchscreen display with the ability to produce upwards of 16.7 million colors — 72% NTSC color coverage and 100% sRGB. The screen has a brightness rating of 210 cd/m², a 1000:1 contrast ratio and a 176-degree viewing angle.

The pen tablet features built-in legs that provide a natural tilt angle and a recessed connection so it lays flat when the three-in-one power port is plugged in.

Included with the Cintiq 16HD is the Wacom Pro Pen 2, which works with the tablet to offer 8192 levels of pen pressure sensitivity — four times that of its predecessor, the Cintiq Pro 16. The pen features two side buttons and lag-free tracking. It uses Electro Magnetic Resonance (EMR) technology, meaning no batteries are needed to keep the pen operating.

The Wacom Cintiq 16HD works with both macOS and Windows operating systems and is currently available for pre-order for $ 649.95. In addition to the graphics tablet and Wacom Pro Pen 2, it comes with a detachable pen holder, three replacement nibs, a nib removal tool, a 3-in-1 cable, and the required power cable and adapter.

Wacom offers a limited one-year warranty in Japan, Asia Pacific and China and a two-year limited warranty in the USA, Canada, Latin America, Europe, Middle East and Africa.

Articles: Digital Photography Review (dpreview.com)

 
Comments Off on Wacom announces the Cintiq 16HD, a Full HD graphics tablet that displays 16.7 million colors

Posted in Uncategorized


How to Boost Your Post-Processing Skills With a Graphics Tablet

22 Sep

During the course of your love affair with photography, you’ll use many different pieces of equipment. Some you’ll purchase, some you’ll beg, borrow, or steal. They will all serve one purpose or another. Some you may love so much that you keep forever. Most you won’t.

You don’t hear me talk about gear often. Over time I’ve worked hard to simplify my gear, and as a travel photographer, I’ve had to be ruthless in shedding excess size and weight. Every now and then, however, you come across a tool that is so valuable to your workflow that you can’t imagine working without it. One of those tools for me is a graphics tablet.

step up your post-processing with a graphics tablet

Photo by Kate Trysh on Unsplash

I’ve been using a tablet for quite a few years now, and it’s totally worth the extra weight in my bag. When I sold everything I owned and bought a one-way ticket to travel the world with my camera, I found space for my tablet. It has revolutionized my post-processing, and it can revolutionize yours too.

What is a Graphics Tablet?

A graphics tablet is a device that allows you to use a stylus instead of a mouse to control the cursor on your computer screen. They come in many sizes and offer a variety of features. They work by pointing at or drawing on the surface of the tablet with the stylus, which transfers your movements onto your screen. Most come with buttons on the stylus and on the tablet, which you can configure to act as mouse buttons or keystrokes.

They range from small tablets with no buttons all the way up to huge displays where you can draw directly onto the screen, much like an iPad. They often include features like pressure-sensitivity, allowing extremely precise controls that come in very handy when drawing.

Photo by Kelly Sikkema on Unsplash

Why Use a Tablet?

You might be asking yourself what’s so special about a tablet. What’s wrong with a good old mouse? I used to feel the same way until I tried using one. The humble mouse works fine for everyday computer usage, but it’s severely limited when it comes to photo editing.

Have you ever found yourself getting frustrated while trying to edit some fine details in a photo and having to go back over and over again? When you use a mouse, you’re relying on the movements of the large muscles and bones in your arm and hand to move it around your screen. It’s incredibly cumbersome. Your arm works great with big movements, but not so much with small, precise ones.

Now think about the precision and fine motor skills required to draw with a pen. Every tiny muscle in your hand is used to control the movements. I like to think of it this way: a toddler can use a mouse, but there’s no way they could use a tablet. They can’t even write their own name. A tablet will allow you to use those fine motor skills that you developed all those years ago.

step up your post-processing with a graphics tablet

Photo by Josefa nDiaz on Unsplash

How Do You Use a Tablet?

You may have seen tablets being used in Photoshop tutorials and wondered how they’re used. You don’t need to be a professional retoucher or illustrator to benefit from using a tablet. Even if you do all your post-processing in Lightroom, you will likely still find that a tablet will make the process much more precise and enjoyable.

step up your post-processing with a graphics tablet

ExpressKey menu in the Wacom setting panel.

The main benefits of editing with a tablet are speed and precision. As I mentioned earlier, most tablets will have some extra controls on the stylus and on the tablet itself. These controls can be customized to do pretty much anything.

This means that you can replace your most commonly used keystrokes with a single button. The touch ring can be set to adjust things like brush size and hardness, or scroll and zoom. These controls can speed up your post-processing dramatically.

step up your post-processing with a graphics tablet

Touch Ring options in the Wacom settings panel.

Where a graphics tablet really shines is when you want to apply local adjustments to your photos. Whether you’re making selections, drawing, painting, erasing, or dodging and burning, you’ll find that it’s far easier with a stylus than a mouse. It feels more natural and you’ll make a lot fewer mistakes.

If you don’t currently make a lot of local adjustments to your photos, I highly recommend taking some time to learn how. Learning basic dodging and burning is one of the best things you can do to take your post-processing skills to the next level. Do it with a tablet and you’ll be amazed what a difference it makes to your workflow.

There are many great resources available online for free that will teach you the basics of dodging and burning in both Lightroom and Photoshop. Likewise with setting up and using a tablet. There is a bit of a learning curve, but once you get the hang of it, you’ll never want to edit with a mouse again.

Choosing a Tablet

As I’ve mentioned, tablets range massively in price, size, and features. What you need will depend on a few factors like your budget, how much space you have on your desk, and how you like to work.

You can spend anywhere from $ 25 to $ 2000, so there is something that will suit your needs. You should be able to find a decent tablet under $ 100 that does the job.

step up your post-processing with a graphics tablet

Wacom’s high-end Cintiq tablet.Photo by Norbert Levajsics on Unsplash

Choosing the right size can be tricky. On one hand, the larger your tablet, the easier it is to use. You won’t find yourself having to move around the screen as much with a larger tablet. On the other hand, it will take up more space on your desk or in your bag. I personally like using a tablet that’s smaller than my laptop, that way they both fit nicely in my bag when I’m on the road.

In terms of features, you don’t need a lot of the more advanced features. My older Wacom Intuos doesn’t feature pressure sensitivity, and I don’t miss it. I would recommend using a tablet with at least a few control buttons, as they can speed up your workflow quite a bit.

Don’t stress about getting an expensive, high-end tablet, though. You’ll likely find that a basic model or a cheaper brand will suit your needs just fine. If you have an iPad lying around, there are apps available that allow you to connect it to your computer and use it as a tablet.

step up your post-processing with a graphics tablet

Huion Graphics Drawing Pen Tablet – Photo by Drew Thomas on Unsplash

Beg, Borrow or Steal

Well, maybe not steal, but ask around and see if someone you know has a tablet you could borrow or rent to try for a week. If you can find one to test out, give it a chance. As I’ve said, it takes a while to get used to it, so don’t give up too soon.

I’m sure that once you get your head around it you’ll be wanting one of your very own, and you’ll never look back.

The post How to Boost Your Post-Processing Skills With a Graphics Tablet appeared first on Digital Photography School.


Digital Photography School

 
Comments Off on How to Boost Your Post-Processing Skills With a Graphics Tablet

Posted in Photography


Blackmagic releases DaVinci Resolve 15 with all-new VFX and motion graphics module

10 Apr

In addition to the new Pocket Cinema Camera 4K announced earlier today, Blackmagic Design also released a major update to its video production software DaVinci Resolve. According to Blackmagic, DaVinci Resolve 15 comes with “hundreds of new features and improvements” but the major addition is a new Fusion module that fully integrates visual effects and motion graphics tools into the DaVinci Resolve workflow.

If you were wondering if Blackmagic is serious about making this a class-leading application, this update should help answer that. Already an industry favorite for color-correction, DaVinci Resolve 15 now includes four high-end video production applications in one: there’s a module for editing, a module for color correction, a module for audio production, and now, the new Fusion module for VFX and motion graphics as well.

Previously available as a stand-alone application, Fusion—which Blackmagic Design calls the “world’s most advanced visual effects and motion graphics software”—is now built right into DaVinci Resolve 15.

“DaVinci Resolve 15 is a huge and exciting leap forward for post production because it’s the world’s first solution to combine editing, color, audio and now visual effects into a single software application,” said Grant Petty, CEO, Blackmagic Design. “We’ve listened to the incredible feedback we get from customers and have worked really hard to innovate as quickly possible. DaVinci Resolve 15 gives customers unlimited creative power to do things they’ve never been able to do before. It’s finally possible to bring teams of editors, colorists, sound engineers and VFX artists together so they can collaborate on the same project at the same time, all in the same software application!”

$ (document).ready(function() { SampleGalleryV2({“containerId”:”embeddedSampleGallery_9400954258″,”galleryId”:”9400954258″,”isEmbeddedWidget”:true,”selectedImageIndex”:0,”isMobile”:false}) });

According to Blackmagic, the Fusion module gives visual effects and motion graphics artists a true 3D workspace with over 250 tools for compositing, vector paint, particles, keying, rotoscoping, text animation, tracking, stabilization and more. You’ll still be able to purchase Fusion on its own, but Blackmagic plans to fully integrate the entire application into DaVinci Resolve 15 “within the next 12-18 months.”

Today’s release isn’t the final version, but rather a public beta that is available as a free download to all current DaVinci Resolve and DaVinci Resolve Studio customers. The free version of DaVinci Resolve 15 will remain free, while the Studio version—which adds multi-user collaboration, support for frame rates over 60p, more filters and effects, and more—is available for $ 300 with “no annual subscription fees or ongoing licensing costs.” Take that Adobe…

To learn more, check out the full press release below or visit the Blackmagic Design website.

Press Release

Blackmagic Design Announces DaVinci Resolve 15

New upgrade fully integrates visual effects and motion graphics, adds even more audio tools plus hundreds of new features and improvements that editors and colorists have asked for!

NAB 2018, Las Vegas, USA – April 9, 2018 – Blackmagic Design today announced DaVinci Resolve 15, a massive update that fully integrates visual effects and motion graphics, making it the world’s first solution to combine professional offline and online editing, color correction, audio post production, multi user collaboration and now visual effects together in one software tool. DaVinci Resolve 15 adds an entirely new Fusion page with over 250 tools for compositing, paint, particles, animated titles and more. In addition, DaVinci Resolve 15 includes a major update to Fairlight audio, along with over 100 new features and improvements that professional editors and colorists have asked for.

A public beta of DaVinci Resolve 15 will be available today and for immediate download from the Blackmagic Design website. DaVinci Resolve 15 will also be demonstrated on the Blackmagic Design NAB 2018 booth at #SL216.

DaVinci Resolve 15 continues to revolutionize post production by combining 4 extremely high end applications as different pages in one single piece of software. The edit page has all of the tools professional editors need for both offline and online editing, the color page features the world’s most advanced color correction tools, the Fairlight audio page is designed specifically for audio post production, and the new Fusion page gives visual effects and motion graphics artists everything they need to create feature film quality effects and animations. All it takes is a single click to instantly move between editing, color, effects and audio.

This gives individual users unlimited creative flexibility because they can learn and explore different toolsets. It also enables collaboration so people with different talents can work together on the same project at the same time. The DaVinci Resolve 15 collaborative workflow dramatically speeds up post production because customers no longer need to import, export or translate projects between different software applications, and work no longer needs to be conformed when changes are made. Everything is in the same software application.

The free version of DaVinci Resolve 15 can be used for professional work and has more features than virtually every other paid application for post production. DaVinci Resolve 15 Studio, which adds multi user collaboration, 3D, VR, dozens of additional filters and effects, unlimited network rendering and other advanced features such as temporal and spatial noise reduction, is available to own for only US$ 299. There are no annual subscription fees or ongoing licensing costs. DaVinci Resolve 15 Studio costs less than all other cloud based software subscriptions and it does not require an internet connection once the software has been activated. That means customers don’t have to worry about losing work in the middle of a job if there is no internet connection.

“DaVinci Resolve 15 is a huge and exciting leap forward for post production because it’s the world’s first solution to combine editing, color, audio and now visual effects into a single software application,” said Grant Petty, CEO, Blackmagic Design. “We’ve listened to the incredible feedback we get from customers and have worked really hard to innovate as quickly possible. DaVinci Resolve 15 gives customers unlimited creative power to do things they’ve never been able to do before. It’s finally possible to bring teams of editors, colorists, sound engineers and VFX artists together so they can collaborate on the same project at the same time, all in the same software application!”

DaVinci Resolve 15 Detailed Overview

DaVinci Resolve 15 features an entirely new Fusion page for feature film quality visual effects and motion graphics animation. Fusion was previously only available as a stand alone application and is the world’s most advanced visual effects and motion graphics software. It is now built into DaVinci Resolve 15. The new Fusion page gives customers a true 3D workspace with over 250 tools for compositing, vector paint, particles, keying, rotoscoping, text animation, tracking, stabilization and more. Adding Fusion to DaVinci Resolve has been a massive project that will be completed over the next 12-18 months. Customers can get started using Fusion today to complete nearly all of their visual effects and motion graphics work. The standalone version of Fusion will continue to be available for customers who need it.

In addition to bringing Fusion into DaVinci Resolve 15, Blackmagic Design has also added support for Apple Metal, multiple GPUs and CUDA acceleration, making Fusion in DaVinci Resolve faster than ever. To add visual effects or motion graphics, customers simply select a clip in the timeline on the Edit page and then click on the Fusion page where they can use Fusion’s dedicated node based interface, which is optimized for visual effects and motion graphics. Compositions created in the standalone version of Fusion can also be copied and pasted into DaVinci Resolve 15 projects.

DaVinci Resolve 15 also features a huge update to the Fairlight audio page. The Fairlight page now has a complete ADR toolset, static and variable audio retiming with pitch correction, audio normalization, 3D panners, audio and video scrollers, a fixed playhead with scrolling timeline, shared sound libraries, support for legacy Fairlight projects, and built in cross platform plugins such as reverb, hum removal, vocal channel and de-esser. With DaVinci Resolve 15, customers no longer have to worry about audio plugins when moving between Mac, Windows and Linux because the FairlightFX plugins run natively on all three platforms.

DaVinci Resolve is the fastest growing nonlinear video editor in the industry. It’s also Hollywood’s favorite color corrector. Blackmagic Design has listened carefully to feedback from professional colorists and editors. DaVinci Resolve 15 includes over a hundred new features and improvements that editors and colorists have asked for.

Colorists get an entirely new LUT browser for quickly previewing and applying LUTs, along with new shared nodes that are linked so when one is changed they all change, multiple playheads for quickly referencing different shots in a program, over 5x performance improvement for stabilization, improved noise reduction, and new Super Scale HD to 8K up-rezzing. DaVinci Resolve 15 also expands HDR support with GPU accelerated Dolby Vision metadata analysis and native HDR 10+ grading controls. In addition, new ResolveFX let customers quickly patch blemishes or remove unwanted elements in a shot using smart fill technology. There are also new ResolveFX for dust and scratch removal, lens and aperture diffraction effects, and more.

Professional editors will find new features in DaVinci Resolve 15 specifically designed to make cutting, trimming, organizing and working with large projects even better. DaVinci Resolve 15 has dramatically improved load times so that large projects with hundreds of timelines and thousands of clips now open instantly. New stacked timelines and timeline tabs let editors see multiple timelines at once so they can quickly cut, paste, copy and compare scenes between timelines. There are also new markers with on-screen annotations, subtitle and closed captioning tools, auto save with versioning, greatly improved keyboard customization tools, new 2D and 3D Fusion title templates, image stabilization on the Edit page, a floating timecode window, improved organization and metadata tools, Netflix render presets with IMF support and much more.

For the ultimate high speed workflow, customers can add a DaVinci Resolve Micro Panel, DaVinci Resolve Mini Panel or a DaVinci Resolve Advanced Panel. All controls are logically placed near natural hand positions and are made out of the highest quality materials. Smooth, high resolution weighted trackballs and precision engineered knobs and dials feature the perfect amount of resistance for accurately adjusting any setting. The DaVinci Resolve control panels give colorists and editors fluid, hands on control over multiple parameters at the same time, allowing them to create looks that are simply impossible with a standard mouse.

In addition, Blackmagic Design also introduced new Fairlight audio consoles for audio post production that will be available later this year. The new Fairlight consoles are available in 2, 3 and 5 bay configurations. Prices for the new Fairlight control panels are approximately 80% less than the previously available panels with prices ranging from US$ 21,995 to US$ 48,995.

Availability and Price

The public beta of DaVinci Resolve 15 is available today as a free download from the Blackmagic Design website for all current DaVinci Resolve and DaVinci Resolve Studio customers. DaVinci Resolve Studio is available for US$ 299 from Blackmagic Design resellers worldwide.

The Fairlight consoles will be available later this year and will be priced from US$ 21,995 for the Fairlight 2 Bay console. The Fairlight consoles will be available from Blackmagic Design Resellers worldwide.

Articles: Digital Photography Review (dpreview.com)

 
Comments Off on Blackmagic releases DaVinci Resolve 15 with all-new VFX and motion graphics module

Posted in Uncategorized


Astropad Mini turns your iPhone into a graphics tablet

29 Aug

The makers of the Astropad iPad app have launched a version for the iPhone, aptly called Astropad Mini. Like the iPad version, the new app allows you to use your Apple device as a graphics tablet when working with imaging applications such as Adobe Photoshop or Lightroom using Astropad’s LIQUID technology for communication with the Mac. Read more

Articles: Digital Photography Review (dpreview.com)

 
Comments Off on Astropad Mini turns your iPhone into a graphics tablet

Posted in Uncategorized


Air Stylus turns your iPad into a graphics tablet

30 Jun

Avatron, the developer of Air Display, has today released a new iPad app. Air Stylus extends your computer screen to your iPad display and, in combination with a pressure-sensitive pen, turns the latter into a graphics tablet that works with a range of imaging applications including Adobe Photoshop and Apple’s Aperture. Read more

related news: Digital Photography Review (dpreview.com)

 
Comments Off on Air Stylus turns your iPad into a graphics tablet

Posted in Uncategorized


Air Stylus turns your iPad into a graphics tablet

22 Jun

airstylus.jpg

Avatron, the developer of Air Display, has today released a new iPad app. Air Stylus extends your computer screen to your iPad display and, in combination with a pressure-sensitive pen, turns the latter into a graphics tablet that works with a range of imaging applications including Adobe Photoshop and Apple’s Aperture. Read more

News: Digital Photography Review (dpreview.com)

 
Comments Off on Air Stylus turns your iPad into a graphics tablet

Posted in Uncategorized


Urban Graphics Photography

23 Jul

Ein Beitrag von: Siegfried Hansen

In der folgenden Fotoserie „Urban Graphics Photography“ habe ich Fotos gemacht, die den Menschen in seiner städtischen Umgebung zeigen. Die meisten Großstädte der Welt sind zugebaut, asphaltiert und zubetoniert; sodass sich dort der Mensch wie ein Fremdkörper bewegt.

Den meisten Menschen ist gar nicht bewusst, in welchem architektonischen und grafischen Umfeld sie sich bewegen. Die Grafik ist wie ein Korsett, das die Person oder den Menschen umspannt, umgarnt und vielleicht sogar einengt.

Die abgebildete Person sieht ihr Umfeld nicht aus dem Betrachtungswinkel des Fotografen und weiß somit gar nicht, in was für einem schönen, hässlichen oder eleganten Umfeld sie sich bewegt. Ich suche speziell in den Städten nach solchen Mustern, Linien und Strukturen, um die Situation besser zu veranschaulichen und darzustellen.

Inspiriert wurde diese Serie durch den Bauhauskünstler Lionel Feininger, dessen Art es war, die Welt in Flächen zu zerlegen, was mich schon immer fasziniert hat. Mir kam es in dieser Fotodarstellung darauf an, das vorhandene urbane Umfeld in Flächen und Linien zu erfassen und abzulichten mit einem menschlichen Fokuspunkt.

Hamburg 2007 © Siegfried Hansen
Hamburg 2007

Bei dem ersten Bild habe ich ganz formal nur die Flächen gesehen. Ich habe mir einen für mich interessanten Standpunkt gesucht und einen Teilausschnitt aus dieser gesamten Brücken- und Rolltreppe-Situation gewählt.

Meistens warte ich einen Augenblick ab, bis jemand vorbeikommt, oftmals besuche ich die besagte Stelle aber auch mehrmals, bis sich der für mich richtige Zeitpunkt ergibt. Die Grundsituation bleibt, nur Licht und Schatten müssen bei dieser Vorgehensweise noch beachtet werden.

Die Wahl des Standpunktes geschieht rein nach Gefühl, geschult durch jahrelanges Sehtraining von Flächen, Linien und Formen in der Straßenfotografie.

Hamburg 2012 © Siegfried Hansen
Hamburg 2012

Als erstes fiel mir die sogenannte „Rasterfahndung“ zu diesem Bild ein. Ich sah die Situation von einem Parkdeck aus. Zuerst beobachtete ich das Umfeld. Teilweise überquerten die Leute die Straße oder es fuhren Autos vorbei. Aus mehreren unterschiedlichen Aufnahmen und Betrachtungen entstand diese Aufnahme, die mir am besten gefiel.

Hamburg 2011 © Siegfried Hansen
Hamburg 2011

Im folgenden Bild haben mich die Rundungen des Geländers sowie die abgerundeten Treppen inspiriert. Eine Fotografie, die auf mehreren Ebenen aufgebaut ist. Auch hier spielt der Mensch nur eine Randfigur in der urban-grafischen Sichtweise.

London 2008 © Siegfried Hansen
London 2008

Während bei dem vorherigen Bild die Rundungen dominierten, sind es bei diesem Bild Linien, Licht und Schatten. Zuerst habe ich auch hier die Grafik gesehen und überlegt, wie ich mich am besten positioniere, um für den Betrachter eine interessante, grafische Darstellung zu zeigen.

Hamburg 2013 © Siegfried Hansen
Hamburg 2013

Bei dem letzten Bild dieser Serie habe ich eine Wendeltreppe in die vordere Ebene platziert, um diese grafisch dominante Situation besser darstellen zu können. Der entscheidende Moment entstand, als eine Person die Straße überquerte.

Einen ausführlichen Bericht über 14 Seiten mit Tipps zur Entstehung meiner Bilder zeigt die Zeitschrift fotoforum in ihrer aktuellen Ausgabe Juli/August 2013.


kwerfeldein – Fotografie Magazin

 
Comments Off on Urban Graphics Photography

Posted in Equipment