RSS
 

Posts Tagged ‘glow’

Create Light Beams in GIMP that Glow Without Any Plug-ins

01 Apr

The post Create Light Beams in GIMP that Glow Without Any Plug-ins appeared first on Digital Photography School. It was authored by Ana Mireles.

Create Light Beams in GIMP that Glow Without Any Plug-ins

Do you want to create light beams with GIMP? While previous versions of GIMP used a process called Alpha to Logo, it’s not available in the latest version. Not to worry, you don’t have to download any plug-in or script-fu, as I’ll show you a step-by-step example to do them manually.

Create Light Beams

GIMP’s open-source nature can be the most attractive thing for some people and the most off-putting for others. Create light beams used to be a one-click operation, but the script-fu was removed since version 2.10.4. There’s a way to get it back and install it separately, but you can also create them using GIMP’s basic functions.

How to Create Light Beams in GIMP

1. Design the shape

Open the image or canvas where you want to create light beams.

Now create a new layer, I strongly recommend you to name them as you go because you will need a few of them.

Do this in the designated space on the top. Then choose Fill With Transparency and click OK.

Add transparency layers

In this new layer, draw the shape of your light beam using the Path Tool. Make sure the Edit Mode is set to Design and start drawing.

If you want to create curves, just hold the mouse button and drag the anchor point.

Design light beams

Once you have the shape you want, choose the color by clicking in the patches you find on the left panel.

Then right-click in any anchor point of your shape and choose Edit > Stroke Path from the menu.

Stroke the designed path

This will open a pop-up window.

Select Paintbrush and Emulate Paintbrush.

This will apply the effect using the settings you have in your Paintbrush tool as if you had painted the shape.

2. Create the beam

Now, the stroke needs to start looking like a light beam. For this, you need to draw a lighter outline to it. The easiest way is to right-click on the layer and choose Alpha to Selection.

Alpha to selection

Go back to the color swatches and choose a lighter hue, or even white.

Create another transparency layer, then go to Edit > Stroke Selection. In the pop-up window choose Stroke Line and set the value that will determine how thick you want it.

Create light beams outlines
Here I disabled the visibility of the first stroke. You don’t have to do this, it was only to show you how the second stroke does an outline.

Deselect everything and click on the Layer Mask button.

Set it to black (full transparency). This will cover the entire outline you created before, but that’s OK, you’ll make it visible in the next step.

Pick the Paint Brush tool and set the color to white.

Then lower the opacity of the brush and paint over your light beam to slowly make the outline visible. After that, with full opacity, paint over some parts to create highlights.

add some highlights
I used full opacity only in the curves because that’s where I want the highlights to be.

3. Make it glow

Duplicate this layer and delete the mask. Lower its opacity and then go to Filters > Blur > Gaussian Blur. The value is up to you, I started with 22. Repeat this process a second time, this time changing the values in the Opacity and the Blur filter.

create light beams that glow

This is how you can create light beams that appear to glow. If you feel like adding a neon effect, keep on reading to learn how.

4. Add some color for a neon effect

With the top layer selected, add a new transparency layer.

Then set the color you want in the swatches.

Since you’re going for a neon effect, I recommend you choose something ‘electric’.

Use the Paint Brush tool to add some colored splats on your design.

create neon light beams

Change this layer to Soft Light blending mode at the top of the Layers panel.

Then create another one and do the same with another color. Change this one to HSL Color.

create light beams using GIMP

That’s it! Your neon glowing light beam is ready.

Feel free to skip any step or add some more to make it your own.

Remember, the good thing about doing them manually is that you have full control over the outcome.

Extra tip:

If you want it to swirl around something, like mine, just erase or cover with a layer mask the parts that should go behind the subject.

Incorporate light beams in your photography

Conclusion

Scripts and plug-ins can save some time, but they aren’t necessarily available or easy to install. Granted, you don’t always know the individual commands that were automated and that makes it difficult.

This process, however, is meant as a starting point to make it less daunting and allow you to get creative. I hope you liked this technique to create light beams in GIMP without any plug-ins.

Want to learn more GIMP Tutorials? You may like:

  • A Brief introduction to GIMP Software
  • Creative Uses for the GIMP Jigsaw Pattern
  • How to Use Gimp for Basic Photo Re-Touching
  • Make your Photos Sparkle with GIMP
  • 5 Top Tips for Working with Gimp

The post Create Light Beams in GIMP that Glow Without Any Plug-ins appeared first on Digital Photography School. It was authored by Ana Mireles.


Digital Photography School

 
Comments Off on Create Light Beams in GIMP that Glow Without Any Plug-ins

Posted in Photography


Irix Edge Light Pollution filter targets the yellow glow from sodium lamps

29 Jan

Irix has released a new filter in its Edge product line and the first in its Super Endurance (SE) series, the new Irix Edge Light Pollution filter. The offering, which appears to be a glorified UV/Haze filter, is available in 67mm, 72mm, 77mm, 82mm, and 95mm sizes and features durable optical glass strengthened with “a special thermal treatment” and multiple coatings.

Irix says its new Light Pollution filter is designed to be used in urban environments and for nighttime photography where light pollution may obscure stars and natural colors. The filter is designed to remove the yellow glow resulting from sodium lights commonly used in urban environments.

In addition to multiple anti-reflective coatings to minimum reflections, the new Irix filter has a nano coating that repels oil and water. The surrounding aluminum frame sports a black finish resistant to damage and flares. For additional protection, Irix is selling the filter with a protective case for transportation and storage.

The new Irix Edge Light Pollution filter is available in the following sizes and prices:

  • 67mm: 95 EUR / $ 108 USD
  • 72mm: 107 EUR / $ 122 USD
  • 77mm: 125 EUR / $ 143 USD
  • 82mm: 135 EUR / $ 154 USD
  • 95mm: 149 EUR / $ 170 USD

Articles: Digital Photography Review (dpreview.com)

 
Comments Off on Irix Edge Light Pollution filter targets the yellow glow from sodium lamps

Posted in Uncategorized


How to Make Headshots That Glow

11 Jul

I’d like to share a particular technique I use to capture a “glowing subject” effect for headshots. You may be disappointed to hear that, by glow effect, I don’t mean your headshots will literally glow, like in the dark, because they most likely won’t. But that’s okay because this technique is actually better than that and who wants a headshot that literally glows anyway? To the point, when set up correctly, you’ll end up with a subtle, spotlight-like feel on your subject which appears to glow, hence the title of this article.

headshots that glow example

The process

The process consists of a pretty straight forward lighting setup involving the use of different light levels for your key and background light and a fairly long lens. Essentially, you emphasize your subject by allowing light and focus to fall off as it moves toward the background. Here are the details:

To get the effect I use a 70-200mm f/2.8 lens at around 200mm. I recommend a long and fairly fast lens zoomed all the way into the longest focal length. A long (telephoto) lens will compress the scene and keep your subject from appearing distorted and bent, the way a wide lens would. It will also give you a nice, shallow, depth of field.

headshots that glow lens

Background choice

You’ll want to choose your background first before setting up all of your lights. Unless, of course, you enjoy moving them around for the exercise, which I don’t. I often like to add some interest to each headshot by choosing a background that suggests a kind of “on location” environment. I set mine up in the studio, but backgrounds like this can be found almost anywhere.

headshot background

Keep in mind that the background will be soft in the final photo as a result of using the long end of the 200mm lens and a large aperture, so plan accordingly. To find your background you may find it helpful to focus on something close, reframe, and get some shots of your background out of focus just for test purposes.
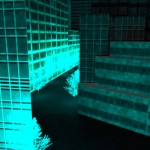
Also, keep in mind that you’re going to place your subject at least six to seven feet from the background. Make sure you have room to do this while also having the appropriate distance in front of your subject to frame a good headshot at 200mm. To be safe, give yourself 15 feet in front of the subject.

headshots that glow distance to subject

Lighting

After finding a good background, it’s time to set up the lights. First, I’d like to give special thanks to my model, the mannequin, for participating in this demo.
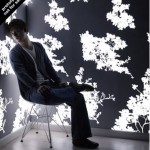
headshots mannequin

Main light

The setup I’m using here is called clamshell lighting, with a rim light or kicker (whichever you prefer to call it, also known as an accent light) added on the side of the face. The main light is above the subject and centered. I most often use an AlienBees B800 light with a beauty dish modifier, softened with a diffusion sock or two. Sometimes I’ll use more than one sock so that I can effectively keep my aperture around f/3.5 or maybe even f/2.8 with no sync-speed issues. If you’d like to sculpt the light further, try using a grid on the beauty dish.

headshots lighting setup

I’ve also used a large octabox in place of the beauty dish. However, I think the beauty dish works well for this particular look. I won’t go into great detail about how to best use a beauty dish, but ideally, you’ll want to line the center reflector up with the subject’s face.

Adjust the light depending on your subject’s bone structure, moving it further up and in for more definition in the cheeks, etc. Typically I have the dish about two feet back from the subject (toward camera) and about a foot overhead, focused down at an angle. Boom the light and beauty dish over the subject with a c-stand or whatever boom arm you may have handy.

Addition lights and reflectors

Next, add a reflector under the subject’s face (right above waist level or just out of frame) to bounce light back up and fill the shadows under the chin. The size of the reflector really comes down to what you’re comfortable using.

headshots reflector

Use a strip softbox with a grid for the rim or kicker light. I’ll place the light a few feet behind the subject and about two feet off to one side or the other, aimed back at the subject. Set this light to an exposure equal to your key light (as low as it goes with an AlienBees B800).

headshots lighting

Lastly, set up a background light. You can use any method of diffusion you have at your disposal for your background light. I try to keep mine fairly soft and even. The trick is to underexpose your background a few stops. By this, I mean a couple of stops under the exposure of your subject.

How many stops is a matter of personal preference. However, you don’t want to go too dark or have an exposure too similar to your subject’s exposure, or you’ll loose the effect. Because the key and rim are already set to the lowest light level, you’re going to want to either use heavy diffusion or put some distance between your light and background. Turning the light away from the background works too. Underexposing the background a couple of stops is a critical part of the process.

headshots background headshots background

Conclusion

That’s it. Don’t forget to thank our model, the mannequin, and you should be ready to go! Or shall I say, ready to glow? Hmmm.

Please post any questions or comments you have in the area below, and remember to share your headshots as well.

The post How to Make Headshots That Glow by Carlisle Kellam appeared first on Digital Photography School.


Digital Photography School

 
Comments Off on How to Make Headshots That Glow

Posted in Photography


Embracing the Lensbaby Velvet 85’s glow

30 Jun

I have to admit I was pretty excited when I heard about the newly-announced Lensbaby Velvet 85. When the Velvet 56 was released in 2015, I was convinced that I didn’t know how to shoot with it so I set my expectations low. I ultimately decided it was my 2015 Gear of the Year, largely because it forced me to let go of some of my self-imposed creative and photographic rules and shoot in a different way.

With the Velvet 85, I already know the potential of the soft glow, balanced by pleasing sharpness at higher apertures when I need the satisfaction of crisp focus. And offering someone who favors longer primes the Velvet effects in an 85mm focal length? Yes, please.

The obvious thing to do with the Velvet 85 would be to go out and shoot a bunch of velvety soft portraits with lovely compression and smooth bokeh. I didn’t do that. I was in the midst of experimenting with soft focus macros of flowers, so that’s what I shot. And then I took it with me on a street photography photo walk.

Despite using the Velvet 85 in situations that might not be considered typical for a manual focus creative portrait lens, I like it. Quite a bit. I still struggle with shooting wide open, but just stopping down to F2.0 is enough for me to find a balance between glowing edges and sharpness that I can work with. Using the whole range of apertures gives me an enormous amount of flexibility in shooting everything from ethereal flower petals to detailed freckles sprinkled across a child’s nose.

If you are still curious about how the Velvet 85 performs as a portrait lens, there are plenty of other photographers who are shooting portraits with it. In fact, Lensbaby partnered with photographer and educator Kevin Kubota to film a new video about shooting portraits with the Velvet 85 and other Lensbaby optics. (Note: You’ll need to register for Lensbaby University — it’s free — in order to watch the whole video.)

And don’t forget to check out our gallery and let us know what you think. But before you say that you could get the same effect with a filter smeared with Vaseline, know that I tried it. It’s not the same.

See our Lensbaby Velvet 85 sample gallery

$ (document).ready(function() { SampleGalleryStripV2({“galleryId”:”0266755850″}) })

Sample photoSample photoSample photoSample photoSample photo

Articles: Digital Photography Review (dpreview.com)

 
Comments Off on Embracing the Lensbaby Velvet 85’s glow

Posted in Uncategorized


Glow in the Dark Outdoor Art: 15 Designs That Come Alive At Night

09 Jan

[ By SA Rogers in Art & Installation & Sound. ]

glow-in-the-dark-snails

Phosphorescent paints, pigments and pebbles that charge via sunlight by day and glow after dark transform the nighttime urban landscape, illuminating murals, bike paths, skate parks, rivers and even live snails. It’s like taking the glow-in-the-dark stickers you plastered all over everything as a kid out into the real world and achieving similar effects on a satisfyingly large scale, hiding secrets all over the city that will be revealed when the sun goes down.

3 Glow-in-the-Dark Street Art Murals by Reskate

glow-in-the-dark-reskate-mural-1

glow-in-the-dark-reskate-mural-2

glow-in-the-dark-reskate-mural-4

glow-in-the-dark-reskate-mural-3

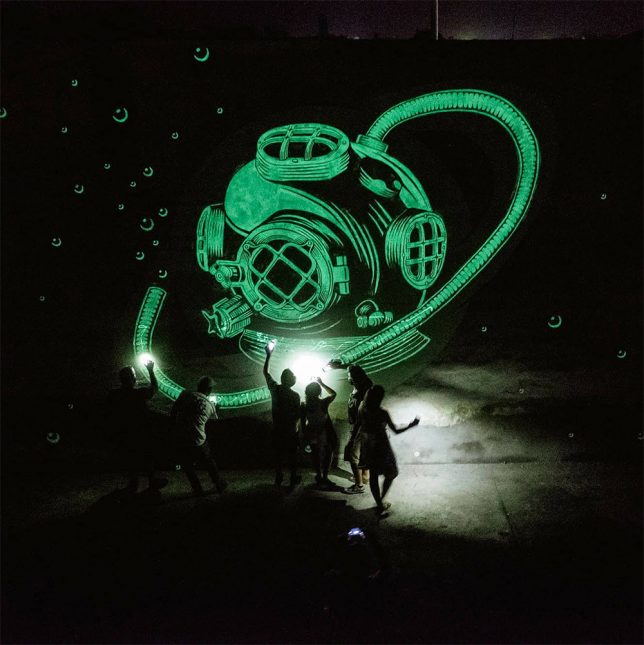
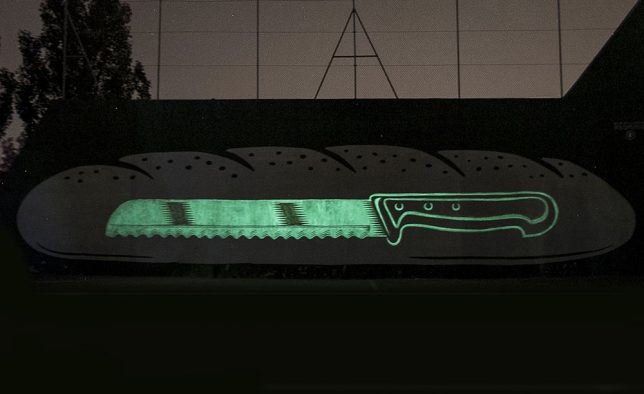
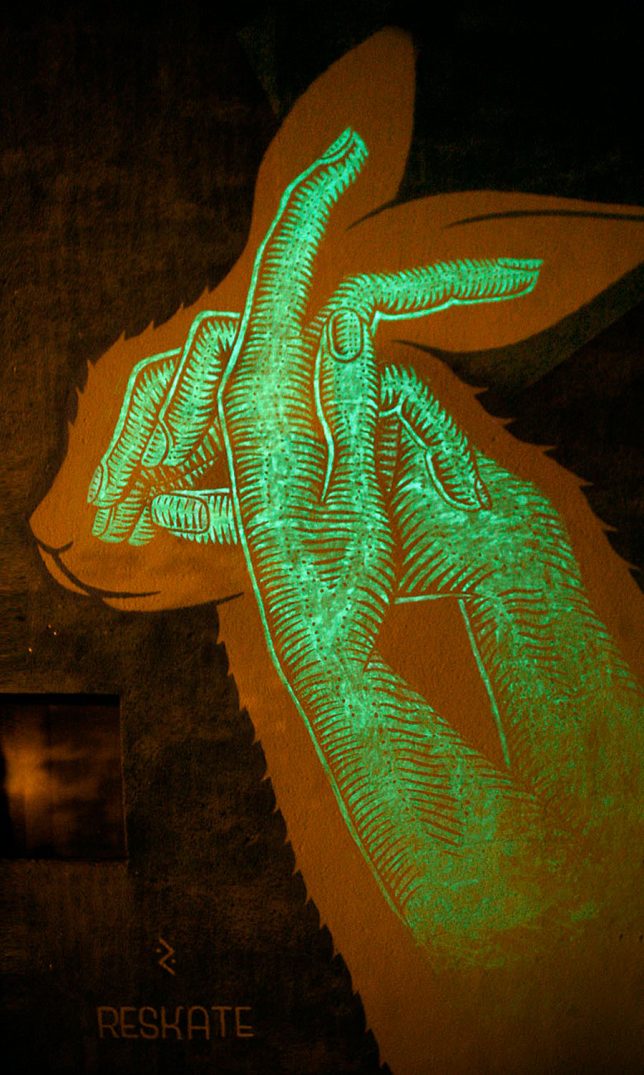
When the sun goes down, hand puppets, knives and space helmets appear within a rabbit, a planet and a loaf of bread. Spanish creative studio Reskate used glow-in-the-dark paint to hide these unexpected figures within their silhouetted murals.

Glow in the Dark Bike Path in the Netherlands

glow-in-the-dark-bike-path-poland

glow-in-the-dark-bike-path-2

glow-in-the-dark-bike-path-3

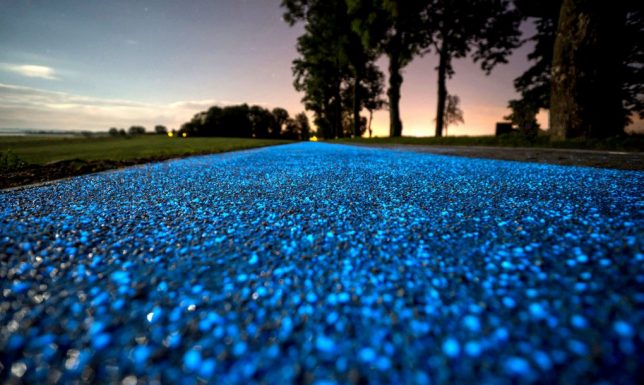
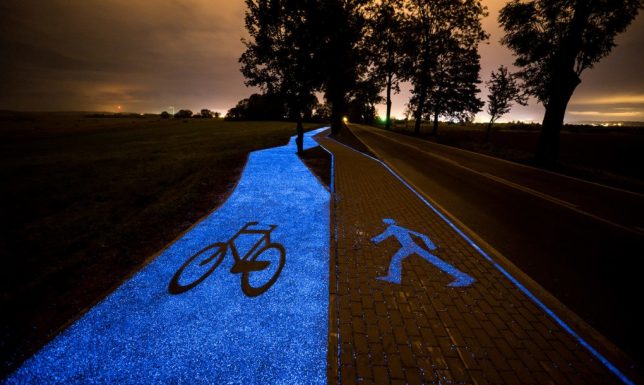
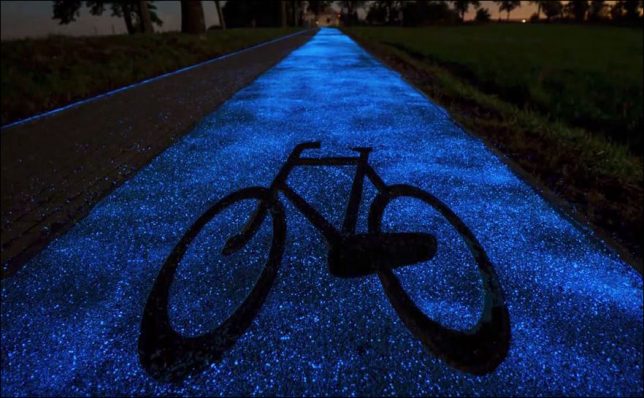
This bike path is safer after dark thanks to small particles of phosphor called ‘luminosphores’ that charge up during the day and release light at night. Urban planners in Lidzbark Warminski, Poland took inspiration from a similar project by Studio Roosegaarde in the Netherlands, but wanted to use a zero-energy light source instead of solar-powered LEDs.

Phosphorescent Mural by SpY, Paris

glow-in-the-dark-spy-mural-1

glow-in-the-dark-spy-mural-2

glow-in-the-dark-spy-mural-3

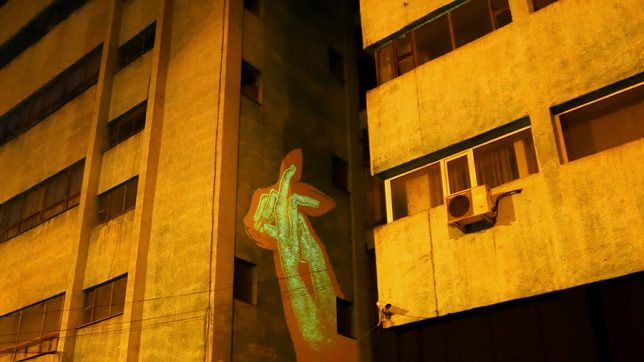
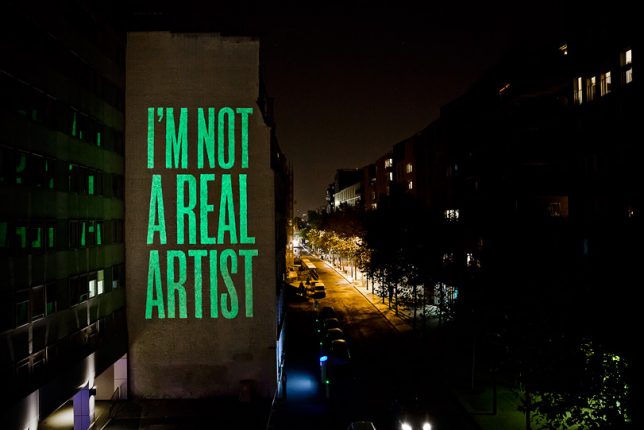
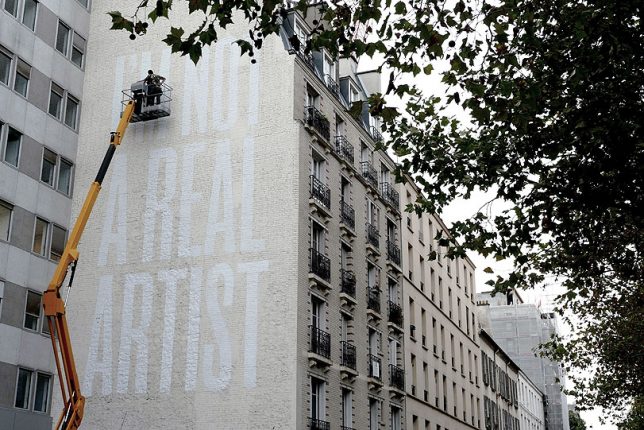
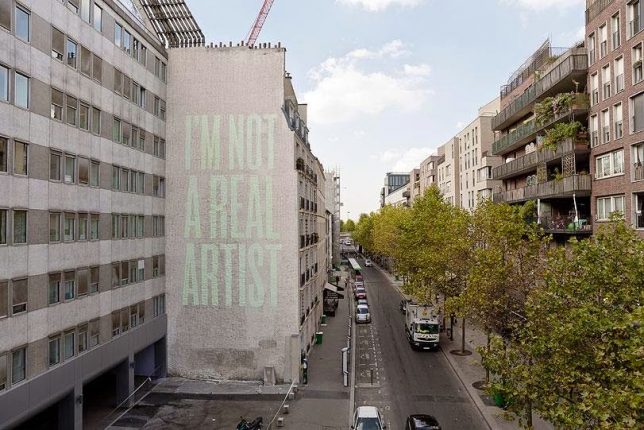
Blending into the pale brick on the side of a Paris building by day, this mural by SpY reveals its secrets at night, blaring ‘I AM NOT A REAL ARTIST.’

Snail Swarm Enhanced with LED Lights & UV Paint

glow-in-the-dark-snails

glow-in-the-dark-snails-2

glow-in-the-dark-snails-3

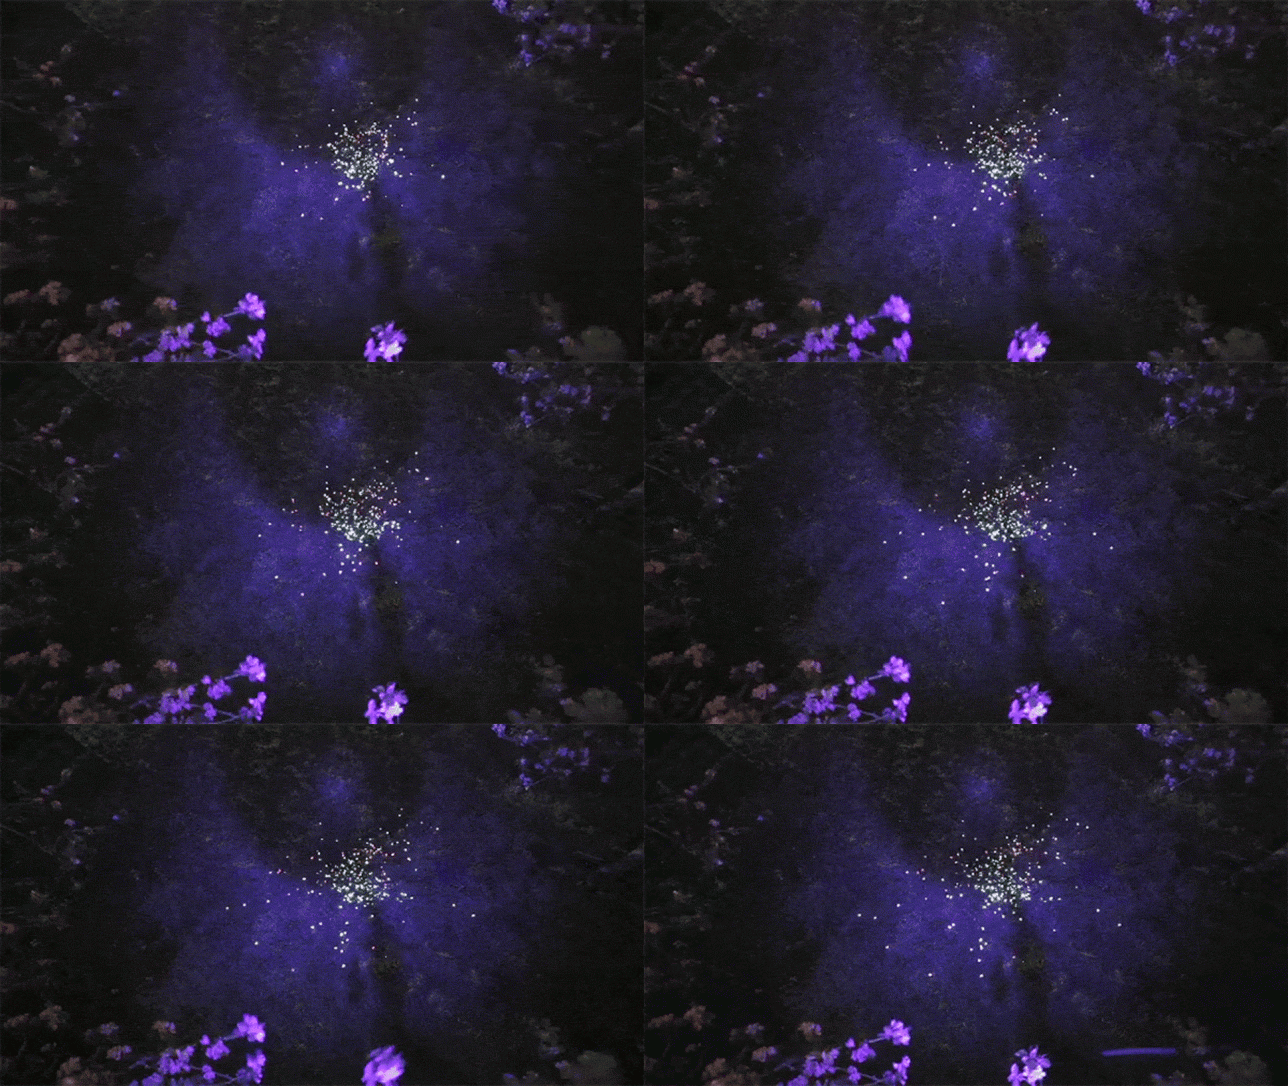
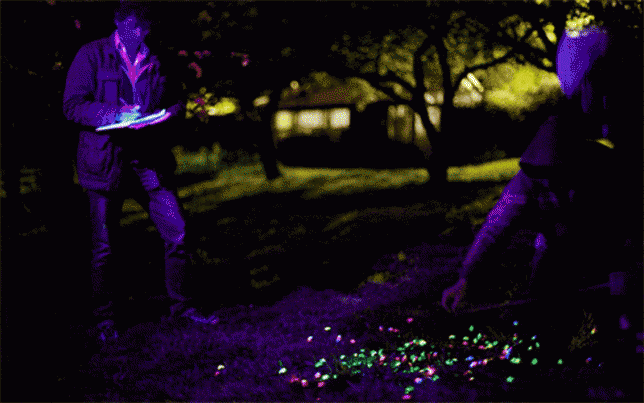
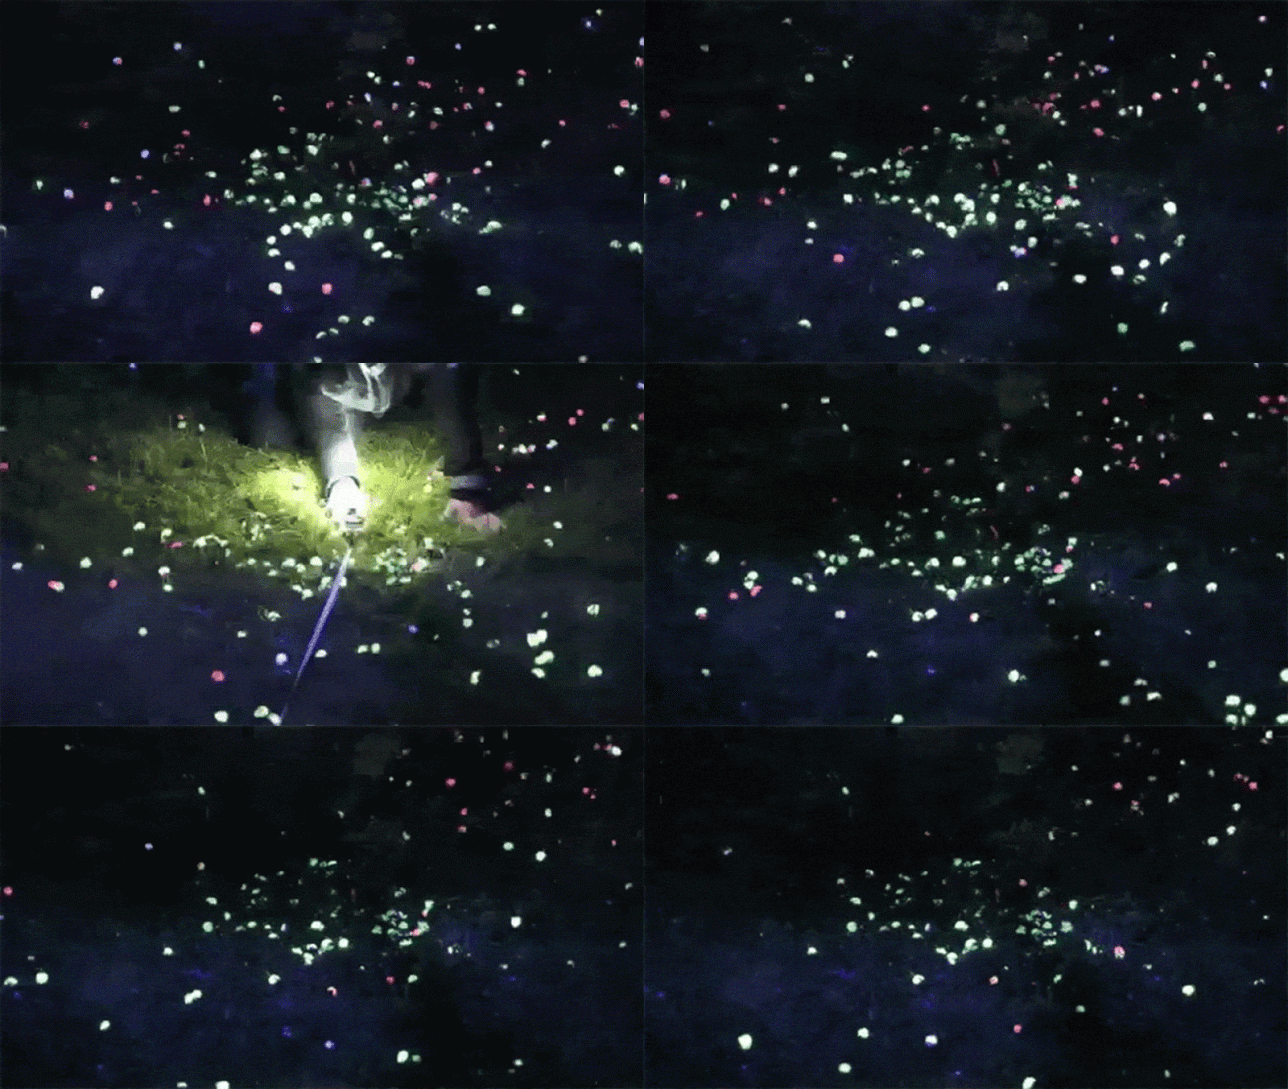
Researching snails can be kind of dry, so a group of researchers from the Ecology department at the University of Exeter found a more fun – and visually dazzling – way to go about it. The team tagged hundreds of live snails with LED lights and UV paint, and then tracked their patterns of movement at night. The experiment is an effort to track how snails spread lungworm to dogs.

Next Page – Click Below to Read More:
Glow In The Dark Outdoor Art 15 Designs That Come Alive At Night

Share on Facebook


[ By SA Rogers in Art & Installation & Sound. ]

[ WebUrbanist | Archives | Galleries | Privacy | TOS ]


WebUrbanist

 
Comments Off on Glow in the Dark Outdoor Art: 15 Designs That Come Alive At Night

Posted in Creativity


Go with the glow: How to effectively use Orton Layers in post processing

08 May

This image was taken in the summer of 2015 on the Skyline Trail near Panorama Point on the slopes of Mt. Rainier, WA.  The image is composed of 8 focus stacked frames and was shot at the following settings: 16mm, f/8, 1/25sec, ISO 400 using a Sony a7R and a Canon 16-35mm f/2.8L II lens.

Photo: Chris Williams Exploration Photography

Have you ever wondered how some of the top landscape photographers achieve that dreamy yet sharp look in their photos? It turns out that the answer is really quite simple. The Orton effect, as it has been dubbed in recent years, is achieved by selectively adding a Gaussian Blur layer in Photoshop. When applied correctly the technique can add depth, atmosphere and an almost surreal feeling to your images.  It can also help reverse some of the ‘crunchiness’ that sometimes results from web sharpening and compressing a large scene dynamic range into one, tone-mapped image. 

The technique itself was developed by photographer Michael Orton in the darkroom some years ago. This ‘Orton’ effect was achieved through the process of sandwiching two slightly over exposed images; one of which was slightly out of focus while the other remained tack sharp. The result of this process yielded a soft glowy image that retained much of its edge detail. 

Lucky for us this effect is now easily attained and even simplified in the digital age through the use of tools like Photoshop. In the following steps I will outline how to use and refine the technique that has been made popular by landscape photographers like Ryan Dyar over the past few years. 

Apply the Blur

The first step to this process is to take care of your focus stacking, exposure blending and touch up work before you apply the blur layer. Once that has been completed, sharpen your image as you would normally and merge the visible layers. Right click on your merged image layer and duplicate it.  

Now that you have the duplicated layer you can begin the process of applying the Orton effect. Select your duplicated layer (leave it at 100% opacity and normal blending mode) and apply the Gaussian filter to your layer. The radius at which you blur the pixels really depends upon your camera’s resolution and the desired outcome for your finished product. 

Selecting the Gaussian Blur layer is as simple as browsing through the filter options in Photoshop and selecting the appropriately named layer.

I typically blur the Raw files from my Sony a7R at a pixel radius of around 37. If you’re using a lower resolution file from something like a Sony a7S or even an APS-C camera I wouldn’t go further than a pixel radius blur of 25. The methodology behind this is that you don’t want to lose all of your edge detail and compromise the contrast in your blur layer, so choosing the correct blur radius is important. It’s a balance, and one that you should really play with to determine what blur radius works best for your needs and file types. Generally speaking, you want to stay within a pixel radius blur range of 15-40.  

A preview of the effect of your Gaussian blur settings can be seen prior to applying the setting to the layer; adjust the pixel blur radius here to determine what works best for your image.

Once you have selected the Gaussian blur settings that work best for your image click ‘okay’ to apply the filter to your layer. Leave the opacity of the layer at 100% for now.  

Bring Back the Contrast and Select the Opacity

One of the most important steps to this process is to apply a ‘levels’ adjustment to this layer. More often than not, when photographers first start to experiment with this type of technique in post processing, their images are left with haloing and a lack of contrast. Applying a levels adjustment selectively to your Orton layer can make a huge difference in your final result by bringing back the blacks and highlights that the Orton layer tends to bleed out. I normally bring the blacks in to between 10-25 and the highlights to around 245. Applying this step to your layer will ensure that you lose a minimal amount of contrast and will help to blend the layer in areas of harsh transition.   

Choose the ‘levels’ tool and adjust the blacks and lights to your taste.

Once you have completed this step it’s now time to adjust the opacity of your Orton layer. I typically aim for between 10-20% opacity. This really depends on your style and what the overall desired look and feel of your image is.  The example below illustrates what can happen if you increase your Orton layer to 35%, which can be a bit on the excessive side depending upon your image.   

10% Orton Layer 35% Orton Layer

The Devil is in the Details

Now that you’ve got this great atmosphere and glow going on in your image, you may ask yourself what happened to the detail? Loss of detail can happen when this layer is applied in your workflow, but there is a very easy solution to remedy this issue; the High-Pass filter. 

The first step is to duplicate your original background image layer (that has no Orton applied to it), select it, pull it to the top of your workflow and navigate to the filters tab.  Scroll down to find the ‘other’ category and select ‘High Pass’. A high-pass filter brings the detail out in the areas that tend to be most effected by the Gaussian layer: the edges of the elements in your composition. 

Choosing the high-pass filter follows many of the same steps as locating the Gaussian filter only this time the filter is located in the sub-menu titled ‘other’.

Once you have done this you will be given an option to select the pixel radius you wish to apply to your layer. I normally try to stay within a pixel radius of 4-5.5 (any larger and the image detail can get grainy). Pick your desired radius and click OK.  

Once you have selected the high-pass filter you can choose your pixel radius size; I normally choose between 4 and 5.5.

If you aren’t familiar with this type of application your first thought will probably be: ‘what did I just do to my image?’ as you stare at the grey layer on your screen. Fear not! There’s a very easy solution; you will need to select the layer and choose the ‘Soft Light’ blending mode.  

Make sure to apply the ‘soft light’ blending mode to your layer to blend the high-pass pixel detail seamlessly into your exposure.

This mode seamlessly blends the High-Pass pixel detail back into your image. You may want to adjust the opacity of this layer to your tastes after its application, but that’s all there is to it!  If you feel like you’ve got your settings down to a science you may want to even record this as an action. Be aware that every image will be a bit different from a processing stand point, however, so you may want to make subtle changes on a case by case basis.

Toggle the application of your layers off and on and make changes in opacity, detail and contrast as you see fit.

The Final Product

No Orton applied Orton applied

If you’ve completed all of these steps successfully, you now know how to effectively utilize an Orton layer in your workflow. This type of layer can be added to anything from landscapes, to wildlife, and even to portraits in some cases. The limits are only bound by your creativity. Have fun with it and happy shooting!    

Articles: Digital Photography Review (dpreview.com)

 
Comments Off on Go with the glow: How to effectively use Orton Layers in post processing

Posted in Uncategorized


Gear Review – Glow QuadraPro Portable Softbox

11 Dec

There is no greater teacher in life than time and experience. If I could go back in time and teach myself some photography lessons, high on my list would be OCF – off-camera flash. Back when I was starting out in photography, I used to dread using my flash. In fact, I think for the first two years of my photography career, I did not even own one. If a client would enquire about a family photoshoot, I would promptly reply back saying I am strictly a natural light photographer and the best times to schedule the session would be a little after sunrise or around sunset. I think I might have even turned down some indoor photo sessions because I hated the look and feel of a flash.

Fast forward a few years, as I ventured into the genre of wedding photography, I started to get over my fear of using a flash. As I educated myself on studio lights, flashes, and all the other lightning paraphernalia out there, I stopped hyperventilating as much at the thought of using artificial light for my photos. Although I am now fairly comfortable using an on-camera flash, I still consider myself a novice artificial light photographer. The next step to mastering artificial lights is to get comfortable with off-camera flash. To that end, I knew I needed, at the bare minimum, a light stand, a soft box, and my flash. So when I got the opportunity to review the GLOW QuadraPop Portable Softbox from Adorama I jumped at the chance.

Screen Shot 2015-12-03 at 1.37.49 PM

Let me preface this article by setting the record straight. I have never used an off-camera lighting system from the ground up. I have watched several online classes and tutorials on how a single light off-camera system works. In fact there are several wonderful articles on dPS that discuss off-camera flash like this one. But this is the first time I have handled such a setup ,and so, in essence, I am reviewing this product as a novice off-camera flash/softbox user.

Contents and what’s in the box

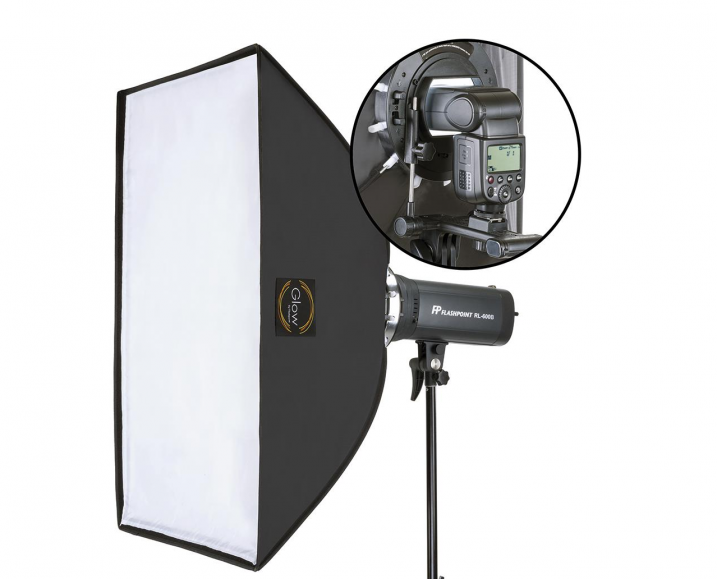
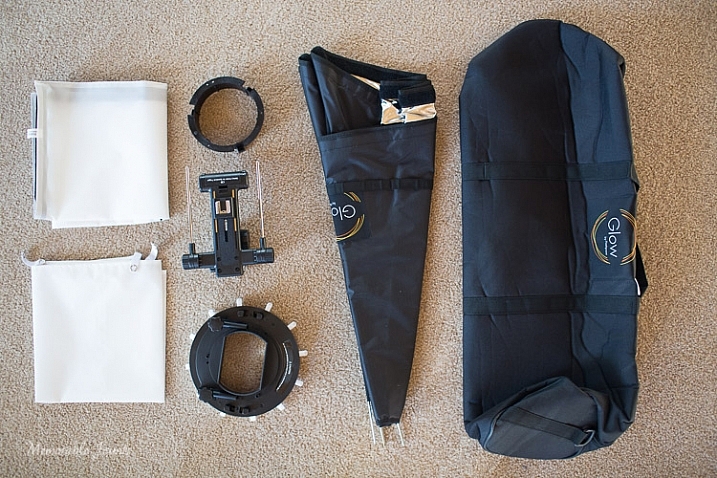
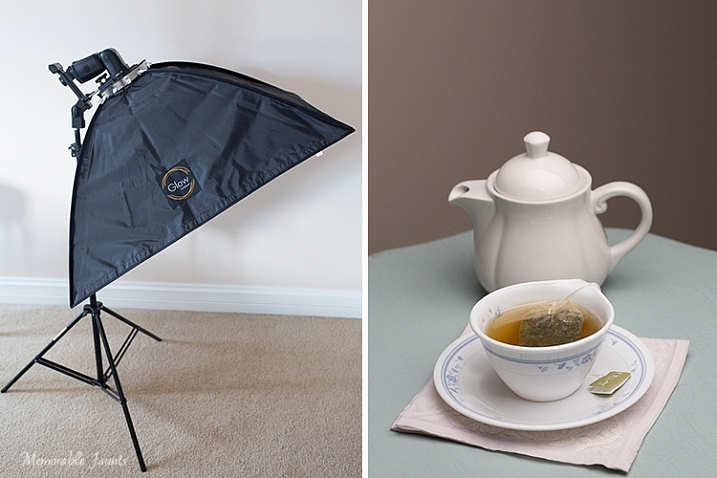
The QuadraPro comes fully equipped to use with a speedlight, as well as a studio strobe. Included in the box were the actual soft box, angle adjustment shoe bracket that can be adjusted for height and depth, removable inner and outer diffusers, removable cold shoe, and a protective bag to carry the QuadraPro on location. The only thing you will need to have is a light stand. I have a generic, lightweight stand that I had purchased from a local camera shop last year, and the GLOW QuadraPro worked perfectly with it.

Memorable Jaunts Glow QuadraPro Softbox Article Image Whats in the bag-1

I have to admit that when I opened the box, I was a little nervous about how to set up the whole system. I am used to reading manuals and watching product videos prior to handling equipment, but for this softbox setup I decided to skip all the research and prep work, and start using the product right away. The setup did take me a few minutes to figure out, but once I read through the one page instruction sheet that comes with the GLOW QuadraPro, it was easy enough.

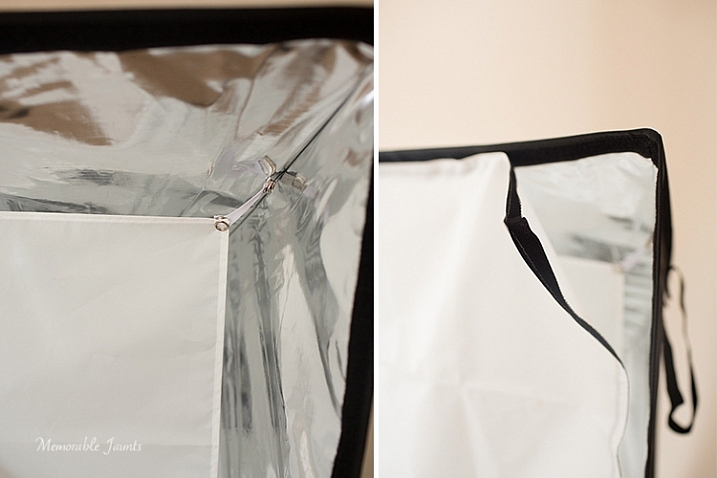
The flash cold shoe bracket was easy to use, but attaching the actual softbox to the QuadraPro ring did take me a couple of tries. Once I was able to secure the rods into the rings, it was easy to snap them in to place by adjusting the rings in a circular manner. The inner and outer diffuser panels are quite literally a snap to attach. The outer diffuser panel has a velcro attachment mechanism, while the inner panel snaps with push buttons.

Ease of use and comfort

The Glow QuadraPop line is perfect for mobile studios, on-location work, and also travel. The entire system is quite lightweight, and easy to set up and dismantle. This is ideal for individual portraits and product shots, as well as for use on location. The one I used is the QuadraPop Rectangular softbox that comes in two sizes – 28×38″ and 24×34″. I used the GLOW QuadraPop with both the internal, and external, diffuser panels. Additionally the flash shoe bracket has an angle adjustment knob for easy tilting, thereby adjusting the angle of light – perfect for photographing things from above.

Memorable Jaunts Glow QuadraPro Softbox Article Image Angle Adjustment on the Flash Hotshoe-3

My afternoon tea was photographed with the softbox above and to the right of the tea cup, as seen in the reflection on the surface of the tea in the cup, and the light on the tea pot.

Basic setup and portability

I created a quick video on how easy it is to set up the softbox:

Memorable Jaunts Glow QuadraPro Softbox Article Image Softbox Setup-1

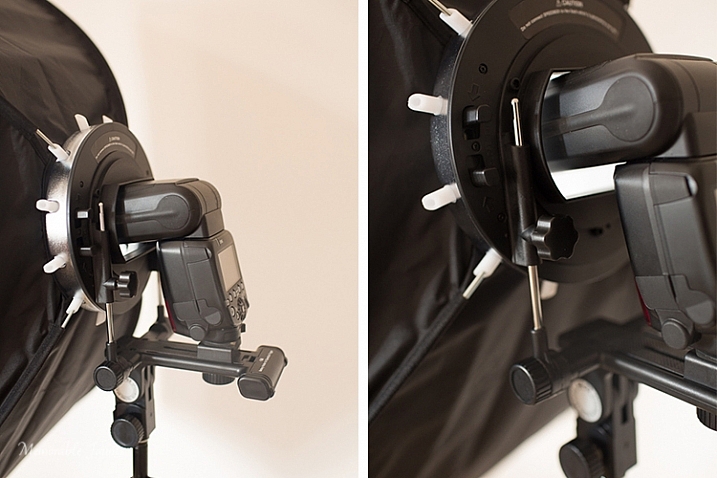
The softbox is mounted on the circular ring using the white clasps. The softbox is mounted on the light stand via the cold-shoe mount that also holds the flash.

Memorable Jaunts Glow QuadraPro Softbox Article Image Softbox Setup-4

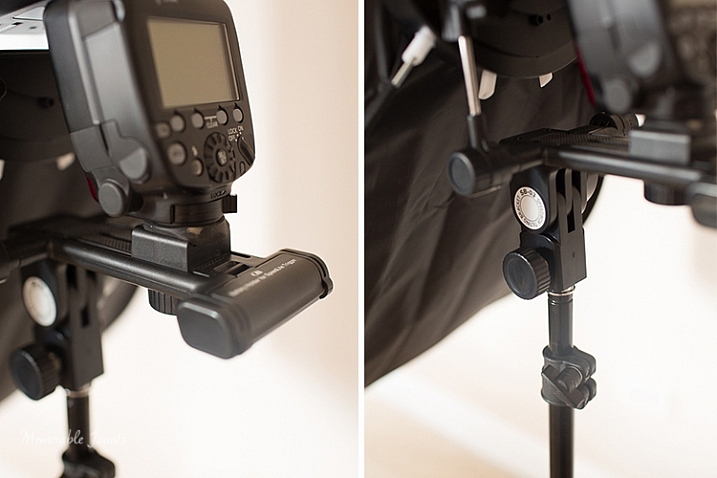
The cold-shoe mount has an adjustable screw that slides the flash forward or backward on the base.

Memorable Jaunts Glow QuadraPro Softbox Article Image Softbox Setup-6

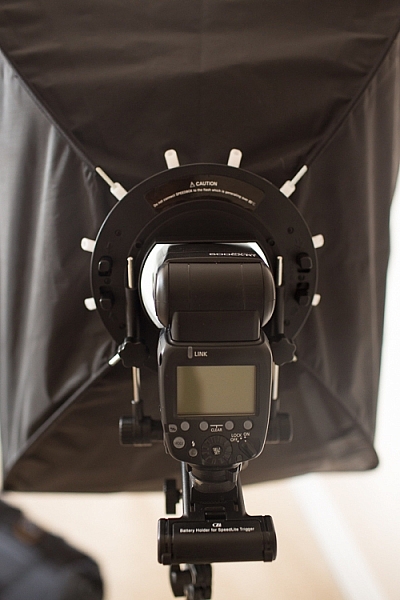
Back view of the fully assembled GLOW QuadraPro Softbox with the flash attached.

Memorable Jaunts Glow QuadraPro Softbox Article Image Softbox Setup-8

Inside diffuser panel that snaps into place, while the outside diffuser panel has velcro that attaches to the inside of the softbox close to the edge.

Indoor and outdoor use

I planned on putting the GLOW QuadraPop to the test with both indoor and outdoor use. But, just as I was writing this article, Chicago got the first major snow storm of the season. So, with subzero temps, I decided to forgo the outdoor test and just use it indoors with my obliging models, a.k.a my kids!

While indoors I moved the GLOW system from one room to the other, to see how easily I could manage carrying the system around. Before moving it, I removed the flash from the cold-shoe attachment, and also collapsed the softbox by squeezing the tabs on the sides of the ring. This did take some force, as the softbox rods were quite secure in their respective white sockets. I did not remove the diffuser panels as recommended, because I wanted the set up process to be easy at my next location (similar to what it would be like on a live on-location photoshoot). This made the set up, and take down process, much easier and faster.

Please note – I was experimenting with various softbox positions and had the flash on ETTL. My focus here was not on posing, but on the look and feel of a diffused lighting setup using a single softbox, i.e. the GLOW QuadraPro.

Memorable Jaunts Glow QuadraPro Softbox Article Image Indoor setup -4

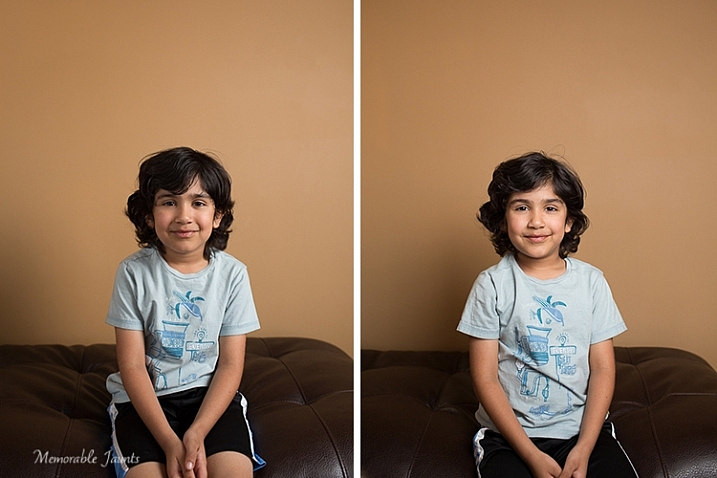
The image on the left has the softbox to the right of the camera. There is a slight shadow on the left hand side, and a nice drop-off of light on the background. The image on the right has the softbox placed directly in front of the model for a more even tone, and even lighting on the face.

Memorable Jaunts Glow QuadraPro Softbox Article Image Indoor setup -3

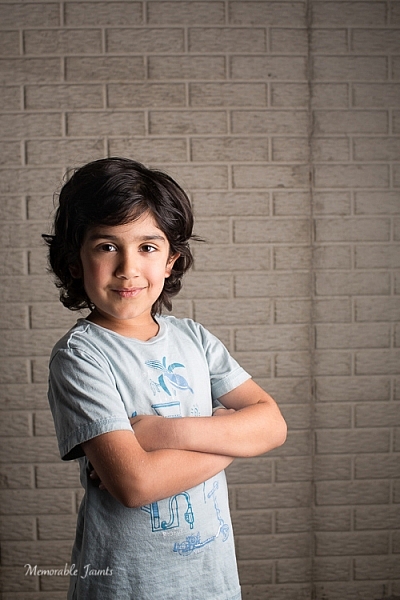
For this image, I moved to the basement where it was much darker. I quite like the effect of the dramatic lighting on the left side of his face, with some shadows on the other side. His body is turned slightly towards the softbox, which is at approximately at a 45 degree angle from the subject’s position.

Next up, my other willing model who had to be constantly bribed with treats and food!

Memorable Jaunts Glow QuadraPro Softbox Article Image Indoor setup -5

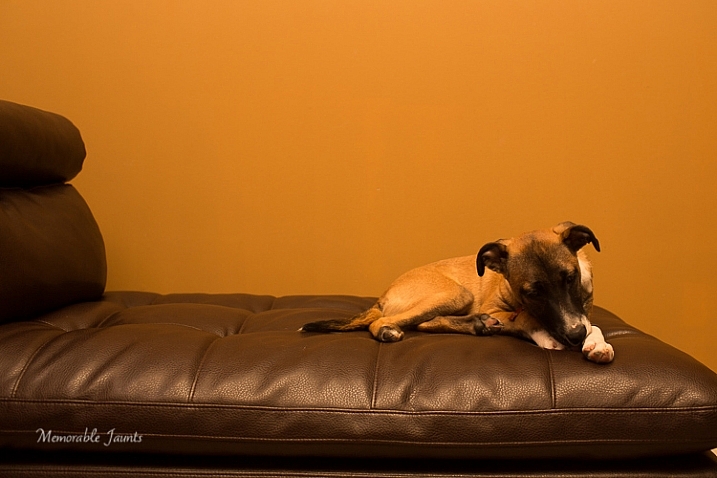
This image was taking WITHOUT the softbox. The flash was just bounced straight up without any additional diffusion. The image is quite dark and the color of the wall is quite terrible in this image.

Memorable Jaunts Glow QuadraPro Softbox Article Image Indoor setup -8

The image on the left had the softbox placed at a 45 degree angle to the dog. The image on the right has the softbox pointed straight ahead, giving a more even lighting and beautiful catchlights in his eyes. Plus the color of the wall is more true to its actual color!

Final Thoughts

In conclusion, the GLOW QuadraPro softbox is a fairly easy to use, lightweight and portable, flash diffusion system. I quite liked the convenience of having the setup all ready to use as I was experimenting with a single off-camera flash. Initially the softbox was a bit difficult to put together, and that was purely because I have never used this type of lighting system from the ground up. But once I got used to the clamps, they were very easy to assemble and dismantle.

googletag.cmd.push(function() {
tablet_slots.push( googletag.defineSlot( “/1005424/_dPSv4_tab-all-article-bottom_(300×250)”, [300, 250], “pb-ad-78623” ).addService( googletag.pubads() ) ); } );

googletag.cmd.push(function() {
mobile_slots.push( googletag.defineSlot( “/1005424/_dPSv4_mob-all-article-bottom_(300×250)”, [300, 250], “pb-ad-78158” ).addService( googletag.pubads() ) ); } );

The post Gear Review – Glow QuadraPro Portable Softbox by Karthika Gupta appeared first on Digital Photography School.


Digital Photography School

 
Comments Off on Gear Review – Glow QuadraPro Portable Softbox

Posted in Photography


28 Ethereal Images of Light Rays that Glow

18 Apr

To photographers light is the most important thing above all else. It is the ultimate prize to come home with a photo with “good light”.

One type of light that is truly ethereal is the phenomenon of rays of light. It is only possible for light rays to be visible in an image when certain atmospheric conditions exist; there must be some kind of particle suspended in the air for the light to bounce off such as dust, fog, or smoke.

Here are 28 images of light rays that have a certain glow about them. Enjoy!

Photograph Home by matt dinning on 500px

Home by matt dinning on 500px

Photograph Poland by Artur Magdziarz on 500px

Poland by Artur Magdziarz on 500px

Photograph Amazing Earth by Rick White on 500px

Amazing Earth by Rick White on 500px

Photograph The Valley of Light by Michael Shainblum on 500px

The Valley of Light by Michael Shainblum on 500px

Photograph A Journey to the Light by Rarindra Prakarsa on 500px

A Journey to the Light by Rarindra Prakarsa on 500px

Photograph Raging Light by Martin Kornmesser on 500px

Raging Light by Martin Kornmesser on 500px

Photograph Praying by La Mo on 500px

Praying by La Mo on 500px

Photograph The Cave by Tommy  Angelsen on 500px

The Cave by Tommy Angelsen on 500px

Photograph Dawning by Dylan Toh  & Marianne Lim on 500px

Dawning by Dylan Toh & Marianne Lim on 500px

Photograph heavenly autumn 7 by Bart Ceuppens on 500px

heavenly autumn 7 by Bart Ceuppens on 500px

Photograph Hold On Tight by Vichaya Pop on 500px

Hold On Tight by Vichaya Pop on 500px

Photograph Light shower by Martin Kornmesser on 500px

Light shower by Martin Kornmesser on 500px

Photograph Waiting for a New Life! by Mardy Suong Photography on 500px

Waiting for a New Life! by Mardy Suong Photography on 500px

Photograph Nori Othman by Mohammed Abdo on 500px

Nori Othman by Mohammed Abdo on 500px

Photograph Beams of Light by BP Chua  on 500px

Beams of Light by BP Chua on 500px

Photograph Peter's ray by Jarno Dijkstra on 500px

Peter's ray by Jarno Dijkstra on 500px

Photograph Better than Coffee by Tracey Harrison-Hill on 500px

Better than Coffee by Tracey Harrison-Hill on 500px

Photograph Upper Antelope Canyon by Victor Chen on 500px

Upper Antelope Canyon by Victor Chen on 500px

Photograph Descending by Thomas Conrad  on 500px

Descending by Thomas Conrad on 500px

Photograph Sunset With A Twist by Michael Shainblum on 500px

Sunset With A Twist by Michael Shainblum on 500px

Photograph Sonnenstrahlen im Wald by Leo Pöcksteiner on 500px

Sonnenstrahlen im Wald by Leo Pöcksteiner on 500px

Photograph The lake by Christian Wig on 500px

The lake by Christian Wig on 500px

Photograph morning by Alberto Melcangi on 500px

morning by Alberto Melcangi on 500px

Photograph Enveloping light by Stefan Andronache on 500px

Enveloping light by Stefan Andronache on 500px

Photograph Fresh Beginning by Scott Knox on 500px

Fresh Beginning by Scott Knox on 500px

Photograph Ray Of Light by Roland Guth on 500px

Ray Of Light by Roland Guth on 500px

Photograph Home is where the light is by Claudiu Guraliuc on 500px

Home is where the light is by Claudiu Guraliuc on 500px

Photograph Entrance by markus  on 500px

Entrance by markus on 500px

googletag.cmd.push(function() {
tablet_slots.push( googletag.defineSlot( “/1005424/_dPSv4_tab-all-article-bottom_(300×250)”, [300, 250], “pb-ad-78623” ).addService( googletag.pubads() ) ); } );

googletag.cmd.push(function() {
mobile_slots.push( googletag.defineSlot( “/1005424/_dPSv4_mob-all-article-bottom_(300×250)”, [300, 250], “pb-ad-78158” ).addService( googletag.pubads() ) ); } );

The post 28 Ethereal Images of Light Rays that Glow by Darlene Hildebrandt appeared first on Digital Photography School.


Digital Photography School

 
Comments Off on 28 Ethereal Images of Light Rays that Glow

Posted in Photography


Photoluminescent Furniture: Filled Wooden Voids Glow in Dark

17 Dec

[ By WebUrbanist in Art & Sculpture & Craft. ]

glow dark wood table

A pair of crafty carpenters have separately arrived at the same conclusion: glow-in-the-dark resin is a really neat way to fill cracks, gaps, splits and other natural or accidental voids frequently found in wood shelves and surfaces.

glow in the dark shelf

Whether you have a small piece that needs infill or mending or a larger project in the works, one of these approaches may well be ideal for your own do-it-yourself project – some details are provided below but full instructions on each strategy can be found via links included as well.

glow shelf final product

glow knot seen from below

In the first instance, Mat Brown decided to try something other than the standard invisible-style repair to solve the problem of empty space around knots and front-facing unevenness in boards to be used as shelving.

glow dark resin mix

glow dark wood process

He provides further details on the process over at his blog, but in a nutshell: he used robust tape below and on the sides then heated up the resin, mixed in the powder and poured in the results. After a second similar round he cut, sanded and finished the pieces.

glowing infill table design

glowing cyprus power resin

Mike Warren has subsequently brought a similar idea to the table, creating a tutorial for filling in the naturally separation gaps found in a certain species of cyprus, livening up the surface with bright resin.

glow dark table detail

The full illustrated list of 25 steps for this latter version can be seen on Instructables, but in this case a similar process was used, just heavier-duty tools employed (like a drum sander) to keep the workload down. Hat tip to Chris of Colossal for finding both of these projects as well.

Share on Facebook


[ By WebUrbanist in Art & Sculpture & Craft. ]

[ WebUrbanist | Archives | Galleries | Privacy | TOS ]


WebUrbanist

 
Comments Off on Photoluminescent Furniture: Filled Wooden Voids Glow in Dark

Posted in Creativity


Head Light: Popup Wall Lamp Has Horns that Glow in Shadows

18 Jul

[ By WebUrbanist in Design & Fixtures & Interiors. ]

light and dark headlight

A classy alternative to hanging animal parts, this deer head wall lamp started as a design concept, went viral as a prototype and has just been funded for full production via a successful crowdfunding campaign.

popup lighting design

owl lamp pop up

peacock lamp pop up

This particular popup lighting design is the first in a series of pieces that combine abstracted animals (including an owl and a peacock) and minimalist home lighting design – a sort of modern (and less morbid) take on faux taxidermy.

popup dear head light

deer head light pair

pop up light night

Chen Bikovski is a Tel Aviv-based designer exploring the relation of light and space. “Since I was a child, I was fascinated by Pop-up books…The excitement before turning a page, a simple pull that uncovers a whole new world. I loved how the story came to life, how the books created a fantasy world that flew off the page. The magic, the excitement, the naiveté…”

dear head light design

pop up lighting

dear head light in room

Named ‘Promising Young Designer of 2012,’ Chen’s work is presented in prominent galleries and featured in leading design publications. “The idea behind Popup Lighting was to create a permanent light fixture that would bring a magical ambiance to any space. A multi-dimensional light that would inspire the senses and ignite the imagination.”

Share on Facebook


[ By WebUrbanist in Design & Fixtures & Interiors. ]

[ WebUrbanist | Archives | Galleries | Privacy | TOS ]


WebUrbanist

 
Comments Off on Head Light: Popup Wall Lamp Has Horns that Glow in Shadows

Posted in Creativity