RSS
 

Posts Tagged ‘Frozen’

Frozen soap bubbles create scenes from a fantasy world

25 Mar

$ (document).ready(function() { SampleGalleryV2({“containerId”:”embeddedSampleGallery_8718171696″,”galleryId”:”8718171696″,”isEmbeddedWidget”:true,”selectedImageIndex”:0,”isMobile”:false}) });

In a recent episode of DPReview TV, new host (and mad scientist) Don Komarechka introduced us to the magical world of frozen soap bubbles. Take a look at some of the fantastical images he captured.

View the frozen soap bubble sample gallery

This was a really fun video, so if you missed it you’ll want to give it a watch. You can see it below or watch it on YouTube.

Articles: Digital Photography Review (dpreview.com)

 
Comments Off on Frozen soap bubbles create scenes from a fantasy world

Posted in Uncategorized


How to Photograph Frozen Bubbles in the Cold

12 Mar

The post How to Photograph Frozen Bubbles in the Cold appeared first on Digital Photography School. It was authored by Mark C Hughes.

Bubbles in the Air

I live somewhere that gets pretty cold in the winter, and occasionally it gets super-cold. Alright, discussing cold is always a relative measure depending upon where you live, but I may be understating a bit to say it gets pretty cold, when actually, it gets freezing by pretty much anyone’s measure. Fortunately for my family and me, it only gets challenging for about a week or two in the depths of winter.

In the hardest times, temperatures reach around -30C (-22F). At these temperatures, there is very little moisture in the air, and it is just plain cold. Extra layers only help a little bit. Frostbite is a very significant risk for any exposed skin, particularly if there is any wind (times to freeze exposed skin are less than a couple of minutes).  Many people here wear the temperatures they endure almost as a badge of honor.

So cold we can freeze bubbles before they pop

It gets really cold here

At these temperatures, everything freezes here – even things you probably didn’t think could freeze. The large river that goes through my city freezes for the entire winter. Starting sometime in November until breakup in April, eyelashes and beards freeze, camera lenses freeze (aperture blades and shutters won’t move) and cars require block heaters to keep the oil in the crankcase warm enough so that you can start the engines.

There are colder places on earth, but not that many.  During our recent cold snap from the polar vortex (very cool name but I’m not sure its a real thing), people compared it to temperatures in Antarctica (it was slightly colder here than there).

It gets pretty cold here

So what, who cares?

Realistically, apart from complaining about the weather (a common national pastime for Canadians… look it up) you don’t want to spend much time outside at these freezing temperatures. So why tell you about crazy frigid temperatures? Because there is something that you can do at these temperatures that you can’t really do if it isn’t cold enough. You can blow bubbles and take pictures of them freezing before your eyes. The effect is remarkable, and it happens very fast. Frozen bubbles! If you can blow bubbles, you can watch them freeze before your eyes.

The process is pretty quick. The ideal temperature to do this is when temperatures dip below about -20C or -4F. At temperatures higher than that, the bubbles don’t freeze the same way. Blowing bubbles at these subzero temperatures can be challenging, but if you take the time, you can get some amazing results.

Bubbles on a bubble wand

The science of bubbles

Bubbles are common phenomena that kids love playing with. They seem very simple, but the science behind them is quite complicated. Bubbles are made up of two soap films – inside layer and outside layer – holding and trapping a layer of water between them to form the bubble. When you blow the bubbles through a wand or a straw, the air you introduce expands the inner film layer to create the bubble. As the water evaporates, the bubble eventually bursts. The bubbles stay together based upon the surface tension (the tendency to stick together) of the soap film, but the film is, in general, very thin.

In warm weather, soap and water are all you require for making lots of bubbles, but at colder temperatures, the soap film needs to be stronger. By adding glycerine or corn syrup, you make the bubbles stronger. By adding a small number of sugar crystals, the bubbles will show crystal patterns in the bubble walls as they freeze. The main ingredients you need access to are water, dish soap, glycerine, and some sugar.

Ingredients to make frozen bubble images

The 3 W’s and 1 H

In preparation for shooting bubbles, the key questions before you start are WHERE, WHAT, HOW and WHEN. Because the temperatures are so cold, you need to plan everything in advance because you can’t spend that much time in these temperatures trying to guess what you are going to do next. You need to pick a spot to set your bubble down (this is not a floating bubble exercise). This is the WHERE. Preferably it is someplace convenient, at a reasonable height and near a source of warmth (like somewhere near a door or running car to get you inside).

You then need to decide on the WHAT, is there a particular look you are going for? Is there an effect you are trying to achieve? (Night shot? Candles?)

Next, you need to think about HOW. How are you going to compose the shot? How are you going to blow the bubbles? What is the background like (this is a key aspect)? How are you going to manage both focusing, bubble making and shot taking? Are you going to need a tripod?

Finally, the WHEN is the last part to consider. You need to pick a time of day on a day that is cold enough to create the effect, that has great light and when there is little to no wind (this disrupts the bubbles). Wind will quickly destroy any efforts to blow bubbles in the cold.

Bubble frozen solid with corn syrup

The WHERE

So let’s consider the WHERE.

It will be cold, so you will need to scout a location that is easy to get to, at a reasonable height to photograph preferably from a tripod (to free up your hands) and is relatively near warmth.

These are normally close-up images, so it presents some similar challenges as macro photography. You really can be just about anywhere as long as you don’t have distracting shapes, colors or patterns in the background. Ideally, if you choose a reasonable aperture, the bokeh will have the background blurred but significant shapes, colors or patterns will be apparent.

I used the snowy railing on my back deck as a place I would set up for my shots because it was close to my house, at waist height and I can control the background.

Frozen bubble with a dark background

The WHAT

Regular bubbles don’t really work in super cold temperatures. The bubble mixtures that work in the summer struggle in super-cold temperatures and tend to just burst before freezing. In cold temperatures, bubbles can be more difficult to generate. Even if you do, they often just fall to the ground.

If you search the internet, you will get lots of clear advice but little in the way of explanation. I found and tried multiple recipes for bubbles and discovered that some of the recipes don’t work all that great. All generate bubbles, but some work better than others.

The general objective is to get bubbles with thicker films that tend to stay together. Also, by adding some sugar, you can get cool crystalline patterns as the bubbles freeze.

The recipe I settled on (as it worked fairly reliably) was 1 cup of water, 4 tablespoons of dish soap (not dishwasher soap), 3 tablespoons of glycerine and 2 tablespoons of sugar. I saw many recipes that used corn syrup, but they didn’t seem to work as well as the glycerine and made for sticky bubbles. However, corn syrup does work – just not as well. The glycerine strengthens the bubble, and the sugar helps with the crystalline patterns in the freezing bubbles.

To blow the bubbles, you will need a straw and some patience. Preferably you use a reusable straw (which I have a bunch of).

Regular Bubble solutions don’t really work for freezing bubbles

The HOW

Once you have figured out your location, you need to compose your shot. Plan on a bubble being about 3 inches in diameter (could be bigger but probably won’t be smaller). Set your camera on a tripod, pick the spot where you are placing the bubble and set your focus manually.

You can set the bubble on snow, or if you use the bottom of a cup or glass, a small amount of solution on the base helps place the bubble easier and without it popping. It is also useful to have your camera set up to take multiple shots (slow burst) without recomposing or refocusing.

Bubble with focus on the back wall rather than front wall

Once set, use a straw in the solution and slowly blow the bubbles. You will need to keep the bubble on the straw, place the bubble and slowly extract the straw from the top of the bubble. This technique worked best for me. Remember it is cold, and blowing bubbles is not that easy when it very cold.

The WHEN

Okay, you are all set…but is it cold enough? You need -20C (-4F) or the bubbles don’t freeze properly. Ideally, you want it sunny as the light hitting the bubbles really makes them pop. The good news is that generally when it is really cold, there is so little moisture in the air that it is often sunny.

Finally, you want there to be as little wind as possible. The wind will cause the bubbles to move unpredictably and cause them to burst. Try to find a location sheltered from the wind.

Using a candle to illuminate a bubble at night

The Shoot

Once all the preparation is complete, and you are ready to go, you may realize that it is difficult to blow bubbles, wear gloves, stay warm and shoot at the same time. Once the bubbles start to freeze, they freeze fast. You will want to place the bubble and then watch for it to begin to freeze and then take multiple images in a short burst.

If you can have someone blow bubbles for you, this helps because getting the bubbles to form, place them and then hope they stay together long enough for the images to turn out can be a bit of a challenge. It is a little finicky to get the bubbles to stay where you want them but if all the stars align the results are great and fun.

Mostly frozen bubble

The Results

If you get everything working, you can get pretty amazing results.  Whether for still images or video, bubbles freezing are really interesting to see and photograph. If you plan out the images, you can get great results.

Not quite frozen bubble


The post How to Photograph Frozen Bubbles in the Cold appeared first on Digital Photography School. It was authored by Mark C Hughes.


Digital Photography School

 
Comments Off on How to Photograph Frozen Bubbles in the Cold

Posted in Photography


Researchers recover photos from a USB drive that spent a year frozen in seal poop

09 Feb
Seals at Cape Cross, Namibia — Joachim Huber

A USB flash drive recovered from frozen seal scat has been reunited with its owner, according to New Zealand’s National Institute of Water and Atmospheric Research (NIWA). The organization revealed its findings in a post early this week, when it stated that a functional USB drive with recoverable photos and at least one video had been found in thawed seal poo.

According to the NIWA, seal scat is ‘as good as gold’ for researchers who study the creatures. Volunteers with LeopardSeals.org collect these samples and ship them to the researchers, who then freeze them until they’re ready to analyze the droppings.

In November 2017, the NIWA says marine biologist Dr. Krista Hupman received a sample collected by a local vet. The scat was placed in a freezer, only to be removed last month by volunteers with the organization. The sample was defrosted, rinsed, and then broken apart to study.

Amid the expected findings was one concerning discovery: a USB flash drive. After being left out to dry, the researchers connected the drive and were surprised to recover images of sea lions, as well as a video showing the tip of a blue kayak and a mother and baby sea lion in the water.

NIWA shared the video on its Twitter account on February 4 in an attempt to reunite the USB drive with its owner.

The amusing story went viral, and it only took a day for owner Amanda Nally to claim her property, according to The Project NZ. The hardy USB drive’s make and model remain unknown, but it’s safe to say regardless of official specs the flash drive was indeed weather ‘sealed.’

Articles: Digital Photography Review (dpreview.com)

 
Comments Off on Researchers recover photos from a USB drive that spent a year frozen in seal poop

Posted in Uncategorized


Frozen Warriors: Capturing the mighty musk ox in its natural habitat

25 Mar

Wildlife photographer Chris Schmid recently travelled to Norway’s Dovrefjell-Sunndalsfjella National Park—which contains some of the most punishing-yet-beautiful landscapes on Earth—to shoot an ambitious documentary photography and filmmaking project. His goal was to capture the mammoth-like musk ox in their natural arctic habitat, and the result is the short film The Frozen Warriors.

Using RED cameras for video, DJI drones for aerial shots, and the Sony a9 and a7R III for stills photography, Schmid sought to capture footage that would foster some sort of connection between his audience and the musk oxen, whose already dwindling numbers are increasingly threatened by climate change. This, despite being one of the most resilient animals on Earth, having survived the last ice age without breaking a sweat.

As Chris explains:

What fascinates me about the musk ox is the strength it has to adapt to the most hostile of environments. In the winter, they feed on roots, mosses and lichens buried under the snow and spend over four months without sunshine, in total darkness, surviving in temperatures reaching as low as -60°C

Check out the film at the top of this post and scroll through Schmid’s photographs from the project below to get to know these Frozen Warriors for yourself. And if you want to learn more about the project (and help raise awareness), visit (and share) the Frozen Warriors project page here.

$ (document).ready(function() { SampleGalleryV2({“containerId”:”embeddedSampleGallery_3466407533″,”galleryId”:”3466407533″,”isEmbeddedWidget”:true,”selectedImageIndex”:0,”isMobile”:false}) });

Articles: Digital Photography Review (dpreview.com)

 
Comments Off on Frozen Warriors: Capturing the mighty musk ox in its natural habitat

Posted in Uncategorized


How to do Photography of Frozen Flowers

07 Jul

Have you ever received a beautiful bunch of flowers and wondered how they might look frozen solid? No? Well, me neither! Actually, up until recently, I was more interested in keeping flowers in a good old conventional vase. But photographers are a mighty creative bunch. Provided with some of nature’s most basic ingredients, we put our heads together and discovered an amazing way to create such wonderfully abstract photographs of frozen flowers. And with such beautiful results, I wish I had started stowing my floral bouquets in the freezer sooner!

How to do Photography of Frozen Flowers

Supplies

You will need:

  • Flowers
  • Freezer
  • Water
  • Container
  • Camera

Method

Getting started

How to do Photography of Frozen Flowers

There are a few methods I’ve encountered for preparing photo-ready frozen flowers. One of those methods involves the use of liquid nitrogen, but I’m going with something a little less technical. To fully encase your beautiful flowers in a block of ice, you’ll need to gradually build up the surrounding layers of ice. Usually, you could go about filling any old tray with water, throwing it in the freezer and forgetting about it until summer. However, flowers contain oxygen, and oxygen is lighter than water. This means that chucking flowers into a full bowl of water and freezing it over is a no-go. The flowers will simply bob to the surface, stick out of the ice and wither away.

Anchoring your flowers

Instead, have a dig in your Tupperware drawer. I’ve found that a wide and relatively shallow plastic container works best, depending on freezer space. Fill your container with a few centimeters of water. Tap water has a foggier appearance when frozen, so use distilled water if you want a glossier effect. Place your flowers face-down in the water, arrange them how you like, and place the container in the freezer. The small amount of water will freeze over, trapping parts of the flowers and anchoring them so that they can’t float in subsequent layers of water.

Retrieve the container after a couple of hours, making sure the flowers are partially frozen to the ice in the container. Once the flowers are secured, pour a few extra centimeters of cool water over the flowers and existing ice. Be careful not to add too much though – the ice below can thaw and release the flowers, starting the whole process again. Return the container to the freezer.

Flowers fixed in place by a few centimeters of frozen water

Final stages

After another couple of hours (you guessed it) take the container out of the freezer again and add a few more centimeters of water. This time, you can add as much water as you like. But remember, the thicker the ice, the harder it will be for light to pass through the frozen block, cutting down the amount of light which will reach your camera’s sensor. However, ice will melt over time, so adding more water is better than adding too little. When you have added the last layer of water, take your container and pop it back in the freezer one last time.

Once the uppermost layer is frozen, remove the container from the freezer and let it sit for 10 minutes or so. After the ice has separated from the container, turn the container upside down over a cloth. Gently tap the container and the ice should slide out. Voila, behold the beautiful results of your hard work!

How to do Photography of Frozen Flowers

In this image, the base of the container has created an impression in the ice. You can even out the surface by rubbing a warm dampened cloth over the uneven imprint.

Photographing your creation

Now that you’ve created your icy flower sculpture, it’s time to photograph it before it melts. I recommend positioning your ice block near a light source or window with natural light coming through. This allows light to penetrate the ice and the membrane of the flowers to create a more detailed subject. For my photographs, I leaned my frozen flower block against the glass petitions of my apartment balcony. Be sure to put a towel underneath the ice to avoid a wet puddle.

How to do Photography of Frozen Flowers

How to do Photography of Frozen Flowers

Positioning the frozen block of flowers against natural light illuminates the details and varying tones in the image.

Experiment!

Now that you have the technique down, have a go with different combinations of flowers and containers. Depending on the shape and length of a container, you can manipulate the density and trajectory of bubble trails frozen in the ice. Try adjusting the orientation of the container, or breaking and refreezing the ice.

To make the rounded point encasing the rose head below, I lined the inside of a glass cup with a plastic bag. After anchoring the flower head to the first few frozen centimeters of ice, I gradually built up the layers of water to completely cover the rose. The air that escaped the rose was squeezed out and trapped inside the base of the glass, creating intricate patterns around the rose head. To make the ice more rounded, I simply wore the edges down with my hand for a minute or two.

How to do Photography of Frozen Flowers

The long bubbles suspended over the rose head are the paths of oxygen trying to escape

How to do Photography of Frozen Flowers

Line the inside of a glass cup so that the flower is easier to remove once it is completely encased in ice.

Once completely frozen, I let the glass sit at room temperature, gently tugging on the plastic bag every 10 minutes or so. Eventually the plastic bag became separated from the glass, and I carefully lifted the ice from the cup, revealing the beautifully encased flower inside.

How to do Photography of Frozen Flowers

A single rose, completely frozen after being positioned vertically in a glass cup.

How to do Photography of Frozen Flowers

As water freezes, oxygen is squeezed out of the flower, leaving beautiful trails in the ice.

Conclusion

Frozen flower photography is a super simple way to give your floral images a unique edge. With a few simple tools found in the kitchen and a pretty selection of flowers, you can create a countless variety of beautifully intricate photographs. Whether you are looking to update your portfolio or searching for something to do on a rainy day, these eye-catching floral sculptures are definitely worth braving the cold.

Share your frozen flower photos in the comments below! You could also give this a try: How to do Frozen Object Photography at Home.

How to do Photography of Frozen Flowers

How to do Photography of Frozen Flowers

How to do Photography of Frozen Flowers

How to do Photography of Frozen Flowers

How to do Photography of Frozen Flowers

How to do Photography of Frozen Flowers

How to do Photography of Frozen Flowers

How to do Photography of Frozen Flowers

The combination of ice and organic material is simple and striking, even as the ice begins to crack.

How to do Photography of Frozen Flowers

A small section of an autumn leaf protrudes from the ice.

The post How to do Photography of Frozen Flowers by Megan Kennedy appeared first on Digital Photography School.


Digital Photography School

 
Comments Off on How to do Photography of Frozen Flowers

Posted in Photography


Pollution Pops: Sewage-Ridden Public Waters Frozen into Horrifying Popsicles

21 Jun

[ By WebUrbanist in Art & Sculpture & Craft. ]

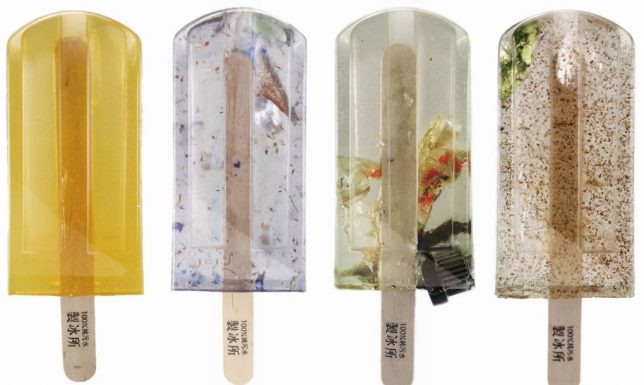
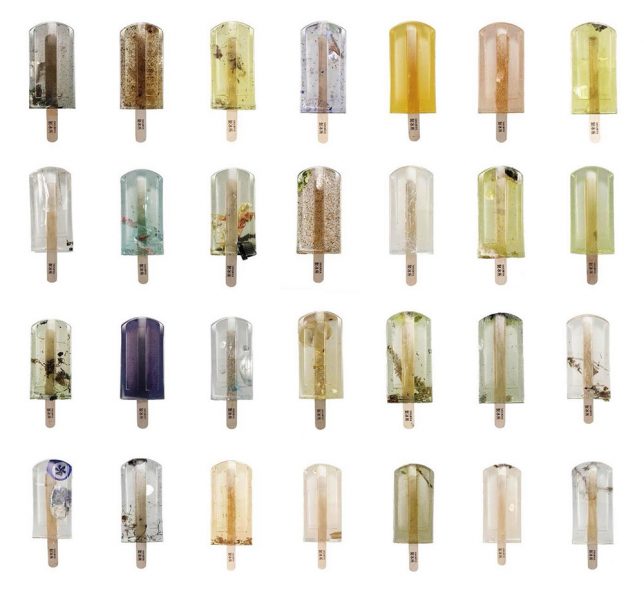
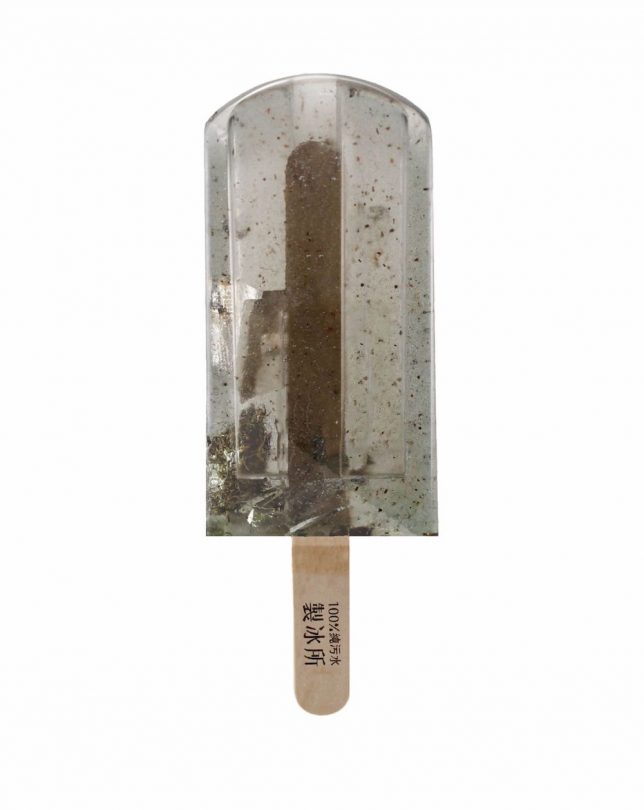
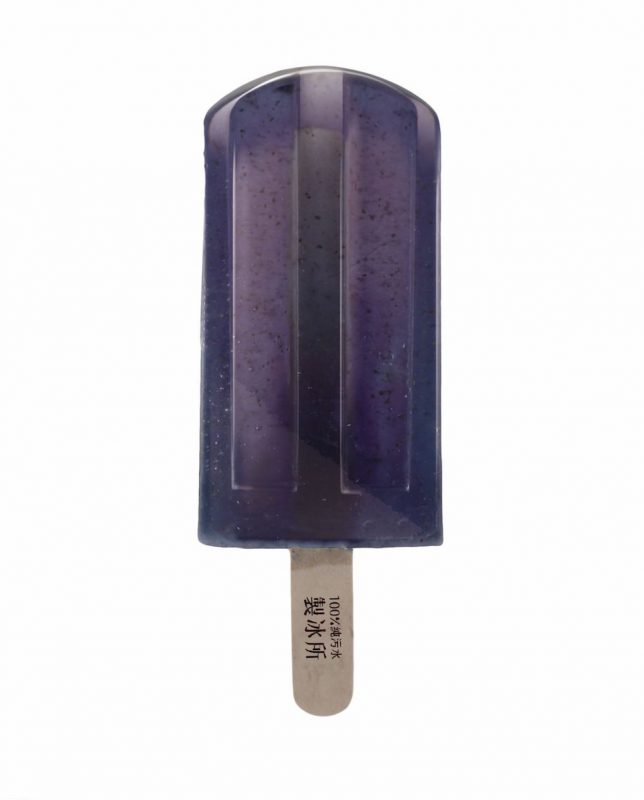
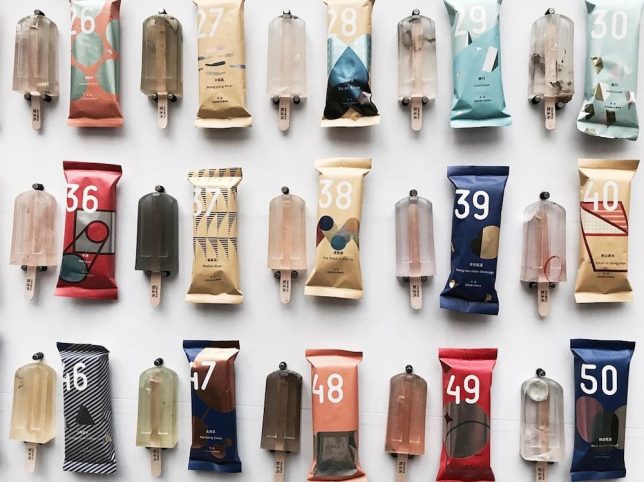
A stomach-churning twist on classic frozen treats, 100 stabilized ice pops made from Taiwan’s polluted lakes, rivers, beaches and ports feature an unsettling array of sewage found in public waters.

Each of these edible-scale popsicles was first frozen then preserved in polyester resin and wrapped in packaging. Diverse flavors feature ingredients such as plastic, arsenic, mercury and metal. Unappetizing titles include Yang-tzu-chou Drainage, The Large Ditch in Tianwei, and New Huwei Creek.

Some even look tasty at a glance, like some kind of hand-crafted iced delight. But the game of choosing something to try quickly becomes a nightmare of deciding which might be least terrible. Surely one without bits of cork, bottle caps or candy wrappers would be better, but then again: invisible poisons could be much worse.

Art students Hung I-chen, Guo Yi-hui, and Cheng Yu-ti from the National Taiwan University of the Arts concocted titled their line of less-than-delicious designs “Polluted Water Popsicles.” Their work was nominated for the Young Pin Design Award and featured in the New Generation of Design Exhibition this May at the Taipei World Trade Center.

Share on Facebook


[ By WebUrbanist in Art & Sculpture & Craft. ]

[ WebUrbanist | Archives | Galleries | Privacy | TOS ]


WebUrbanist

 
Comments Off on Pollution Pops: Sewage-Ridden Public Waters Frozen into Horrifying Popsicles

Posted in Creativity


Cold Frontage: Storm Leaves Waterfront House Encased in Frozen Waves

30 Mar

[ By WebUrbanist in Art & Photography & Video. ]

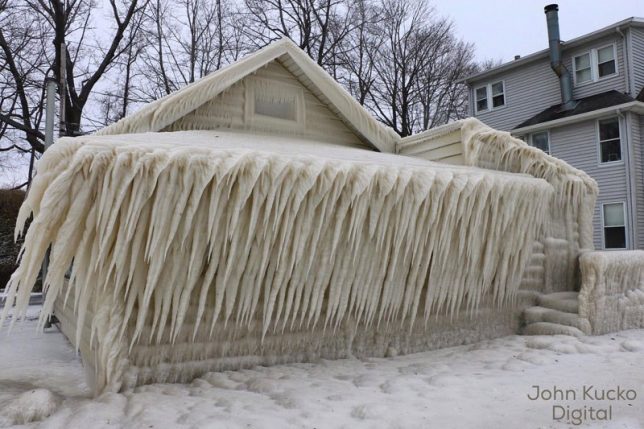
ice house exterior

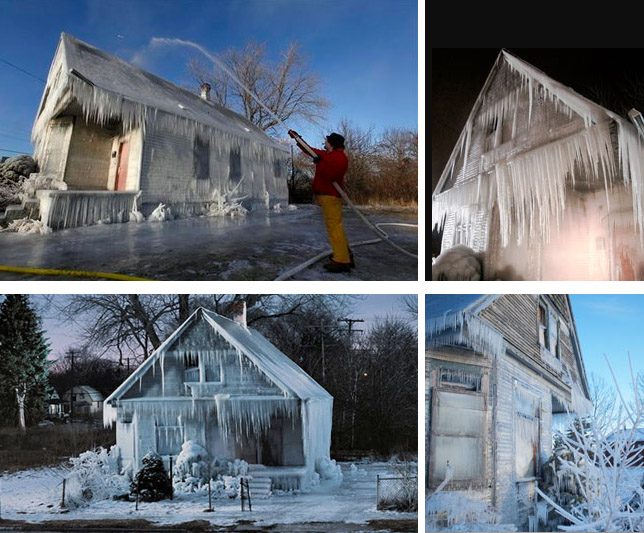
When a cold front blew in over Lake Ontario, photographer John Kucko caught wind of the phenomenon and rushed to shoot images of a remarkably frozen home.

iced over house

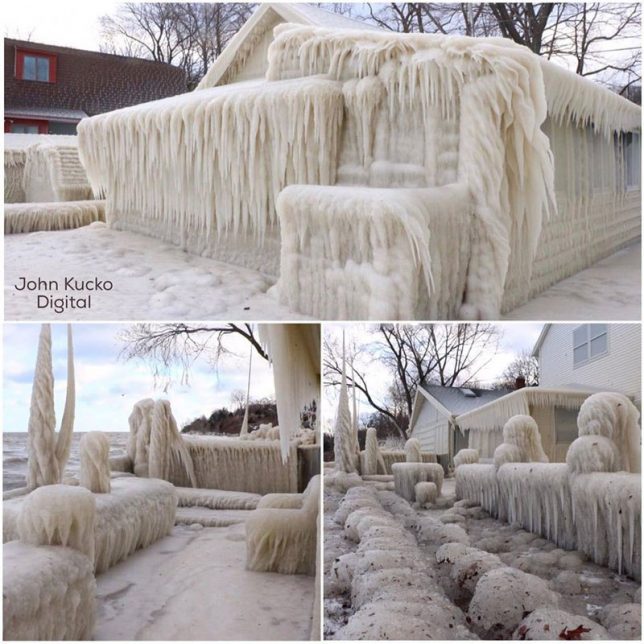
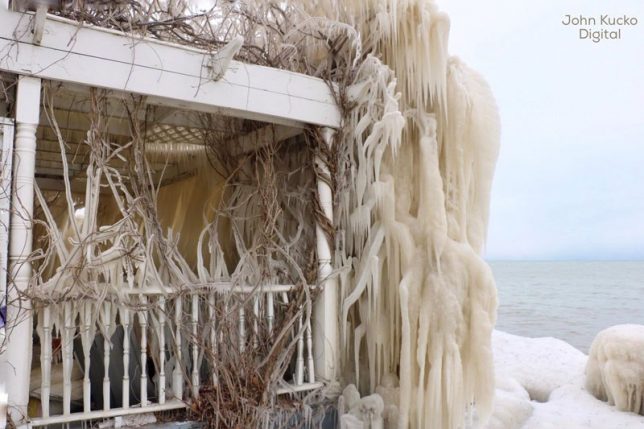
Located in Webster, New York, the house is entirely trapped inside ice, a combination of sheets and icicles wrapping the residence on all sides. Outdoor furniture and landscaping elements between the lake and the house were likewise wrapped in frozen water.

cold front

An unusual combination of waves, wind and freezing weather contributed to the mix, as well as the home’s proximity to the lake. Winds over 80 mile per hour pushed water the short twenty feet to the residence. You can see more images and videos on the photographers Facebook page.

ice house detroit

Years ago, artists in Detroit did something similar but intentional with an abandoned home, showering it with water and letting it ice over for effect.

Share on Facebook


[ By WebUrbanist in Art & Photography & Video. ]

[ WebUrbanist | Archives | Galleries | Privacy | TOS ]


WebUrbanist

 
Comments Off on Cold Frontage: Storm Leaves Waterfront House Encased in Frozen Waves

Posted in Creativity


24 Frozen Images of Some Cold Winter Weather

29 Jan

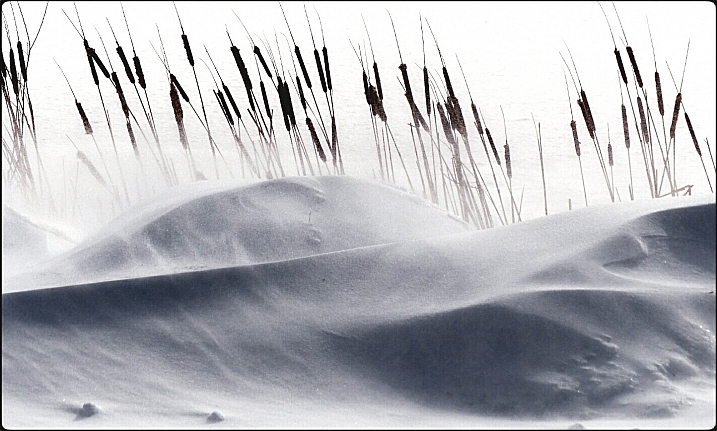
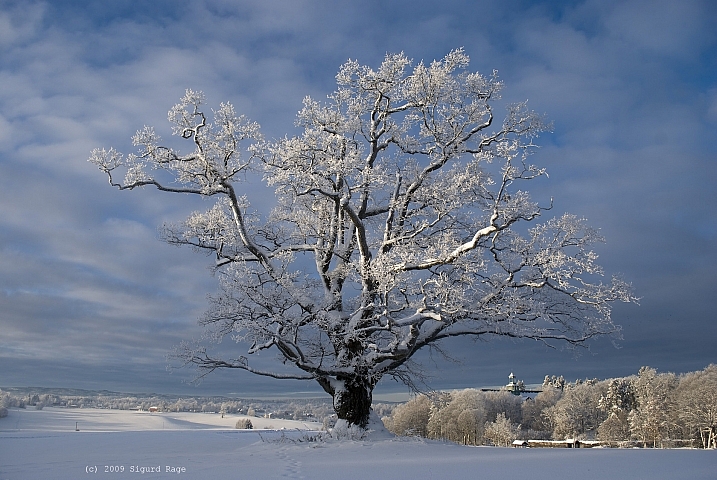
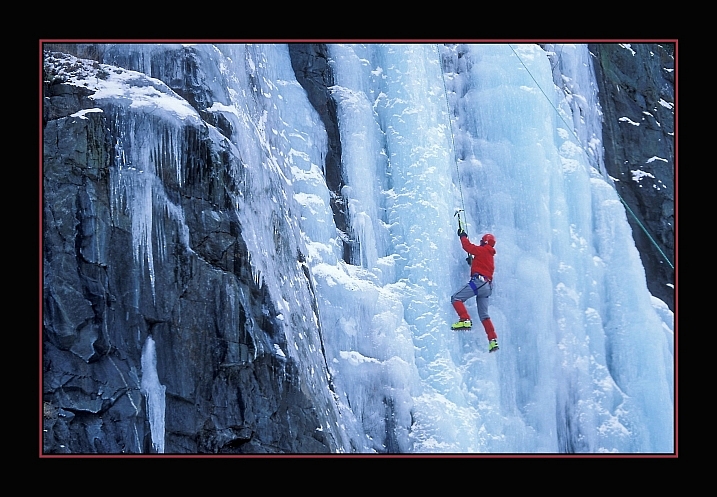
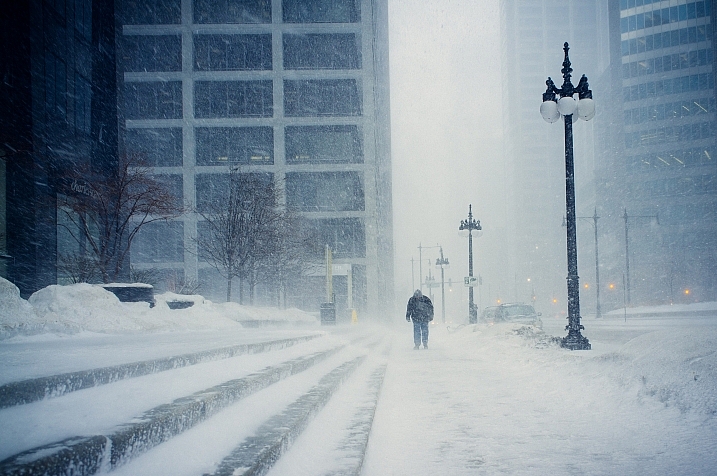
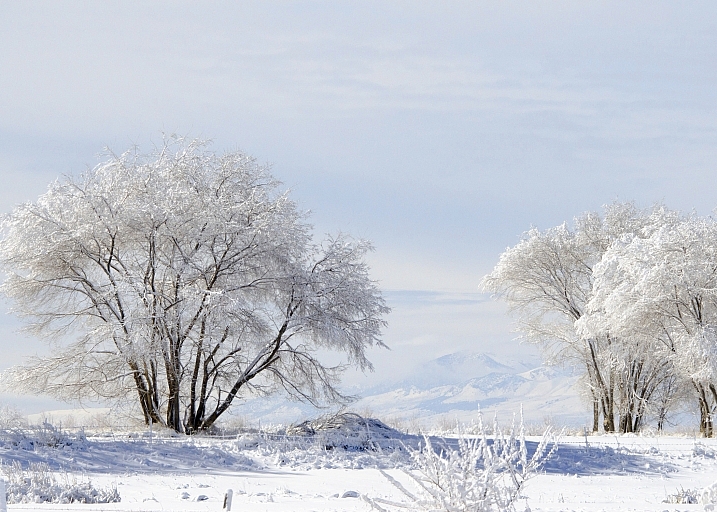
Here in the northern hemisphere part of the world, it is winter. That means two things – cold and snow. But that doesn’t stop some people (nor should it stop you) from doing photography.

Let’s have a look at some frozen images of some cold winter scenes.

By Howard Ignatius

By Neil Howard

By Dan (catching up)

By smilla4

By Ken Mattison

By Sigurd Rage

By Roger S. Hart

By Barbara Friedman

By Julie Falk

By chuddlesworth

By USFWS Mountain-Prairie

By Jack Skipworth

By ShinyPhotoScotland

By B Gilmour.

By Tupulak

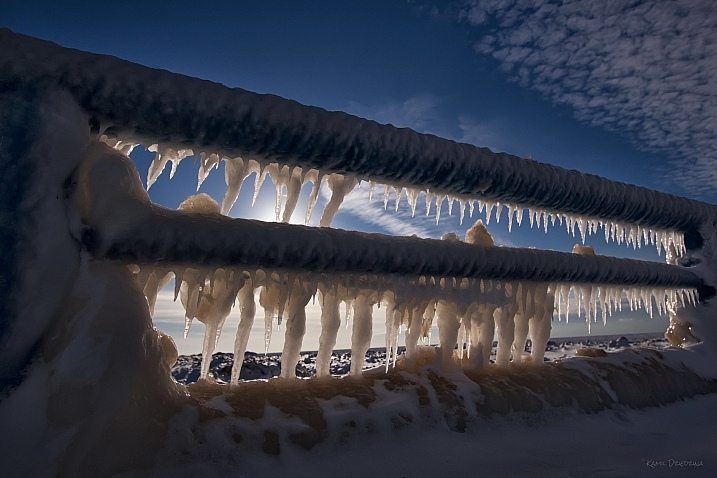
By Kamil Dziedzina

By MJI Photos (Mary J. I.)

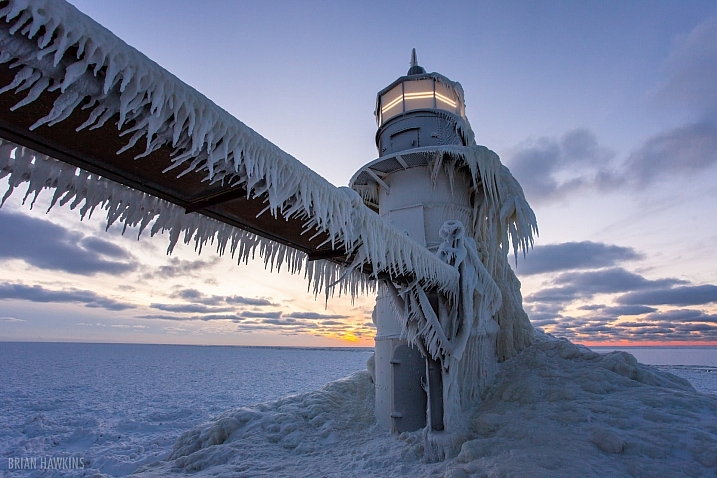
By Brian Hawkins

By Melinda Shelton

By Simon Doggett

By Nicolas Raymond

By ellenm1

By Gonzalo Baeza

By ravas51

googletag.cmd.push(function() {
tablet_slots.push( googletag.defineSlot( “/1005424/_dPSv4_tab-all-article-bottom_(300×250)”, [300, 250], “pb-ad-78623” ).addService( googletag.pubads() ) ); } );

googletag.cmd.push(function() {
mobile_slots.push( googletag.defineSlot( “/1005424/_dPSv4_mob-all-article-bottom_(300×250)”, [300, 250], “pb-ad-78158” ).addService( googletag.pubads() ) ); } );

The post 24 Frozen Images of Some Cold Winter Weather by Darlene Hildebrandt appeared first on Digital Photography School.


Digital Photography School

 
Comments Off on 24 Frozen Images of Some Cold Winter Weather

Posted in Photography


Weekly Photography Challenge – Frozen

29 Jan

The first thing I want you to do to get ready this week is to have a look at these 24 Frozen Images to get you ready for a spine-chilling challenge!

Weekly Photography Challenge – Frozen

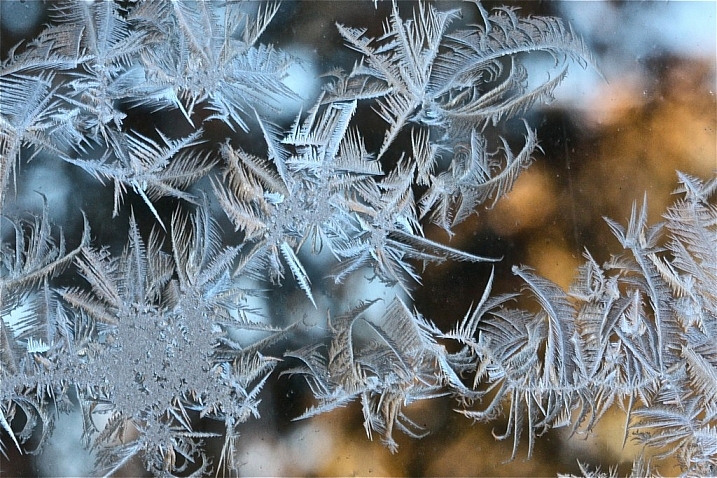
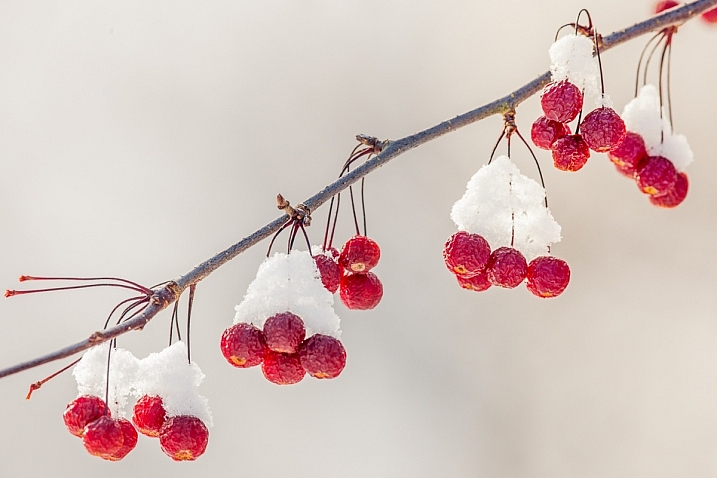
If you live in a northern part of the globe this should be easy for you. Find something frozen, just look around for:

  • Icicles
  • Snow
  • Frost
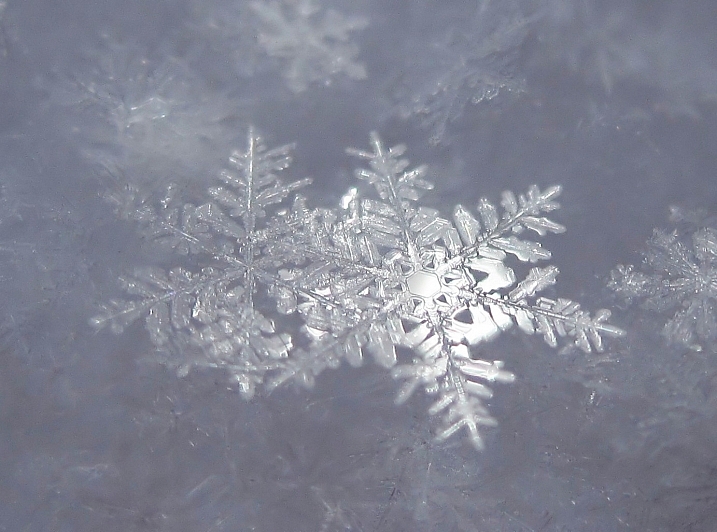
  • Snowflakes if you want to go ultra macro!

By wiredforlego

By LASZLO ILYES

By Susanne Nilsson

Even if you do not live in the northern parts of the world you can participate in this challenge. Think outside the box what else is frozen? How about:

  • Ice cubes
  • Popsicles
  • Ice skating rink
  • Ice cream!

You could even freeze something inside an ice cube and photograph that! How about a flower or slice of cucumber? Get inventive.

By Barta IV

By Derek Key

By m01229

Share your images below:

Simply upload your shot into the comment field (look for the little camera icon in the Disqus comments section) and they’ll get embedded for us all to see or if you’d prefer, upload them to your favorite photo-sharing site and leave the link to them. Show me your best images in this week’s challenge. Sometimes it takes a while for an image to appear so be patient and try not to post the same image twice.

Share in the dPS Facebook Group

You can also share your images on the dPS Facebook group as the challenge is posted there each week as well.

googletag.cmd.push(function() {
tablet_slots.push( googletag.defineSlot( “/1005424/_dPSv4_tab-all-article-bottom_(300×250)”, [300, 250], “pb-ad-78623” ).addService( googletag.pubads() ) ); } );

googletag.cmd.push(function() {
mobile_slots.push( googletag.defineSlot( “/1005424/_dPSv4_mob-all-article-bottom_(300×250)”, [300, 250], “pb-ad-78158” ).addService( googletag.pubads() ) ); } );

The post Weekly Photography Challenge – Frozen by Darlene Hildebrandt appeared first on Digital Photography School.


Digital Photography School

 
Comments Off on Weekly Photography Challenge – Frozen

Posted in Photography


Shoot Your Own Frozen Flower Photos!

23 Apr

Spring is upon us. And it’s bringing a ton of flowers.

Now the only question is: whatcha gonna do with all those blooming beauties?

Ooh, we know! You should freeze ‘em, photograph ‘em, and then marvel at the gorgeous results.

Seriously, frozen floral photos are so pretty and unique that it’s almost unfair . So let us show you how to make them with this easy peasy (freezy) tutorial.

Freeze Flowers for Stunning Photos

Thanks for the inspiration Mo Devlin!
(…)
Read the rest of Shoot Your Own
Frozen Flower Photos! (508 words)


© Taylor for Photojojo, 2015. |
Permalink |
No comment |
Add to
Frozen Flower Photos!”>del.icio.us

Post tags:


Photojojo

 
Comments Off on Shoot Your Own Frozen Flower Photos!

Posted in Equipment