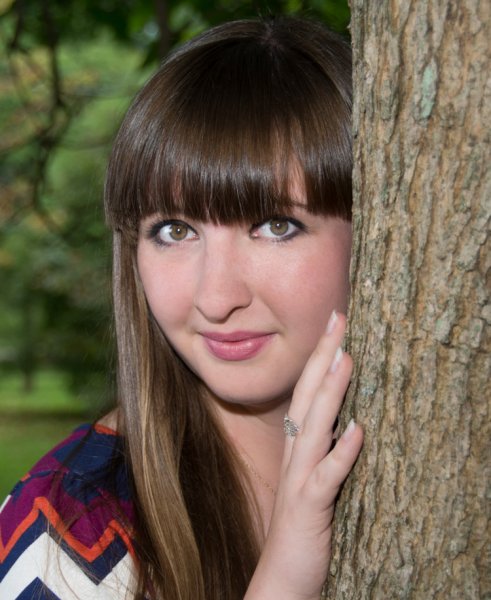
The goal of portrait retouching is to bring out the most naturally pleasing image of the subject. This image is the finished result of Frequency Separation Retouching in Photoshop.
Portrait retouching may be accomplished using many different methods. Still, how often have you seen a portrait image that has been retouched to the point that the subject’s face looks unnatural? Even many of the software packages available for portrait retouching result in an airbrushed effect to skin tones.
What if the detail and color of a portrait could be separated for retouching? Frequency Separation Retouching will allow you to do just that! It will allow you to fix all the usual facial issues like removing wrinkles, bags under eyes, and blemishes. By dividing your image into two separate frequency layers, one layer being high frequency digital data, which contains the information of detail in the image, and a low frequency layer which contains the tonal and color information of the image. However, the neat thing with Frequency Separation Retouching is that it allows you to make these corrections and retain the natural textures of the skin. By separating the colors and the details you can work on one aspect without affecting the other. Sure, some people will prefer the usual retouching methods, including airbrushing, but Frequency Separation Retouching gives you another option to use for enhancing your portraits. If you have a working knowledge of Photoshop, here’s how to get started:
Setup
#1 Make two copies of the background layer
In Photoshop, open your image, then make two copies of the background layer. Label the first layer “color” as this will be your low frequency layer, then name the second layer “detail” to become your high frequency layer.
#2 Apply a blur to the color layer
Turn off the detail layer and select the color layer. Apply a Gaussian Blur (found under the Filter menu>Blur) to a setting that blurs all the detail of the image, but leaves features intact (see sample below). This setting will vary from one image to another depending of the size of the image.
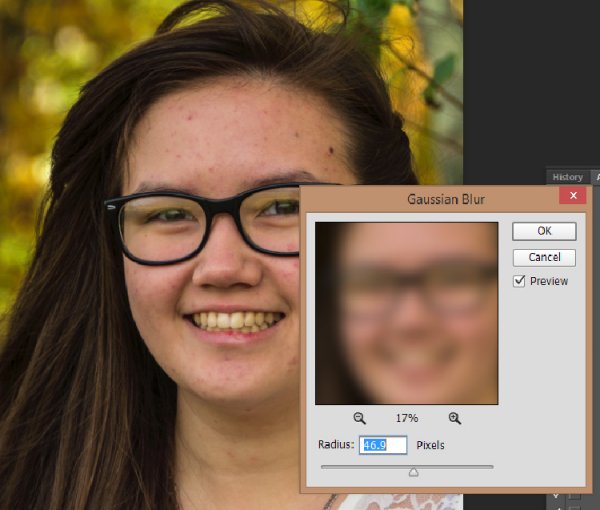
#3 Setup the detail layer
Turn the detail layer back on and select it, then go to Apply Image under the Image tab. Depending on which color depth you are working with, 8 bit or 16 bit, see settings below for Apply Image.
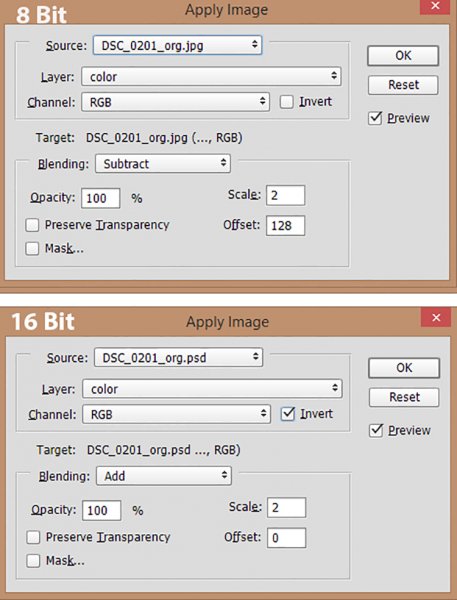
Set your Layer to color. For 8 bit images set the Blending to Subtract, Scale to 2 and Offset. For 16 bit images set the Blending to Add, Scale to 2, Offset to 0 and check the Invert box.
- Change the blending mode of the detail layer to Linear Light.
- Create a layer group, and drag the color and detail layers into the new layer group.
Once you get the hang of this setup, it’s easy to make a Photoshop action to take care of these steps with one click. Download my Photoshop action for the setup HERE (the file is zipped, just unzip and load into Photoshop)
Now you’re ready to start the fun part!
Retouch the Color layer
By retouching the color layer, you are going to even out all the color tones of your subject’s complexion and to remove dark and light areas.
Clone Tool – the Clone tool can be used to even out the color tones or experiment with different blending modes. Normal, Darken and Lighten are very good effect modes to use on the color layer. You may also need to adjust the opacity (the degree of transparency) of these blending modes.
Dodge and Burn Tools are a couple of other useful tools to even out dark and light tones of the skin tones.
As with almost any Photoshop function, there are various ways to get the results you desire. The tools mentioned above are good starting points for working on the color layer, but the possibilities are endless! Don’t be afraid to experiment.
Retouch the Detail layer
Click on the Detail layer, which contains every detail of your portrait image. There are a wide variety of tools you can use to fix skin imperfections, ranging from wrinkles to acne.
Clone Tool – Use the Clone tool with mode set to normal and just clone out imperfections, sampling (ALT/OPT key click) from a desirable area to paint over an imperfection in another area.
Healing Brush Tool – The Healing Brush tool works similarly to the Clone tool and will sample textures from nearby areas to make a seamless patch.
Spot Healing Brush – Spot Healing Brush works similarly to the Clone tool and Healing brush, but does not require you to sample a source area. It will automatically sample from another area to repair the target imperfection. Use the adjustable brush sizes to paint over spots and remove them.
Patch Tool – Like the Healing tool, the Patch tool will match the texture of the near-by area for a seamless repair. Make a selection over the area to be repaired and drag the selection over a good area. For best results work on small areas at a time.
Content-Aware Patch – Similar to the Patch Tool, but with the Content-Aware Patch you select a good area and drag it over area to be repaired, and the tool will match the texture.
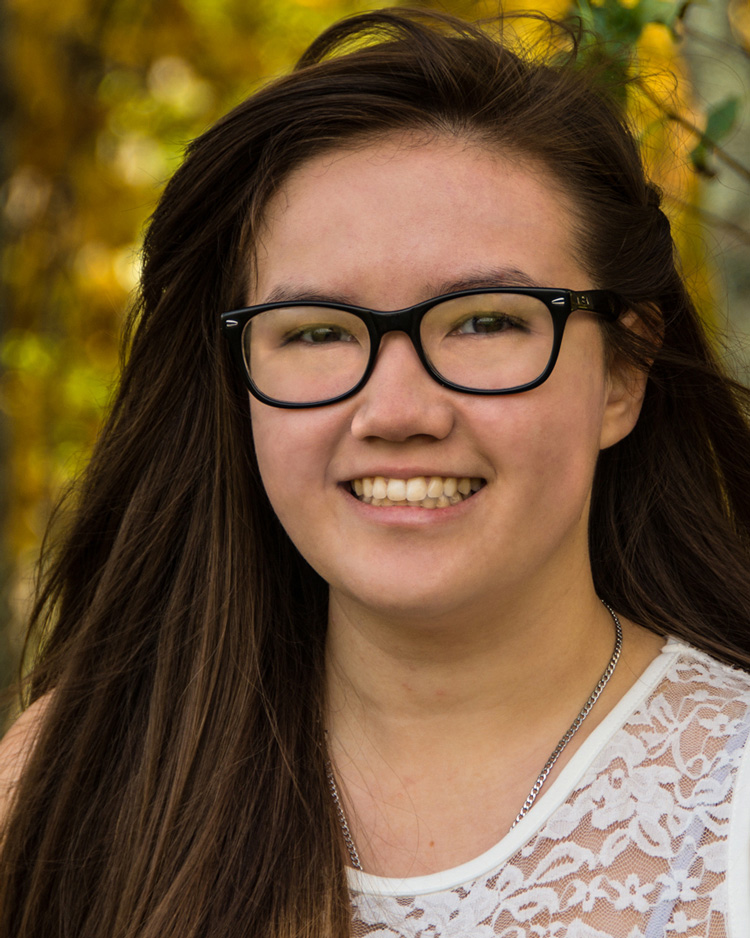
After image
Once you have finished retouching the color and detail layers of your image, you can simply turn off the layer group to see the before and after of your work. (This is also a handy review tactic as you are working, to see how your adjustments are affecting the image.) Because all the retouching you have done are applied to the two new layers, it is completely non-destructive to the original image. So, if you are unhappy with your first results, you can simply delete the retouched group and start over.
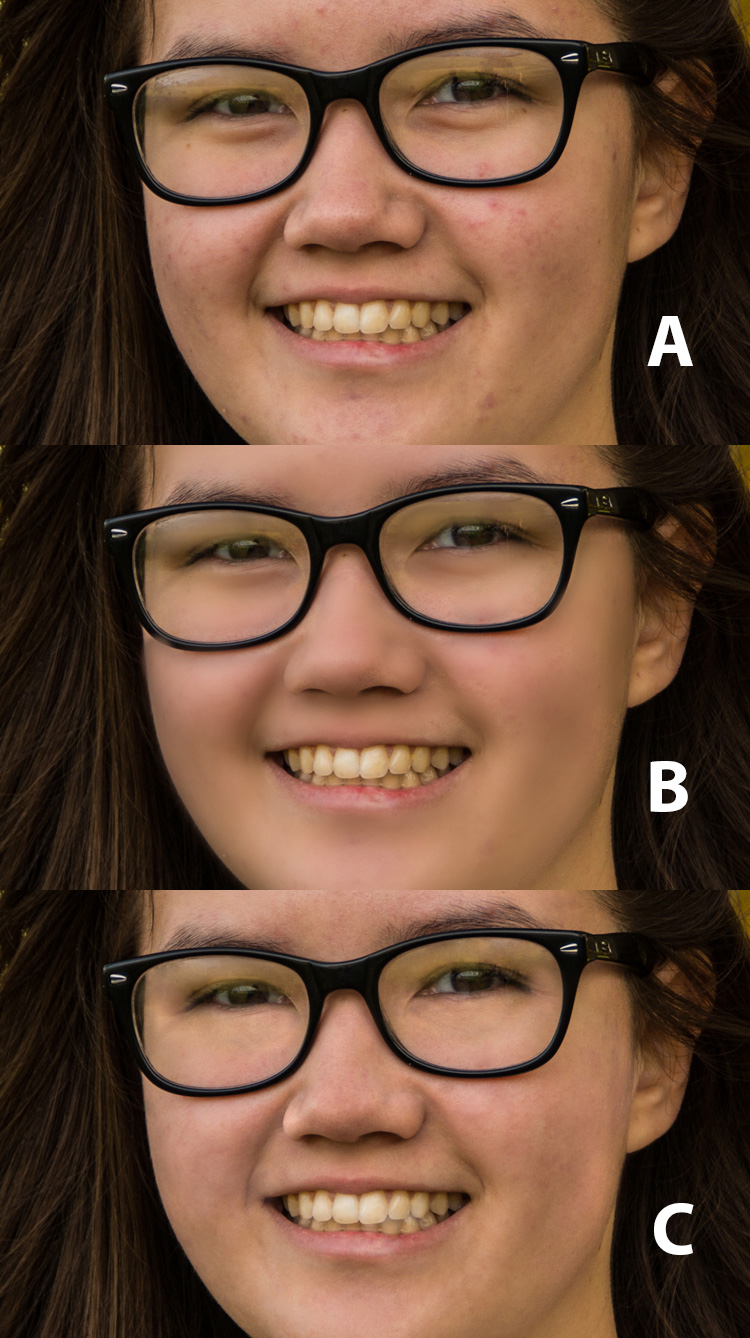
A – Original image B – Air-Brushed look retouching C – Frequency Separation retouching
Conclusion
Portrait retouching can be accomplished by using many different methods, and various software and plugins designed especially for that purpose. This article is meant to give you a Photoshop option for retouching and enhancing your portrait photography. The great feature of this method is the ability to separate the detail from the color and tones before retouching. Do you have any tips for portrait retouching?
googletag.cmd.push(function() {
tablet_slots.push( googletag.defineSlot( “/1005424/_dPSv4_tab-all-article-bottom_(300×250)”, [300, 250], “pb-ad-78623” ).addService( googletag.pubads() ) ); } );
googletag.cmd.push(function() {
mobile_slots.push( googletag.defineSlot( “/1005424/_dPSv4_mob-all-article-bottom_(300×250)”, [300, 250], “pb-ad-78158” ).addService( googletag.pubads() ) ); } );
The post How to do Frequency Separation Portrait Retouching in Photoshop by Bruce Wunderlich appeared first on Digital Photography School.

Digital Photography School


You must be logged in to post a comment.