Editing Freckles in Lightroom
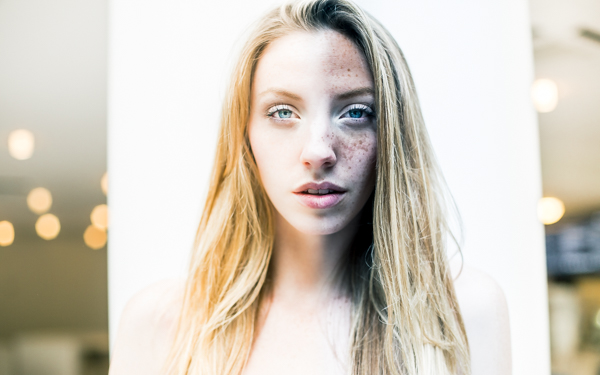
One photo, edited completely in Lightroom
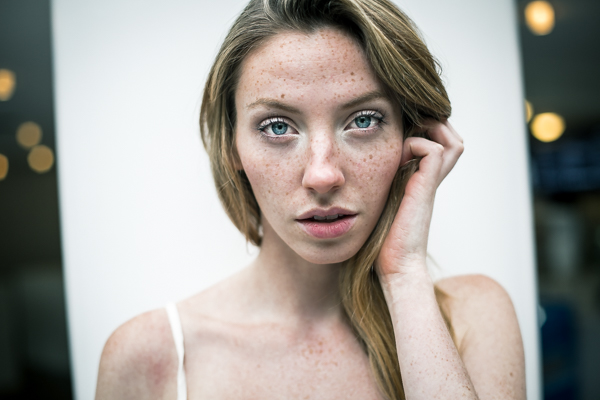
I recently photographed a model in New York City. As I was communicating with her leading up to the shoot I noticed in some of her pictures that she had freckles. I personally am a big fan of freckles and wanted to do a shoot that highlighted her skin rather than hide it behind makeup or photoshop tricks. One of my favorite photos that came out of the shoot was this one, cropped close to highlight her eyes and skin:

After I posted the photo above on Instagram I was emailed by someone asking me what process I used to get that gritty look. I’m here to share my secrets and show how you can achieve this look in less than 30 seconds with Lightroom, every time.
First off, here is what the original looked like, straight out of the camera:
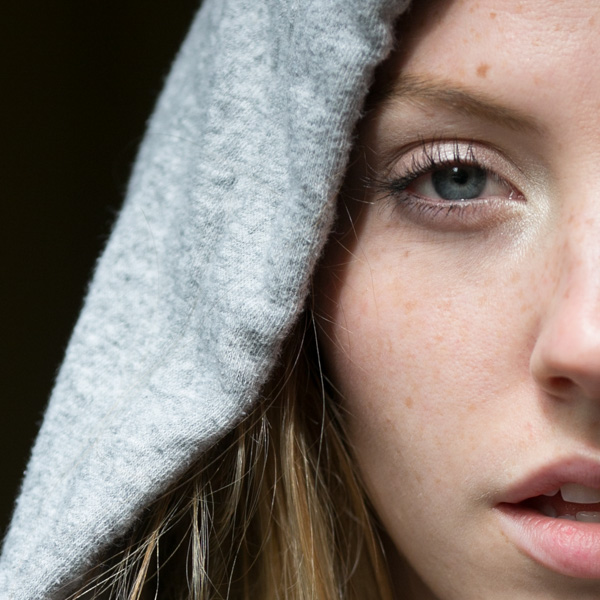
I shoot in RAW to make sure I have enough information to work with. All the freckles are there in the skin, which you can see lightly showing up in the original photo.
Step One: Convert to Black and White
The first step is to convert your image to black and white by selecting “B&W” in the develop panel of Lightroom, or using the shortcut key “v.”
Now I have something that looks like this:

Step 2: Adjust Red and Orange Sliders
Still not seeing the freckles, right? Under B&W in the develop module in Lightroom you should see “Black and White Mix” and a column of sliders beneath it with all the colors of the rainbow. These allow you to control the original colors in the photo, within the black and white mode.
Knowing that freckles and skin blemishes are typically orange/red in nature, you will be playing with the orange and red sliders only. You get to decide how far you want to push them, making your subject more or less intense looking.
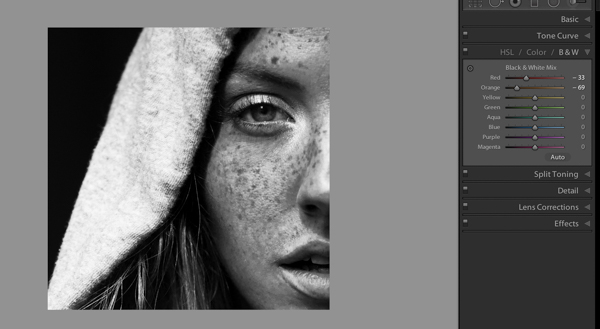
That’s about it, actually. You’ve just enhanced the freckles in your photo. Congratulations! If you want to give it even a little more pop, try this with your tone curve and exposure sliders:
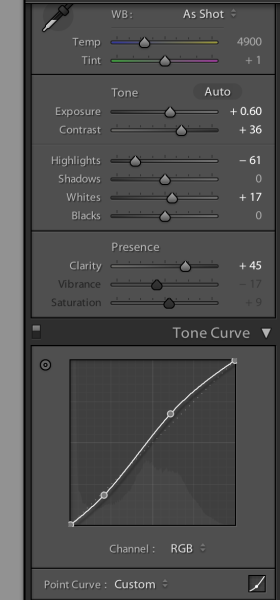
The last thing I did to the picture was use the Adjustment Brush (k) to bring the highlights down on the hood of her sweater, which I felt was too bright for the photo. Then I used the Adjustment Brush to brighten the eyes a bit using the Dodge (Lighten) effect.

Voila! This is equally impressive in color. You just need to adjust the Color sliders Red and Orange:
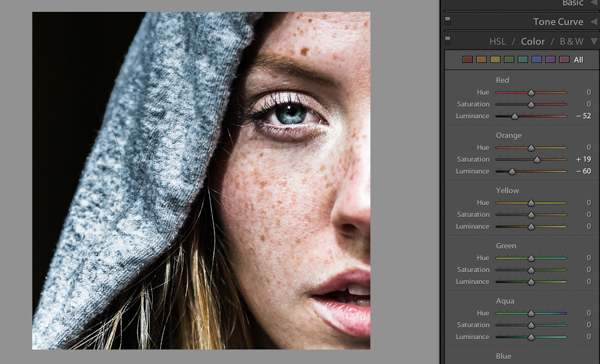
I would love to see what you do with photos of your children or self-portraits using this technique. And if you are someone who really wants to get rid of freckles, you can basically reverse the the effect by pulling the same sliders to the right instead:
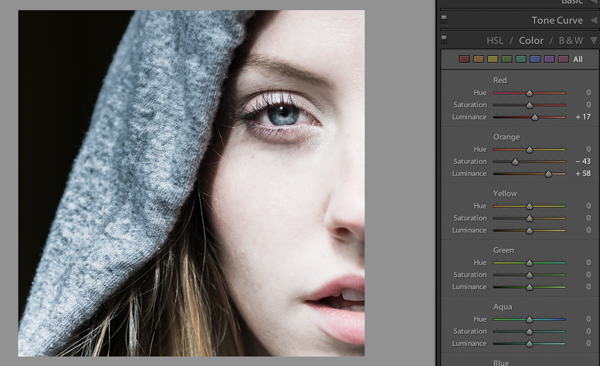
Please post your examples below!
The post How to Make Freckles POP or Disappear using Lightroom by Phillip VanNostrand appeared first on Digital Photography School.
You must be logged in to post a comment.