RSS
 

Posts Tagged ‘Foreground’

How to Use Foreground to Create Depth in Your Images

28 Feb

The post How to Use Foreground to Create Depth in Your Images appeared first on Digital Photography School. It was authored by Anne McKinnell.

how to use foreground to create depth in your photos

What is the foreground, and how can you use it for stunning photos?

That’s what this article is all about.

I’m going to show you how you can identify and incorporate strong foreground elements in your photography – so that you end up with beautiful landscape shots, architectural shots, nature shots, and more.

And I’m going to explain my favorite way to use foregrounds:

To create depth.

(It’s a technique I use all the time in my own images, as you’ll soon see.)

So if you’re ready to become a foreground photography expert…

…let’s get started!

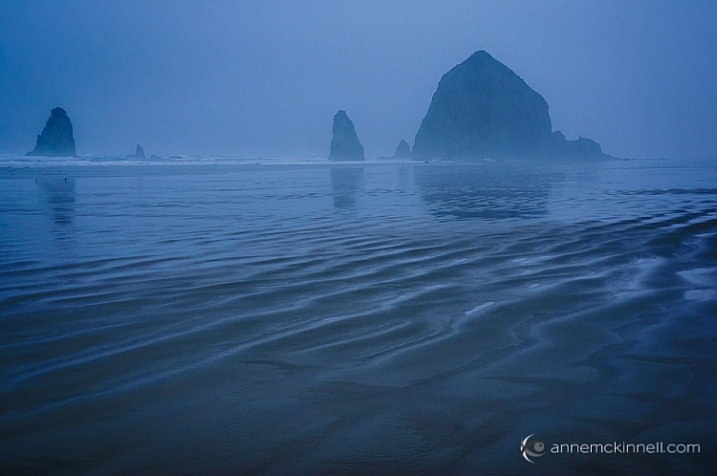
Cannon Beach, Oregon in the fog with sand ripples in the foreground to create depth

What is a foreground?

When you’re photographing a grand landscape scene, you can often divide it into three sections:

The background.

The middle ground.

And the foreground.

The foreground consists of anything that lies between you and your main subject.

Then there’s the middle ground, which is often the subject (i.e., the main point of interest in the photo).

And the background is made up of everything behind the subject.

Now, the foreground, middle ground, and background areas are not at fixed distances. They’re understood relative to one another.

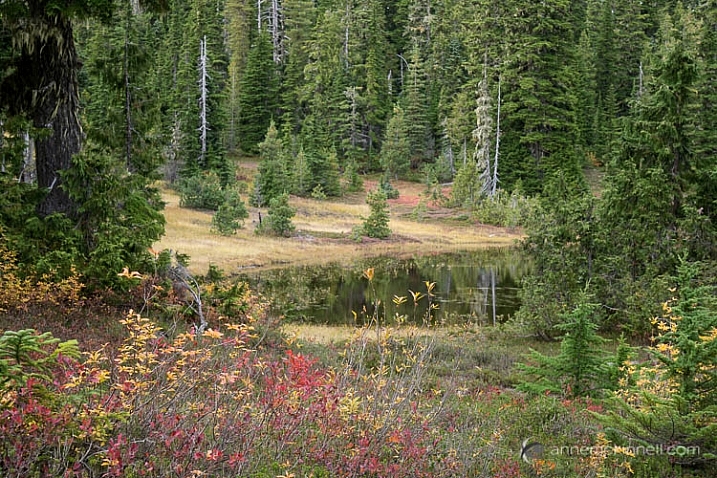
For example, the scene below contains some colorful shrubs in the foreground, a pond in the middle ground, and trees in the background:

a pond in the woods

Another way to think about this is using a stage.

You have upstage, toward the back – that’s the background. It gives setting and context.

Center stage is the middle ground, where the bulk of the action takes place.

And downstage – the foreground – is closest to the audience, and therefore the most intimate part of a scene. Downstage is capable of whispering to the audience and luring them into the action. It is the most easily seen and heard part of the theater, and it can reveal the finer details of the story.

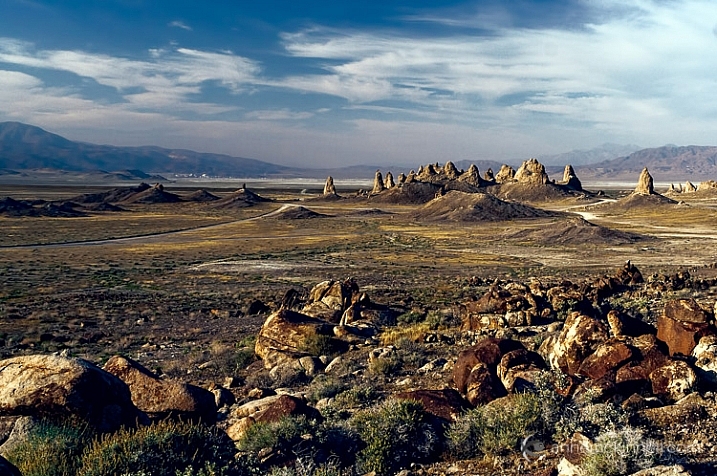
Trona Pinnacles, California with a nice foreground to create depth

One thing to note:

While many photos – especially landscape photos – contain a foreground, a middle ground, and a background, not all photos are so layered. Some images include only a foreground and a background. Others have no layers at all.

How should you use the foreground?

In general, you don’t want an empty foreground.

Instead, you should fill the foreground with some key point of interest, such as a human figure, a tree, a boat, some flowers, rocks, or anything else that is comparatively near to you.

So when you’re out shooting, once you’ve found a nice background, check the area around you for a good foreground element.

Then include that element in your composition!

(You may need a wide-angle lens for this; that’s how I captured most of the photos in this article.)

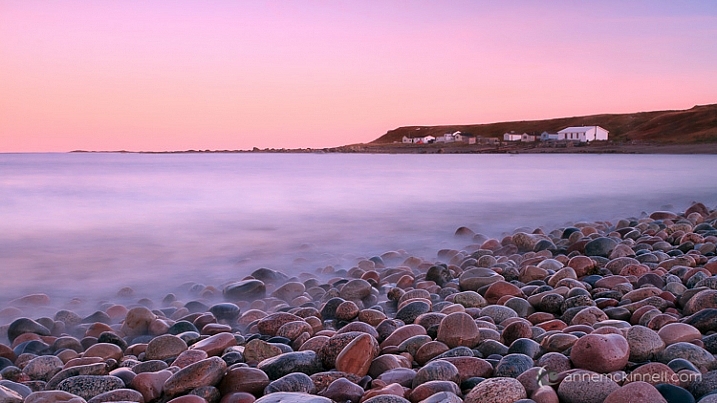
For instance, when capturing the photo below, I used the beautiful sky as my background, and the colorful rocks as my foreground element:

Green Point, Newfoundland with rocks in the foreground

One tip:

Don’t be afraid to change your perspective! If you find a nice foreground that won’t fit into the scene, try moving your camera higher, lower, or to one side to incorporate the foreground into the frame.

Why is a foreground so important?

A strong foreground is one of the simplest ways to create deep, three-dimensional photos.

You see, one of the biggest hurdles in photography is that majestic, three-dimensional scenes are rendered into mere two-dimensional images; the physical depth that the photographer experiences in real life is lost.

So how do you create the illusion of depth?

With strong elements in the foreground!

When you’re composing a photo and it’s looking a little too flat, simply adding some foreground interest can instantly improve depth.

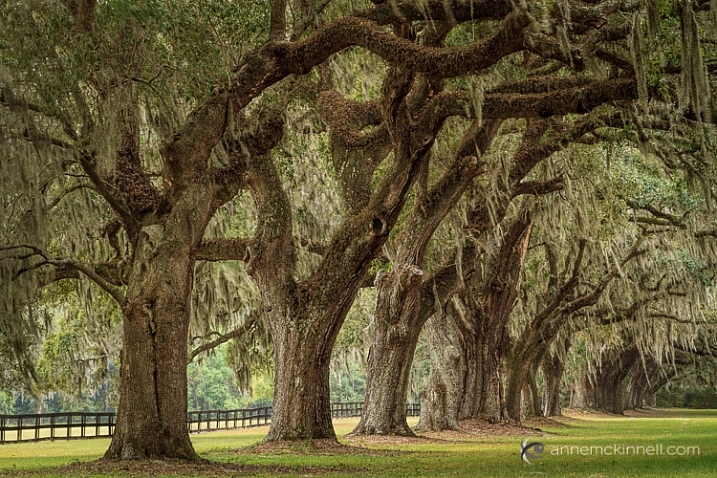
For example, imagine a group of trees in a field, all standing in a row. If you photograph them head-on, they’ll look more or less identical – their size, distance, and sharpness will be the same, and the composition will likely be a flat, static one.

However, if you change your perspective and shoot the trees from one side, everything changes. One tree becomes closer and therefore larger, while the other trees shrink in comparison.

Like this:

Boone Hall Plantation, South Carolina

When a viewer sees the image, their eyes will immediately fall on the tree in the foreground first, and the implied line created by the row will pull their gaze inward toward the other trees. Suddenly, the composition has depth!

Now, scenes can have many potential foreground elements. For instance, you can lower your camera to incorporate rocks, flowers, or anything else on the ground. That use of foreground will provide a point for the viewer’s eyes to enter the image, and any lines created in the foreground will direct the viewer’s gaze toward the middle ground and background.

Tips for using a foreground in photography

As with any compositional element, the foreground is only helpful if it adds to your image. If the foreground doesn’t help tell the story or – worse yet – it distracts the eye, then it isn’t going to improve the photo. Your foreground should be an important part of the scene and not a distraction.

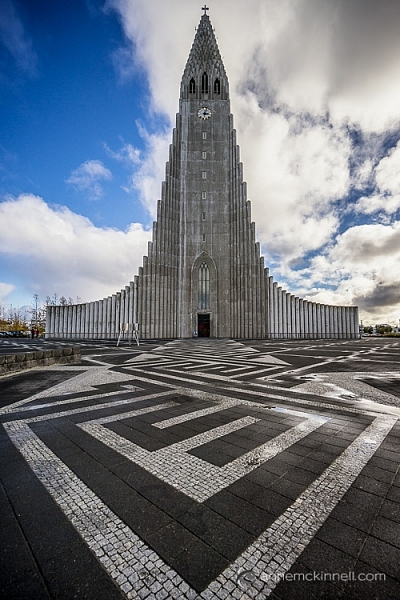
Hallgrimskirkja, Reykjavik, Iceland

Foreground elements can even be made of simple shapes and lines, like the foreground in the photo above.

In fact, your foreground elements can be nothing but shapes and lines, such as the paint on a stretch of road, the waves on the ocean’s shore, or the shadows cast across a windswept desert. Any lines that point toward your subject will be especially effective because they will guide the viewer toward the main attraction.

(Lines that point toward your subject are known as leading lines; these are a powerful compositional device!)

Similarly, a wall that stretches from foreground to background will carry the eye along with it. The corners of your frame are strong points, and anything that leads inward from these corners will have a significant impact.

Textures are another compositional tool that can make for an interesting foreground, like in the photo below:

sunset with rocks in the foreground for enhanced depth

Ultimately, however, the best foregrounds are those that you like the most!

So test out different foregrounds.

Experiment.

And capture some shots that are full of depth!

Using foreground to create depth: Conclusion

Now that you’ve finished this article, you should be well-equipped to create stunning, depth-filled images.

You know how to find powerful foregrounds.

And you know how to position them for gorgeous results.

So have fun with foreground photography!

Now over to you:

What do you think about using foregrounds to create depth? Do you plan to use this trick the next time you go out shooting? Share your thoughts in the comments below!

The post How to Use Foreground to Create Depth in Your Images appeared first on Digital Photography School. It was authored by Anne McKinnell.


Digital Photography School

 
Comments Off on How to Use Foreground to Create Depth in Your Images

Posted in Photography


Using Layers and Foreground Interest for Better Landscape Photography

22 Jan

Have you ever been travelling, come upon a breathtaking vista, and taken a photograph only to find your representation to be a poor record of the view you remember? Welcome to the wonderful world of landscape photography! Capturing that breathtaking view in a photograph is not quite as easy as it looks.

Luckily, with a few simple strategies, you can significantly improve chances of getting better images. Read on and follow these tips for using layers and foreground to take your photos to the next level.

Using Layers and Foreground Interest for Better Landscape Photography

Do your images capture what you saw?

As is the case with any type of photography, great subjects (people or places) always help make better photographs. However, just because a vista is spectacular or the light is gorgeous does not guarantee that your photographs will turn out that way.

Why? What is going on?

The problem

Basically, the problem lies in creating composition from the vistas as they are presented. Many tourist views are interesting because of scale or the unusual nature of the location. To make a good image you need to create interest and capture that sense of scale. As you travel through scenic areas around the world, those locations that are the easiest to access don’t necessarily make the best landscape photographs. Being high or adjacent to the road may create a great viewpoint but it often doesn’t lend itself to a great two-dimensional representation (photography) of a three-dimensional object (the world and the view in front of you).

Using Layers and Foreground Interest for Better Landscape Photography

Going one step further, many beginners will look at landscape images from other photographers and instinctively like some and not others. They will often have difficulty articulating why they prefer one image over another. Understanding composition and layering will help you make more interesting images and get a better appreciation of why you enjoy certain landscape photographs.

The solutions

The best way to understand these concepts is to break your image down into a few simple pieces when approaching a scene you want to photograph, and then put them all together in the final photograph. Let’s start with scene scouting and composition before you worry about your camera settings.

Using Layers and Foreground Interest for Better Landscape Photography

Choose your subject

As part of your location scouting, before you set up to take an image, take some time to think about what you are looking at before you are ready take your camera out of the bag. Decide on the subject matter you are interested in making into a photograph. Figure out what part of it you found interesting – it could be something close, like a lake, or something far away, like a mountain.

Shoot when the light is best

Next, try to make sure you are taking the image when the sun is low in the sky. This is not always an option when you are travelling and it is raining or you only have time during the middle of the day. The wrong time of day (i.e. midday) will significantly limit the impact of your photographs. It is almost always essential to shoot landscape images during golden hour (right after sunrise or just before sunset).

Using Layers and Foreground Interest for Better Landscape Photography

The only exceptions are when the sky is overcast or if you are in the mountains. If the sky is overcast it will extend your shooting time but simultaneously makes getting good images harder because the sky is not interesting.

When you are in a mountain range, the mountains are often big enough to interfere with the lighting on your subject as shadows from mountains will get in the way. This means you have to shoot later in the day. In general, shooting during the golden hour will create interesting shadows and great quality of light.

Think in terms of layers

Once you have your subject selected and have picked an appropriate time of day, the next step is to think about layers. Add an object(s) of interest in front of your subject, and include it in the composition of your image. This will often mean using your feet to get into a better position.

Using Layers and Foreground Interest for Better Landscape Photography

What is meant by layering composition or objects of interest?

Good landscape photos have layers or objects in the foreground (close to you), middle ground (medium distance from the camera), and background (farthest away). This will help prevent your images from looking flat. These layers form elements that draw the viewer’s eyes and create depth in your photo.

It’s even better if the foreground leads into the background (maybe a river or a line of trees). Some objects, like people, can create a sense of scale. This is particularly important when you are looking at large vistas. For example, a massive cliff will provide no sense of scale without someone or something of a recognizable size in the field of view.

Using Layers and Foreground Interest for Better Landscape Photography

What makes a good foreground layer?

What kinds of things can you use to create these layered elements? For the background, distant mountains or hills can do the track. For the middle layer, look for tree lines, intermediate distance hills, clusters of objects, rivers, or lakes. If you have open water such as a lake in the foreground, lowering your perspective, may allow you to see a reflection of your subject that can create additional interest.

Finally, for the front layer, any isolated object in the foreground can function for this purpose. It could be a rock, a cluster of grass, or even a person. The object in the foreground creates weight and balances the image. These should all be placed in the field of view to divide up your image and create interest. You get extra credit for atmospheric effects like fog, mist or haze. Remember you can introduce a subject in the foreground, or get lower to the ground to make something small look bigger.

Using Layers and Foreground Interest for Better Landscape Photography

Get ready to shoot

Okay, now that you have scouted your subject, planned your layers, and have positioned yourself you can grab your camera. Choose a lens that gives an appropriate field of view, remembering that really wide angle lenses don’t necessarily work for distant objects in landscapes because they tend to make them appear very small.

Compose your image well

With your camera and lens selection in hand, you need to compose the image in your frame. It is easiest to remember and implement the Rule of Thirds with layers at the thirds. Most modern cameras can be configured to have a grid with lines that divide the screen into nine squares (two horizontal lines and two vertical lines). Where these lines intersect is where you should put the objects(s) of interest, or the layers.

Using Layers and Foreground Interest for Better Landscape Photography

For example, placing the horizon on one of these lines is great. Having the sunrise positioned on one of the intersections of the lines is even better. If the sky is really interesting, put the horizon on the bottom third so the sky fills the top two thirds. If the ground is the most interesting, position the sky so that it is only the top third.

Remember you can also shoot landscapes in portrait orientation if that helps the composition. Some people don’t want to follow things like the rule of thirds, but until your photographs are regularly turning out as you want them, it is a good general approach.

Camera settings

In general, for each type of landscape there will be preferred camera settings that will make your photographs really pop. Don’t set your camera at its widest aperture for landscape photographs. You want to try to get as much of the subject of interest in focus. Using a smaller aperture will help, but don’t go too far or you will start introducing diffraction effects.

Use the hyperfocal distance of your aperture to your advantage and make sure you are focusing on an element in the middle ground. This will get all of your background in focus and much of your foreground too, especially if you are using a f-stop in the range of f/8 – f/11.

Finally, you should almost always use a tripod for landscape photography. This type of photography demands tack sharp images: achieve this by using a tripod.

Conclusion

Once you get used to this as an approach to your imagery, it will help you create better images and understand why you like some landscape images more than others.

Please share any additional tips you have for adding layers to your landscape photos in the comments below. Share your landscape images as well, we’d love to see them.

The post Using Layers and Foreground Interest for Better Landscape Photography by Mark C Hughes appeared first on Digital Photography School.


Digital Photography School

 
Comments Off on Using Layers and Foreground Interest for Better Landscape Photography

Posted in Photography


The Importance of an Anchor – Why Foreground Matters

13 Mar

Most everyone is familiar with the concept of an anchor in the nautical sense. The anchor keeps the vessel from drifting away, due to current or wind. It fixes the vessel to a certain position. While this is easily understood, fewer people are aware of the need for a similar concept in photography.

I enjoy using wide angle lenses for landscape photography, but I also recognize that a wider focal length brings additional compositional challenges. While a wide focal length can produce visually exciting images, it can also produce really boring, empty feeling images. The nature of wide angle lenses is that they create the feeling of space, of distance. That distance can really disconnect the viewer from your subject, if you are not careful. When using a wide focal length, it becomes incredibly important to anchor your image with a strong foreground.

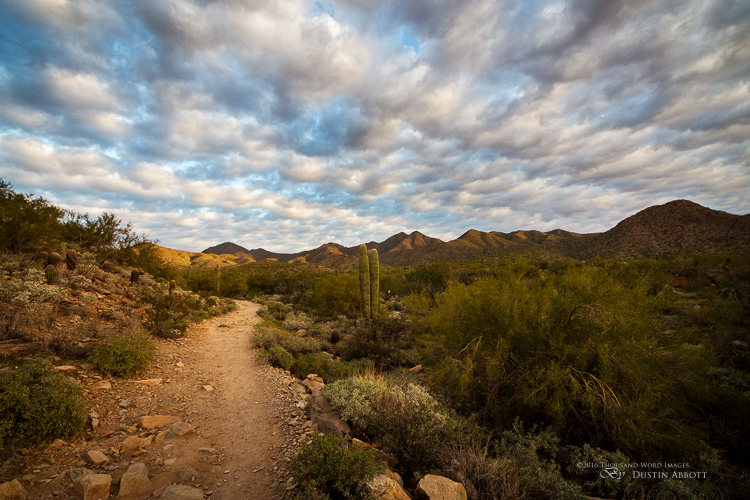
Trailhead

The trailhead in the foreground of this image, leads you into the grander scene.

The nature of a wide angle means that it distorts the perspective of the objects, closest to the camera. There is a feeling of distance from your background, so the eye needs something closer to engage it, before moving on to the grander scene beyond. I’m sure you’ve seen visually stunning images of famous mountain ranges, sunsets, waterfalls, or wild natural scenes. I’m willing to be that your favorites all feature a small scale object in the foreground. Patterns in the ice or snow, wildflowers, rocks, or fallen autumn leaves. These serve as the visual anchors of the scene. Without them the image becomes much more boring, and far less grand.

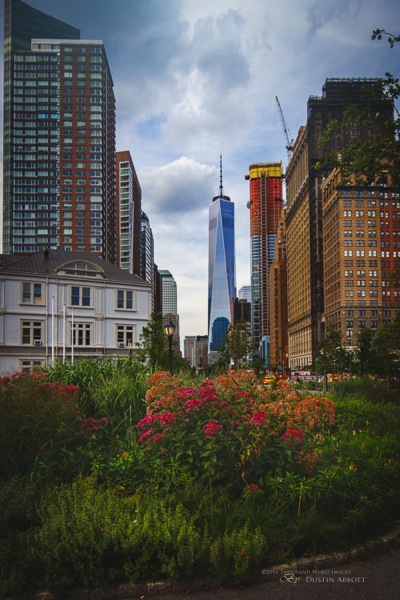
There are many beautiful places on our planet, but photography, much like everything else, is very trendy. It is rare that you have an opportunity to capture something that has never been photographed before. The challenge then, is to find a way to set your work apart from the crowd. Anchoring your image through something unique is one of the key ways to accomplish this. Take for example, the new One World Trade Center in New York City. It has an incredible amount of emotional capital invested in it, because of the events of September 11th, 2001. So, it’s been photographed hundreds of thousands of times already since its completion. I wanted something different, and I saw the opportunity while in Battery Park further up Manhattan Island. Green space is at a premium in the big city, so when I saw an opportunity to shoot the tower, with the anchor of some flowers in the park in the foreground, I jumped on it, and am happy to have a different perspective on a familiar sight (image below).

The City

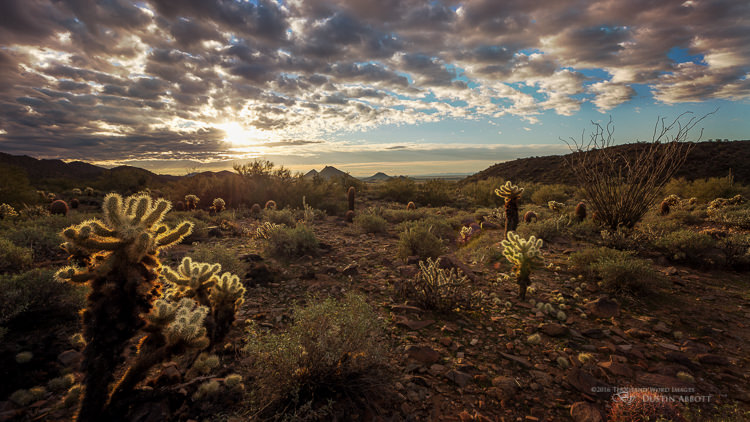
The sunrises and sunsets of Arizona, in the American Southwest, are breathtaking, but can be challenge to capture because of the scale of the wide open spaces. This particular morning brought a gorgeous sunrise with a great, nuanced sky. I composed with a 15mm lens that could capture a lot of the context, but to keep it visually interesting I got about as close as I could to a clump of cholla cacti, that was catching the directional morning light. That grabs your attention first, and as your eyes move on through the scene, you have a great sense of depth of the wide open space because you are already visually anchored to the scene.

Cholla

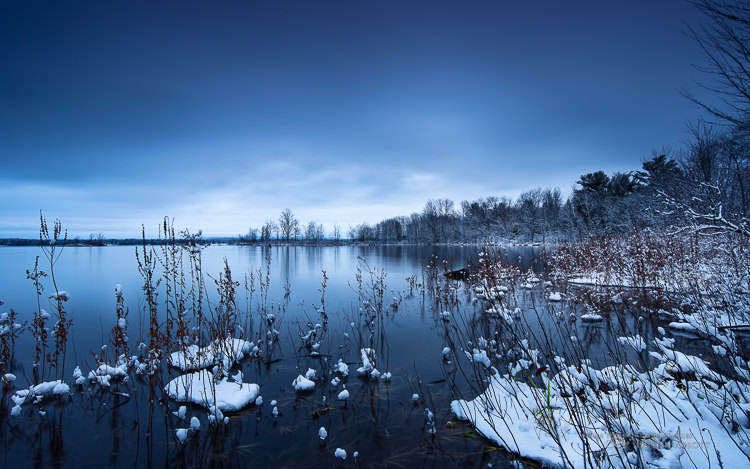
Here’s another example from Ontario, Canada. This was the first snow of the winter, and the rivers and lakes were still not frozen. I shot a long exposure, that has a lot of subtleties in the sky and vibrant blue, wintry tones. But it’s made special by the patches of snow, caught amongst the plants, on the water’s edge in the foreground. These anchor the image, and give depth to it, along with providing some bright points in an otherwise dark scene.

Snow

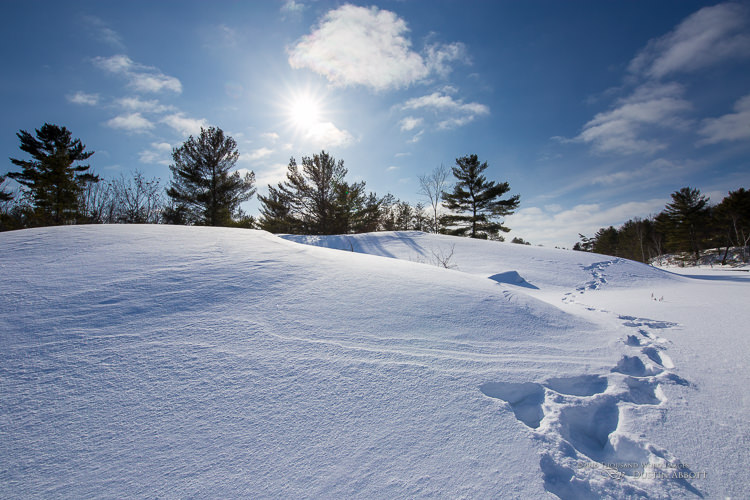
Your anchor can also help to lead you into the scene. In this snowy scene on a cold, clear, winter day, the footprints featured in the foreground help lead your eye through the scene below.

Snow Footprints

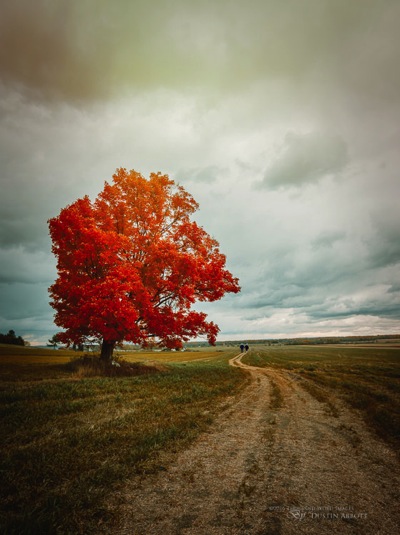
Finally, the path that anchors this beautiful autumn image, eventually leads you to the elderly couple walking hand in hand. The name of this image is “Seasons of Life”, and the use of the anchor to lead the eye through the scene has helped me tell a story, and provide some emotional resonance.

Path

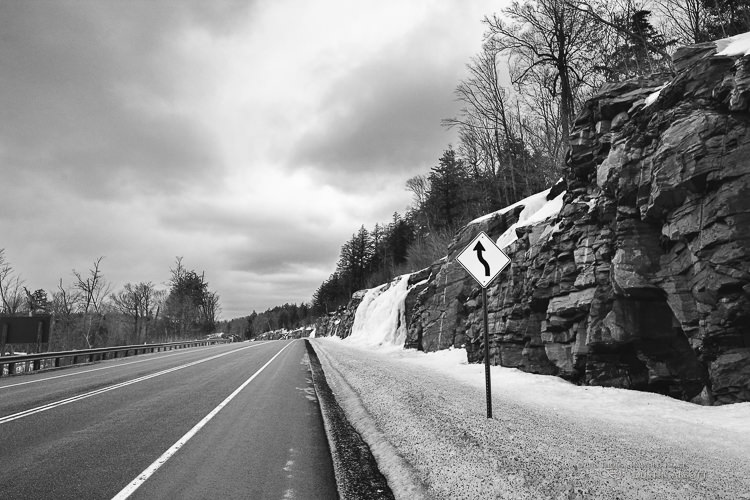
Another purpose of the anchor is to make a scene more visually engaging. Use the wide angle distortion to your advantage. I was driving through Ontario, Canada’s famous Algonquin Provincial Park, and noted the cool frozen cascades along the road. I wanted to include a road sign for more visual interest. Note how this first image, while not distorted, is not particularly interesting.

Less Interesting

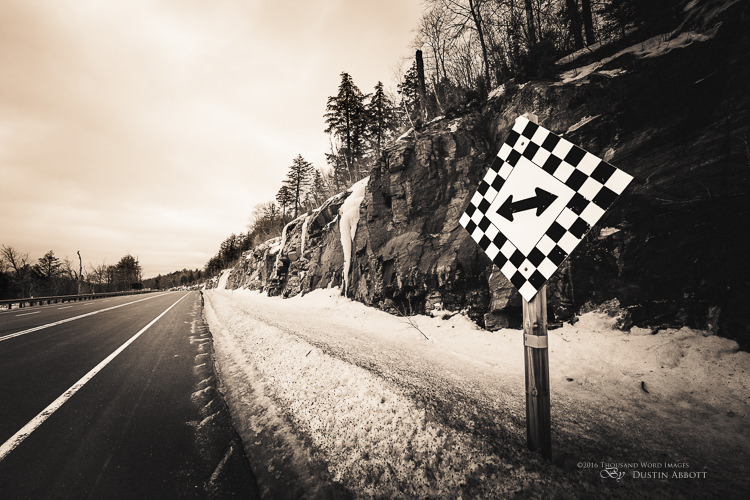
In this second image, however, I got close enough to this sign that the wide angle lens I was using, distorted it. Distortion sounds bad, but the end result here is a more visually interesting image, where the sign helps point the eye into the scene, where you can see the frozen cascades along the road.

Sign

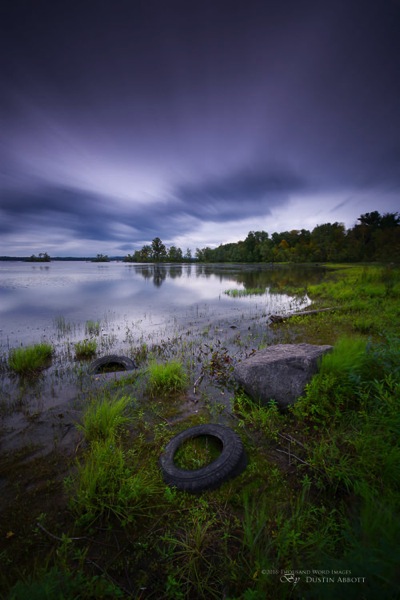
You can also use this to tell your story. I shot a visually lush scene, but wanted my anchor to tell the story of people “Dumping in Paradise”. By getting close to the old tire it becomes unnaturally prominent, but by shooting it with a wide angle lens I’m also able to give the larger context in one shot. I’ve suddenly got an image with a cause attached to it, because of the anchor. Shooting a closer shot of the tire stuck in mud wouldn’t have had the same visual impact.

Dumping in Paradise

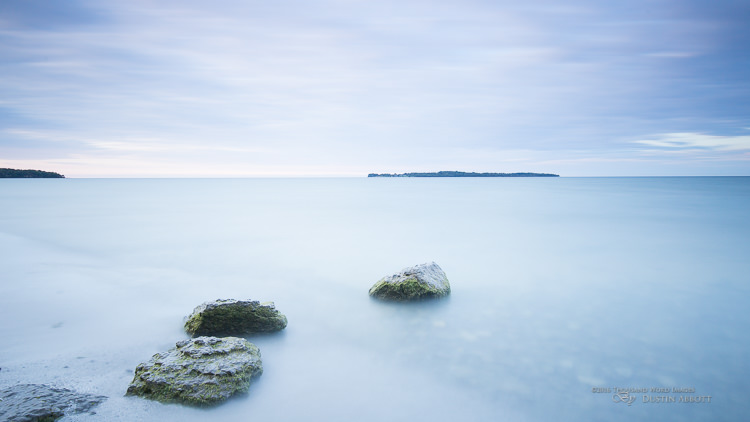
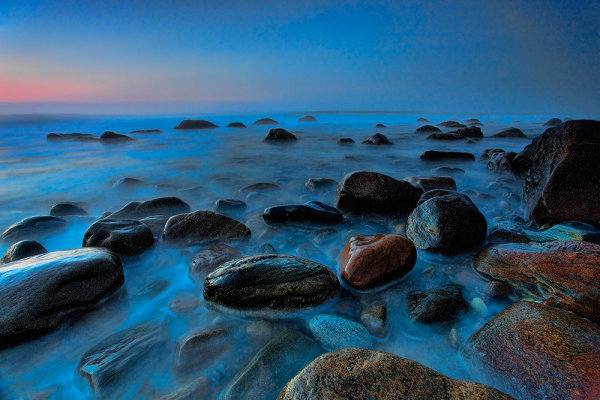
One final way that an anchor is important, is to prevent a scene from feeling empty. The way that long exposures blur water is very cool, of course, but this image would have felt very empty with nothing but blurred water. It would have lacked any true feature. But the foreground rocks that I’ve included in the composition, give the eye something to look at, and that in turn causes the brain to appreciate the image more as a whole. The rocks also point you toward the island in the distance, creating some tension between the little rocks in the foreground, and the big rock beyond.

Zen

These are but a few examples to help you understand the relationship between the foreground and background of an image. The foreground is your anchor, and without that anchor there is a good chance the image is going to, well, drift. A good anchor will help build strong, visually appealing images that will help to set your work apart – and isn’t that what we are all looking for?

Do you use anchors in your wide angle landscape photography? Share your ideas in the comments below.

googletag.cmd.push(function() {
tablet_slots.push( googletag.defineSlot( “/1005424/_dPSv4_tab-all-article-bottom_(300×250)”, [300, 250], “pb-ad-78623” ).addService( googletag.pubads() ) ); } );

googletag.cmd.push(function() {
mobile_slots.push( googletag.defineSlot( “/1005424/_dPSv4_mob-all-article-bottom_(300×250)”, [300, 250], “pb-ad-78158” ).addService( googletag.pubads() ) ); } );

The post The Importance of an Anchor – Why Foreground Matters by Dustin Abbott appeared first on Digital Photography School.


Digital Photography School

 
Comments Off on The Importance of an Anchor – Why Foreground Matters

Posted in Photography


How to Use Foreground to Create Depth in Your Images

18 Nov

One of the biggest hurdles in photography is the fact that our majestic three-dimensional scene is rendered into a mere two-dimensional image, and the physical depth that we experience in real life is lost. To resurrect this spacious feeling, we can create the illusion of depth where there is none, by using strong elements in the foreground.

Cannon Beach, Oregon, by Anne McKinnell

When we make a photograph, our natural urge is to get a clear shot of the main subject, without other objects getting between it and the lens. That’s exactly what makes foreground elements so powerful though – they’re unexpected, and sometimes even counter-intuitive. Like any other compositional element, they create shapes, lines, and patterns that lead the viewer’s eye through the image and can be used to enhance its visual impact.

What is the foreground?

When you are working with a grand vista landscape scene, you can often divide it into three sections: the foreground, mid-ground, and background. For example, the scene below contains some colorful shrubs in the foreground, a pond in the mid-ground, and trees in the background.

Paradise Meadows by Anne McKinnell

The foreground, mid-ground, and background areas are not at fixed distances, but are understood relative to each other. The foreground consists of anything that lies between you and your subject, which is typically considered to be in the mid-ground (but not always). The background is made up of everything behind the subject.

You can think of a photograph like a stage: you have the upstage – that’s the background. It gives setting and context to what happens below it. Center stage is the mid-ground, where the bulk of the action takes place. But downstage – the foreground – is the closest to the audience, and therefore the most intimate part. It is capable of whispering to them and luring them into the action. It is the most easily seen and heard, and therefore understood, and can reveal the finer details of the story.

Trona Pinnacles, California, by Anne McKinnell

Not all photographs have three sections though, some just have a foreground and a background, and some have no depth at all.

How is the foreground used?

The foreground should contain some key point of interest, such as a human figure, a tree, a boat, some flowers, rocks, or anything else that is comparatively near to you. Composing in this way evokes depth, and gives your image the illusion of that missing third dimension.

Green Point, Newfoundland, by Anne McKinnell

When you’re composing a photo and you feel that it’s looking a little too flat, placing something in the foreground can instantly add a sense of depth. Exactly how this is done depends entirely on your subject, and on your own creative decisions. This can mean physically adding something to your scene, if you are able to. But most of the time, you’ll be looking for objects in the surrounding area that would make an interesting foreground, and changing your perspective – either by moving your camera higher, lower, or to one side – to incorporate those elements inside of the frame.

For example, imagine a group of oak trees in a field, all standing in a row. If you photograph them head-on, they’ll all look more or less identical – their size, distance, and focus will be the same, and the composition will likely be a flat, static one. However, if you change your perspective and shoot them from one side, everything changes. One becomes closer, and therefore larger, while the others shrink in comparison. When a viewer sees this image, their eyes will immediately fall on the tree in the foreground first, and the implied line created by the row will pull their gaze inwards towards the other trees. Suddenly, the composition has depth!

Boone Hall Plantation, South Carolina, by Anne McKinnelll

Likewise, you could change your perspective by lowering your camera angle to incorporate rocks, flowers, or anything else that is on the ground, into your image. This use of foreground will provide a point for the viewer’s eye to enter the image, and any lines created in the foreground will direct their eye into the image.

Like any other compositional element, the foreground is only helpful if it adds to the impact of the image. If it doesn’t help tell the story, or worse yet, if it distracts the eye, then it isn’t working as a benefit to your image. Your foreground should be an important part of the scene, and not something distracting. Look for things that point towards the focal point in some way.

Hallgrimskirkja, Reykjavik, Iceland, by Anne McKinnell

Foreground elements can even be made of simple shapes and lines. In some cases, your foreground elements may be nothing but shapes and lines, like the paint on a stretch of road, the waves on the ocean’s shore, or the shadows cast across a wind-swept desert. Anything that forms a line towards your subject is especially effective. These are known as leading lines.

Similarly, a wall that stretches into the picture from the foreground will carry the eye along with it. The corners of your frame are especially strong points, and anything that leads inwards from them will have a particular impact. Textures are another compositional tool that can make for an interesting foreground.

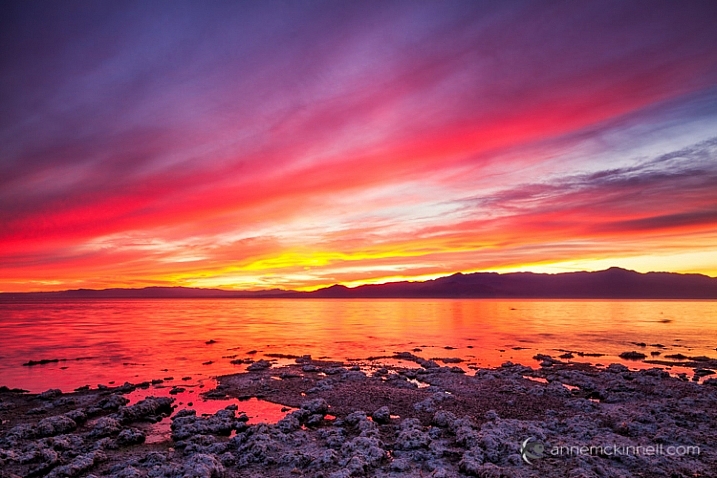
Salton Sea, California, by Anne McKinnell

Arranging your composition so that there are interesting elements in front of your main subject is a very effective compositional tool that can evoke depth, by giving your image the illusion of the missing third dimension.


This week on dPS we’re featuring a series of articles about composition. Many different elements and ways to compose images for more impact. Check out the ones we’ve done so far:

  • Using Framing for More Effective Compositions
  • 7 Tips to Improve Your Skyline Photos
  • 33 Images that Exemplify Compositional Elements
  • Weekly Photography Challenge – Composition Craziness
  • How to Take Control of Aperture and Create Stronger Photos
  • How Cropping in Post-Production Can Improve Composition
  • Good Crop Bad Crop – How to Crop Portraits
  • How to use Focal Length and Background Compression to Enhance Your Photos

googletag.cmd.push(function() {
tablet_slots.push( googletag.defineSlot( “/1005424/_dPSv4_tab-all-article-bottom_(300×250)”, [300, 250], “pb-ad-78623” ).addService( googletag.pubads() ) ); } );

googletag.cmd.push(function() {
mobile_slots.push( googletag.defineSlot( “/1005424/_dPSv4_mob-all-article-bottom_(300×250)”, [300, 250], “pb-ad-78158” ).addService( googletag.pubads() ) ); } );

The post How to Use Foreground to Create Depth in Your Images by Anne McKinnell appeared first on Digital Photography School.


Digital Photography School

 
Comments Off on How to Use Foreground to Create Depth in Your Images

Posted in Photography


How to Use Foreground for Dramatic Portraits

06 Feb

I remember a long time ago, I took a close up shot that I absolutely loved of a little kid on a slide for an article on a local park that had won a national award. I proudly brought it to my magazine editor, who said, “That’s great , but where’s the rest of the shot?” She couldn’t tell if Continue Reading

The post How to Use Foreground for Dramatic Portraits appeared first on Photodoto.


Photodoto

 
Comments Off on How to Use Foreground for Dramatic Portraits

Posted in Photography


Include The Foreground For Dramatic Landscapes

30 Jan

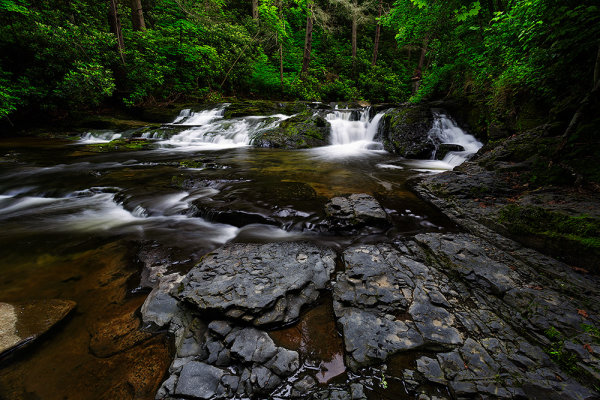
When I came upon this small cascade, I felt it would make a nice image. I began working up close and felt like something was missing. Then I walked further downstream and found these interesting rock formations. Camera was Canon EOS 5D Mark III, with EF 17-40mm f/4L. Exposure was 2.5 sec., f/18, ISO 100.

When photographing landscapes, it’s very easy to get lost in the grandiosity of the overall view, and sometimes , lose sight of what could be a better image.  Many times, I’ve been taken in by a grand expanse that was simply beautiful to look at, but was unable to translate that beauty into a compelling image. In the past few years, one of my favorite landscape techniques is to use an ultra wide angle lens to emphasize the foreground and use that beautiful expanse as background for an image.

I was never what one would call a true “wide angle shooter”, but as I began exploring landscape photography more and more, I fell in love with lenses such as the 16-35mm f/2.8, the 14mm f/2.8, and the 8-15mm Fisheye Zoom. These lenses have become my go-to lenses when shooting landscape images.  They allow me to capture wide expanses, while emphasizing elements of the composition immediately in front of me.

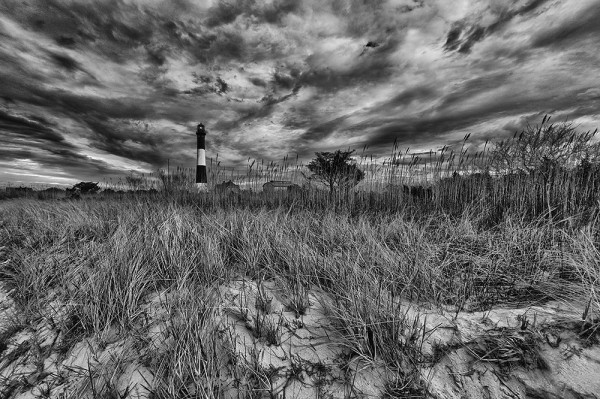
The dune grass created a lot of foreground interest for me, with a nice texture that pointed towards the lighthouse. A low shooting angle ensured I'd be able to include that dramatic sky as well. Canon EOS 5D Mark III, with EF 8-15mm f/4L Fisheye Zoom. Exposure 1/60, f/16, ISO 100. The perspective was then corrected in Photoshop.

The first thing to realize when shooting with these lenses is that you have to be close to that foreground element. It needs to be prominent and stand out. Being able to spot those elements that will do that for your image is a skill that requires some practice to perfect.  It took me some time to learn to “see” like a wide angle lens would.  But now I constantly pick out elements and frame my image around that element being right in front of the camera, rather than looking at the bigger picture first and accidentally getting a nice foreground.

It’s important to take into account point of view when placing your foreground in the scene.  Too often I see photographers extending their tripod legs to the height that would be best for them standing at their full height.  The problem with this is that this is the height at which most people look at things, so for the most part the point of view in the scene won’t be too different from everyone else’s point of view.  I prefer to be able to get low when possible, and really get close to the foreground.  It’s a point of view most people don’t bother to get to, and it also makes the chosen foreground element that much more prominent in the scene. By being low, there’s also the added benefit that if the sky is dramatic, you can angle the camera up just a bit to include more of the sky.

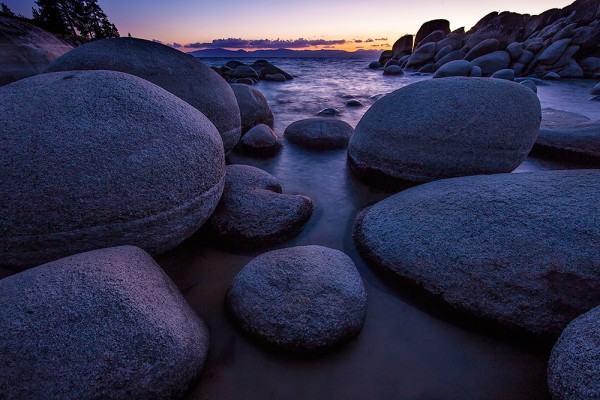
These rocks made a beautiful foreground to place against the warm tones created by the sunset. EOS 5D Mark II with EF 14mm f/2.8L II. Exposure was 2.5 sec., f/11, ISO 100.

Once you have that foreground element in place, you want to be sure it’s in focus.  But more than that, you want to be sure EVERYTHING that you want to be sharp, IS sharp. To do this, you’ll have to figure hyperfocal distance. Hyperfocal distance is defined as  the closest distance at which a lens can be focused while keeping objects at infinity acceptably sharp. When the lens is focused at this distance, all objects at distances from half of the hyperfocal distance out to infinity will be acceptably sharp.  There are two ways to figure this out.  The first way is to do some math.  Math makes my head hurt, so I do it the easy way and use a depth of field calculator on my smart phone.  There are several out there, so I’d suggest trying some of the free ones first before spending money on the paid apps.  Once you tell the app what camera you are using (sensor size), focal length, and f-stop, as well as the distance to the foreground element you want in focus, the calculator will tell you what the hyperfocal distance is- the distance you should focus your lens to, as well as the near limit- or how far the nearest area of sharp focus is from the camera. Everything beyond that point should also be acceptably sharp all the way to infinity.

Of course, the foreground does not always lend itself to being included in our compositions.  These are choices we as photographers must make for every image we take.  As I said, it can be very easy to be sucked in by a beautiful vista.  But it’s just as easy to be turned off when the vista is only so-so. By looking at all areas of the scene, the foreground, as well as the middle ground and background, more options open up to your camera, and of course, more photos.

Fog and mist at sunrise obliterated the grander vista I had intended to shoot this morning. The lighthouse was shrouded in fog, but as the sun came up it created this beautifully soft light. A long exposure using a variable ND filter allowed me to give a misty effect to the water. The wet rocks glistening in the soft light gave the foreground added interest. Canon EOS 5D Mark II, EF 17-40mm f/4L. Exposure: 20 sec., f/11, ISO 800.

Post originally from: Digital Photography Tips.

Check out our more Photography Tips at Photography Tips for Beginners, Portrait Photography Tips and Wedding Photography Tips.

Include The Foreground For Dramatic Landscapes


Digital Photography School

 
Comments Off on Include The Foreground For Dramatic Landscapes

Posted in Photography